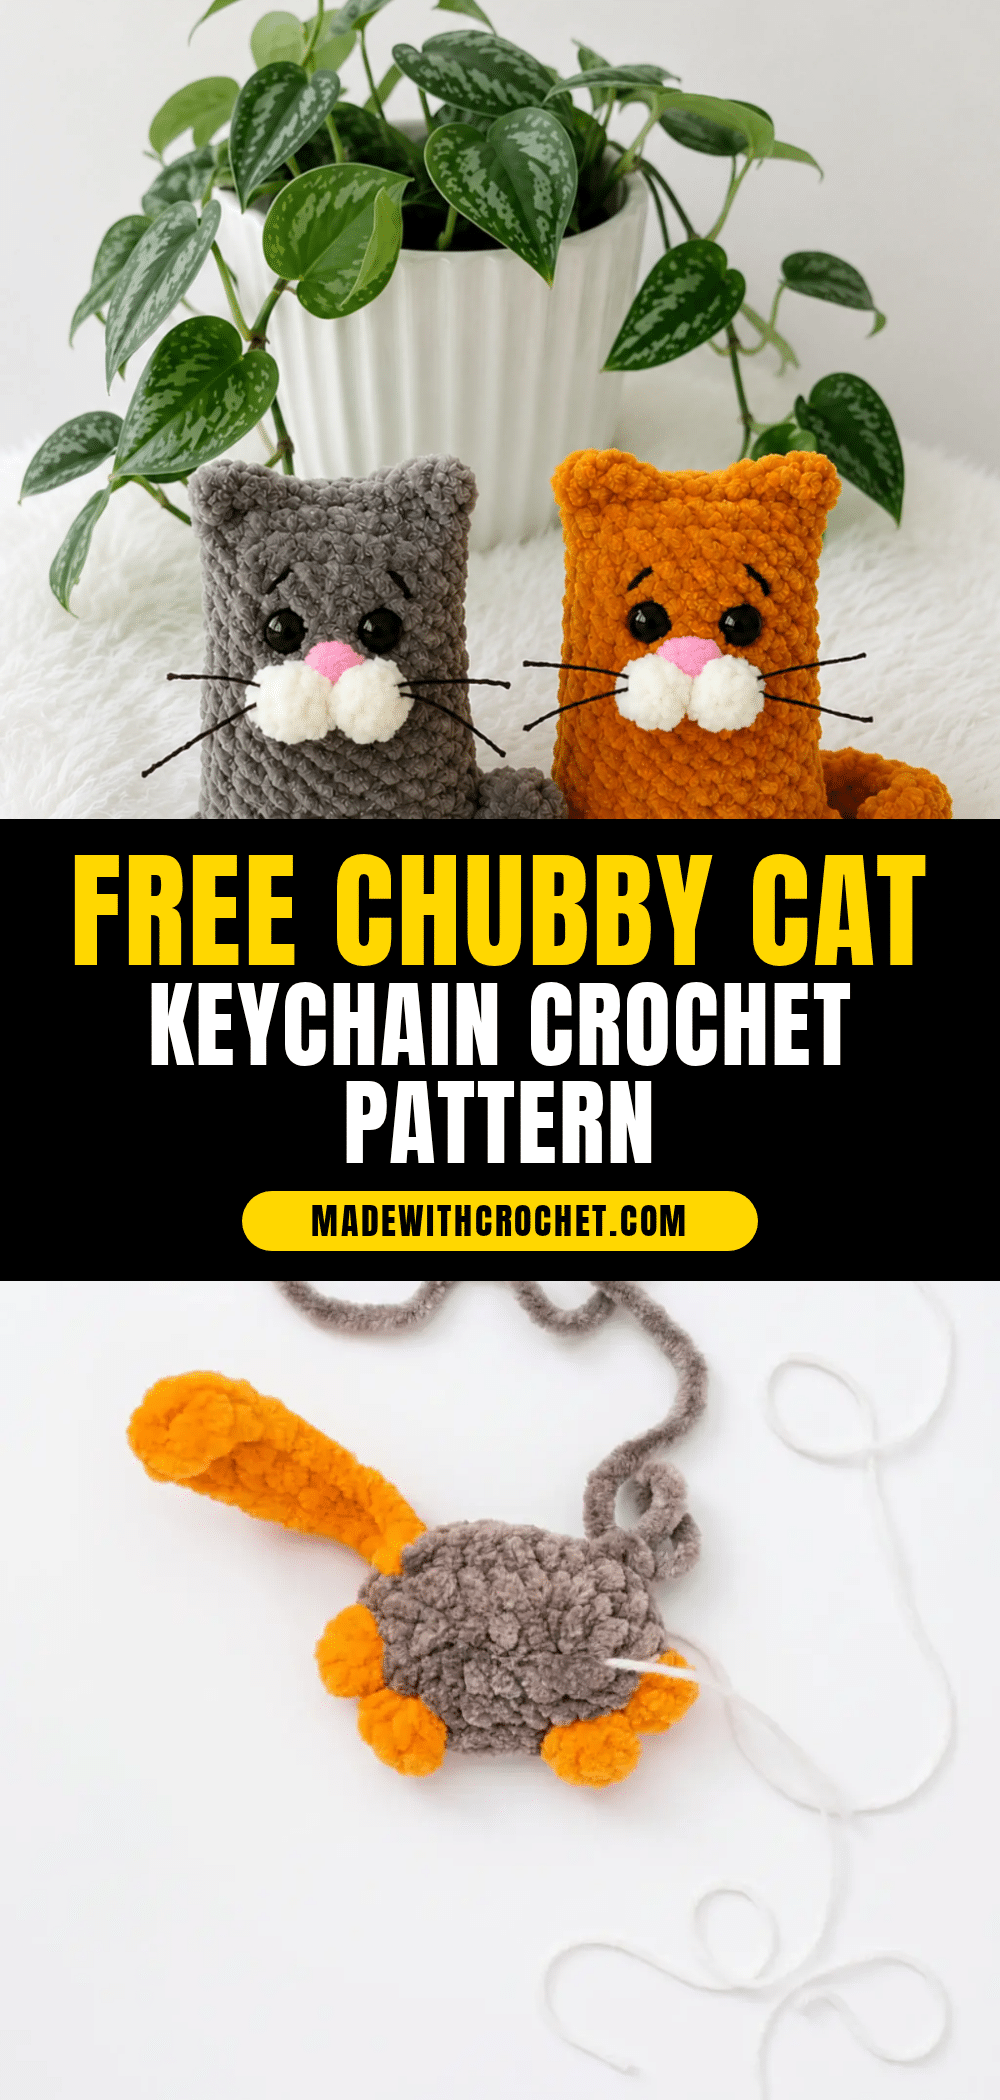
There’s something deeply satisfying about a project where the shaping, texture, and tiny details all come together in your hands. This chubby cat keychain pattern is a perfect example—every round builds on the last, from the clever one-piece construction that forms the legs and tail directly into the body, to the soft, plush finish that makes you want to keep going. The velvet yarn hides your stitches just enough to create that smooth, huggable surface, while the subtle increases and decreases give the cat its round, squishy silhouette. It’s the kind of make that rewards careful attention to tension and a love for the little things that make amigurumi so addictive.
Texture and Stitch Notes
The magic of this pattern lies in how the stitches work with the yarn. Velvet or chenille yarn naturally softens stitch definition, which is perfect for the cat’s chubby, seamless look. The continuous spiral construction means every round flows into the next without visible joins, so the body feels like one solid, plush piece. The leg clusters (four double crochets worked into the same stitch) and the muzzle puffs (five double crochets in one stitch) add subtle texture and dimension without breaking the smooth surface. If you’re using a contrast color for the muzzle, the stitch clusters will pop just enough to give the face character. This is a pattern where the yarn and stitch choices work together to create a toy that feels soft, sturdy, and full of personality.
Project Overview
This chubby cat keychain amigurumi is a quick, satisfying project that’s perfect for confident beginners and experienced crocheters alike. The body, legs, tail, and muzzle are all worked in one continuous piece, so there’s minimal sewing. The finished cat measures approximately 3.5 inches (9 cm) tall, making it an ideal size for a keychain, bag charm, or small gift. The pattern uses US crochet terminology and is worked in continuous rounds (spiral).
Materials
- Yarn: Velvet/chenille-style yarn (Worsted weight, 4), 1 skein in your main color (gray, orange, white, or yellow all work beautifully). Small amounts of white yarn for the muzzle puffs (if using contrast color).
- Hook: US size E-4 (3.5 mm)
- Safety eyes, 8mm, 1 pair
- Fiberfill stuffing
- Stitch marker
- Yarn needle
- Scissors
- Fabric marker or embroidery thread for the nose (optional, black yarn works too)
Abbreviations
- ch — Chain
- dc — Double Crochet
- dec — Decrease (invisible decrease)
- hdc — Half Double Crochet
- inc — Increase (2 sc in same stitch)
- sc — Single Crochet
- sl st — Slip Stitch
- st(s) — Stitch(es)
- tr — Treble Crochet
Pattern Notes
- This pattern is written in US crochet terminology.
- The body is worked in continuous rounds (spiral) — do not join or chain up between rounds. Use a stitch marker to track the start of each round.
- Gauge isn’t critical for this project, but working tightly is essential so stuffing doesn’t peek through the stitches.
- Stitch count is given at the end of each round in parentheses, like this: (22)
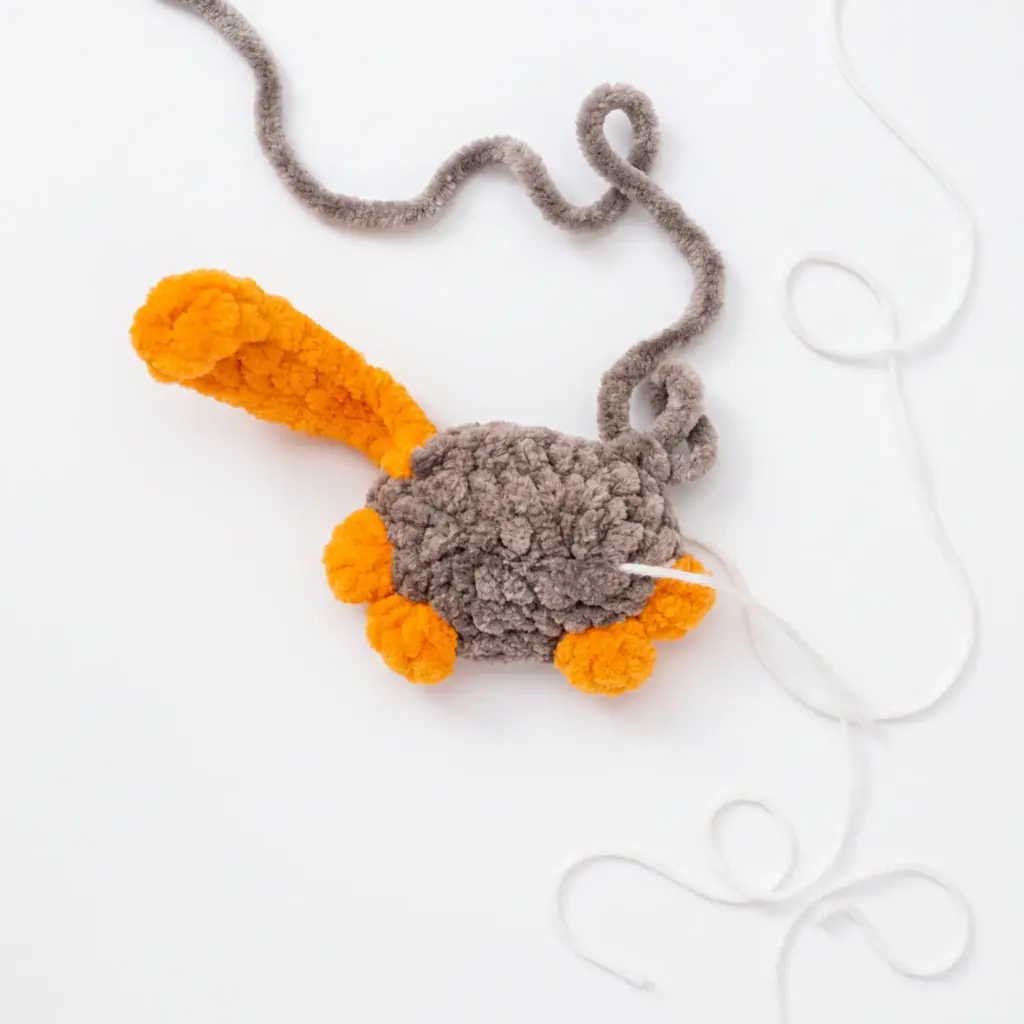
- Legs and tail are worked directly onto the body in Round 3 — there’s no separate sewing for these pieces.
- Stuff firmly and consistently as you work; the finished cat measures approximately 3.5 inches (9 cm) tall using the materials listed, though your gauge and yarn choice may produce a slightly different size.
- For a tiger or leopard version, work the tail separately as a simple chain-and-single-crochet strip (instructions included at the end) and add contrast spots or stripes wherever you like.
Pattern Instructions
Main Body (includes legs, tail, and muzzle)
Stuff the piece firmly as you work. Keep the bottom flat rather than domed.
Ch 6, starting in the 2nd ch from hook.
Rnd 1: inc, 3 sc, 4 sc in next st, 3 sc, inc. (14)
Rnd 2: 2 inc, 3 sc, 4 inc, 3 sc, 2 inc. (22)
In Round 3, you’ll add the tail and both front and back legs.
Rnd 3: 9 sc, work tail (ch 12, then starting in the 3rd ch from hook work back along the chain: 2 tr, 2 dc, 2 hdc, 2 sc, 2 sl st), 2 sc, work leg (4 dc worked into the same stitch to form a cluster), 1 sc, work leg (same as before), 5 sc, work leg (same as before), 1 sc, work leg (same as before). (22)
Rnds 4–10: sc in each st around. (22) — work 7 rounds even
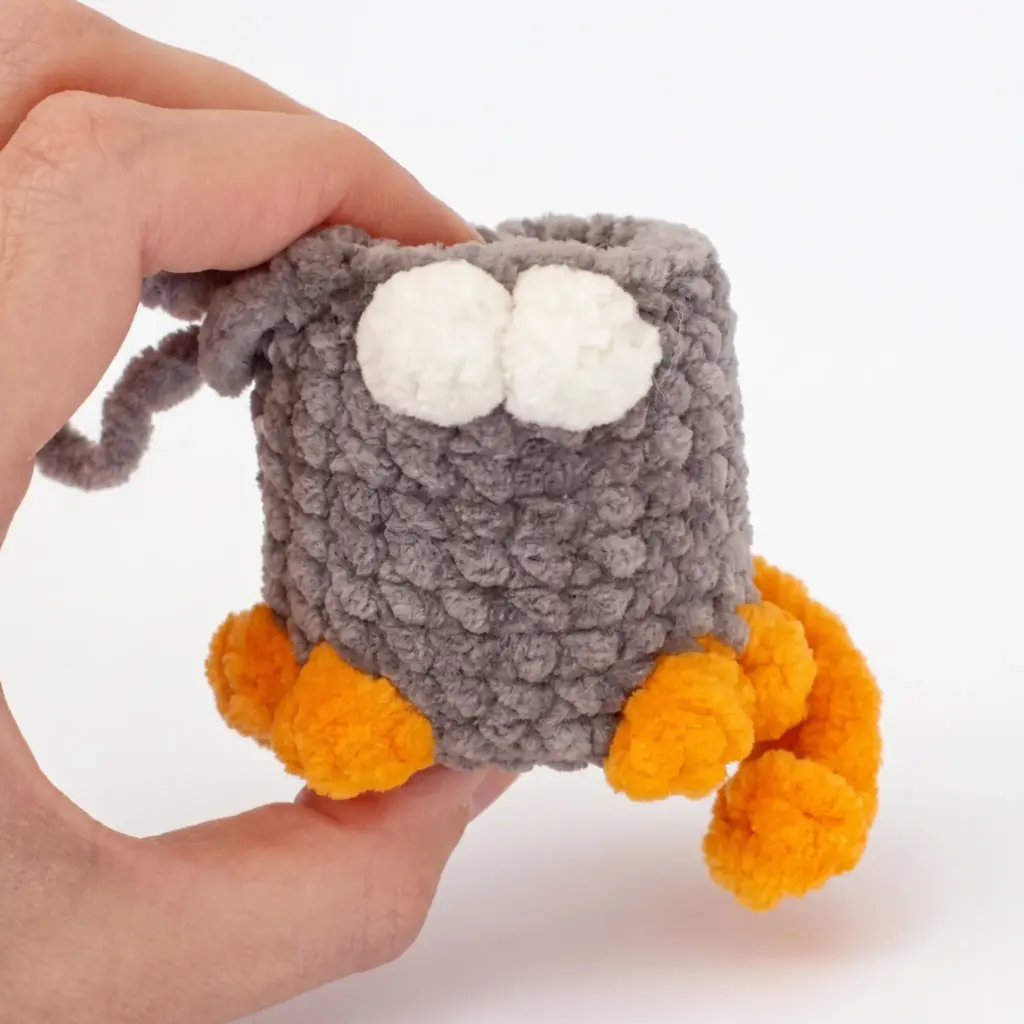
In Round 11, you’ll shape the muzzle. Center it on the front of the piece.
Rnd 11: 16 sc, work cluster (5 dc worked into the same stitch to form a cluster), 1 sc, work cluster (same as before), 3 sc. (22)
Rnd 12: sc in each st around. (22)
Place your two decreases on the sides of the piece so they stay hidden — check a photo reference if you have one for placement.
Rnd 13: dec, 10 sc, dec, 8 sc. (20)
Attach the safety eyes now, positioning them between Rounds 13 and 14, spaced 3 stitches apart between the eye posts. While the eyes are open, embroider the nose in the same area.
Rnds 14–17: sc in each st around. (20) — work 4 rounds even
Rnd 18: sc 11–12 sts only. (11–12) This is a partial round — stop when you reach the center on the left side of the piece.
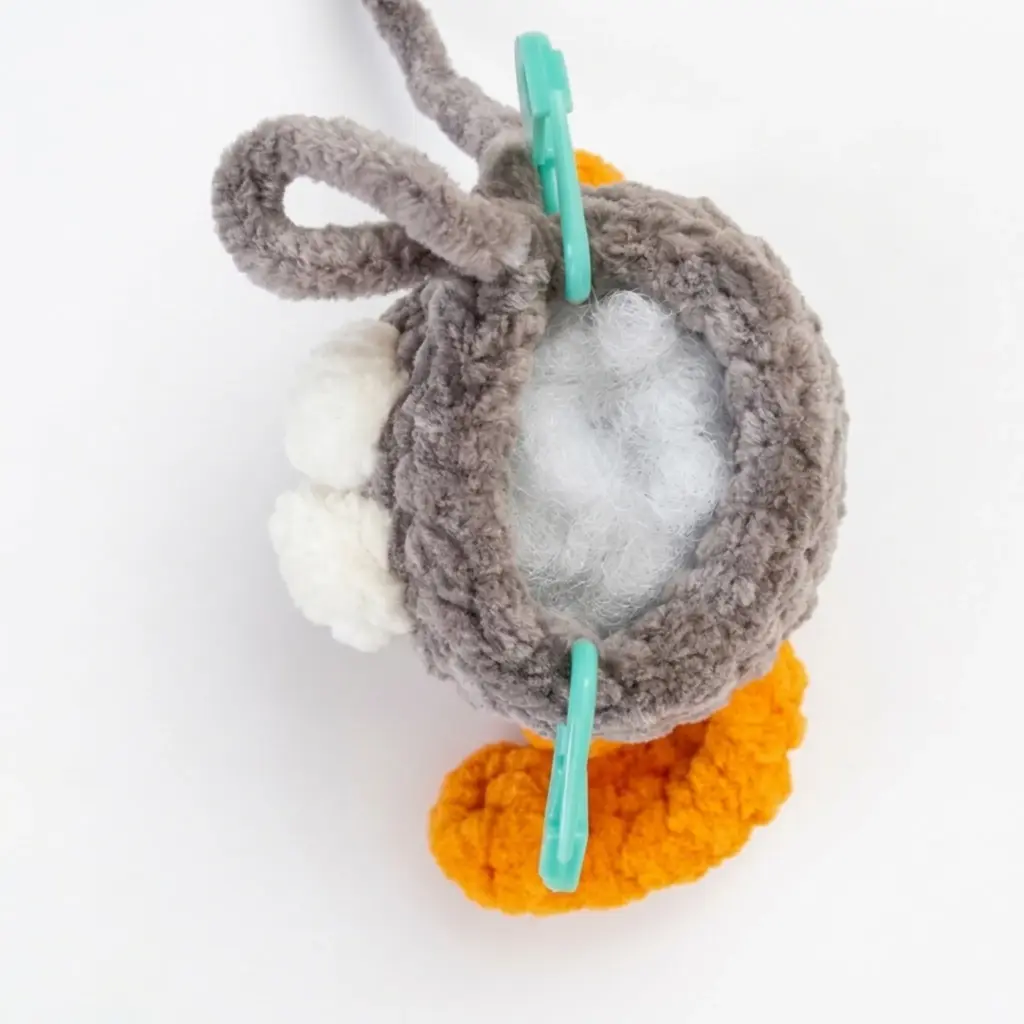
Stuff the body firmly all the way to the top opening, adding more fiberfill as needed while you work the final round.
Fold both halves of the top opening together and work through both layers to close it.
Rnd 19: 2 hdc, 1 sc, 4 sl st, 1 sc, 2 hdc. (10)
Fasten off, leaving enough yarn tail to weave in securely, then tuck the tail inside the toy.
Tiger or Leopard Tail (alternate version)
Ch 12, starting in the 2nd ch from hook, sc across the chain. (11)
Fasten off and set aside to attach later, or work it directly onto Round 3 in place of the curled tail if you prefer a straight tail.
Assembly
- With a yarn needle, use a spare length of yarn or a knitting needle to gently pull the stuffing up toward the closed top seam, smoothing out any lumps or gaps.
- If you’re making the tiger or leopard variation, position the straight tail where you’d like it and stitch it in place using a whipstitch, then weave in the tail end.
- Using black yarn or embroidery thread, add whiskers to each side of the muzzle if you haven’t already.
- For spotted or striped variations, embroider spots or stripes onto the body now, placing them wherever suits your design.
- Weave in all remaining yarn ends and trim any excess close to the fabric.
Tips
- Getting the tension right makes all the difference with this pattern. Because the body is worked in a continuous spiral with no seam allowance to hide gaps, aim for stitches that are snug enough that you can’t see the stuffing through them, but not so tight that your hand cramps up. If your chenille or velvet yarn feels slippery, sizing down half a hook size can help keep your stitches defined.
- The invisible decreases in Round 13 are what keep the shaping smooth around the neck area, so take your time here. Insert your hook under the front loops of the next two stitches, yarn over, and pull through both loops at once — this creates a cleaner, less bulky decrease than working through both loops of two separate stitches.
- Stuffing firmness matters more than you might expect with a flat-backed keychain shape like this one. Pack it densely enough that the piece holds its form and doesn’t collapse when squeezed, but stop adding fiberfill once the stitches start to stretch or the fabric feels stiff rather than plush.
- If you want to substitute a different yarn, keep in mind that velvet or chenille yarns naturally hide stitch definition, which is part of what gives this cat its soft, huggable look. Switching to a smooth worsted-weight cotton or acrylic will still work structurally, but your stitches will show more, so consistent tension becomes even more important.
- Round 3 is the trickiest section of this whole pattern since you’re working the tail, both legs, and the body stitches all in one round. Read through the entire round before you start, and consider marking where each leg cluster should land with a scrap of contrasting yarn so you don’t lose your place.
Frequently Asked Questions
What size hook should I use for this cat keychain pattern?
This pattern calls for a US size E-4 (3.5 mm) hook when working with worsted weight velvet or chenille yarn. If you substitute a thinner or thicker yarn, adjust your hook size accordingly to keep your stitches tight enough to hide the stuffing.
Do I need to sew the legs and tail on separately?
No, this pattern is designed so the legs and tail are crocheted directly into Round 3 of the body, eliminating the need for separate pieces and seams. The only exception is the alternate straight tail for the tiger or leopard variation, which is worked separately and whipstitched on afterward.
How much yarn do I need to make one cat keychain?
A single skein of worsted weight velvet or chenille yarn is more than enough to complete one cat, with plenty left over for a second piece in the same color. Exact yardage will vary depending on your tension and how firmly you stuff the finished toy.
Can I make this pattern with a different yarn weight?
Yes, but you’ll need to adjust your hook size to match the yarn weight and maintain a tight gauge. Keep in mind that the finished size and texture will change. Velvet or chenille yarn gives the softest, most huggable result, while smoother yarns will show more stitch definition.
How do I attach the keychain ring?
The pattern does not specify a keychain ring attachment point, but you can easily add one. After finishing the body, you can sew a small loop of yarn or a jump ring to the top of the cat’s head, or thread a keychain ring through the top seam before weaving in the final yarn tail.
What if my stitches are too loose and the stuffing shows?
If you can see the stuffing through your stitches, your tension is too loose. Try using a smaller hook (e.g., US size D-3 or 3.25 mm) and focus on keeping your stitches snug. Working with velvet yarn can also help hide small gaps, as the fibers naturally fill in the spaces between stitches.
Pin This Crochet Pattern!