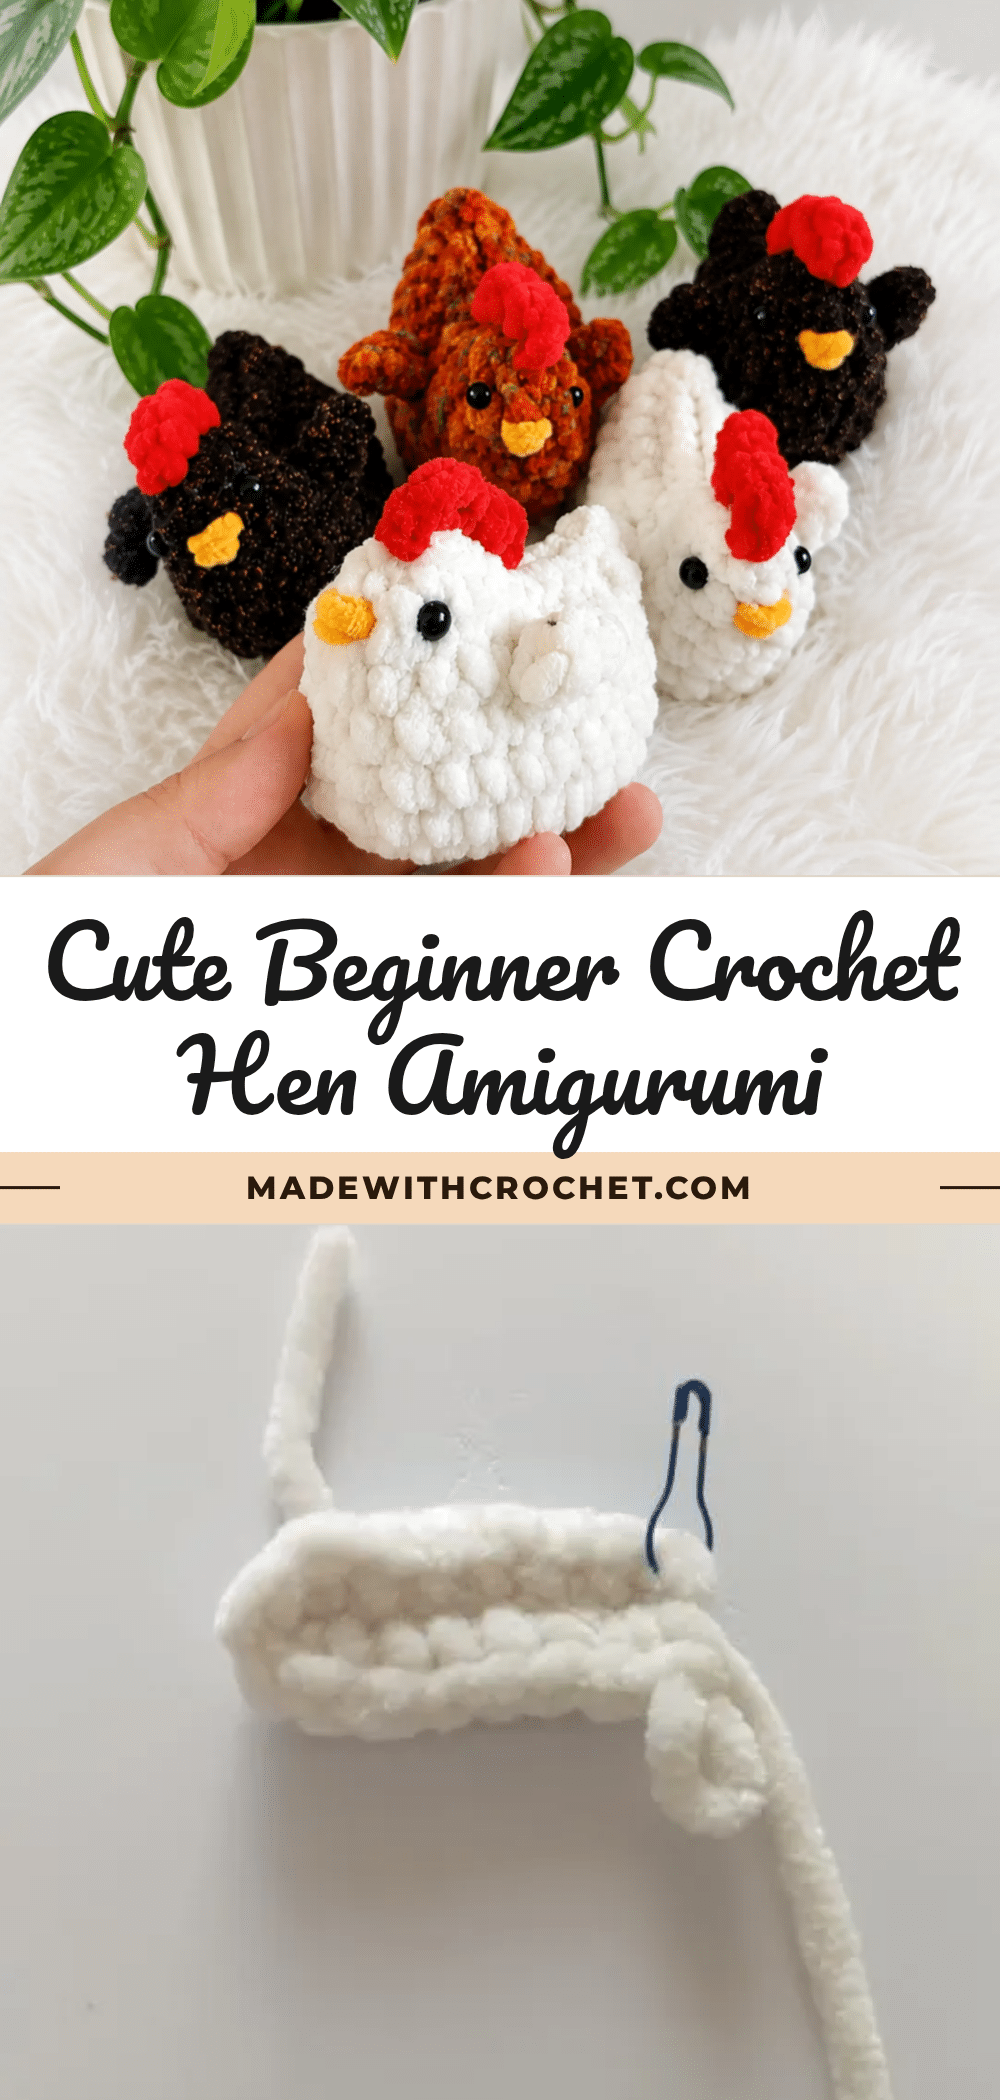
Picture a tiny hen small enough to nestle in the palm of your hand, her fluffy plush texture making her look freshly hatched and ready for an Easter basket or spring windowsill display. This little plush hen amigurumi pattern turns a few balls of plush yarn into a charming farmhouse-style character with a jaunty red comb and tucked little wings. It’s a beginner-friendly amigurumi project, perfect if you’re comfortable with basic single crochet but haven’t tackled shaping or seaming yet. The finished hen measures about 2.75 inches tall and 3 inches long, making her an ideal quick gift or a fun addition to a spring-themed collection. Grab your hook and a bit of plush yarn, and let’s get started on this crochet hen pattern.
Seasonal Styling Ideas
This hen is a natural fit for spring and Easter crafting, but her charm extends far beyond one season. Tuck her into a tiny basket with a few mini eggs for a handmade gift, or line up a small flock on a nursery shelf for a soft, farmhouse-inspired decor touch. The white or cream plush body works beautifully with pastel accents — try adding a tiny pastel bow or setting her on a bed of soft green yarn “grass.” For a cozy winter look, you could even crochet a miniature scarf in a contrasting color. The simple, rounded shape makes her a versatile canvas for seasonal styling, so feel free to experiment with colors and accessories that match your holiday or home decor.
Project Overview
This pattern walks you through creating a complete plush hen amigurumi from start to finish. You’ll work the body and head as one continuous piece, then add the comb, beak, and safety eyes. The project uses basic stitches and simple shaping, making it an excellent next step for beginners ready to try working in spiral rounds and folding fabric.
Materials
- Plush/velvet yarn, worsted weight, approximately 130 yd (120 m) per 3.5 oz (100 g) skein, in 3 colors: white or cream (main color, for body), red (comb), and a small amount of orange (embroidered beak)
- 3.5 mm (US E-4) crochet hook
- 6 mm safety eyes (2)
- Polyester fiberfill stuffing
- Stitch marker
- Yarn needle (blunt tip)
- Scissors
- Fabric glue, for securing safety eyes
Abbreviations Used
- ch — Chain
- dc — Double Crochet
- hdc — Half Double Crochet
- inc — Increase (2 sc in same stitch)
- sc — Single Crochet
- sl st — Slip Stitch
- st(s) — Stitch(es)
Pattern Notes
This pattern is written in US crochet terminology. The body and head are worked in continuous spiral rounds; the head shaping section transitions into rows, so watch the labels carefully as you move through the pattern. Gauge is not critical for this project — it will only affect the finished size of your hen, not the construction. Stitch count is given at the end of each round or row in parentheses: (##). Glue the safety eyes in place once the head shaping is complete, and lightly stuff the body before closing to keep her shape soft but stable. Keep your stitch marker in place throughout the spiral rounds — the pattern relies on specific stitches landing at the center front and center back, so accurate stitch placement matters more than usual here.
Pattern Instructions
Body & Head (make 1)
Begin with the main color. Keep your stitch marker centered as you work.
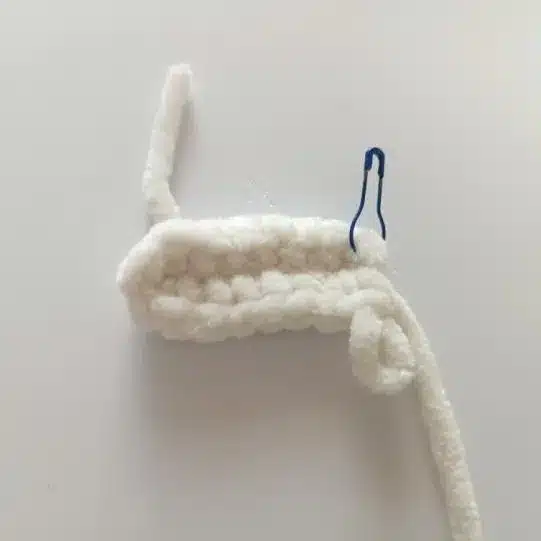
Rnd 1: Ch 7, starting in the 2nd chain from hook, inc, 4 sc, in last chain work 4 sc, working down the other side of the foundation chain: 4 sc, inc. (16)
Rnd 2: 2 inc, 4 sc, 4 inc, 4 sc, 2 inc. (24)
Rnd 3: sc in each st around. (24)
Rnd 4: sc in each st around. (24)
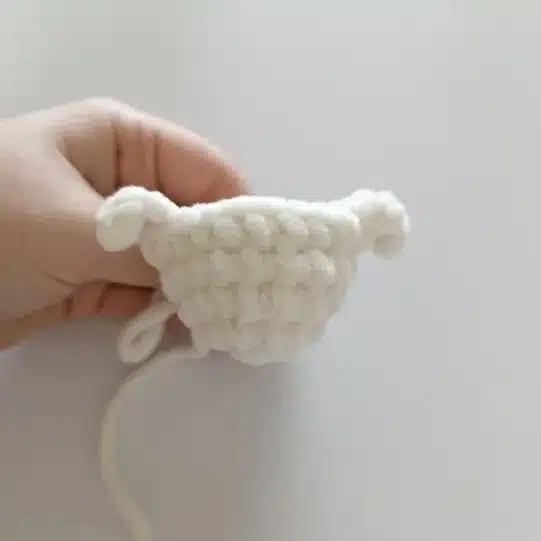
Rnd 5: 8 sc, work wing (ch 4, then working back along the chain: sl st, sc, hdc, sl st into the base stitch), 9 sc, work wing (repeat as above), 7 sc. (24)
Rnd 6: 8 sc up to the wing, 9 sc between the wings (the 5th stitch of this section must land at center front), 6 sc after the wing. This round ends one stitch short of a full round. (23)
From this point forward, specific stitches must land at center front or center back as noted. If your stitch count doesn’t line up exactly, work one extra stitch or skip a stitch so the marked stitch falls precisely where indicated.
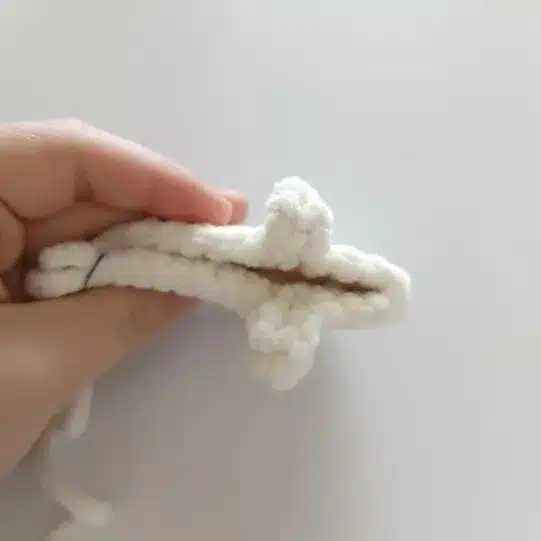
Row 7: 3 dc (the 2nd dc must land at center back), 9 sl st, hdc, dc (this stitch must land at center front), hdc, 12 sl st.
Fold the piece flat so the two layers of the head come together. Work 7 sl st through both layers to close the seam — a small opening will remain at the top. Do not stuff before this step.
Work a finishing round of sc around this small opening (9 sc used here), joining with a sl st to the first stitch of the round.
Fold the head in half again and work 4 sl st through both loops of both layers together. In the last stitch, change to red yarn — you’re ready to build the comb.
Comb
Work the comb directly into the ridge formed where the two sides of the folded fabric meet, using red yarn. Ch 2 into this same stitch, work 2 dc into the same stitch, sl st in the next stitch, ch 2, work 2 dc into the 3rd stitch, sl st to finish.
Glue the safety eyes in place now, positioning them evenly on either side of the head above the beak area, before you move to finishing.
Assembly
- Weave in the yarn tail left from the color change at the comb, securing it firmly at the base of the crest.
- Using orange yarn and a yarn needle, embroider a small triangular beak on the front of the head, centered below the eyes.
- Glue the 6 mm safety eyes in place on either side of the head, checking that they sit level with one another before the glue sets.
- If your wings are sitting away from the body, tack them down with a few small stitches using main color yarn and a yarn needle so they lie flat against the sides.
- Weave in all remaining ends, working them through the plush stitches so they stay hidden inside the body.
Tips & Tricks
- Plush yarn hides stitch definition beautifully, but it also hides your stitch count if you’re not careful — pause every few rounds and physically count your stitches rather than relying on how the fabric looks, especially through Rounds 1 and 2 where the increases build the oval base shape.
- When you reach Round 7 and the head shaping section, take it slow. This is the trickiest part of the pattern because specific stitches need to land at center front and center back. Lay the piece flat after each round to check that your marked stitches are lining up before moving forward — it’s much easier to adjust a stitch or two here than to unpick the fold later.
- Stuff the body lightly and evenly before you close up that final opening at the top of the head. Because plush yarn already has volume and loft, overstuffing will distort her rounded shape rather than making her firmer — aim for a soft, huggable density rather than a rock-hard fill.
- If you want to substitute yarn, stick with a plush or chenille-style worsted weight for the fuzzy, chick-like texture this pattern is designed around. A smooth cotton or acrylic worsted will still work structurally, but you’ll lose the soft, feathery look that makes this hen so charming.
- When sewing down the wings, work your stitches through the very edge of the wing and catch just a small amount of the body fabric underneath, so your seam stays invisible in the plush texture rather than flattening the wing shape.
Frequently Asked Questions
What skill level is this crochet hen pattern suited for?
This pattern is designed for confident beginners who already know how to single crochet, chain, and slip stitch. The only techniques you’ll need to learn are basic increases and simple folding and seaming, which are explained step by step in the instructions.
What size will my finished hen be?
Using the recommended plush worsted weight yarn and a 3.5 mm hook, your hen will measure approximately 2.75 inches tall and 3 inches long. Keep in mind that your finished size may vary slightly depending on your yarn choice, hook size, and how tightly or loosely you crochet.
Can I use a different yarn weight for this pattern?
You can substitute a different worsted weight yarn, but choosing a plush or chenille-style yarn is strongly recommended to achieve the soft, feathery texture shown in this pattern. Switching to a smooth cotton or acrylic yarn will still work structurally, but the finished hen will look less fuzzy and more like a standard amigurumi.
Why do specific stitches need to land at center front or center back?
The head shaping rounds rely on certain stitches lining up precisely so the folded seam creates the correct beak and head shape. If your stitch count drifts even slightly, adding or skipping a single stitch will realign everything before you continue, which keeps the finished head symmetrical.
How do I keep the wings from sticking out?
After assembly, if your wings are sitting away from the body, tack them down with a few small stitches using main color yarn and a yarn needle. Work your stitches through the very edge of the wing and catch just a small amount of the body fabric underneath so the seam stays invisible in the plush texture.
Can I make this hen in different colors?
Absolutely! While the pattern calls for white or cream for the body, you can easily use any color you like. A soft yellow would create a chick, or a warm brown could make a more rustic hen. Just keep the comb red for contrast, and adjust the beak color as desired.
Pin This Crochet Pattern!