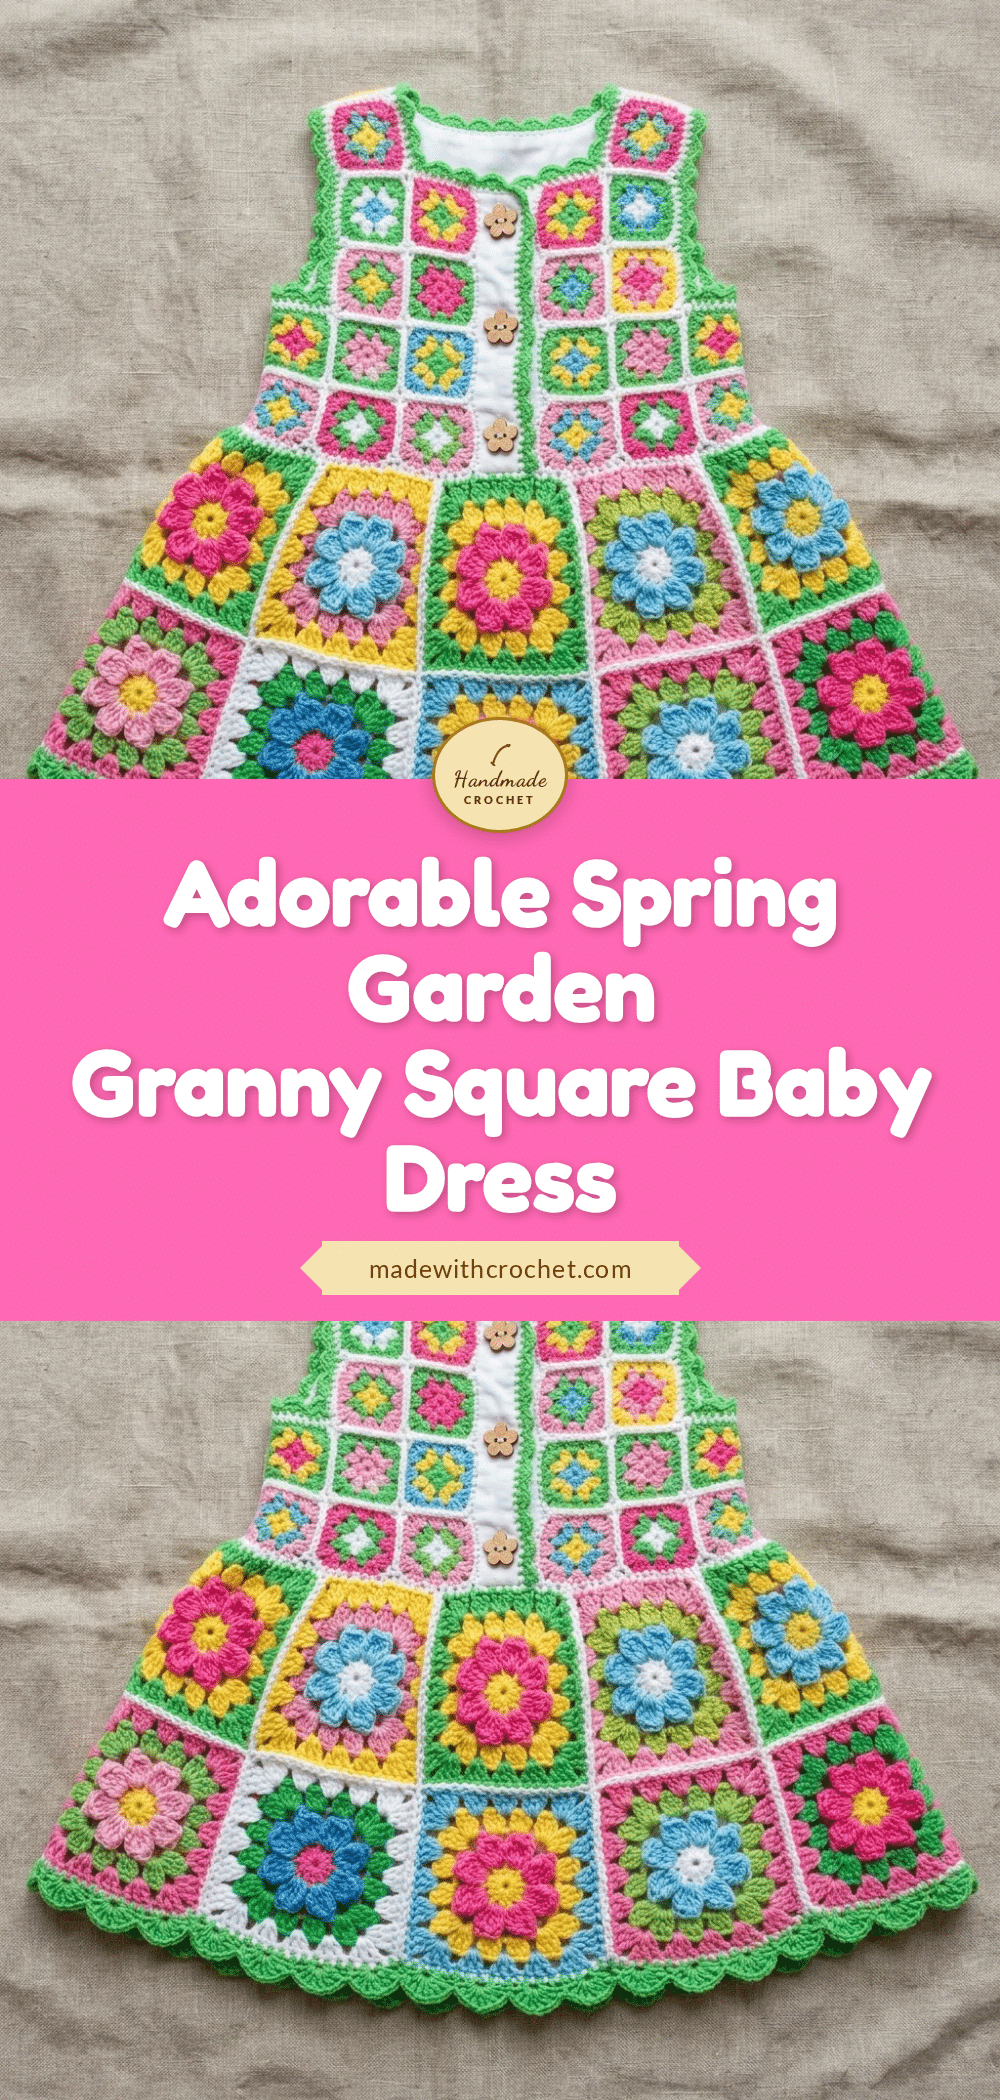
There is something deeply soothing about the rhythm of crochet on a quiet evening. The soft scratch of the hook, the small batch of yarn ready at your side, and the satisfying count of stitches as you settle into a familiar repeat. This Spring Garden Granny Square Baby Dress captures that exact feeling. It is a project that invites you to slow down, celebrating the joy of color changes and the gentle progression of rounds. As you work through the clusters and shells, you are not just making a garment; you are crafting a keepsake that feels as warm and comforting as the ritual itself.
Small Details That Make It Better
What truly elevates this dress from a simple craft project to a cherished heirloom is the thoughtful construction. The design cleverly uses smaller squares for the bodice and larger squares for the skirt, creating a beautiful A-line silhouette without the need for complex shaping or decrease rows. This structural choice ensures the dress hangs perfectly on a little one. Another wonderful detail is the inclusion of a white cotton lining for the bodice. This isn’t just for aesthetics; it adds necessary structure so the garment holds its shape, while also providing a soft, comfortable layer against a baby’s delicate skin. The randomized color placement of the petals ensures no two dresses look exactly alike, giving your creation a unique, garden-fresh personality.
Project Overview
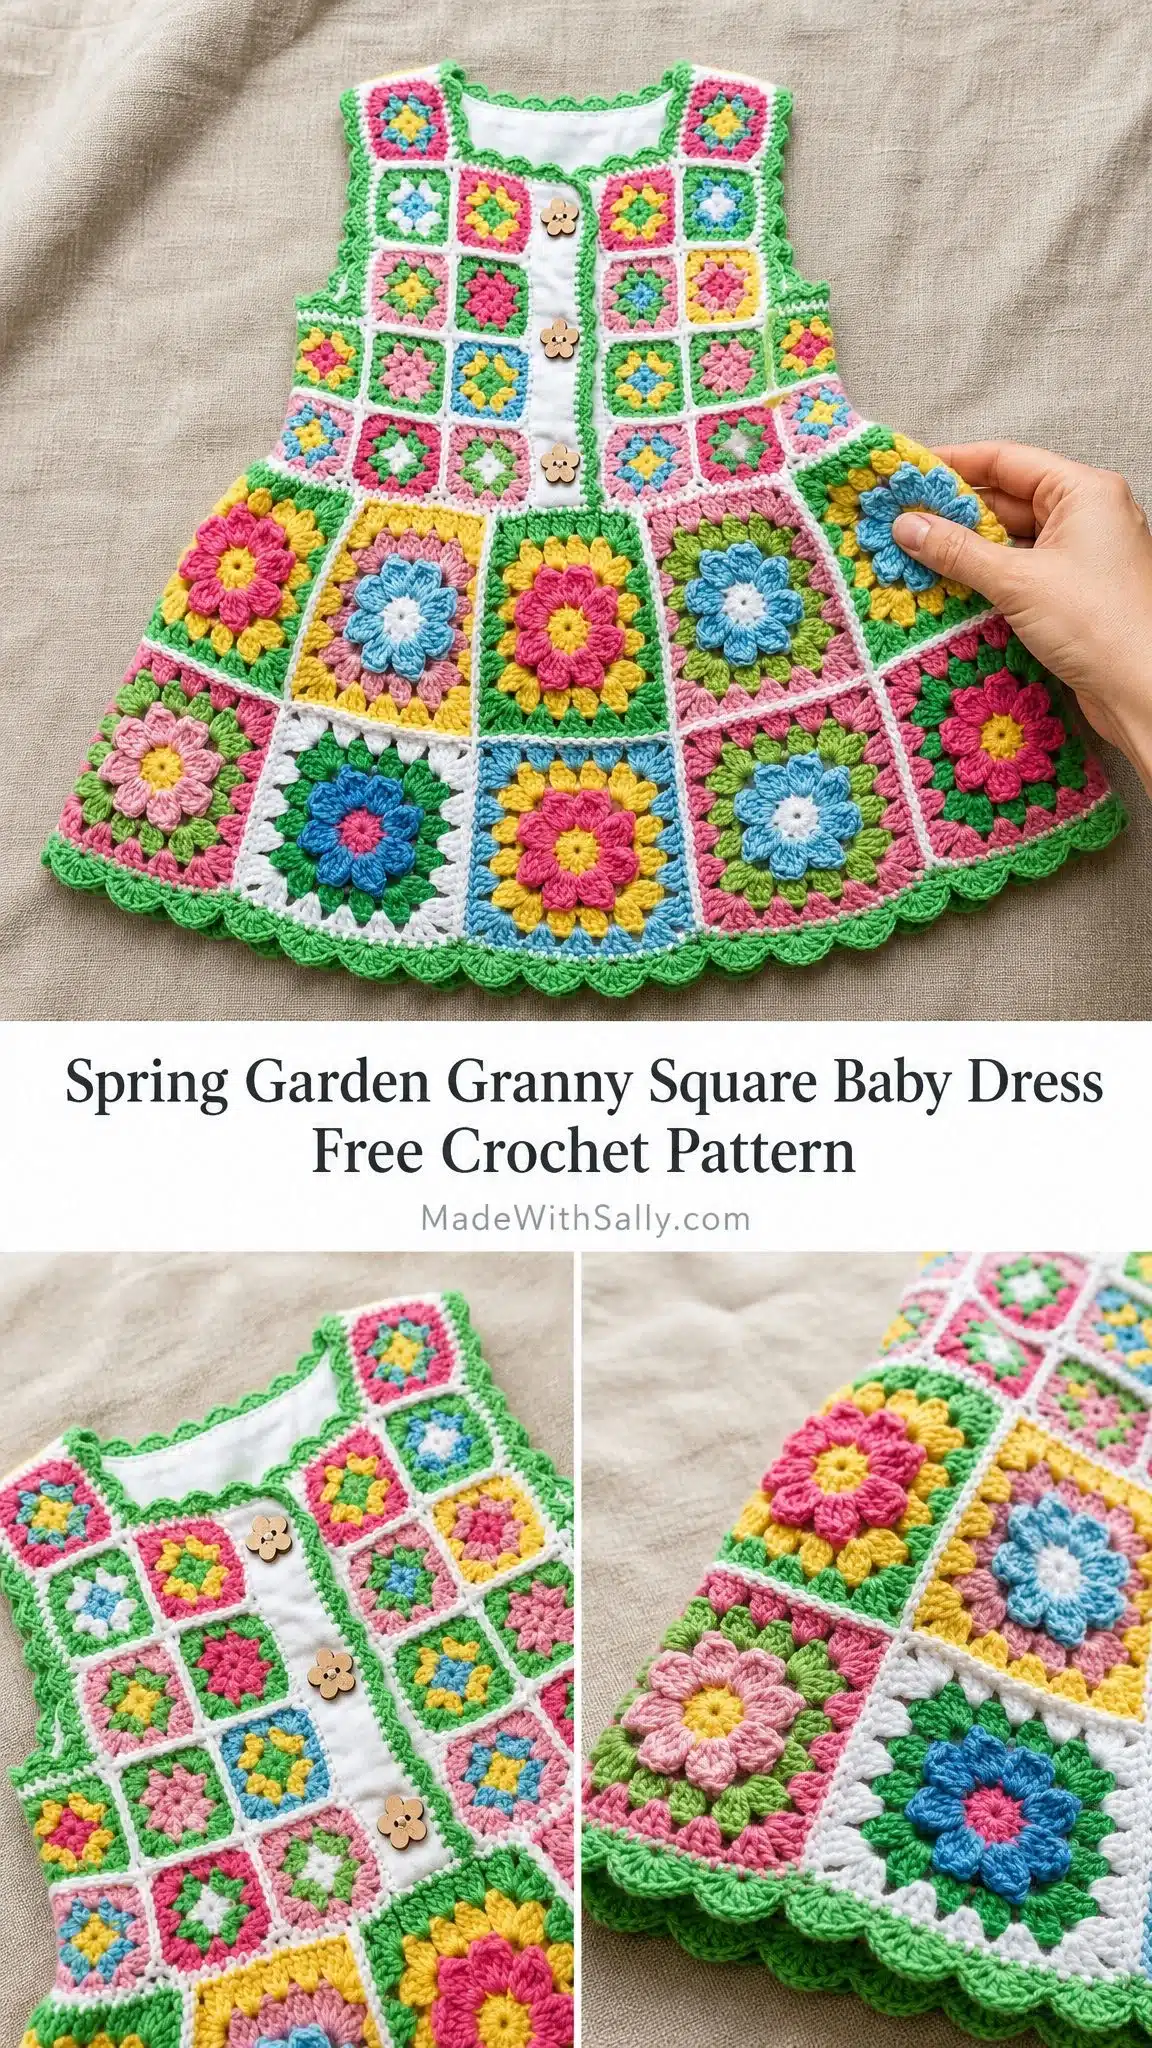
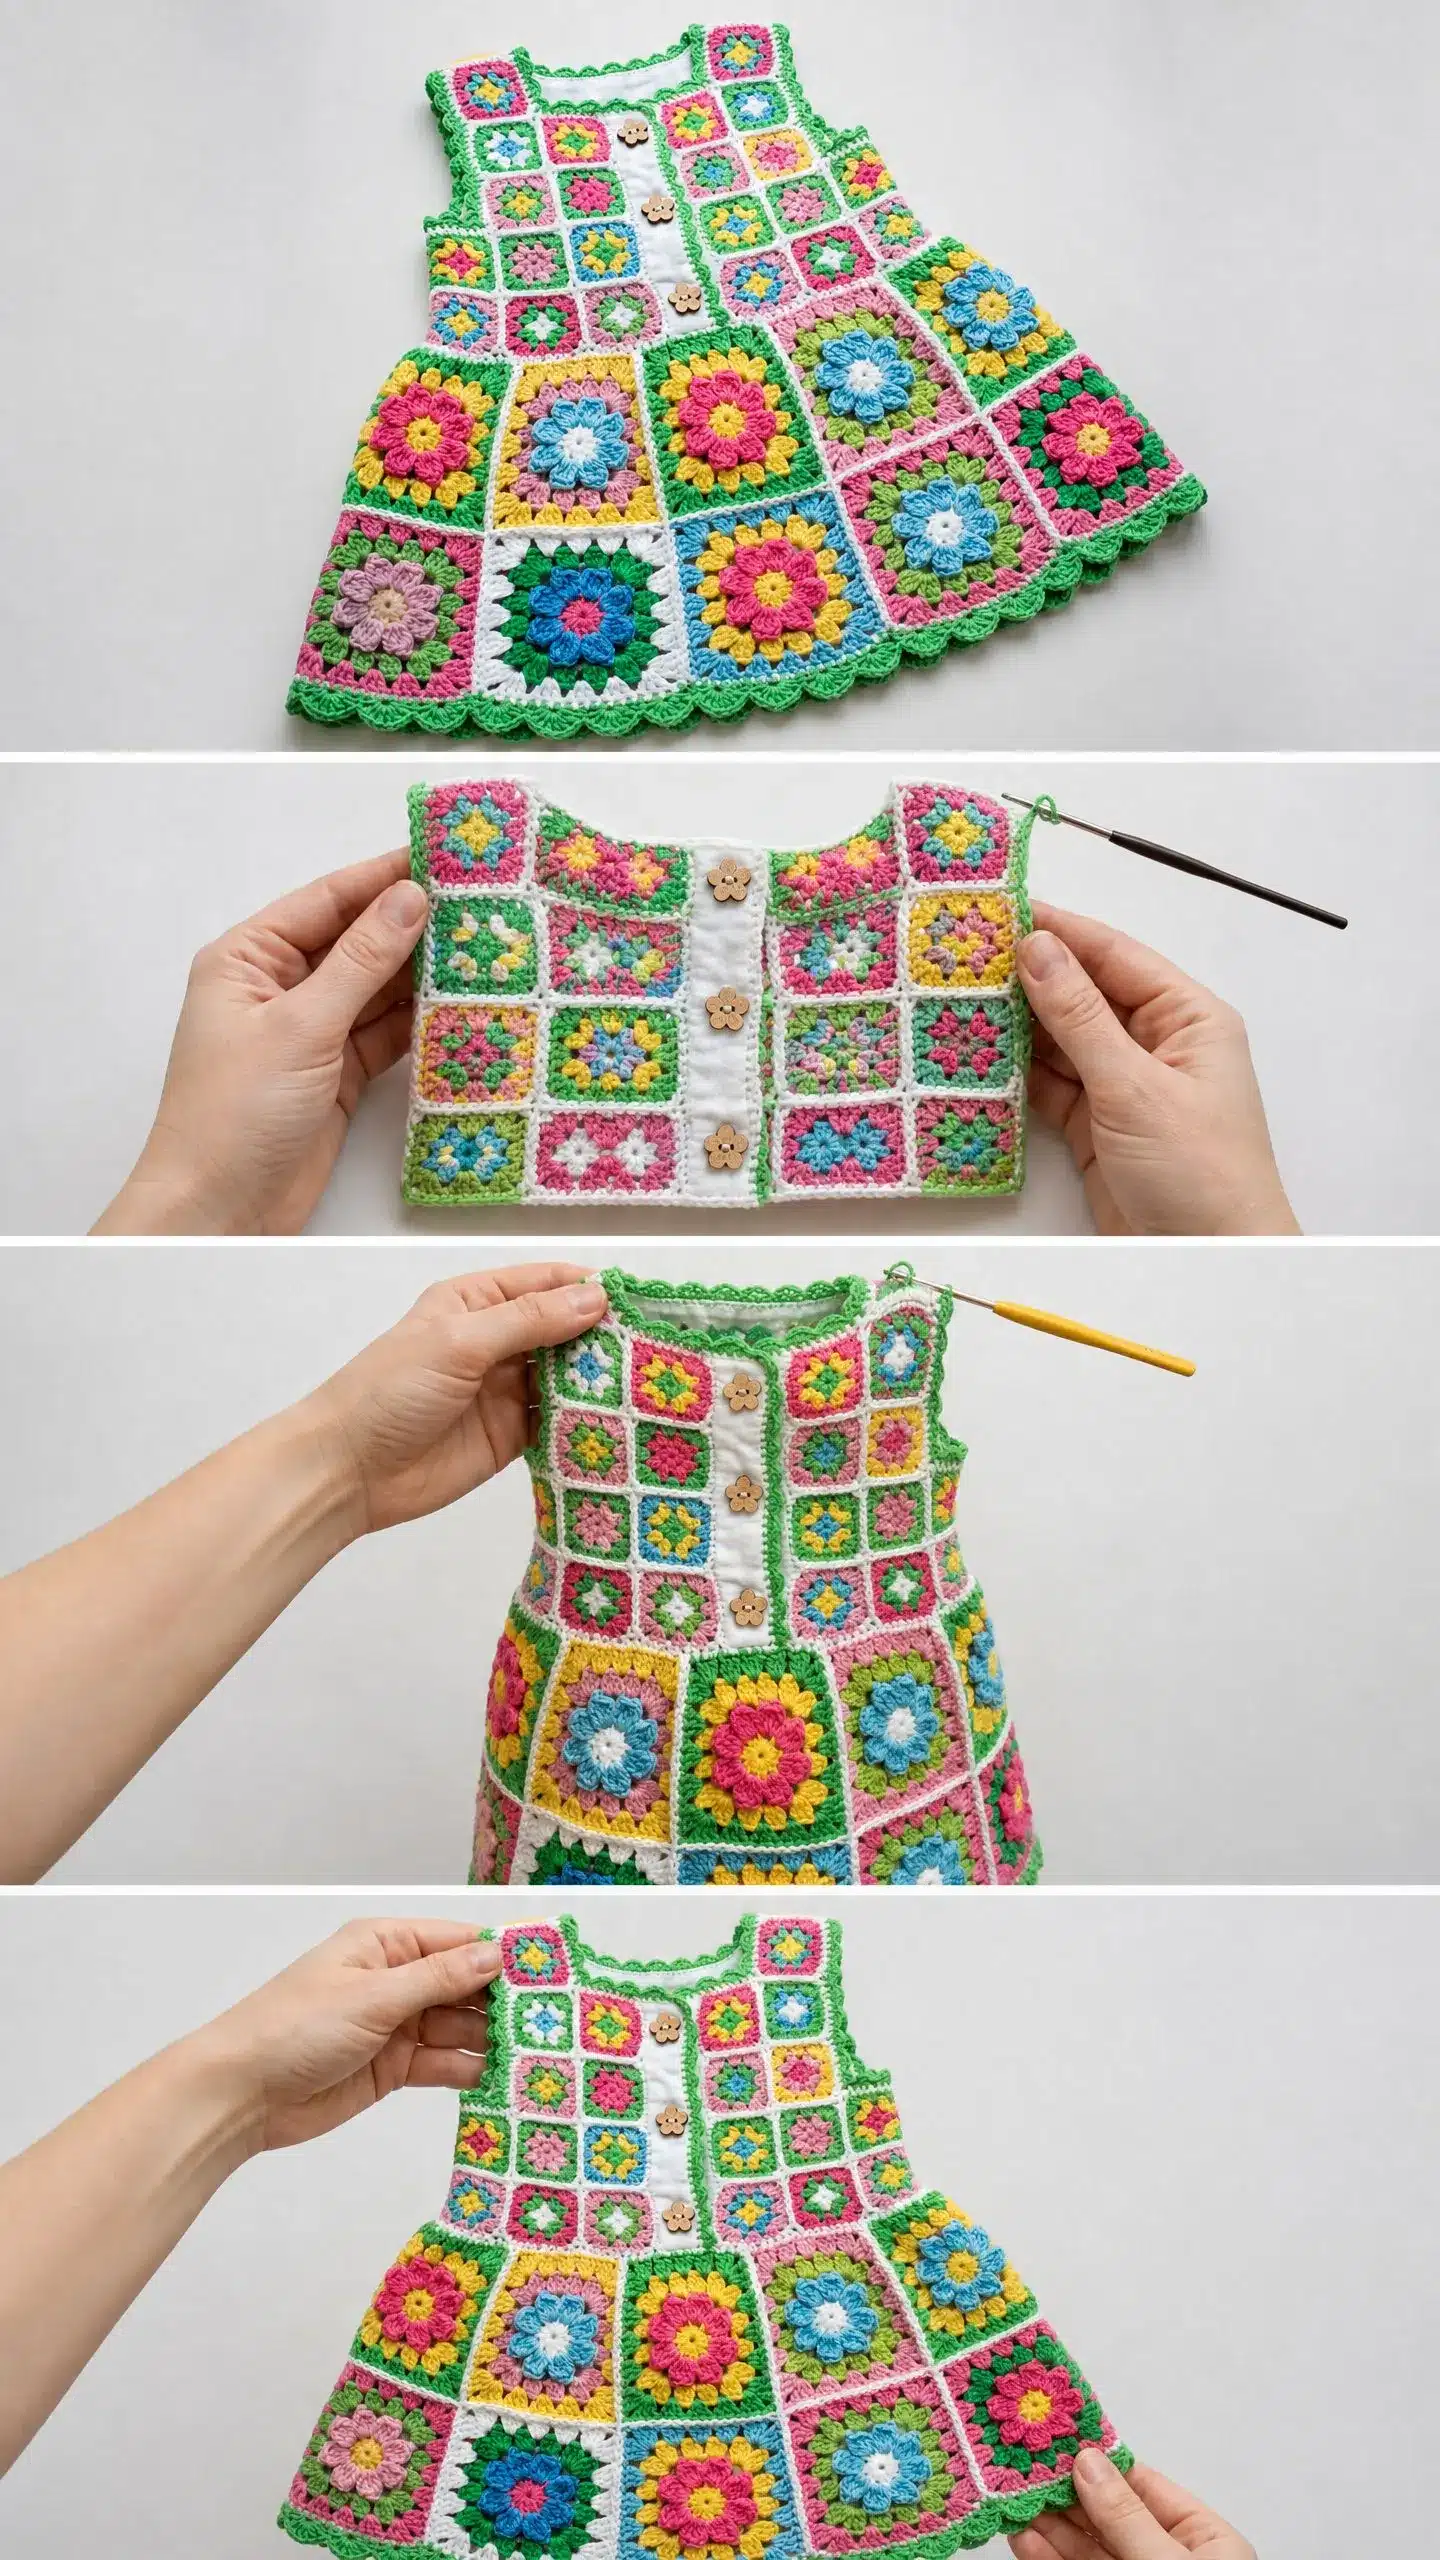
This pattern creates a charming baby dress featuring a bodice made of small granny squares and a skirt made of large granny squares. The construction relies on joining squares as you go (JAYG) to create a seamless, flat appearance. The dress features scalloped edgings around the neckline, armholes, and hem, finished with a decorative green border. It is designed for intermediate crocheters who are comfortable with multi-color management and basic seaming.
Materials
- Yarn: Light worsted weight (category 3, DK to light worsted). 100 percent cotton or cotton-acrylic blend is recommended.
- Total Yardage: Approximately 680 (575, 805) yd, depending on size.
- Color Breakdown (Size 12-18 months):
- Color A (Bright pink): ~100 yd
- Color B (Sky blue): ~85 yd
- Color C (Sunshine yellow): ~85 yd
- Color D (Leaf green): ~130 yd (includes border usage)
- Color E (White): ~110 yd (includes joining rounds)
- Color F (Soft pink/blush): ~65 yd
- Hooks: US size E-4 / 3.5 mm hook (small squares/borders) and US size G-6 / 4.0 mm hook (large squares).
- Notions: Tapestry needle, 3 flower-shaped wooden buttons (5/8 in / 16 mm diameter), sewing needle and thread, white cotton fabric (~1/4 yard for bodice lining), fabric scissors, straight pins, blocking mats, and rust-proof pins.
Gauge and Finished Size
Finished Sizes
The pattern is written for size 12 to 18 months. Changes for other sizes appear in parentheses throughout the instructions.
- Size 6 to 12 months: Chest 18 in / 46 cm, length shoulder to hem 14 in / 35.5 cm
- Size 12 to 18 months: Chest 20 in / 51 cm, length shoulder to hem 16 in / 40.5 cm
- Size 2T: Chest 22 in / 56 cm, length shoulder to hem 18 in / 45.5 cm
Gauge
Gauge is critical for this project because the dress fit depends on your squares measuring exactly right. If your squares are too big, size down your hook. If they are too small, size up. Make a test square before committing to the full project.
- Small square (3 rounds, E-4 hook): 2 in x 2 in / 5 cm x 5 cm
- Large square (5 rounds, G-6 hook): 4 in x 4 in / 10 cm x 10 cm
- Scallop border: 10 stitches per 1.5 in / 3.8 cm
Abbreviations
beg: beginning
ch: chain
ch-sp: chain space
dc: double crochet (yarn over, insert hook, pull up loop, yarn over and pull through 2 loops twice)
hdc: half double crochet
JAYG: join as you go
rnd: round
RS: right side
sc: single crochet (insert hook, pull up loop, yarn over and pull through both loops)
sk: skip
sl st: slip stitch
sp: space
st(s): stitch(es)
WS: wrong side
yo: yarn over
Pattern Notes
- All squares are worked in the round with RS facing throughout. Do not turn.
- Each round begins with a sl st join and ch 3 (counts as first dc of first cluster) unless otherwise stated.
- Color sequences within squares are randomized intentionally. The dominant petal color of each square may be any of colors A, B, C, or F. The joining/background color between clusters is always E (white). The outer border round of every square is always D (green).
- The center ring of every square is worked in C (yellow) or A (pink) to mimic a flower center.
- Fasten off and weave in all ends after each square is complete, before joining.
Pattern Instructions
Small Granny Square Instructions
Use US E-4 / 3.5 mm hook. Each small square measures 2 in x 2 in / 5 cm x 5 cm after light blocking.
Round 1: Using center color (C or A), make a magic ring (or ch 4, sl st to join). Ch 3 (counts as dc). Work 2 dc into ring. Ch 2. (Work 3 dc into ring, ch 2) 3 times. Sl st to top of beg ch-3 to join. Fasten off. (4 clusters of 3 dc = 12 dc, 4 ch-2 corner spaces)
Round 2: Join E (white) with sl st into any ch-2 corner sp. Ch 3. Work 2 dc into same corner sp. Ch 2. Work 3 dc into same corner sp. (Corner shell made.) Ch 1. (Work corner shell into next ch-2 corner sp, ch 1) 3 times. Sl st to top of beg ch-3 to join. Fasten off. (8 clusters = 24 dc, 4 ch-2 corner sps, 4 ch-1 side sps)
Round 3: Join D (green) with sl st into any ch-2 corner sp. Ch 3. Work 2 dc into same corner sp. Ch 2. Work 3 dc into same corner sp. Ch 1. Work 3 dc into ch-1 side sp. Ch 1. (Work corner shell into next ch-2 corner sp, ch 1, work 3 dc into ch-1 side sp, ch 1) 3 times. Sl st to top of beg ch-3 to join. Fasten off. (12 clusters = 36 dc, 4 ch-2 corner sps, 8 ch-1 side sps)
The small square has 3 cluster groups per side between corners after Round 3.
Bodice Square Counts by Size
- Size 6 to 12 months: 16 small squares total (8 front, 8 back)
- Size 12 to 18 months: 16 small squares total (8 front, 8 back)
- Size 2T: 20 small squares total (10 front, 10 back)
Large Granny Square Instructions
Use US G-6 / 4.0 mm hook. Each large square measures 4 in x 4 in / 10 cm x 10 cm after light blocking.
Round 1: Using center color (C or A), make a magic ring. Ch 3 (counts as dc). Work 2 dc into ring. Ch 2. (Work 3 dc into ring, ch 2) 3 times. Sl st to top of beg ch-3 to join. Fasten off. (12 dc, 4 ch-2 corner sps)
Round 2: Join petal color (A, B, C, or F, your choice) with sl st into any ch-2 corner sp. Ch 3. Work 2 dc into same sp. Ch 2. Work 3 dc into same sp. Ch 1. (Work corner shell into next ch-2 corner sp, ch 1) 3 times. Sl st to top of beg ch-3 to join. Fasten off. (8 clusters = 24 dc, 4 ch-2 corner sps, 4 ch-1 side sps)
Round 3: Join E (white) with sl st into any ch-2 corner sp. Ch 3. Work 2 dc into same sp. Ch 2. Work 3 dc into same sp. Ch 1. Work 3 dc into ch-1 side sp. Ch 1. (Work corner shell into next corner sp, ch 1, work 3 dc into ch-1 side sp, ch 1) 3 times. Sl st to top of beg ch-3 to join. Fasten off. (12 clusters = 36 dc, 4 ch-2 corner sps, 8 ch-1 side sps)
Round 4: Join petal color (same as Round 2 or a contrasting petal color) with sl st into any ch-2 corner sp. Ch 3. Work 2 dc into same sp. Ch 2. Work 3 dc into same sp. Ch 1. (Work 3 dc into next ch-1 sp, ch 1) twice. (Work corner shell into next corner sp, ch 1, work 3 dc into next ch-1 sp, ch 1, work 3 dc into next ch-1 sp, ch 1) 3 times. Sl st to top of beg ch-3 to join. Fasten off. (16 clusters = 48 dc, 4 ch-2 corner sps, 12 ch-1 side sps)
Round 5: Join D (green) with sl st into any ch-2 corner sp. Ch 3. Work 2 dc into same sp. Ch 2. Work 3 dc into same sp. Ch 1. (Work 3 dc into next ch-1 sp, ch 1) 3 times. (Work corner shell into next corner sp, ch 1, (work 3 dc into next ch-1 sp, ch 1) 3 times) 3 times. Sl st to top of beg ch-3 to join. Fasten off. (20 clusters = 60 dc, 4 ch-2 corner sps, 16 ch-1 side sps)
The large square has 5 cluster groups per side between corners.
Skirt Square Counts by Size
- Size 6 to 12 months: 16 large squares total (8 front, 8 back)
- Size 12 to 18 months: 20 large squares total (10 front, 10 back)
- Size 2T: 24 large squares total (12 front, 12 back)
Assembly
Bodice Assembly
When completing the last ch-2 corner or ch-1 side space of a new square, replace the chain(s) with a sl st into the corresponding ch-sp of the adjacent already-completed square. Then continue the ch sequence for any remaining chains needed. This connects squares without bulky seams.
- Make all small squares for your size. Block each square to 2 in x 2 in.
- Lay out front left panel squares (1 wide by 5 tall for 12-18 months) and join JAYG as you work each new square. Connect the right edge of each square to the left edge of the one beside it and the bottom edge to the top edge of the square below. Join through ch-1 side spaces with a flat sl st join.
- Repeat for front right panel. The left front and right front panels are NOT joined at the center. Leave a gap of approximately 1/2 in at center front for the button placket.
- Join all back panel squares in a 2-wide by 5-tall grid.
- Join front panels to back panels at the shoulders. The top 1 square of each front panel aligns with the top 1 square of each back panel at the shoulder. Join these squares at their top edges using a sl st seam with D (green) on RS.
- Leave the side edges of the top 2 squares on each side (front and back) open as armholes. Join the side seams below the armhole opening only. For 12-18 months, connect the bottom 3 squares of front and back at each side edge using a flat sl st seam with D.
Skirt Assembly
- Make all large squares for your size. Block each square to 4 in x 4 in.
- Join large squares JAYG into skirt front panel (5 wide by 2 tall for 12-18 months). Join skirt back panel identically.
- Join skirt front and back panels at the side seams using a flat sl st seam with D, RS together. Leave the top edge and hem edge open. The skirt is now a tube.
Joining Bodice to Skirt
Hold bodice WS down and skirt WS up with the top edge of the skirt aligned to the bottom edge of the bodice. The skirt is wider than the bodice. Distribute excess skirt width evenly around the bodice bottom edge by pinning at center front, center back, and each side seam first. Then distribute the remaining skirt fabric evenly between those points.
Join with D, working a sl st seam through the edge stitches of both layers. Work the seam from RS so the green joining shows as a decorative ridge on the outside of the dress. Space 1 sl st per ch-1 sp or dc cluster edge around the full circumference. Fasten off. Weave in end.
Neckline, Armhole, and Hem Borders
Neckline Border: Join D with sl st at center back neckline. Work 1 sc evenly around neckline opening. Sl st to join. Ch 1. Sc in each sc around. Sl st to join. For scallop round: Work scallops as follows: Sl st into designated stitch to anchor, ch 3, work 4 dc into the same stitch or space, sl st into the next designated stitch (2 stitches forward). Repeat around. Sl st to join. Fasten off.
Armhole Border: Join D with sl st at underarm join point on one armhole. Round 1: Sc evenly around armhole opening, placing 1 sc per ch-1 sp and 2 sc per ch-2 corner sp. For 12 to 18 months, approximately 28 sc around each armhole. Sl st to join. (28 sc). Round 2: Ch 1. Sc in each sc around. Sl st to join. (28 sc). Round 3 (scallop round): Work scallops as for neckline. 28 sc divided by 2 = 14 scallops. Sl st to join. Fasten off. Repeat for second armhole.
Hem Border: Join D with sl st at center back hem. Work 1 sc evenly around hem opening. Sl st to join. Ch 1. Sc in each sc around. Sl st to join. For scallop round: Work scallops as for neckline. Sl st to join. Fasten off.
Bodice Lining
Cut white cotton fabric to fit the bodice panel. Sew the lining to the inside of the bodice, ensuring it covers the back of the squares for comfort and structure.
Button Placket and Attachment
Attach the 3 flower-shaped wooden buttons to the right front panel placket, spacing them evenly to align with the buttonholes or gaps in the left front panel.
Finishing and Blocking
Weave in all remaining ends using a tapestry needle, burying tails at least 1 inch in both directions. Wet block the finished dress by submerging in cool water. Gently press out excess water in a towel and lay flat on blocking mats. Pin each square to its finished dimensions. Pin borders to lie flat. Allow to dry completely (24 to 48 hours) before unpinning.
Tips
- To make larger sizes beyond 2T: Add 2 additional small squares per row of bodice (increasing bodice width to 3 squares across per panel) and add 1 to 2 additional columns of large squares to the skirt.
- To lengthen the dress: Add a third row of large squares to the skirt, adding 4 in to the length.
- To shorten the dress: Use only 1 row of large squares for the skirt, reducing length by 4 in.
- To adjust bodice length: Add or remove 1 row of small squares from the bodice, adjusting length by 2 in per row.
FAQs
What type of yarn is best for this dress?
A light worsted weight (category 3) yarn is recommended. 100 percent cotton or a cotton-acrylic blend works beautifully because it provides crisp stitch definition for the granny squares and is durable enough for baby wear.
How do I join the squares without bulky seams?
Use the JAYG (Join As You Go) method. When completing the last chain space of a new square, replace the chain with a slip stitch into the corresponding space of the adjacent square. This creates a flat, invisible seam.
Can I wash this dress?
Yes. Machine wash cold on a gentle cycle, inside out. Lay flat to dry. Do not tumble dry as heat may cause cotton to shrink and distort the square shapes. Do not iron directly; if pressing is needed, use a pressing cloth and low heat on the wrong side only.
How do I adjust the size?
The pattern is written for 12-18 months. To size up or down, adjust the number of squares in the bodice and skirt panels as noted in the square counts. You can also add or remove rows of squares to adjust the length.
Why is a lining recommended?
The white cotton lining adds structure to the bodice so it hangs properly and provides a soft, comfortable layer against the baby’s skin, preventing any scratchiness from the crochet stitches.
Pin This Crochet Pattern!