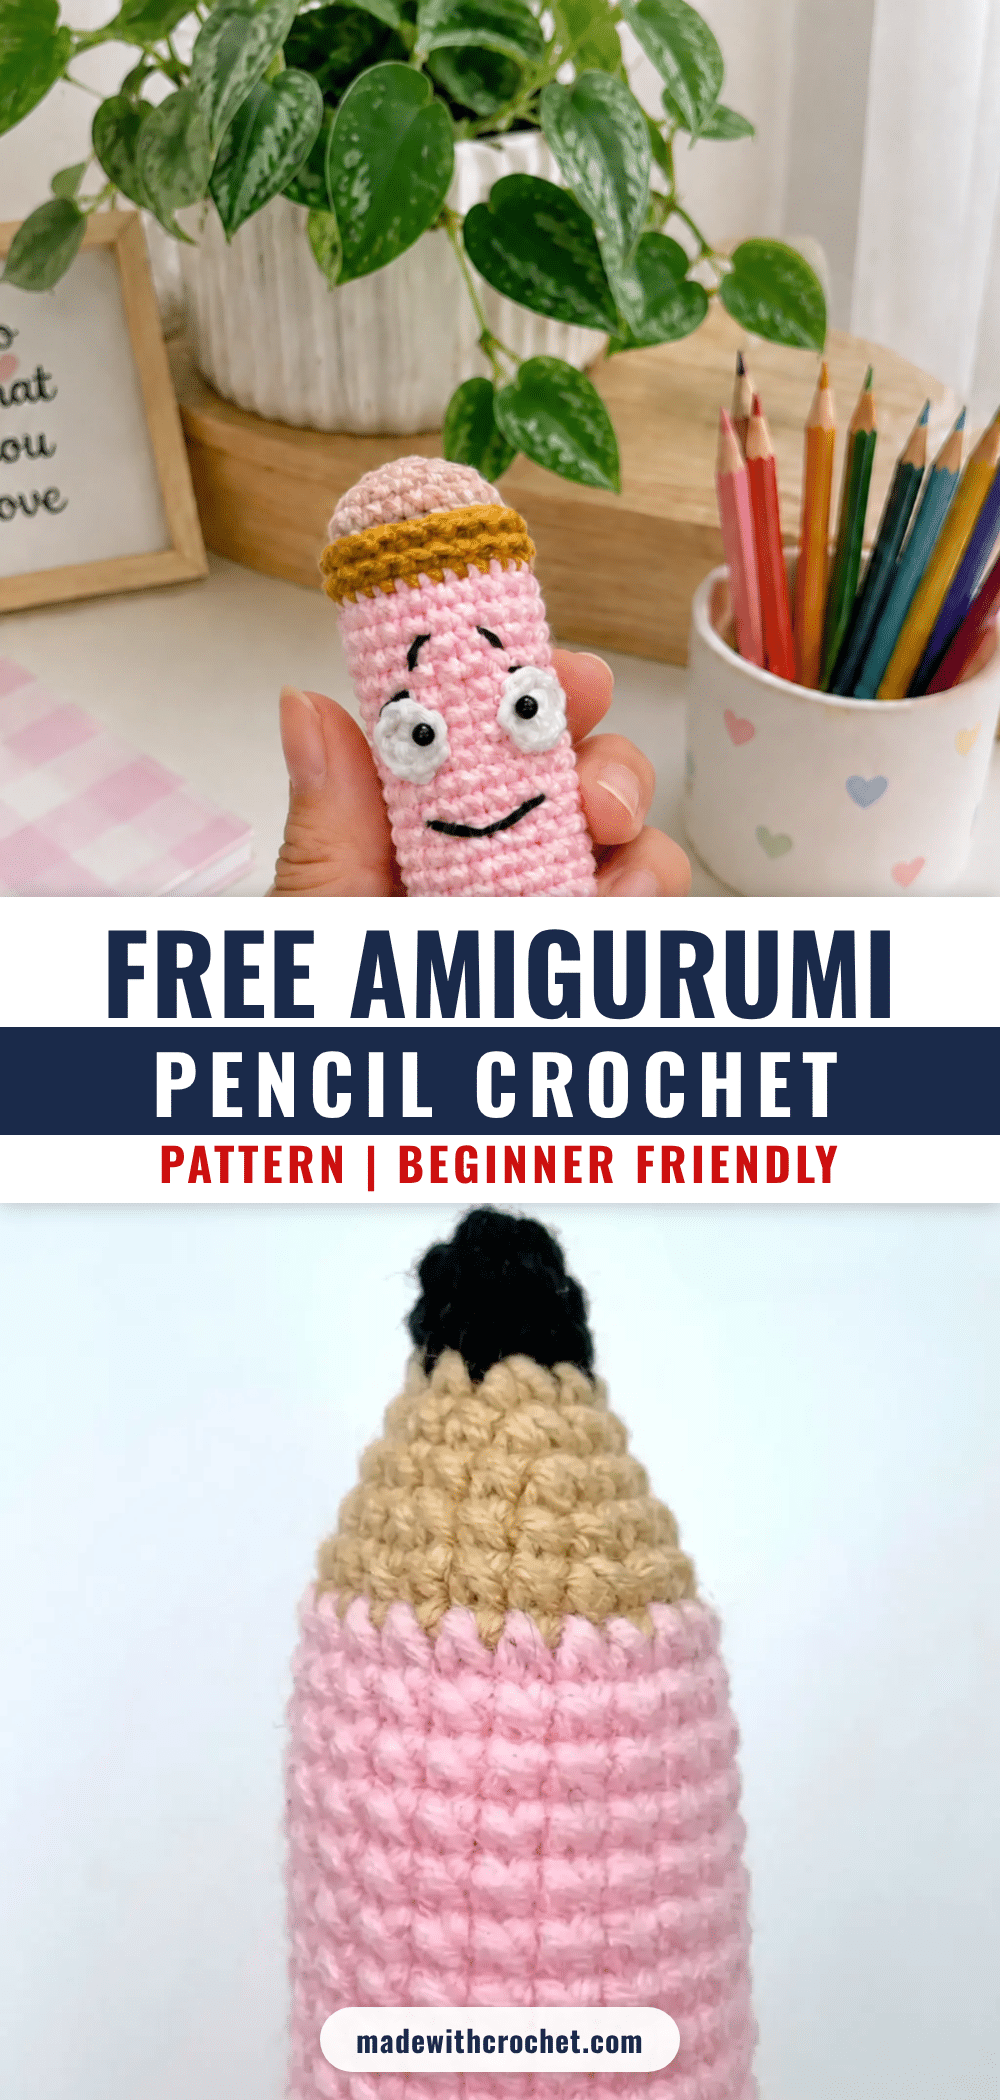
Looking for a quick, beginner-friendly crochet project that doubles as a thoughtful gift or a charming desk accessory? This cute amigurumi pencil toy is the perfect answer. Whether you’re crafting a back-to-school surprise for a little one, a fun teacher appreciation gift, or a whimsical addition to your own workspace, this pattern delivers. It’s a small, satisfying project that works up fast and uses simple stitches, making it an ideal choice for crocheters looking to practice color changes and amigurumi basics.
Gift and Use Ideas
This little pencil is more than just a toy. Its sturdy, upright design makes it a fantastic decorative piece for a student’s desk, a cheerful bookmark, or a unique addition to a pencil case. It’s a wonderful handmade gift for teachers, classmates, or anyone who loves stationery. The cheerful embroidered face adds a touch of personality that makes it a joy to give and receive. You could even make a set in different colors for a vibrant, playful collection.
Project Overview
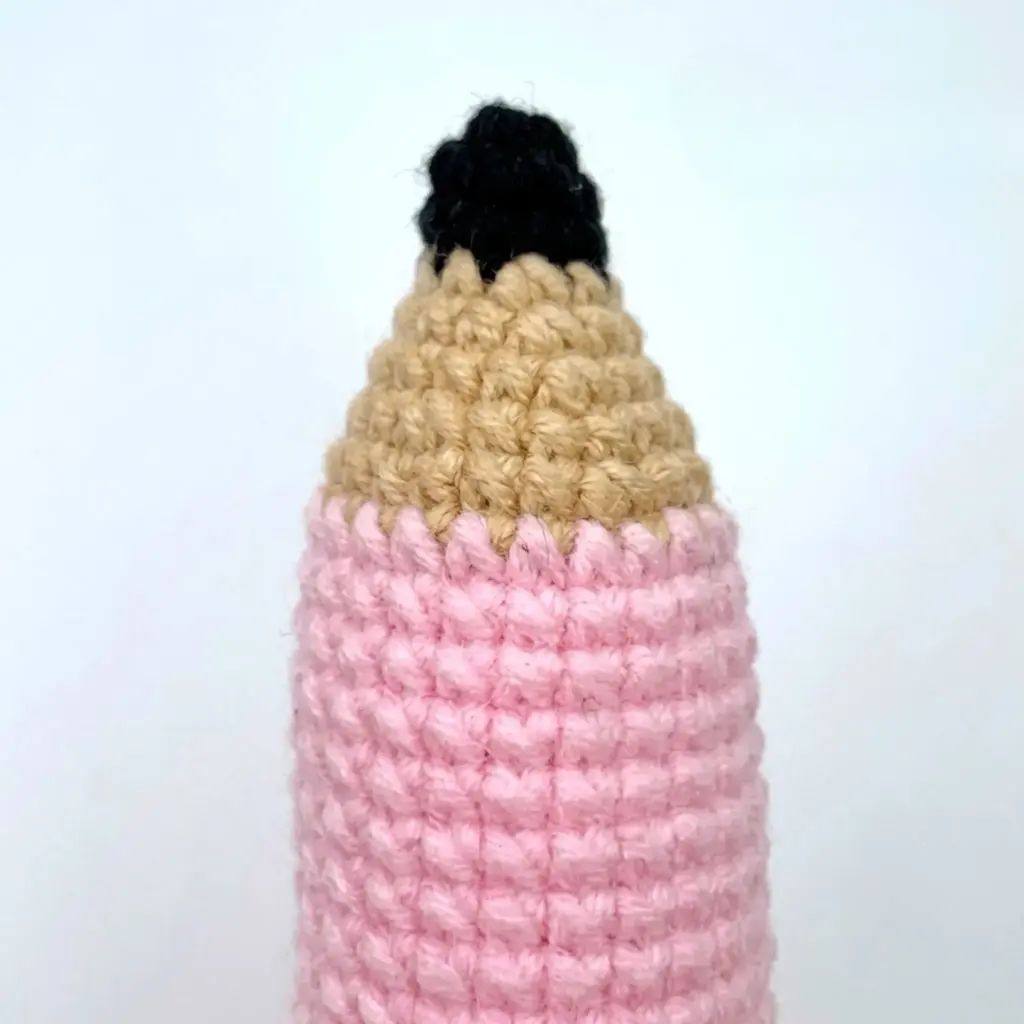
This amigurumi pencil is worked from the tip to the top in one continuous spiral. You’ll start with the black graphite tip, move through the beige wooden body, and add colorful bands to create the classic pencil look. The pattern uses simple increases and decreases, with a clever back-loop-only technique to create a raised eraser band. The finishing touches, including the embroidered face and safety eyes, bring your pencil to life.
Materials
- Yarn: Light worsted weight (CYCA #3 DK or light worsted); colors needed: Black, Beige, Pink, Mustard, Powder Pink, White
- Hook size: E-4 / 3.5 mm (adjust to achieve a tight, gap-free fabric)
- Safety eyes: 2 black safety eyes, 8–10 mm
- Stuffing: Polyester fiberfill
- Stitch marker: 1, to track the beginning of each round
- Yarn needle / tapestry needle
- Scissors
- Black embroidery thread or yarn for eyelashes, eyebrows, and mouth
Abbreviations
- BLO — Back Loop Only
- ch — Chain
- dec — Invisible Decrease (worked through the front loops of the next 2 sts)
- FLO — Front Loop Only
- inc — Increase (2 sc in the same stitch)
- MR — Magic Ring
- sc — Single Crochet
- sl st — Slip Stitch
- st / sts — Stitch / Stitches
Pattern Notes
- This pattern is written in US crochet terminology.
- The body is worked in a continuous spiral — do not join rounds or chain at the start of each round. Use a stitch marker to track your progress.
- Gauge is not critical for this project. What matters is tension: your fabric should be tight enough that no stuffing shows through the stitches.
- Stitch count is given at the end of each round in parentheses: (##).
- Begin stuffing gradually from Rnd 4 onward. Pay particular attention to packing the pointed tip firmly so it holds its tapered shape.
- Safety eyes are attached between Rnds 16 and 20, spaced 2–3 stitches apart. Attach them before closing the top of the body.
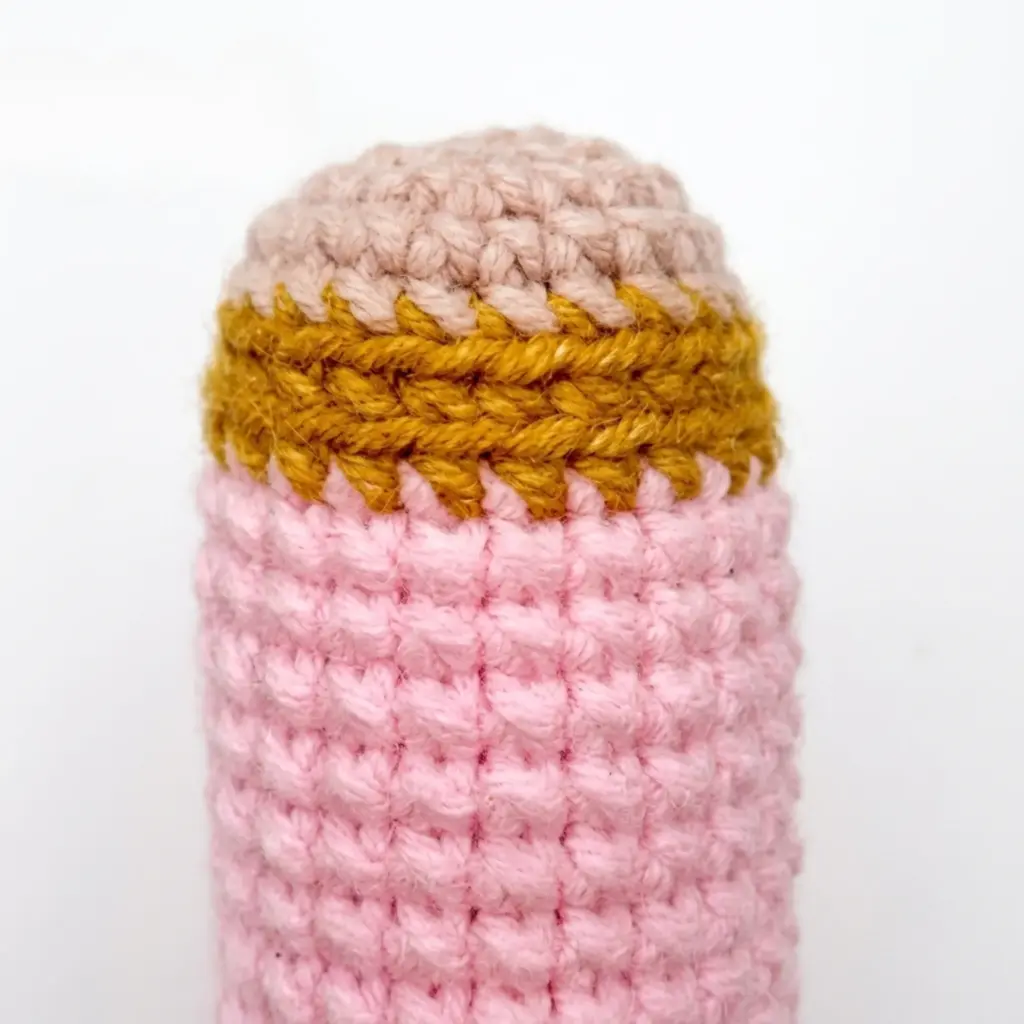
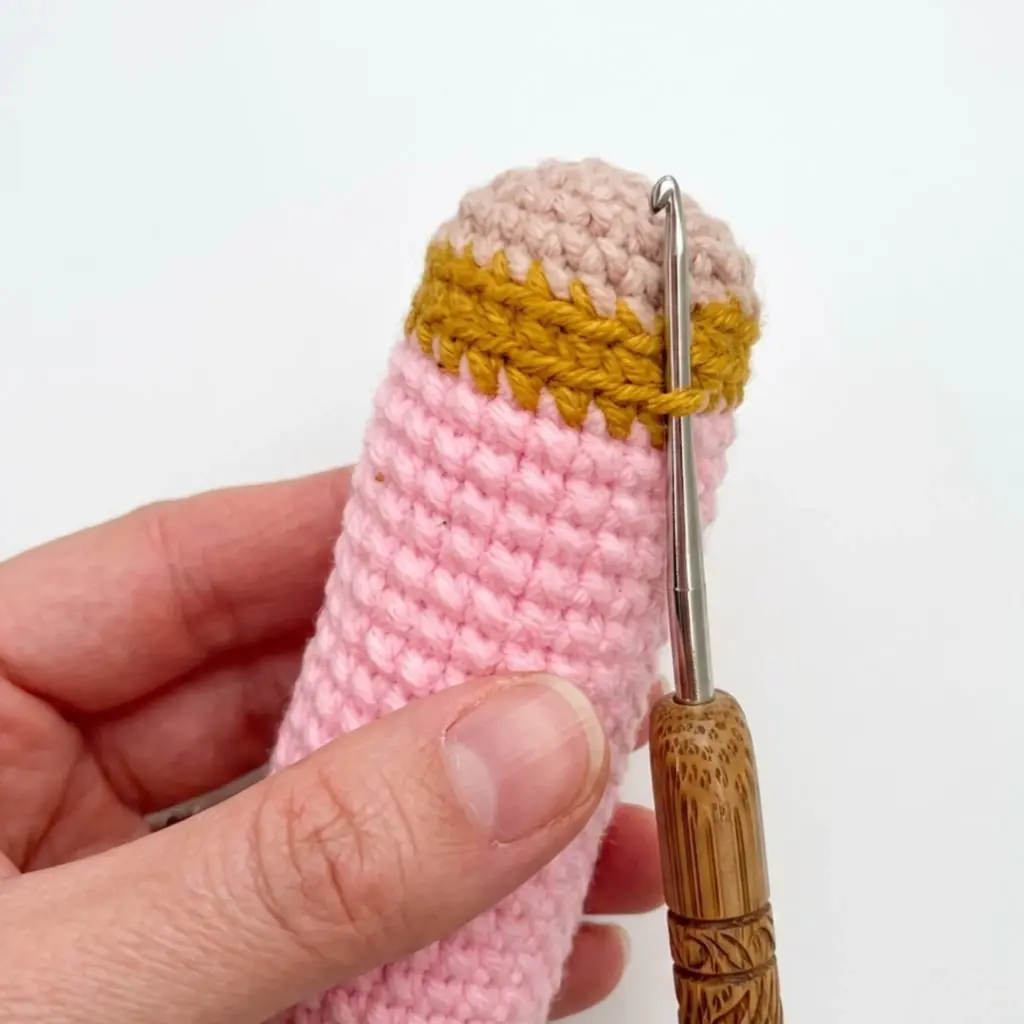
- Rounds 26 and 27 are worked BLO intentionally. The free front loops left behind will be picked up later to create the mustard eraser band edging.
Pattern Instructions
Body
Begin with Black yarn.
- Rnd 1: 6 sc in MR. (6)
- Rnd 2: (1 sc, inc) × 3. (9)
- Rnd 3: 9 sc. (9)
Fasten off Black. Join Beige. Weave in end securely inside the piece. Begin adding fiberfill gradually from this point, shaping the tip carefully as you go.
- Rnd 4: (2 sc, inc) × 3. (12)
- Rnd 5: (3 sc, inc) × 3. (15)
- Rnd 6: 2 sc, inc, (4 sc, inc) × 2, 2 sc. (18)
- Rnd 7: (5 sc, inc) × 3. (21)
- Rnd 8: 3 sc, inc, (6 sc, inc) × 2, 3 sc. (24)
Fasten off Beige. Join Pink. Weave in end inside the piece.
- Rnds 9–24: 24 sc. (24) (16 rounds total)
Fasten off Pink. Join Mustard. Weave in end inside the piece.
- Rnd 25: 24 sc. (24)
- Rnd 26: Working in BLO only: 24 sc. (24)
Fasten off Mustard. Join Powder Pink. Weave in end inside the piece.
- Rnd 27: Working in BLO only: 24 sc. (24)
From this point forward, work through both loops as normal.
- Rnd 28: 24 sc. (24)
- Rnd 29: (2 sc, dec) × 6. (18)
- Rnd 30: (1 sc, dec) × 6. (12)
Stuff the body firmly now, shaping it into a smooth, even cylinder. This is your last chance to adjust the fiberfill before the opening closes.
- Rnd 31: 6 dec. (6), sl st into next st. Fasten off, leaving a long tail.
Thread the tail onto your yarn needle and weave through the front loop of each remaining stitch around the opening. Pull tight to cinch the hole closed. Weave in the end.
Eraser Band Edging (make 2 — one for Rnd 25 FLO, one for Rnd 26 FLO)
With Mustard yarn, insert your hook into the free front loops of Rnd 25 — these are the loops left unworked after you crocheted Rnd 26 in BLO. Work 24 sl st around in FLO. Fasten off. Weave in end. Repeat this edging on the free front loops of Rnd 26 in the same way.
Eyes (make 2)
With White yarn.
- Rnd 1: 6 sc in MR, sl st to close. (6)
Fasten off, leaving a long tail for sewing.
Assembly
Position the two white eye pieces on the front of the body between Rnds 16 and 20, spacing them 2–3 stitches apart from each other at the center. Attach a safety eye through the center of each white eye piece, then press the washer firmly on the inside to lock it in place. Using the long yarn tails from the white eye pieces, sew each one onto the body using a whipstitch around the outer edge. Pull snug so each eye sits flat against the surface. Using black embroidery thread or a length of Black yarn threaded onto your yarn needle, embroider pupils onto each eye. Embroider eyelashes above each eye, eyebrows just above those, and a small curved mouth below the eyes on the front of the body. Weave in all remaining ends.
Tips
- Keep your tension tight throughout. Amigurumi works best when the fabric has no gaps. If you can see fiberfill through the stitches, try going down half a hook size. A tighter fabric also means the finished piece holds its shape longer, especially in the tapered tip section.
- Stuff the tip before you lose access to it. The graphite tip (Rnds 1–3) is a narrow, pointed section. Push small pinches of fiberfill in with a pencil or dowel as you work Rnds 4–8 to pack it firmly. Trying to stuff it after the body has grown wider is frustrating and usually results in a lopsided tip.
- Mark Rnd 25 before you work it. Because you’ll return to the FLO of both Rnds 25 and 26 later for the eraser band edging, place a locking stitch marker in the first stitch of each of those rounds as you complete them. It saves you from hunting for the right row later.
- The BLO rounds create a natural groove. When you work Rnds 26 and 27 in BLO, the fabric folds slightly inward at that point — this is what gives the eraser band its raised, dimensional look. Don’t try to flatten it. That ridge is exactly what you want.
- For invisible decreases, always insert through the front loops only. On a continuous spiral in the round, this keeps the dec nearly invisible from the right side of the work. It makes a noticeable difference in how clean the top of the pencil looks when it’s finished.
Frequently Asked Questions
What yarn weight works best for this amigurumi pencil pattern?
A light worsted or DK weight yarn (CYCA #3) gives you the clearest stitch definition and the most manageable size for this project. You can use a thicker worsted weight if you want a larger pencil, but be sure to adjust your hook size accordingly to keep the fabric tight and gap-free. Avoid fuzzy or textured yarns for the body — clean, smooth yarn shows off the color changes and stitch detail far better.
How do I keep the pencil tip from collapsing or going floppy?
The key is stuffing early and stuffing firmly. Begin adding fiberfill at Rnd 4 and push small amounts into the narrow tip section with a blunt tool like a dowel or the eraser end of an actual pencil. Pack it tightly before the body widens too much to give you access. A well-stuffed tip holds its tapered shape permanently and gives the finished toy a satisfying, solid feel.
Can I use safety eyes instead of embroidering the pupils?
Yes — the white crocheted eye pieces are sewn on as a base, and you can absolutely use small safety eyes (6–8 mm) inserted through the center of each white circle instead of embroidering the pupils. Just make sure to attach the safety eye washers on the inside of the white piece before sewing it onto the body, since you won’t have easy access afterward. Either method looks great; safety eyes give a glossier, more graphic finish while embroidery reads as softer and more handmade.
What is the finished size of the crocheted pencil toy?
Using DK or light worsted yarn with a 3.5 mm hook, the finished pencil measures approximately 4–5 inches (10–13 cm) in length.
How do I make the invisible decrease?
To work an invisible decrease (dec), insert your hook through the front loop only of the next stitch, then insert it through the front loop only of the following stitch. Yarn over and pull through both front loops (two loops on hook). Yarn over again and pull through both loops on the hook. This technique creates a nearly invisible decrease that blends seamlessly into the fabric.
Can I change the color of the pencil body?
Absolutely! The pattern is very customizable. You can use any color for the main body (Pink in the pattern) to create a rainbow of pencils. The Beige section represents the wood, but you could also experiment with different colors for a more whimsical look. Just keep the Black tip and the Mustard/Powder Pink eraser section for the classic pencil silhouette.
Pin This Crochet Pattern!