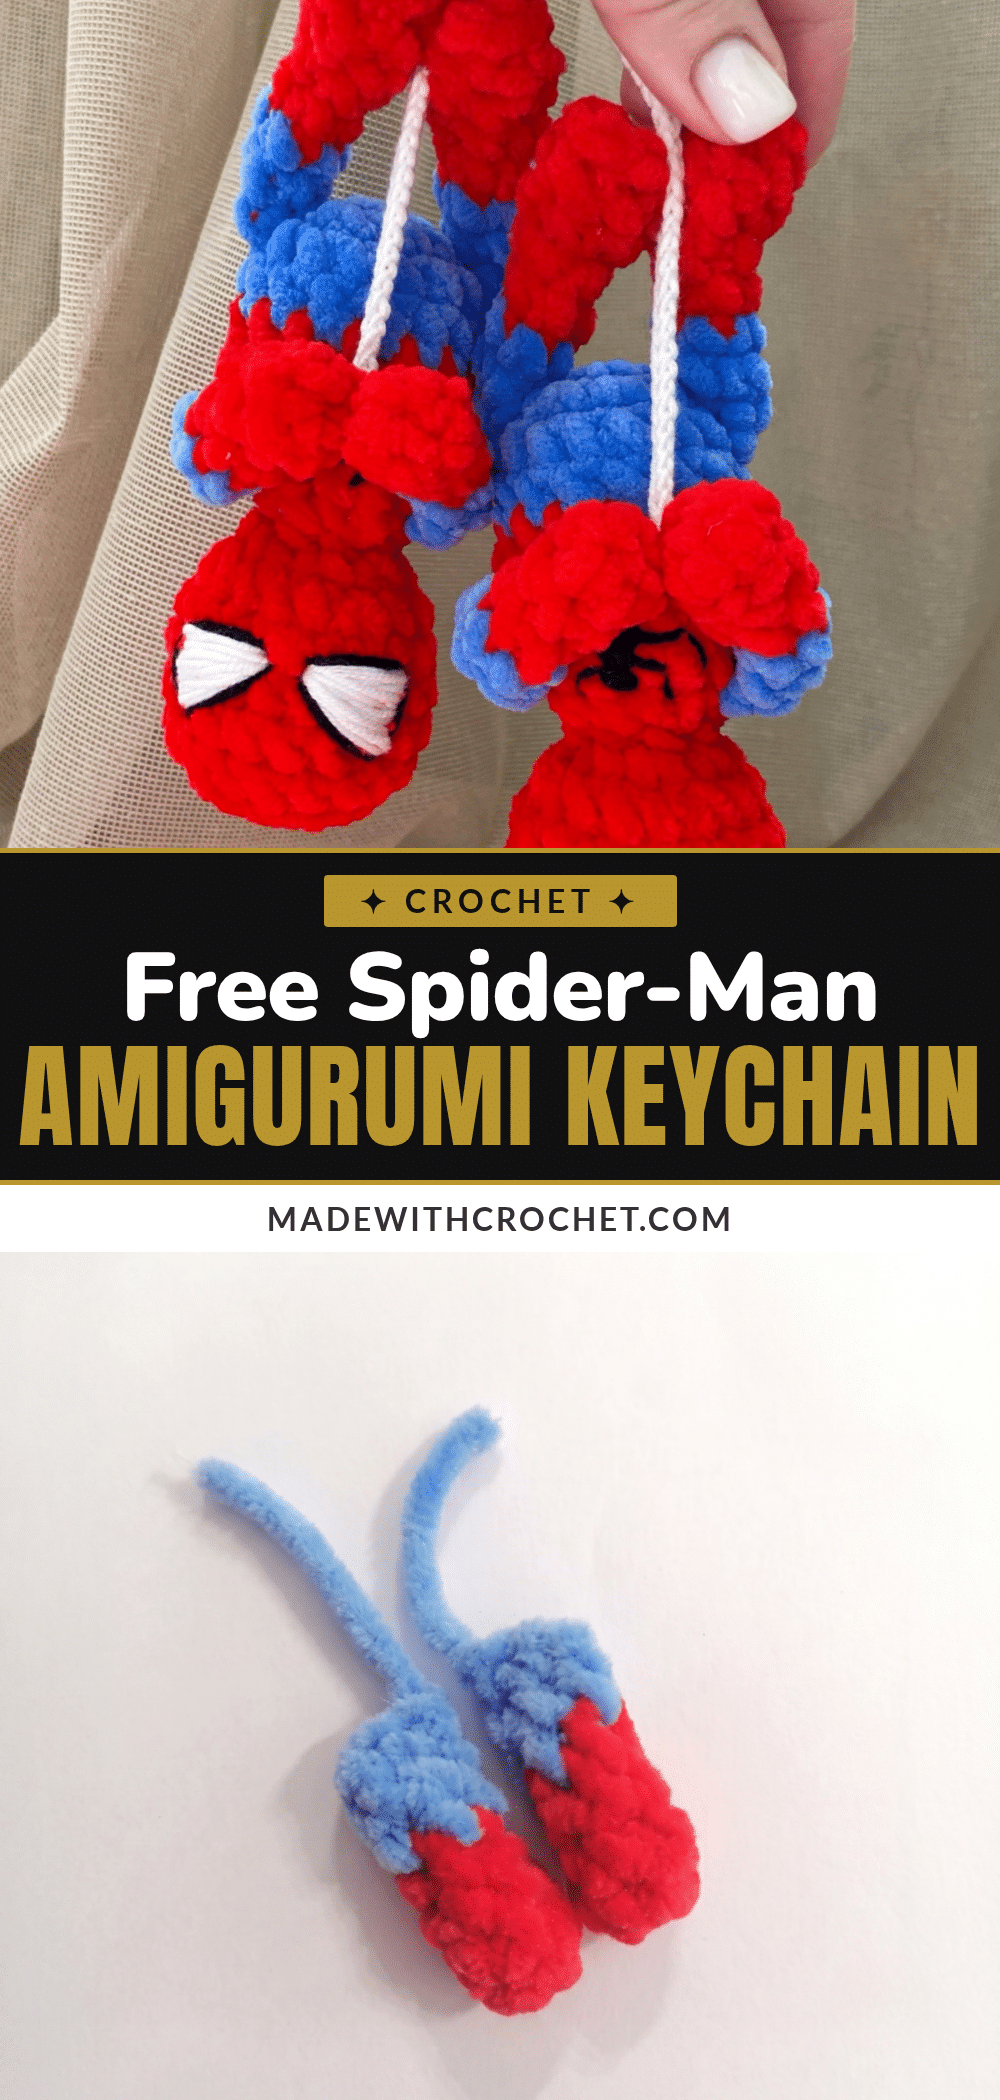
Have you ever started an amigurumi project only to worry that the limbs won’t line up or the head will look lumpy? You’re not alone — those small fears keep many crafters from trying something new. But this Spider-Man keychain is designed to ease those worries. The body and head are worked in one continuous piece, so there’s no tricky neck sewing, and the limbs are joined as you crochet, making symmetry almost automatic. It’s a forgiving, fast project that builds confidence with every round.
Maker Notes
This little web-slinger is pure fun to make. The plush chenille yarn gives it a soft, huggable texture that contrasts beautifully with the crisp embroidered eyes and web details. The upside-down hanging pose captures Spider-Man’s classic swinging action, making it a playful keychain or bag charm. It’s also a great stash-buster — you only need small amounts of red and blue. Whether you’re making it for a Marvel fan or as a quick gift, the finished piece feels polished and full of personality.
Project Overview
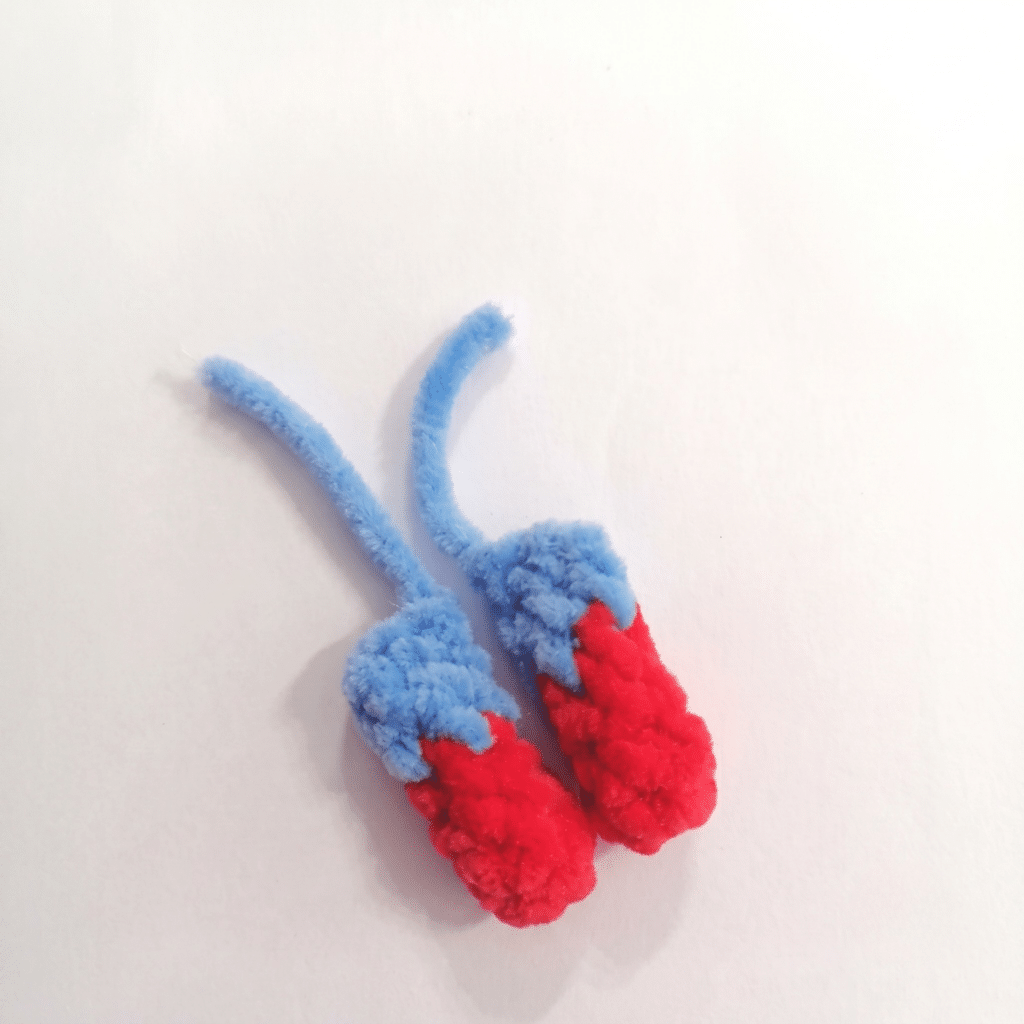
This crochet Spider-Man amigurumi keychain is a compact, beginner-friendly project that works up quickly. The finished figure is small but full of personality, with a continuous body-head construction that eliminates complicated assembly. It makes an unforgettable handmade gift for kids and comic lovers alike.
Materials
- Yarn (Main): Plush chenille yarn, approx. 100g / 120 yds — Red (approx. 15g per keychain) and Blue (approx. 5g per keychain). Recommended: any bulky-weight chenille such as Wolans Bunny Baby. CYCA weight: Bulky (#5).
- Yarn (Detail): White and black yarn for embroidering eyes and web detail. Recommended: a lighter-weight chenille or soft DK-weight yarn.
- Hook (Main): US F-5 / 3.75 mm
- Hook (Detail): US B-1 to C-2 / 2.5–3 mm (for embroidery yarn)
- Fiberfill stuffing
- White felt + super glue (alternative to embroidered eyes)
- Stitch marker
- Tapestry needle
- Scissors
- Sewing thread or tightening thread (for securing legs)
- Keychain ring
Abbreviations
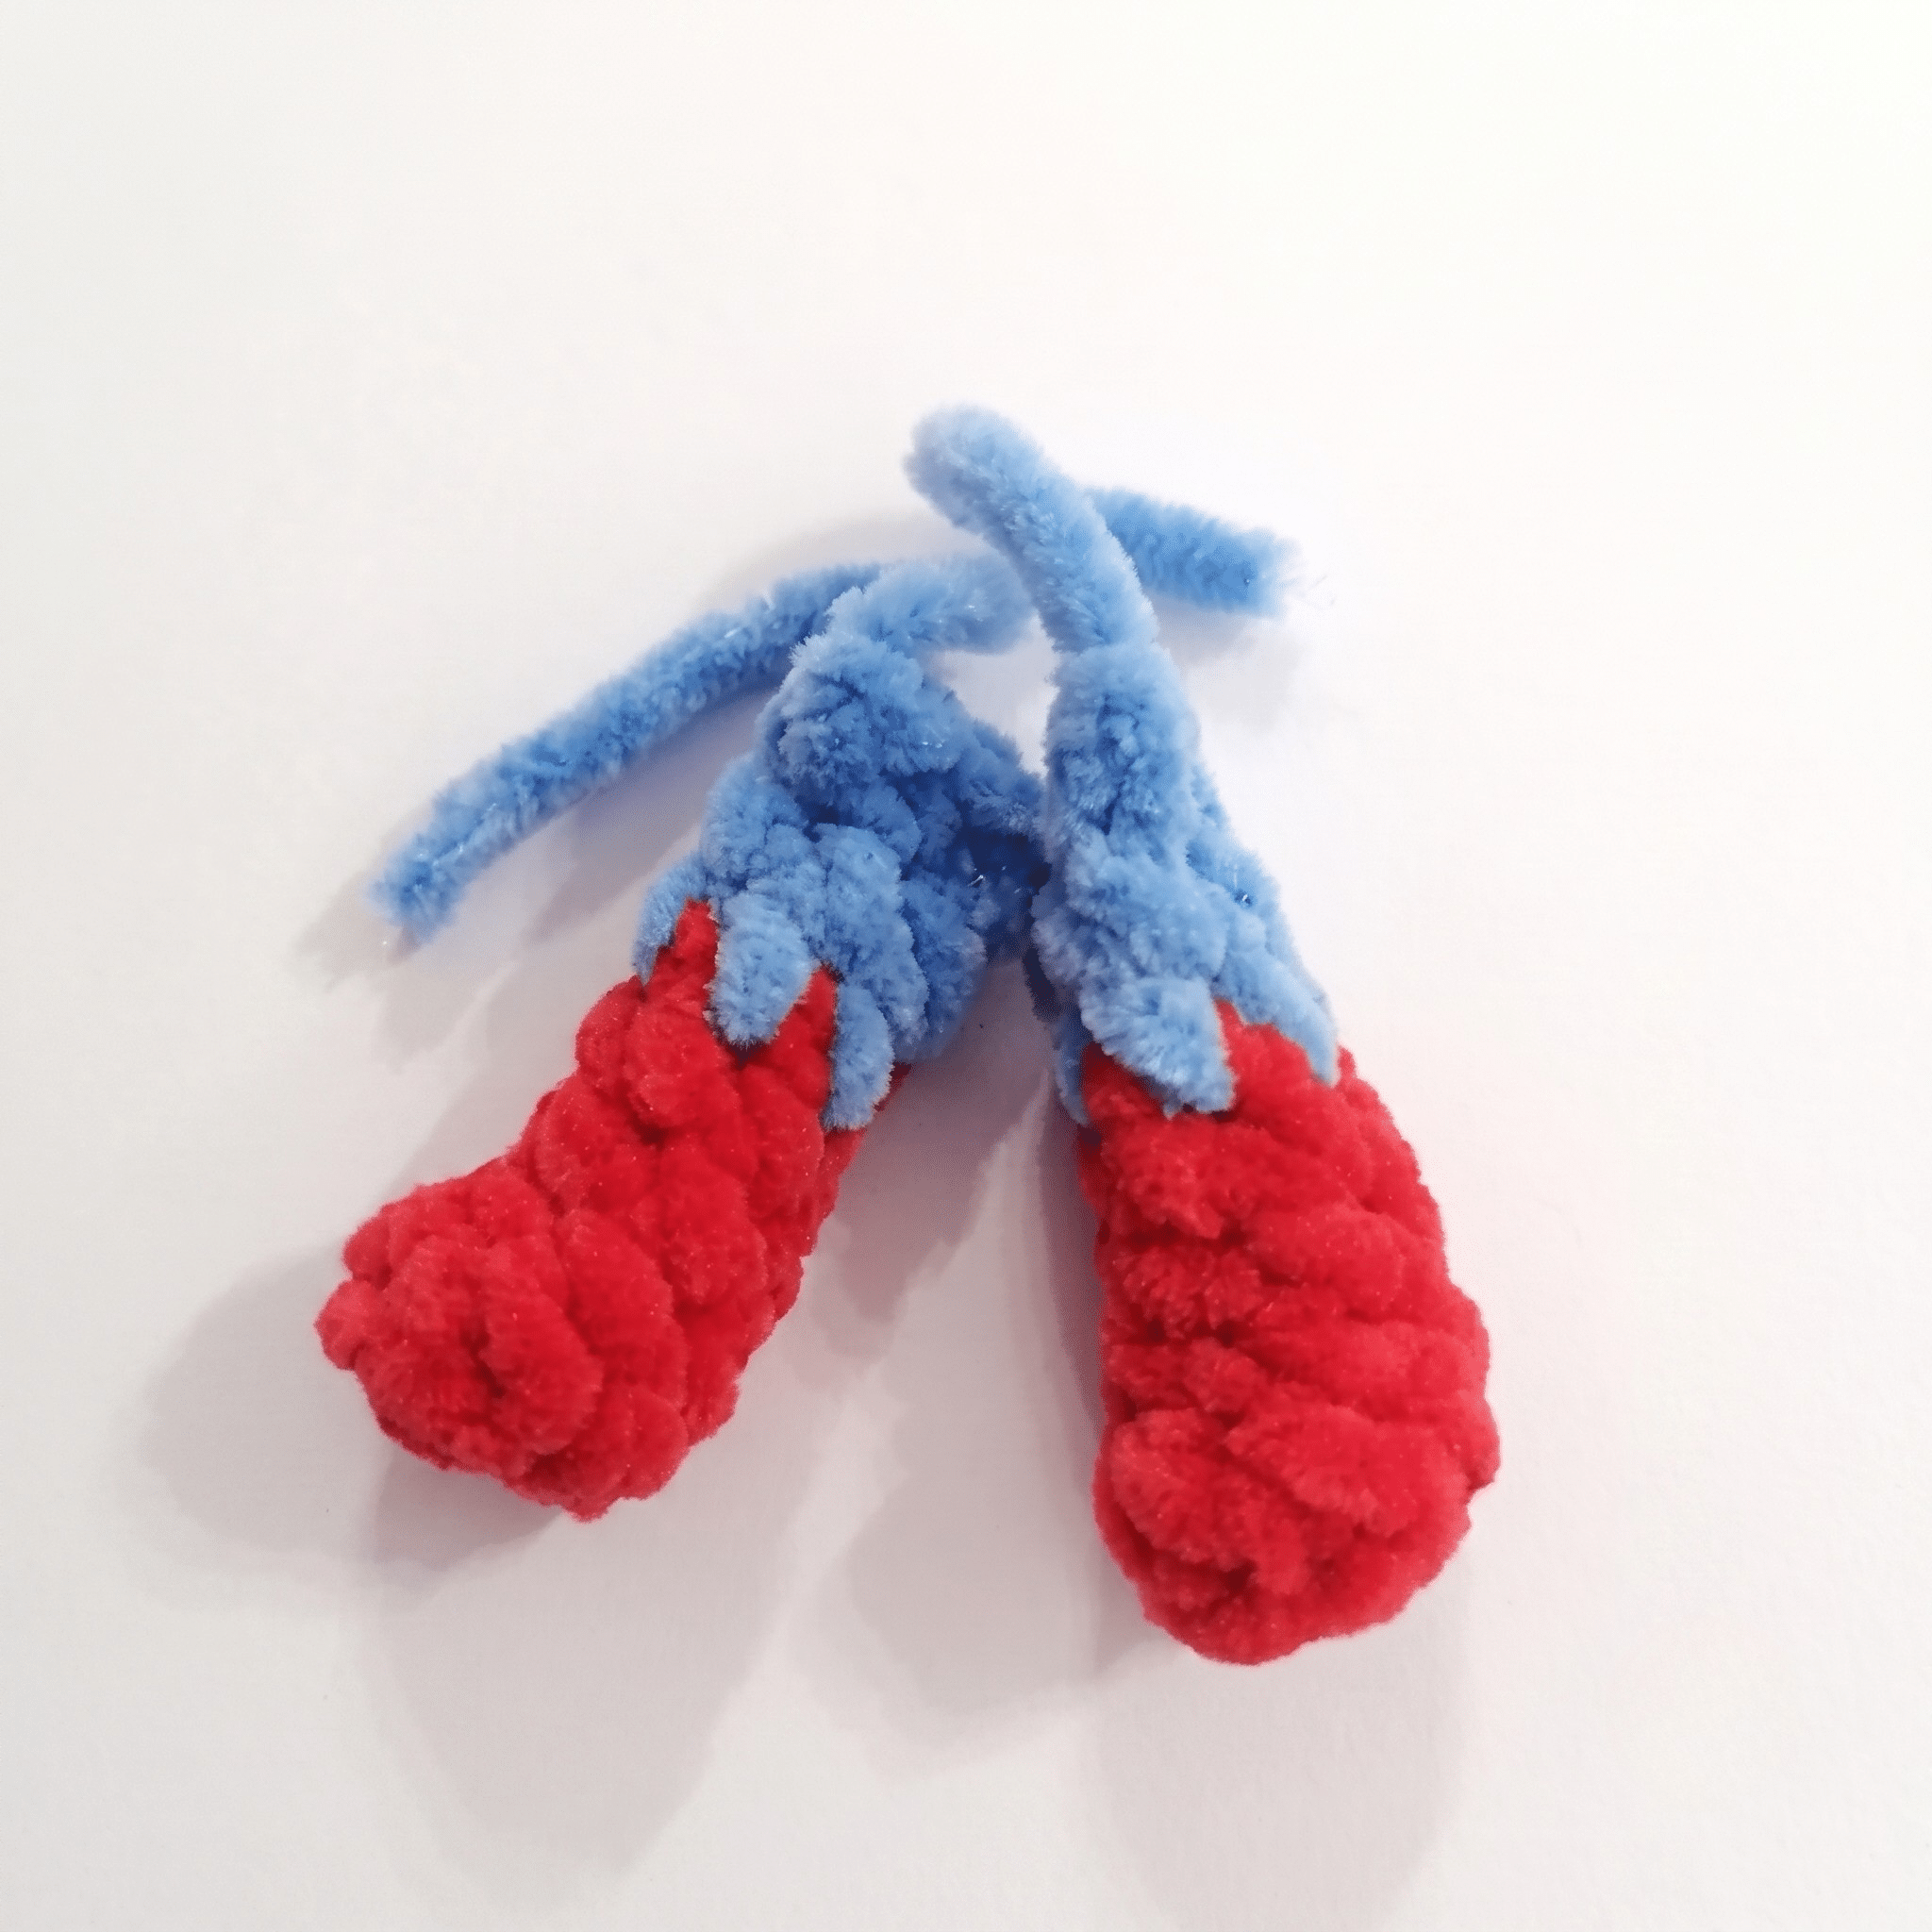
- BLO — Back Loop Only
- ch — Chain
- dec — Decrease (invisible decrease)
- inc — Increase (2 sc in same stitch)
- MR — Magic Ring
- sc — Single Crochet
- sl st — Slip Stitch
- SM — Stitch Marker
- st / sts — Stitch / Stitches
Pattern Notes
- This pattern is written in US crochet terminology.
- All pieces are worked in a continuous spiral — do not join rounds or chain at the start of a new round. Use a stitch marker to track your round beginnings.
- Gauge is not critical for this project; finished size will vary with hook and yarn choice. With the recommended materials, the finished keychain figure measures approximately 3–4 inches (7.5–10 cm).
- Stitch count is given in parentheses at the end of each round: (##)
- The Arms and Legs are not stuffed.
- The Body-Head is stuffed firmly — add fiberfill before the neck decreases (Rnd 9) and again before closing the head.
- Legs are joined to the body on Rnd 3; Arms are joined on Rnd 8. In both cases, work the joining sc through both the body stitch and the open edge stitch of the flattened limb simultaneously.
- Place your stitch marker at the back/spine side of the Body-Head throughout.
Pattern Instructions
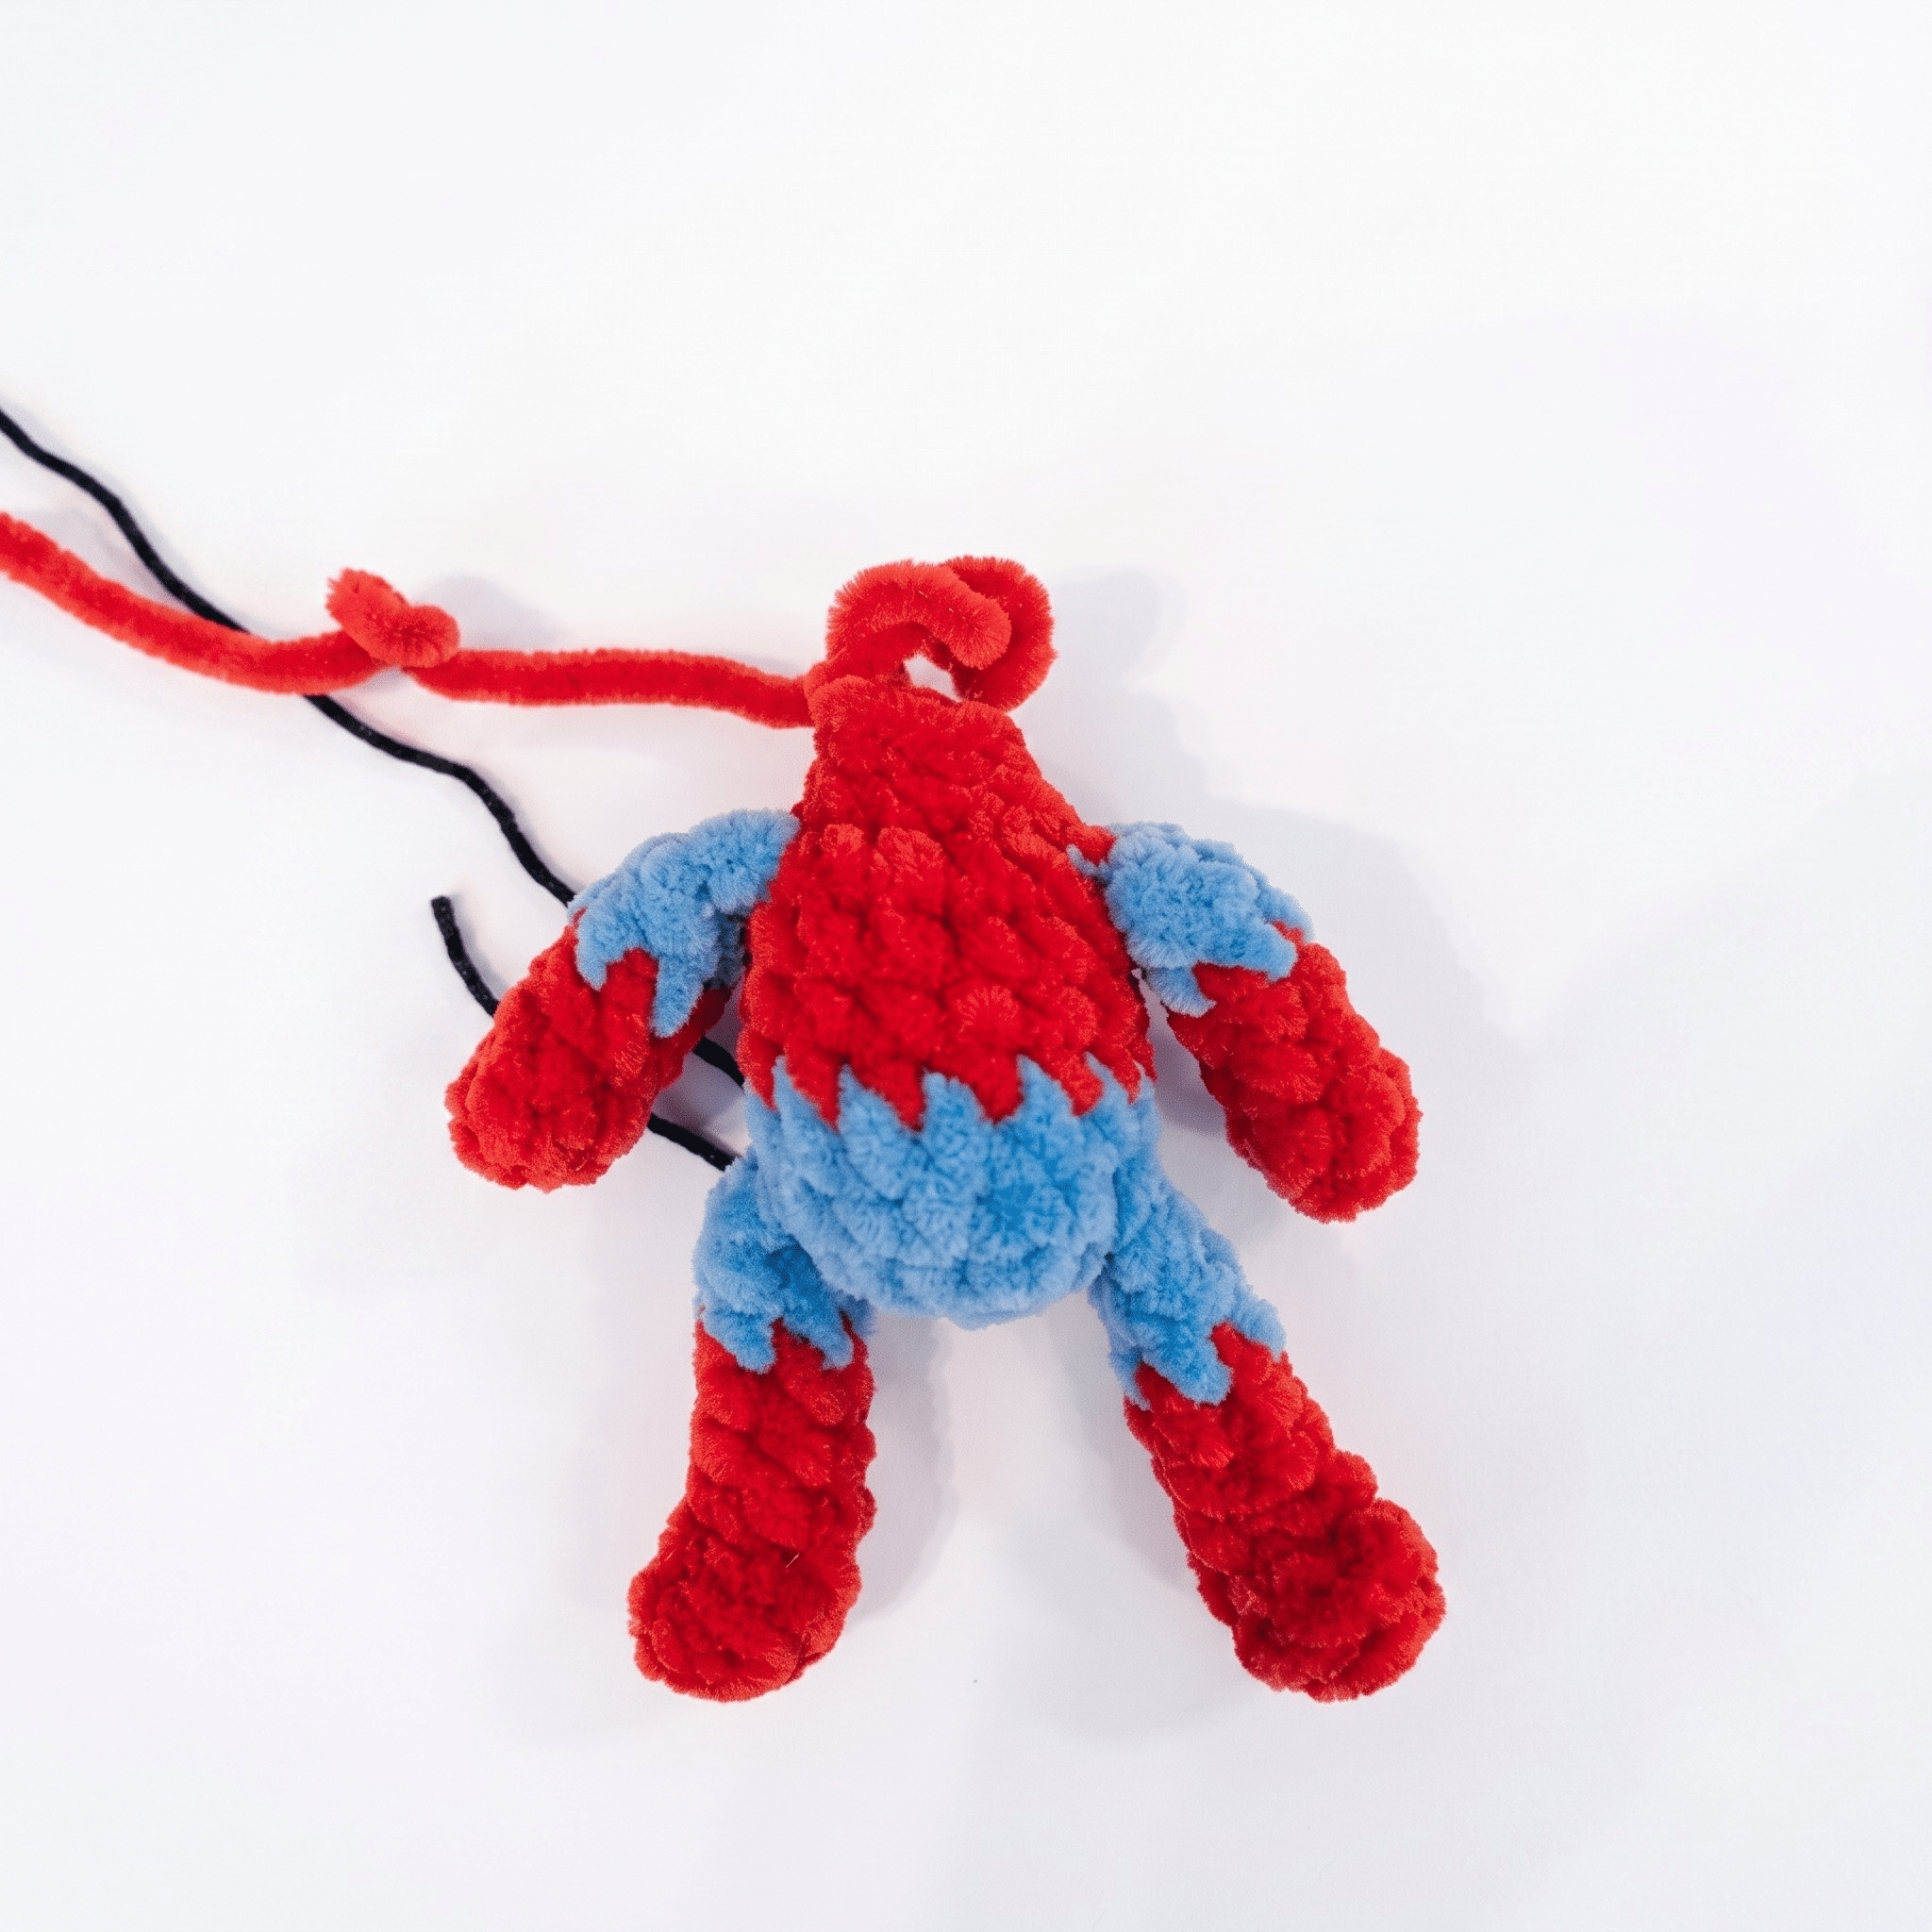
Arms (Make 2)
Begin with red yarn. Do not stuff.
- Rnd 1: 5 sc in MR. (5)
- Rnd 2: 5 sc. (5)
- Rnd 3: 5 sc. (5)
- Rnd 4: 5 sc. At the end of this round, change to blue yarn. Fasten off red. (5)
- Rnd 5: 5 sc. (5)
- Rnd 6: 5 sc. (5)
Flatten the piece in half. Working through both layers, sc across — 2 sc total — to close the seam. Fasten off, leaving a long tail for assembly.
Legs (Make 2)
Begin with red yarn. Do not stuff.
- Rnd 1: 6 sc in MR. (6)
- Rnd 2: 6 sc BLO. (6)
- Rnd 3: 2 sc, dec, 2 sc. (5)
- Rnd 4: 5 sc. (5)
- Rnd 5: 5 sc. At the end of this round, change to blue yarn. Fasten off red. (5)
- Rnd 6: 5 sc. (5)
- Rnd 7: 5 sc, then work 1 additional sc to center the seam.
Flatten the piece in half. Working through both layers, sc across — 2 sc total — to close the seam. Fasten off, leaving a long tail for assembly.
Body-Head (worked as one continuous piece)
Begin with blue yarn. Place SM at the back/spine position and move it up each round.
Bottom / Hips
- Rnd 1: 7 sc in MR. (7)
- Rnd 2: inc in each st around. (14)
- Rnd 3: 2 sc, [join Left Leg: sc through next body st AND first open edge st of flattened Leg, sc through same body st AND second open edge st of Leg], 6 sc, [join Right Leg: sc through next body st AND first open edge st of flattened Leg, sc through same body st AND second open edge st of Leg], 2 sc. (14) Ensure both legs hang symmetrically relative to the center front.
- Rnd 4: 14 sc. At the end of this round, change to red yarn. Fasten off blue. (14)
Torso
- Rnd 5: 14 sc. (14)
- Rnd 6: 14 sc. (14)
- Rnd 7: 14 sc. (14)
- Rnd 8: 3 sc, [join Left Arm: sc through next body st AND first open edge st of flattened Arm, sc through same body st AND second open edge st of Arm], 5 sc, [join Right Arm: sc through next body st AND first open edge st of flattened Arm, sc through same body st AND second open edge st of Arm], 2 sc. (14) Verify arms are level and symmetrical. Add a sl st adjustment if needed to realign marker position. Stuff the body firmly now before continuing.
Neck
- Rnd 9: dec 7 times around. (7)
- Rnd 10: 7 sc. (7)
Head
- Rnd 11: inc in each st around. (14)
- Rnd 12: [3 sc, inc, 2 sc, inc] repeat twice. (18)
- Rnd 13: 18 sc. (18)
- Rnd 14: 18 sc. (18)
- Rnd 15: 18 sc. (18)
- Rnd 16: 18 sc. (18) Stuff the neck and head firmly before closing.
- Rnd 17: [sc, dec] repeat 6 times. (12)
- Rnd 18: dec 6 times. (6)
Fasten off, leaving a tail. Weave the tail through the remaining 6 stitches, pull tight to close the opening, and weave in the end.
Assembly
- Attach the keychain cord first. Crochet a twisted cord (I-cord) or a length of chain to your desired length. This cord will thread through the body and serve as the hanging spine of the keychain.
- Thread arms and legs onto the cord. Position them so the figure hangs upside-down in Spider-Man’s classic web-swinging pose.
- Secure all limbs. Use sewing thread to knot each limb firmly onto the cord so they don’t slip.
- Embroider the eyes — Method A: Using white yarn and your detail hook or tapestry needle, embroider the eye whites onto the head. Outline and add detail using black yarn.
- Embroider the eyes — Method B (felt alternative): Cut eye shapes from white felt and attach with super glue.
- Embroider the chest emblem. Using black yarn, sew Spider-Man’s spider emblem onto the chest area of the body.
- Attach the keychain ring to the top of the cord.
- Weave in all remaining ends securely.
Tips
- Keep your tension tight throughout. Chenille yarn is forgiving but can show gaps if you crochet loosely. For amigurumi, a slightly tight tension ensures the fiberfill doesn’t show through the finished fabric.
- Master the invisible decrease for a smooth finish. Insert your hook under the front loop only of the first stitch, then under the front loop only of the second stitch, yarn over and pull through both loops, then complete the sc normally. This method eliminates the “bump” that a standard decrease leaves behind — especially visible on plush yarn.
- Stuff in layers, not all at once. Add a small amount of fiberfill every few rounds as you close the head rather than cramming it in at the end. This prevents lumpy shaping and gives you more control over the final silhouette.
- Nail the limb join on Rnds 3 and 8. These rounds do double duty — they work the body stitch and attach the limb simultaneously. Lay your flattened arm or leg against the work before you crochet it in, and count the stitches on either side to confirm symmetry before you commit.
- Choose your eye method based on recipient age. For young children, embroidered eyes (Method A) are always the safest choice — nothing to pull off or swallow. For display pieces or older fans, felt eyes give a crisper, more graphic Spider-Man look that photographs beautifully.
Frequently Asked Questions
Can I use regular acrylic yarn instead of chenille for this keychain?
Yes, you can substitute any yarn weight you prefer, but chenille gives this keychain its signature plush, velvety look. If you switch to standard acrylic, drop down a hook size to keep your tension tight enough that fiberfill doesn’t show through.
How do I make the invisible decrease with chenille yarn?
Work the invisible decrease exactly as you would with any yarn: insert your hook under the front loop only of the first stitch, then under the front loop only of the second stitch, yarn over and pull through both loops, then complete the sc. Chenille can be a bit fuzzy, so take it slowly and use a stitch marker to keep your place.
My limbs don’t look symmetrical. How can I fix this?
Before you crochet the joining round, lay the flattened limb against the body and count the stitches on either side. If they’re uneven, adjust by working a sl st or an extra sc in the body round to realign your stitch marker. It’s easier to fix before you commit to the join.
Can I make this keychain larger or smaller?
Absolutely. Changing your yarn weight and hook size will scale the project up or down. Just remember to adjust your tension and stuffing amount accordingly. The pattern’s continuous spiral construction makes it easy to adapt.
What’s the best way to attach the keychain ring?
Crochet a twisted cord or chain to your desired length, thread it through the top of the body, and then attach the keychain ring to the cord’s loop. Secure the cord with a knot or a few stitches to prevent it from slipping out.
Is this pattern suitable for a beginner?
Yes, it’s a great entry point for amigurumi. The continuous body-head construction eliminates tricky sewing, and the limb joins are built into the rounds. If you can make a magic ring, single crochet, and work increases and decreases, you can complete this project.
Pin This Crochet Pattern!