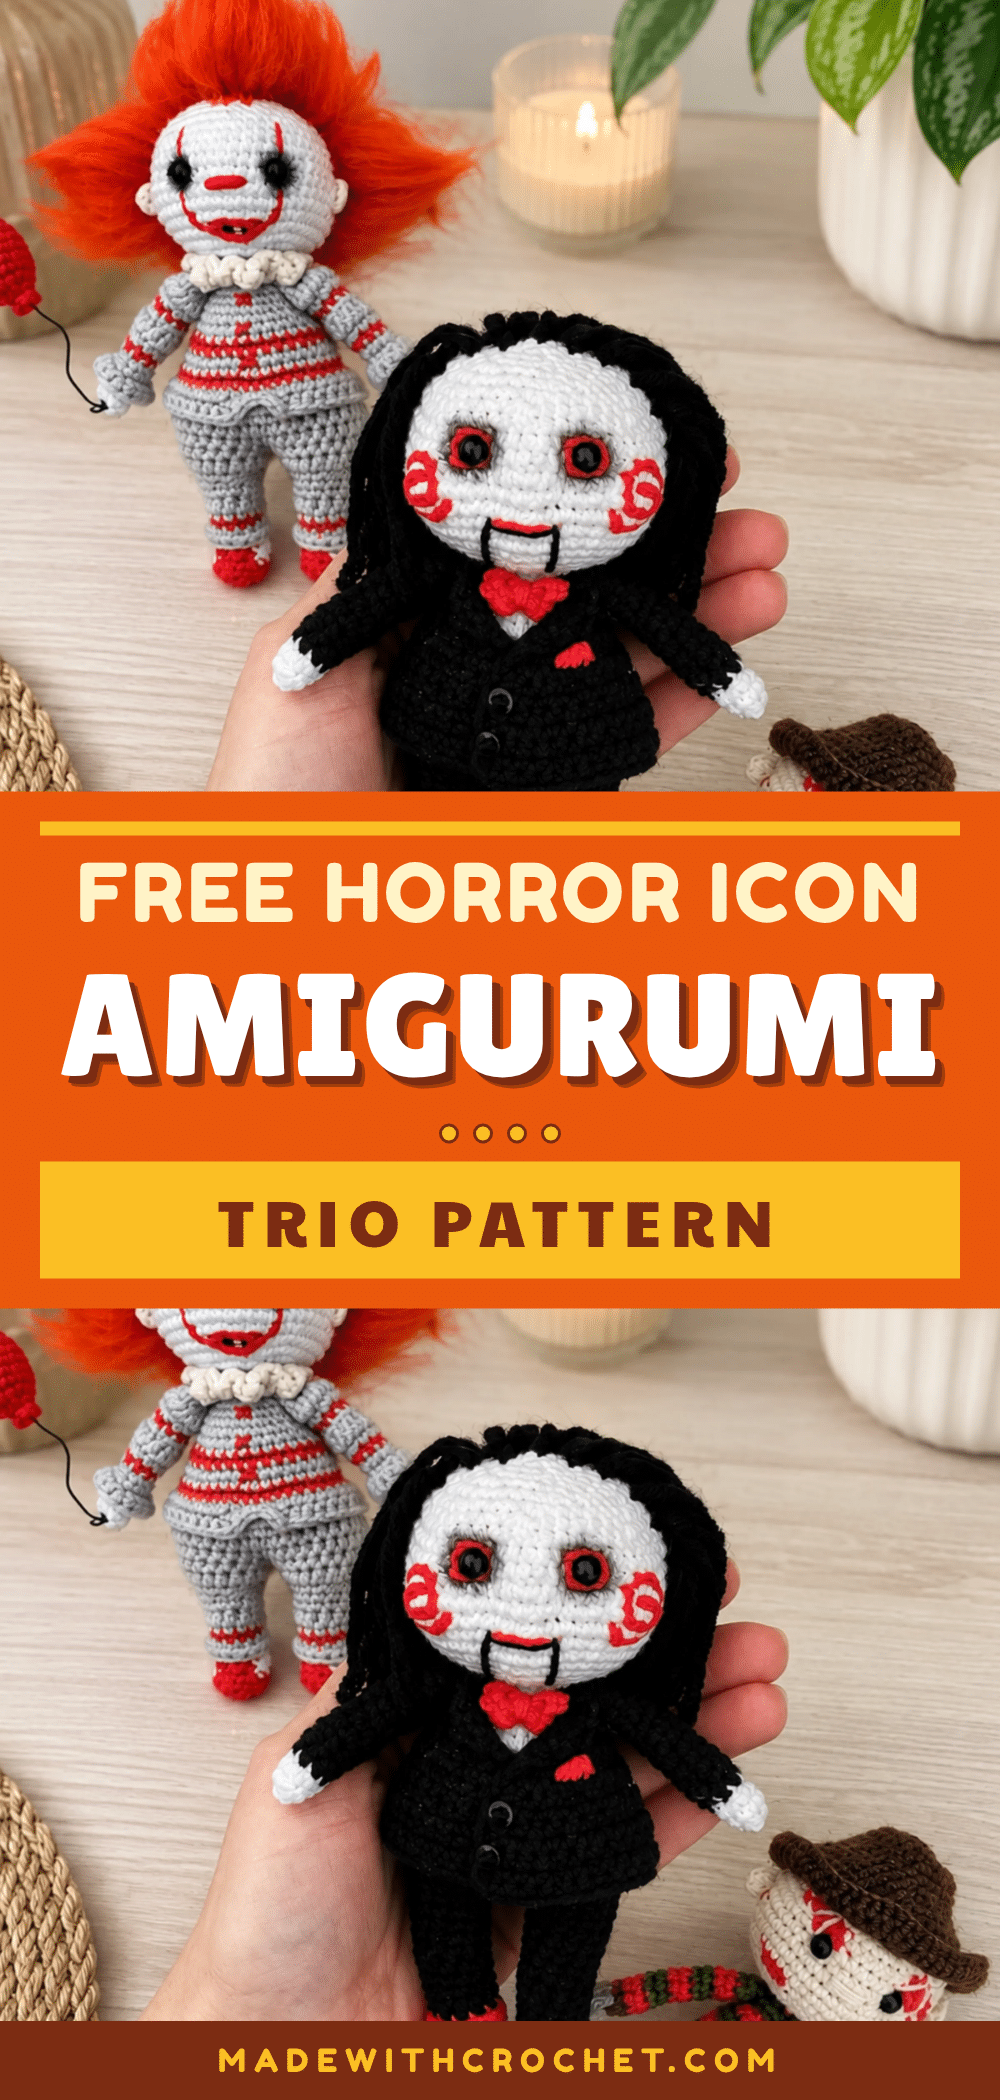
This pattern invites you to sink your hook into a trio of tiny horror icons, where every round builds character through deliberate stitch texture and shaping. From the crisp back-loop-only ridges that define Freddy’s sweater hem to the careful color changes that map Pennywise’s painted face, each detail is a small reward for your attention. The real joy here is watching the pieces come together—the way a few extra stitches in the right place turn a simple sphere into a recognizable face, or how a BLO round creates a crisp line that separates costume from body. If you love projects that challenge your tension control and reward your patience with expressive results, this amigurumi set will keep you hooked from the first magic ring to the final cinched closure.
Texture and Stitch Notes
What makes this pattern sing is the interplay of textures. The back-loop-only rounds aren’t just a technical requirement—they create visible ridges that mimic sweater hems, jacket collars, and scar tissue. The color-change sections on each head are worked with a mix of BLO and both-loop stitches, which gives the surface a dimensional, almost sculpted feel. Pay close attention to the shift-marker notes; those extra plain stitches ensure your BLO rounds land exactly where they need to for the cleanest lines. The result is a trio of dolls that feel substantial in the hand, with every stitch contributing to the overall character.
Project Overview
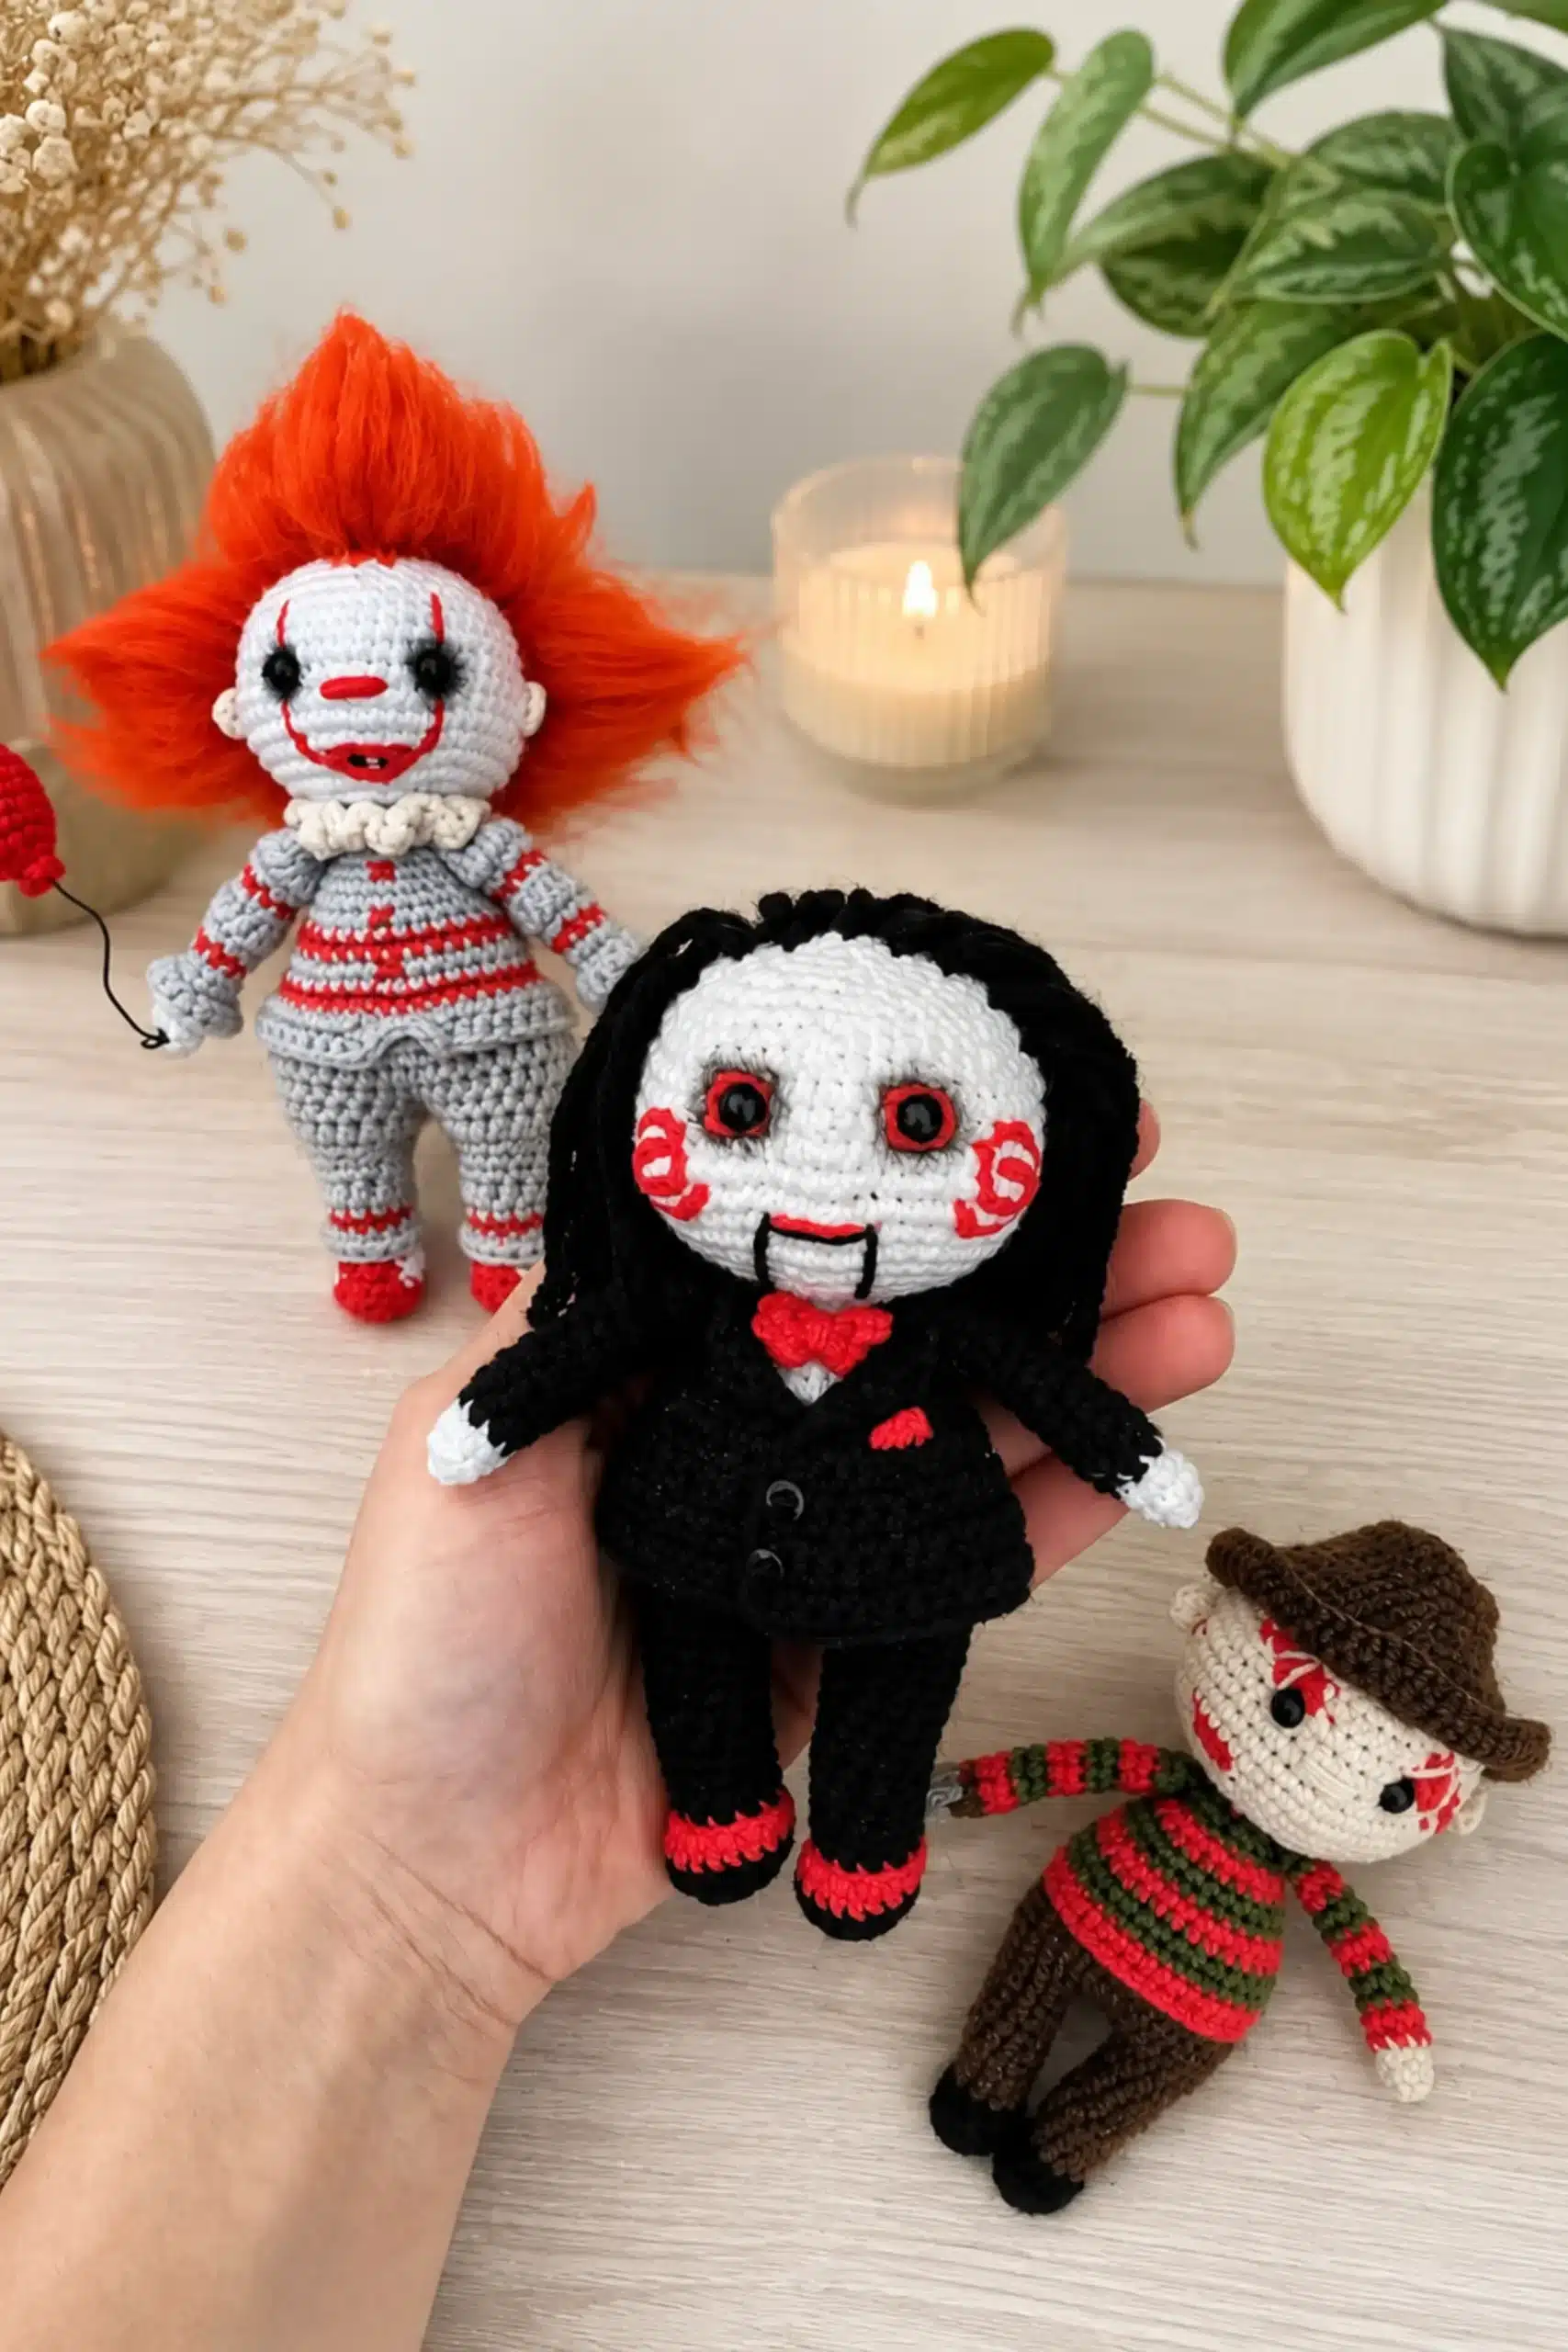
This amigurumi collection brings Freddy Krueger, Billy the Puppet, and Pennywise to life in yarn form. It’s built for the intermediate crocheter who’s ready to work color changes, back-loop-only shaping, and sculpted facial detail in one project. Each doll finishes at roughly 5.5 to 6 inches tall and shares a common construction method, so once you’ve made one, the other two come together fast. You’ll build legs, join them into a body, add arms, then finish with a sculpted head and character-specific accessories like Freddy’s bladed glove, Billy’s tuxedo jacket, and Pennywise’s ruffled collar.
Materials
- Worsted weight cotton or cotton-blend yarn in black, green, gray, red, beige, white, and brown
- Wool-blend or felting wool for hair: black for Billy, orange for Pennywise
- Hook: 2.25 mm (US B-1) for main pieces; 1 mm steel hook for Freddy’s razor blades
- Safety eyes, 5 mm (2 pairs, one per applicable doll)
- Polyester fiberfill stuffing
- Stitch markers
- Yarn needle for sewing and embroidery
- Scissors
- Strong cotton sewing thread
- Dry pastels for shading (optional)
- Two 5 mm black or red buttons (for Billy’s jacket)
- Thin wire, about 0.9 mm, for Pennywise’s balloon and Freddy’s blades
- Fabric adhesive tape, for wrapping wire
Abbreviations
- BLO — Back Loop Only
- ch — Chain
- dec — Decrease
- FLO — Front Loop Only
- hdc — Half Double Crochet
- inc — Increase
- MR — Magic Ring
- sc — Single Crochet
- sl st — Slip Stitch
- st(s) — Stitch(es)
Pattern Notes
This pattern is written in US crochet terminology. Body, limb, and head pieces are worked in continuous spiral rounds; jackets, hats, and collars are worked in flat turning rows or joined rounds where noted. Gauge is not critical, but a tighter gauge than typical produces a firmer amigurumi and prevents stuffing from showing through. Stitch count is given at the end of each round or row in parentheses. Some rounds are marked “+1 sc to shift marker” (or +2) — this simply moves your round marker over so future BLO or color-change rounds land in the right place; work it as an extra plain stitch. For Billy’s Jacket, the turning ch-1 at the start of each row counts as the first sc — skip the very first stitch of the row and begin your first stitch into the next one. Safety eyes are inserted before the final stuffing and closing of each head — placement rounds are called out in italics. Arms are stuffed loosely (only at the tips), while bodies and heads are stuffed firmly for a solid, huggable shape.
Pattern Instructions
Freddy Krueger
Left Arm
Rnd 1: 6 sc in MR. (6)
Rnd 2: (1 sc, inc) x3. (9)
Rnd 3: sc around. (9)
Change to red.
Rnds 4–5: sc around. (9)
Change to green.
Rnds 6–7: sc around. (9)
Change to red.
Rnd 8: dec, 7 sc. (8)
Rnd 9: sc around. (8)
Change to green.
Rnds 10–11: sc around. (8)
Change to red.
Rnds 12–13: sc around. (8)
Change to green.
Rnd 14: sc around. (8)
Rnd 15: dec, 6 sc. (7)
Fasten off, weave in end. Stuff loosely, tips only.
Right Arm
Work identically to the Left Arm, substituting brown for beige as the base color. (7 sts at completion)
Blades
Using the 1 mm hook and gray yarn, ch 7, weaving in the tail as you go. Attach the strip to Rnd 2 of the Right Arm with a sl st. Repeat this 4 times total to form the finger blades.
Legs (make 2)
Rnd 1: ch 4, in 2nd ch from hook work 2 sc, 3 sc in last ch, working back along the other side: 1 sc, inc. (8)
Rnd 2: (inc, 1 sc) x4. (12)
Rnd 3: (1 sc, inc) x6. (18)
Rnd 4: BLO sc around. (18)
Rnd 5: 4 sc, 5 dec, 2 sc, dec. (12) +1 sc to shift marker.
Change to brown.
Rnd 6: BLO sc around. (12)
Stuff lightly.
Rnds 7–9: sc around. (12)
Rnd 10: 4 sc, 4 hdc, 4 sc. (12)
Rnds 11–14: sc around. (12)
Do not fasten off after the second leg — stuff both pieces, shaping the knees.
Body
Rnd 1: 10 sc, ch 3, 12 sc around second leg, 3 sc along chain, 2 sc around first leg. (30) This marks the beginning of the round.
Rnd 2: (4 sc, inc) x6. (36)
Rnds 3–5: sc around. (36)
Rnd 6: 32 sc — do not complete the round, to shift the marker. (32)
Change to red.
Rnd 7: BLO sc around. (36)
Rnd 8: sc around. (36)
Change to green.
Rnd 9: sc around. (36)
Rnd 10: (4 sc, dec) x6. (30) +1 sc to shift marker. Set the working yarn aside and join a separate red strand to Rnd 8, working sl st around to form the sweater hem, then return to the body.
Change to red.
Rnd 11: sc around. (30)
Rnd 12: (8 sc, dec) x3. (27)
Change to green. +1 sc to shift marker. Stuff lightly.
Rnd 13: sc around. (27)
Rnd 14: (7 sc, dec) x3. (24) +1 sc to shift marker.
Change to red.
Rnd 15: sc around. (24)
Rnd 16: (2 sc, dec) x6. (18)
Change to green.
Rnd 17: sc around. (18)
Rnd 18: 3 sc; attach an arm and work 3 sc through arm and body; 6 sc through body only; attach the second arm and work 3 sc through arm and body; 3 sc through body only. (18) +1 sc to shift marker.
Change to red.
Rnd 19: BLO (1 sc, dec) x6. (12)
Stuff firmly, shaping the body.
Head
Change to beige.
Rnd 1: inc x12. (24)
Rnd 2: (1 sc, inc) x12. (36) +1 sc to shift marker.
Rnd 3: (5 sc, inc) x6. (42)
Rnd 4: (6 sc, inc) x6. (48)
Rnd 5: 27 sc beige, 4 sc BLO in red, 17 sc beige. (48)
Rnd 6: 5 sc beige, 3 sc BLO red, 19 sc beige, 4 sc both loops red, 1 sc BLO red, 16 sc beige. (48)
Rnd 7: 37 sc beige, 4 sc BLO red, 7 sc beige. (48) +1 sc to shift marker.
Rnd 8: 11 sc beige, 2 sc BLO red, 22 sc beige, 1 sc BLO red, 3 sc both loops red, 9 sc beige. (48)
Rnd 9: 12 sc beige, 1 sc both loops red, 2 sc BLO red, 19 sc beige, 1 sc BLO red, 3 sc both loops red, 10 sc beige. (48)
Rnd 10: 13 sc beige, 2 sc both loops red, 3 sc BLO red, 8 sc beige, 2 sc BLO red, 18 sc beige, 2 sc BLO red. (48)
Rnd 11: 2 sc BLO red, 12 sc beige, 4 sc both loops red, 1 sc BLO red, 6 sc beige, 1 sc BLO red, 2 sc both loops red, 1 sc BLO red, 18 sc beige, 1 sc both loops red. (48)
Rnd 12: 2 sc both loops red, 1 sc BLO red, 13 sc beige, 2 sc both loops red, 8 sc beige, 3 sc both loops red, 2 sc BLO red, 17 sc beige. (48) +1 sc to shift marker.
Rnd 13: 27 sc beige, 2 sc both loops red, 19 sc beige. (48)
Rnd 14: (6 sc, dec) x6, beige only. (42)
Insert safety eyes between Rnd 10 and 11, 7 sts apart.
Rnd 15: (5 sc, dec) x5 beige, 3 sc BLO red, 2 sc, dec beige. (36) +1 sc to shift marker.
Rnd 16: (4 sc, dec) x6, beige only. (30)
Stuff head.
Rnd 17: (3 sc, dec) x6. (24)
Rnd 18: (2 sc, dec) x6. (18)
Rnd 19: (1 sc, dec) x6. (12)
Rnd 20: dec x6. (6)
Stuff firmly, cinch opening closed, fasten off, weave tail inside. Embroider the nose in beige between Rnd 9 and 10, and add random beige lines over the red scars to mimic torn skin.
Hat
Row 1: ch 12, in 2nd ch from hook work 10 sc, 3 sc in last ch, 9 sc along the other side, inc. (24)
Row 2: (3 sc, inc) around. (30)
Row 3: sc around. (30)
Row 4: BLO sc around. (30)
Row 5: inc, 13 sc, inc, 14 sc, inc. (33)
Row 6: 16 sc, inc, 15 sc, inc. (35)
Row 7: 16 sc, inc, 16 sc, inc, 1 sc. (37)
Row 8: 8 sc, inc, 8 sc, inc, 8 sc, inc, 9 sc, inc. (41)
Row 9: 9 sc, inc, 9 sc, inc, 9 sc, inc, 10 sc, inc. (45)
Row 10: 10 sc, inc, 10 sc, inc, 10 sc, inc, 11 sc, inc. (49)
Row 11: 11 sc, inc, 10 sc, inc, 12 sc, inc, 11 sc, inc, 1 sc. (53)
Row 12: 51 sc — do not complete the round, to shift the marker. (51)
Row 13: FLO 26 sc, inc, 26 sc. (54)
Row 14: (8 sc, inc) x6. (60)
Row 15: (9 sc, inc) x6. (66)
Row 16: 66 sl st. (66)
Fasten off, weave in end, and sew the hat onto the head, tilted slightly back.
Ears (make 2)
Rnd 1: 4 sc in MR. (4)
Fasten off, leaving a tail for sewing. Sew ears to the sides of the head, between Rnd 7 and 11.
Billy the Puppet
Arms (make 2)
Rnd 1: 6 sc in MR. (6)
Rnd 2: (1 sc, inc) x3. (9)
Rnd 3: sc around. (9)
Change to black.
Rnds 4–7: sc around. (9)
Rnd 8: dec, 7 sc. (8)
Rnds 9–14: sc around. (8)
Rnd 15: dec, 6 sc. (7)
Fasten off, weave in end. Stuff loosely, tips only.
Legs (make 2)
Rnd 1: ch 4, in 2nd ch from hook work 2 sc, 3 sc in last ch, working back: 1 sc, inc. (8)
Rnd 2: (inc, 1 sc) x4. (12)
Rnd 3: (1 sc, inc) x6. (18)
Change to red.
Rnd 4: BLO sc around. (18)
Rnd 5: 4 sc, 5 dec, 2 sc, dec. (12) +1 sc to shift marker.
Change to black.
Rnd 6: BLO sc around. (12)
Stuff lightly.
Rnds 7–9: sc around. (12)
Rnd 10: 4 sc, 4 hdc, 4 sc. (12)
Rnds 11–14: sc around. (12)
Stuff pieces, shaping the knees. Do not fasten off after the second leg.
Jacket
Row 1: ch 17, in 2nd ch from hook work 16 sc. (16)
Row 2: ch 1 (counts as first sc), skip first sc, 15 sc. (16)
Rows 3–8: repeat Row 2. (16)
Row 9: ch 1, skip first sc, 7 sc, ch 3, skip 3 sc, 5 sc. (13 sc + 3 ch)
Row 10: ch 1, skip first sc, 5 sc, 3 sc in ch-3 space, 7 sc. (16)
Rows 11–12: ch 1, skip first sc, 15 sc. (16)
Fasten off, leaving a long tail for sewing.
Body
Rnd 1: 10 sc, ch 3, 12 sc around second leg, 3 sc along chain, 2 sc around first leg. (30)
Rnd 2: (4 sc, inc) x6. (36)
Rnds 3–5: sc around. (36)
Rnd 6: 32 sc — do not complete round, to shift marker. (32)
Rnd 7: sc around. (36)
Change to white.
Rnd 8: BLO sc around. (36)
Rnd 9: sc around. (36)
Rnd 10: (4 sc, dec) x6. (30) +1 sc to shift marker.
Rnd 11: sc around. (30)
Rnd 12: (8 sc, dec) x3. (27) +1 sc to shift marker. Stuff lightly.
Rnd 13: sc around. (27)
Rnd 14: (7 sc, dec) x3. (24) +1 sc to shift marker.
Rnd 15: sc around. (24)
Rnd 16: (2 sc, dec) x6. (18)
Rnd 17: sc around. (18)
Rnd 18: Position the jacket at the center back; 3 sc through jacket and body; attach an arm and work 3 sc through arm, jacket, and body in black; 6 sc through body only in white; attach the second arm and jacket, 3 sc through arm, jacket, and body; 3 sc through jacket and body only in black. (18)
Change to white.
Rnd 19: BLO (1 sc, dec) x6. (12)
Stuff firmly, shaping the body. Sew the jacket closed as if buttoned, overlapping the front edges evenly, then fold the top corners down and sew the tips in place. Sew on the 5 mm buttons.
Collar
Join white to Rnd 8’s remaining front loops: ch 2, 4 dc into each half-stitch, sl st into the starting chain. Fasten off.
Bow Tie
Ch 6, in 2nd ch from hook work 5 sc. (5)
Row 2: ch 1, turn, 5 sc. (5)
Rows 3–4: repeat Row 2. (5)
Fasten off, leaving a tail. Wrap the tail around the center to form the bow shape, then sew to the chest.
Head
Rnd 1: inc x12. (24)
Rnd 2: (1 sc, inc) x12. (36)
Rnd 3: (5 sc, inc) x6. (42)
Rnd 4: (6 sc, inc) x6. (48)
Rnds 5–7: sc around. (48)
Rnd 8: 13 sc, 4 inc, 7 sc, 4 inc, 20 sc. (56)
Rnd 9: 16 sc, inc, 2 sc, inc, 10 sc, inc, 2 sc, inc, 22 sc. (60)
Rnd 10: 13 sc, 5 dec, 8 sc, 5 dec, 19 sc. (50)
Rnd 11: 15 sc, dec, 11 sc, dec, 20 sc. (48)
Rnds 12–13: sc around. (48) +1 sc to shift marker.
Rnd 14: (6 sc, dec) x6. (42)
Rnd 15: (5 sc, dec) x6. (36)
Rnd 16: (4 sc, dec) x6. (30)
Insert safety eyes between Rnd 11 and 12, 6 sts apart, and outline each eye with sl st in red. Embroider the mouth in red between Rnd 7 and 8, and the chin in black from Rnd 8 down to Rnd 3 in an upside-down U shape. Work mirrored spiral shapes on the cheeks between Rnd 7 and 12 using sl st and red yarn.
Rnd 17: (3 sc, dec) x6. (24)
Rnd 18: (2 sc, dec) x6. (18)
Rnd 19: (1 sc, dec) x6. (12)
Rnd 20: dec x6. (6)
Stuff firmly, cinch closed, fasten off. Add gathering stitches along the inner edge of the eyes from Rnd 13 to Rnd 8, and shade around the eyes with black dry pastel.
Hair
Using black wool-blend yarn, cut strands approximately 6 inches long. Fold each strand in half and pull the loop through a stitch on the head, then pull the ends through the loop. Attach strands across the top and back of the head, covering from the forehead to the nape. Trim to shape.
Pennywise
Arms (make 2)
Rnd 1: 6 sc in MR. (6)
Rnd 2: (1 sc, inc) x3. (9)
Rnds 3–4: sc around. (9)
Change to gray.
Rnd 5: sc around. (9)
Rnd 6: BLO sc around. (9)
Rnd 7: sc around. (9)
Change to red.
Rnd 8: dec, 7 sc. (8)
Change to gray.
Rnd 9: (1 sc, inc) x4. (12)
Rnd 10: 12 hdc. (12)
Rnd 11: (1 sc, dec) x4. (8)
Change to red.
Rnd 12: sc around. (8)
Change to gray.
Rnd 13: 8 inc. (16)
Rnd 14: 16 hdc. (16)
Rnd 15: 8 dec. (8)
Stuff loosely, tips only. Fold flat and work 3 sc through both layers. Join gray to Rnd 5’s remaining front loops: ch 2, (2 hdc, inc) x2, 2 hdc, inc into the starting loop. Fasten off.
Legs (make 2)
Rnd 1: ch 4, in 2nd ch from hook work 2 sc, 3 sc in last ch, working back: 1 sc, inc. (8)
Rnd 2: (inc, 1 sc) x4. (12)
Rnd 3: (1 sc, inc) x6. (18)
Join white.
Rnd 4: BLO — 5 sc white, 6 sc red, 7 sc white. (18)
Rnd 5: 4 sc, dec white; 3 dec red; dec, 2 sc, dec white. (12) +1 sc to shift marker.
Rnd 6: sc around, white only. (12)
Change to gray.
Rnd 7: BLO sc around. (12)
Change to red.
Rnd 8: BLO sc around. (12)
Stuff lightly.
Change to gray.
Rnd 9: sc around. (12)
Rnd 10: 4 sc, 4 hdc, 4 sc. (12)
Rnds 11–12: sc around. (12)
Rnd 13: BLO (2 sc, inc) x4. (16)
Rnd 14: 16 hdc. (16)
Join gray to Rnd 7’s remaining front loops: (3 hdc, inc) x3, sl st into first hdc. Stuff pieces, shaping the knees.
Body
Rnd 1: 13 hdc, ch 1, 16 hdc around second leg, 1 sc along chain, 3 hdc around first leg. (34)
Rnd 2: 5 hdc, inc, 7 hdc, 1 sc, 7 hdc, inc, 8 hdc, 1 sc, 3 hdc. (36)
Rnd 3: 6 hdc, inc, 7 hdc, 1 sc, 8 hdc, inc, 8 hdc, 1 sc, 3 hdc. (38)
Rnd 4: 38 hdc. (38)
Rnd 5: 7 sc, dec, 15 sc, dec, 10 sc — do not complete round, to shift marker. (36)
Rnd 6: sc around. (36)
Change to red.
Rnd 7: BLO sc around. (36) +1 sc to shift marker.
Change to gray.
Rnd 8: sc around. (36)
Rnd 9: (4 sc, dec) x6. (30)
Change to red.
Rnd 10: sc around. (30) +1 sc to shift marker.
Change to gray.
Rnd 11: (8 sc, dec) x3. (27)
Rnd 12: sc around. (27)
Stuff lightly.
Rnd 13: (7 sc, dec) x3. (24) +2 sc to shift marker.
Rnd 14: sc around. (24)
Rnd 15: (2 sc, dec) x6. (18)
Rnd 16: sc around. (18)
Rnd 17: 3 sc; attach an arm and work 3 sc through arm and body; 6 sc through body only; attach the second arm and work 3 sc through arm and body; 3 sc through body only. (18) +1 sc to shift marker.
Change to white.
Rnd 18: BLO (1 sc, dec) x6. (12)
Stuff firmly, shaping the body.
Ruffle Collar
Join beige to Rnd 17’s remaining front loops: ch 2, 4 dc into each half-stitch, sl st into the starting chain. Fasten off.
Head
Rnd 1: inc x12. (24)
Rnd 2: (1 sc, inc) x12. (36)
Rnd 3: (5 sc, inc) x6. (42)
Rnd 4: (6 sc, inc) x6. (48)
Rnds 5–13: sc around. (48) +2 sc to shift marker.
Rnd 14: (6 sc, dec) x6. (42)
Rnd 15: (5 sc, dec) x6. (36)
Rnd 16: (4 sc, dec) x6. (30) +1 sc to shift marker.
Insert safety eyes between Rnd 9 and 10, 7 sts apart.
Rnd 17: (3 sc, dec) x6. (24)
Rnd 18: (2 sc, dec) x6. (18)
Rnd 19: (1 sc, dec) x6. (12)
Rnd 20: dec x6. (6)
Stuff firmly, cinch closed, fasten off. Embroider the nose in red between Rnd 8 and 9, then add red stripes over the eyes between Rnd 14 and 5. Work the mouth with sl st in red from stripe to stripe, fill the center in black, and add two white teeth. Cross-stitch red buttons onto the body at Rnd 9, 12, and 15.
Hair
Using orange wool-blend yarn, cut strands approximately 6 inches long. Fold each strand in half and pull the loop through a stitch on the head, then pull the ends through the loop. Attach strands across the top and sides of the head, covering from the forehead to the nape. Trim to shape, leaving some strands longer for a wild look.
Ears (make 2)
Rnd 1: 4 sc in MR. (4)
Fasten off, leaving a tail for sewing. Sew ears to the sides between Rnd 7 and 11, close to the hairline.
Balloon
Using red yarn, ch 2, work 6 sc in 2nd ch from hook. (6)
Rnd 2: inc x6. (12)
Rnd 3: (1 sc, inc) x6. (18)
Rnds 4–6: sc around. (18)
Rnd 7: (1 sc, dec) x6. (12)
Rnd 8: dec x6. (6)
Stuff lightly, fasten off, leaving a tail. Wrap the wire with fabric adhesive tape, then insert one end into the balloon and sew the opening closed around the wire. Attach the other end of the wire to the left arm.
Assembly
Stuff the Head, Body, and both Legs of each doll firmly, leaving the Arms stuffed loosely at the tips only. Sew each doll’s Hat, Ruffle Collar, or Bow Tie in place before attaching the Head, since these details are easier to align while the pieces lie flat. Attach the Head to the Body using the working yarn tail, whipstitching around the neck opening and hiding the join under the collar or hem. For Freddy, sew the razor Blades to the Right Arm and the Ears to the Head, then sew the Hat on last, tilted slightly backward. For Billy, sew the closed Jacket over the Body and Arms, then attach the Bow Tie to the chest and press the Collar flat against the jacket front. For Pennywise, sew the Ears close against the hairline and attach the wired Balloon to the left hand once the Arm is fully assembled. Weave in all remaining yarn ends securely inside each piece before setting your finished dolls upright.
Tips
- Keep your tension slightly tighter than usual for amigurumi work. A snug fabric keeps the fiberfill from peeking through, which matters even more here given how much color-change detail sits on the surface of each head.
- When you hit the back-loop-only rounds, take it slow. BLO stitches create the visible ridge that separates the sweater hem, jacket collar, and scar textures from the rest of the piece, so working into the wrong loop will flatten that detail.
- On Billy’s Jacket, remember that the turning chain counts as your first stitch. Skipping that first sc keeps your stitch counts climbing correctly row by row instead of drifting off pattern.
- For invisible decreases, insert your hook under the front loops of both stitches only, rather than through all four loops. This keeps the decrease nearly seamless on a piece this small.
- When sewing on Freddy’s hat or Pennywise’s collar, pin the piece in place first and check it from multiple angles. A slight tilt makes a big difference in expression at this size.
Frequently Asked Questions
What size hook should I use for the main pieces?
A 2.25 mm (US B-1) hook is recommended for the main pieces. A 1 mm steel hook is used for Freddy’s razor blades.
Can I use a different yarn weight?
Worsted weight yarn is specified for this pattern. Using a different weight will change the finished size and may affect the stitch definition, especially for the color-change details.
How do I keep the color changes neat?
Work the last yarn-over of the stitch before the color change with the new color. Carry the unused yarn loosely along the inside of the work, or cut and weave in ends for longer color blocks.
What does “+1 sc to shift marker” mean?
This is an extra plain stitch worked at the end of a round to move your stitch marker forward. It ensures that future back-loop-only or color-change rounds line up correctly with the previous ones.
How do I attach the safety eyes securely?
Insert the safety eyes between the specified rounds before closing the head. Push the washer firmly onto the post from the inside of the head, then stuff and close as directed.
Can I wash the finished dolls?
Hand washing in cool water with a mild detergent is recommended. Lay flat to dry. Avoid machine washing or drying, as this may damage the fiberfill and yarn texture.
Pin This Crochet Pattern!