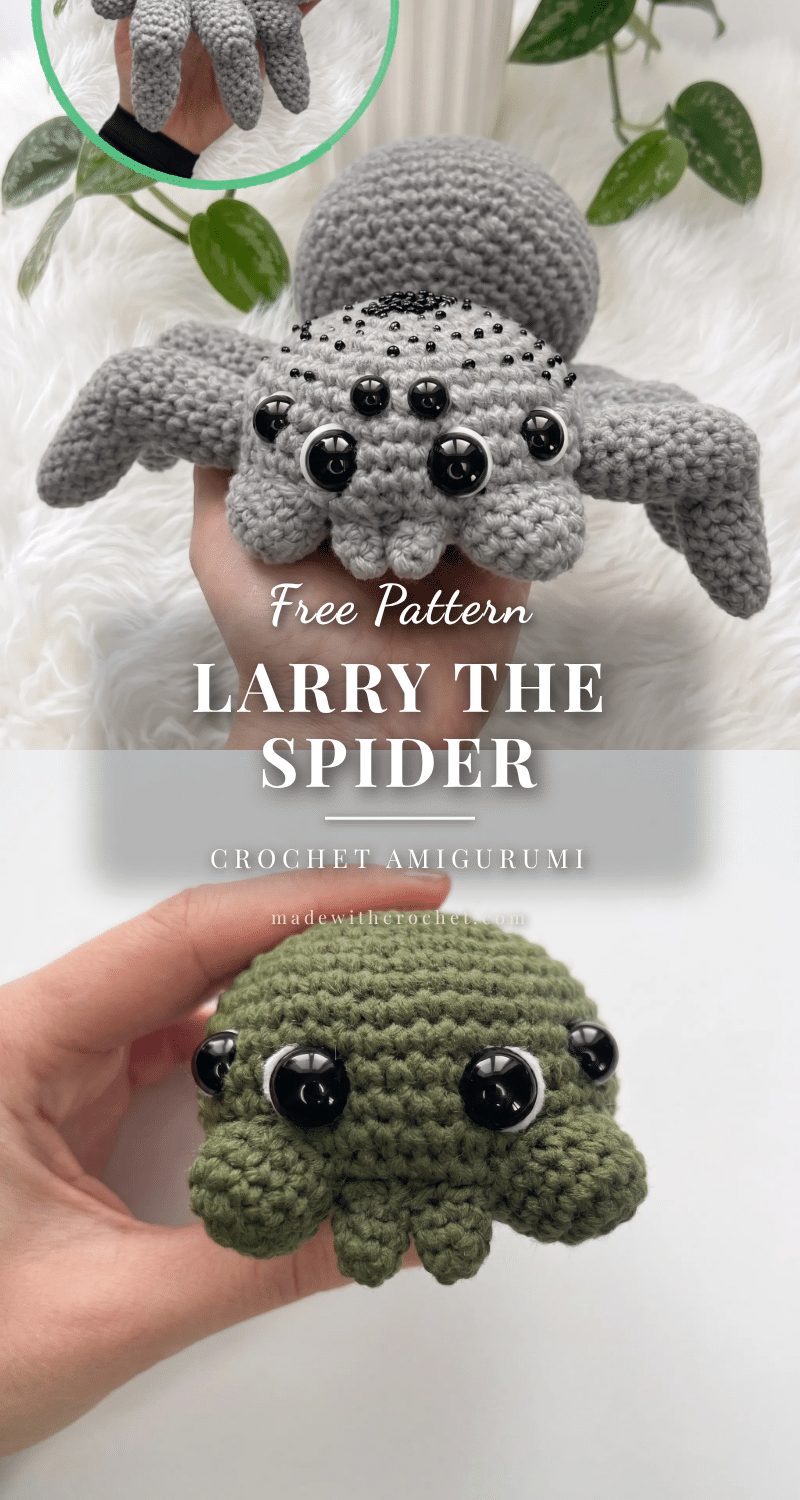
I remember the exact moment I chose the yarn for Larry. I was standing in my stash, holding a skein of soft gray cotton for the head and legs, and a cheerful lime green for the body. It felt like a small rebellion — turning a creature that usually makes people shiver into something bright and huggable. That intentional color decision, a cool neutral paired with a pop of unexpected color, is what makes this little spider feel like a character, not just a project.
Yarn and Color Notes
The original Larry uses a soft gray for the Head and Legs and a vibrant green for the Body, but this is where you can make him your own. A deep charcoal with a mustard yellow body gives him a sophisticated, almost vintage feel. For a more playful look, try a pale pink head with a lavender body. Because the pattern uses worsted weight cotton, the colors stay crisp and the stitches are well-defined. The contrast between the two colors is key — it helps define the separate body parts and gives Larry his distinctive, two-tone charm.
Project Overview
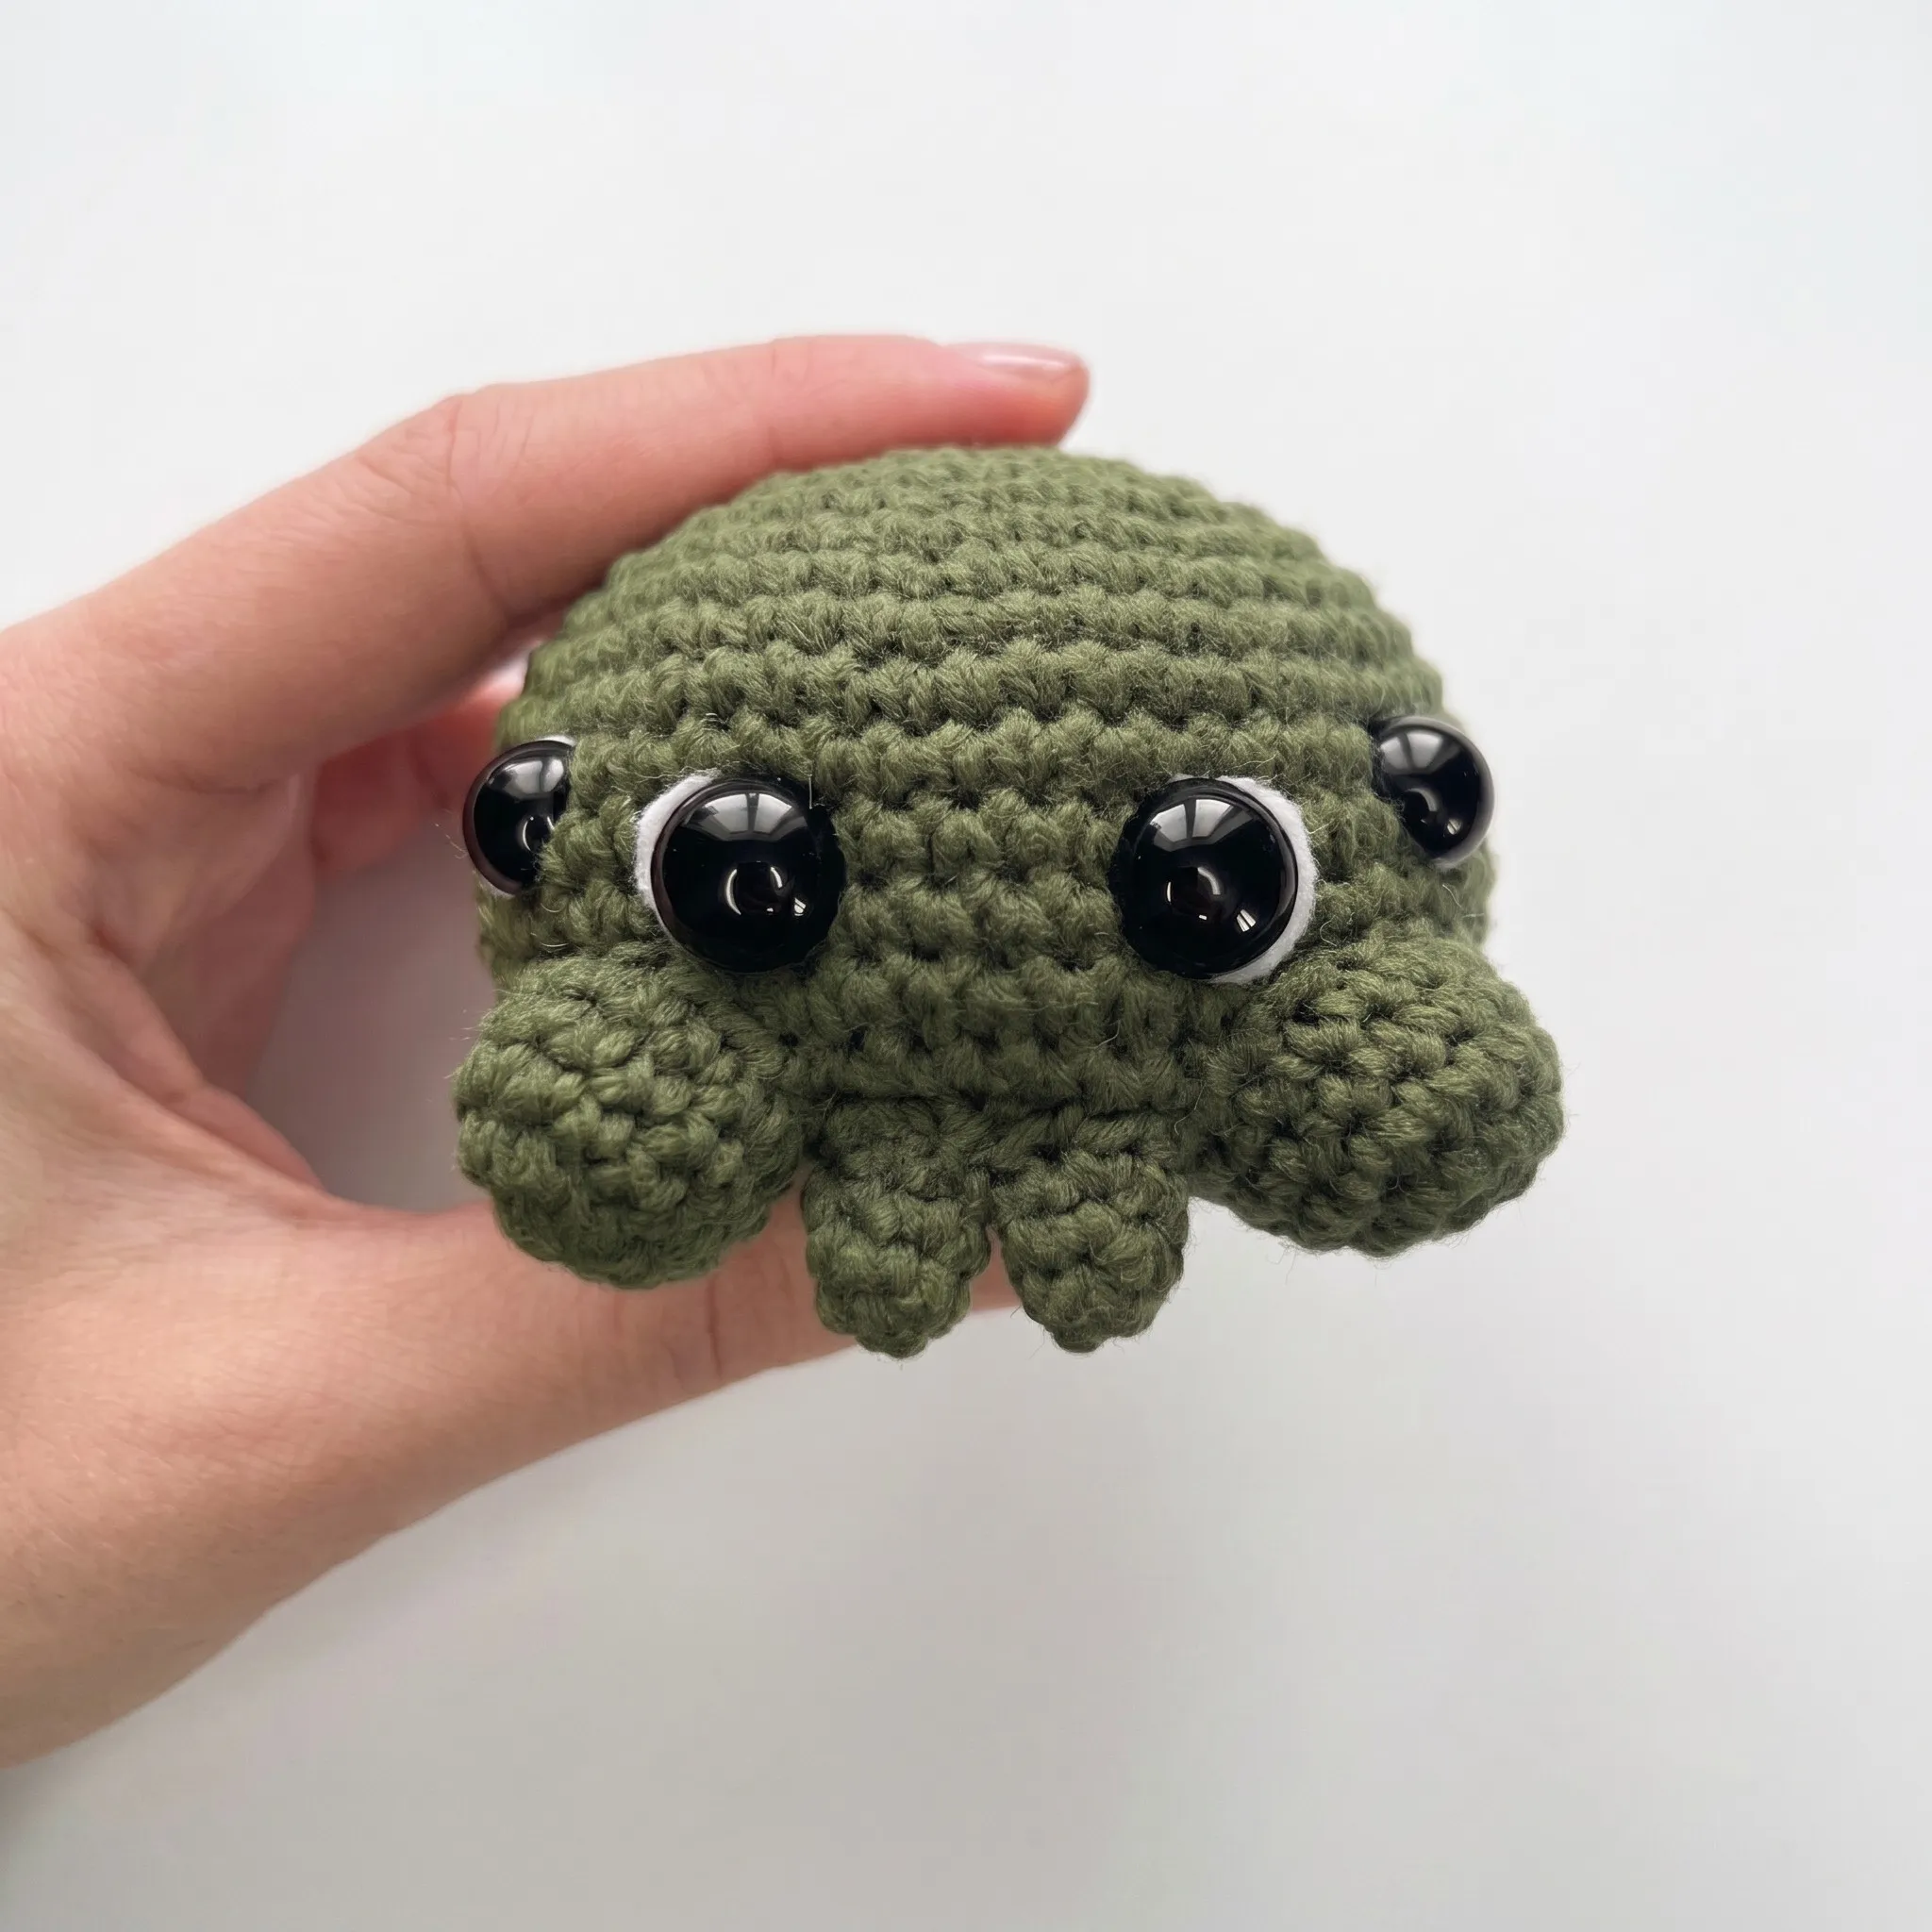
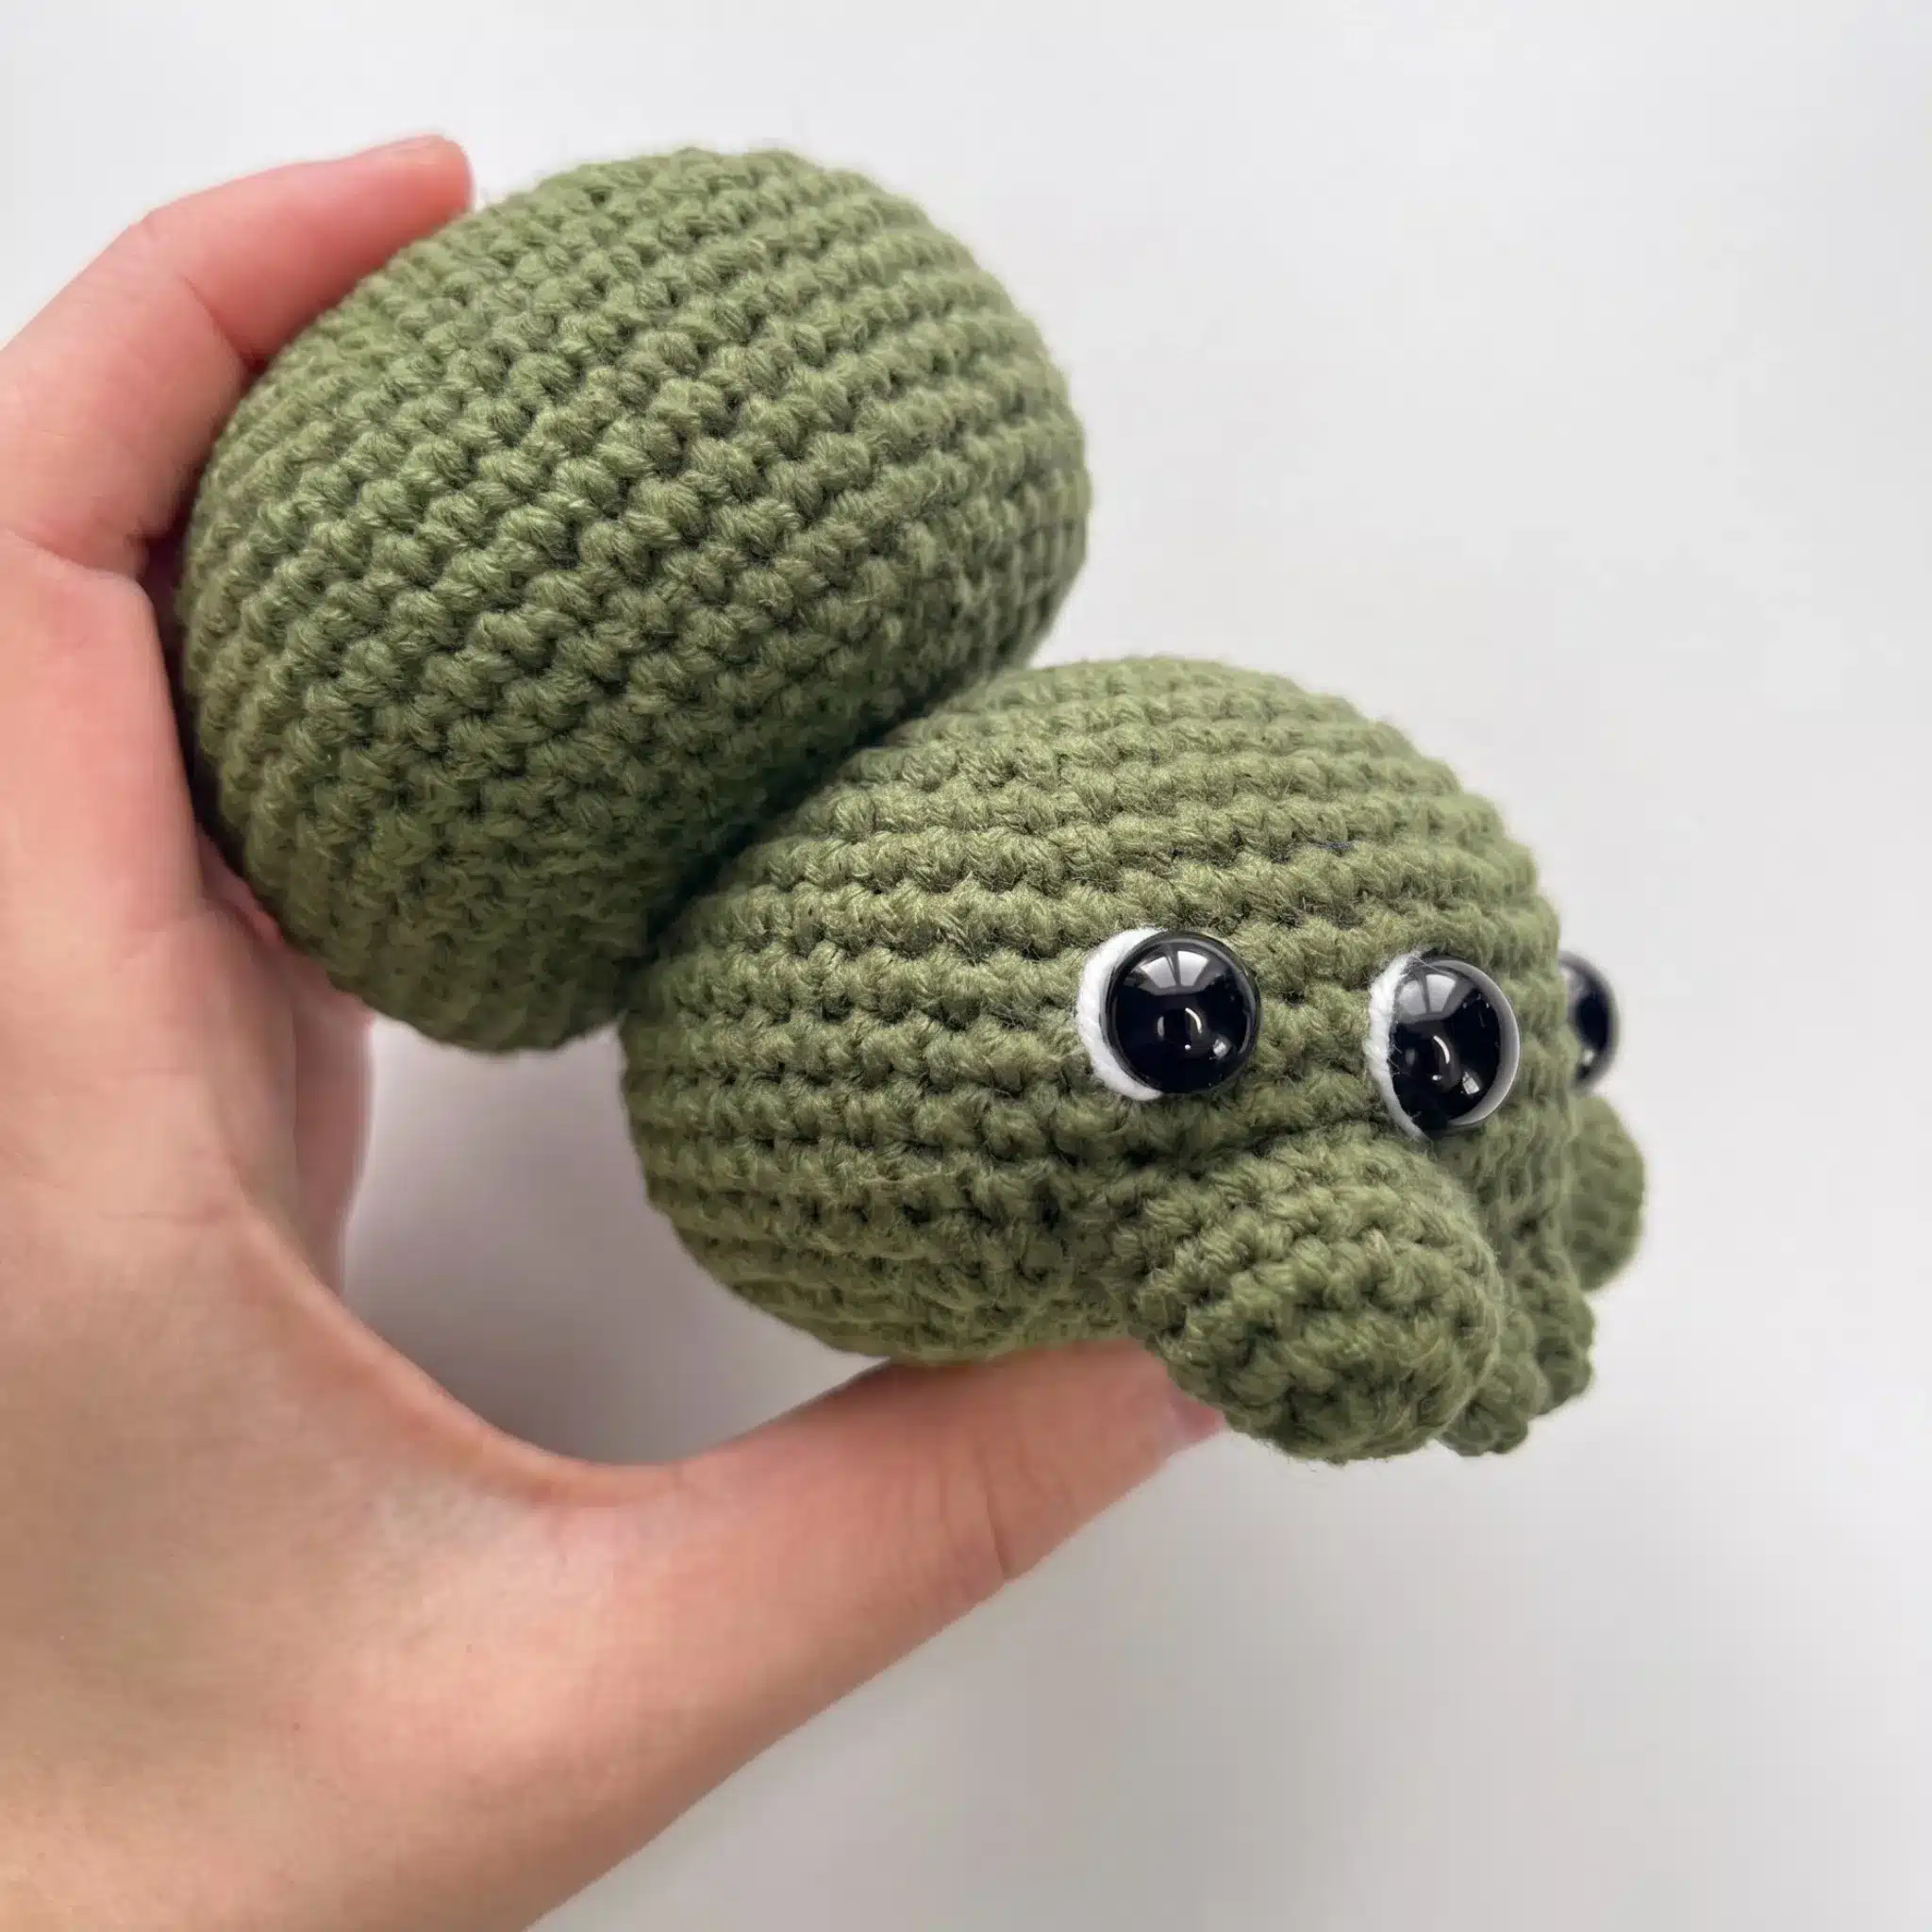
Picture a spider you’d actually want to find in your yarn basket: round, huggable, with big glossy eyes and two tiny fangs that look more charming than threatening. That’s Larry, and he’s exactly the kind of amigurumi spider pattern that turns a “creepy crawly” into a cuddly little character your kids will fight over. This crochet spider pattern is rated intermediate — nothing you can’t handle if you’ve made a basic amigurumi ball before, but the segmented legs and layered shaping will keep you engaged from start to finish. You’ll build his head, a separate body, four fangs, and six two-part legs, then assemble them into one very good-natured arachnid.
Materials
- Worsted weight (Aran) cotton yarn in two colors — one for the Head and Legs, one for the Body (shown in gray and green)
- US B-1 (2.25 mm) crochet hook
- Safety eyes: two 12mm and two 10mm
- Fiberfill stuffing
- Stitch markers
- Yarn or tapestry needle
- Scissors
Abbreviations
- dec — Decrease (invisible decrease)
- inc — Increase (2 sc in same stitch)
- MR — Magic Ring
- sc — Single Crochet
- sl st — Slip Stitch
Pattern Notes
This pattern is written in US crochet terminology. All pieces are worked in continuous spiral rounds (no joining, no chain-up) unless a slip stitch finish is specifically noted. The stitch count is given at the end of each round in parentheses, like this: (6). Gauge isn’t critical here — focus on working tightly enough that stuffing doesn’t peek through your stitches. Safety eyes are placed at specific rounds on the Head before you finish stuffing, so read ahead before you close any piece. Legs are worked in two segments each, then joined at an angle for a natural, bent-leg look.
Pattern Instructions
Head
Rnd 1: 6 sc in MR. (6)
Rnd 2: inc in each st around. (12)
Rnd 3: sc, inc repeat around. (18)
Rnd 4: 2 sc, inc repeat around. (24)
Rnd 5: 3 sc, inc repeat around. (30)
Rnd 6: 2 sc, inc, 2 sc repeat around. (36)
Rnd 7: 5 sc, inc repeat around. (42)
Rnd 8: 3 sc, inc, 3 sc repeat around. (48)
Rnd 9: 7 sc, inc repeat around. (54)
Rnds 10–15: sc in each st around. (54)
Attach the 12mm safety eyes between Rnds 12 and 13, spacing them 4 stitches apart. Attach the 10mm safety eyes between Rnds 11 and 12, positioned 2 stitches in from the larger eyes.
Rnd 16: 7 sc, dec repeat around. (48)
Rnd 17: 3 sc, dec, 3 sc repeat around. (42)
Rnd 18: 5 sc, dec repeat around. (36)
Rnd 19: 2 sc, dec, 2 sc repeat around. (30)
Rnd 20: 3 sc, dec repeat around. (24)
Begin stuffing the head firmly at this point — you want it dense enough to hold its round shape.
Rnd 21: 2 sc, dec repeat around. (18)
Rnd 22: 1 sc, dec repeat around. (12)
Rnd 23: dec around. (6)
Finish stuffing, then close the opening by weaving your tail through the front loops only (FLO) of the last 6 stitches and pulling tight.
Body
Rnd 1: 6 sc in MR. (6)
Rnd 2: inc in each st around. (12)
Rnd 3: sc, inc repeat around. (18)
Rnd 4: 2 sc, inc repeat around. (24)
Rnd 5: 3 sc, inc repeat around. (30)
Rnd 6: 4 sc, inc repeat around. (36)
Rnd 7: 5 sc, inc repeat around. (42)
Rnd 8: 6 sc, inc repeat around. (48)
Rnd 9: 7 sc, inc repeat around. (54)
Rnds 10–16: sc in each st around. (54)
Rnd 17: 7 sc, dec repeat around. (48)
Rnd 18: 6 sc, dec repeat around. (42)
Rnd 19: 5 sc, dec repeat around. (36)
Rnd 20: 4 sc, dec repeat around. (30)
Rnd 21: 3 sc, dec repeat around. (24)
Fasten off with a slip stitch, leaving a long tail for sewing. Stuff the body firmly before attaching it to the Head.
Legs — First Segment (make 6)
Rnd 1: 6 sc in MR. (6)
Rnd 2: inc in each st around. (12)
Rnds 3–10: sc in each st around. (12)
Rnd 11: 2 sc, dec repeat around. (9)
Fasten off with a slip stitch, leaving a long tail for sewing.
Legs — Second Segment (make 6)
Rnd 1: 6 sc in MR. (6)
Rnd 2: sc in each st around. (6)
Rnd 3: inc, 5 sc. (7)
Rnd 4: inc, 6 sc. (8)
Rnd 5: inc, 7 sc. (9)
Rnds 6–10: sc in each st around. (9)
Fasten off with a slip stitch, leaving a long tail for sewing.
Small Fangs (make 2)
Rnd 1: 4 sc in MR. (4)
Rnd 2: inc, 3 sc. (5)
Rnd 3: inc, 4 sc. (6)
Rnd 4: sc in each st around. (6)
Fasten off with a slip stitch, leaving a long tail for sewing.
Large Fangs (make 2)
Rnd 1: 6 sc in MR. (6)
Rnd 2: inc in each st around. (12)
Rnd 3: inc, 11 sc. (13)
Rnd 4: inc, 12 sc. (14)
Rnd 5: inc, 13 sc. (15)
Fasten off with a slip stitch, leaving a long tail for sewing.
Assembly
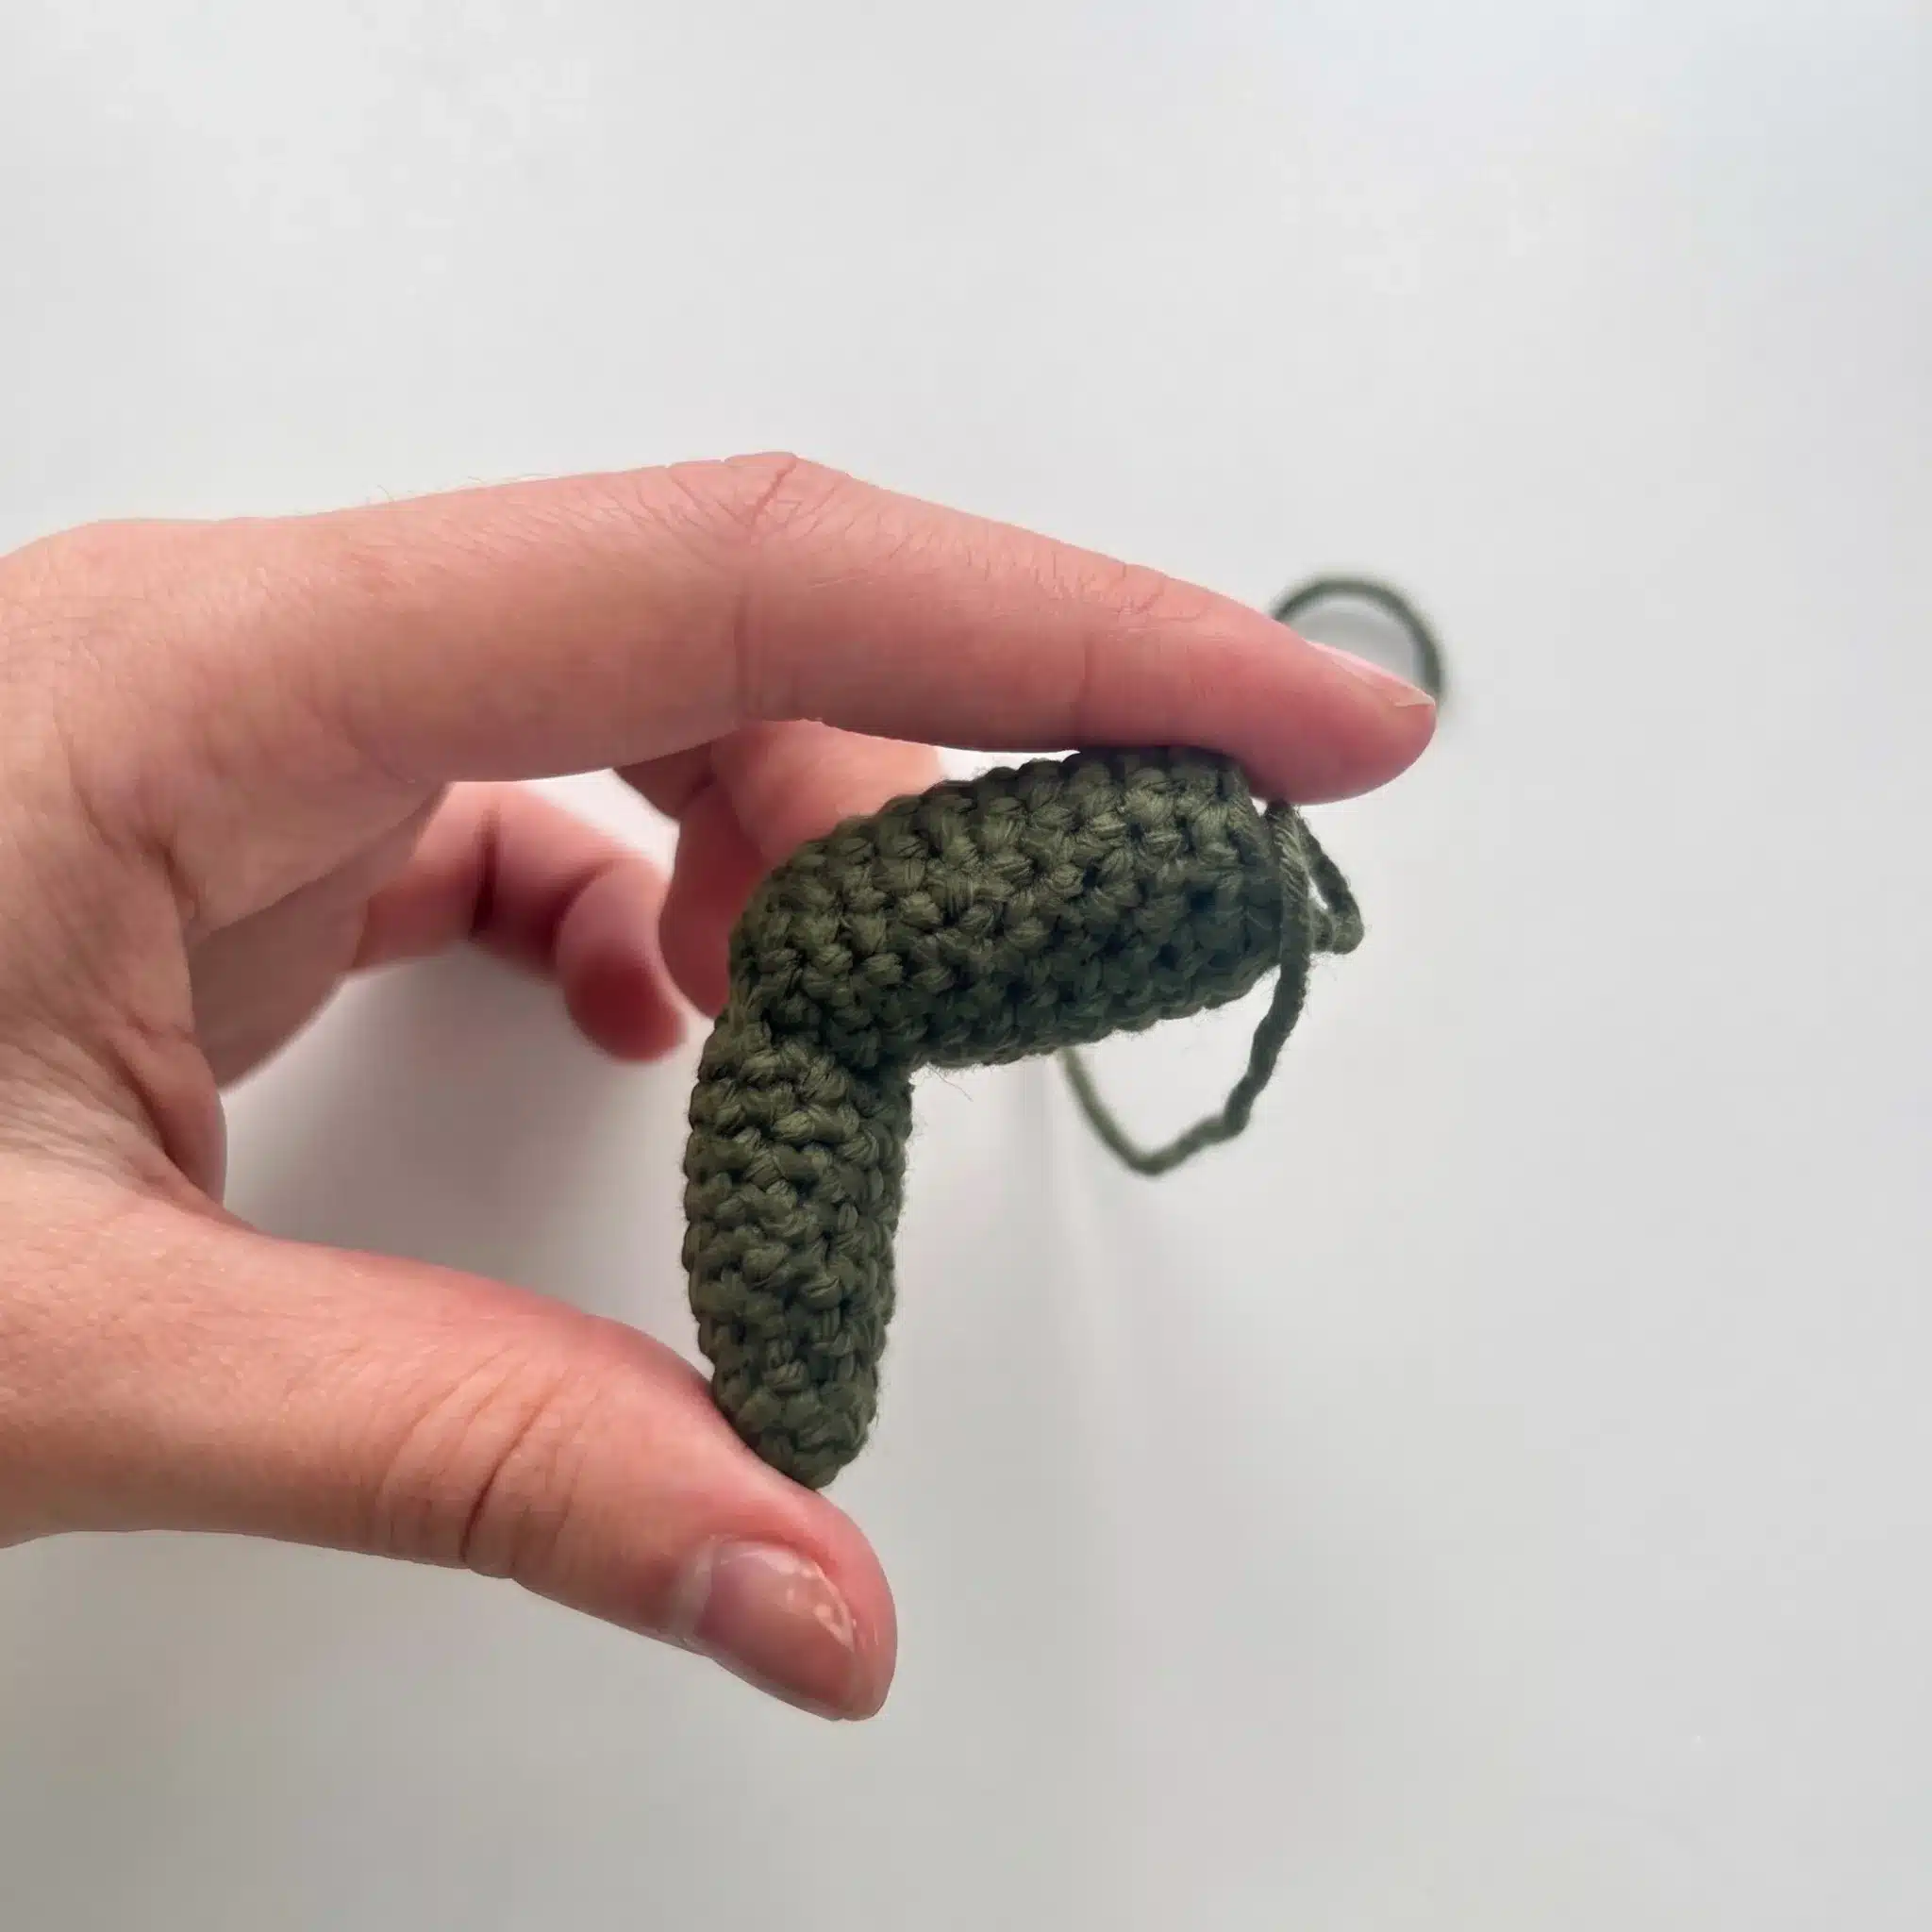
Stuff every First Segment and Second Segment leg piece firmly, but not so tightly that they lose flexibility. Using the yarn tail on each piece, sew a First Segment to a Second Segment at an angle so the finished leg has a natural bend. Repeat until you have 6 complete legs.
Position the 6 legs evenly around the sides of the Head and whipstitch each one in place using its tail.
Sew the two Small Fangs and two Large Fangs to the front of the Head, alternating them for a toothy little grin.
Attach the stuffed Body to the Head using mattress stitch for a seam that all but disappears.
Weave in every remaining end and trim.
Tips
- Keep your tension snug throughout — amigurumi lives or dies by tight stitches, and Larry’s rounded head especially needs stitches close enough together that stuffing can’t peek through between them. If your gauge tends to run loose, drop down half a hook size rather than fighting your natural tension.
- For the invisible decrease, insert your hook into the front loops of the next two stitches only, then pull up a loop through both and complete as a normal single crochet. This keeps your decrease rounds smooth instead of leaving little bumps or gaps along the Head’s shaping curve.
- Stuff as you go, not all at once at the end. Add fiberfill in small pinches starting a few rounds before each decrease section, checking the shape against a mirror or photo as you work. This keeps the Head and Body evenly round instead of lumpy in one spot.
- When you swap yarn colors or weights, remember that a thicker yarn will make Larry noticeably bigger and use up your safety eyes’ proportions differently — size up your eyes slightly if you move to a bulky weight, and always swatch a few rounds first to confirm your stitches stay dense enough for stuffing.
- The First Segment to Second Segment leg join is the trickiest part of this pattern. Pin both pieces together before you start sewing, checking the angle against the reference photos, and use a whipstitch worked through both loops on each side for a join sturdy enough to hold up to a lot of little hands.
Frequently Asked Questions
What yarn weight and hook size should I use for the Larry the Spider amigurumi pattern?
This pattern is designed for worsted weight (Aran) cotton yarn worked with a US B-1 (2.25 mm) hook. Cotton yarn holds its shape well for amigurumi and gives Larry a firm, huggable body. If you swap to a different weight, size your hook down slightly to keep your stitches tight enough to hide the stuffing.
How many legs does Larry the Spider have, and how are they made?
Larry has six legs, and each one is made from two separate crocheted segments. You crochet a First Segment and a Second Segment for each leg, stuff them, then sew them together at an angle to create a natural bend before attaching all six to the Head.
When do I attach the safety eyes on the Head?
Attach the 12mm safety eyes between Rounds 12 and 13, spacing them 4 stitches apart. Attach the 10mm safety eyes between Rounds 11 and 12, positioned 2 stitches in from the larger pair. Placing them before you finish stuffing makes it much easier to check the spacing and angle.
Can I change the colors used in this amigurumi spider pattern?
Yes, the color choices are entirely up to you. The original uses one color for the Head and Legs and a separate color for the Body. Feel free to experiment with any combination that makes you smile.
What is the invisible decrease, and why should I use it?
The invisible decrease is a technique where you insert your hook into the front loops of the next two stitches only, then pull up a loop through both and complete as a normal single crochet. It creates a much smoother, less noticeable decrease than a standard sc2tog, which is especially important for the Head’s shaping curve.
How do I close the opening at the top of the Head?
After the final decrease round, weave your yarn tail through the front loops only (FLO) of the last 6 stitches. Pull the tail tight to draw the opening closed, then weave in the end securely.
Pin This Crochet Pattern!