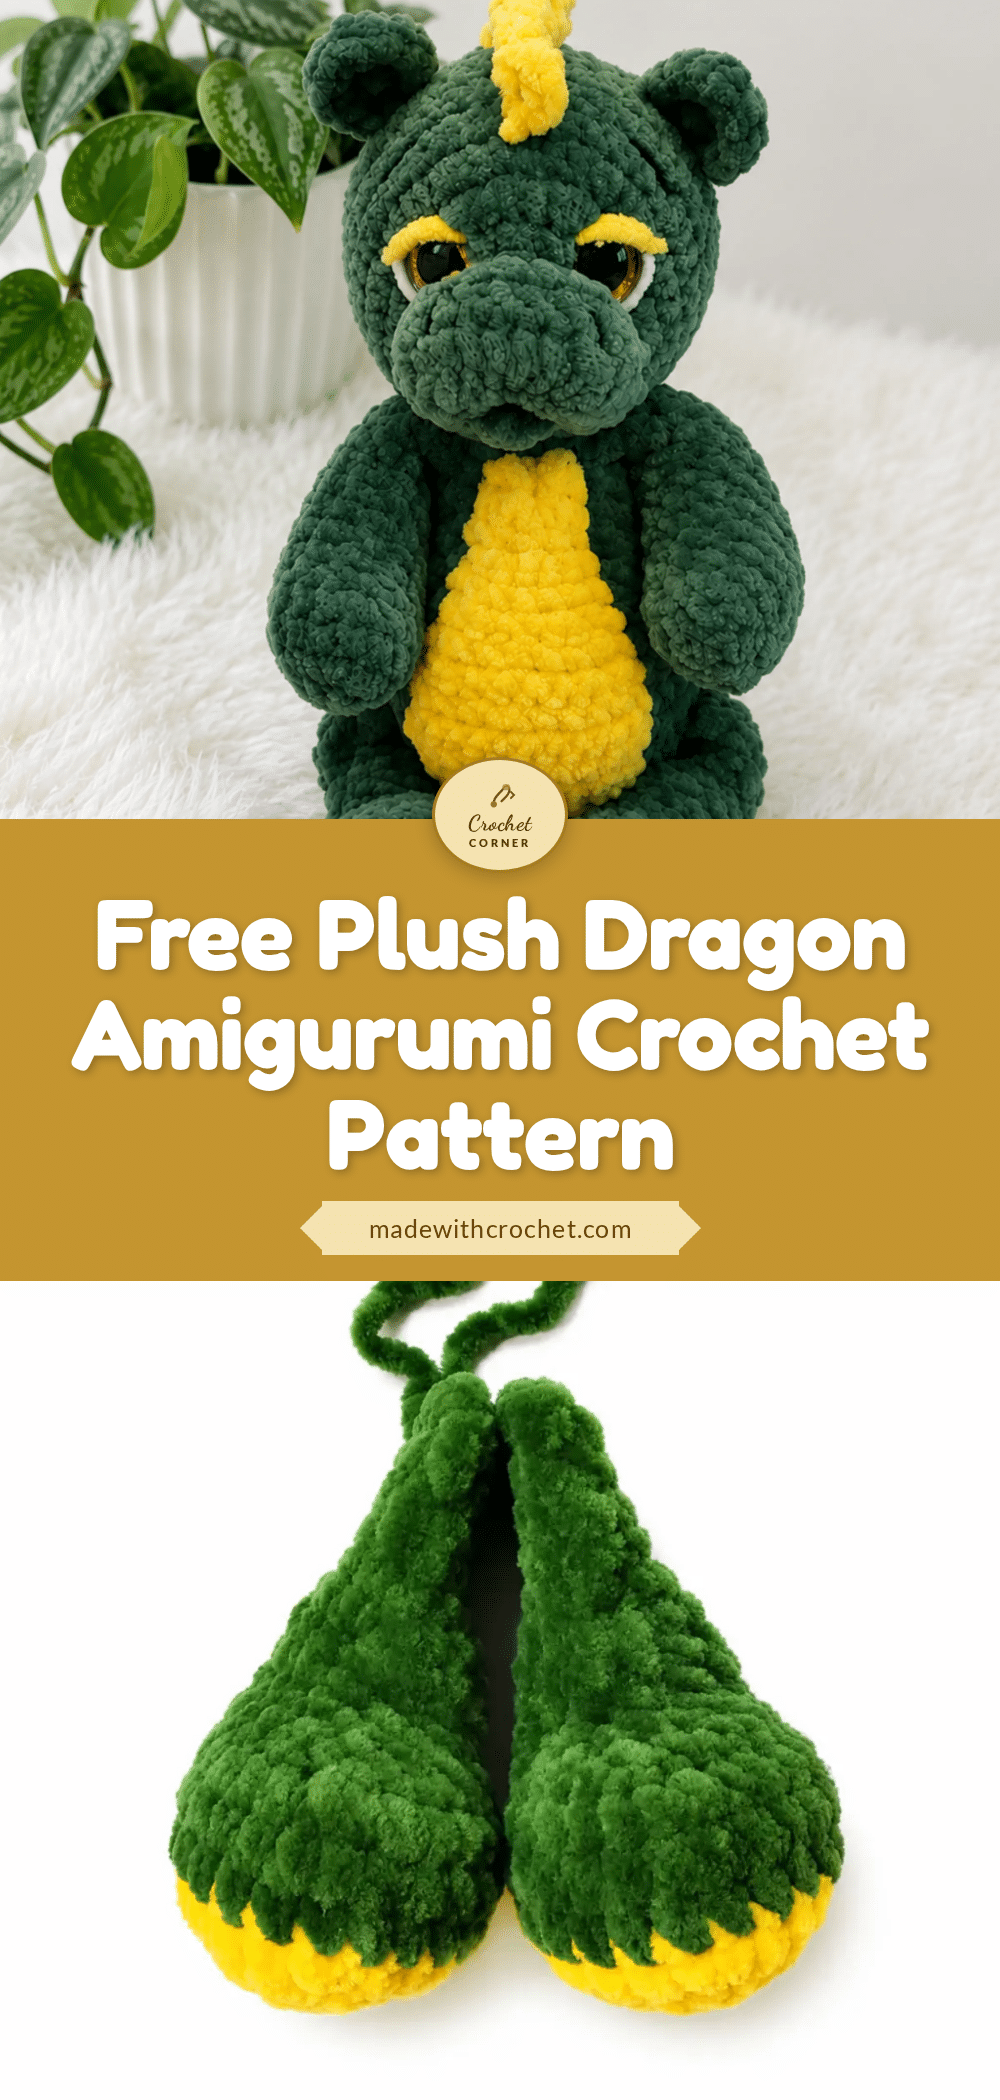
You know that feeling when you finish a project and immediately want to squeeze it? That’s exactly what happens with this plush dragon amigurumi. It’s soft, squishy, and full of personality — the kind of toy that looks equally at home on a nursery shelf or a grown-up’s desk. Whether you’re making it as a gift or treating yourself, this free crochet pattern delivers a cuddly dragon that’s as fun to make as it is to hold.
Why the Finished Piece Stands Out
What makes this dragon special isn’t just its velvety chenille yarn — it’s the thoughtful details that bring it to life. The raised scalloped spine ridge, the tacked eyes that give it an expressive gaze, and the optional false eyelashes all add character without complicating the build. The contrast belly patch and foot pads break up the main color beautifully, and the segmented belly texture gives it a playful, almost storybook feel. It’s a pattern that rewards careful finishing, but even beginners will find the process forgiving thanks to the forgiving plush yarn.
Project Overview
This intermediate-friendly amigurumi pattern uses basic single crochet stitches worked in continuous spiral rounds. You’ll create each piece separately — legs, arms, body, head, tail, belly patch, and ears — then assemble them with simple sewing techniques. The finished dragon stands about 9 inches (23 cm) tall, making it a perfect lap-sized companion.
Materials
- Plush yarn (Bulky weight, chenille-style, such as Himalaya Dolphin Baby) — main color, 1 skein
- Plush yarn (Bulky weight, chenille-style) — contrast color, 0.5 skein, for the feet and belly patch
- Worsted weight cotton yarn in black, for embroidering the face
- Hook size G/6 (4mm)
- Safety eyes, 16mm, 1 pair
- Fiberfill stuffing
- False eyelashes (optional)
- Strong thread (dental floss works well) for eye tacking
- Yarn needle with a large eye, for sewing and embroidery
- Scissors
- Stitch marker
- Fabric glue, for attaching eyelashes (if using)
Abbreviations Used
- ch — Chain
- dec — Decrease (invisible decrease)
- inc — Increase (2 sc in same stitch)
- mr — Magic Ring
- sc — Single Crochet
- sl st — Slip Stitch
Pattern Notes
This pattern is written in US crochet terminology. Work in continuous spiral rounds throughout — do not join or chain at the start of a round. Use a stitch marker to track the beginning of each round, moving it up as you go. Gauge is not critical for this project, but a tighter gauge will help stuffing stay hidden and give the finished dragon better shape definition. The stitch count is given at the end of each round or row in parentheses, for example (12). The finished dragon measures approximately 9 inches (23 cm) tall, though your exact size will vary slightly depending on hook, yarn, and tension. Insert the safety eyes before finishing the head, and stuff each piece firmly but not overly tight, so seams stay smooth. Save long yarn tails after finishing the arms and legs — you’ll use them to attach these pieces directly into the body as you work.
Pattern Instructions
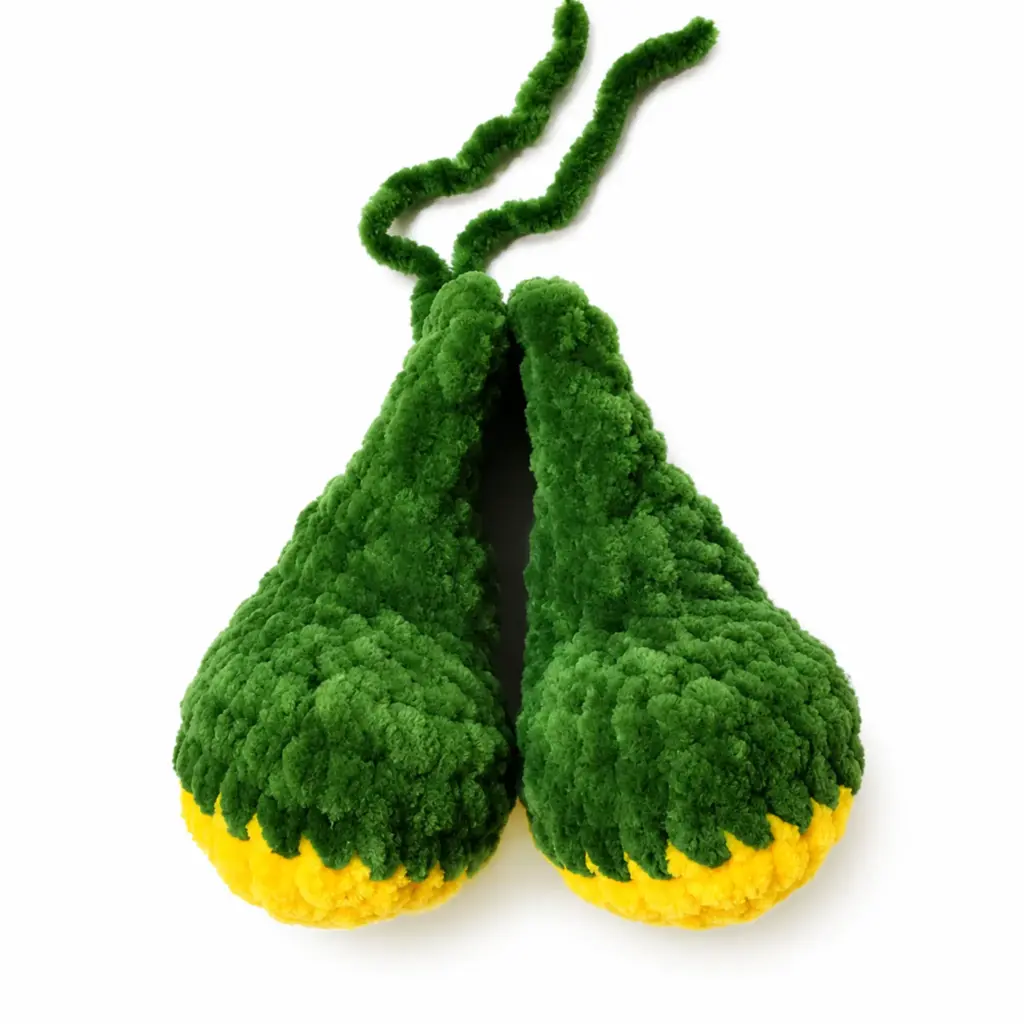
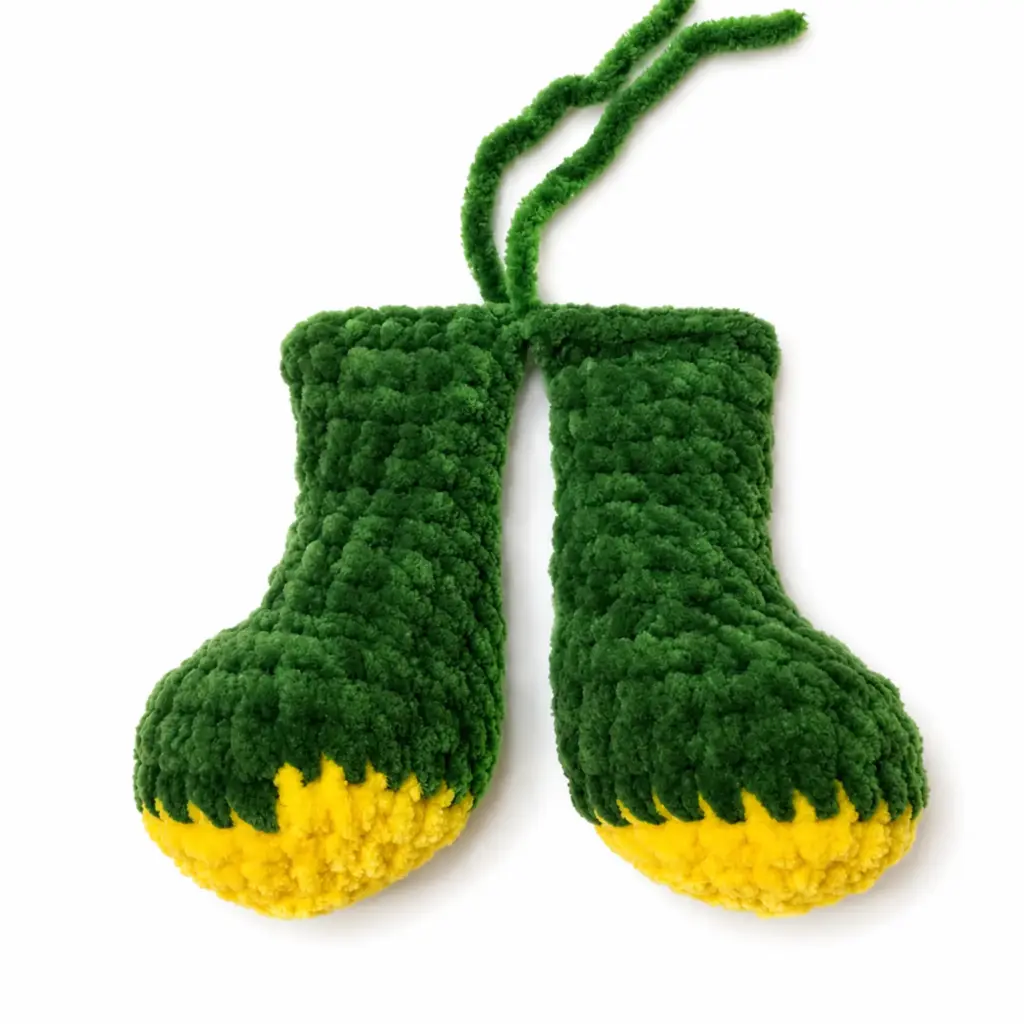
Legs (make 2)
Rnd 1: 6 sc in mr. (6)
Rnd 2: inc around. (12)
Rnd 3: 1 sc, inc repeat around. (18)
Rnd 4: 1 sc, inc, 2 sc, inc repeat 5 times, 1 sc. (24)
If working the foot pad in a contrast color, switch to your main color now.
Rnds 5–7: sc around. (24) (3 rounds)
Rnd 8: dec 6 times, 12 sc. (18)
Rnd 9: dec 4 times, 10 sc. (14)
Rnds 10–12: sc around. (14) (3 rounds)
Rnd 13: dec, 5 sc, dec, 5 sc. (12)
Stuff the lower portion of the leg firmly.
Rnds 14–16: sc around. (12) (3 rounds)
Rnd 17: sc 3 sts, shifting your seam placement slightly to one side. Flatten the top of the leg and sc through both layers to close: 6 sc.
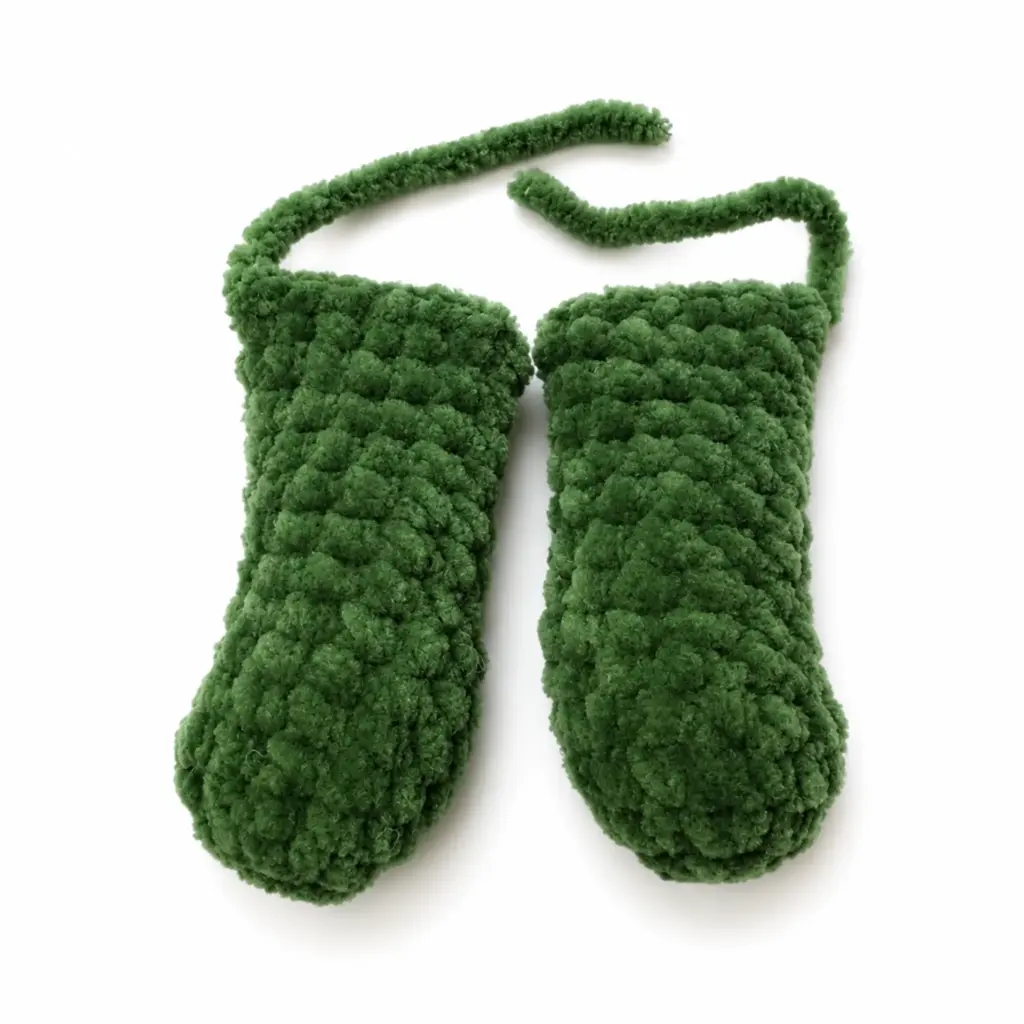
Arms (make 2)
Rnd 1: 7 sc in mr. (7)
Rnd 2: inc around. (14)
Rnds 3–4: sc around. (14) (2 rounds)
Rnd 5: 6 sc, dec twice, 4 sc. (12)
Rnds 6–13: sc around. (12) (7 rounds)
Stuff the lower portion of the arm.
Rnd 14: sc 2 sts, shifting your seam placement slightly to one side. Flatten the top of the arm and sc through both layers to close: 6 sc. Fasten off and weave in the end.
Body
Rnd 1: 6 sc in mr. (6)
Rnd 2: inc around. (12)
Rnd 3: 1 sc, inc repeat around. (18)
Rnd 4: 2 sc, inc repeat around. (24)
Rnd 5: 3 sc, inc repeat around. (30)
Rnd 6: sc around. (30)
Rnd 7: 4 sc, inc repeat around. (36)
Attach the legs in the following round.
Rnd 8: 6 sc, 6 sc working through the body stitch and one leg together, 12 sc, 6 sc working through the body stitch and the second leg together, 6 sc. (36)
Rnds 9–12: sc around. (36) (4 rounds)
Rnd 13: 9 sc, 1 sc, dec repeat 6 times, 9 sc. (30)
Rnd 14: sc around. (30)
Rnd 15: 10 sc, dec 6 times, 8 sc. (24)
Rnd 16: sc around. (24)
Rnd 17: 6 sc, dec repeat 3 times. (21)
Rnd 18: 5 sc, dec repeat 3 times. (18)
Attach the arms in the following round. Before joining, hold the arms against the body to confirm they sit directly above the legs — you may need to shift the placement by a stitch or two.
Rnd 19: 3 sc, 6 sc working through the body stitch and one arm together, 3 sc, 6 sc working through the body stitch and the second arm together. (18)
Rnd 20: 4 sc, dec repeat 3 times. (15)
Fasten off and weave in the end.
Head
Chain 7. Starting in the 2nd chain from the hook:
Rnd 1: inc, 4 sc, 4 sc in the last stitch, then working down the opposite side of the starting chain: 4 sc, inc. (16)
Rnd 2: 2 inc, 5 sc, 3 inc, 5 sc, inc. (22)
Rnds 3–4: sc around. (22) (2 rounds)
Rnd 5: 2 sc, 10 inc, 10 sc. (32)
Rnd 6: 2 sc, 1 sc, inc repeat 10 times, 10 sc. (42)
Rnds 7–13: sc around. (42) (7 rounds)
Insert the safety eyes between rounds 5 and 6, spacing them 5 stitches apart.
Rnd 14: 5 sc, dec repeat 6 times. (36)
Rnd 15: 4 sc, dec repeat 6 times. (30)
Rnd 16: 3 sc, dec repeat 6 times. (24)
Rnd 17: 2 sc, dec repeat 6 times. (18)
Rnd 18: 1 sc, dec repeat 6 times. (12)
Rnd 19: dec 6 times. (6)
Close the opening and weave in the end.
Tail
Rnd 1: 6 sc in mr. (6)
Rnd 2: 1 sc, inc repeat 3 times. (9)
Rnd 3: sc around. (9)
Rnd 4: 2 sc, inc repeat 3 times. (12)
Rnds 5–6: sc around. (12) (2 rounds)
Rnd 7: 3 sc, inc repeat 3 times. (15)
Rnd 8: sc around. (15)
Rnd 9: 4 sc, inc repeat 3 times. (18)
Rnd 10: 5 sc, inc repeat 3 times. (21)
Rnd 11: 10 sc, inc, 2 sc, inc, 2 sc, inc, 4 sc. (24)
Rnd 12: sc around. (24)
Rnd 13: 9 sc, inc, 4 sc, inc, 4 sc, inc, 4 sc. (27)
Rnd 14: 10 sc, inc, 5 sc, inc, 5 sc, inc, 4 sc, sl st. (30)
Stuff the tail and set aside to sew on during assembly.
Belly Patch (contrast color)
Chain 4. Starting in the 2nd chain from the hook: 3 sc. Work in turned rows, chaining 1 at the start of every row (this chain does not count as a stitch).
Row 2: 1 sc, inc, 1 sc. (4)
Row 3: sc across. (4)
Row 4: 1 sc, inc twice, 1 sc. (6)
Row 5: sc across. (6)
Row 6: 1 sc, inc, 2 sc, inc, 1 sc. (8)
Row 7: sc across. (8)
Row 8: 1 sc, inc, 4 sc, inc, 1 sc. (10)
Row 9: sc across. (10)
Row 10: 1 sc, inc, 6 sc, inc, 1 sc. (12)
Row 11: sc across. (12)
Row 12: 1 sc, dec, 6 sc, dec, 1 sc. (10)
Row 13: 1 sc, dec, 4 sc, dec, 1 sc. (8)
Row 14: 1 sc, dec, 2 sc, dec, 1 sc. (6)
Fasten off, leaving a long tail for sewing.
Ears (make 2)
Rnd 1: 6 sc in mr. (6)
Rnd 2: inc around. (12)
Join with a sl st to the first stitch of the round. Fasten off, leaving a long tail for sewing the ear on.
Assembly
Sew the Head to the Body, centering it over the neckline and checking that it sits straight before securing all the way around. Position the Belly Patch down the front of the Body, from the chin to just above where the legs meet. Sew it in place with a whipstitch, then use your needle to tack a few horizontal lines across it, leaving 2 rows of space between each line, to create a segmented belly texture. Sew the Tail to the back of the Body, with the increase rounds facing upward so the tail curves naturally away from the body. Sew the Ears onto the Head between rounds 11 and 12, spacing them 8 stitches apart so they sit symmetrically.
Work the spine ridge: use pins to mark a line running from the tip of the tail up to the forehead. Anchor a strand of your main color plush yarn where the tail begins, then work sc into each marked stitch up the spine toward the forehead. At the forehead, turn your work, chain 1, then work 2 sc into each stitch along the ridge, chaining 1 after every sc, to create a raised, scalloped crest.
Tack the eyes for extra shaping and expression: thread strong thread and, working between rounds 2 and 3 of the head, insert at Point 1 and bring the needle out at Point 2, then insert at Point 3 and bring it out at Point 4, offset 1–2 stitches to the side. Insert again at Point 1, bring the needle out at Point 5, then insert at Point 6 and bring it out at Point 4. Pull the threads gently to gather and shape the eye area, then secure and weave in the end. Embroider white highlights over roughly 1/3 of each eye using white plush yarn, then use black yarn held double to embroider a small upper eyelid flick above each eye. Glue on false eyelashes at this stage if you’d like extra flair. Embroider the eyebrows above each eye using black yarn, angling them for the expression you prefer — a soft curve reads as gentle, while a sharper angle reads as feisty. Weave in any remaining loose ends throughout the finished dragon.
Tips
- Keeping your tension consistent matters more in this pattern than in most, since plush yarn is naturally forgiving and can hide loose stitches — but it can also hide gaps where stuffing peeks through if you crochet too loosely. Aim for stitches that sit snugly against each other without straining your hook to push through.
- For clean invisible decreases, insert your hook into the front loops of the next two stitches only, then pull up a loop and complete the single crochet as usual. This keeps your decrease rounds smooth instead of leaving a visible ridge, which matters most around the head shaping rounds.
- Stuff as you go rather than waiting until a piece is fully closed. For the arms and legs, add stuffing before you begin the final few rounds, since it’s much easier to work stitches around stuffing than to stuff through a narrow opening afterward. Aim for firm but not rock-hard — you want the piece to hold its shape and still give slightly when squeezed.
- If you substitute a different yarn, choose another bulky-weight chenille or velvet-style yarn to preserve the soft finished texture this pattern relies on. Switching to a smooth worsted-weight cotton will still work structurally, but you’ll lose the plush look the dragon is known for, and you may need to size down your hook slightly to keep stitches tight.
- When sewing the arms, legs, and ears onto the body, use the long yarn tail left from each piece and a whipstitch or mattress stitch, catching only a small amount of yarn from each stitch as you go. This keeps the seam nearly invisible in plush yarn, since the texture naturally camouflages small stitches.
Frequently Asked Questions
What size hook should I use for this pattern?
The pattern calls for a G/6 (4mm) hook. This smaller hook size helps create tight stitches that prevent stuffing from showing through the plush yarn.
Can I use a different yarn weight?
Yes, but for the best results, stick with a bulky-weight chenille or velvet-style yarn. If you use a lighter weight yarn, you’ll need to adjust your hook size and the finished dragon will be smaller and less plush.
How do I attach the legs and arms securely?
The pattern instructs you to crochet the legs and arms directly into the body as you work, using the long yarn tails left from each piece. This creates a strong, seamless attachment that won’t come loose over time.
What if I don’t have safety eyes?
You can embroider the eyes using black yarn or felt circles instead. Just be sure to secure them well if the toy is intended for a young child.
How do I make the spine ridge?
After assembly, use pins to mark a line from the tail tip to the forehead. Single crochet along that line, then turn and work 2 sc into each stitch, chaining 1 between each, to create the raised scalloped crest.
Can I wash the finished dragon?
Plush yarn is typically best cleaned by spot cleaning with a damp cloth. If you need to wash it, hand wash gently in cool water and lay flat to dry to maintain the shape and texture.
Pin This Crochet Pattern!