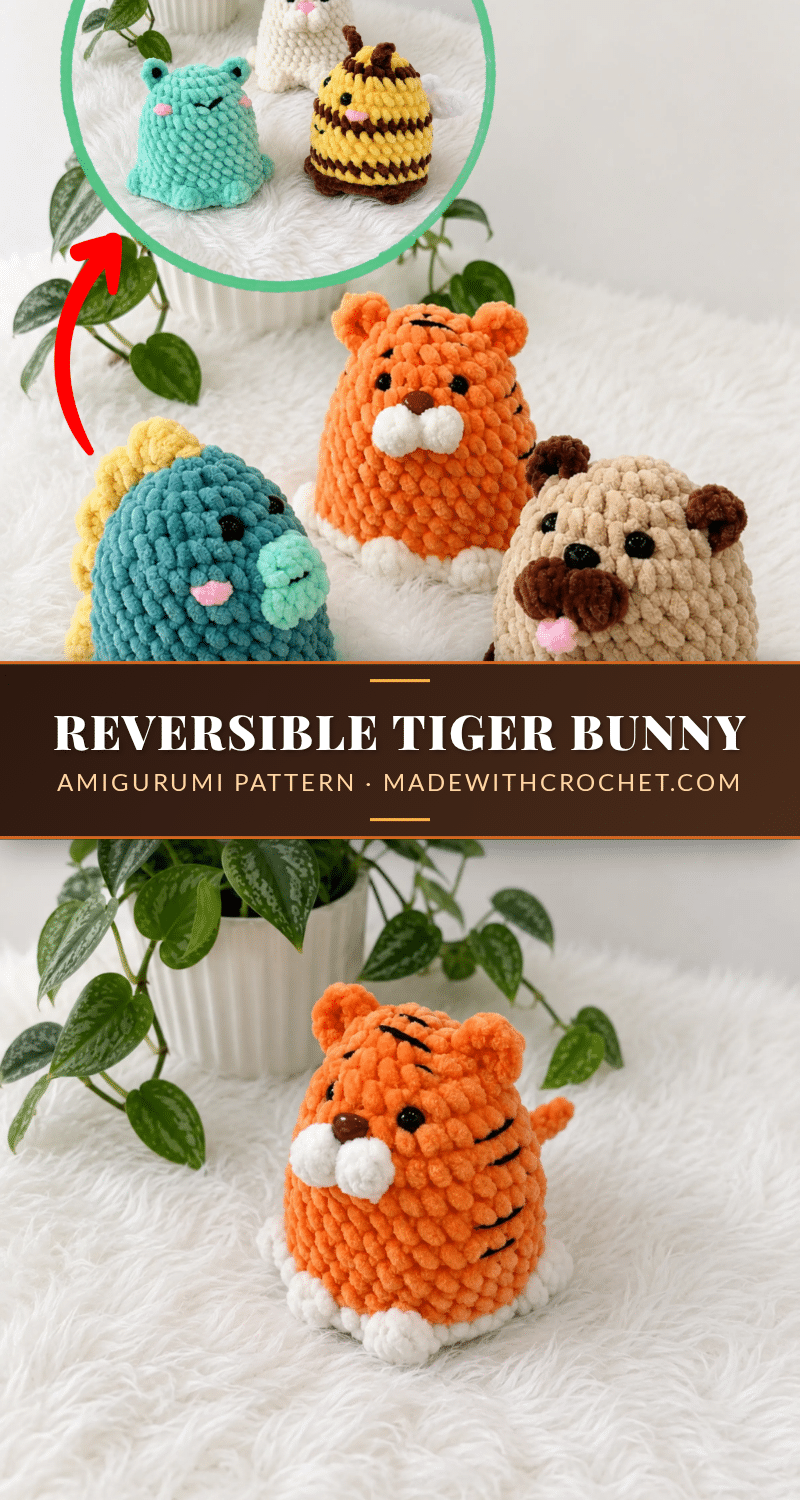
As the seasons change and cozy weather settles in, there’s no better time to craft a handmade gift that brings double the delight. This reversible tiger and bunny amigurumi pattern is perfect for holiday markets, nursery decor, or a surprise for little ones who love a bit of magic. Flip the fierce tiger inside out, and a sweet bunny appears—it’s a tiny trick that makes playtime extra special.
Seasonal Styling Ideas
This reversible toy is a natural fit for spring and Easter baskets, but don’t stop there. Use orange and white for a classic tiger-bunny pair, or swap in pastel pinks and creams for a softer, nursery-friendly look. The same base pattern works for a whole menagerie—think a pug, bee, dinosaur, or frog—so you can create a set of flip-toys for every holiday or gift-giving occasion. The plush, chenille-style yarn gives it a huggable texture that feels as good as it looks.
Project Overview
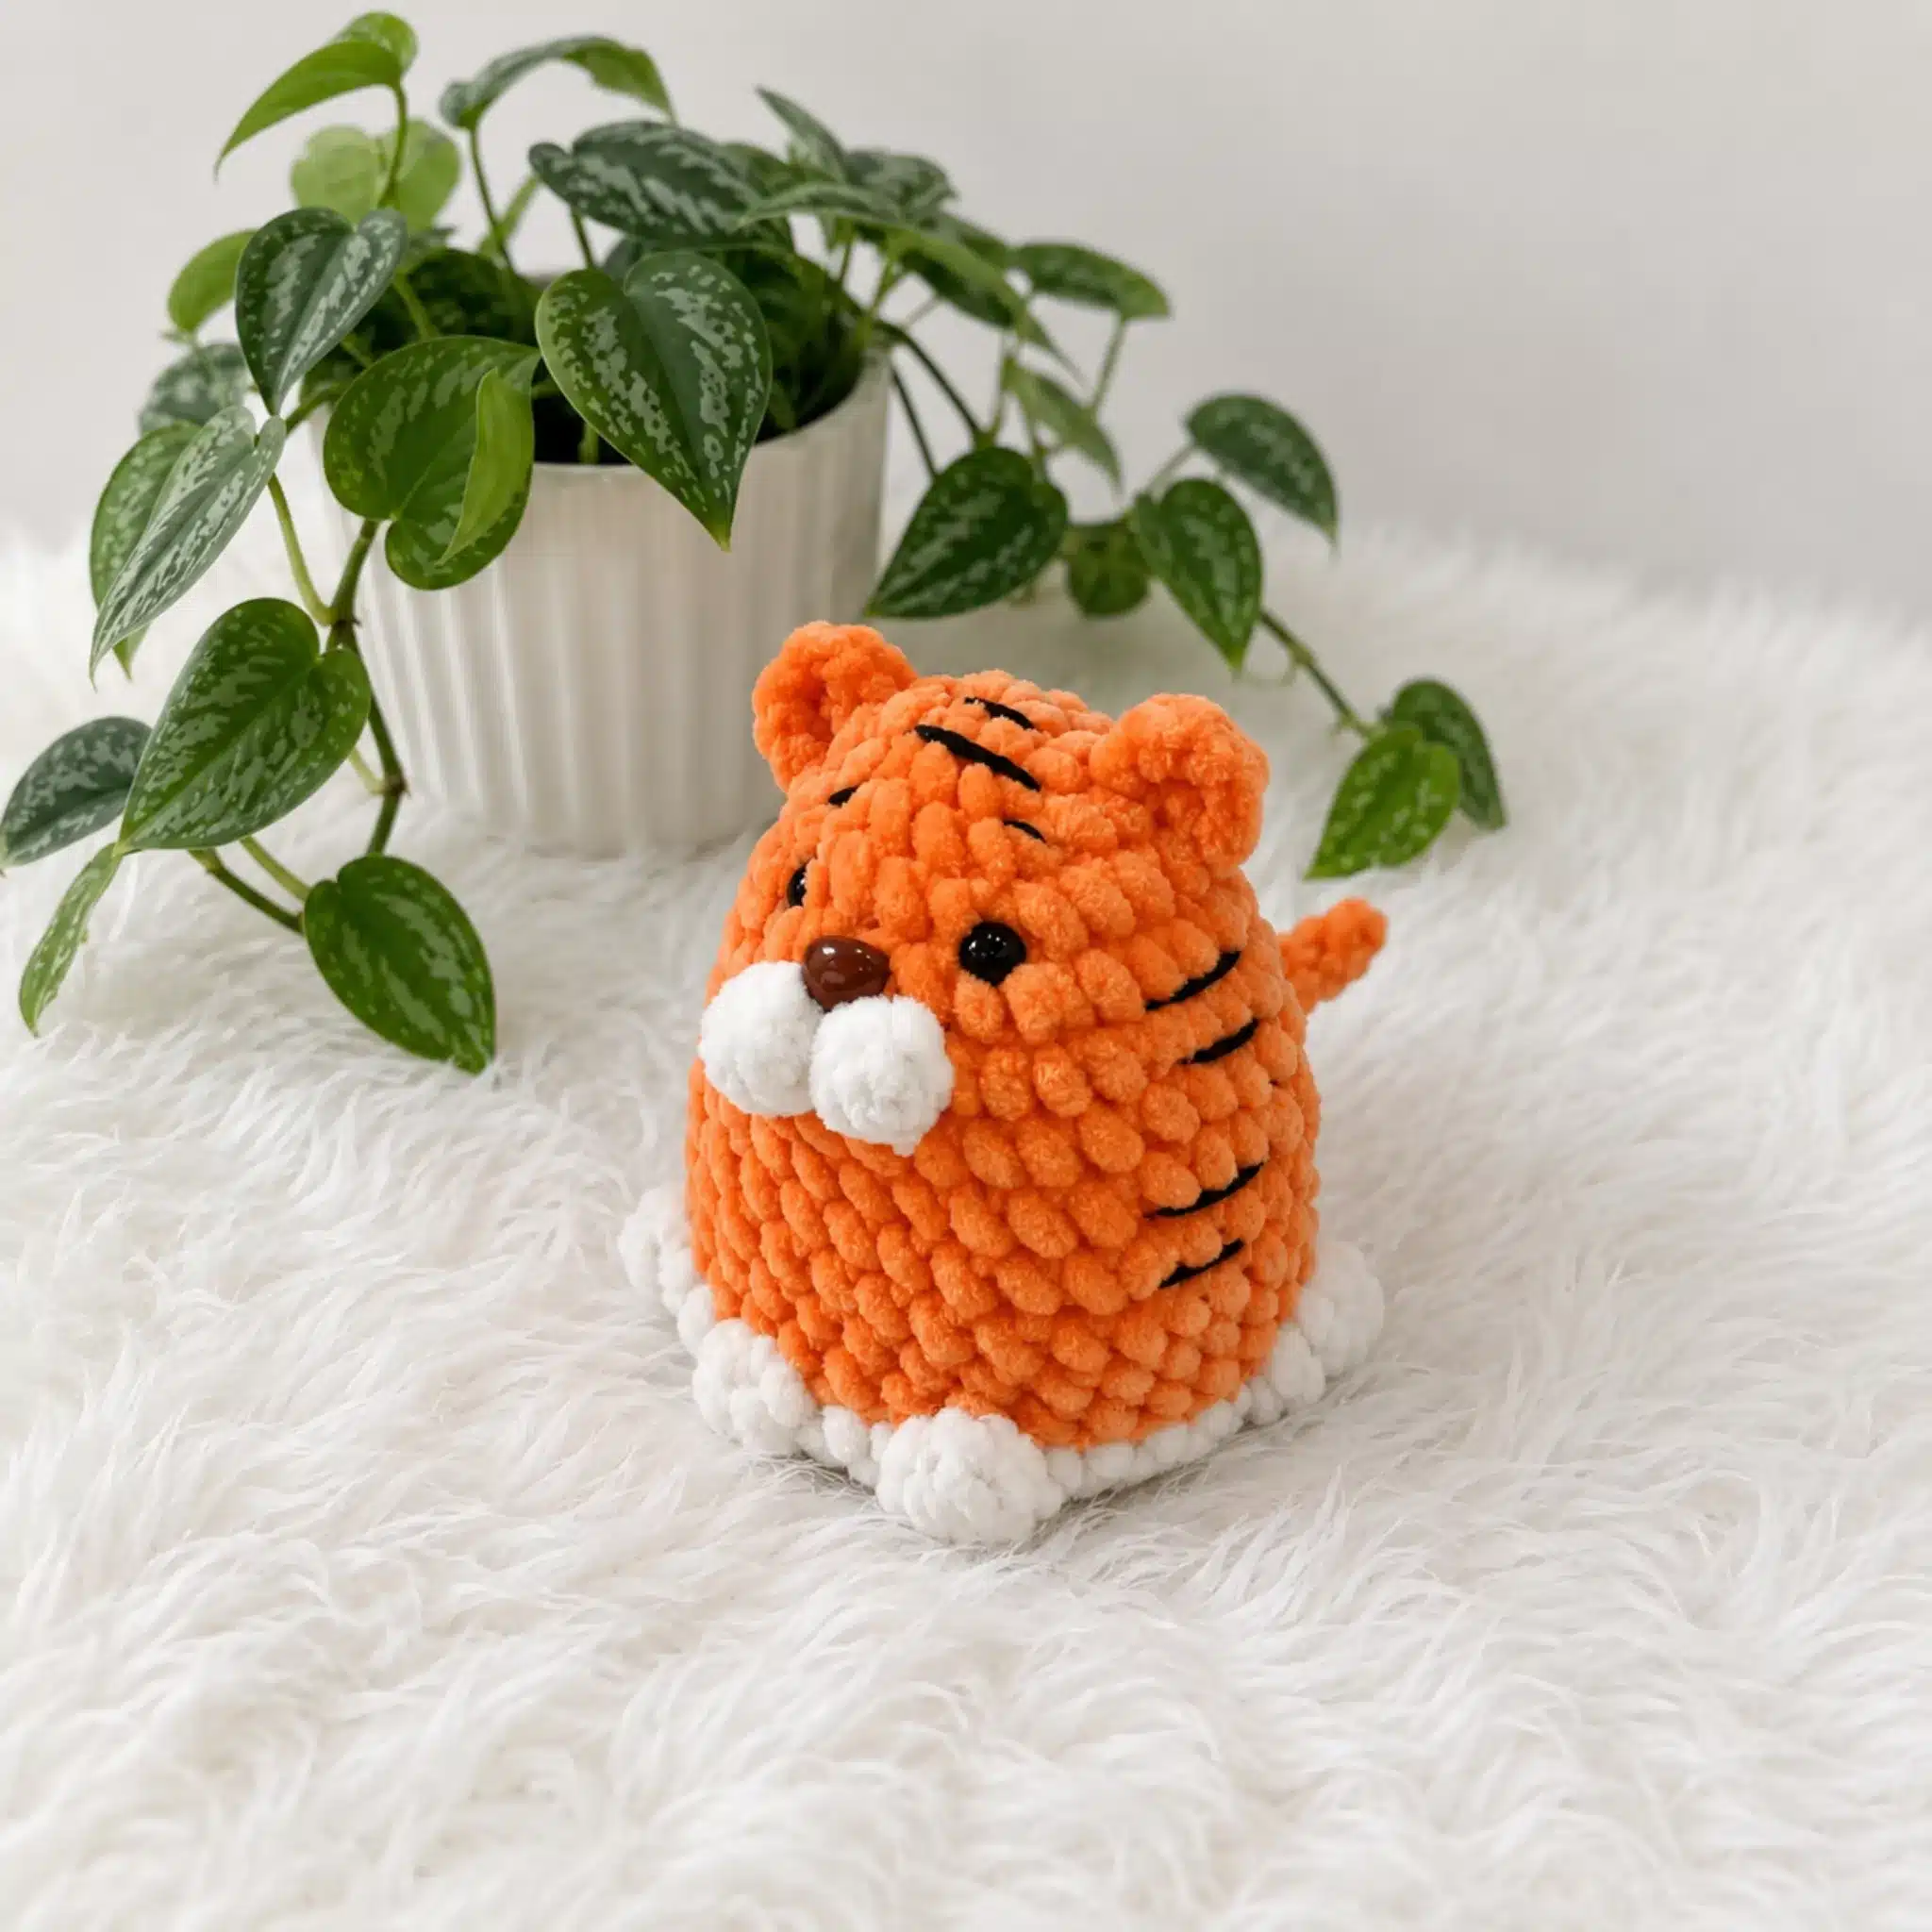
This intermediate-level pattern creates a reversible amigurumi toy that measures approximately 10 cm (4″) when finished. The tiger and bunny bodies are worked separately and then joined together in a clever paw round, allowing the toy to flip inside out. Bonus instructions for a pug, bee, dinosaur, and frog are also included, all built from the same base body shape.
Materials
- Yarn: Velvet/plush yarn (such as a chenille-style baby yarn), approximately 20–30g each in orange and white for the Tiger/Bunny pair; tan and dark brown for the Pug; yellow and brown for the Bee; teal, light green, and yellow for the Dinosaur; and mint green for the Frog
- Small amount of black cotton-blend yarn for embroidered details (eyebrows, stripes, mouths)
- Small amount of plush pink yarn for cheeks
- Hook size: 4.0 mm (US G/6) or 4.5 mm (US 7)
- Safety eyes, 8–10mm, 1 pair per animal
- Safety nose, 10mm (Tiger and Bunny)
- Stuffing/fiberfill
- Stitch marker
- Yarn/tapestry needle
- Scissors
Abbreviations Used
- BLO — Back Loop Only
- ch — Chain
- dc — Double Crochet
- dec — Decrease
- FLO — Front Loop Only
- hdc — Half Double Crochet
- inc — Increase
- MR — Magic Ring
- puff — Puff Stitch (4 dc worked together in one stitch)
- sc — Single Crochet
- sl st — Slip Stitch
Pattern Notes
- This pattern is written in US crochet terminology.
- Each body is worked in continuous spiral rounds — do not join or chain up unless a step tells you to turn for a flat row.
- Gauge isn’t critical for this project; just crochet snugly enough that stuffing doesn’t peek through the stitches, but loosely enough that the Bunny piece can turn inside out through the Tiger piece.
- Stitch count is given at the end of each round in parentheses.
- The Tiger and Bunny bodies are worked as separate, unstuffed pieces and joined together at the paw round — this is what creates the reversible effect.
- Finished size with the recommended yarn is approximately 10 cm (4″).
Pattern Instructions
Tiger — Head/Body
Rnd 1: 6 sc in MR. (6)
Rnd 2: inc in each st around. (12)
Rnd 3: sc, inc repeat around. (18)
Rnd 4: 2 sc, inc repeat around. (24)
Rnd 5: 3 sc, inc repeat around. (30)
Switch to white yarn for the puff stitches only in Rnd 6.
Rnd 6: 14 sc, puff, 1 sc, puff, 13 sc. (30)
Fasten off white and weave in the end.
Rnds 7–9: sc in each st around. (30)
Insert safety eyes between Rnds 4 and 5, spaced 4 sc apart, with the nose placed between the two puff stitches. For a flatter profile, the eye and nose posts can be gently warmed and flattened on the inside with a lighter before assembly.
Rnd 10: 2 sc, ch 8, sc in 2nd ch from hook and next 6 ch, 28 sc. (30) This forms the tail — keep it centered on the back.
Rnds 11–12: sc in each st around. (30)
2 sc, sl st. Fasten off and weave in the end.
Ears (make 2 Tiger, 2 Bunny)
Tiger Ear: ch 4, 2 dc in 3rd ch from hook.
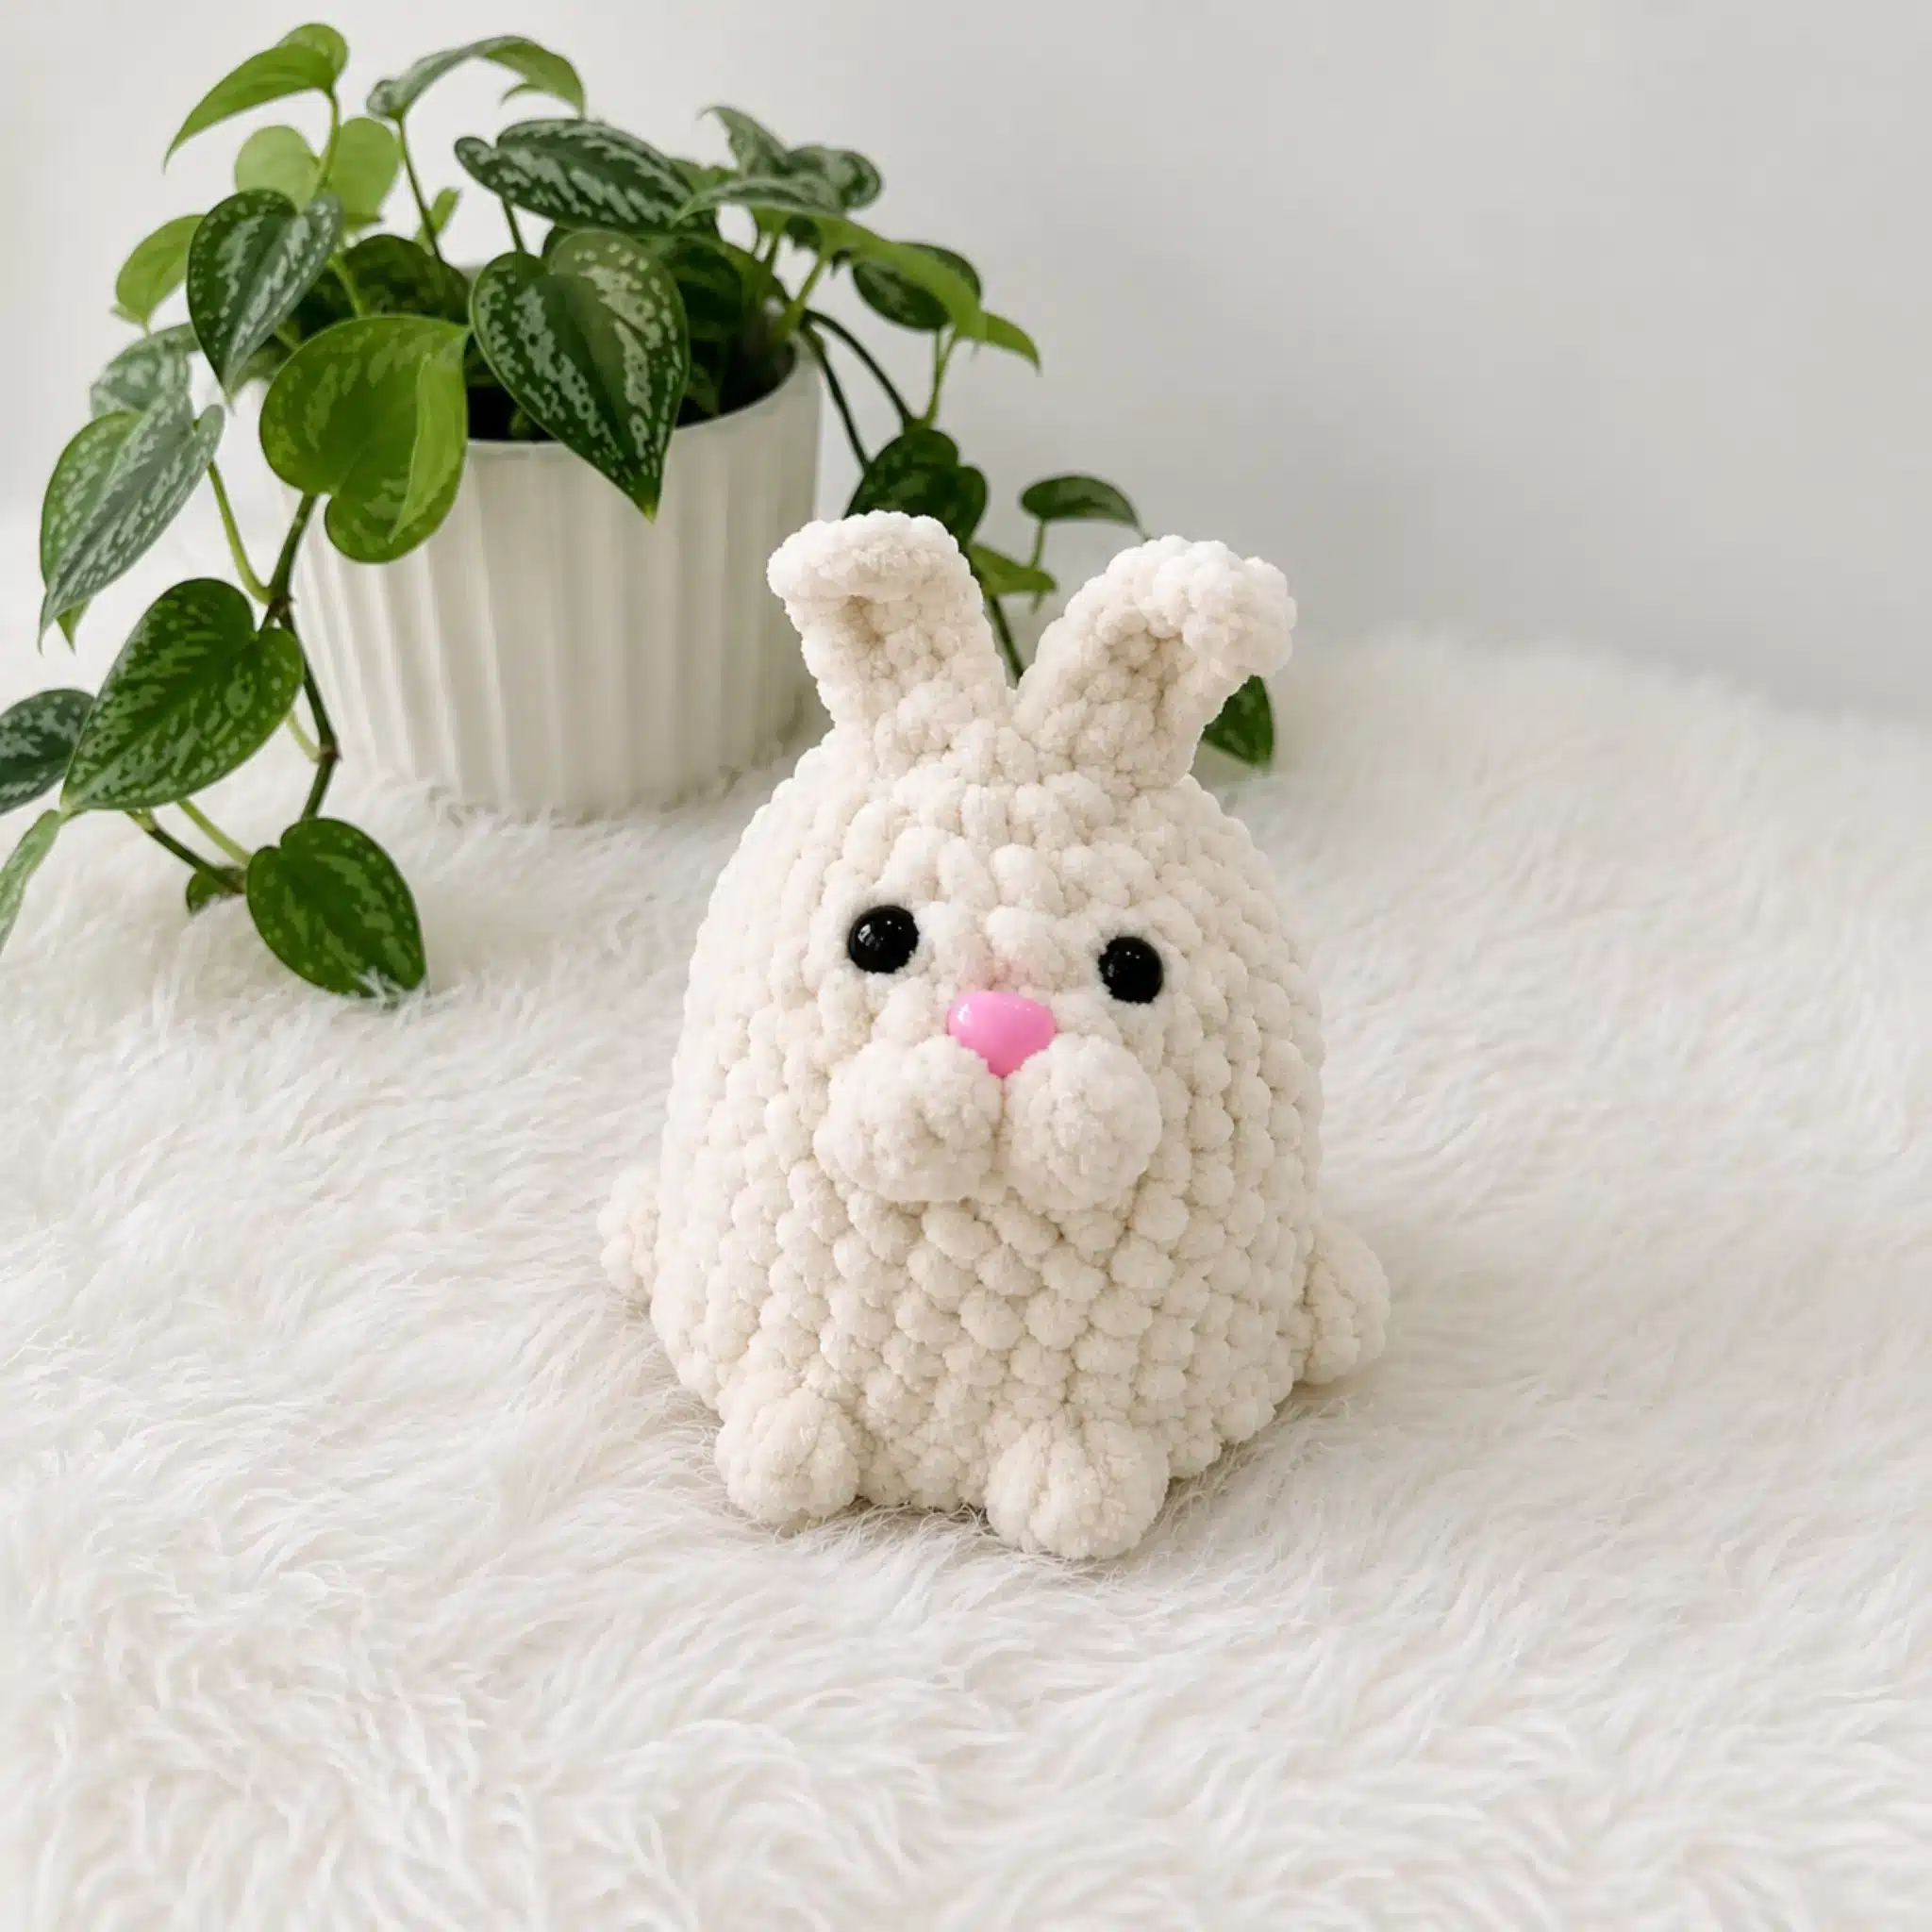
Bunny Ear: ch 7, 5 dc in 3rd ch from hook.
Weave in the ear tails through the top of the head and knot securely on the inside. Embroider eyebrows and tiger stripes with black cotton-blend yarn.
Bunny — Head/Body
Rnd 1: 6 sc in MR. (6)
Rnd 2: inc in each st around. (12)
Rnd 3: sc, inc repeat around. (18)
Rnd 4: 2 sc, inc repeat around. (24)
Rnd 5: 3 sc, inc repeat around. (30)
Rnd 6: 14 sc, puff, 1 sc, puff, 13 sc. (30)
Rnds 7–9: sc in each st around. (30)
Insert safety eyes between Rnds 4 and 5, spaced 4 sc apart, with the nose placed between the puff stitches.
Rnd 10: 2 sc, puff, 27 sc. (30) Keep this centered on the back — it forms the small tail.
Rnds 11–12: sc in each st around. (30)
2 sc, sl st. Do not fasten off — leave the working loop live for joining.
Joining — Paws
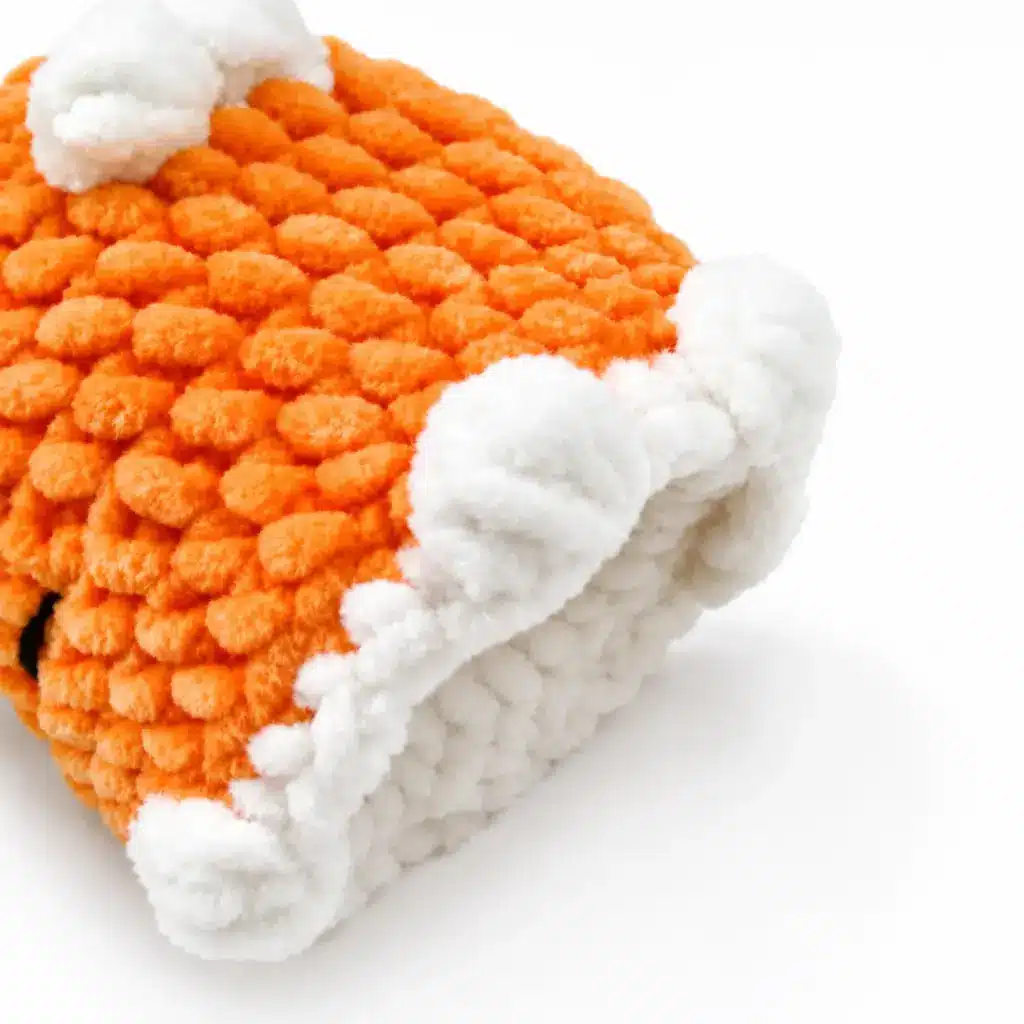
Turn the Bunny piece wrong side out and slide it inside the Tiger piece, wrong sides together, matching up both tails. Begin the joining round directly beneath the tail, at the center back. Switching to a hook one size smaller than what you used for the bodies makes this round easier to control. Work through BLO on the Tiger stitches and FLO on the Bunny stitches at the same time: 7 sc, puff, 5 sc, puff, 3 sc, puff, 5 sc, puff, 6 sc.
Pug — Head/Body
Rnd 1: 6 sc in MR. (6)
Rnd 2: inc in each st around. (12)
Rnd 3: sc, inc repeat around. (18)
Rnd 4: 2 sc, inc repeat around. (24)
Rnd 5: 3 sc, inc repeat around. (30)
Switch to dark brown yarn for the puff stitches only in Rnd 6.
Rnd 6: 14 sc, puff, 1 sc, puff, 13 sc. (30)
Fasten off dark brown and weave in the end.
Rnds 7–9: sc in each st around. (30)
Rnd 10: 2 sc, ch 4, sc in 2nd ch from hook and next 2 ch, 28 sc. (30)
Rnds 11–12: sc in each st around. (30)
2 sc, sl st. Fasten off and weave in the end.
Tongue: ch 2, sc in 2nd ch from hook.
Ear: ch 4, sl st in 2nd ch from hook, sc, hdc.
Attach the ears to the head. Attach the tongue under the snout using the same method as the ears.
Bee — Body
Rnd 1: 6 sc in MR. (6)
Rnd 2: inc in each st around. (12)
Rnd 3: sc, inc repeat around, worked in brown. (18)
Rnd 4: 2 sc, inc repeat around. (24)
Rnd 5: 3 sc, inc repeat around. (30)
Rnds 6–12: sc in each st around. (30)
Work Rnds 7 and 11 in brown, alternating with yellow for the remaining rounds to create the stripes.
Antennae: ch 4, sl st in 2nd ch from hook and each ch across.
Wings: ch 6, hdc in 3rd ch from hook, 3 dc.
Embroider the mouth and cheeks. Attach the wings and antennae. Work the legs the same way as the Tiger and Bunny.
Dinosaur — Body
Rnd 1: 6 sc in MR. (6)
Rnd 2: inc in each st around. (12)
Rnd 3: sc, inc repeat around. (18)
Rnd 4: 2 sc, inc repeat around. (24)
Rnd 5: 3 sc, inc repeat around. (30)
Rnd 6: 14 sc, 3 dc inc (in light green), 13 sc. (33)
Rnd 7: 14 sc, 3 dc dec (in light green), 13 sc. (30)
Rnds 8–12: sc in each st around. (30)
Spine: Join yellow yarn and sc down the center back up through Rnd 10, ch 5, turn, 4 sc in 2nd ch from hook, then work sl st, 4 hdc, sl st, 4 hdc, repeating this pattern up to the forehead. Fasten off and weave in the end.
Embroider the mouth and cheeks.
Frog — Body
Rnd 1: 6 sc in MR. (6)
Rnd 2: inc in each st around. (12)
Rnd 3: sc, inc repeat around. (18)
Rnd 4: 2 sc, inc repeat around. (24)
Rnd 5: 3 sc, inc repeat around. (30)
Rnds 6–12: sc in each st around. (30)
Eyes: ch 4, 2 dc in 3rd ch from hook.
Sew or glue small black pupils onto the plush eye pieces, then attach the eyes to the body. Embroider the mouth and cheeks. Work the legs the same way as the previous animals.
Assembly
Insert the finished Bunny body inside the finished Tiger body, wrong sides facing each other, and line up both tails at the center back. Work the paw-joining round through the Back Loop Only of the Tiger and the Front Loop Only of the Bunny simultaneously, following the puff stitch placement given above. Weave in the live yarn tail from the Bunny piece securely once the joining round is complete. Thread the ear tails through to the inside of each head and knot to secure, then embroider the facial details on each side with black cotton-blend yarn. For the bonus animals, attach ears, wings, antennae, tongues, or eyes using their yarn tails, then embroider mouths and cheeks as noted. Weave in every remaining loose end throughout the piece.
Tips & Tricks
- Keep your tension looser than you might for a standard amigurumi — this pattern specifically calls for looser stitches so the finished piece can turn inside out smoothly. If your gauge is too tight, the Bunny won’t slide easily through the Tiger’s opening, and the reversible trick won’t work as cleanly.
- When you reach the paw-joining round, take your time separating the front and back loops before you insert your hook. Switching to a hook one size smaller for this round, as the pattern suggests, gives you much more control when working through two layers of stitching at once.
- Watch your stuffing density carefully in reverse: because these bodies stay unstuffed until they’re joined and worn as a flip toy, you’re relying on the yarn’s own loft rather than fiberfill for shape. Choose a plush or chenille-style yarn with good body, since a thin, limp yarn will make the finished toy look flat rather than round.
- Placing the safety eyes and nose can be fiddly on a yarn this textured. Push the posts through firmly and check the placement from both the front and the side before locking the backs in place, since misaligned eyes are much harder to fix after assembly.
- When embroidering the stripes and eyebrows, use short, straight stitches rather than long ones. Short stitches sit neatly on top of the plush yarn’s texture, while long stitches tend to sink between the loops and lose definition.
Frequently Asked Questions
Can I use a different yarn weight for this pattern?
Yes, but the finished size and reversible function will change. Stick with a plush or chenille-style yarn for the best results, and adjust your hook size accordingly to maintain a loose enough tension for the flip feature.
How do I keep the reversible feature working after washing?
Hand wash gently in cool water and lay flat to dry. Avoid wringing or twisting, as this can distort the stitches and make the toy harder to flip.
Can I make just one side of the reversible toy?
Absolutely. The Tiger and Bunny bodies are worked separately, so you can stop after completing one. The pattern also works as a standalone amigurumi if you prefer a single animal.
What if my safety eyes are too small or too large?
The pattern calls for 8–10mm eyes. If you use a different size, adjust the spacing between them on the head to keep the face balanced. Test placement before locking the backs in place.
How do I attach the ears securely for the reversible toy?
Weave the ear tails through the top of the head and knot them tightly on the inside. For extra security, you can also sew a few small stitches through the base of the ear and into the head.
Can I make the bonus animals reversible too?
The bonus animals (pug, bee, dinosaur, frog) are designed as standalone toys, not reversible pairs. However, you can use the same base body shape to create your own reversible combinations by following the joining technique from the tiger and bunny section.
Pin This Crochet Pattern!