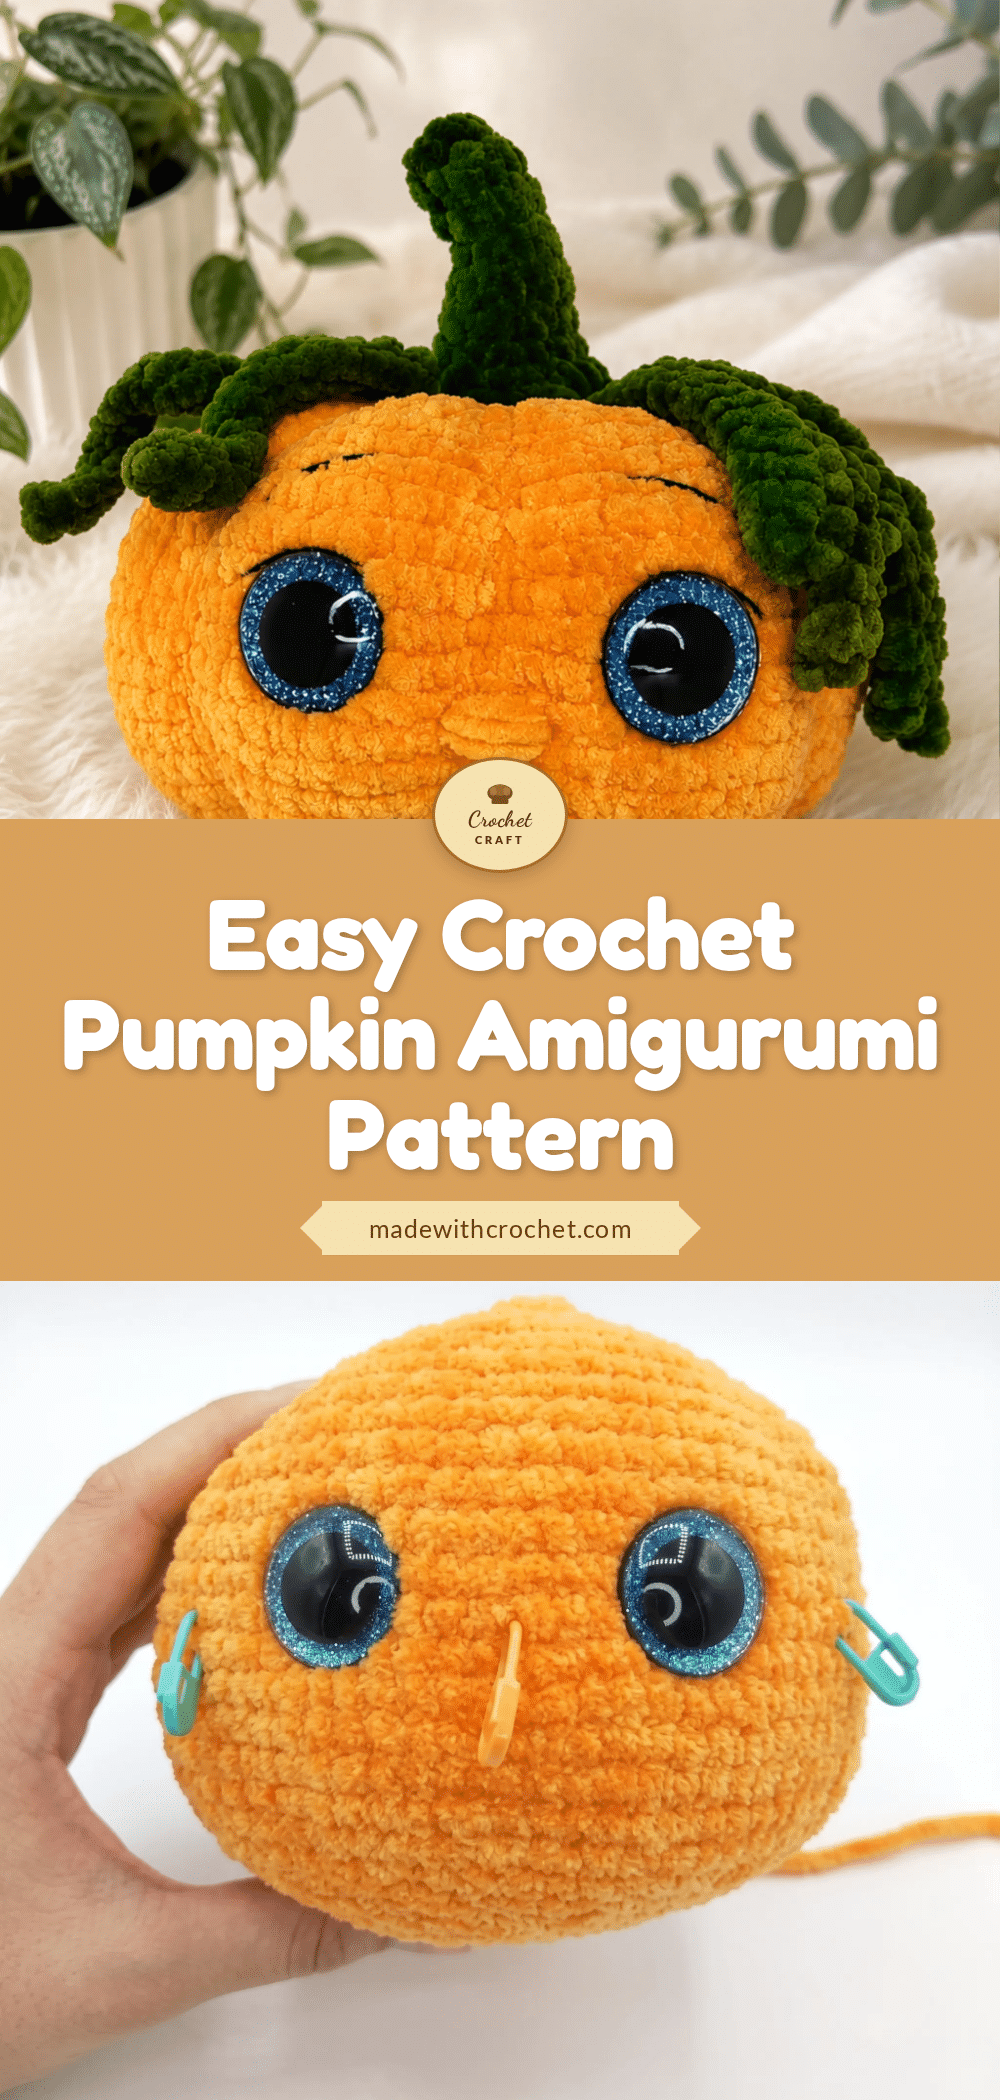
As the leaves begin to turn and a crisp chill fills the air, there’s no better way to celebrate the season than with a handmade friend. This easy crochet pumpkin amigurumi pattern is the perfect project for cozy autumn afternoons. Whether you’re crafting for a fall market, adding a touch of whimsy to your nursery decor, or looking for a unique handmade gift, this plump little pumpkin with its oversized, expressive eyes and charming smile is sure to delight. It’s a wonderful project for confident beginners and intermediate crocheters alike.
Seasonal Styling Ideas
This pumpkin’s charm lies in its versatility. For a classic fall look, use a rich rust or burnt orange chenille yarn. To make it a year-round decor piece, consider a soft pastel pink or mint green for a spring or nursery theme. The large 30mm safety eyes give it a modern, kawaii-inspired look that stands out on a shelf or as a centerpiece. The clever cinching technique creates authentic ridges, making it a satisfying project that looks impressive without being overly complex. You can even create a whole patch in different colors for a truly personalized touch.
Project Overview
This pattern guides you through creating a soft, ridged pumpkin amigurumi with a stem, curly tendrils, and a leaf. The body is worked in continuous spiral rounds, and a special back-loop cinching technique gives it its signature shape. The finished pumpkin is approximately 3.5 inches (9 cm) tall and 5 inches (13 cm) in diameter.
Materials
- Yarn: Chenille/velvet-style yarn in Worsted weight — main color (rust/orange), slightly more than half a skein; contrast color (green), about 1/5 skein
- Hook: US size E-4 (3.5 mm)
- Safety eyes: 30mm, 1 pair
- Fiberfill stuffing
- Stitch markers
- Yarn needle
- Scissors
- Black embroidery thread (for eyebrows and mouth details)
Abbreviations
- BLO — Back Loop Only
- ch — Chain
- dec — Decrease (invisible decrease)
- inc — Increase (2 sc in same stitch)
- MR — Magic Ring
- picot — ch 3, sl st into same stitch as last sc
- Rnd(s) — Round(s)
- Row(s) — Row(s)
- sc — Single Crochet
- sl st — Slip Stitch
Pattern Notes
- This pattern is written in US crochet terminology.
- The pumpkin body and stem are worked in continuous spiral rounds — do not join or turn; use a stitch marker to track the beginning of each round.
- The leaf is worked in flat turned rows.
- Gauge is not critical for this project, but working with the specified yarn and hook produces a finished pumpkin approximately 3.5 inches (9 cm) tall (excluding the stem) and 5 inches (13 cm) in diameter.
- Stitch counts are given at the end of each round or row in parentheses.
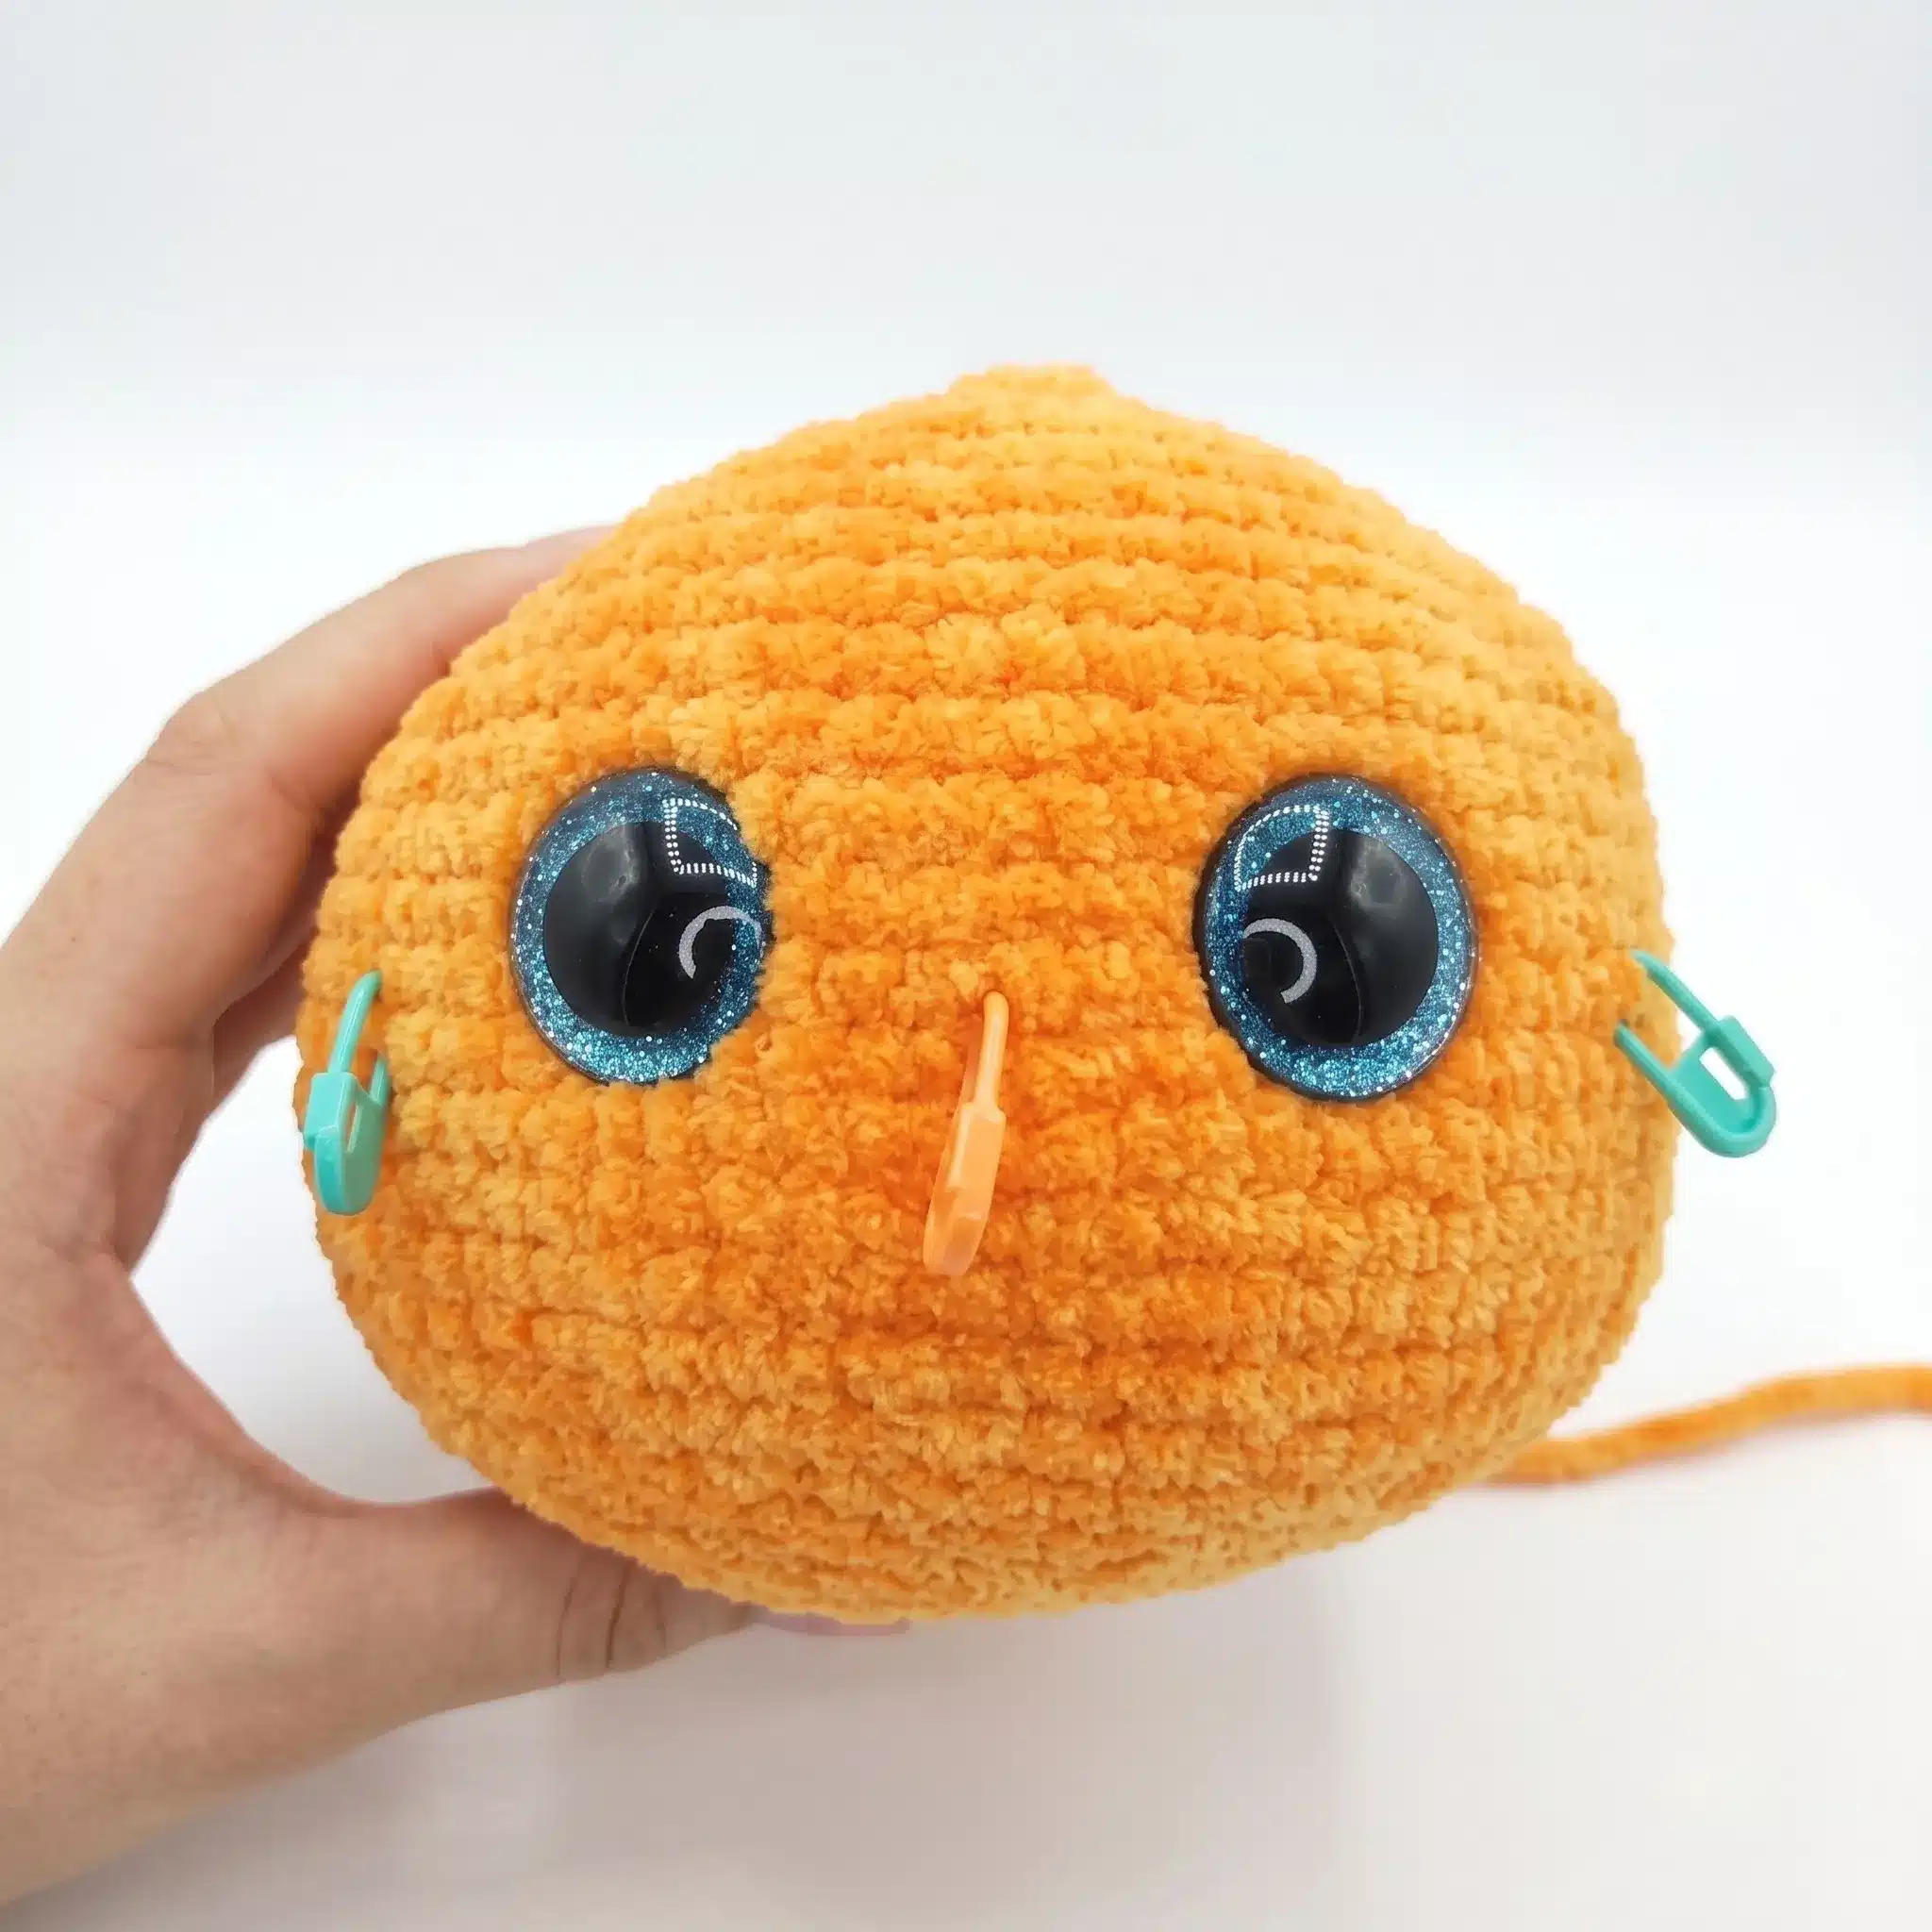
- Safety eyes are inserted between Rounds 13 and 14 of the pumpkin body, spaced about 7–8 stitches apart — the cinching line will run between the eyes, so leave that gap clear.
- Round 16 includes a special back-loop marking step that sets up the cinching technique used to shape the pumpkin’s ridges — don’t skip this step.
- Stuff the pumpkin firmly but evenly before completing the final decrease rounds so the shape holds.
Pattern Instructions
Pumpkin Body
Rnd 1: 6 sc in MR. (7)
Note: work 7 sc into the magic ring for this pattern.
Rnd 2: inc in each st around. (14)
Rnd 3: sc, inc repeat around 7 times. (21)
Rnd 4: 2 sc, inc repeat around 7 times. (28)
Rnd 5: 3 sc, inc repeat around 7 times. (35)
Rnd 6: 2 sc, inc, 4 sc, inc repeat 6 times, 2 sc. (42)
Rnd 7: 5 sc, inc repeat around 7 times. (49)
Rnd 8: 3 sc, inc, 6 sc, inc repeat 6 times, 3 sc. (56)
Rnd 9: 7 sc, inc repeat around 7 times. (63)
Rnd 10: 4 sc, inc, 8 sc, inc repeat 6 times, 4 sc. (70)
Rnd 11: 9 sc, inc repeat around 7 times. (77)
Rnds 12–20: sc in each st around. (77)
Note: In Round 16, work every 11th stitch in Back Loop Only (BLO) and place a stitch marker in each of those stitches — at stitches 11, 22, 33, 44, 55, 66, and 77. This keeps your cinching yarn from shifting later.
Insert safety eyes now, positioned between Rounds 13 and 14, spaced about 7–8 stitches apart.
Rnd 21: 9 sc, dec repeat around 7 times. (70)
Rnd 22: 4 sc, dec, 8 sc, dec repeat 6 times, 4 sc. (63)
Rnd 23: 7 sc, dec repeat around 7 times. (56)
Begin stuffing the pumpkin firmly at this point, adding more as you continue decreasing.
Rnd 24: 3 sc, dec, 6 sc, dec repeat 6 times, 3 sc. (49)
Rnd 25: 5 sc, dec repeat around 7 times. (42)
Rnd 26: 2 sc, dec, 4 sc, dec repeat 6 times, 2 sc. (35)
Rnd 27: 3 sc, dec repeat around 7 times. (28)
Rnd 28: 2 sc, dec repeat around 7 times. (21)
Rnd 29: 1 sc, dec repeat around 7 times. (14)
Rnd 30: dec around 7 times. (7)
Leave a long yarn tail for cinching, then cut yarn.
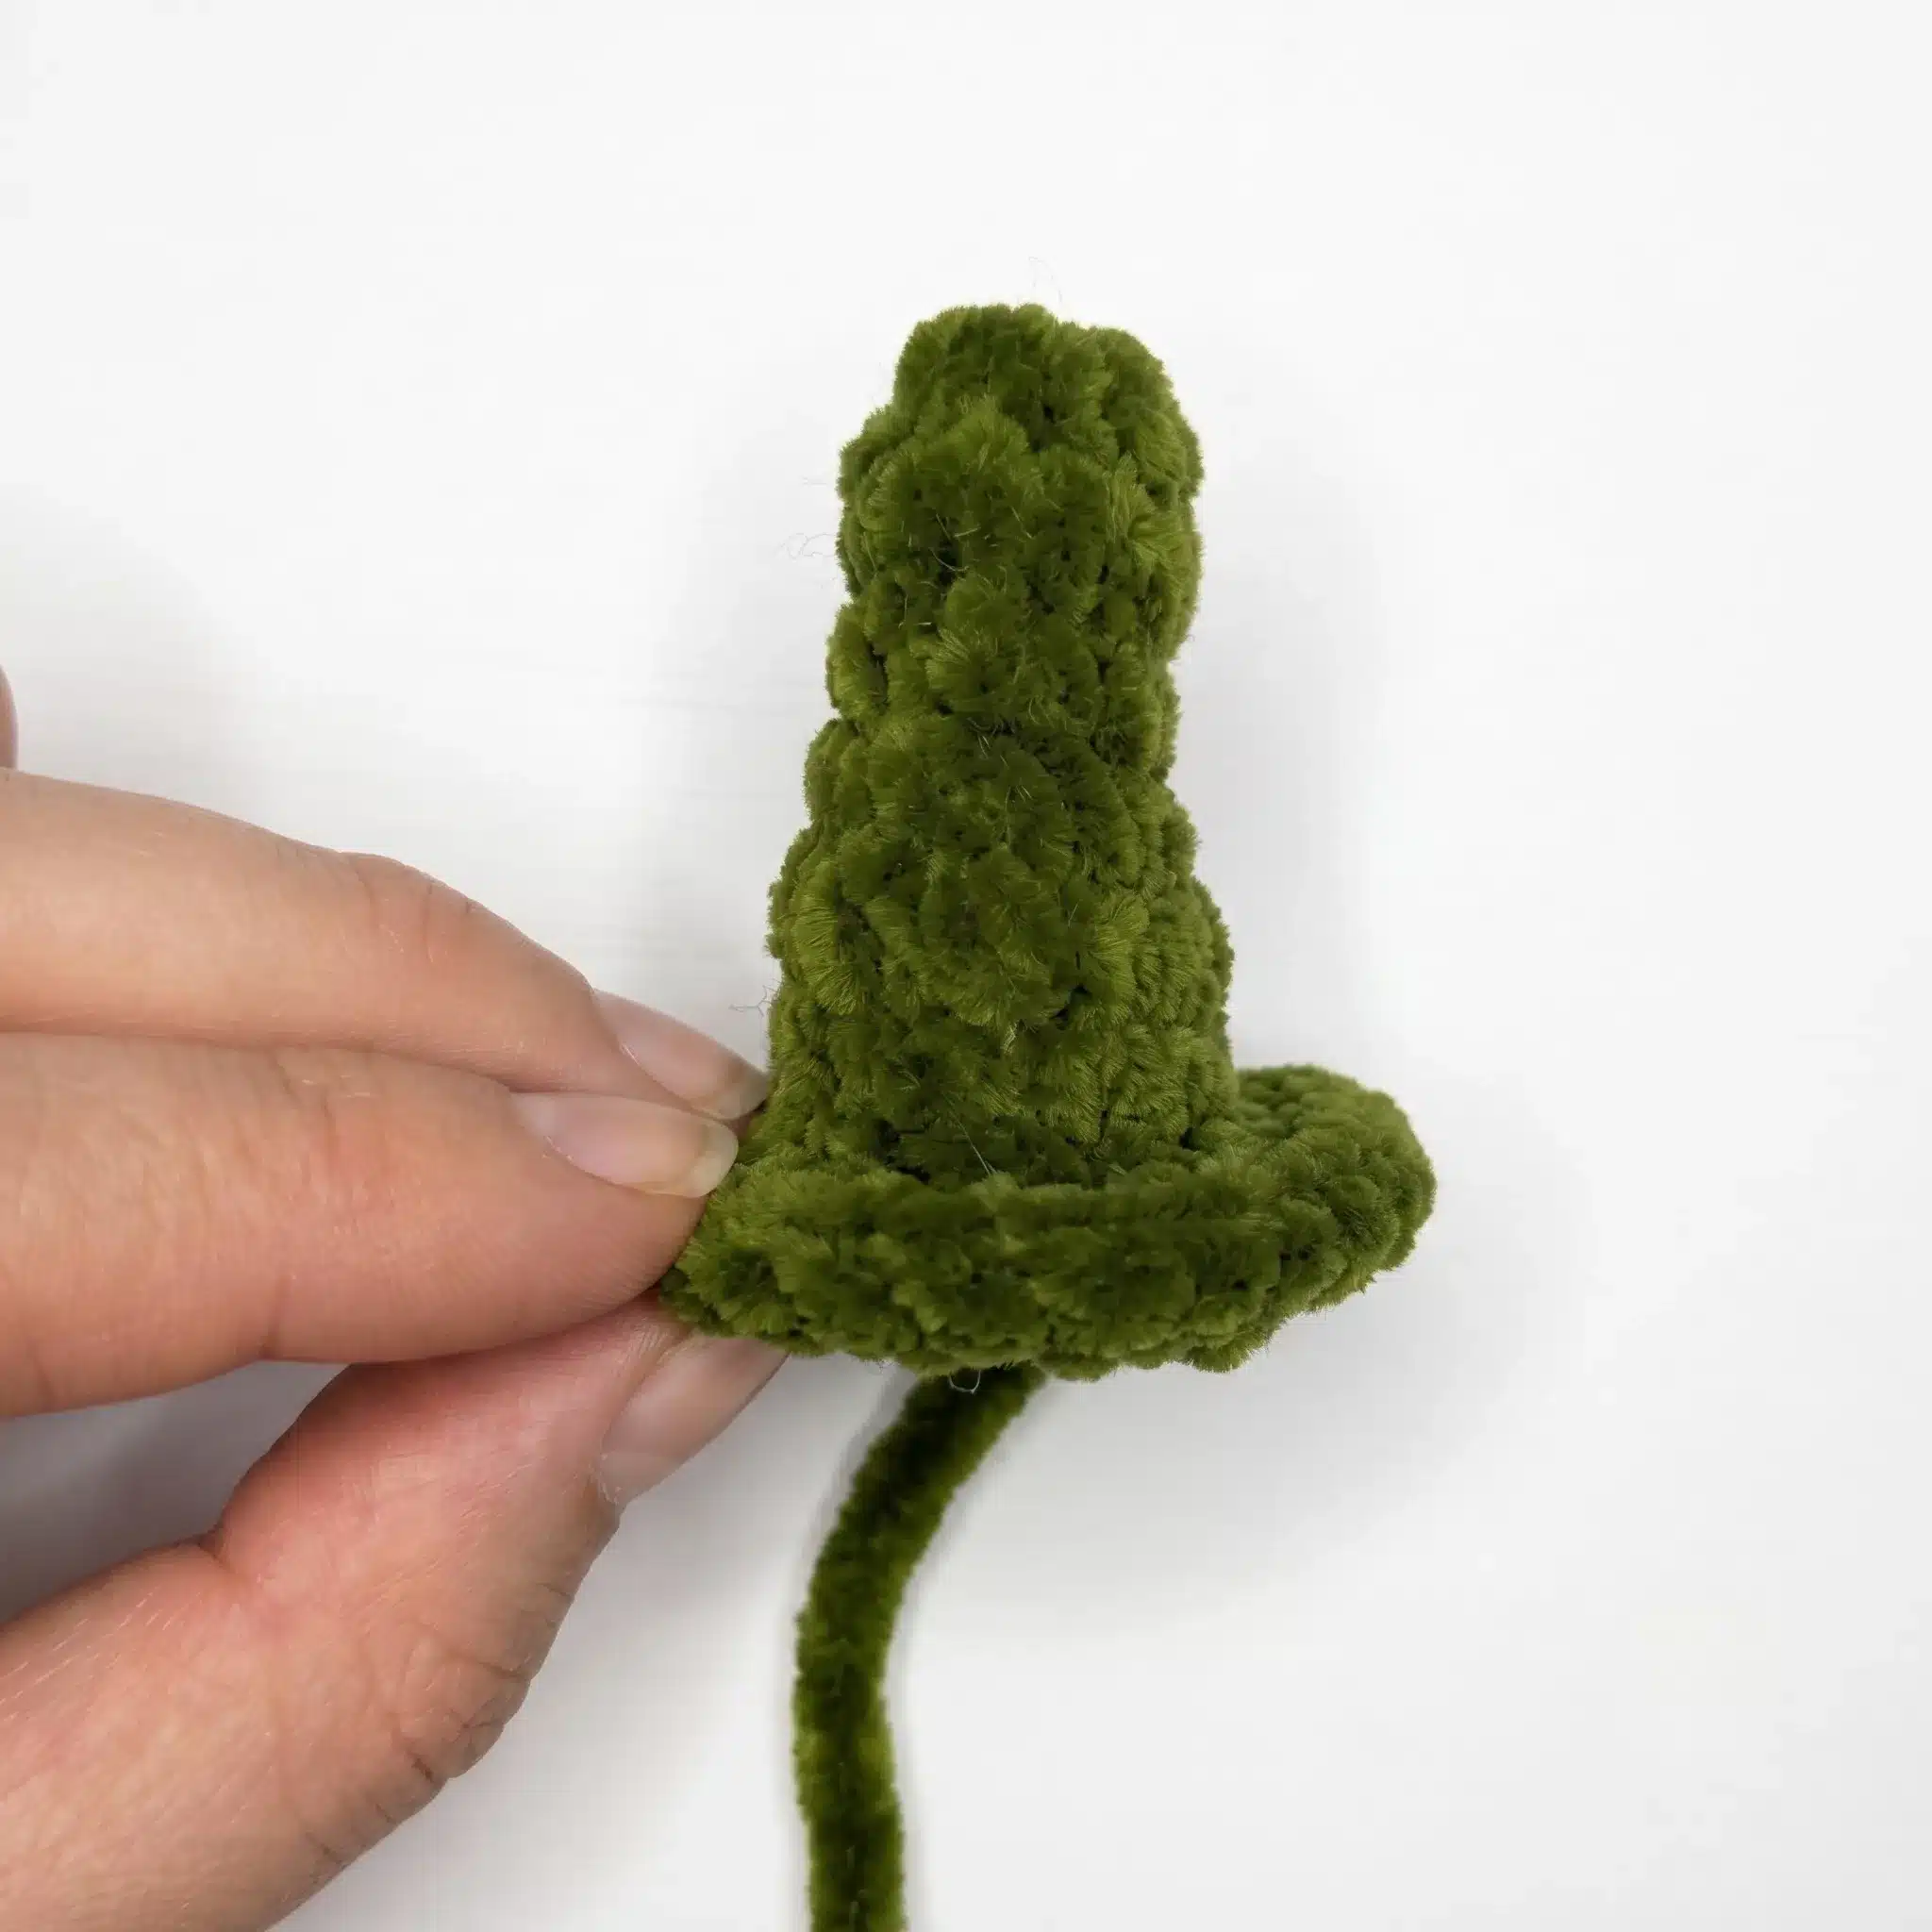
Stem (make 1, green)
Rnd 1: 6 sc in MR. (6)
Rnds 2–4: sc in each st around. (6)
Rnd 5: sc, inc repeat around 3 times. (9)
Rnd 6: sc in each st around. (9)
Rnd 7: sc, inc repeat 4 times, 1 sc. (13)
Rnd 8: inc, 2 sc, inc repeat 4 times. (18)
Sl st to close, cut yarn and weave in end to fasten off.
Curly Tendrils (make 2, green)
Tendril 1: Ch 15, sl st in 2nd ch from hook and in each ch across. (14 sl sts)
Cut yarn and fasten off.
Tendril 2: Ch 21, sl st in 2nd ch from hook and in each ch across. (20 sl sts)
Cut yarn and fasten off.
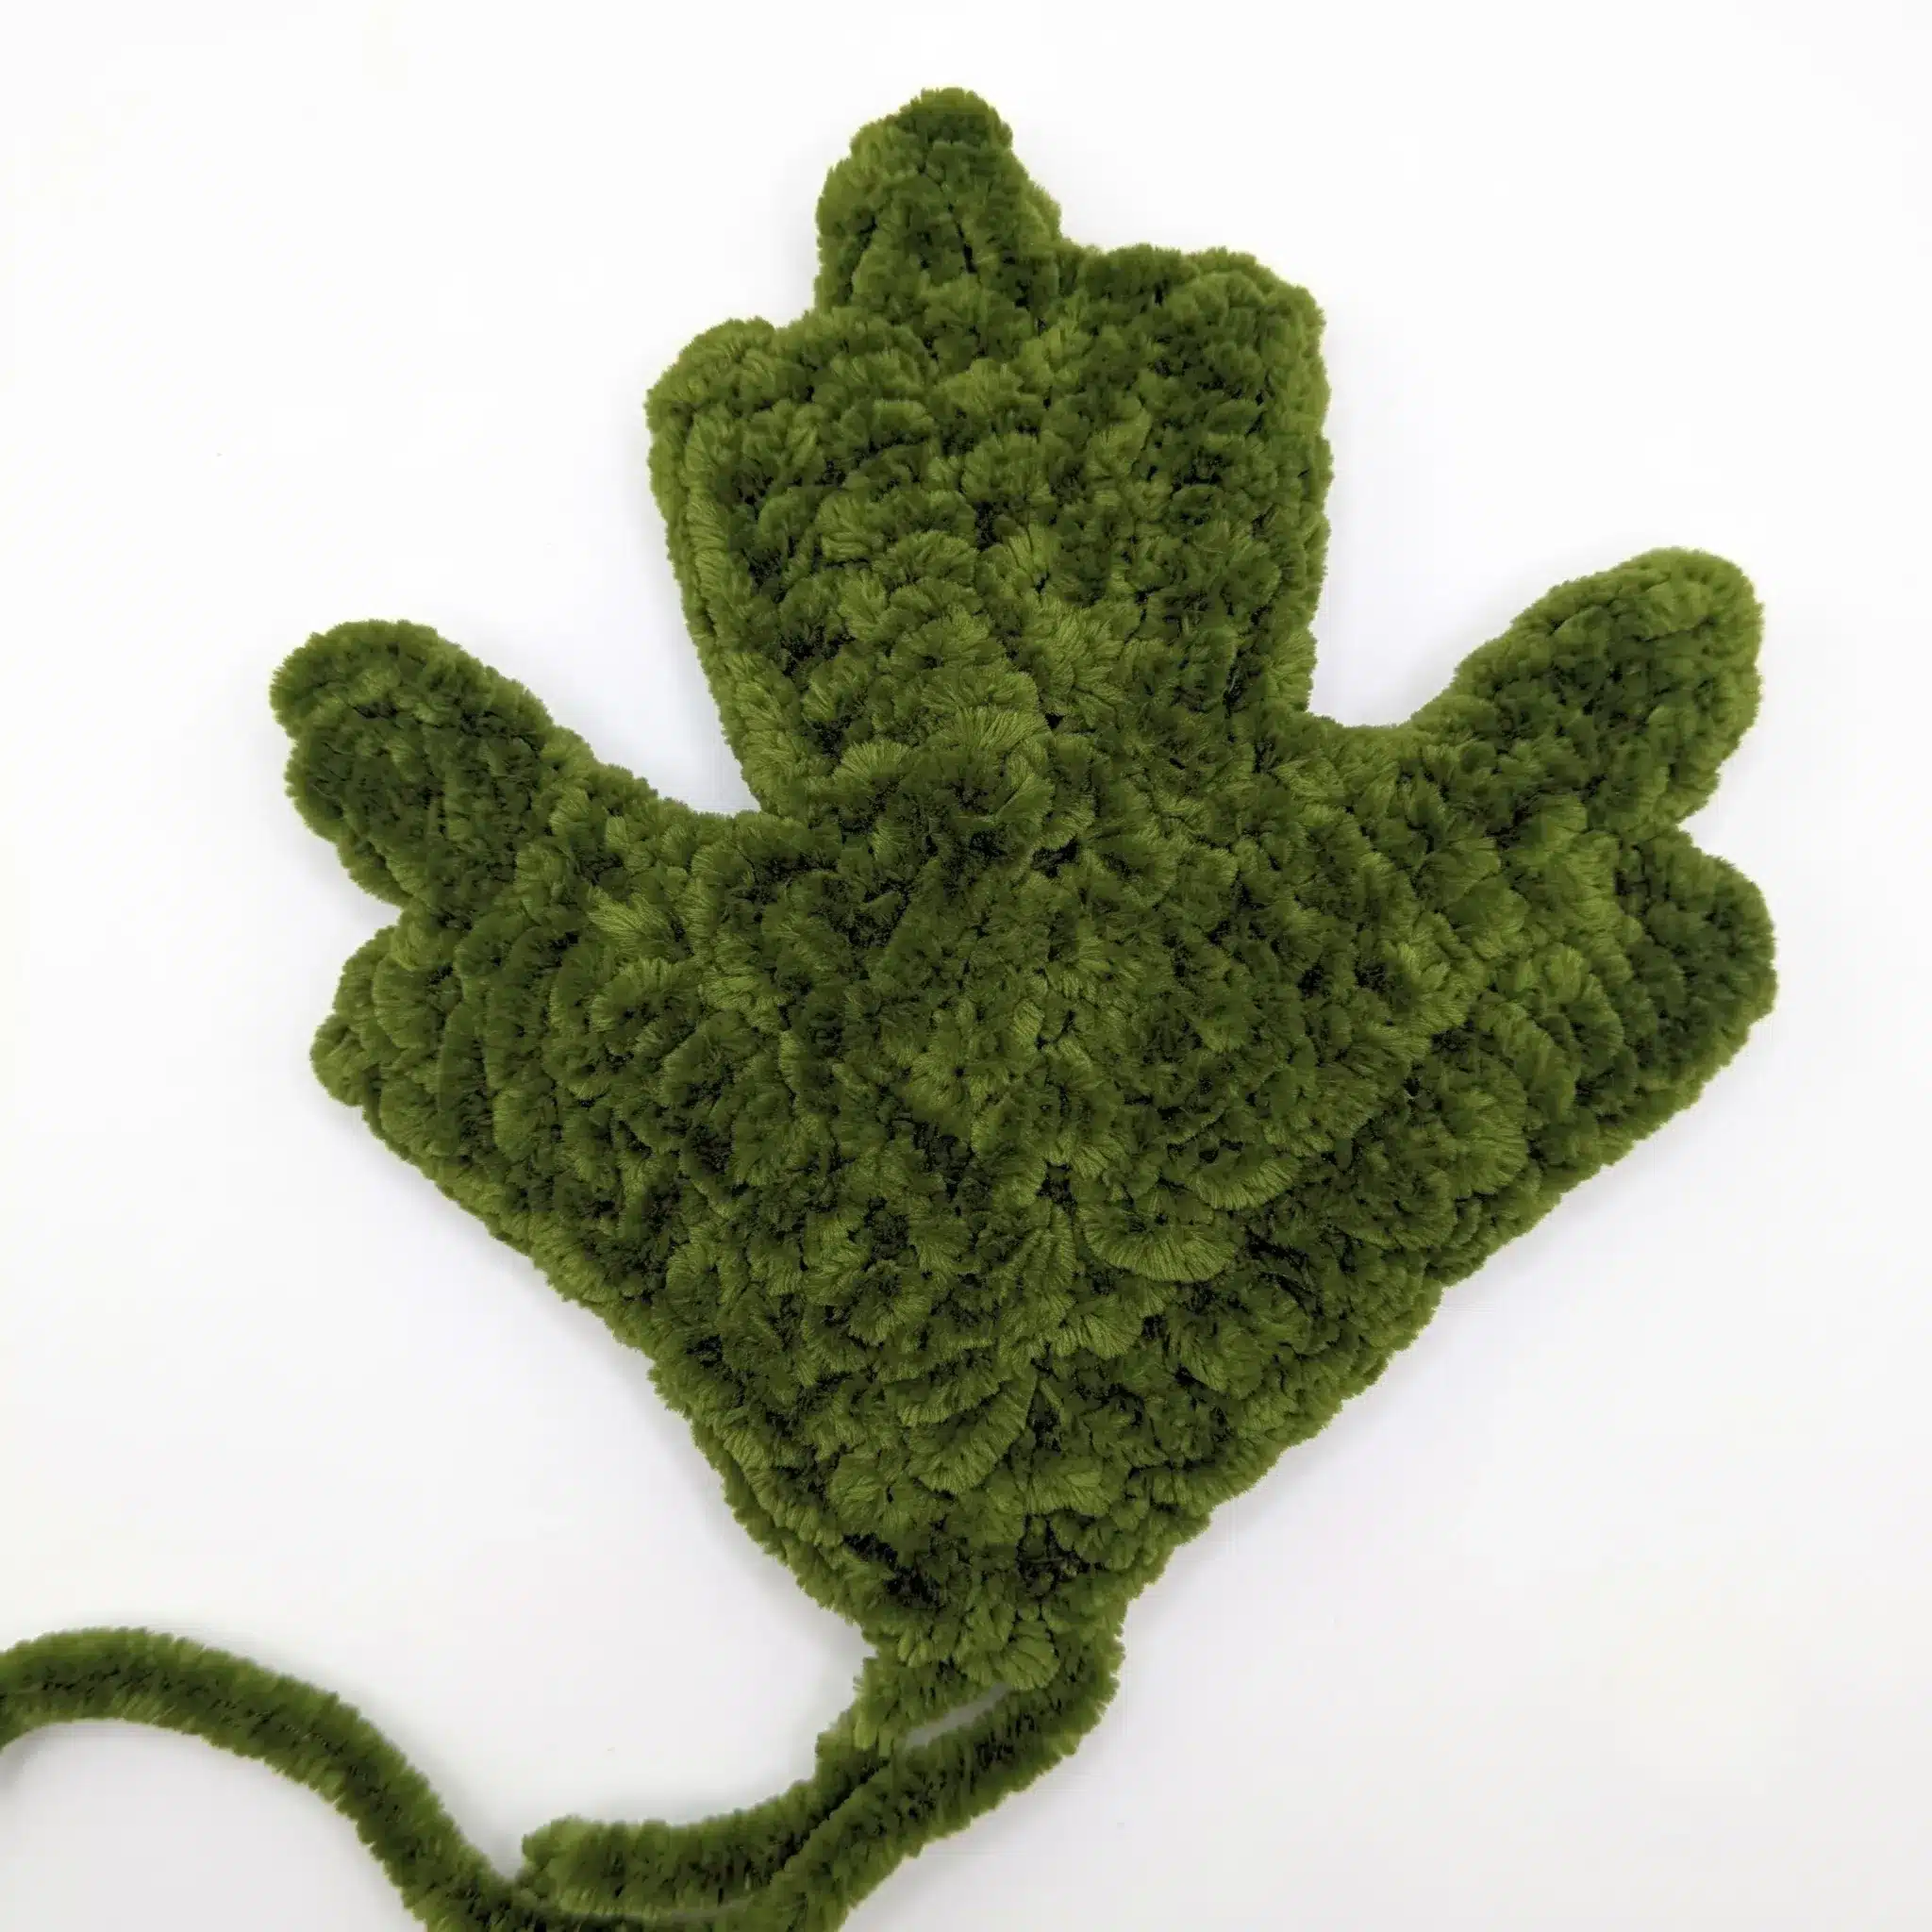
Leaf (make 1, green)
Row 1: Ch 7, sc in 2nd ch from hook and in each ch across, picot. (6 sc)
Row 2: 4 sc, ch 1, turn, 5 sc, sc in picot, picot.
Row 3: sc in picot, 4 sc, ch 1, turn, 6 sc, sc in picot, picot.
Row 4: sc in picot, 2 sc, ch 5, sc in 2nd ch from hook and next 6 ch, sc in picot, picot. (8 sc along chain)
Row 5: sc in picot, 2 sc, ch 5, sc in 2nd ch from hook and next 6 ch, sc in picot, picot. (8 sc along chain)
Row 6: sc in picot, 7 sc, ch 1, turn, 9 sc, sc in picot, picot.
Row 7: sc in picot, 7 sc, ch 1, turn, 9 sc, sl st in picot.
Cut yarn and fasten off.
Assembly
With the long tail left at the end of Round 30, thread your yarn needle and pull tightly through the marked Back Loop Only stitches from Round 16 (stitches 11, 22, 33, 44, 55, 66, and 77). This cinching step draws the body inward, creating the signature pumpkin ridges. Pull the tail through to secure and knot off, then weave the end into the body.
Position the two curly Tendrils near the center top of the pumpkin, alongside where the Stem will sit, and whipstitch them in place using their yarn tails.
Position the Leaf beside the Stem at the top of the pumpkin and whipstitch it in place, tucking the base of the leaf under the stem for a natural, layered look.
Whipstitch the Stem securely to the top center of the pumpkin, covering the cinched center point.
Using black embroidery thread, stitch the eyebrows and mouth details onto the pumpkin’s face beneath the safety eyes. Weave in all remaining yarn ends throughout the piece.
Tips
- Getting the cinching step right is what makes this pumpkin look truly authentic, so take your time with it. Pull the tail through each marked Back Loop Only stitch evenly, checking as you go that the tension is consistent all the way around — an uneven pull will make some ridges deeper than others.
- When working your decreases in Rounds 21 through 30, use an invisible decrease technique rather than a standard one. It keeps the surface smooth and prevents small gaps from appearing as the piece narrows toward the base.
- Stuff the body firmly before you finish the final few decrease rounds, since it becomes much harder to add stuffing once the opening gets small. Push stuffing into the sides first so the pumpkin holds its rounded shape rather than caving in at the middle.
- If you’re substituting yarn, stick with a chenille or velvet-style yarn in a similar worsted weight — this texture is what gives the pumpkin its soft, plush ridges. A smooth cotton or acrylic will still work but will show less definition in the cinched grooves.
- When attaching the tendrils and leaf, arrange them loosely before sewing so you can adjust the angles until they look balanced and natural, rather than symmetrical — a little asymmetry actually makes the finished piece feel more charming.
Frequently Asked Questions
What size hook and yarn do I need for this amigurumi pumpkin?
This pattern uses a US size E-4 (3.5 mm) hook with a chenille-style worsted weight yarn. Using this combination produces a finished pumpkin approximately 3.5 inches tall and 5 inches in diameter. You can size the project up or down by switching to a larger or smaller hook and yarn weight.
Why does Round 1 say to work 7 sc into the magic ring?
This is a specific design choice for this pattern to achieve the correct stitch count for the increases that follow. It’s a slight variation from the standard 6 sc, so be sure to follow the note carefully.
Can I use different sized safety eyes?
Yes, you can. The pattern calls for 30mm eyes, which give the pumpkin its characteristic oversized, cute look. If you use smaller eyes, the face will have a different proportion, but the pattern will still work.
What is the best way to stuff the pumpkin?
Stuff the pumpkin firmly but evenly. It’s best to start stuffing after Round 23 and continue adding small amounts as you work the decrease rounds. Push the stuffing into the sides first to maintain a rounded shape and prevent the middle from caving in.
How do I make the invisible decrease?
To make an invisible decrease, insert your hook into the front loop only of the next two stitches, yarn over, and pull through both loops, then yarn over and pull through the two loops on your hook. This creates a nearly invisible stitch that is perfect for amigurumi.
Pin This Crochet Pattern!