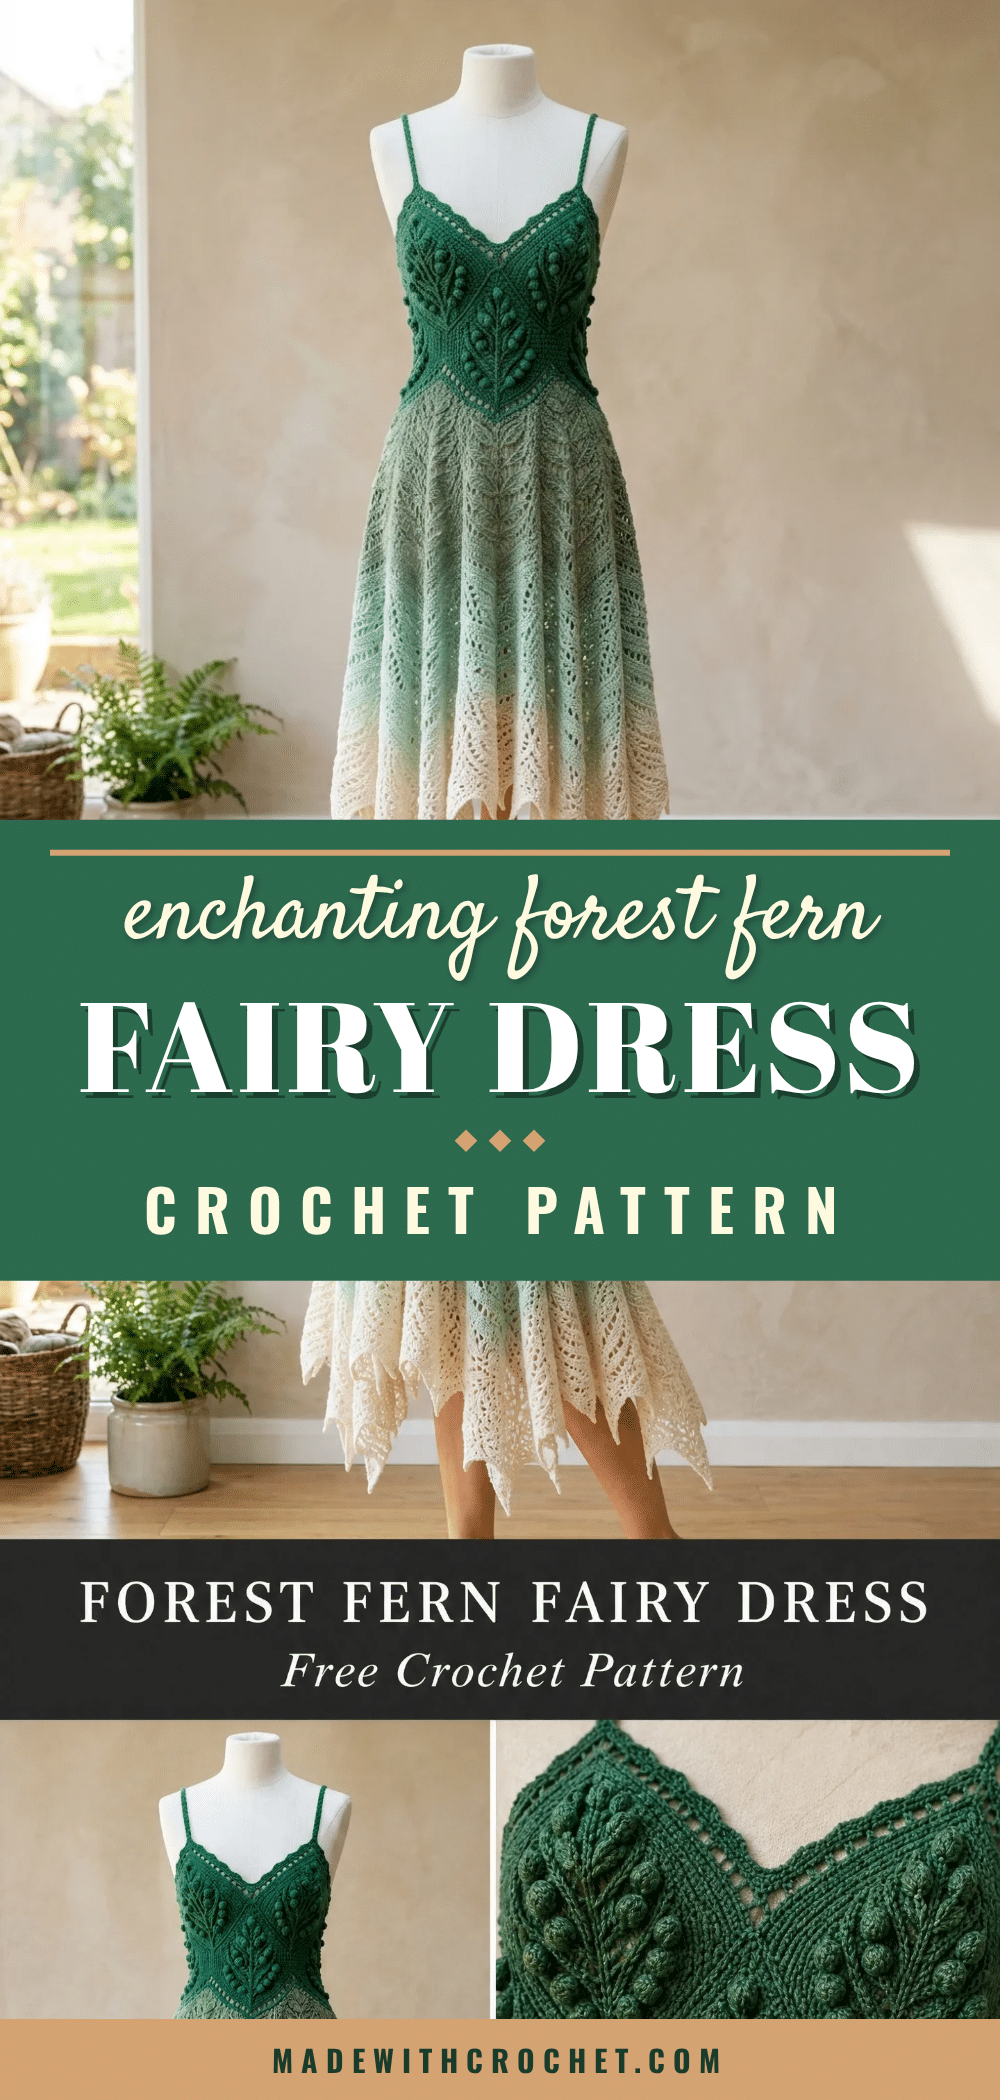
If you have ever looked at an intricate crochet dress and thought, “That is beautiful, but I will never be able to make that,” you are not alone. Many crocheters feel intimidated by textured bodices and flowing lace skirts. The Forest Fern Fairy Dress is designed to change that mindset. While it is an advanced project, every complex-looking element is built from simple, repeatable techniques. You will work one bobble at a time, one post stitch at a time, and one lace repeat at a time. Before you know it, you will be holding a stunning, wearable piece of art that you created with your own hands.
Maker Notes
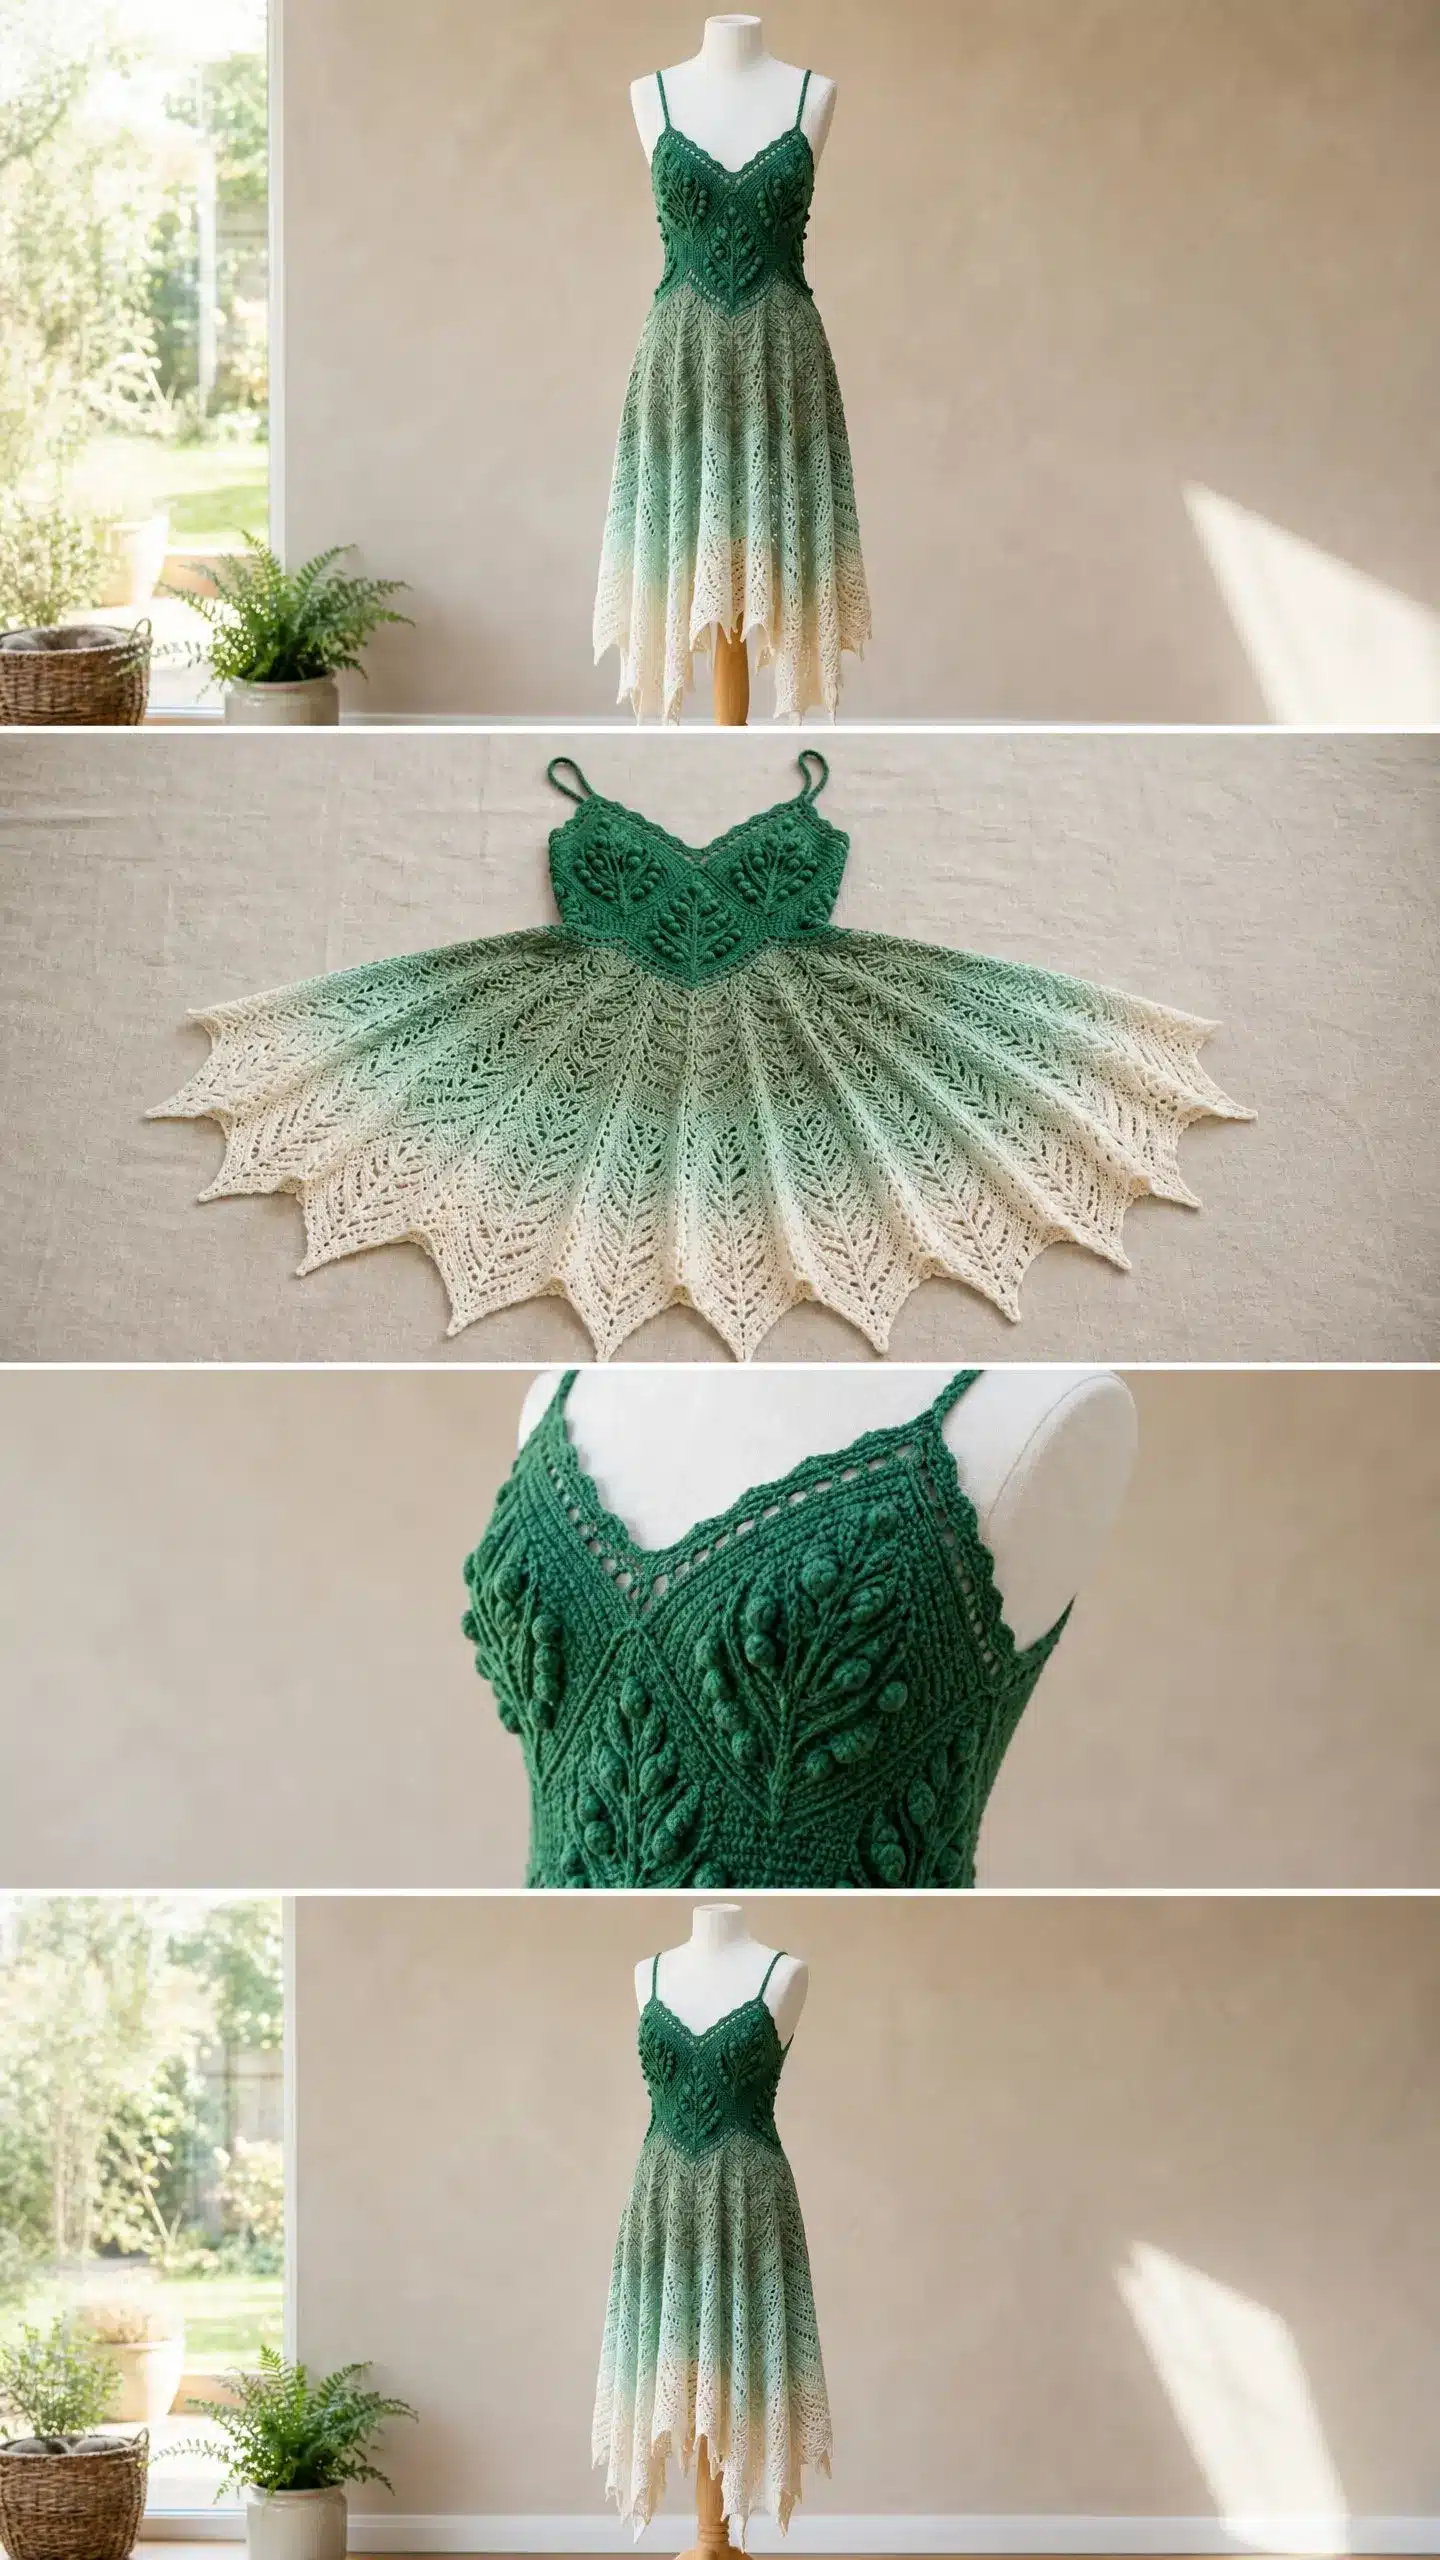
This pattern is a labor of love, designed to feel like it belongs in an enchanted forest. The deep forest green bodice features dimensional leaf motifs that pop against a background of half double crochet. The skirt transitions through sage to cream, ending in delicate pointed lace tips. The construction moves from the top down, with the bodice worked flat in rows and the skirt worked in continuous joined rounds. The result is a garment that feels both structured and ethereal. Take your time with this project, enjoy the process, and do not be afraid to rip back a few rows to get the tension just right.
Project Overview
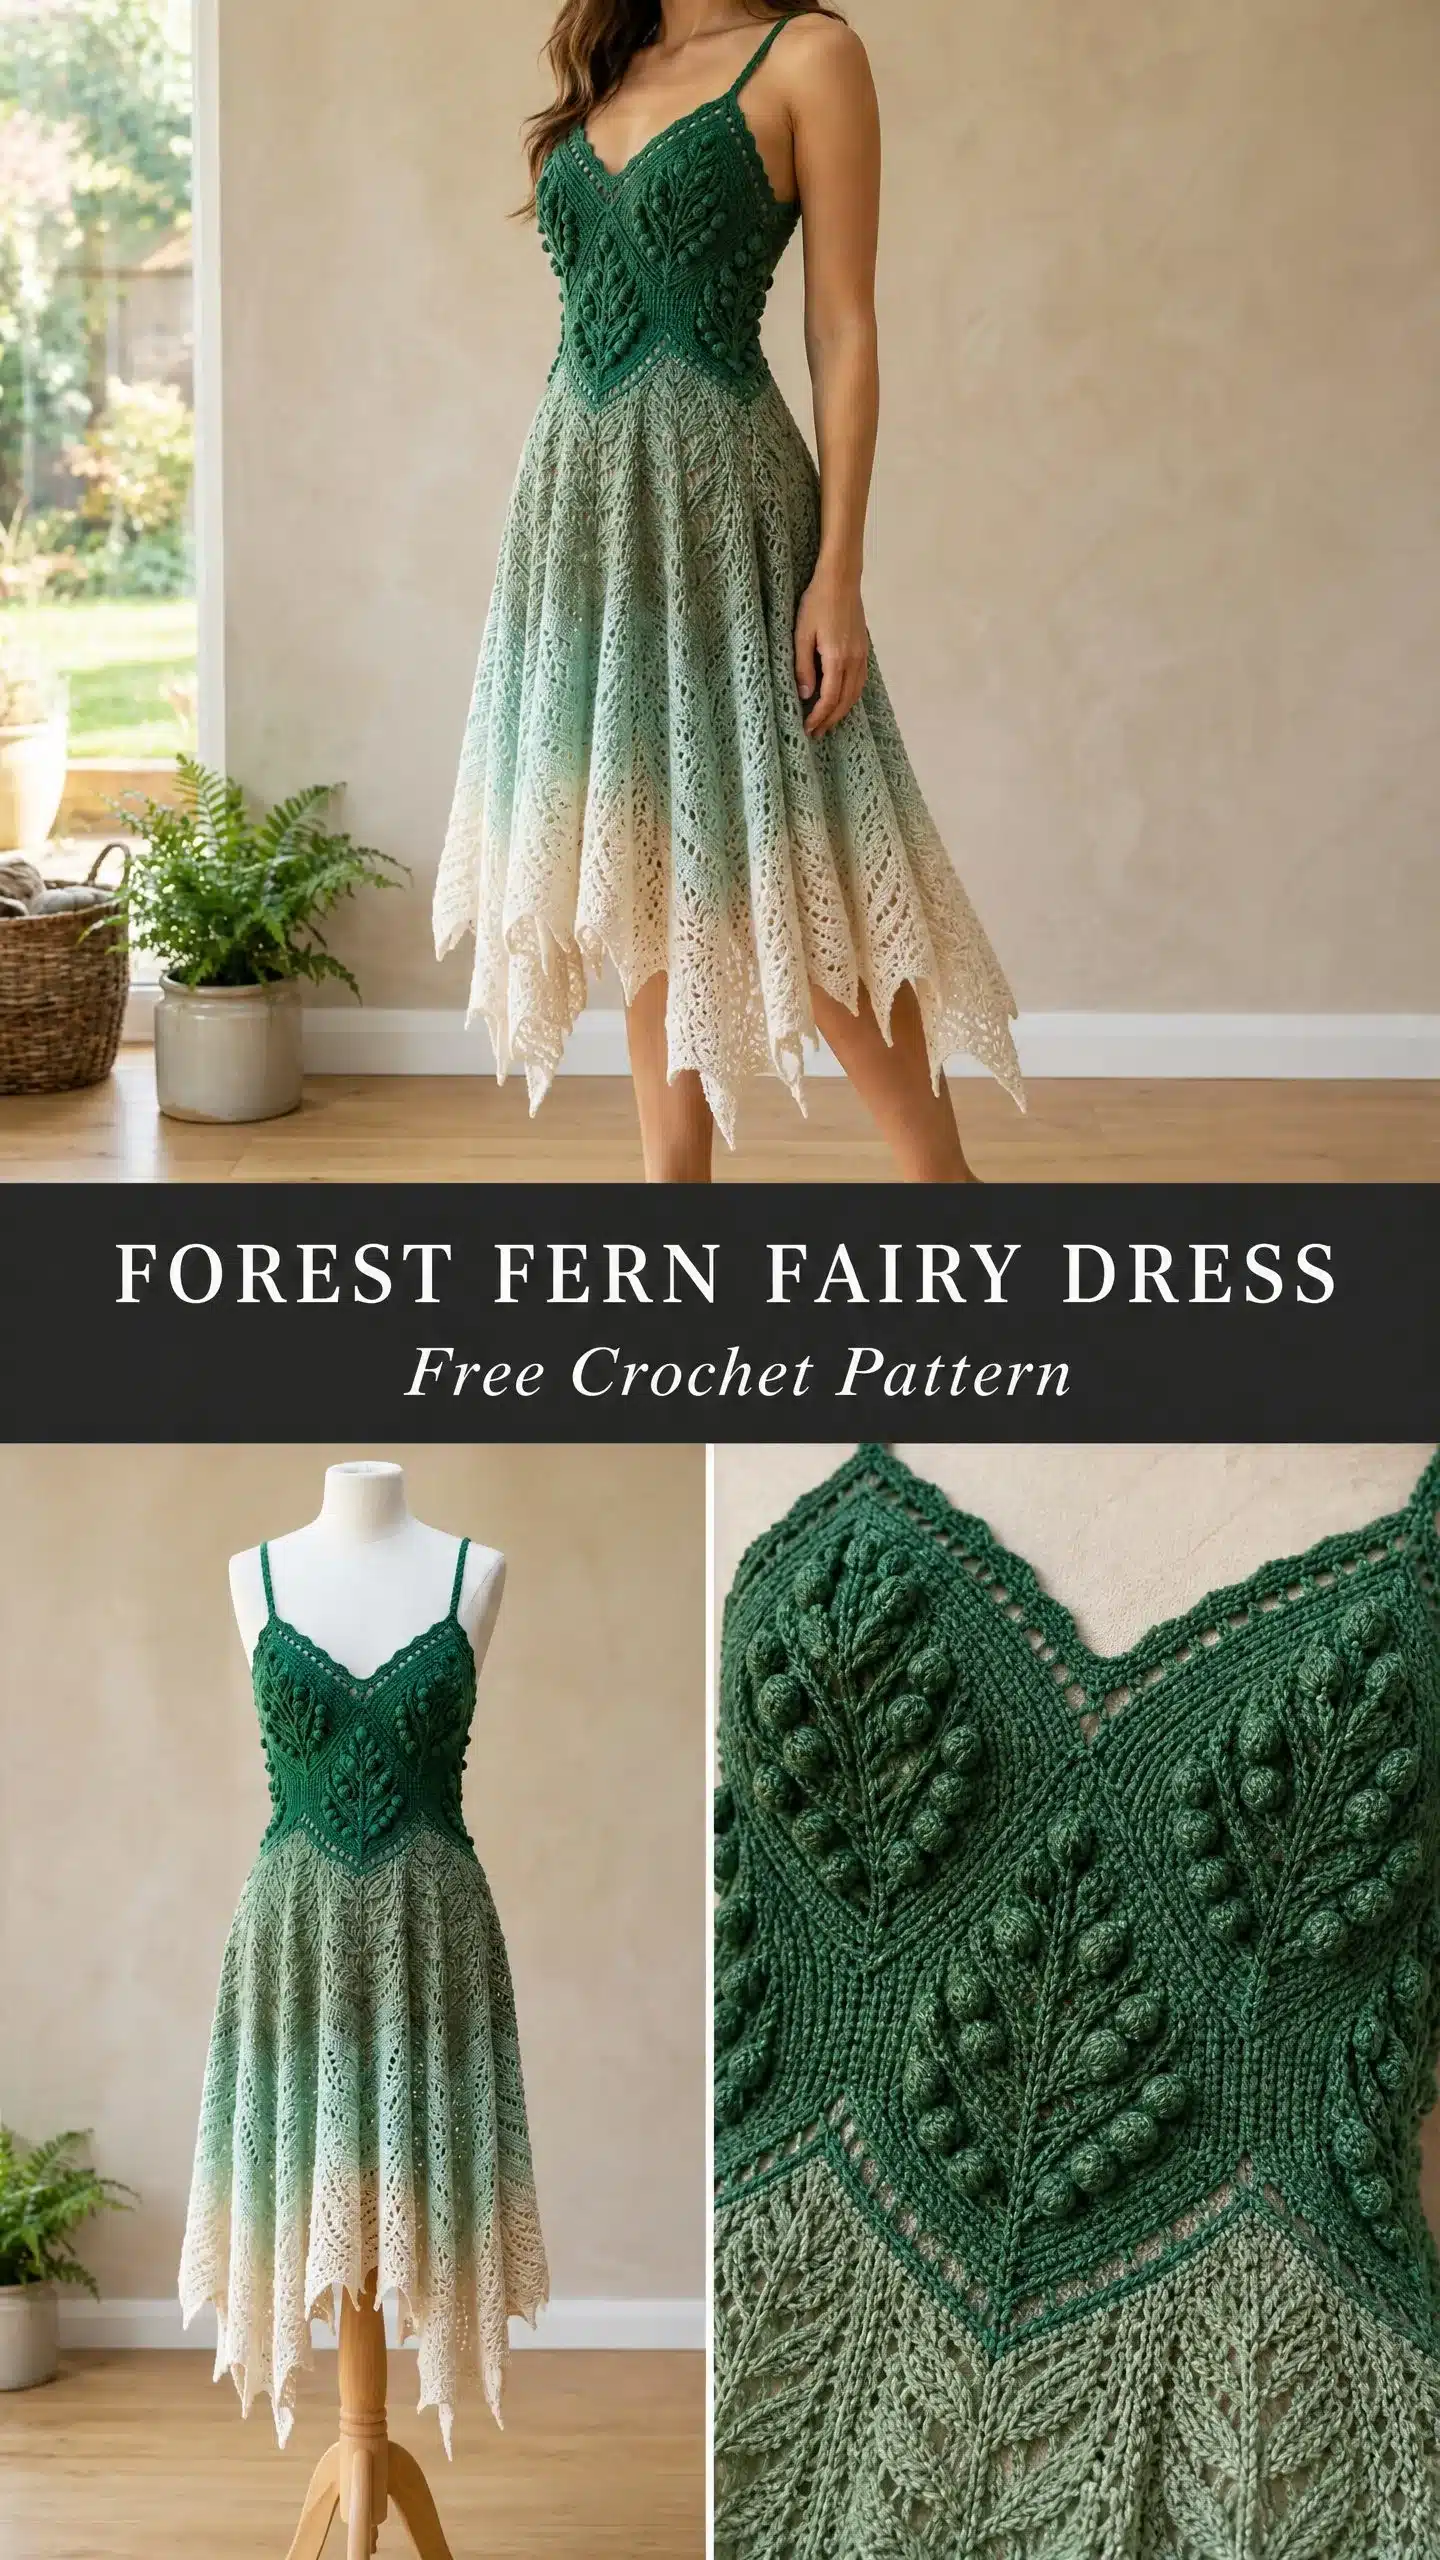
The Forest Fern Fairy Dress is a complete, wearable garment that pairs a heavily textured crochet bodice in deep forest green with a gradient lace skirt. The skirt transitions beautifully from emerald through sage to natural cream, ending in delicate pointed lace tips that create the signature handkerchief silhouette. Construction moves from the top of the bodice downward. You will work the bodice flat in rows with shaping for the V-neckline and bust, then seam at the sides. The skirt is worked in continuous joined rounds from the waist down, increasing steadily to create gorgeous fullness.
Skill Level
Advanced. This pattern requires comfort with several techniques: working front post and back post stitches, creating bobbles, reading lace repeats with yarn overs and decreases in combination, managing color gradients over many rounds, and custom pointed hem shaping. If you are a beginner or intermediate crocheter, I recommend building experience with fitted tops, basic lace, and post stitches before tackling this project. But do not let that discourage you forever. Save this pattern, practice those skills, and come back when you are ready. The dress will be worth the wait.
Finished Measurements
This pattern is written for a size Medium with the following finished measurements:
- Bust: 36 inches / 91.5 cm
- Waist: 28 inches / 71 cm
- Hip at fullest skirt point: 54 inches / 137 cm
- Bodice length (shoulder strap base to waist): 14 inches / 35.5 cm
- Skirt length (waist to longest hem point): 22 inches / 56 cm
- Total dress length (strap base to longest hem point): 36 inches / 91.5 cm
Size customization tips are provided at the end of the pattern.
Materials
Yarn
You will need DK weight yarn (CYCA 3) in three colors:
- Yarn A (deep forest green): 600 yards / 550 meters
- Yarn B (sage green): 400 yards / 366 meters
- Yarn C (cream): 500 yards / 457 meters
Alternatively, use a single gradient or ombre skein of at least 1,400 yards / 1,280 meters that transitions from deep green through sage to cream. You will still need supplemental solid deep green for the bodice.
Yarn Suggestions
- Option 1: Paintbox Yarns Simply DK (100 percent acrylic, 276 yards / 252 meters per 100 g skein). Purchase 3 skeins in Grass Green for Yarn A, 2 skeins in Slate Green for Yarn B, and 2 skeins in Champagne White for Yarn C.
- Option 2: Drops Safran (100 percent cotton, 175 yards / 160 meters per 50 g ball). Purchase 4 balls in Dark Green for Yarn A, 3 balls in Mint for Yarn B, and 3 balls in Off White for Yarn C.
- Option 3: WeCrochet Mighty Stitch DK (80 percent acrylic, 20 percent superwash wool, 290 yards / 265 meters per 100 g skein). Purchase 2 skeins in Green Envy for Yarn A, 2 skeins in Aloe for Yarn B, and 2 skeins in Bare for Yarn C.
Substitution note: Choose any DK weight yarn with good stitch definition. Avoid fuzzy or halo yarns, which will obscure the lace and texture work. Check that your substitute meets gauge before beginning.
Hooks
- US size E-4 / 3.5 mm for bodice texture work
- US size F-5 / 3.75 mm for skirt lace
Additional Supplies
- Tapestry needle for weaving ends
- Stitch markers (at least 12)
- Blocking mats and rust-proof pins
- Measuring tape
- Optional: 1/4 inch / 6 mm wide satin ribbon in sage green, 1 yard / 91 cm, for strap reinforcement
Gauge and Finished Size
Getting gauge right is essential for fit. Please do not skip this step.
- Bodice gauge (US E-4 / 3.5 mm hook, Yarn A): 18 stitches and 20 rows = 4 inches / 10 cm in half double crochet
- Bobble leaf panel gauge: one 10-stitch leaf panel = 2.25 inches / 5.7 cm wide
- Skirt gauge (US F-5 / 3.75 mm hook, Yarn B): One 16-stitch lace repeat = 3 inches / 7.6 cm wide, 6 rounds of lace pattern = 2 inches / 5 cm tall
Make a gauge swatch of at least 20 stitches by 24 rows in half double crochet before beginning the bodice. Wash and block your swatch the same way you intend to treat the finished dress before measuring. Adjust hook size as needed.
Abbreviations (US Terms)
beg: beginning
BLO: back loop only
bob: bobble (see Special Stitches)
BP: back post
BPdc: back post double crochet
ch: chain
ch-sp: chain space
dc: double crochet
dc2tog: double crochet two together (decrease)
FP: front post
FPdc: front post double crochet
FPtr: front post treble crochet
hdc: half double crochet
hdc2tog: half double crochet two together
lp(s): loop(s)
MC: main color (Yarn A, forest green, used for bodice)
pm: place marker
rem: remaining
rep: repeat
RS: right side
sc: single crochet
sk: skip
sl st: slip stitch
sm: slip marker
sp: space
st(s): stitch(es)
t-ch: turning chain
tch: turning chain
tr: treble crochet
WS: wrong side
yo: yarn over
Pattern Notes
Before you begin, here are some important things to keep in mind:
- This pattern is written for a size Medium. Size customization tips are provided at the end of the pattern.
- The bodice is worked flat in rows, then seamed at the sides.
- The skirt is worked in joined rounds from the waist down.
- Color changes happen at specific points in the skirt. Follow the pattern carefully for a smooth gradient.
- Blocking is essential for the lace skirt to open up and achieve the correct dimensions.
Pattern Instructions
Bodice Instructions
The bodice features raised leaf motifs and bobble clusters that pop against a background of half double crochet. The texture comes from front post and back post stitches, which wrap around the vertical bar of stitches in the row below to create dimensional raised and recessed lines.
Right Cup (worked from strap downward, RS facing)
This is the signature texture of the bodice. Each panel represents a stylized fern or leaf with a central bobble spine and flanking raised ribs.
Row 1 (RS): BPdc in next st, FPdc in next st, FPdc in next st, bob in next st, FPdc in next st, FPdc in next st, BPdc in next st, hdc in next 3 sts.
Row 2 (WS): hdc in next 3 sts, BPdc in next st, BPdc in next st, hdc in next st, BPdc in next st, BPdc in next st, hdc in next st, BPdc in next st.
Row 3 (RS): BPdc in next st, FPdc in next 2 sts, bob in next st, FPdc in next 2 sts, BPdc in next st, hdc in next 3 sts.
Row 4 (WS): hdc in next 3 sts, BPdc in next st, BPdc in next 2 sts, hdc in next st, BPdc in next 2 sts, BPdc in next st.
Repeat Rows 1 through 4 for pattern.
Left Cup
Work the Left Cup as a mirror image of the Right Cup, following the same stitch pattern but reversing the shaping.
Joining Bodice Panels and Working the Waist Band
Place right cup and left cup side by side with RS facing. The V-neckline center point is where the two inside edges meet. Join the two cups with a flat slip stitch seam along the center V from neckline point to Row 10 (approximately 2 inches / 5 cm down from neckline point) to create the front V plunge. Do not seam further. The remaining inner edges form the front opening and are finished with an edging row below.
With RS facing and Yarn A, join yarn at bottom left edge of left cup.
Waist join row (RS): Ch 2, hdc across 27 sts of left cup, hdc across 27 sts of right cup. Turn. (54 hdc)
Waist Rows 2 through 6: Ch 2, hdc in each st across. Turn after each row. (54 hdc)
Waist Row 7 (decrease row): Ch 2, hdc2tog, hdc in each st to last 2 sts, hdc2tog. Turn. (52 hdc)
Waist Row 8: Ch 2, hdc in each st across. Turn. (52 hdc)
Waist Row 9: Ch 2, hdc2tog, hdc in each st to last 2 sts, hdc2tog. Turn. (50 hdc)
Waist Row 10: Ch 2, hdc in each st across. Turn. (50 hdc)
Waist Row 11: Ch 2, hdc2tog, hdc in each st to last 2 sts, hdc2tog. Turn. (48 hdc)
Waist Row 12: Ch 2, hdc in each st across. Turn. (48 hdc)
This is the waist, the narrowest point of the bodice. The waist should measure approximately 10.7 inches / 27 cm for one front panel. The full front plus back will total 28 inches / 71 cm.
Back Bodice
Work the back bodice following the same shaping as the front, creating a mirror image for the back neckline and straps.
Side Seams
With RS together, seam the side edges of the front and back bodice using a flat slip stitch seam or mattress stitch.
Neckline and Armhole Edging
With Yarn A and RS facing, join yarn at any point along the neckline or armhole edge.
Round 1: Sc evenly around the entire opening, placing 1 sc per row end along straight edges and 1 sc per stitch along shaped edges. Join with sl st to first sc. (Approximately 60 sc around neckline V, approximately 30 sc around each armhole opening.)
Round 2: Ch 1, sc in each sc around, work (sc, ch 2, sc) at each V point or corner. Join with sl st. Fasten off.
Work edging identically around the back neckline edge and along the top back edge between the straps.
Skirt Instructions
The skirt begins at the waist and is worked downward in joined rounds. The total waist circumference of the bodice is 28 inches / 71 cm, which at the bodice gauge of 4.5 stitches per inch gives approximately 126 stitches around. We round up to 128 stitches to make the first lace repeat divisible. The transition to the lace gauge (US F-5 hook) happens at Round 1 of the skirt.
Switch to US F-5 / 3.75 mm hook and Yarn A.
Join Yarn A to any waist seam stitch. Work across the full waist edge of the assembled bodice, picking up 128 stitches evenly distributed. If your bodice edge has fewer stitches, work increases evenly in Round 1 to reach 128.
SKIRT ROUND 1 (increase to working count): Ch 2, hdc in each st around, increasing 10 sts evenly spaced. Join with sl st to top of first hdc. (138 hdc)
We need a stitch count divisible by 16 for the lace repeat. 192 is the target. We increase over the first 12 rounds to reach 192.
SKIRT ROUND 2: Ch 2, hdc in each st around, increasing 6 sts evenly. Join with sl st. (144 hdc)
SKIRT ROUND 3: Ch 2, hdc in each st around, increasing 6 sts evenly. Join with sl st. (150 hdc)
SKIRT ROUND 4: Ch 2, hdc in each st around, increasing 6 sts evenly. Join with sl st. (156 hdc)
SKIRT ROUND 5: Ch 2, hdc in each st around, increasing 6 sts evenly. Join with sl st. (162 hdc)
SKIRT ROUND 6: Ch 2, hdc in each st around, increasing 6 sts evenly. Join with sl st. (168 hdc)
SKIRT ROUND 7: Ch 2, hdc in each st around, increasing 6 sts evenly. Join with sl st. (174 hdc)
SKIRT ROUND 8: Ch 2, hdc in each st around, increasing 6 sts evenly. Join with sl st. (180 hdc)
SKIRT ROUND 9: Ch 2, hdc in each st around, increasing 6 sts evenly. Join with sl st. (186 hdc)
SKIRT ROUND 10: Ch 2, hdc in each st around, increasing 6 sts evenly. Join with sl st. (192 hdc)
CHECKPOINT: After Round 10, you should have 192 stitches. Verify by counting. Place a stitch marker every 16 stitches (12 markers total). Each section of 16 stitches will become one lace repeat.
SKIRT ROUNDS 11 AND 12: Ch 2, hdc in each st around. Join with sl st. (192 hdc each round)
At the end of Round 12, change to Yarn B (sage green) by joining it at the join point with a standing hdc.
Lace Skirt (Rounds 13 through 44)
Work the lace pattern as established, following the lace leaf repeat over 16 stitches. The skirt will increase in fullness as you work the lace rounds, creating the signature handkerchief hem with pointed lace tips.
Assembly
Place right cup and left cup side by side with RS facing. The V-neckline center point is where the two inside edges meet. Join the two cups with a flat slip stitch seam along the center V from neckline point to Row 10 (approximately 2 inches / 5 cm down from neckline point) to create the front V plunge. Do not seam further. The remaining inner edges form the front opening and are finished with an edging row below.
With RS facing and Yarn A, join yarn at bottom left edge of left cup.
Waist join row (RS): Ch 2, hdc across 27 sts of left cup, hdc across 27 sts of right cup. Turn. (54 hdc)
Waist Rows 2 through 6: Ch 2, hdc in each st across. Turn after each row. (54 hdc)
Waist Row 7 (decrease row): Ch 2, hdc2tog, hdc in each st to last 2 sts, hdc2tog. Turn. (52 hdc)
Waist Row 8: Ch 2, hdc in each st across. Turn. (52 hdc)
Waist Row 9: Ch 2, hdc2tog, hdc in each st to last 2 sts, hdc2tog. Turn. (50 hdc)
Waist Row 10: Ch 2, hdc in each st across. Turn. (50 hdc)
Waist Row 11: Ch 2, hdc2tog, hdc in each st to last 2 sts, hdc2tog. Turn. (48 hdc)
Waist Row 12: Ch 2, hdc in each st across. Turn. (48 hdc)
This is the waist, the narrowest point of the bodice. The waist should measure approximately 10.7 inches / 27 cm for one front panel. The full front plus back will total 28 inches / 71 cm.
Tips
- Block your gauge swatch before measuring to ensure accurate fit.
- Use stitch markers to keep track of your lace repeats in the skirt.
- Weave in ends as you go to avoid a daunting finishing session.
- If you are using a gradient yarn, check your color transitions periodically to ensure they are falling where you want them.
- Take breaks. This is a marathon project, not a sprint.
FAQs
Can I make this dress in a different size?
Yes, size customization tips are provided at the end of the pattern. You can adjust the bodice width and skirt increases to fit your measurements.
What if my gauge is off?
If your gauge does not match, try switching to a different hook size. If you are still off, you may need to adjust the number of stitches in the bodice or skirt to achieve the correct fit.
Can I use a different yarn weight?
This pattern is designed for DK weight yarn. Using a different weight will change the gauge and finished size significantly. If you substitute, be prepared to do extensive gauge testing and pattern adjustments.
How do I care for the finished dress?
Hand wash in cool water with a gentle detergent and lay flat to dry. Block after each wash to maintain the lace shape and dimensions.
Is this pattern suitable for beginners?
No, this is an advanced pattern. Beginners should build experience with fitted tops, basic lace, and post stitches before attempting this project.
How long does it take to make this dress?
The total estimated time is 57 to 81 hours, depending on your speed and experience level. The bodice takes approximately 18 to 25 hours, the skirt takes 35 to 50 hours, and finishing takes 4 to 6 hours.
Pin This Crochet Pattern!