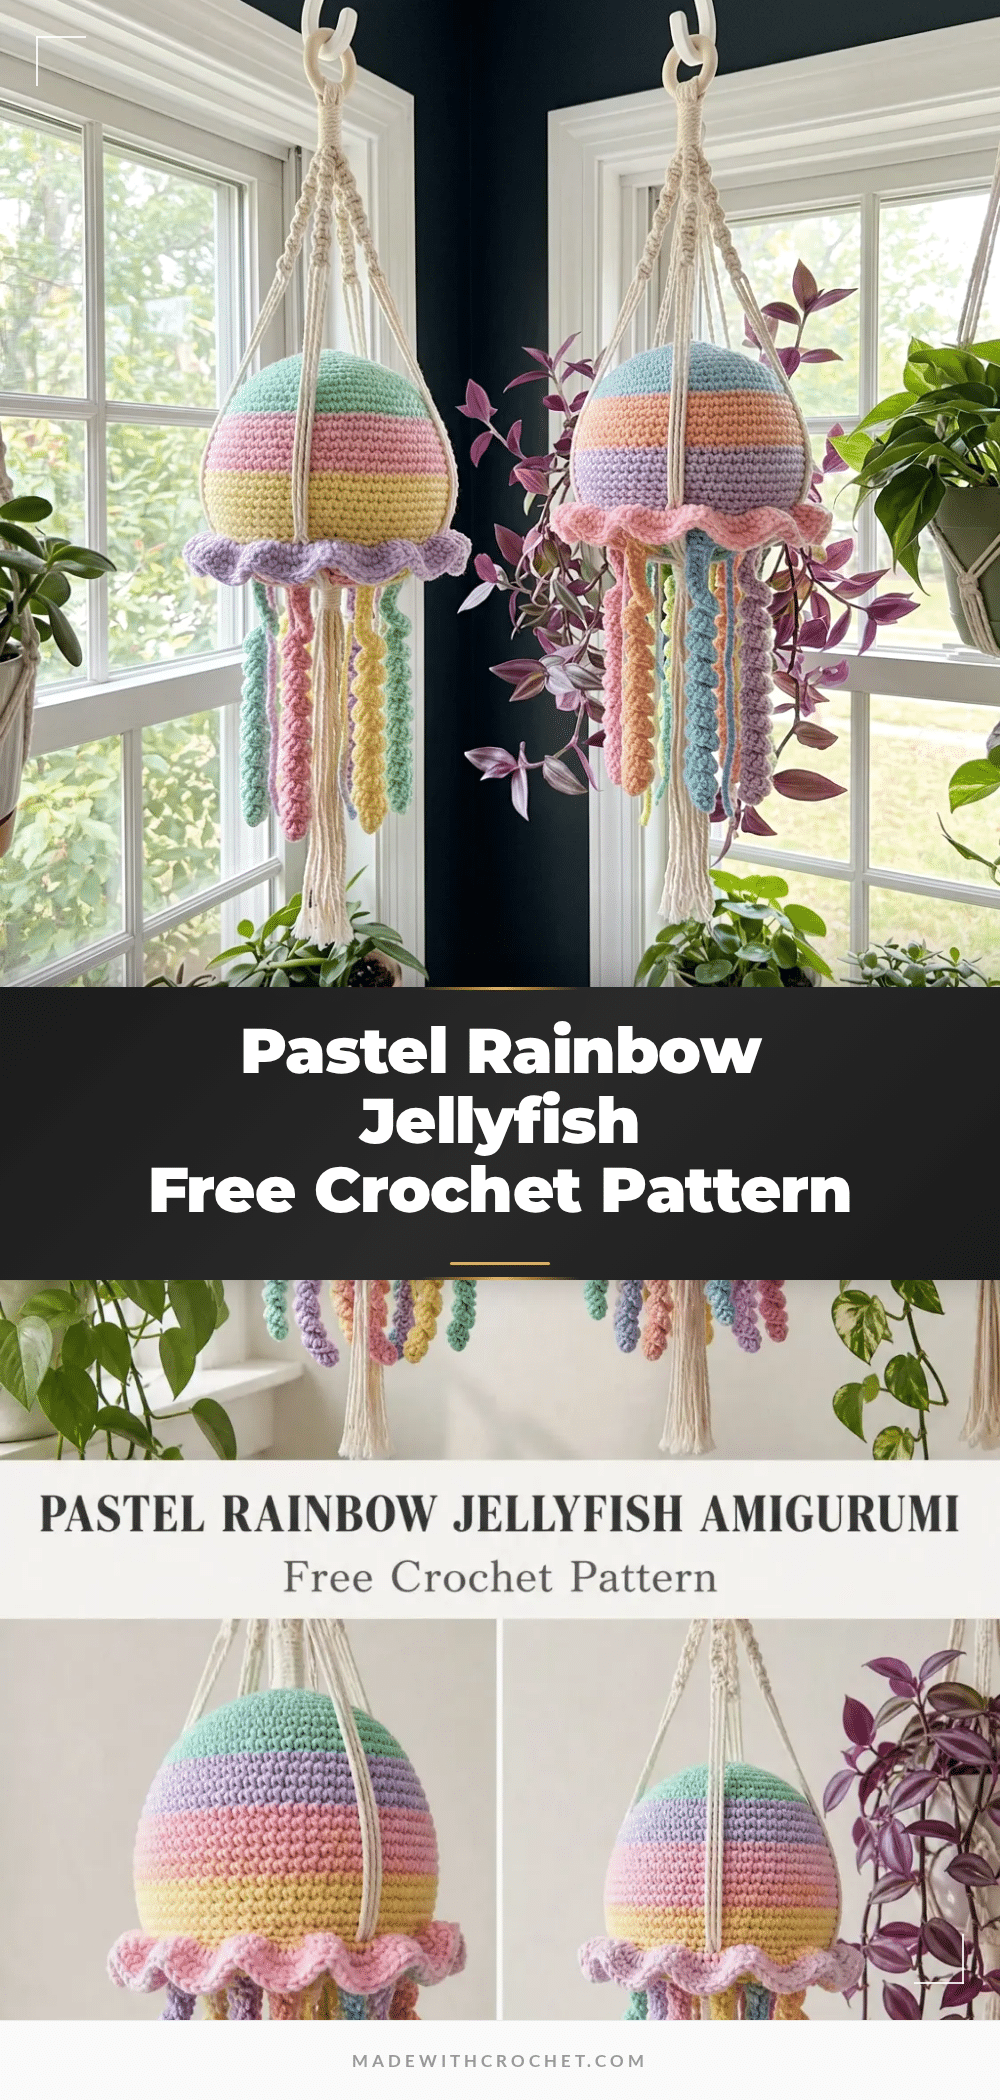
Spring is the perfect season to add a touch of whimsy to your home decor, and this pastel rainbow jellyfish amigurumi is just the project to do it. Whether you’re crafting for a nursery refresh, a handmade gift for a baby shower, or simply want to bring some soft, cheerful color into your space, this hanging jellyfish fits the bill beautifully. Its gentle stripes and floating tentacles evoke the lightness of the season, making it a delightful addition to any cozy corner.
Seasonal Styling Ideas
This jellyfish is a natural fit for spring and summer decor, but its pastel palette makes it versatile year-round. Hang it in a nursery with other soft rainbow accents, or use it as a boho bedroom statement piece. The macrame hanger adds a trendy, handmade touch that complements plant-filled spaces. You could even swap the color palette for a more muted, earthy tone for fall, or bright neons for a summer party vibe. The construction is the same, but the color choices let you customize it to any season or room.
Project Overview
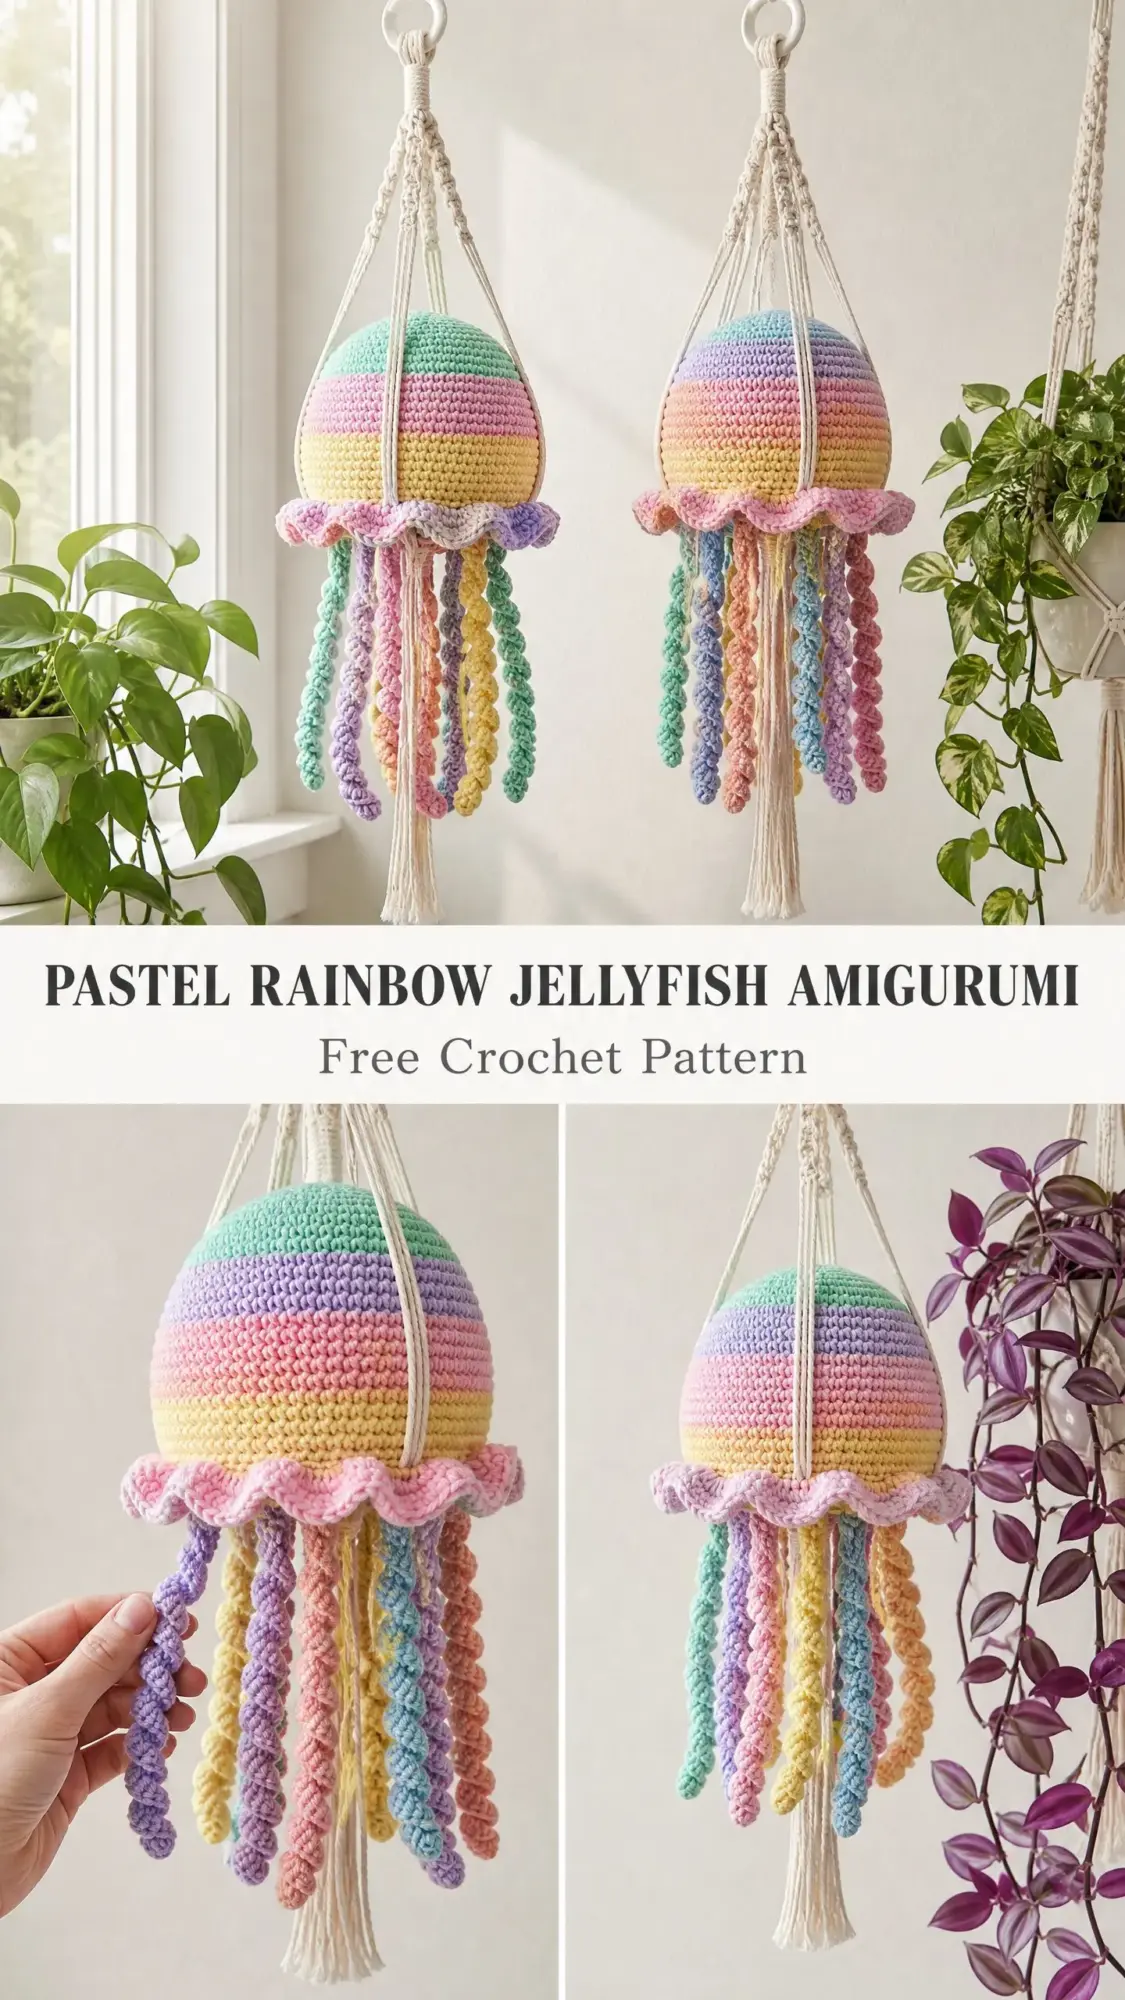
This pastel jellyfish is worked entirely in single crochet (sc) using the amigurumi technique of continuous rounds. The bell is shaped through increases and decreases, stuffed firmly to hold its dome, and finished with an attached ruffled skirt and separate curly tentacles. The whole piece hangs from a simple macrame cord cradle attached to a ring. The finished jellyfish measures approximately 6 inches (15 cm) across at the widest point and 4.5 inches (11.5 cm) tall. Total hanging length from the top of the ring to the bottom of the longest tentacle is roughly 24 to 28 inches (61 to 71 cm). This is an intermediate level project. Plan for 12 to 18 hours of total crafting time.
Materials
Yarn
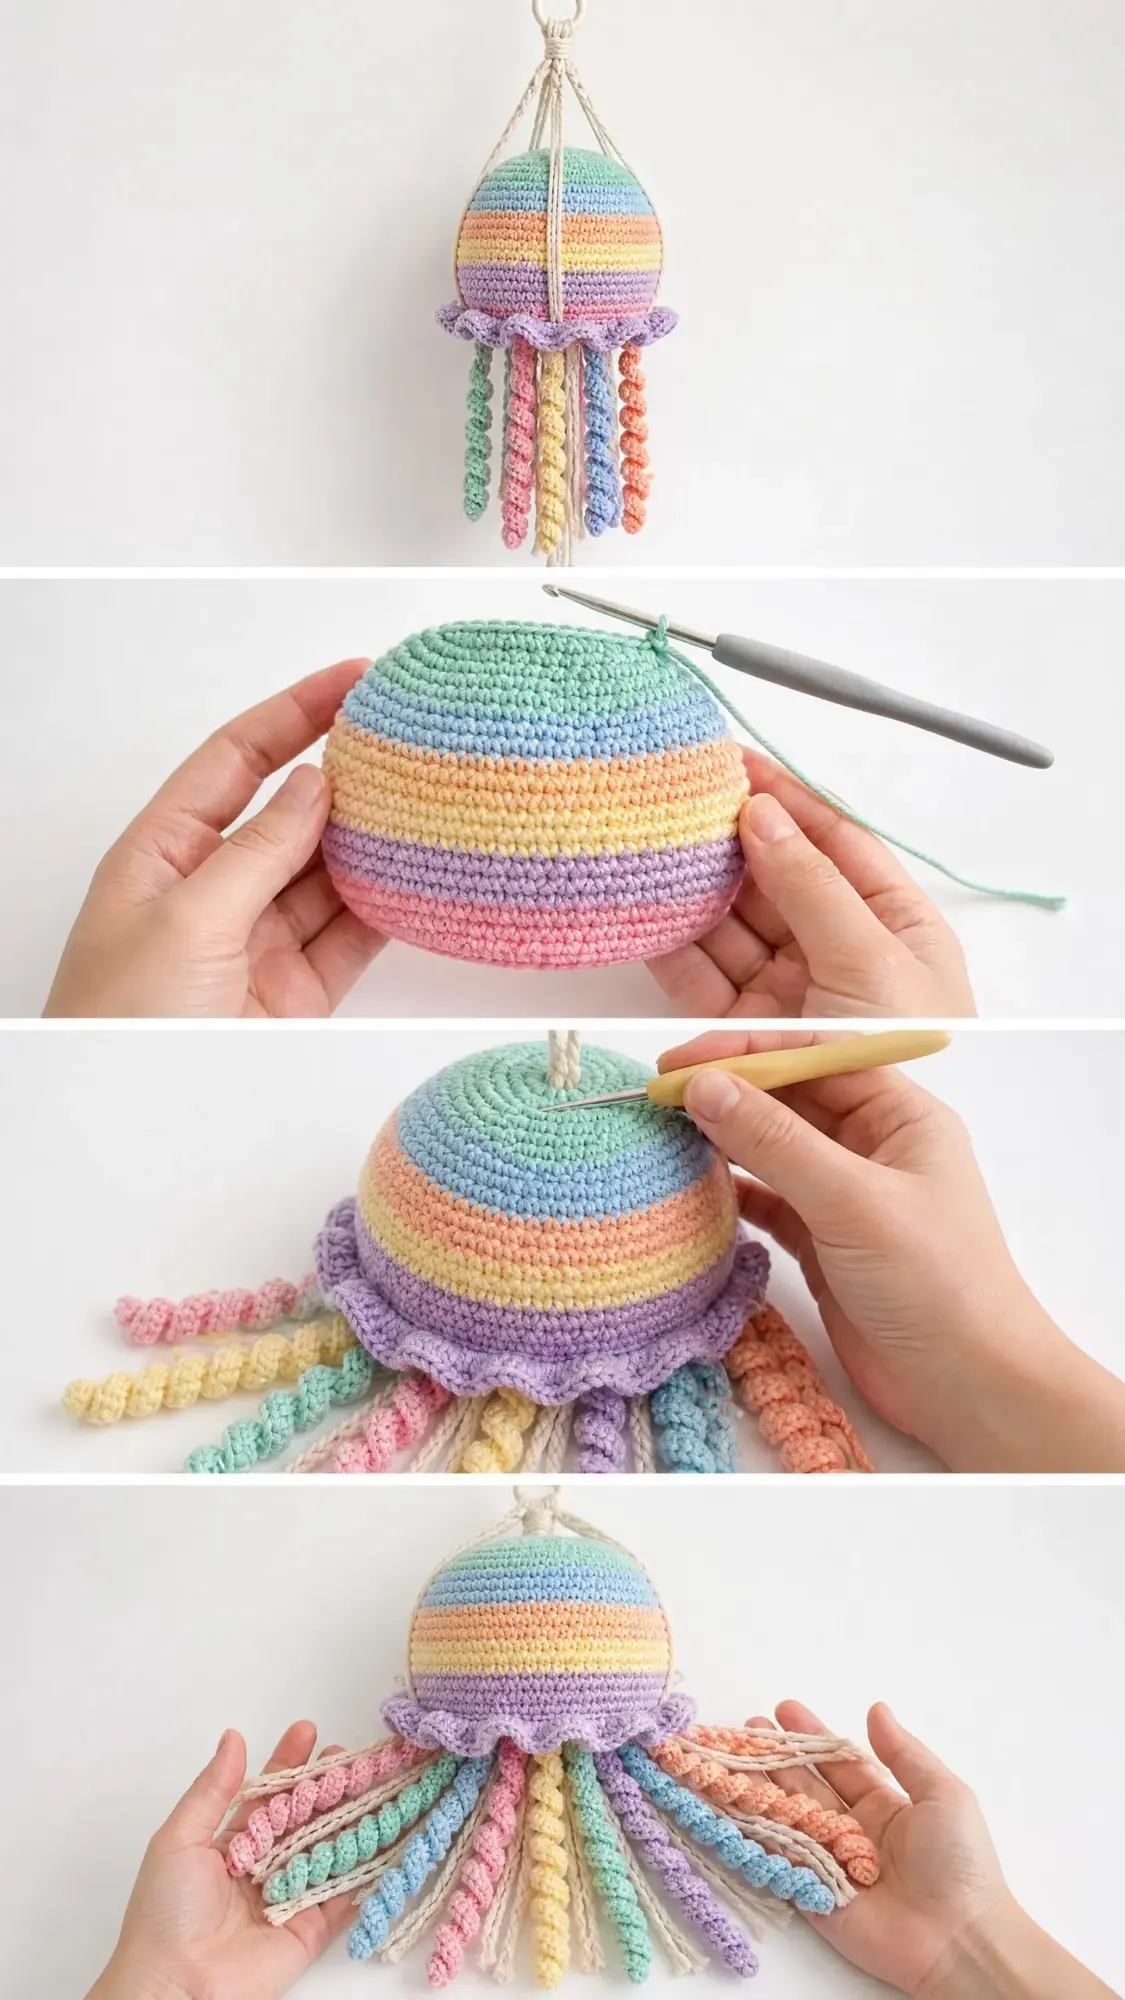
You will need worsted weight (4/medium) cotton or cotton-blend yarn in five pastel colors:
- Color A: Mint or seafoam green
- Color B: Soft pink or blush
- Color C: Pale yellow or butter
- Color D: Lavender or light purple (also used for the ruffle skirt)
- Color E: Peach or light orange (optional, for a second colorway or substitute stripe)
For the tentacles, use scraps from your stripe colors. Recommended yarn brands: Lion Brand 24/7 Cotton, Paintbox Yarns Simply Cotton Worsted, or Drops Safran (adjust hook to US E-4/3.50 mm if using this lighter weight option). Avoid fuzzy or textured yarns.
Hook
US size G-6 / 4.00 mm crochet hook
Other Materials
- 3 mm or 4 mm natural cotton macrame cord, approximately 15 to 20 yards (14 to 18 meters)
- One 2-inch (5 cm) plastic or wooden ring for hanging
- Polyfill stuffing, approximately 2 to 3 oz (60 to 85 g)
- Yarn needle or tapestry needle
- At least 2 stitch markers
- Scissors
Gauge and Finished Size
Gauge: 18 sc x 20 rows = 4 inches (10 cm) in single crochet, worked in continuous rounds. Gauge matters here. If your stitches are too loose, the stuffing will show through and the bell will not hold its shape. Work tighter or drop down one hook size if needed. Always make a small swatch before starting.
Finished Size: The bell measures approximately 6 inches (15 cm) across at the widest point and 4.5 inches (11.5 cm) tall. Total hanging length from the top of the ring to the bottom of the longest tentacle is roughly 24 to 28 inches (61 to 71 cm).
Abbreviations
- sc = single crochet
- inc = increase (work 2 sc into the same stitch)
- dec = invisible decrease (insert hook into front loop of next stitch, then front loop of following stitch, yarn over and pull through both loops, yarn over and pull through 2 loops on hook)
- sl st = slip stitch
- ch = chain
- MR = magic ring
- st(s) = stitch(es)
- BLO = back loop only
- FLO = front loop only
- rep = repeat
- pm = place marker
- rnd = round
Pattern Notes
- The bell is worked in continuous rounds. Do not join or turn unless instructed. Use a stitch marker in the first stitch of each round and move it up as you go.
- Color changes: Switch to your new color on the last yarn over of the last stitch before starting the new color section. You can carry unused colors up the inside or cut and rejoin.
- Stripe sequence (worked from top to bottom): Rounds 1 to 4: Color A (mint); Rounds 5 to 8: Color B (pink); Rounds 9 to 12: Color C (yellow); Rounds 13 to 16: Color D (lavender); Rounds 17 to 20: Color B (pink); Rounds 21 to 24: Color A (mint).
- Construction order: Bell, stuffing, skirt, tentacles, macrame hanger, final assembly.
Pattern Instructions
Jellyfish Bell Instructions
Start at the top center and work downward.
Using Color A and MR.
- Round 1: Work 6 sc into MR. Pull ring closed. (6 sts)
- Round 2: Inc in each st around. (12 sts)
- Round 3: (Sc 1, inc) rep around. (18 sts)
- Round 4: (Sc 2, inc) rep around. (24 sts)
Change to Color B at end of Round 4.
- Round 5: (Sc 3, inc) rep around. (30 sts)
- Round 6: (Sc 4, inc) rep around. (36 sts)
- Round 7: (Sc 5, inc) rep around. (42 sts)
- Round 8: (Sc 6, inc) rep around. (48 sts)
Change to Color C at end of Round 8.
- Round 9: (Sc 7, inc) rep around. (54 sts)
- Round 10: (Sc 8, inc) rep around. (60 sts)
- Round 11: (Sc 9, inc) rep around. (66 sts)
- Round 12: (Sc 10, inc) rep around. (72 sts)
Change to Color D at end of Round 12.
- Rounds 13 to 16: Sc in each st around. (72 sts each round)
Change to Color B at end of Round 16.
- Rounds 17 to 20: Sc in each st around. (72 sts each round)
Change to Color A at end of Round 20.
- Rounds 21 to 22: Sc in each st around. (72 sts each round)
- Round 23: Working in FLO only, sc in each st around. (72 sts) This is your skirt attachment round. Place a second stitch marker in the back loop of the first stitch so you can find it later.
- Round 24: Working in both loops as normal, sc in each st around. (72 sts)
Begin stuffing now. Insert polyfill gradually as you continue.
- Round 25: (Sc 10, dec) rep around. (66 sts)
- Round 26: (Sc 9, dec) rep around. (60 sts)
- Round 27: (Sc 8, dec) rep around. (54 sts)
- Round 28: (Sc 7, dec) rep around. (48 sts)
- Round 29: (Sc 6, dec) rep around. (42 sts)
- Round 30: (Sc 5, dec) rep around. (36 sts)
- Round 31: (Sc 4, dec) rep around. (30 sts)
- Round 32: (Sc 3, dec) rep around. (24 sts)
- Round 33: (Sc 2, dec) rep around. (18 sts)
- Round 34: (Sc 1, dec) rep around. (12 sts)
- Round 35: Dec around. (6 sts)
Add final stuffing so the bell is firmly packed. Cut yarn, leaving a 10-inch tail. Thread onto yarn needle, draw through all 6 remaining stitches, pull tight to close. Weave in end on the inside.
Ruffled Skirt Instructions
Return to the back loops you left at Round 23. Join Color D with a sl st to any back loop stitch.
- Round 1 of skirt: Sc in each back loop around. (72 sts)
- Round 2 of skirt (ruffle): Work 3 sc in each st around. (216 sts)
For a fuller ruffle like the photos show, work one more round:
- Round 3 of skirt (optional extra ruffle): 2 sc in each st around. (432 sts)
Sl st to join. Fasten off and weave in ends. The ruffle will fan outward beautifully.
Curly Tentacle Instructions
Make 8 to 12 tentacles total in varying lengths and colors. I recommend 2 tentacles per color for a balanced rainbow look.
Short Tentacle: Ch 30. Starting from the second ch from hook, work 3 sc into each ch across. Fasten off, leaving a 6-inch tail for sewing.
Medium Tentacle: Ch 45. Starting from the second ch from hook, work 3 sc into each ch across. Fasten off, leaving a 6-inch tail for sewing.
Long Tentacle: Ch 60. Starting from the second ch from hook, work 3 sc into each ch across. Fasten off, leaving a 6-inch tail for sewing.
Attaching Tentacles
Sew the tentacles evenly around the bottom edge of the bell, just below the ruffle skirt. Space them out so they hang nicely. Weave in all ends securely.
Macrame Hanger Instructions
Cut 4 pieces of cotton macrame cord, each 60 inches (152 cm) long.
Fold all 4 cords in half. Loop them through your plastic or wooden ring using a lark’s head knot: pass the folded loop through the ring from front to back, then bring both tails through the loop and pull snug. You now have 8 cord ends.
Divide into 4 pairs. Working with one pair at a time, make spiral half-hitch knots for approximately 8 to 10 inches (20 to 25 cm) down each pair.
Gather all 4 knotted pairs and tie an overhand gathering knot about 1 inch (2.5 cm) below the spiral sections.
Spread the 8 cord ends into a net shape. Tie pairs of neighboring cords with overhand knots about 2 inches (5 cm) below the gathering knot, alternating pairs to create a diamond net cradle.
Insert your crocheted bell into the cradle with the dome facing up. Adjust knots so it sits level and secure.
Gather all cord ends below the bell and tie a final overhand knot close to the bottom. Trim ends evenly or add finishing knots to each individual cord.
Assembly
Weave in all ends securely on the inside of the bell. Lightly mist with water and reshape by hand if needed. Allow to dry completely before hanging. Do not submerge the stuffed bell in water. For cleaning, spot clean with a damp cloth. If needed, hand wash gently in cool water and lay flat to dry. This piece is decorative and not intended as a toy for children under 3 due to cord components.
Tips
- Smaller jellyfish (4 inches across): Use DK weight yarn with a US E-4/3.50 mm hook. Stop increases at 54 stitches instead of 72. Work 4 straight rounds and adjust decreases accordingly.
- Larger jellyfish (8 inches across): Use bulky weight yarn with a US J-10/6.00 mm hook. Continue increases for 2 more rounds to reach 84 stitches. Add 2 extra straight rounds. Increase tentacle chain lengths by 10 chains each.
Frequently Asked Questions
Can I use a different yarn weight?
Yes, but you will need to adjust your hook size and gauge. The pattern is written for worsted weight yarn. If you use a different weight, your finished size will change, and you may need to adjust the number of increase rounds to achieve the desired shape.
How do I make the tentacles curl tighter?
The tentacles curl automatically based on the stitch trick of working 3 sc into each chain. For a tighter curl, use a slightly smaller hook or work your stitches a bit tighter. For a looser curl, use a larger hook or work 2 sc into each chain instead of 3.
Can I wash the jellyfish?
Spot clean with a damp cloth. If needed, hand wash gently in cool water and lay flat to dry. Do not submerge the stuffed bell in water, as the stuffing can retain moisture and cause issues. The macrame cord can be gently cleaned with a damp cloth as well.
How do I attach the macrame hanger securely?
Make sure the diamond net cradle is snug around the bell. Adjust the overhand knots so the bell sits level. The final overhand knot at the bottom should be tight to prevent the bell from slipping. You can also add a dab of fabric glue to the knots for extra security if desired.
What if I don’t want to use a macrame hanger?
You can skip the macrame hanger entirely and simply attach a loop of yarn or ribbon to the top of the bell for hanging. Alternatively, the jellyfish can sit on a shelf or in a basket as a decorative piece without the hanger.
How many tentacles should I make?
The pattern recommends 8 to 12 tentacles for a balanced look. You can make more or fewer depending on your preference. Using 2 tentacles per color helps create a nice rainbow effect.
Pin This Crochet Pattern!