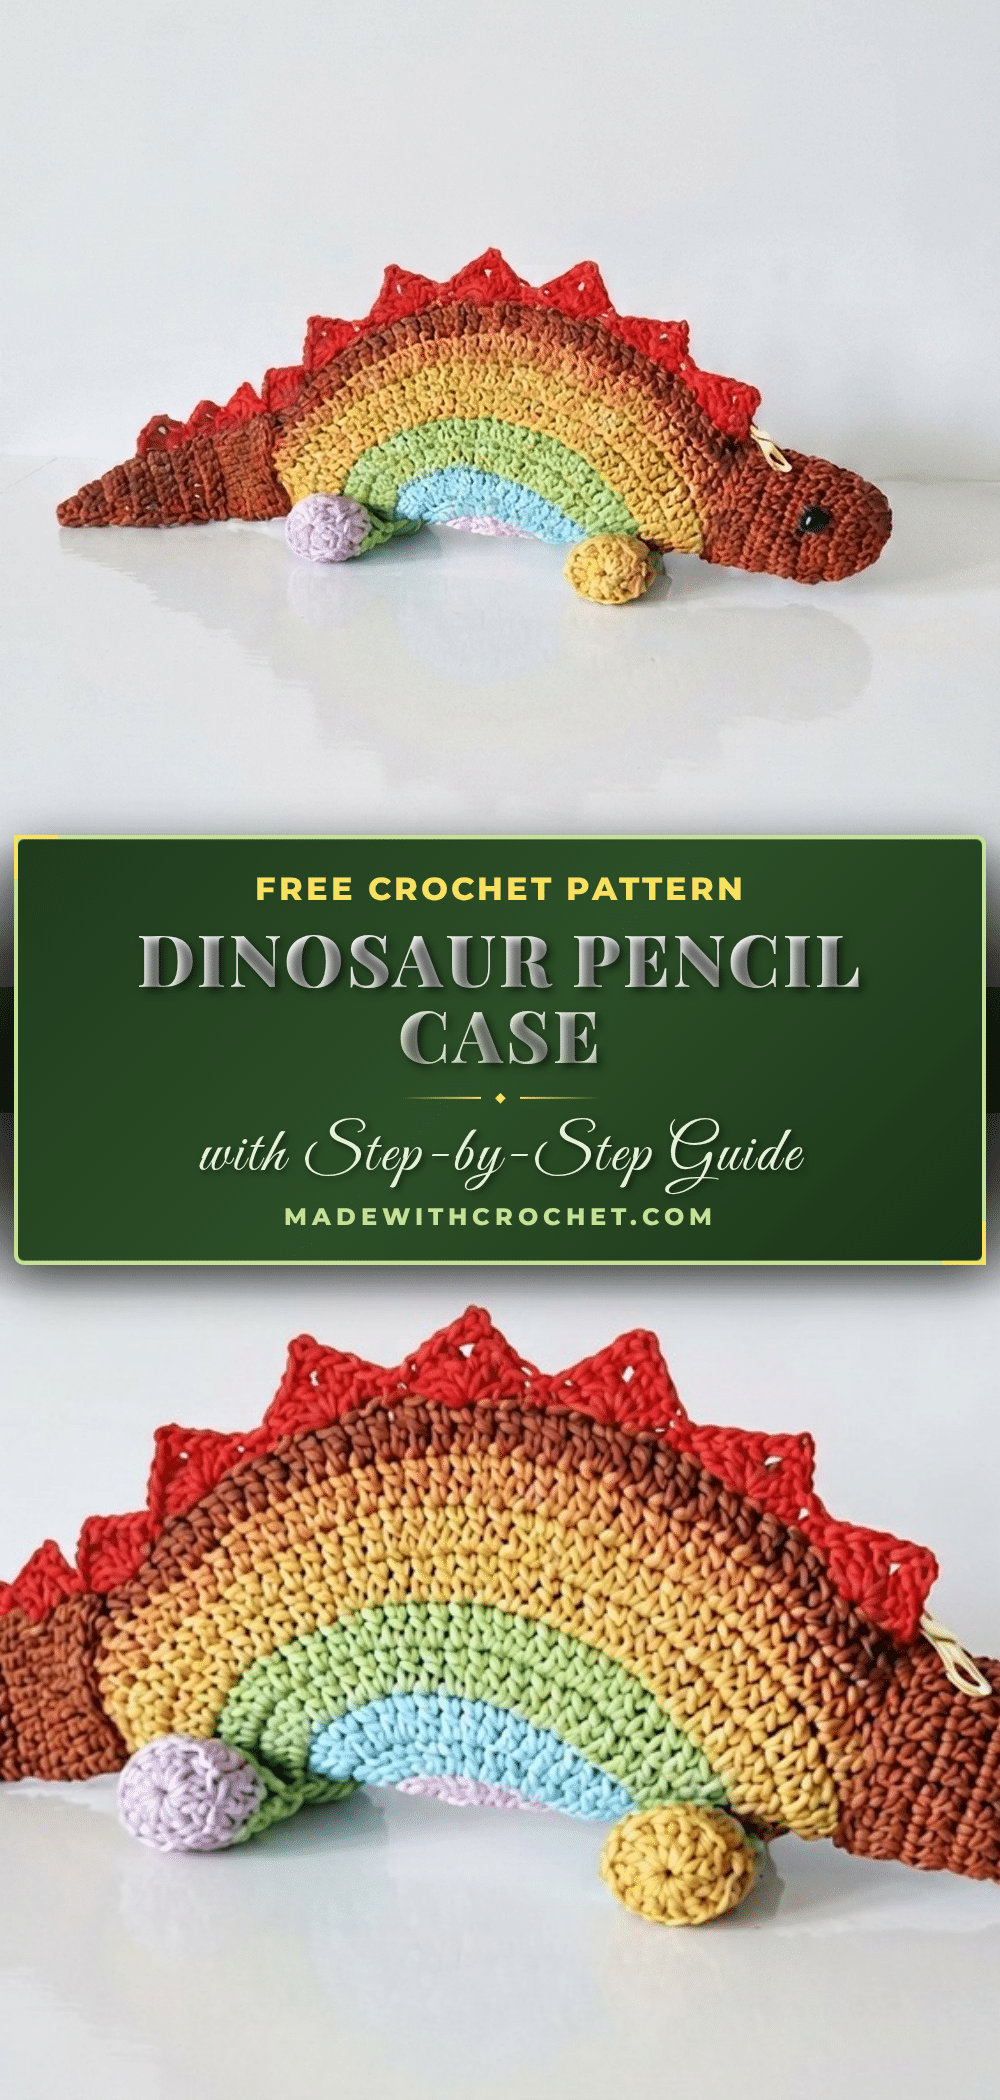
Ever started a crochet project that felt just a little too ambitious, only to worry it would end up lopsided or frustrating? You’re not alone. Many makers hesitate before tackling a shaped, seamed project like a pencil case, especially one with multiple pieces and a fun, dimensional design. But this Cute Dinosaur Pencil Case is here to change that. It’s built with simple, repetitive rounds and clear assembly steps, making it an approachable and rewarding project for any Advanced Beginner. The magic is in the construction: two flat circles, a simple cylinder, and a few small parts come together to create a charming, functional friend for your desk.
Maker Notes
This pattern is a fantastic way to use up small amounts of colorful thread or yarn. The original uses a PolyCherry thread, which gives the case a firm, structured feel that holds its shape beautifully. If you want a slightly larger or softer case, you can easily swap for a DK or worsted-weight cotton yarn and a corresponding hook size—just be prepared to adjust the number of rounds to reach your desired diameter. The color changes every two rounds create a vibrant, striped look, but you could also use a self-striping yarn for a similar effect with fewer ends to weave in. The decorative “thorn” edging is the star of the show, adding that unmistakable dinosaur silhouette. Take your time with the picot stitches; they are what give the spikes their crisp, pointed look.
Project Overview
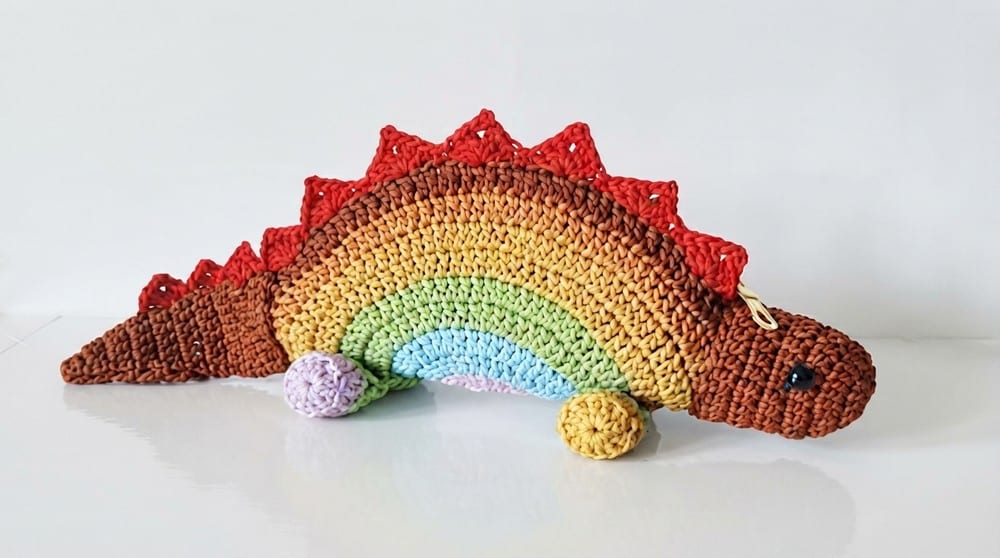
This crochet pattern guides you through creating a colorful, round dinosaur pencil case. You will crochet two identical round panels, a cylindrical side panel (the tail), legs, and a head. These pieces are then seamed together and finished with a decorative spike edging. The result is a sturdy, fun, and practical accessory perfect for holding pencils, pens, and other small supplies.
Materials
- PolyCherry thread (multiple colors: purple, light blue, green, mustard, beige, copper, red)
- Crochet Hook size 4/0 (Tulip brand or equivalent, 2.5 mm)
- Tapestry needle
- Scissors
- Needle and sewing thread (for seaming, optional)
- Lighter or matchstick (for sealing thread ends)
Gauge and Finished Size
- Gauge: Not critical. Finished measurements are based on stitch count as per pattern.
- Finished Size: Diameter: Approx. 12–13 cm (adjust with more/less rounds). Height: Approx. 4–6 cm (adjust length of tail/cylinder as desired).
Skill Level
Advanced Beginner
Abbreviations
- ch: chain
- sl st: slip stitch
- sc: single crochet
- dc: double crochet
- dc inc: 2 double crochets in 1 stitch
- sp: space
Pattern Notes
- Change thread color every two rounds as desired.
- Join each round with a slip stitch and begin rounds with a chain-3 (counts as a double crochet).
- Carry out increases systematically for a flat, smooth circle.
- “Double crochet inc” means two double crochets in the same stitch.
- The pattern can be adapted for different yarns or finished sizes.
- Special Stitches:
- Picot: Ch 2, sl st into the first chain (creates a small point).
- Double crochet increase (dc inc): 2 dc into the same stitch.
Pattern Instructions
Main Round Panels (Make 2)
Using Purple, begin with Slip Knot:
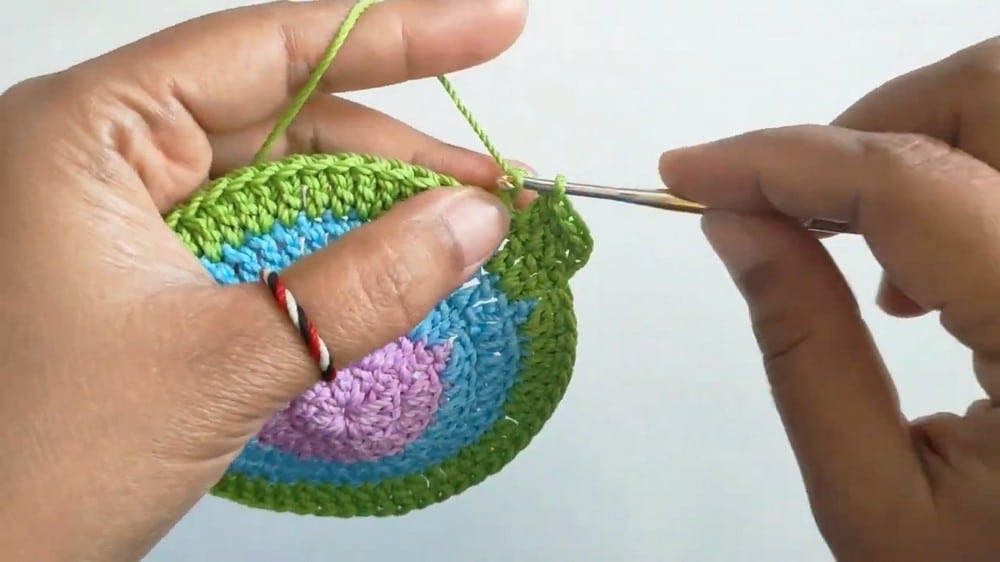
- Round 1: Ch 5. Join to 1st ch with sl st to form a ring. Ch 3 (counts as 1 dc). Work 11 dc into the ring. (Total: 12 dc.) Join with sl st to top of starting ch-3.
- Round 2: Ch 3 (counts as 1 dc). 1 dc in same stitch. 2 dc in each st around (dc inc in every stitch). (Total: 24 dc.) Join with sl st, ch 1, fasten off purple.
Attach Light Blue:
- Round 3: Join at sl st from previous round. Ch 3 (counts as dc). Dc inc in next stitch. Repeat: [1 dc in next st, dc inc in next st] around. (Total: 36 dc.) Join with sl st.
- Round 4: Ch 3 (counts as dc). 1 dc in next st. Dc inc in next st. Repeat: [2 dc, dc inc] around. (Total: 48 dc.) Join with sl st, ch 1, fasten off blue.
Attach Green:
- Round 5: Join at sl st from previous round. Ch 3 (counts as dc). 1 dc in next 2 sts. Dc inc in next st. Repeat: [3 dc, dc inc] around (11 times). (Total: 60 dc.) Join with sl st.
- Round 6: Ch 3 (counts as dc). 1 dc in next 3 sts. Dc inc in next st. Repeat: [4 dc, dc inc] around (11 times). (Total: 72 dc.) Join with sl st, ch 1, fasten off green.
Attach Mustard Color:
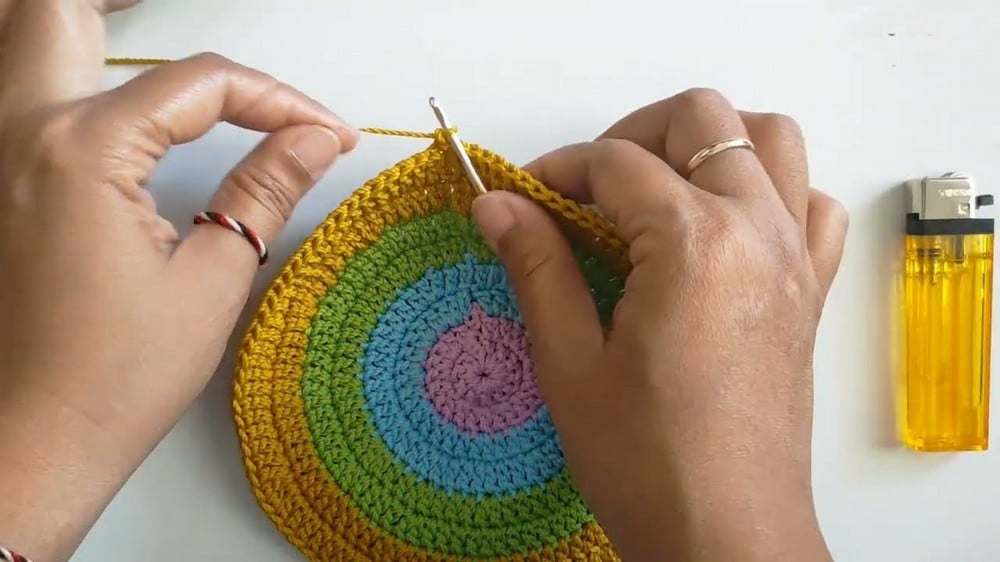
- Round 7: Join in sl st section. Ch 3 (counts as dc). 1 dc in next 4 sts. Dc inc in next st. Repeat: [5 dc, dc inc] around (11 times). (Total: 84 dc.) Join with sl st.
- Round 8: Ch 3 (counts as dc). 1 dc in next 5 sts. Dc inc in next st. Repeat: [6 dc, dc inc] around (11 times). At end: 3 dc in last 3 sts. (Total: 96 dc.) Join with sl st, ch 1, fasten off mustard.
Attach Beige or Bata Color:
- Round 9: Join in sl st. Ch 3 (counts as dc). 1 dc in next 6 sts. Dc inc in next st. Repeat: [7 dc, dc inc] around (11 times). (Total: 108 dc.) Join with sl st, ch 1, fasten off.
Attach Copper:
- Round 10: Join in sl st. Ch 3 (counts as dc). 1 dc in next 7 sts. Dc inc in next st. Repeat: [8 dc, dc inc] around (11 times). At end: 4 dc in last 4 sts. (Total: 120 dc.) Join with sl st, ch 1, fasten off.
Cylinder (Tail/Side Panel)
Using color of choice, make a Magic Ring:
- Round 1: Ch 3. 5 dc into the ring. (Total 6 dc.) Join with sl st.
- Round 2: Ch 3 (counts as dc). Repeat: [1 dc, dc inc] 3 times. (Total: 9 dc.) Join with sl st.
- Round 3: Ch 3. Repeat: [2 dc, dc inc] 3 times. (Total: 12 dc.) Join with sl st.
- Round 4: Ch 3. Repeat: [3 dc, dc inc] 3 times. (Total: 15 dc.) Join with sl st.
- Rounds 5–7: Ch 3. 1 dc in each st around (15 dc in each round). Join with sl st.
- Round 8: Ch 3. Repeat: [4 dc, dc inc] 3 times. (Total: 18 dc.) Join with sl st.
- Round 9: Ch 3. 1 dc in each st around (18 dc). Join with sl st.
- Round 10: Ch 3. Repeat: [5 dc, dc inc] 3 times. (Total: 21 dc.) Join with sl st. Ch 1, leave a long tail for sewing, break thread.
Legs
- Round 1: MR (Magic Ring). Ch 3. 11 dc into the ring. Sl st to join.
- Round 2: Ch 3. 11 dc in back loops only (BLO). Sl st.
- Rounds 3–4: Ch 3. 11 dc. Sl st.
- Round 5: Join the opening with 6 sc. Sl st. Fasten off, leaving a long tail for sewing.
Head
- Round 1: MR. Ch 3. 11 dc into the ring. Sl st.
- Round 2: Ch 3. (1 dc, dc increase) × 11. (dc increase = 2 dc in same stitch). Sl st.
- Rounds 3–6: Ch 3. 23 dc. Sl st. Fasten off, leaving a tail for sewing.
Assembly
- Fold the round piece in half. Align the head and tail, sew them together: Use a tapestry needle and matching yarn, or use a needle and sewing thread.
- Make sure the side cylinder/tail fits around the circumference of the round piece.
- Sew the second round panel to the other side of the tail to complete the pencil case body.
Decorative “Thorn”/Spike Edging
With Red Yarn: Attach to the edge with a slip knot.
- Edging around the case: Repeat around edge: Ch 1, sc across two thicknesses to join panels. Skip 2 ch, 3 dc in next ch. Ch 2, sl st to first ch (picot). 3 dc in same ch. Skip 2 ch, 1 sc. Repeat for 5 motifs along the body.
- Edging at zipper opening (or open side): Join directly as you go. In stitches along the edge: 2 dc in ch, ch 2, picot, 2 dc in same ch, repeat 3 times. Join with sl st, break yarn, secure ends.
Tips
- Use a lighter or matchstick to carefully seal the ends of the PolyCherry thread for extra durability and to prevent fraying.
- Weave in all loose ends securely before assembly to make the finishing process cleaner.
- If you prefer a zippered closure, you can sew a zipper into the open edge before adding the spike edging.
FAQs
Can I use a different yarn weight?
Yes, you can use a DK or worsted-weight cotton yarn. You will need to adjust the number of rounds to achieve your desired finished size, as the gauge will change.
How do I make the pencil case larger or smaller?
To make it larger, continue the increase pattern on the round panels for more rounds. To make it smaller, stop increasing at an earlier round. Adjust the length of the cylinder (tail) accordingly.
What is the best way to attach the head and legs?
Use the long tails left from fastening off to sew the head and legs securely to the body. Use a tapestry needle and matching yarn for invisible stitches.
Can I add a zipper?
Absolutely. Sew a zipper into the open edge of the case before you add the decorative spike edging. The edging can then be worked along the fabric edge next to the zipper.
How do I keep the spikes (thorn edging) looking neat?
Take your time with the picot stitches. Ensure each picot is made by chaining 2 and then slip stitching into the first chain, pulling the yarn snugly to form a small, defined point.
Is this pattern suitable for a beginner?
This pattern is rated for an Advanced Beginner. You should be comfortable with basic stitches like chain, slip stitch, single crochet, and double crochet, as well as working in the round and simple seaming.
Pin This Crochet Pattern!