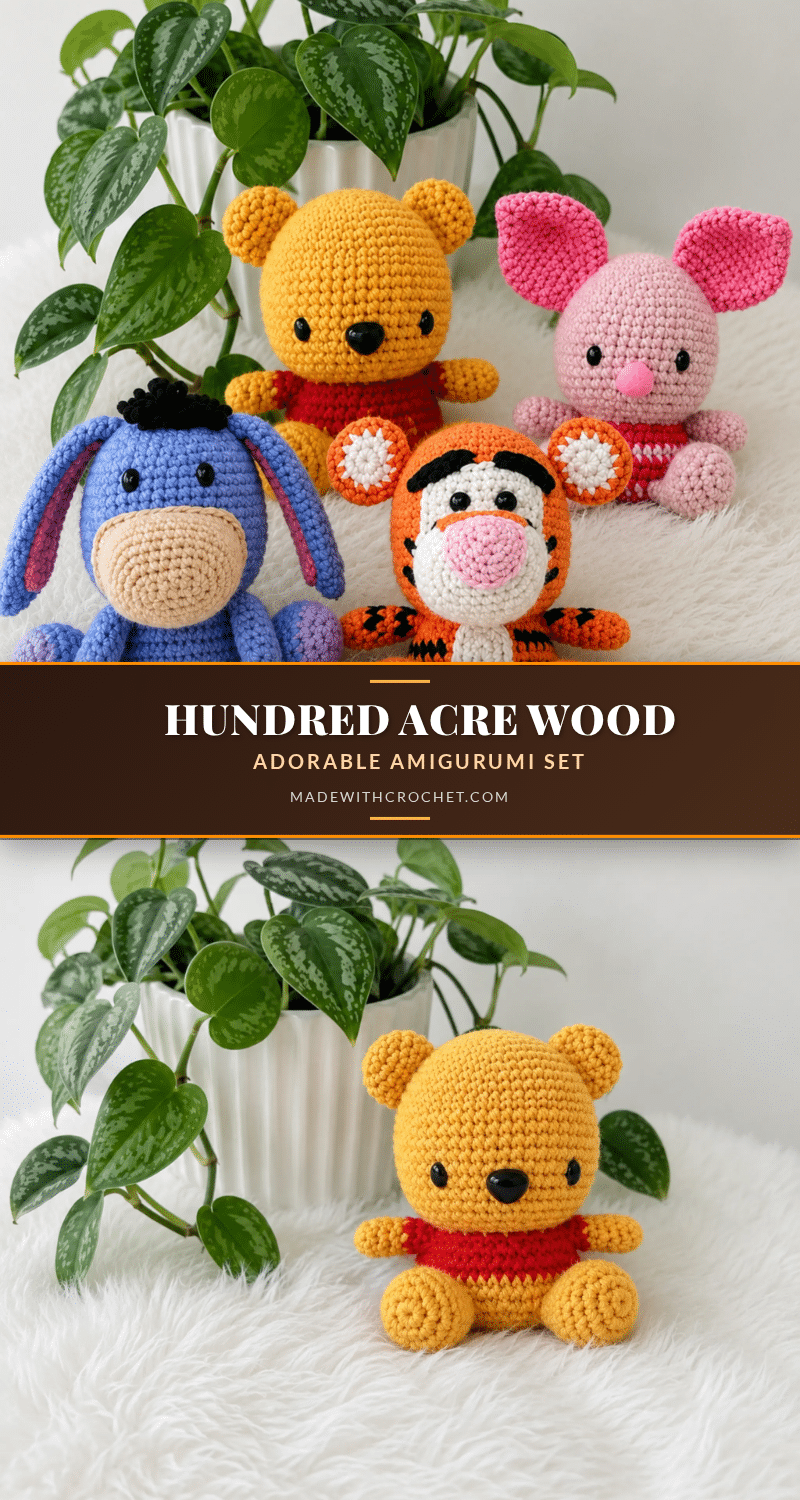
There is a specific kind of magic in pulling a skein of honey-yellow worsted weight yarn from the bottom of your stash bin, the kind that makes you pause and see not just fiber, but a bear ready for an adventure. This Hundred Acre Wood set begins with that same tactile decision—a choice of warm, nostalgic colors that feel intentional the moment the first magic ring is pulled tight. Whether you are drawn to the classic yellow of a certain bear, the sky blue of a donkey, or the vibrant orange of a tiger, this collection transforms simple yarn into a beloved cast of characters. It is a project that rewards patience and precision, turning a quiet afternoon of crocheting into a full shelf of friends.
Yarn and Color Notes
The charm of this amigurumi set lies in its specific color blocking. The patterns rely on distinct color changes to define character traits, such as Pooh’s red shirt or Piglet’s striped outfit. When selecting your yarn, consider a smooth cotton-acrylic blend; this fiber choice helps keep your stitches defined, which is crucial for the frequent increases and decreases found in these patterns. The texture of the yarn will show up in the final finish, so choose a colorway that feels true to the characters you remember. The interplay between the soft pinks of Piglet and the bold oranges of Tigger creates a visual harmony that looks wonderful displayed together.
Project Overview
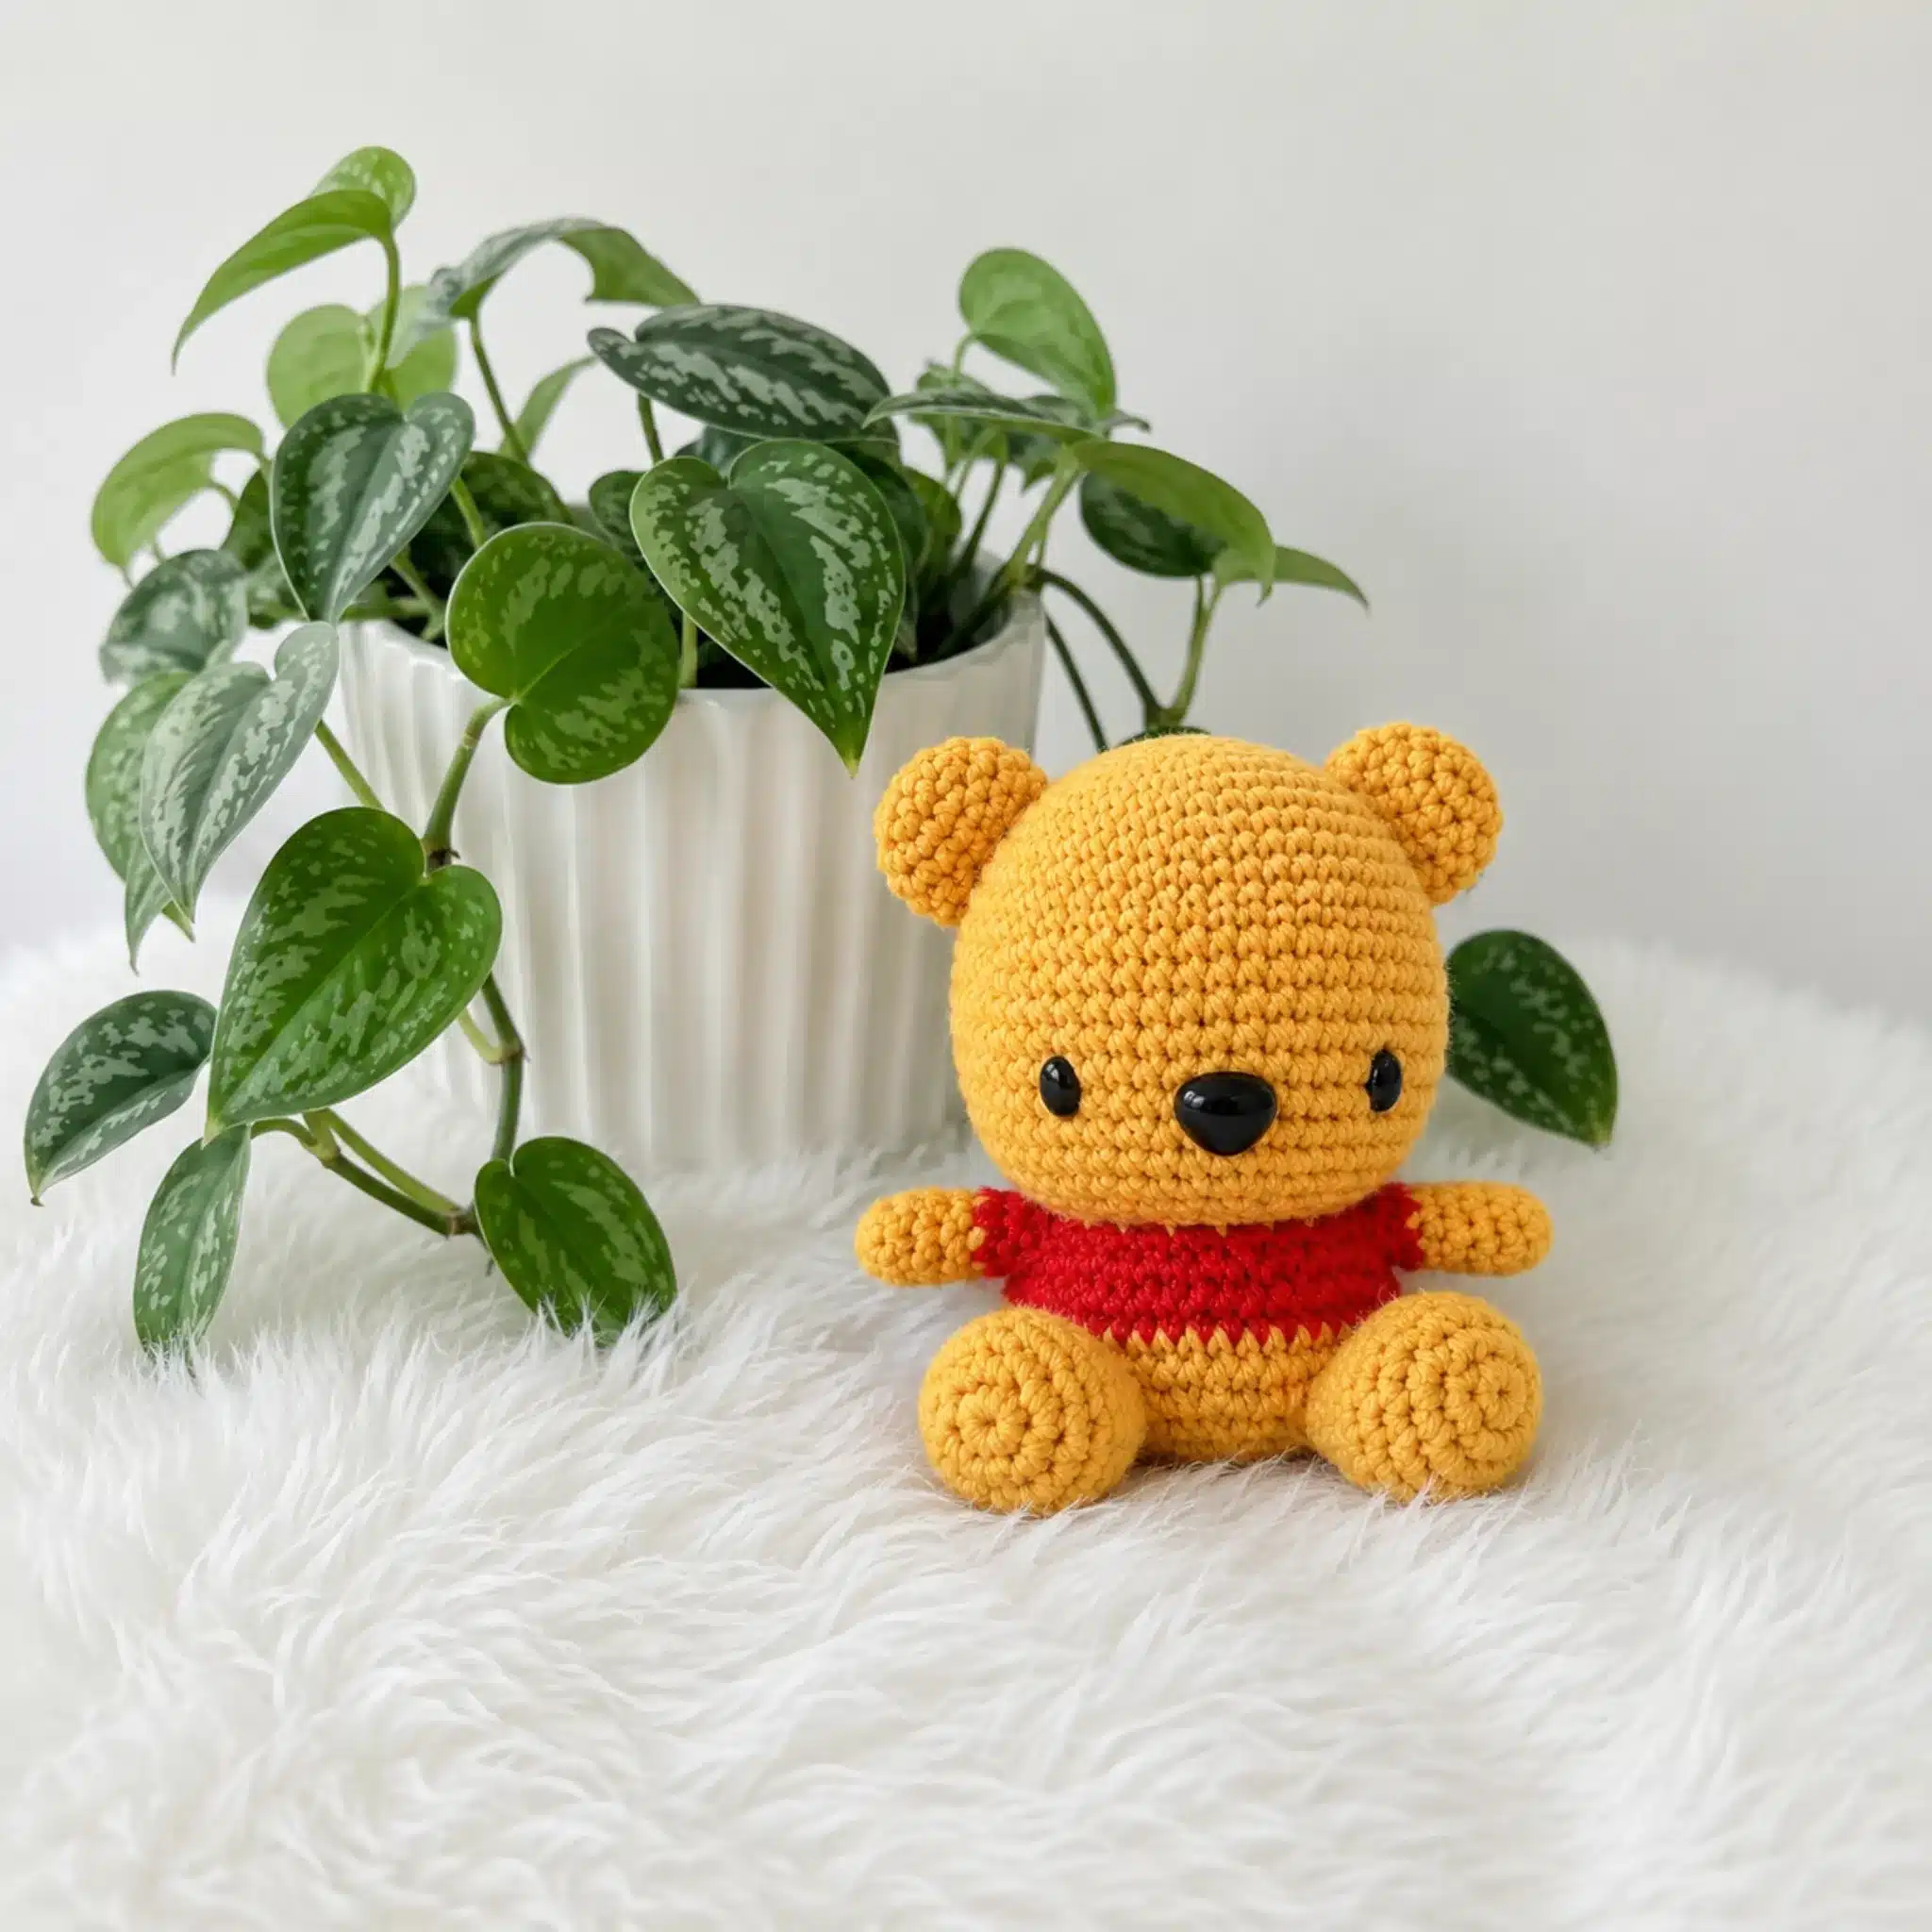
This pattern set includes instructions for four iconic characters: Winnie the Pooh, Piglet, Eeyore, and Tigger. Designed for confident beginners and intermediate crocheters, the project focuses on building amigurumi fluency through repetition of core techniques. While the individual stitches are basic, the assembly of multiple parts and the management of color changes require a steady hand. The characters are worked in continuous spiral rounds, with specific turned rows for muzzle and belly details.
Materials
- Worsted weight (CYCA #4) yarn in: yellow, red, light pink, pink, dark pink, blue, light purple, orange, and cream.
- Crochet hook sized to your yarn for tight, dense stitches (typically US B-1/2.25 mm–C-2/2.75 mm for worsted weight amigurumi; the original pattern does not specify an exact size, so swatch and adjust as needed).
- Black safety eyes (or black half-round beads) for each character.
- Fiberfill stuffing.
- Stitch markers.
- Yarn needle (tapestry needle) for sewing pieces together and embroidering details.
- Scissors.
- Black embroidery thread or yarn for Pooh’s nose.
Gauge and Finished Size
Gauge is not critical for this project. The focus should be on keeping your stitches tight enough that stuffing doesn’t peek through. The finished size will depend on your specific tension and hook size, but the patterns are designed to create standard amigurumi proportions.
Abbreviations
- ch — Chain
- dec — Decrease (invisible decrease)
- inc — Increase (2 sc in the same stitch)
- MR — Magic Ring
- sc — Single Crochet
- st(s) — Stitch(es)
Pattern Notes
This pattern is written in US crochet terminology. Heads, bodies, arms, legs, and most ears are worked in continuous spiral rounds — do not join or turn unless a row is specified. Muzzle pieces (Eeyore and Tigger) and Tigger’s upper muzzle and belly are worked in turned rows. Stitch count is given at the end of each round or row in parentheses. Color changes are noted inline exactly where they occur; you can carry unused yarn up the inside of the piece or cut and rejoin, whichever you prefer. Stuff each piece firmly but not tightly before closing — you want a huggable finish, not a stiff one.
Pattern Instructions
Pooh: Head and Body (yellow, worked in continuous spiral rounds)
Rnd 1: 6 sc in MR. (6)
Rnd 2: inc around. (12)
Rnd 3: sc, inc repeat around. (18)
Rnd 4: 2 sc, inc repeat around. (24)
Rnd 5: 3 sc, inc repeat around. (30)
Rnd 6: 4 sc, inc repeat around. (36)
Rnd 7: sc in each st around. (36)
Rnd 8: 5 sc, inc repeat around. (42)
Rnd 9: sc in each st around. (42)
Rnd 10: 6 sc, inc repeat around. (48)
Rnds 11–17: sc in each st around. (48)
Rnd 18: 6 sc, dec repeat around. (42)
Rnd 19: sc in each st around. (42)
Place safety eyes between Rounds 18 and 19, 10 stitches apart, and insert the nose between the eyes on this round.
Rnd 20: 5 sc, dec repeat around. (36)
Rnd 21: 2 sc, dec repeat around x9. (27)
Rnd 22: sc, dec repeat around x9. (18)
Rnd 23: sc in each st around. (18) — change to red
Rnd 24: 3 sc in same st, inc repeat around x9. (45)
Rnds 25–28: sc in each st around. (45) — change to yellow —
Rnd 29: 3 sc, dec repeat around x9. (36)
Rnd 30: 2 sc, dec repeat around x9. (27)
Rnd 31: sc, dec repeat around x9. (18)
Rnd 32: sc, dec repeat around x6. (12)
Rnd 33: dec x6. (6) Stuff firmly, then fasten off and close the opening.
Pooh: Arms (make 2, worked in continuous spiral rounds)
Rnd 1: 6 sc in MR — yellow. (6)
Rnd 2: 2 sc, inc repeat around. (8)
Rnds 3–5: sc in each st around. (8) — change to red —
Rnds 6–7: sc in each st around. (8) Lightly stuff and fasten off.
Pooh: Legs (make 2, worked in continuous spiral rounds)
Rnd 1: 6 sc in MR — yellow. (6)
Rnd 2: inc around. (12)
Rnd 3: sc, inc repeat around. (18)
Rnds 4–6: sc in each st around. (18)
Rnd 7: sc, dec repeat around. (12)
Rnd 8: 4 sc, dec repeat around x2. (10)
Rnds 9–10: sc in each st around. (10) Stuff and fasten off.
Pooh: Ears (make 2, worked in continuous spiral rounds)
Rnd 1: 6 sc in MR — yellow. (6)
Rnd 2: inc around. (12)
Rnd 3: 5 sc, inc repeat around x2. (14)
Rnds 4–5: sc in each st around. (14) Leave unstuffed and flatten before sewing on.
Piglet: Head and Body (worked in continuous spiral rounds)
Rnd 1: 6 sc in MR — light pink. (6)
Rnd 2: inc around. (12)
Rnd 3: sc, inc repeat around. (18)
Rnd 4: 2 sc, inc repeat around. (24)
Rnd 5: 3 sc, inc repeat around. (36)
Rnd 7: sc in each st around. (36)
Rnd 8: 5 sc, inc repeat around. (42)
Rnd 9: sc in each st around. (42)
Rnd 10: 6 sc, inc repeat around. (48)
Rnds 11–17: sc in each st around. (48)
Rnd 18: sc in each st around. (48)
Rnd 19: 6 sc, dec repeat around. (42)
Place safety eyes between Rounds 18 and 19, 10 stitches apart, and insert the nose between the eyes on this round.
Rnd 20: sc in each st around. (42)
Rnd 21: 5 sc, dec repeat around. (36)
Rnd 22: 2 sc, dec repeat around x9. (27)
Rnd 23: sc, dec repeat around x9. (18)
Rnd 24: sc in each st around. (18) — change to dark pink
Rnd 25: 3 sc in same st, inc repeat around x9. (45)
Rnds 26–28: sc in each st around. (45)
Rnd 29: 3 sc, dec repeat around x9. (36) — change to light pink
Rnd 30: 2 sc, dec repeat around x9. (27)
Rnd 31: sc, dec repeat around x9. (18) — change to dark pink
Rnd 32: sc, dec repeat around x6. (12)
Rnd 33: dec x6. (6) Stuff firmly, then fasten off and close the opening.
Piglet: Arms (make 2, worked in continuous spiral rounds)
Rnd 1: 6 sc in MR — light pink. (6)
Rnd 2: 2 sc, inc repeat around x2. (8)
Rnds 3–8: sc in each st around. (8) Lightly stuff and fasten off.
Piglet: Legs (make 2, worked in continuous spiral rounds)
Rnd 1: 6 sc in MR — light pink. (6)
Rnd 2: inc around. (12)
Rnd 3: sc, inc repeat around. (18)
Rnds 4–6: sc in each st around. (18)
Rnd 7: sc, dec repeat around. (12)
Rnd 8: 4 sc, dec repeat around x2. (10)
Rnds 9–10: sc in each st around. (10) Stuff and fasten off.
Piglet: Ears (make 2, worked in continuous spiral rounds)
Rnd 1: 5 sc in MR — pink. (6)
Rnd 2: inc around. (10)
Rnds 3–4: sc in each st around. (10)
Rnd 5: 4 sc, inc repeat around x2. (12)
Rnd 6: 3 sc, inc repeat around x3. (15)
Rnd 7: 4 sc, inc repeat around x3. (18)
Rnd 8: 5 sc, inc repeat around x3. (21)
Rnds 9–12: sc in each st around. (21)
Rnd 13: 5 sc, dec repeat around x3. (18)
Rnd 14: 4 sc, dec repeat around x3. (15)
Rnd 15: 3 sc, dec repeat around x3. (12)
Rnd 16: sc in each st around. (12) Fold flat and fasten off before sewing on.
Eeyore: Head and Body (worked in continuous spiral rounds)
Rnd 1: 6 sc in MR — blue. (6)
Rnd 2: inc around. (12)
Rnd 3: sc, inc repeat around. (18)
Rnd 4: 2 sc, inc repeat around. (24)
Rnd 5: 3 sc, inc repeat around. (30)
Rnd 6: 4 sc, inc repeat around. (36)
Rnd 7: sc in each st around. (36)
Rnd 8: 5 sc, inc repeat around. (42)
Rnd 9: sc in each st around. (42)
Rnd 10: 6 sc, inc repeat around. (48)
Rnds 11–18: sc in each st around. (48)
Rnd 19: 6 sc, dec repeat around. (42)
Rnd 20: sc in each st around. (42)
Rnd 21: 5 sc, dec repeat around. (36)
Rnd 22: 2 sc, dec repeat around x9. (27)
Rnd 23: sc, dec repeat around x9. (18)
Rnd 24: sc in each st around. (18)
Rnd 25: 3 sc in same st, inc repeat around x9. (45)
Rnds 26–28: sc in each st around. (45)
Rnd 29: 3 sc, dec repeat around x9. (36)
Rnd 30: 2 sc, dec repeat around x9. (27)
Rnd 31: sc, dec repeat around x9. (18)
Rnd 32: sc, dec repeat around x6. (12)
Rnd 33: dec x6. (6) Stuff firmly, then fasten off and close the opening.
Eeyore: Arms (make 2, worked in continuous spiral rounds)
Rnd 1: 6 sc in MR — blue. (6)
Rnd 2: 2 sc, inc repeat around x2. (8)
Rnds 3–8: sc in each st around. (8) Lightly stuff and fasten off.
Eeyore: Legs (make 2, worked in continuous spiral rounds)
Rnd 1: 6 sc in MR — light purple. (6)
Rnd 2: inc around. (12)
Rnd 3: sc, inc repeat around. (18)
Rnds 4–6: sc in each st around — change to blue . (18)
Rnd 7: sc, dec repeat around. (12)
Rnd 8: 4 sc, dec repeat around x2. (10)
Rnds 9–10: sc in each st around. (10) Stuff and fasten off.
Eeyore: Ears — Outer Piece (make 2, worked in continuous spiral rounds)
Rnd 1: 5 sc in MR — blue. (5)
Rnd 2: inc around. (10)
Rnds 3–4: sc in each st around. (10)
Rnd 5: 4 sc, inc repeat around x2. (12)
Rnd 6: 3 sc, inc repeat around x3. (15)
Rnd 7: 4 sc, inc repeat around x3. (18)
Rnd 8: 5 sc, inc repeat around x3. (21)
Rnds 9–18: sc in each st around. (21)
Rnd 19: 5 sc, dec repeat around x3. (18)
Rnd 20: 4 sc, dec repeat around x3. (15)
Rnd 21: 5 sc, dec repeat around x3. (12) Fasten off, leaving a long tail for sewing.
Eeyore: Ears — Inner Piece (make 2, worked in continuous spiral rounds)
Rnd 1: 5 sc in MR — pink. (5)
Rnd 2: inc around. (10)
Rnds 3–4: sc in each st around. (10)
Rnd 5: 4 sc, inc repeat around x2. (12)
Rnds 6–13: sc in each st around. (12) Fasten off. Pair each inner piece with an outer piece, holding wrong sides together, and sc evenly around the edge to join.
Eeyore: Muzzle (worked in turned rows)
Rnd 1: 6 sc in MR. (6)
Rnd 2: inc around. (12)
Rnd 3: sc, inc repeat around. (18) Fasten off.
Tigger: Head and Body (worked in continuous spiral rounds)
Rnd 1: 6 sc in MR — orange. (6)
Rnd 2: inc around. (12)
Rnd 3: sc, inc repeat around. (18)
Rnd 4: 2 sc, inc repeat around. (24)
Rnd 5: 3 sc, inc repeat around. (30)
Rnd 6: 4 sc, inc repeat around. (36)
Rnd 7: sc in each st around. (36)
Rnd 8: 5 sc, inc repeat around. (42)
Rnd 9: sc in each st around. (42)
Rnd 10: 6 sc, inc repeat around. (48)
Rnds 11–18: sc in each st around. (48)
Rnd 19: 6 sc, dec repeat around. (42)
Rnd 20: sc in each st around. (42)
Rnd 21: 5 sc, dec repeat around. (36)
Rnd 22: 2 sc, dec repeat around x9. (27)
Rnd 23: sc, dec repeat around x9. (18)
Rnd 24: sc in each st around. (18)
Rnd 25: 3 sc in same st, inc repeat around x9. (45)
Rnds 26–28: sc in each st around. (45)
Rnd 29: 3 sc, dec repeat around x9. (36)
Rnd 30: 2 sc, dec repeat around x9. (27)
Rnd 31: sc, dec repeat around x9. (18)
Rnd 32: sc, dec repeat around x6. (12)
Rnd 33: dec x6. (6) Stuff firmly, then fasten off and close the opening.
Tigger: Arms (make 2, worked in continuous spiral rounds)
Rnd 1: 6 sc in MR — orange. (6)
Rnd 2: 2 sc, inc repeat around x2. (8)
Rnds 3–8: sc in each st around. (8) Lightly stuff and fasten off.
Tigger: Legs (make 2, worked in continuous spiral rounds)
Rnd 1: 6 sc in MR — orange. (6)
Rnd 2: inc around. (12)
Rnd 3: sc, inc repeat around. (18)
Rnds 4–6: sc in each st around — change to blue . (18)
Rnd 7: sc, dec repeat around. (12)
Rnd 8: 4 sc, dec repeat around x2. (10)
Rnds 9–10: sc in each st around. (10) Stuff and fasten off.
Tigger: Muzzle (cream, worked in turned rows)
Rnd 1: 6 sc in MR. (6)
Rnd 2: inc around. (12)
Rnd 3: sc, inc repeat around. (18) Fasten off.
Tigger: Upper Muzzle (orange, worked in turned rows)
Rnd 1: 6 sc in MR. (6)
Rnd 2: inc around. (12)
Rnd 3: sc, inc repeat around. (18)
Rnd 4: 2 sc, inc repeat around. (24) Fasten off. Hold a front and a back piece together and sc evenly around the edge to join.
Tigger: Nose (pink, worked in continuous spiral rounds)
Rnd 1: 6 sc in MR. (6)
Rnd 2: inc around. (12)
Rnd 3: sc, inc repeat around. (18) Fasten off.
Tigger: Ears — Front (make 2, cream, worked in continuous spiral rounds)
Rnd 1: 6 sc in MR. (6)
Rnd 2: inc around. (12)
Rnd 3: sc, inc repeat around. (18) Fasten off. Hold a front and a back piece together and sc evenly around the edge to join.
Tigger: Ears — Back (make 2, orange, worked in continuous spiral rounds)
Rnd 1: 6 sc in MR. (6)
Rnd 2: inc around. (12)
Rnd 3: sc, inc repeat around. (18) Fasten off. Hold a front and a back piece together and sc evenly around the edge to join.
Tigger: Belly (cream, worked in turned rows)
Rnd 1: 6 sc in MR. (6)
Rnd 2: inc around. (12)
Rnd 3: sc, inc repeat around. (18) Fasten off. Hold a front and a back piece together and sc evenly around the edge to join.
Assembly
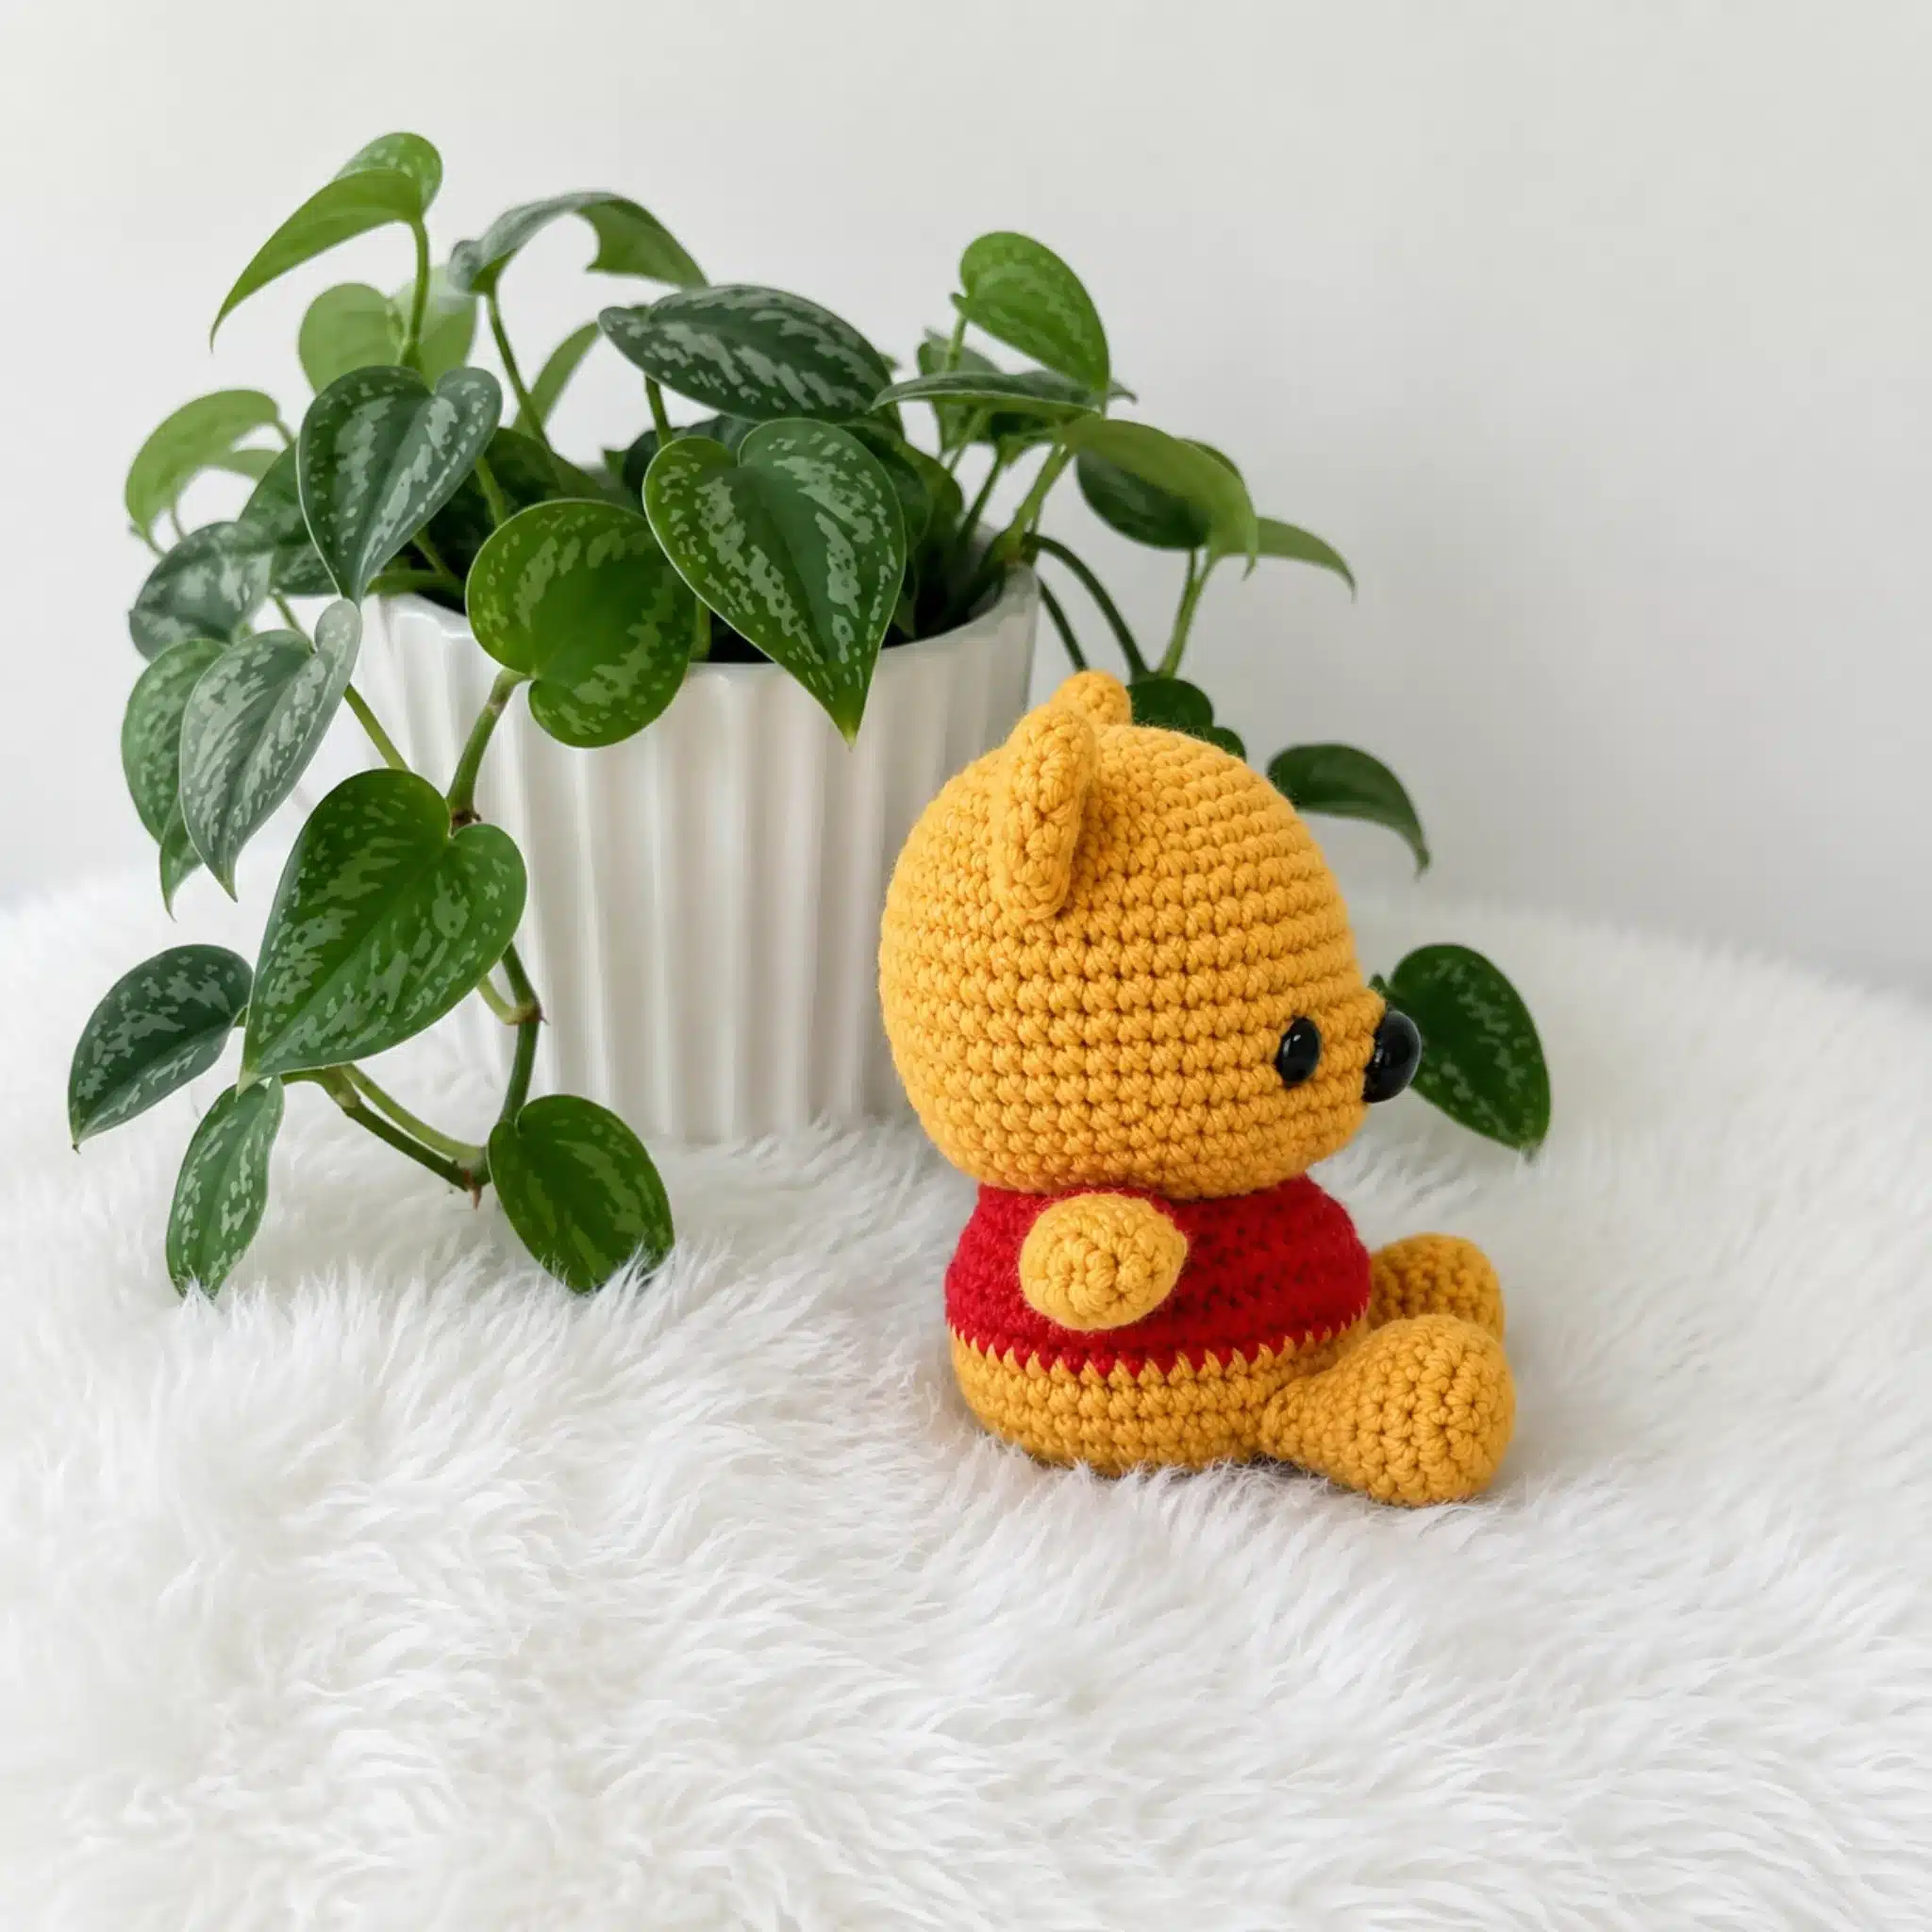
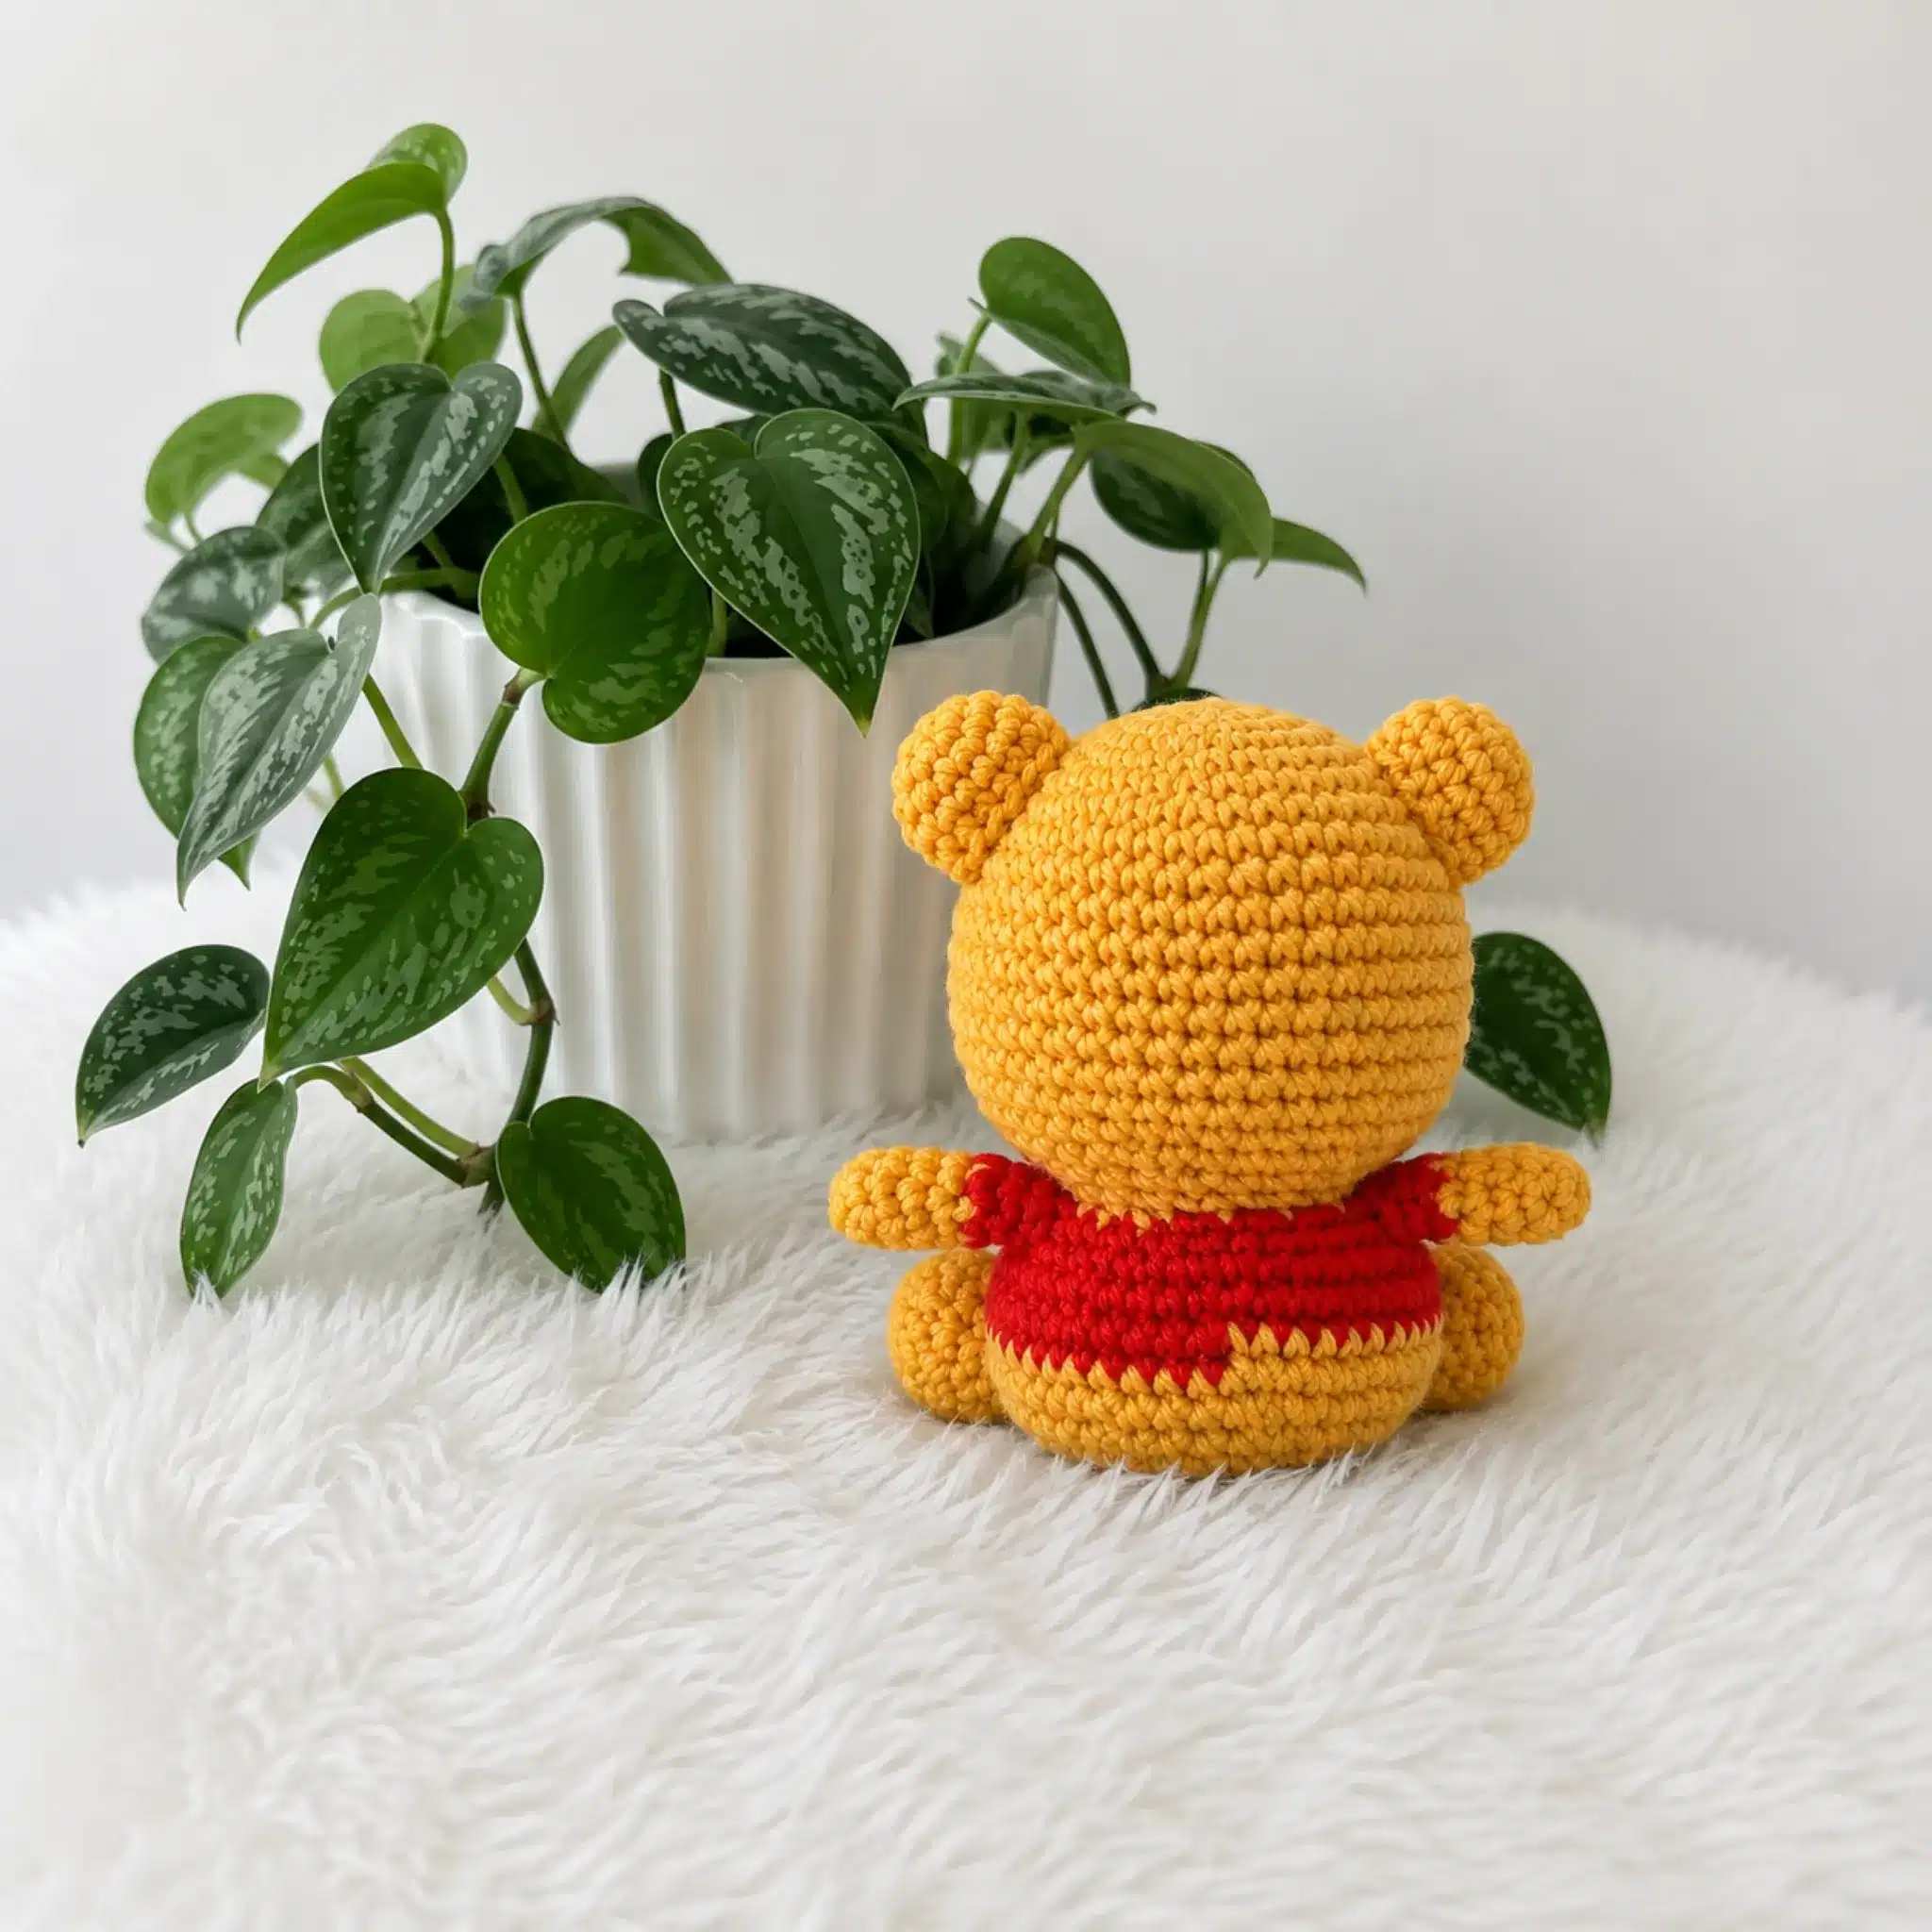
Weave in any loose ends on each finished piece before assembling. For Pooh and Piglet, attach the Arms just below the color-change round on the Body, and attach the Legs to the front bottom of the Body so the character can sit upright. Sew Pooh’s and Piglet’s Ears to the sides of the Head, just above the eye placement round, using a whipstitch and the yarn tail left on each ear. For Eeyore, sew the joined Ear pieces to the top of the Head, angling them slightly downward for that classic droopy look. Stuff the Muzzle lightly and sew it to the lower face, then use black yarn or embroidery thread to add a simple stitched smile. For Tigger, sew the joined Ear pieces to the top of the Head. Attach the Muzzle to the lower face, then sew the Upper Muzzle just above it and the Nose to the muzzle tip. Sew the Belly panel to the front of the Body. Attach Arms and Legs to Eeyore’s and Tigger’s Bodies using a whipstitch, checking that both sides sit evenly before you fasten off. Add safety eyes to Eeyore and Tigger following the same spacing you used for Pooh and Piglet, then secure the backs firmly on the inside of the Head before stuffing. Weave in all remaining yarn tails and trim close to the work.
Tips
- Keep your tension tighter than you would for a garment — amigurumi lives or dies by how well the stuffing stays hidden, and loose stitches let it peek through no matter how carefully you fill each piece. If your stitches feel loose, drop down a hook size before you start rather than trying to fight the tension round by round.
- Work your invisible decreases by inserting your hook into the front loops of the next two stitches only, then pulling up a loop through both before completing the single crochet as normal. This keeps the decrease nearly invisible on the surface, which matters most around the face shaping in Rounds 18–22 for each character.
- Stuff as you go rather than waiting until a piece is closed. Add small amounts of fiberfill every few rounds so it distributes evenly, and stop adding once the piece feels firm but still gives slightly when you press it — overstuffing can distort your stitch definition and stretch the color-change rounds.
- If you’re substituting yarn, stay within worsted weight and choose a smooth, non-splitty fiber like a cotton-acrylic blend; fuzzier yarns make it harder to see your stitches for the frequent increases and decreases in this pattern, especially in Tigger’s stripe-ready orange body.
- When sewing pieces together, work from the wrong side where possible and use a mattress stitch along matching stitch columns — it pulls the seam nearly flat and hides the join far better than a simple whipstitch, especially on visible areas like Eeyore’s ear seams and Tigger’s belly panel.
FAQs
What size hook should I use?
The pattern does not specify an exact hook size. Use a hook sized to your yarn for tight, dense stitches, typically US B-1/2.25 mm–C-2/2.75 mm for worsted weight amigurumi. Swatch and adjust as needed to ensure tight stitches.
How do I prevent stuffing from showing through?
Gauge is not critical, but stitch tension is. Keep your stitches tight. If you see stuffing peeking through, try using a smaller hook or tightening your tension as you crochet.
Can I carry the yarn color instead of cutting it?
Yes. Color changes are noted inline exactly where they occur; you can carry unused yarn up the inside of the piece or cut and rejoin, whichever you prefer.
How should I stuff the pieces?
Stuff each piece firmly but not tightly before closing. You want a huggable finish, not a stiff one. Stuff as you go to ensure even distribution.
Are the ears stuffed?
No, the ears are left unstuffed and flattened before sewing onto the head to maintain their shape.
Pin This Crochet Pattern!