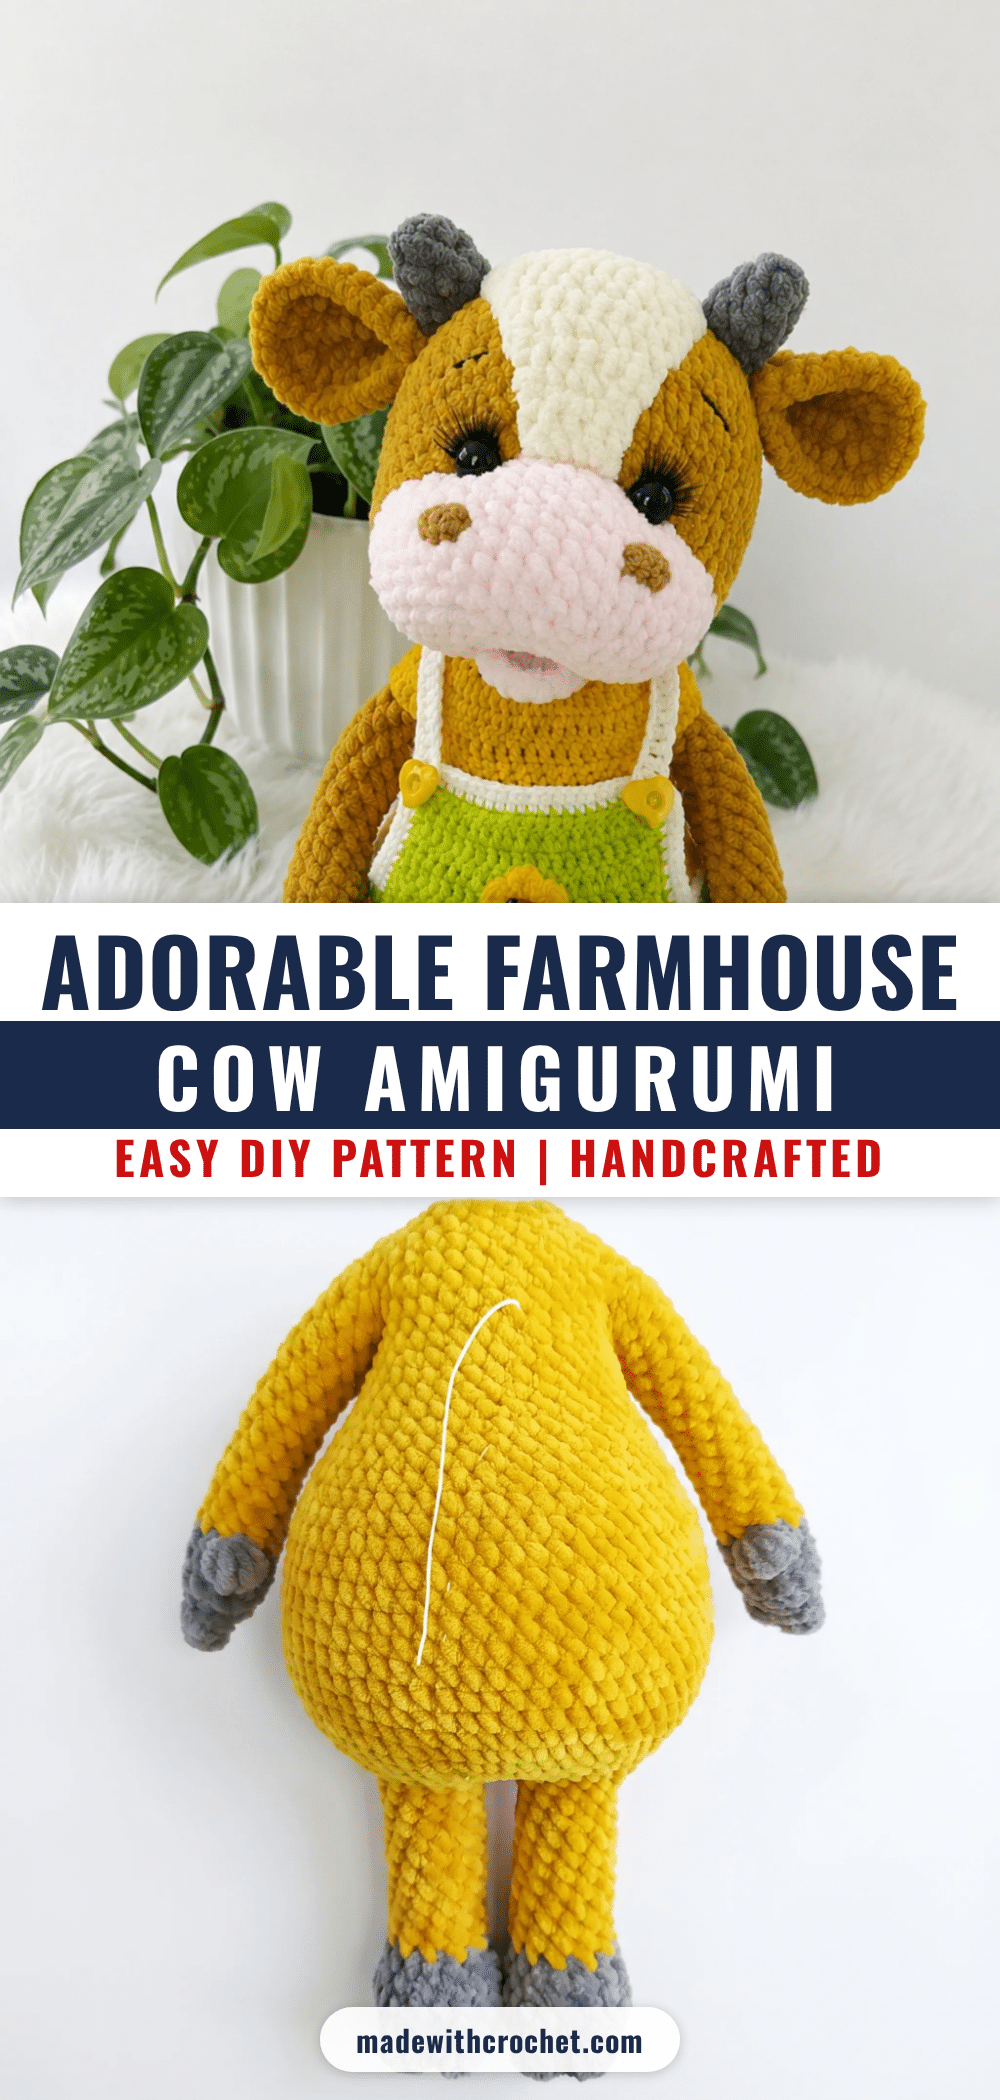
It is a very common worry for amigurumi makers that their first cow might end up looking more like a confused sheep or a lopsided blob. You might worry that the bobble stitches for the hooves will look messy or that joining the legs to the body will result in a gap too wide to hide. But here is the good news: this pattern is designed to be forgiving. The structured shaping and the adorable outfit distract from minor tension inconsistencies, and the instructions are written to guide you through the trickiest parts step-by-step. You do not need to be a perfectionist to make Burenka look charming.
Maker Notes
There is something undeniably cozy about a farmhouse-style amigurumi, and this cow captures that aesthetic perfectly. The choice of Himalaya Dolphin Baby yarn gives the body a soft, plush halo that invites touch, while the contrasting colors of the overalls and cardigan add a playful, storybook quality. I love how the pattern uses the bobble stitch not just for texture, but to define the hooves, giving the cow a grounded, sturdy look. When you dress her in the cardigan and overalls, she transforms from a simple stuffed animal into a character with personality. The facial cinching instructions are particularly clever, allowing you to customize the expression from sweet to slightly mischievous. It is a project that rewards patience with a beautiful, shelf-worthy result.
Project Overview
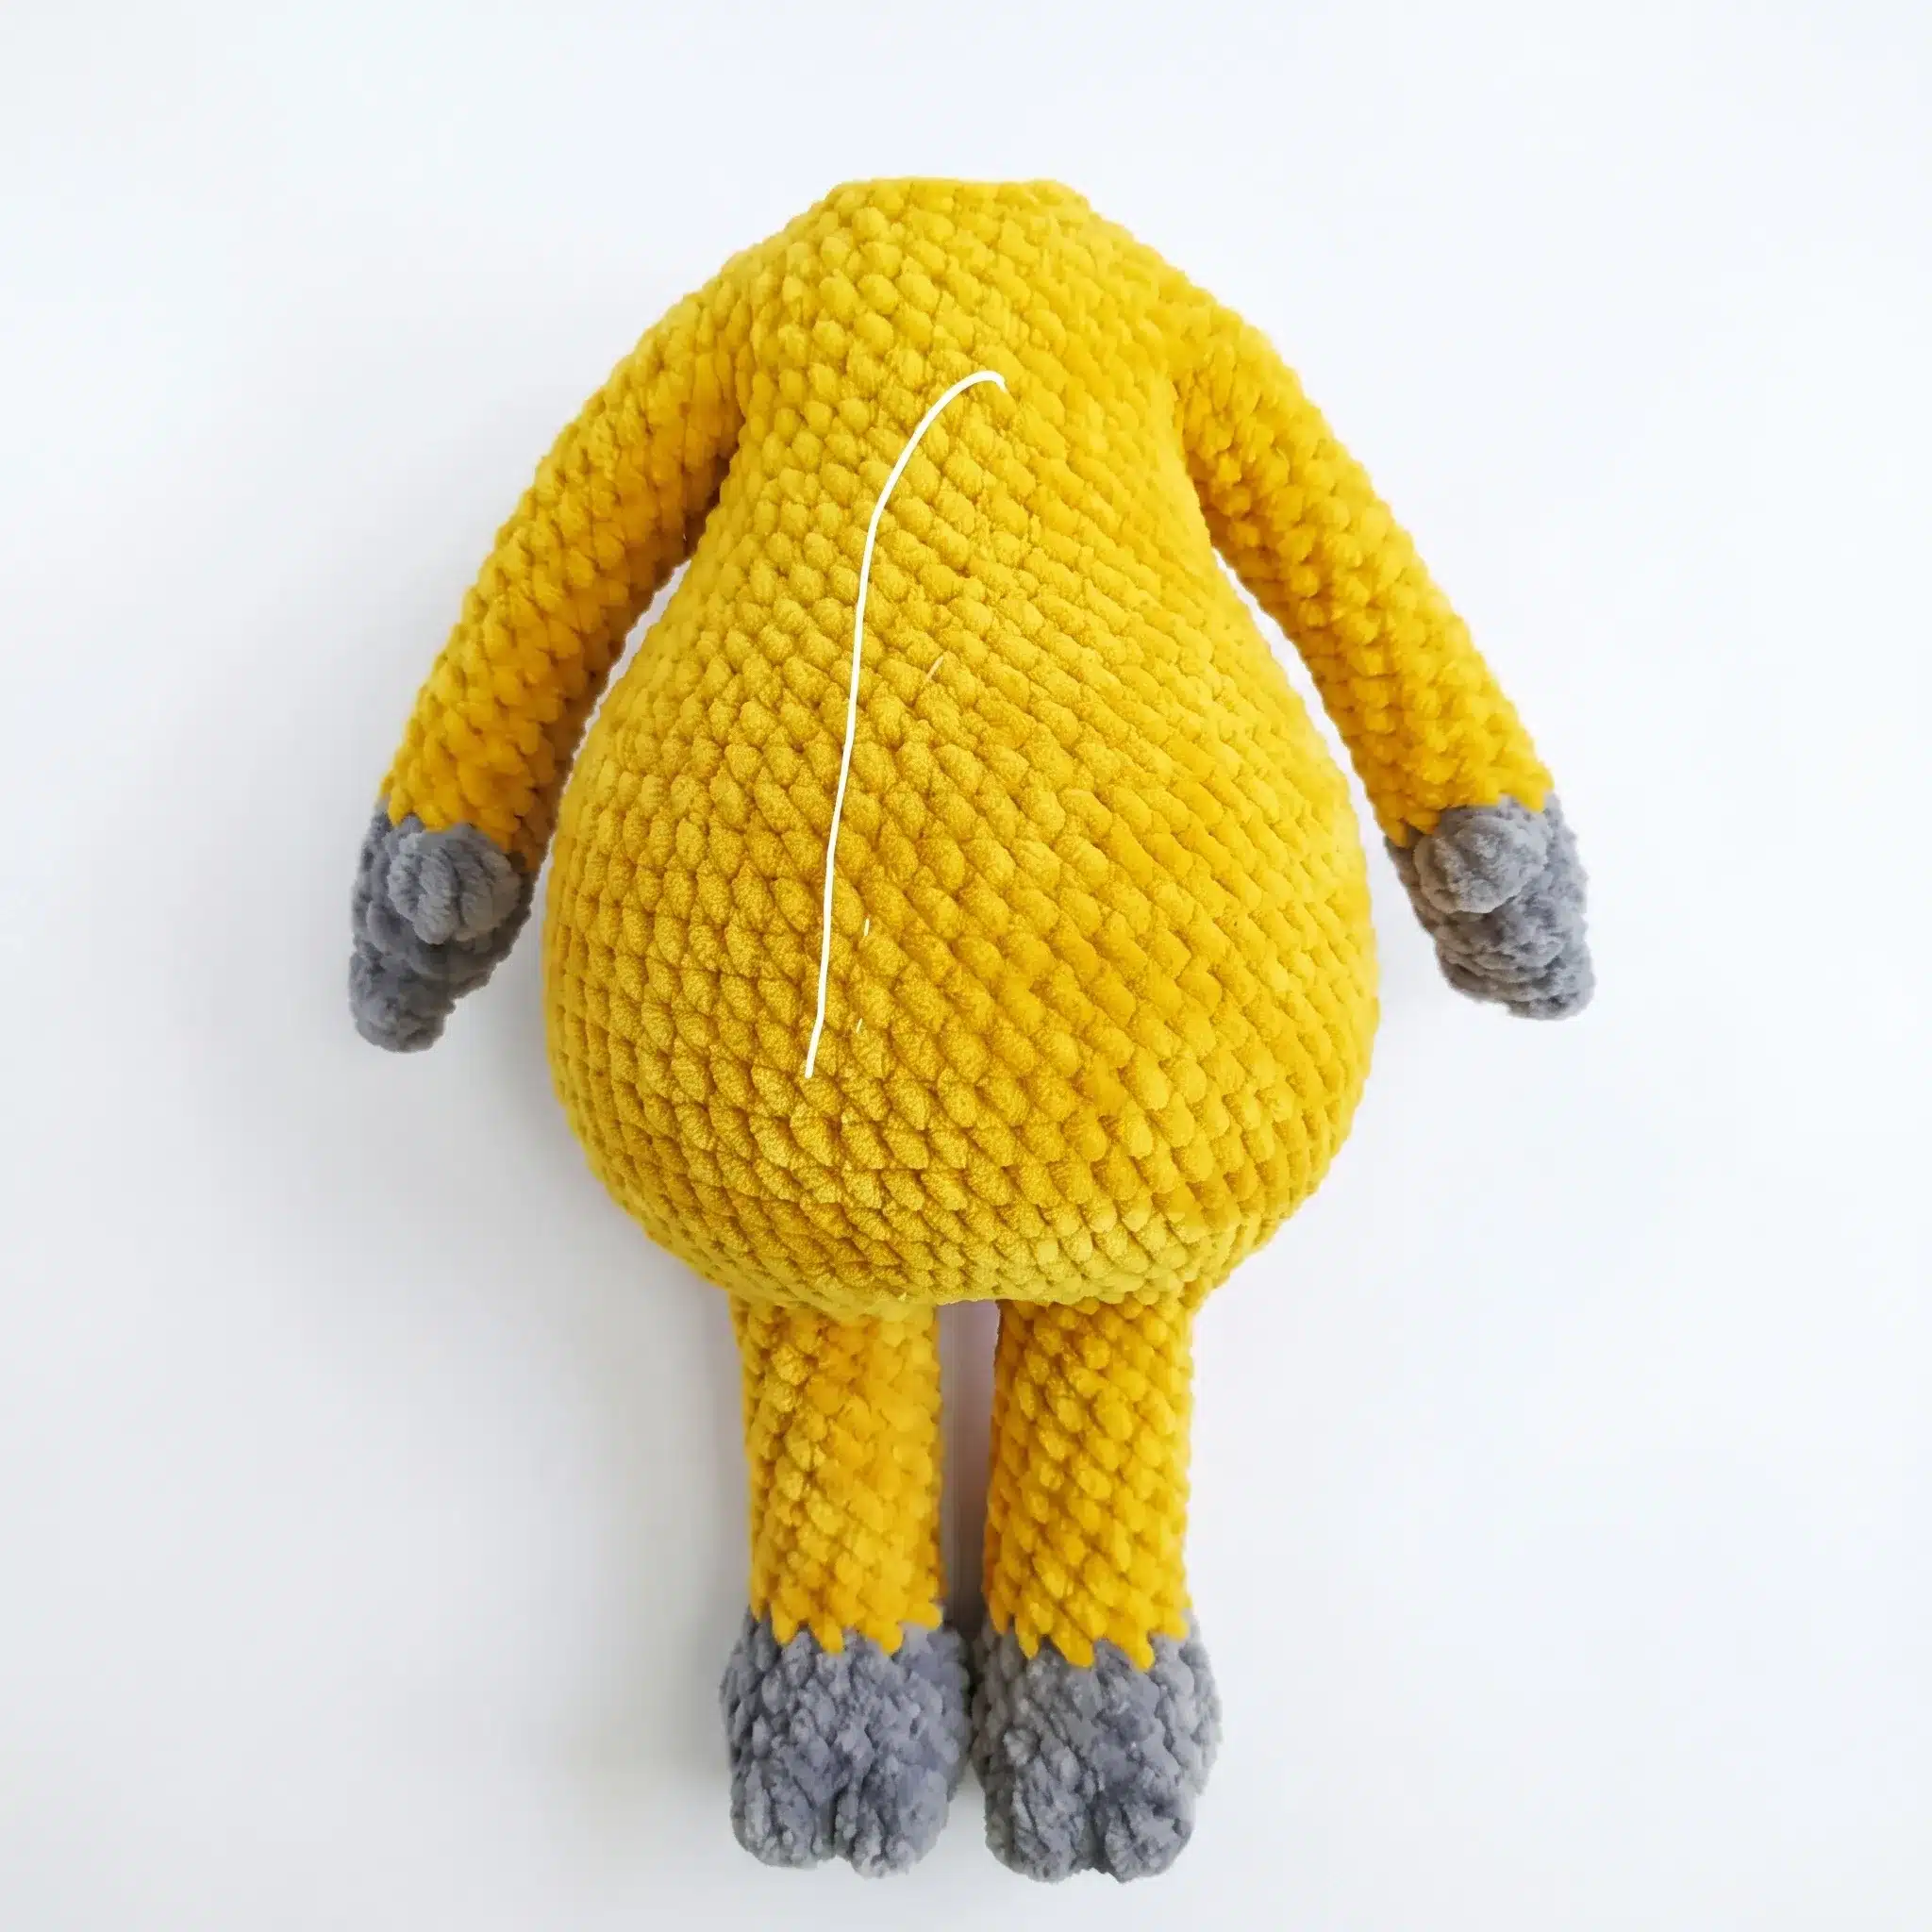
This pattern creates Burenka, a plump little cow with a spotted muzzle, tiny horns, a tasseled tail, and a full mini wardrobe including a cardigan, overalls, and laced-up booties. The project is built for a confident beginner or intermediate crocheter who enjoys shaping techniques like increases, decreases, and textured bobble stitches. The cow is constructed in sections—legs, body, head, and face details—before being assembled and dressed. The finished cow measures approximately 36 cm (14 in) tall.
Materials
- Yarn: Himalaya Dolphin Baby (DK/Light Worsted weight), color 80330 — main body color, approx. 2 skeins
- Yarn: Himalaya Dolphin Baby, color 80320 — hooves and horns
- Yarn: Himalaya Dolphin Baby, colors 80303 and 80308 — face and muzzle patch
- Yarn: Contrasting fingering-weight yarn, color 316 — nostrils
- Yarn: Worsted-weight yarn, color 490 (boxwood/olive) — tail tassel
- Yarn: Black fingering-weight yarn — embroidered eyebrows
- Yarn: Worsted-weight yarn, color 12 (egg yolk) — cardigan
- Yarn: Worsted-weight yarn, color 193 (light lettuce green) — overalls
- Yarn: Worsted-weight yarn, color 01 (white) — overalls trim and bootie laces
- Yarn: Himalaya Dolphin Baby, color 80313 — booties
- Hook: 3.5 mm (US E-4) — for the body, legs, head, horns, and booties
- Hook: 3 mm (~US C/D) — for the tail
- Hook: 2 mm (~US B-1) — for the nostrils, cardigan, and overalls
- Notions: Safety eyes or 12 mm beads — 2
- Notions: Stuffing / fiberfill
- Notions: Stitch markers
- Notions: Yarn needle
- Notions: Scissors
- Notions: Buttons: one 12 mm (cardigan), two 16 mm (overalls)
- Notions: Pre-made or craft-store eyelashes (optional)
- Notions: Reinforced thread or fine yarn, for sewing pieces together
Abbreviations
- BLO — Back Loop Only
- ch — Chain
- dc — Double Crochet
- dec — Decrease (2 sc worked together through the front loops)
- FLO — Front Loop Only
- hdc — Half Double Crochet
- inc — Increase (2 sc in the same stitch)
- MR — Magic Ring
- sc — Single Crochet
- sc3tog — Single Crochet 3 Stitches Together (used to join a piece in place)
- sl st — Slip Stitch
- st(s) — Stitch(es)
Pattern Notes
- This pattern is written entirely in US crochet terminology.
- The legs, body, and head are worked in continuous spiral rounds — place a stitch marker in the first stitch of each round and move it up as you go.
- The ears, muzzle patch, lip, and cardigan are worked in flat turning rows.
- The overalls are worked in joined rounds, closed with a slip stitch and a turning chain at the start of each round.
- Bobble Stitch: This pattern uses a special stitch called a Bobble. For a 3-dc Bobble: work 3 unfinished double crochets into the same stitch (yarn over, insert hook, pull up a loop, yarn over and draw through 2 loops — repeat twice more into the same stitch), then yarn over and draw through all 4 remaining loops on the hook to close. A 5-dc Bobble follows the same method with 5 unfinished dc’s before closing.
- Gauge isn’t critical for this toy, but a tighter gauge keeps stuffing from peeking through.
- Stitch counts are given in parentheses at the end of every round or row.
- Stuff firmly but gradually as you go — overstuffing can stretch and distort the stitches, so add fiberfill in small amounts and check the shape often.
- Safety eyes are placed on Rnd 9 of the head, and full facial shaping (cinching) instructions are included in the Assembly section below.
Pattern Instructions
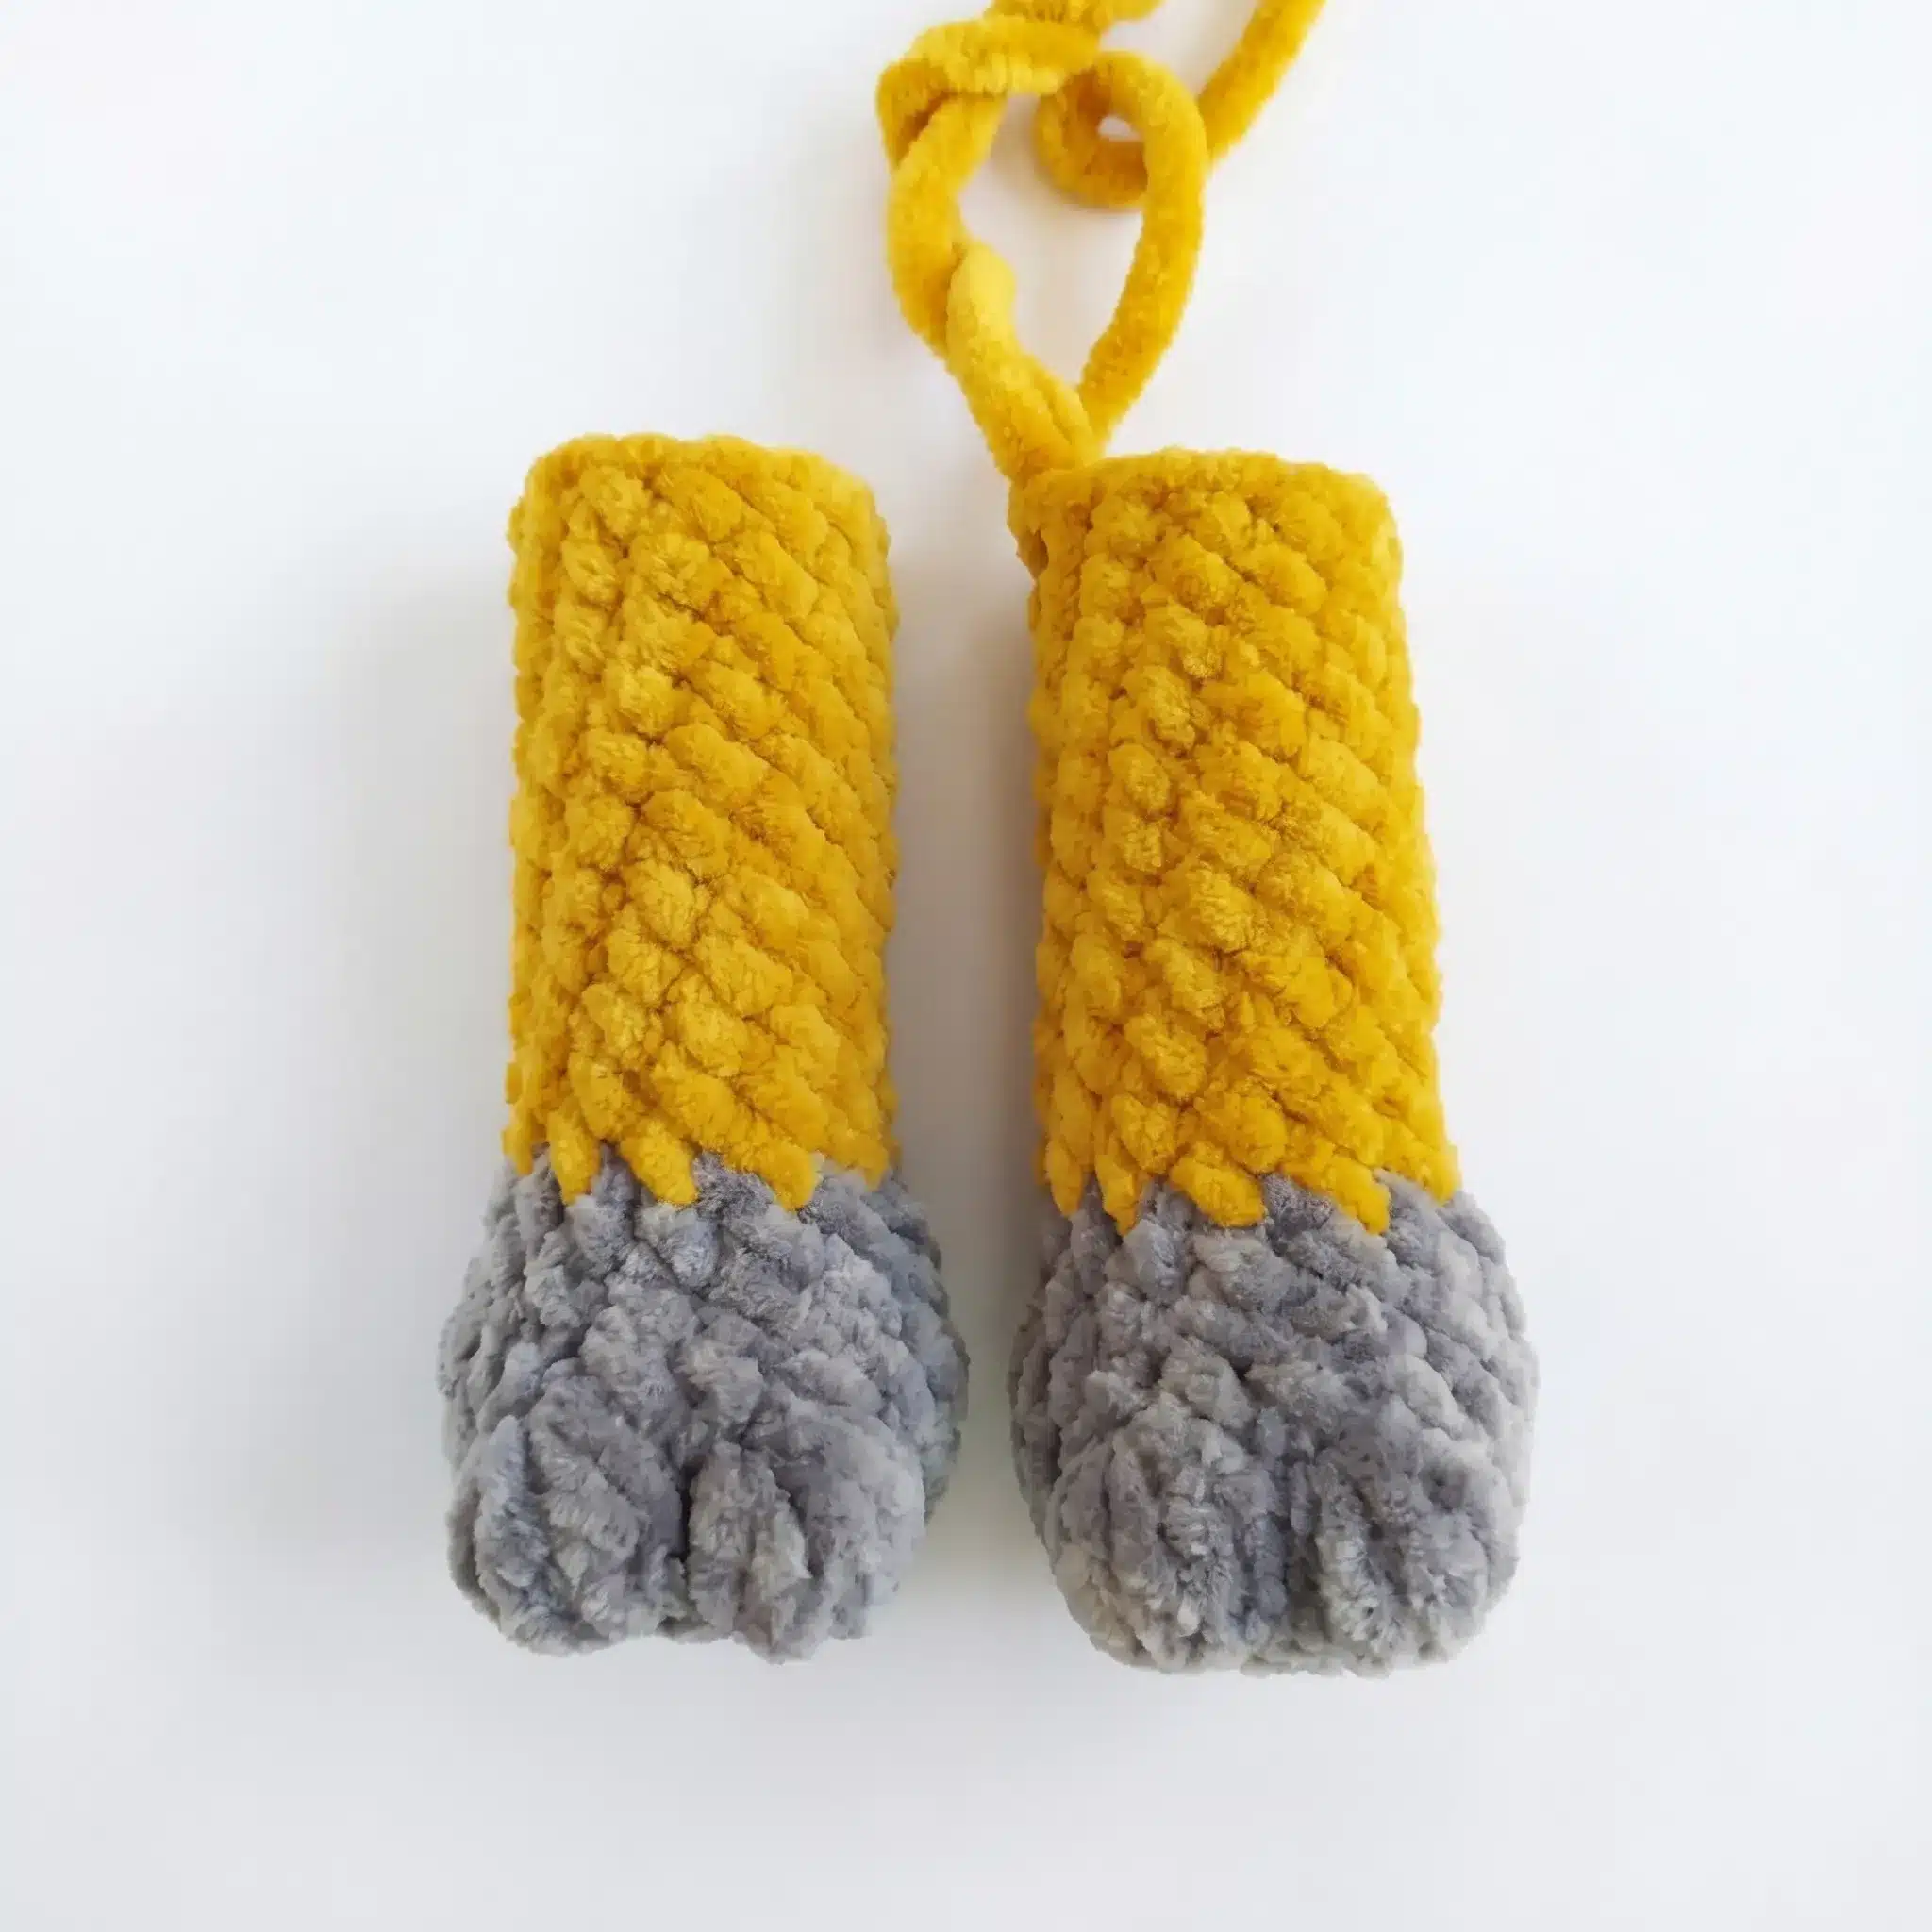
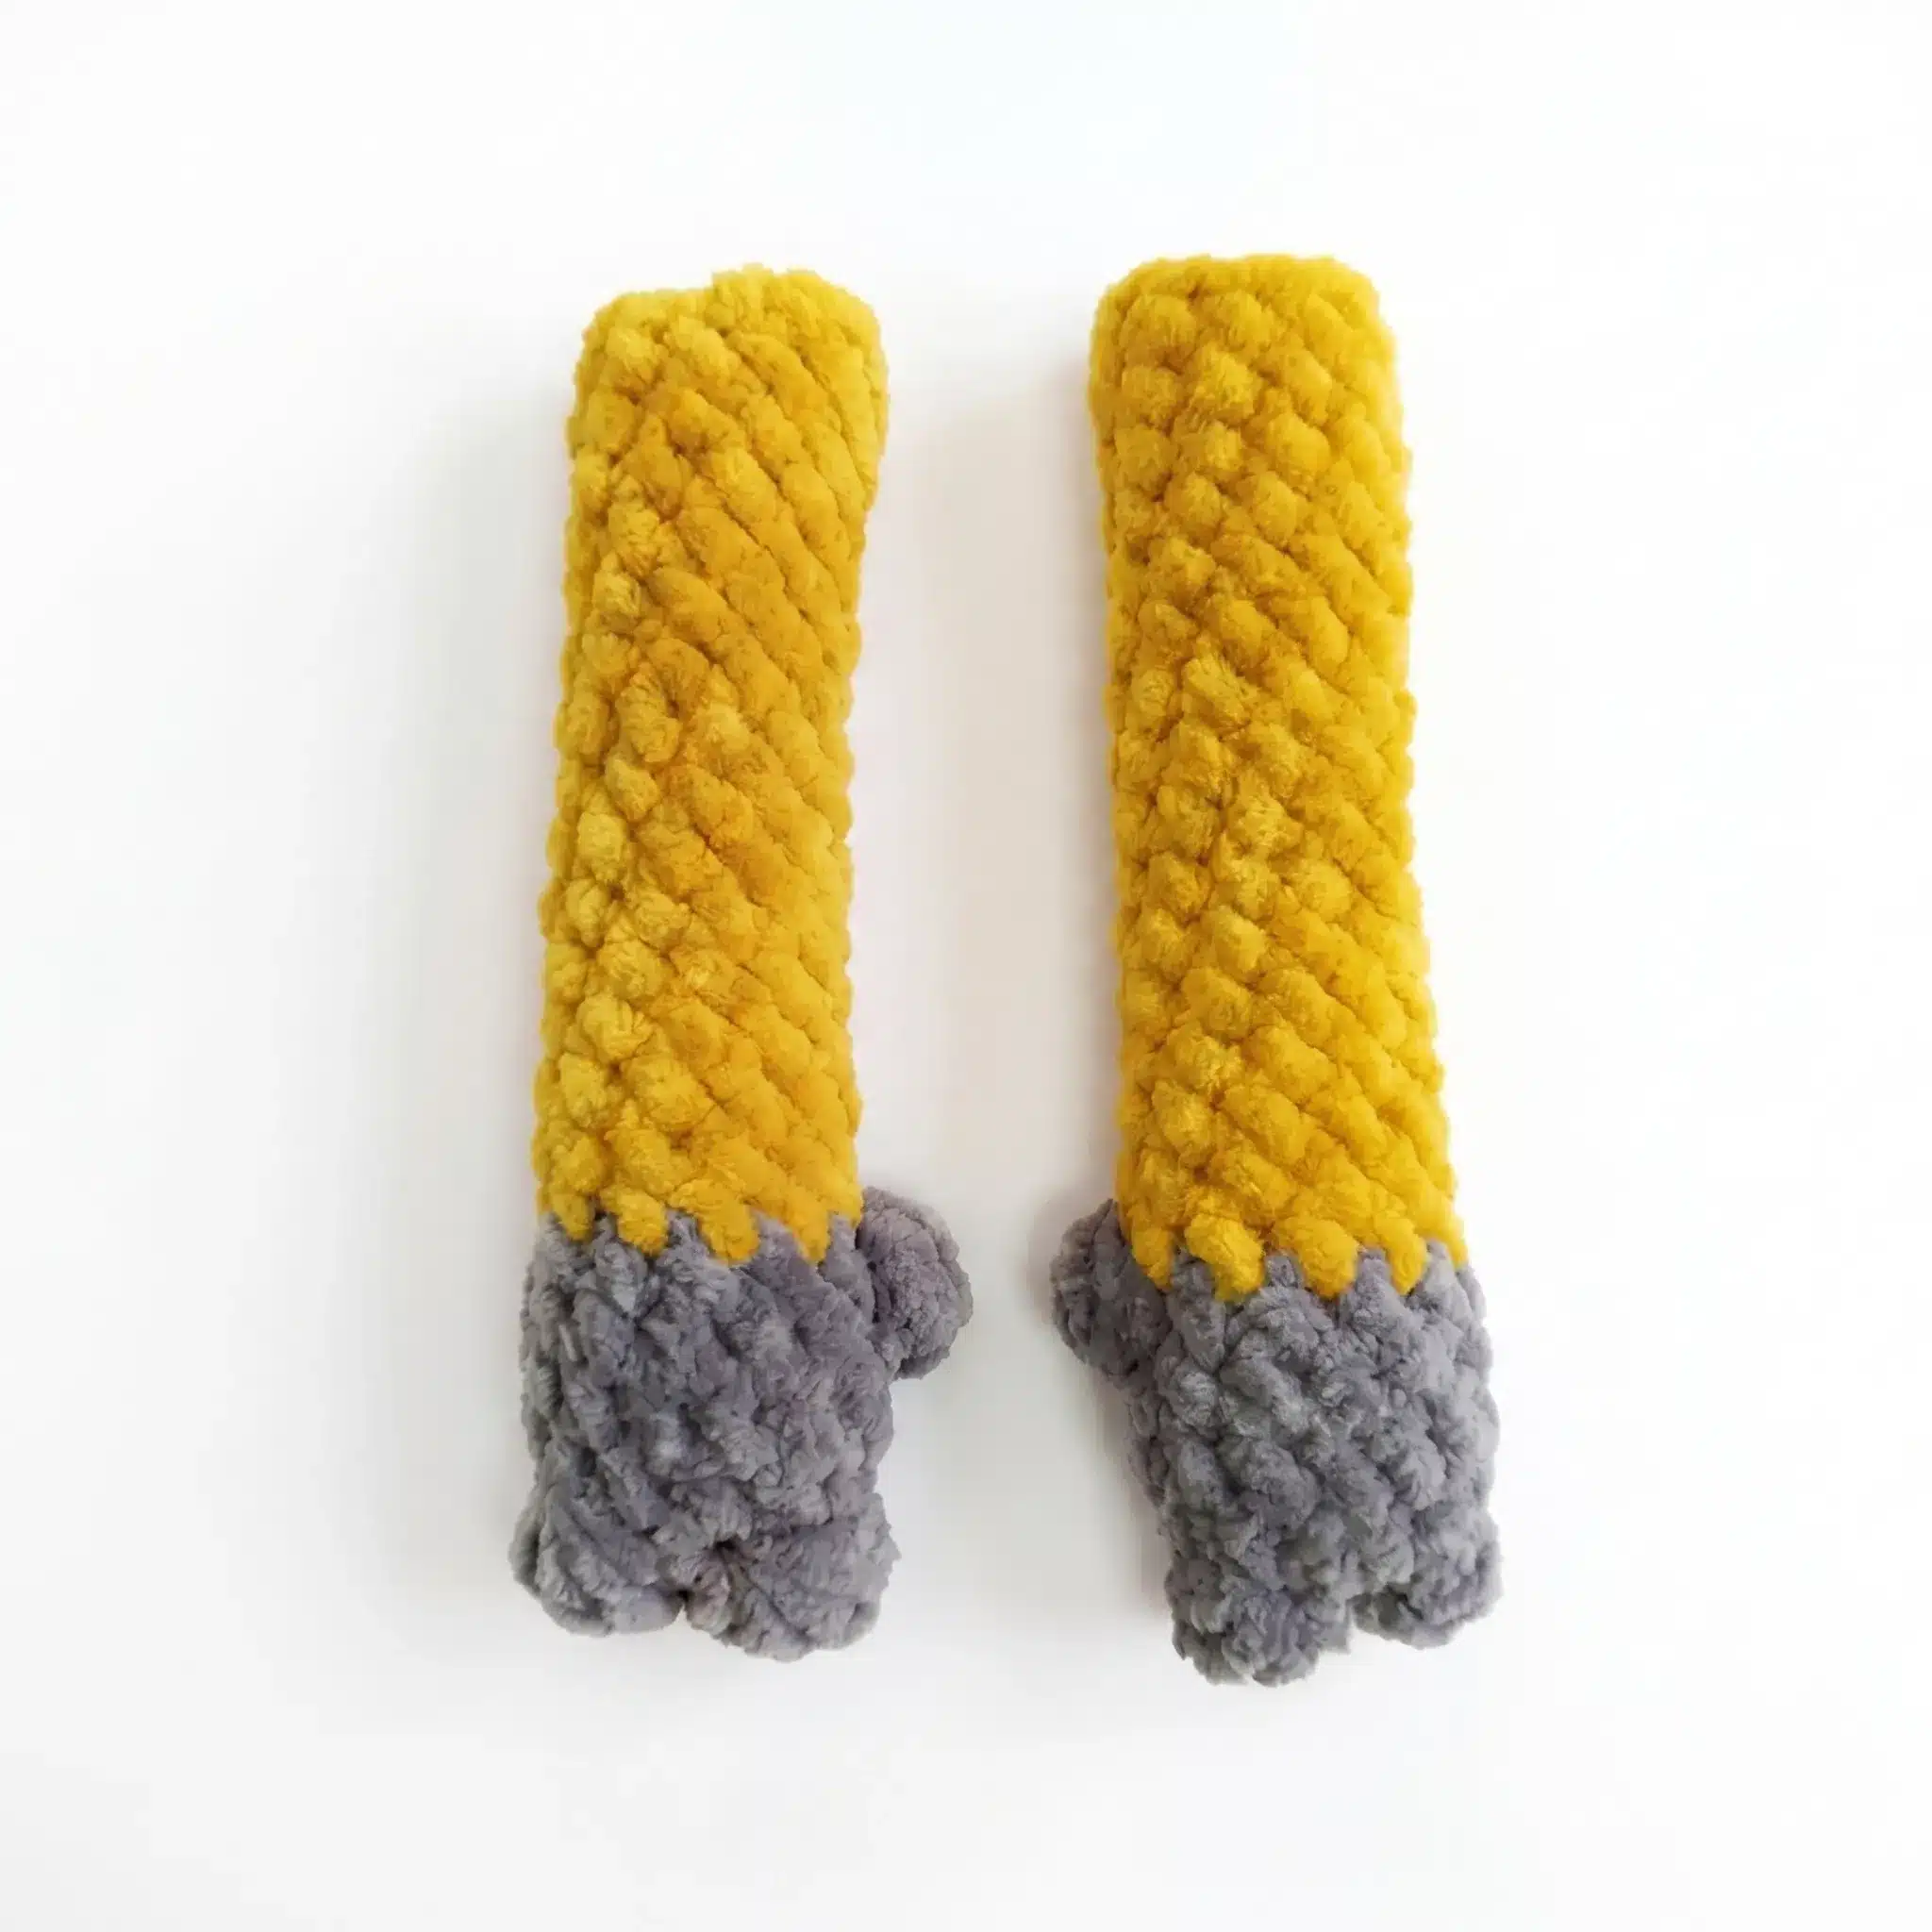
Front Legs (make 2)
Using color 80320 and a 3.5 mm hook:
- Row 1: Ch 5. Starting in the 2nd ch from hook: 5-dc Bobble, 1 sc, 5-dc Bobble, 3 sc in last ch; working into the other side of the foundation chain: 3 sc, then 3 sc in the same st, 3 sc, inc. (13) Place a marker here — this becomes the start of the round from here on.
- Rnd 2: Sc in each st around. (13)
- Rnd 3: Dec, 4 sc, dec, 5 sc. (11)
- Rnd 4 (Leg 1): 4 sc, 5-dc Bobble, 6 sc. (11)
- Rnd 4 (Leg 2): 6 sc, 5-dc Bobble, 4 sc. (11)
Change yarn to color 80330 for the rest of the leg.
- Rnd 5: Dec, 9 sc. (10)
- Rnds 6–20: Sc in each st around. (10) (15 rounds total)
Stuff the lower portion of the leg firmly. Fasten off and weave in the end.
Tail
Using color 80330 and a 3 mm hook:
- Rnd 1: 6 sc in MR. (6)
- Rnds 2–16: Sc in each st around. (6) (15 rounds total)
Flatten the open end so the two sides meet, then work 1 sc through both layers at each stitch across to close it flat. Fasten off and weave in the end.
For the tassel: Cut 15–20 strands of color 490 yarn, each 15 cm (6 in) long. Fold a strand in half, pull the folded midpoint through the last stitch at the tail tip with your hook, then thread the loose ends through that loop and pull snug. Repeat with the remaining strands until the tassel looks full.
Back Legs (make 2) and Body
Using color 80320 and a 3.5 mm hook, start each leg separately:
- Rnd 1: 6 sc in MR. (6)
- Rnd 2: Inc in each st around. (12)
- Rnd 3: (1 sc, inc) around. (18)
- Rnd 4: BLO: 7 sc, (5-dc Bobble, 1 sc) twice, 7 sc. (18)
- Rnd 5: Sc in each st around. (18)
- Rnd 6: 3 sc, (1 sc, dec) 4 times, 3 sc. (14)
- Rnd 7: Sc in each st around. (14)
Change yarn to color 80330. Begin stuffing as you go.
- Rnd 8: 4 sc, (dec, 1 sc) twice, 4 sc. (12)
- Rnds 9–18: Sc in each st around. (12) (10 rounds total)
One leg is complete — fasten off and weave in the end. Repeat Rnds 1–18 for the second leg, but do not fasten off the second leg; continue directly into the body.
- Rnd 19: Ch 2 to join the two legs (on the second leg, join into the 7th stitch, making sure the legs face forward evenly), 6 sc, inc, 5 sc, 2 sc across the joining chain, 5 sc, inc, 6 sc, 2 sc across the joining chain. (30) Place a marker — this becomes the start of the round.
- Rnd 20: (4 sc, inc) around. (36)
- Rnd 21: (5 sc, inc) around. (42)
- Rnd 22: 3 sc, (inc, 6 sc) 5 times, inc, 3 sc. (48)
- Rnd 23: (7 sc, inc) around. (54)
- Rnd 24: 4 sc, (inc, 8 sc) 5 times, inc, 4 sc. (60)
- Rnds 25–32: Sc in each st around. (60) (8 rounds total)
- Rnd 33: 27 sc, sc3tog while attaching the tail, 30 sc. (60)
- Rnd 34: Sc in each st around. (60)
- Rnd 35: 4 sc, (dec, 8 sc) 5 times, dec, 4 sc. (54)
- Rnd 36: (7 sc, dec) around. (48)
- Rnd 37: Sc in each st around. (48)
- Rnd 38: 3 sc, (dec, 6 sc) 5 times, dec, 3 sc. (42)
- Rnd 39: Sc in each st around. (42)
- Rnd 40: (5 sc, dec) around. (36)
- Rnds 41–43: Sc in each st around. (36) (3 rounds total)
- Rnd 44: (4 sc, dec) around, then shift your marker forward 16 sts. (30) This shift moves the start of the round to the back of the body so the shaping in the next rounds lands correctly on the front.
- Rnd 45: 6 sc, sc3tog while attaching a front leg, 13 sc, sc3tog while attaching the second front leg, 5 sc. (30)
- Rnd 46: 6 sc, 7 sc across the attached front leg, 13 sc, 7 sc across the attached front leg, 5 sc. (38)
- Rnd 47: 4 sc, dec, 1 sc, dec, 9 sc, dec, 7 sc, dec, 3 sc. (34)
- Rnd 48: 3 sc, (dec, 7 sc) 3 times, dec, 2 sc. (30)
- Rnd 49: (3 sc, dec) around. (24)
- Rnd 50: (2 sc, dec) around. (18)
- Rnd 51: Sc in each st around. (18)
Fasten off and weave in the end. Shape the body by hand as you finish stuffing — kneading it gently helps the fiberfill settle evenly and gives the piece a smooth, rounded silhouette.
Head
Using color 80303 and a 3.5 mm hook:
- Rnd 1: Ch 6. Starting in the 2nd ch from hook: 4 sc, 3 sc in last ch; working into the other side of the chain: 3 sc, inc. (12)
- Rnd 2: Inc, 3 sc, (inc) 3 times, 3 sc, (inc) twice. (18)
- Rnd 3: 1 sc, inc, 3 sc, (1 sc, inc) 3 times, 3 sc, (1 sc, inc) twice. (24)
- Rnd 4: 2 sc, inc, 3 sc, (2 sc, inc) 3 times, 3 sc, (2 sc, inc) twice. (30)
- Rnd 5: 3 sc, inc, 3 sc, (3 sc, inc) 3 times, 3 sc, (3 sc, inc) twice. (36)
- Rnd 6: 4 sc, inc, 3 sc, (4 sc, inc) 3 times, 3 sc, (4 sc, inc) twice. (42)
- Rnds 7–8: Sc in each st around. (42) (2 rounds total)
- Rnd 9: 28 sc, then change yarn to color 80330 and sc to the end of the round. (42) This is the round where the safety eyes will be placed later — see Assembly.
- Rnd 10: 2 sc, FLO: (hdc inc) 12 times, 28 sc. (54)
- Rnd 11: 4 sc, (inc, 8 sc) 5 times, inc, 4 sc. (60)
- Rnds 12–17: Sc in each st around. (60) (6 rounds total)
- Rnd 18: BLO: sc in each st around. (60)
- Rnd 19: Sc in each st around. (60)
- Rnd 20: (8 sc, dec) around. (54)
- Rnd 21: (7 sc, dec) around. (48)
- Rnd 22: (6 sc, dec) around. (42)
- Rnd 23: (5 sc, dec) around. (36)
- Rnd 24: (4 sc, dec) around. (30)
- Rnd 25: (3 sc, dec) around. (24)
- Rnd 26: (2 sc, dec) around. (18)
- Rnd 27: (1 sc, dec) around. (12)
- Rnd 28: Dec around. (6)
Finish stuffing the head firmly, then cinch the opening closed. Fasten off and weave in the end.
Muzzle Patch
Using color 80308 and a 3.5 mm hook:
- Row 1: Ch 8. Starting in the 2nd ch from hook: 6 sc, 3 sc in last ch; working into the other side of the chain: 6 sc, turn. (15)
- Row 2: Ch 1, 6 sc, (inc) 3 times, 6 sc, turn. (18)
- Row 3: Ch 1, 6 sc, (1 sc, inc) 3 times, 6 sc, turn. (21)
- Row 4: Ch 1, 6 sc, (2 sc, inc) 3 times, 6 sc. (24)
Fasten off, leaving a tail for sewing.
Lip
Using color 80308 and a 3.5 mm hook:
- Row 1: Ch 10. Starting in the 2nd ch from hook: 8 sc, 3 sc in last ch; working into the other side of the chain: 8 sc, turn. (19)
- Row 2: Ch 1, 8 sc, (inc) 3 times, 8 sc, turn. (22)
- Row 3: Ch 1, 8 sc, (1 sc, inc) 3 times, 8 sc, turn. (25)
- Row 4: Ch 1, 8 sc, (2 sc, inc) 3 times, 8 sc. (28)
Fasten off, leaving a tail for sewing.
Ears (make 2)
Using color 80330 and a 3.5 mm hook:
- Row 1: Ch 8. Starting in the 2nd ch from hook: 6 sc, 3 sc in last ch; working into the other side of the chain: 6 sc, turn. (15)
- Row 2: Ch 1, 6 sc, (inc) 3 times, 6 sc, turn. (18)
- Row 3: Ch 1, 6 sc, (1 sc, inc) 3 times, 6 sc, turn. (21)
- Row 4: Ch 1, 6 sc, (2 sc, inc) 3 times, 6 sc. (24)
Fold the ear in half and work sc through both layers to close. Fasten off, leaving a tail for sewing.
Horns (make 2)
Using color 80320 and a 3.5 mm hook:
- Row 1: Ch 6. Starting in the 2nd ch from hook: 4 sc, 3 sc in last ch; working into the other side of the chain: 3 sc, inc. (12)
- Row 2: Ch 1, 4 sc, (inc) 3 times, 4 sc, turn. (15)
- Row 3: Ch 1, 4 sc, (1 sc, inc) 3 times, 4 sc, turn. (18)
- Row 4: Ch 1, 4 sc, (2 sc, inc) 3 times, 4 sc. (21)
Fasten off, leaving a tail for sewing.
Nostrils (make 2)
Using contrasting fingering-weight yarn, color 316, and a 2 mm hook:
- Row 1: 4 sc in MR. (4)
- Row 2: Inc in each st around. (8)
Fasten off, leaving a tail for sewing.
Cardigan
Using worsted-weight yarn, color 12 (egg yolk), and a 2 mm hook:
- Row 1: Ch 12. Starting in the 2nd ch from hook: 11 sc, turn. (11)
- Row 2: Ch 1, 11 sc, turn. (11)
- Row 3: Ch 1, 11 sc, turn. (11)
- Row 4: Ch 1, 11 sc, turn. (11)
- Row 5: Ch 1, 11 sc, turn. (11)
- Row 6: Ch 1, 11 sc, turn. (11)
- Row 7: Ch 1, 11 sc, turn. (11)
- Row 8: Ch 1, 11 sc, turn. (11)
- Row 9: Ch 1, 11 sc, turn. (11)
- Row 10: Ch 1, 11 sc, turn. (11)
Fasten off, leaving a tail for sewing.
Overalls
Using worsted-weight yarn, color 193 (light lettuce green), and a 2 mm hook:
- Rnd 1: Ch 10. Starting in the 2nd ch from hook: 9 sc, turn. (9)
- Rnd 2: Ch 1, 9 sc, turn. (9)
- Rnd 3: Ch 1, 9 sc, turn. (9)
- Rnd 4: Ch 1, 9 sc, turn. (9)
- Rnd 5: Ch 1, 9 sc, turn. (9)
- Rnd 6: Ch 1, 9 sc, turn. (9)
- Rnd 7: Ch 1, 9 sc, turn. (9)
- Rnd 8: Ch 1, 9 sc, turn. (9)
- Rnd 9: Ch 1, 9 sc, turn. (9)
- Rnd 10: Ch 1, 9 sc, turn. (9)
Fasten off, leaving a tail for sewing.
Overalls Trim: Using worsted-weight yarn, color 01 (white), and a 2 mm hook, chain a length of 30–40 ch to create a strap. Fasten off.
Booties (make 2)
Using Himalaya Dolphin Baby, color 80313, and a 3.5 mm hook:
- Rnd 1: 6 sc in MR. (6)
- Rnd 2: Inc in each st around. (12)
- Rnd 3: (1 sc, inc) around. (18)
- Rnd 4: Sc in each st around. (18)
- Rnd 5: Sc in each st around. (18)
- Rnd 6: Sc in each st around. (18)
- Rnd 7: Sc in each st around. (18)
- Rnd 8: Sc in each st around. (18)
- Rnd 9: Sc in each st around. (18)
- Rnd 10: Sc in each st around. (18)
Fasten off, leaving a long tail for sewing.
Bootie Laces: Using worsted-weight yarn, color 01 (white), and a 2 mm hook, chain a length of 20–25 ch for each lace. Fasten off.
Assembly
- Sew the muzzle patch onto the head so its narrow end sits on Rnd 10, between the 4th and 9th hdc increases from Rnd 10.
- Sew the safety eyes onto Rnd 9 of the head: the first eye directly below the 3rd hdc increase, the second eye directly below the 10th hdc increase. Symmetry matters, but don’t chase perfection — small imperfections give the toy handmade charm.
- Shape the muzzle indent: Insert the needle between Rnds 10–11 of the head, bring it out at the 4th hdc increase on Rnd 10, insert it again at the 9th hdc increase on Rnd 10, then bring it back out between Rnds 10–11. Pull gently to cinch, and tie off once you like the shape.
- Shape the eye and mouth indent: Insert the needle between Rnds 4–5 of the head, bring it out at Rnd 9 where the first eye sits, insert it back in at Rnd 9, and bring it out again between Rnds 4–5. Repeat the same sequence for the second eye. Pull both sets of stitches to cinch a soft mouth indent, then run the thread back to the first cinch point, pull snug, tie off, and hide the tail.
- Sew the horns onto Rnd 18 of the head.
- Sew the ears on between Rnds 15–20 of the head.
- Sew the nostrils onto Rnd 5 of the muzzle patch, spacing them roughly 6–7 sc apart.
- Embroider the eyebrows with black yarn.
- Glue on the eyelashes.
- Sew the lip onto Rnds 5–6 of the muzzle patch, adjusting placement until it looks right.
- Sew the head onto the body using a whipstitch, working through both loops of matching stitches for a clean, invisible seam.
- Shape the bottom: Insert the needle at the back of the body, under the tail, between Rnds 32–33, bring it out between the legs, and return through the same path. Repeat a couple of times, pull to cinch, tie off, and weave in the end.
- Dress Burenka in her cardigan, overalls, and booties, and lace up the booties with the white laces.
- Weave in any remaining loose ends throughout the project.
Tips & Tricks
- Keep your tension slightly tighter than you would for a garment — amigurumi worked at a snug gauge keeps stuffing from showing through the stitches and gives the finished pieces a firm, huggable structure. If your stitches look loose, try dropping down half a hook size before you start.
- This pattern’s decrease is worked through the front loops only rather than as an invisible decrease, and that’s intentional — it creates a slightly more visible ridge that helps define the shaping around the legs and head. Follow the front-loop instruction exactly as written for the look this designer intended.
- Stuff a little at a time, especially through the narrow leg and horn tubes, and press the fiberfill into the corners with the blunt end of your hook or a chopstick before adding more. Stop stuffing once the piece feels firm but still gives slightly under gentle pressure — overstuffed amigurumi can distort and split at the seams over time.
- If you swap yarns, stay close to the original DK/light worsted weight and matching hook size so your stitch counts and finished proportions still line up with the pattern. A fuzzier or more textured yarn will also make small details like the muzzle patch and nostrils harder to see clearly, so save those for a smooth, tightly plied yarn even if you change the body yarn.
- The trickiest section of this pattern is Rnd 44 through Rnd 46 of the body, where the round marker shifts and the front legs get joined in. Work slowly here, double-check your stitch counts after each round, and use a locking stitch marker on the leg attachment points so you don’t lose track of where each sc3tog belongs.
Frequently Asked Questions
Can I use a different yarn for the body?
Yes, but stick to a DK or light worsted weight yarn to maintain the correct gauge and proportions. Heavier yarns will make the cow too large, while lighter yarns may result in loose stitches that show stuffing.
How do I fix loose stitches in amigurumi?
If your stitches look loose, try using a smaller hook size. Tighter tension helps prevent stuffing from peeking through and gives the toy a firmer structure.
What if I don’t have safety eyes?
You can use 12 mm beads or embroider the eyes using black yarn. If using beads, ensure they are securely attached and safe for the intended age group.
How do I attach the front legs to the
Pin This Crochet Pattern!