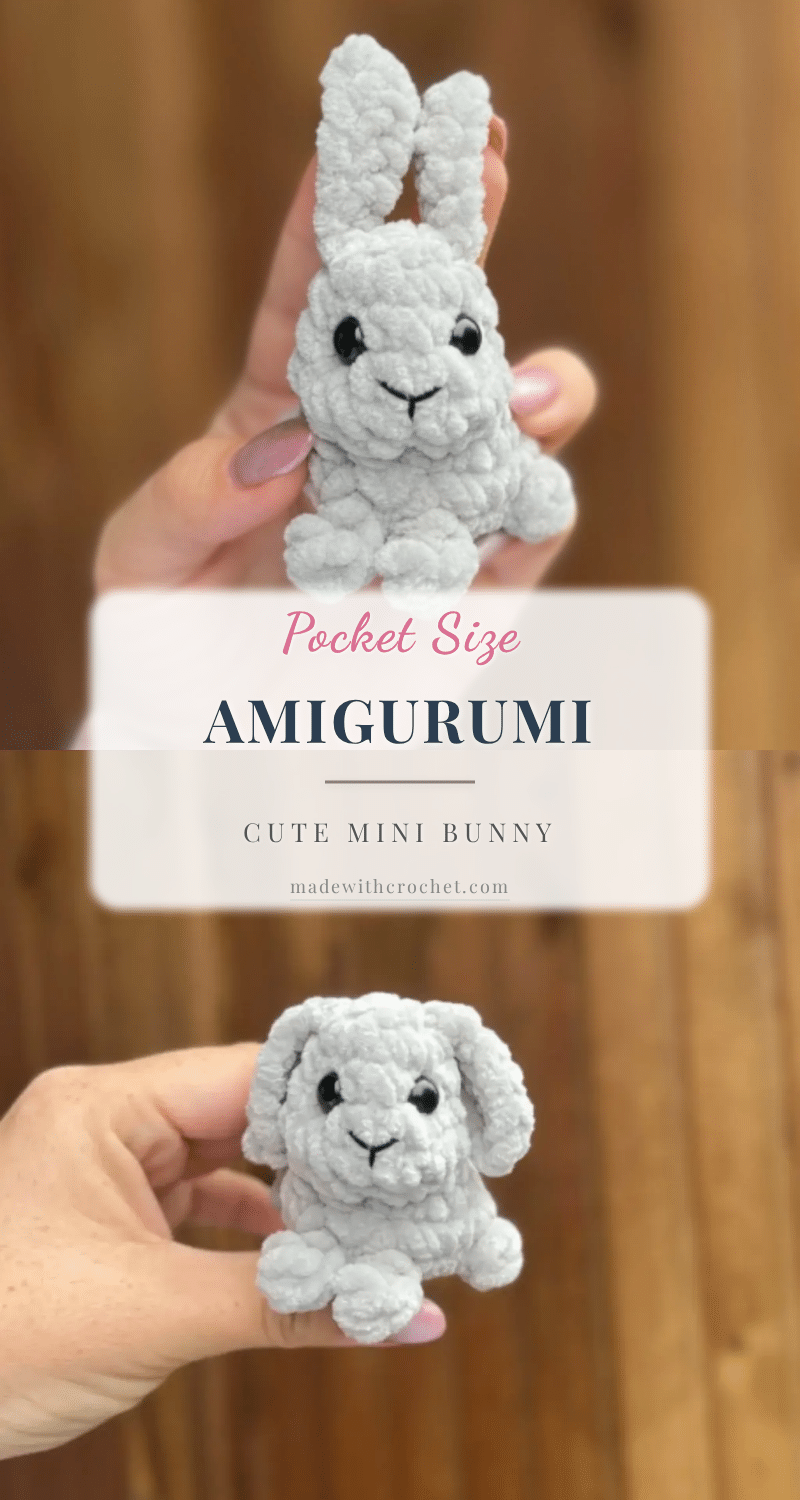
There is a specific kind of magic in the way amigurumi takes shape, round by round, as the spiral builds height and the fabric begins to curve into three dimensions. For the mini amigurumi bunny, that magic is found in the texture of the plush yarn and the precise shaping of the body. You will feel the difference as you work the increases and decreases, watching the head form and the body widen. The little details—the puff stitch legs, the tiny tail, and the cinched waist—give you those satisfying moments that keep crocheters hooked. This pattern focuses on clean lines and soft texture, making every stitch count toward a charming, pocket-sized companion.
Texture and Stitch Notes
Working with plush or chenille-style yarn creates a distinct visual effect where the individual stitches blend into a soft, fuzzy surface. This texture is forgiving; it naturally hides minor tension inconsistencies, which is wonderful for beginners but still allows for beautiful definition when you use the invisible decrease. The “puff stitch” used for the legs adds a unique textural element that mimics the look of tiny, tucked-in feet without requiring complex stuffing. Pay attention to the cinching step in the assembly; pulling the cotton thread gently through the body creates a subtle indentation that defines the haunches, adding a layer of realism and charm that flat stuffing alone cannot achieve.
Project Overview
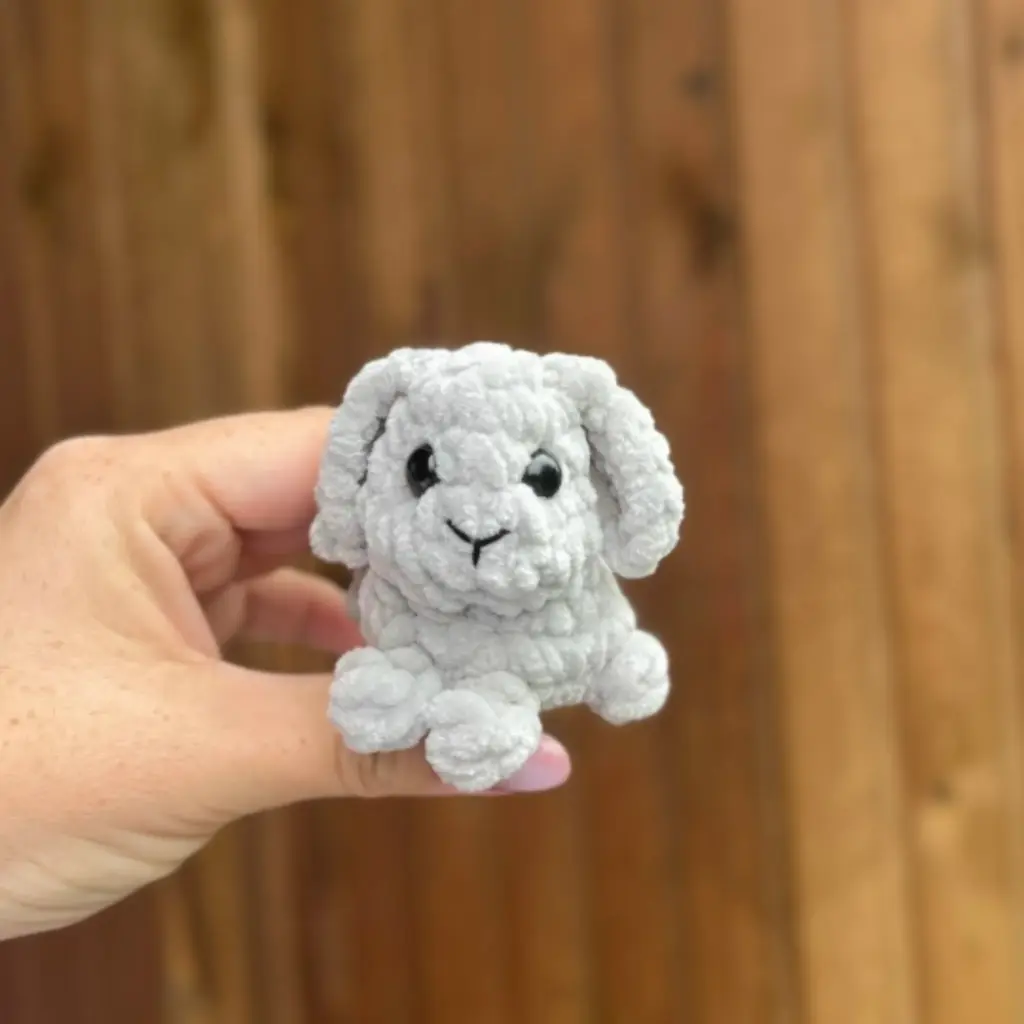
This mini amigurumi bunny is designed to fit entirely in the palm of your hand, measuring approximately 5cm tall and long. It features a body and head worked as one continuous piece, with legs and a tail formed directly onto the body using puff stitches and half double crochets. The ears are attached separately to the side of the head. This project is perfect for keychains, bag charms, or as a small gift, and it utilizes basic amigurumi techniques worked in continuous spiral rounds.
Materials
- Yarn: Medium (Worsted) weight plush or chenille-style yarn, one color of your choice (the sample uses a soft gray)
- Hook: E-4 (3.5 mm) or G-6 (4.0 mm) crochet hook
- Safety Eyes: 8mm, 1 pair
- Embroidery Thread: Black (for the nose)
- Cotton Thread: Coordinating color (for cinching/shaping)
- Stuffing: Fiberfill stuffing
- Tools: Stitch marker, yarn needle with a large eye, scissors
Gauge and Finished Size
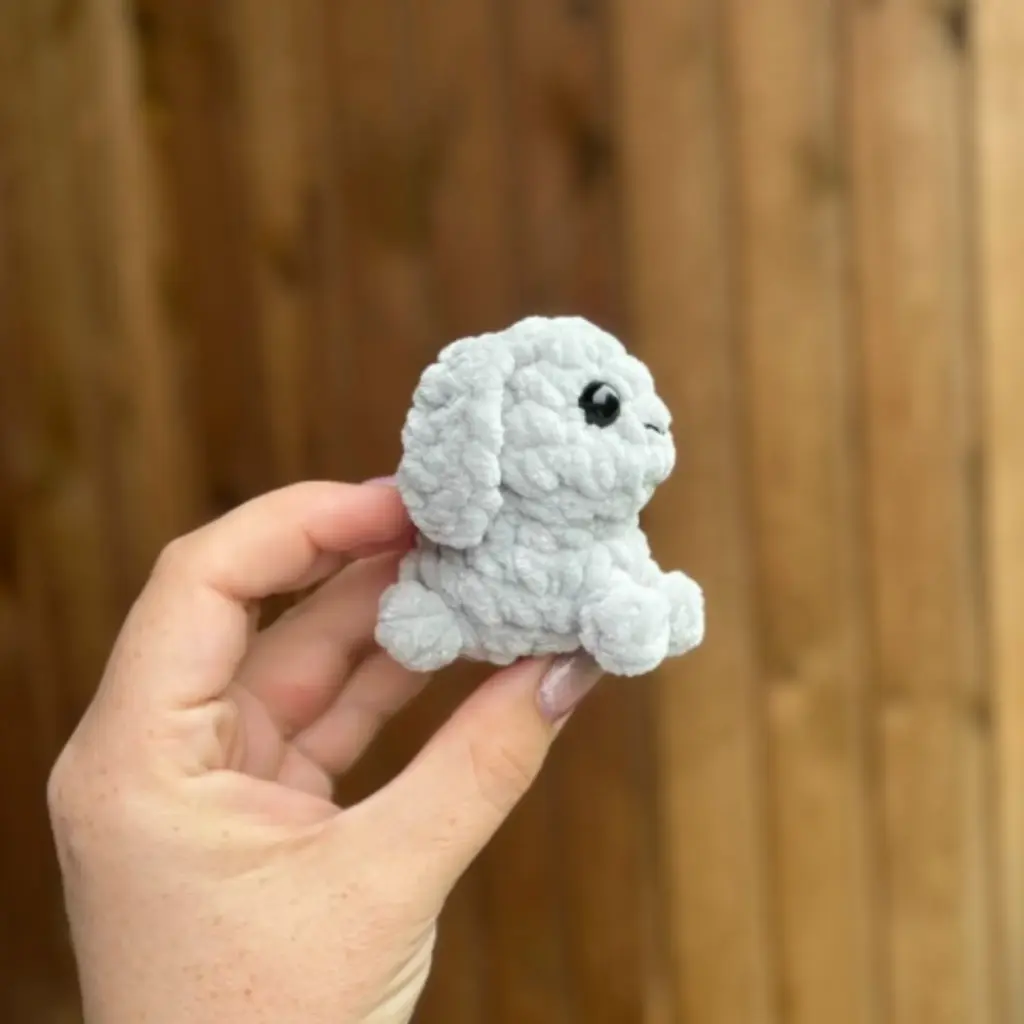
Gauge is not critical for this project. The finished size will vary based on your tension, yarn thickness, and hook size. The sample bunny measures about 5cm tall and long.
Abbreviations
- ch — Chain
- dc — Double Crochet
- dec — Decrease (invisible decrease recommended)
- hdc — Half Double Crochet
- inc — Increase (2 sc in same stitch)
- MR — Magic Ring
- puff st (2dc) — Puff Stitch (2 dc sharing one base and one top)
- sc — Single Crochet
Pattern Notes
- This pattern is written in US crochet terminology.
- The body and head are worked in one continuous piece, in continuous spiral rounds — do not join or chain between rounds, and use a stitch marker to track the beginning of each round.
- Stitch count is given at the end of each round in parentheses: (##)
- The legs, tail, and ears are worked as small appended pieces directly onto the body — read each round carefully, as the leg and tail instructions are worked mid-round.
- Stuff firmly but not stiffly, distributing fiberfill toward the edges first, then filling the center.
- Safety eyes are glued rather than snapped in for this small scale — see the Assembly section for placement.
Pattern Instructions
Body & Head (worked as one piece)
Rnd 1: 6 sc in MR. (6)
Rnds 2–3: sc in each st around. (12)
Rnd 4: 3 sc, 2 inc, 2 sc, 2 inc, 2 sc, inc. (17)
Rnd 5: inc, 2 sc, 2 dec, 2 sc, 2 dec, 4 sc. (14)
Rnd 6: 4 sc, 3 dec, 2 sc, 2 inc. (13)
Rnd 7: 2 inc, 2 sc, inc, 2 sc, inc, 3 sc, 2 inc. (19)
Rnd 8: 2 inc, 6 sc, front leg (ch 3, puff st (2dc) in 2nd ch from hook), 2 sc, front leg (ch 3, puff st (2dc) in 2nd ch from hook), 4 sc, back leg (ch 2, puff st (2dc) in 2nd ch from hook), 5 sc, tail (ch 2, hdc in 2nd ch from hook). (21)
Rnd 9: 5 sc, back leg (ch 2, puff st (2dc) in 2nd ch from hook), 4 sc, 2 dec, 2 sc, 3 dec. (16)
Stuff the piece firmly now, before closing the last round.
Rnd 10: 10 dec. (5) Fasten off, leaving a tail. Close the opening and weave in the end.
Ears (make 2)
Attach yarn to the side of the body at approximately Rnd 2. Ch 7. Starting in the 2nd ch from hook: 1 sc, 3 hdc, 2 sc. Fasten off, leaving a short tail for weaving in. Repeat for the second ear, attaching it beside the first.
Assembly
With the body and head already worked as one piece and stuffed, position both ears at the top of the head, roughly in line with Rnd 2, spaced evenly apart. Sew or tack the base of each ear in place using its yarn tail. The ears can stand upright naturally, or you can fold them backward and secure the tips with a small stitch at the crown of the head for a “floppy ear” look.
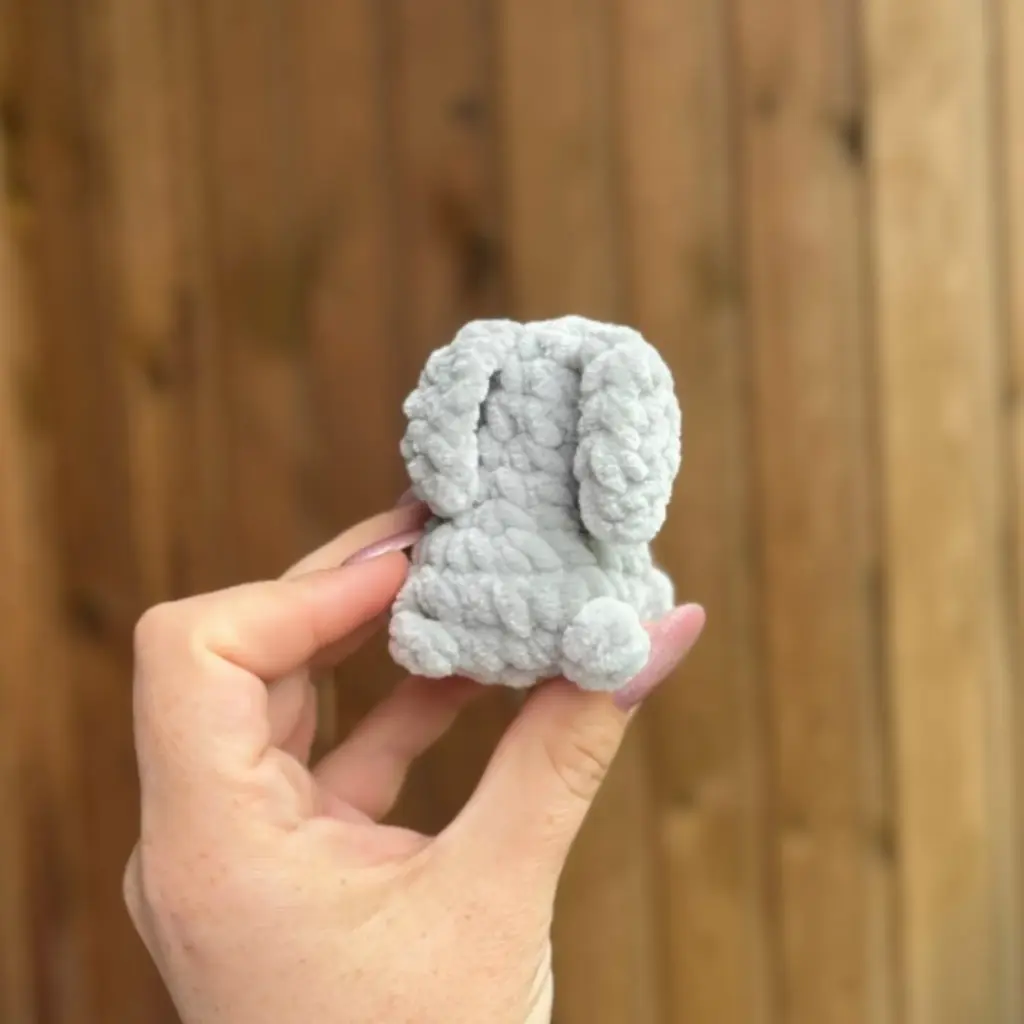
Use cotton thread and your yarn needle to add the cinching detail: pass the needle through the body from front to back at the points shown in your reference photos, pulling gently to define the separation between the head, body, and haunches. Knot off securely and bury the thread inside the stuffing.
Glue the 8mm safety eyes into place on the face, spacing them evenly on either side of center. Using black embroidery thread, stitch a small nose and, if desired, a simple mouth line beneath it. Weave in any remaining loose ends and trim.
Your mini bunny is complete.
Tips
- Keep your tension even: Because this bunny is so small, every stitch is visible — work with consistent tension throughout so the fabric looks uniform rather than lumpy in spots. If your plush yarn tends to split, slow down slightly on each stitch to catch both loops cleanly.
- Master the invisible decrease: A regular decrease can create a slightly bulky ridge on a piece this size, which is much more noticeable at 5cm than on a larger amigurumi. Practice the invisible decrease (working into the front loops of two stitches together) so your shaping rounds stay smooth.
- Don’t overstuff the small legs and tail: The front legs, back legs, and tail are formed from just a chain and a puff stitch or half double crochet — they’re meant to sit flat against the body rather than be stuffed separately. Focus your fiberfill on the main body and head instead.
- Stop stuffing before you close Rnd 10: Add fiberfill gradually as you work Rnds 7–9, checking the shape as you go, and do your final firm pass right before closing the last round. This keeps the decrease rounds easy to work through without fighting overstuffed fabric.
- Substituting yarn changes your finished size: If you swap the plush yarn for a smooth worsted-weight cotton or acrylic, expect a slightly firmer, less fuzzy bunny — plush yarn naturally hides small stitch irregularities, so a smoother yarn will show more texture detail. Adjust your hook size down slightly if you want to keep the same finished dimensions.
FAQs
Why are my safety eyes loose or falling out?
For this small scale (5cm), the pattern recommends gluing the 8mm safety eyes rather than using the standard washer backing, which may not hold securely on such a small surface area. Ensure you use a strong craft glue and let it dry completely.
Can I use regular worsted weight yarn instead of plush yarn?
Yes, but be aware that the finished look will change. Plush yarn hides stitch definition, while regular worsted weight cotton or acrylic will show more texture detail and may look firmer. You may need to adjust your hook size to maintain the 5cm size.
How do I make the ears floppy?
After attaching the ears, you can fold the tips backward and secure them with a small stitch at the crown of the head. This creates a cute “floppy ear” look compared to the natural upright position.
What is a puff stitch (2dc)?
The pattern defines this as a Puff Stitch made of 2 dc sharing one base and one top. It is used to create the small, flat legs and tail that attach directly to the body.
Why do I need cotton thread for assembly?
The cotton thread is used to create a “cinching” effect. By passing the needle through the body and pulling gently, you create a subtle indentation that defines the separation between the head, body, and haunches, giving the bunny a more realistic shape.
Pin This Crochet Pattern!