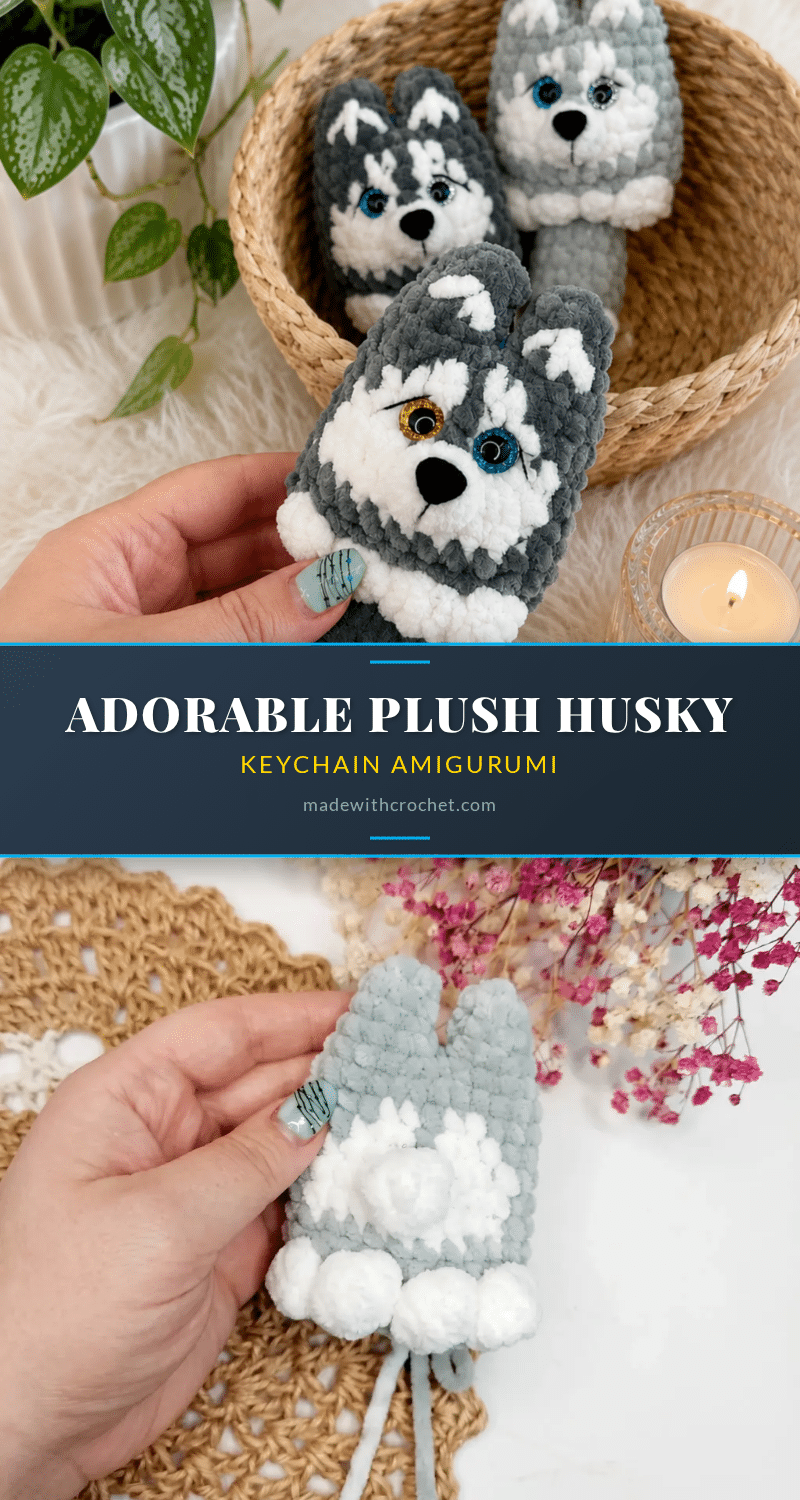
There is a specific kind of magic that happens when you pull a loop through with a hook and suddenly, a flat piece of yarn begins to take on volume. You are sitting at your table, the plush yarn soft under your fingers, and the first few rounds of the body are forming a perfect circle. The ears are waiting to be joined, the stuffing is ready, and you can already picture this little husky clipped to your favorite bag. It is a small project, but the satisfaction of seeing it come together is huge.
Why This Project Works
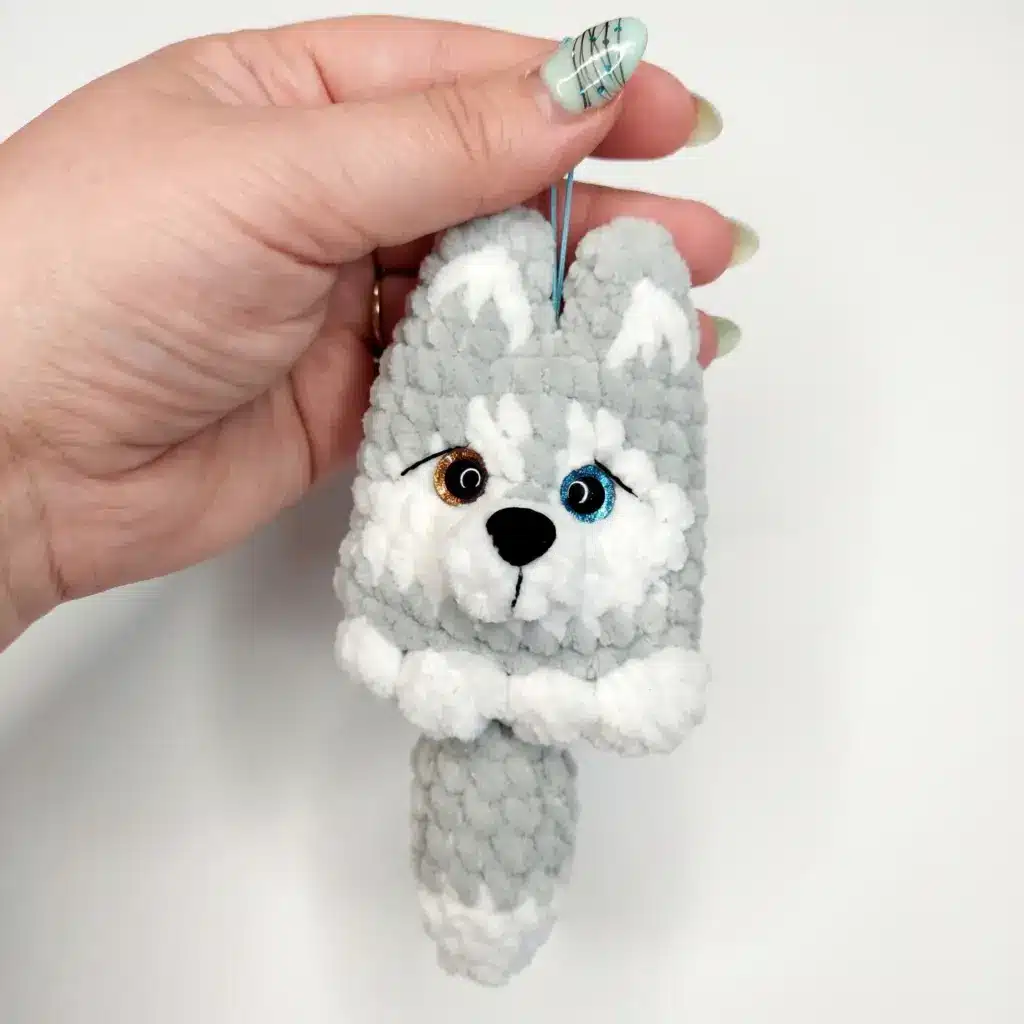
This plush husky keychain is a masterclass in efficient design. It captures the distinct personality of a husky—the perky ears, the two-tone face, and the fluffy tail—without requiring an overwhelming amount of yarn or time. The use of plush or velvet yarn gives it an instant tactile appeal that is impossible to resist. Because the pattern utilizes continuous spiral rounds for the body and ears, you avoid the common amigurumi issue of visible seams, resulting in a smoother, more professional finish. The mid-round color changes on the muzzle and legs add a layer of complexity that looks impressive but is actually quite straightforward once you understand the placement. It is the perfect project for a cozy afternoon, resulting in a sturdy, huggable companion that is ready for adventure.
Project Overview
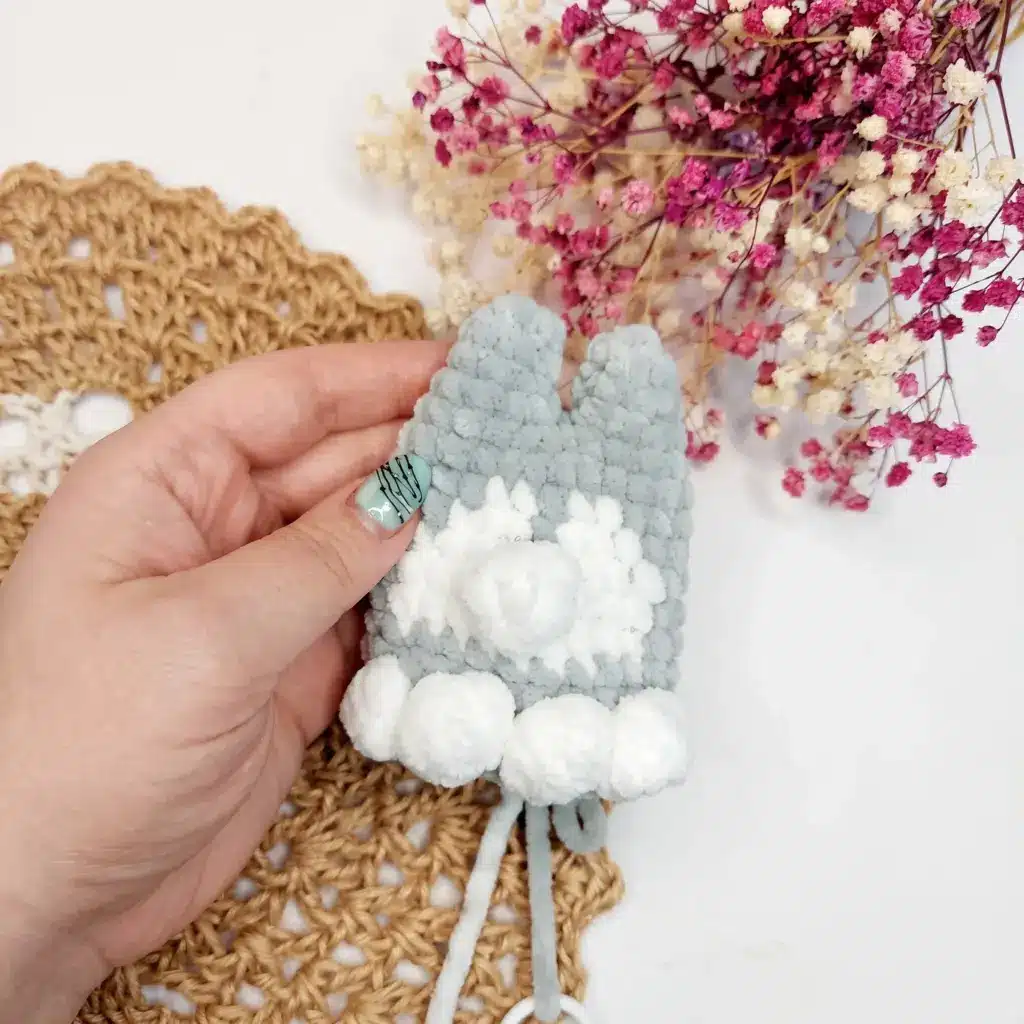
This amigurumi husky keychain pattern is designed for confident beginners and intermediate crocheters. It features a soft plush texture, a two-tone face, and a perky tail, all worked in a single sitting. The project is finished with keychain hardware, making it an ideal gift, bag charm, or a satisfying first amigurumi project with shaping.
Materials Needed
- Yarn: Plush/velvet yarn, worsted weight (US 4 Medium) in Main Color (gray or your choice) and White.
- Hook: US G/6 (3.75 mm).
- Stuffing: Fiberfill stuffing.
- Eyes: 10 mm safety eyes (2).
- Nose: 9×11 mm safety nose (1).
- Tools: Yarn needle, stitch marker, scissors.
- Details: Black embroidery floss (for facial details), craft glue.
- Hardware: Keychain hardware (clasp/ring).
Abbreviations Used
- ch — Chain
- dec — Decrease (invisible decrease, worked as 2 sc together)
- inc — Increase (2 sc in same stitch)
- mr — Magic Ring
- Puff st — Puff Stitch (5 dc worked into one stitch, closed together at the top)
- sc — Single Crochet
- sl st — Slip Stitch
Pattern Notes
This pattern is written in US crochet terminology. The tail and ears are worked in continuous spiral rounds. The body begins with a short foundation chain that joins the two ears together, then continues in continuous spiral rounds from there. Gauge is not critical for this project — focus on a fabric tight enough that stuffing doesn’t peek through. Stitch count is given at the end of each round in parentheses, e.g. (24). Insert the safety eyes between Rounds 7 and 8 of the body, before stuffing. Stuff firmly but evenly as you go so the finished husky holds its shape without looking lumpy. The white color-blocking on the muzzle, chest, and legs is worked mid-round — read each line carefully to see exactly where the color changes happen.
Pattern Instructions
Tail (worked in White)
Rnd 1: 6 sc in MR. (6)
Rnd 2: sc, inc repeat around. (9)
Rnd 3: 2 sc, inc repeat around. (12)
Rnds 4–8: Switch to Main Color, sc in each st around. (12) — work this round 5 times total.
Rnd 9: sc, dec repeat around. (8)
Rnd 10: dec repeat around 4 times, sl st to close. (4)
Fasten off, leaving a tail for later attachment. Weave in the starting end. Stuff the tail lightly as you work, before it closes up completely.
Ears (worked in Main Color, make 2)
On the second ear, do not fasten off — the working yarn will be used to join both ears into the body.
Rnd 1: 6 sc in MR. (6)
Rnd 2: sc in each st around. (6)
Rnd 3: sc, inc repeat around. (9)
Body
Rnd 4: Ch 1, sc 9 across the first ear, sc across the chain, sc 9 across the second ear, sc across the chain. (20)
Rnd 5: 4 sc, inc repeat around. (24) Place a stitch marker at the center of this round — this marks the back of the toy and will help you track color placement.
Rnd 6: In Main Color, sc 9; switch to White, sc 2; Main Color, sc 1; White, sc 2; Main Color, sc 10. (24)
Rnd 7: 8 sc; White, sc 3; Main Color, sc 1; White, sc 3; Main Color, sc 9. (24)
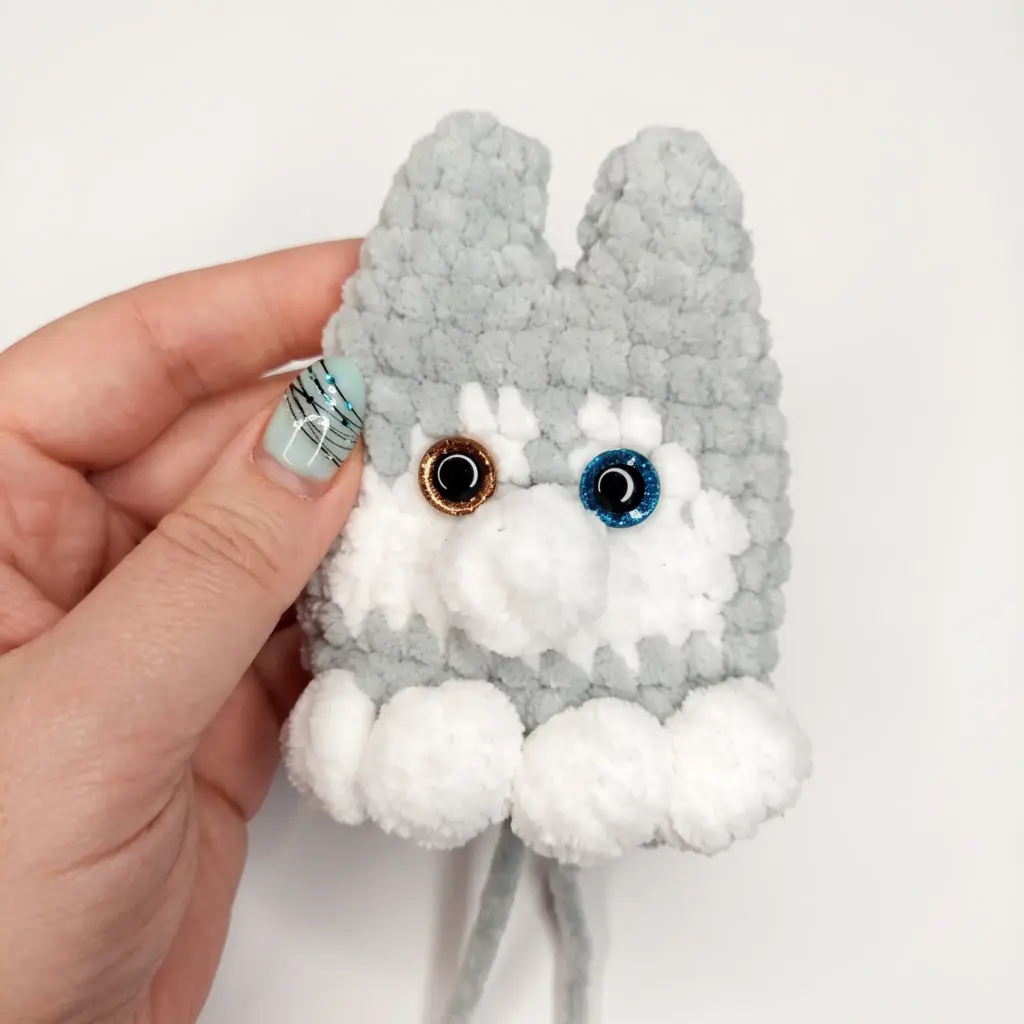
Insert the safety eyes now, spacing them evenly across the white muzzle area before continuing to Round 8.
Rnd 8: 7 sc; White, sc 4; Main Color, sc 1; White, sc 4; Main Color, sc 8. (24)
Rnd 9: 7 sc; White, sc 4; work a Puff st in White — this forms the nose bump ; sc 4 in White; Main Color, sc 8. (24)
Rnd 10: 7 sc; White, sc 9; Main Color, sc 8. (24) You can leave the yarn attached here rather than fastening off — you’ll use it again to work the legs in Round 13.
Rnds 11–12: sc in each st around. (24) — repeat this round twice total.
Rnd 13 (legs, worked in White): 8 sc; White, work a Puff st in the next st; Main Color, sc 1; White, Puff st in next st; Main Color, sc 2; White, Puff st in next st; Main Color, sc 1; White, Puff st in next st; Main Color, sc 8; sc 2 sts together, catching the tail piece to attach it as you close; sl st to finish.
Assembly
Stuff the body firmly, then leave a long tail of yarn on the needle for sewing. Thread the needle through the side of the husky and whipstitch any remaining opening closed, working stitch by stitch through the edge. Glue the safety nose in place over the Puff Stitch nose bump. Using white yarn, add a few embroidered accent stitches to the ears for texture and definition. Using black embroidery floss, stitch a small line down the bridge of the nose and a short bar beneath it to define the muzzle. Attach the keychain hardware securely to the top of the head, between the ears. Weave in any remaining loose ends and trim.
Tips & Tricks
- Keep your tension slightly tighter than you might for a garment — amigurumi pieces need a dense fabric so the fiberfill doesn’t show through the plush yarn’s loose loops. If your invisible decreases look bulky, try inserting your hook only through the front loops of the two stitches you’re joining; this keeps the decrease flatter and less noticeable on a small piece like this one.
- Watch your stuffing as you close the final opening in the body: firm enough to hold the husky’s shape when it’s tugged on a keychain, but not so packed that the seam puckers. Add stuffing gradually and check the shape from all sides before you sew the last few stitches shut.
- If you substitute yarn, stick with a plush or chenille-style yarn in a similar worsted weight — a smooth cotton or wool yarn will change the husky’s fuzzy texture and may require sizing down your hook slightly to keep stitches tight. Round 13, where the legs and Puff Stitches are worked in the same row as the main body color, is the trickiest part of this pattern — go slowly, and don’t be afraid to place a stitch marker at the start of each color section so you don’t lose count partway through.
- Finally, when sewing the tail onto the body during Round 13, hold both pieces together and stitch through both layers as you work those two closing single crochets — this keeps the attachment point sturdy enough for everyday keychain use.
Frequently Asked Questions
Can I use a different type of yarn?
While you can substitute yarn, it is best to stick with a plush or chenille-style yarn in a similar worsted weight. Using smooth cotton or wool will change the husky’s intended fuzzy texture and may require you to size down your hook to maintain tight stitches.
How do I prevent gaps in my amigurumi?
The key is tension. Keep your tension slightly tighter than you would for a garment. If you are using plush yarn, ensure your fabric is dense enough that the fiberfill doesn’t peek through the loose loops of the yarn.
What is a Puff Stitch?
In this pattern, the Puff Stitch is defined as 5 dc (double crochets) worked into one stitch, closed together at the top. This creates a raised, textured bump used for the nose and legs.
When should I insert the safety eyes?
Insert the safety eyes between Rounds 7 and 8 of the body. Make sure to space them evenly across the white muzzle area before you continue to Round 8 and stuff the body.
Is this pattern suitable for beginners?
Yes, this pattern is written for confident beginners and intermediate crocheters. It uses standard stitches and continuous rounds, making it a satisfying project with a big payoff.
Pin This Crochet Pattern!