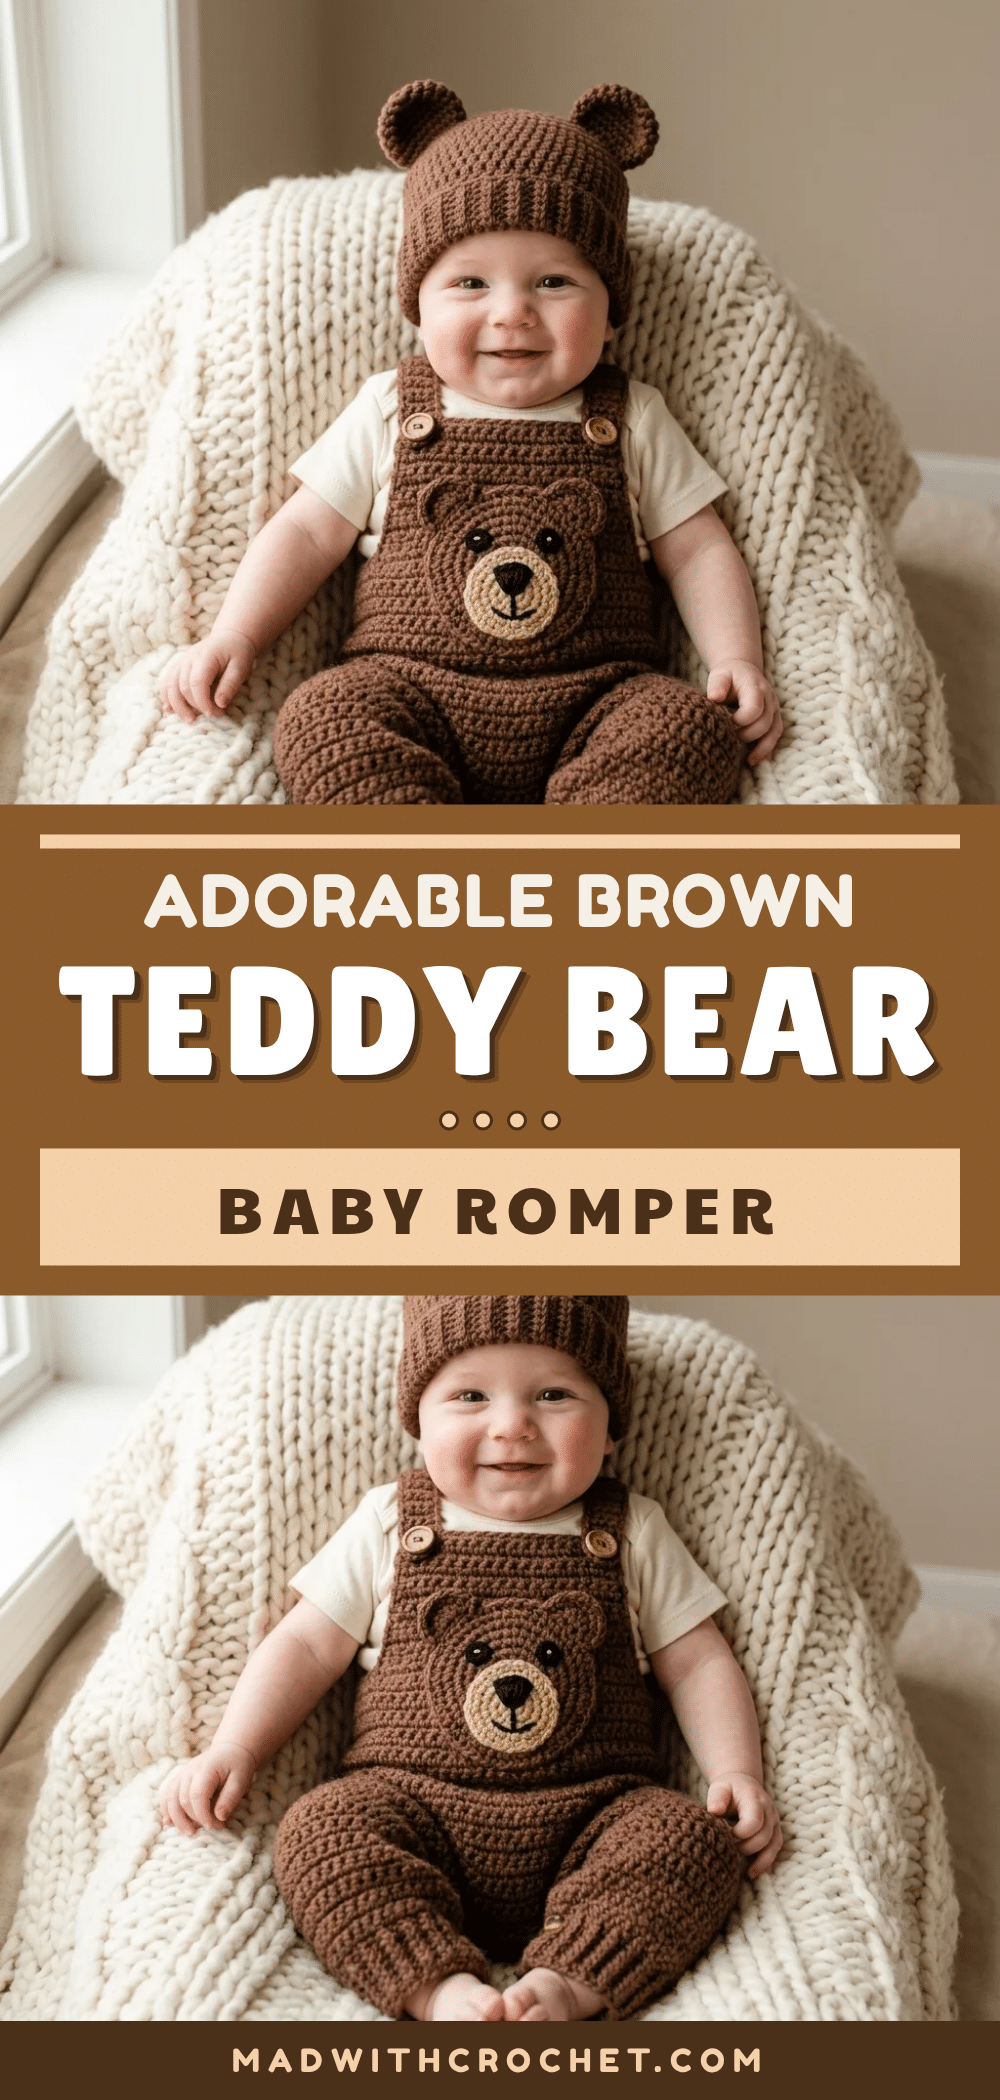
There is something deeply satisfying about the quiet rhythm of crochet. A cozy evening, a small batch of soft yarn, and the repetitive motion of counting stitches can be incredibly meditative. As you work through the rounds, the project takes shape, transforming simple loops into something functional and beautiful. This brown teddy bear baby romper captures that feeling perfectly. It is a project that rewards patience with a boutique-quality result, combining the comfort of a garment with the whimsy of an amigurumi character.
Small Details That Make It Better
What truly elevates this romper from a simple outfit to a keepsake is the thoughtful integration of the bear theme. The contrast of the tan or camel applique against the rich brown main color mimics the natural markings of a teddy bear, creating a visual focal point that is both cute and sophisticated. The ribbed leg cuffs add a touch of texture that not only looks professional but also provides a snug fit to keep little legs warm. Additionally, the inclusion of a matching hat with bear ears ties the entire ensemble together, making it an ideal gift for a baby shower or a special photo session. The wooden buttons add a rustic, natural element that softens the overall look, ensuring the romper feels grounded and timeless rather than overly cartoonish.
Project Overview
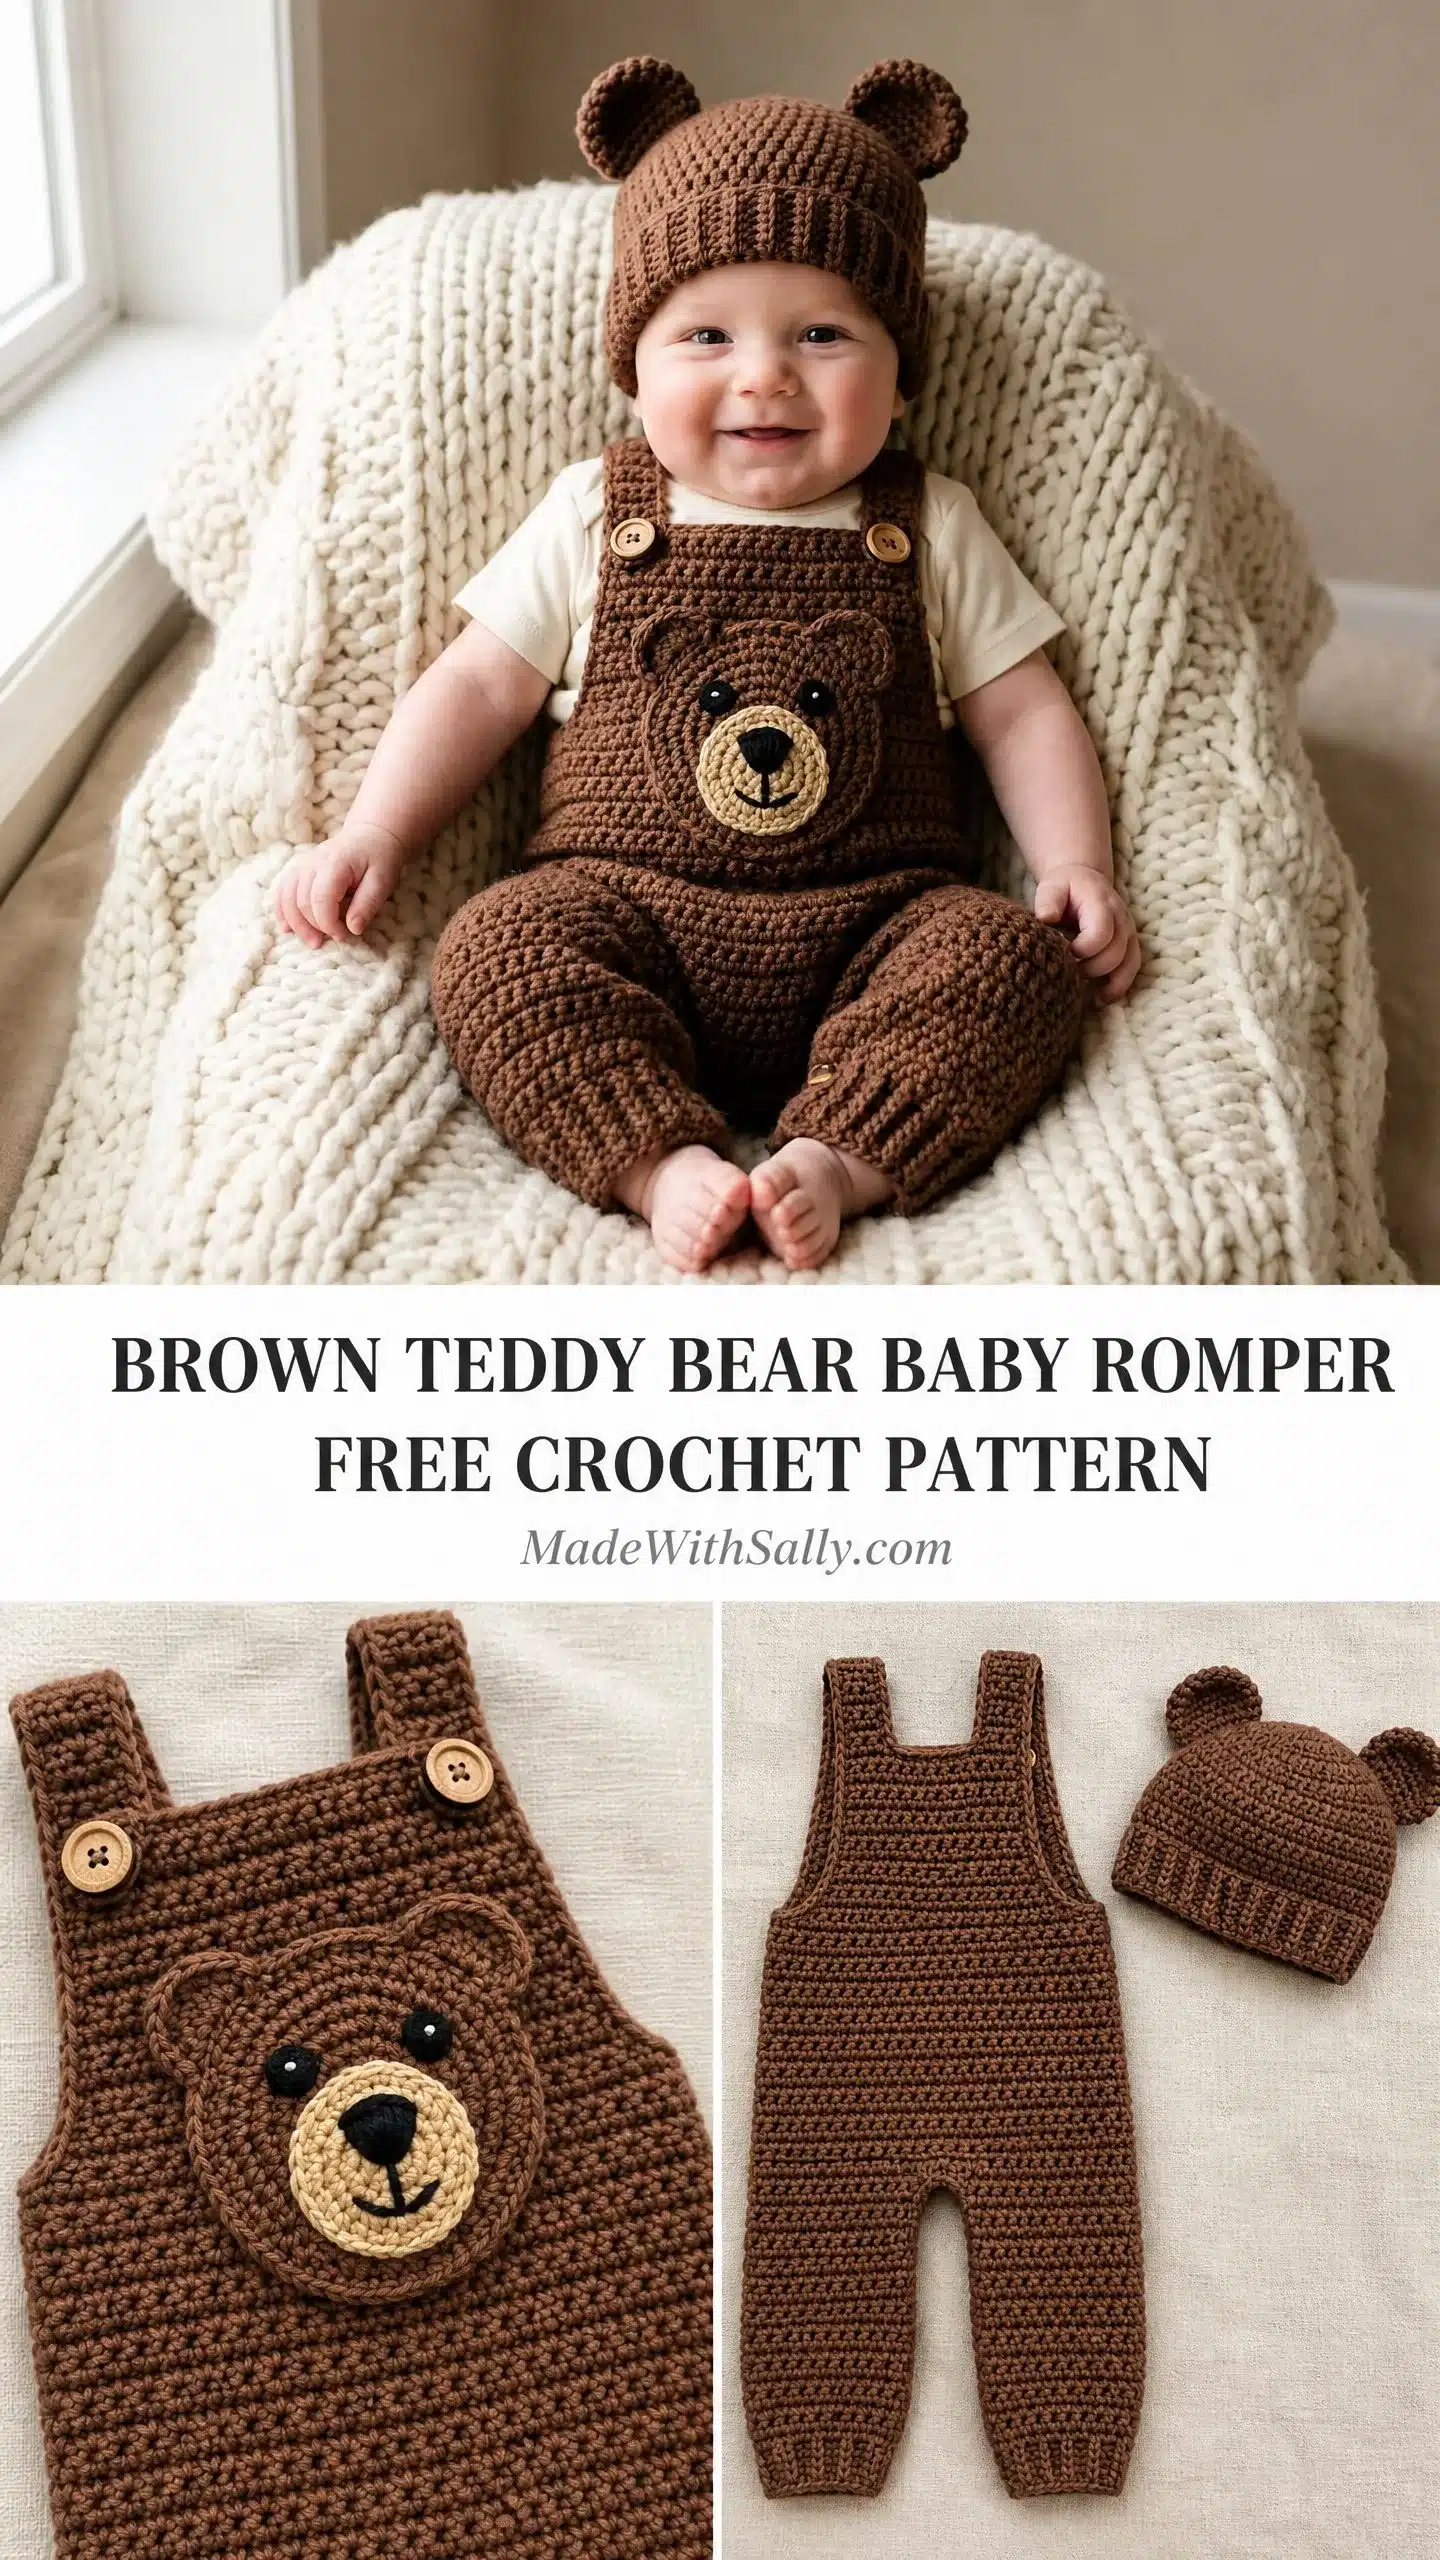
This pattern creates a complete outfit for a 3 to 6 month old baby. You get a one-piece romper with a bib-style front, a hand-crocheted teddy bear applique, wooden button closures, and a matching hat with adorable bear ears. The romper even has button bands along each leg opening for easy diaper changes. The construction starts at the legs and works upward. Each leg is made separately, then joined at the crotch to form the body. From there, you work up to the underarms where the piece divides into a back panel and a front bib. Straps attach at the back and cross over the shoulders to button at the front. It sounds complicated, but it comes together logically once you get started.
Skill Level: Intermediate. You should be comfortable working in rows and rounds, basic shaping with increases and decreases, seaming pieces together, and button placement. If you have completed at least one garment project before, you can handle this.
Time Estimate: Plan for 12 to 18 hours total. That includes the romper, hat, and applique. I like to break this into sessions. Each leg takes about 2 hours, the body takes 4 to 5 hours, the bib and straps need 1 to 2 hours, the hat takes 2 hours, the applique takes 1 hour, and finishing takes another hour.
Finished Measurements
This pattern is written for size 3 to 6 months. Here are the key measurements:
- Romper chest circumference: 17 inches (43 cm)
- Romper total length from shoulder to crotch: 14 inches (35.5 cm)
- Inseam length: 4.5 inches (11.5 cm)
- Leg opening circumference: 9 inches (23 cm)
- Hat circumference: 14 inches (35.5 cm)
Materials You Will Need
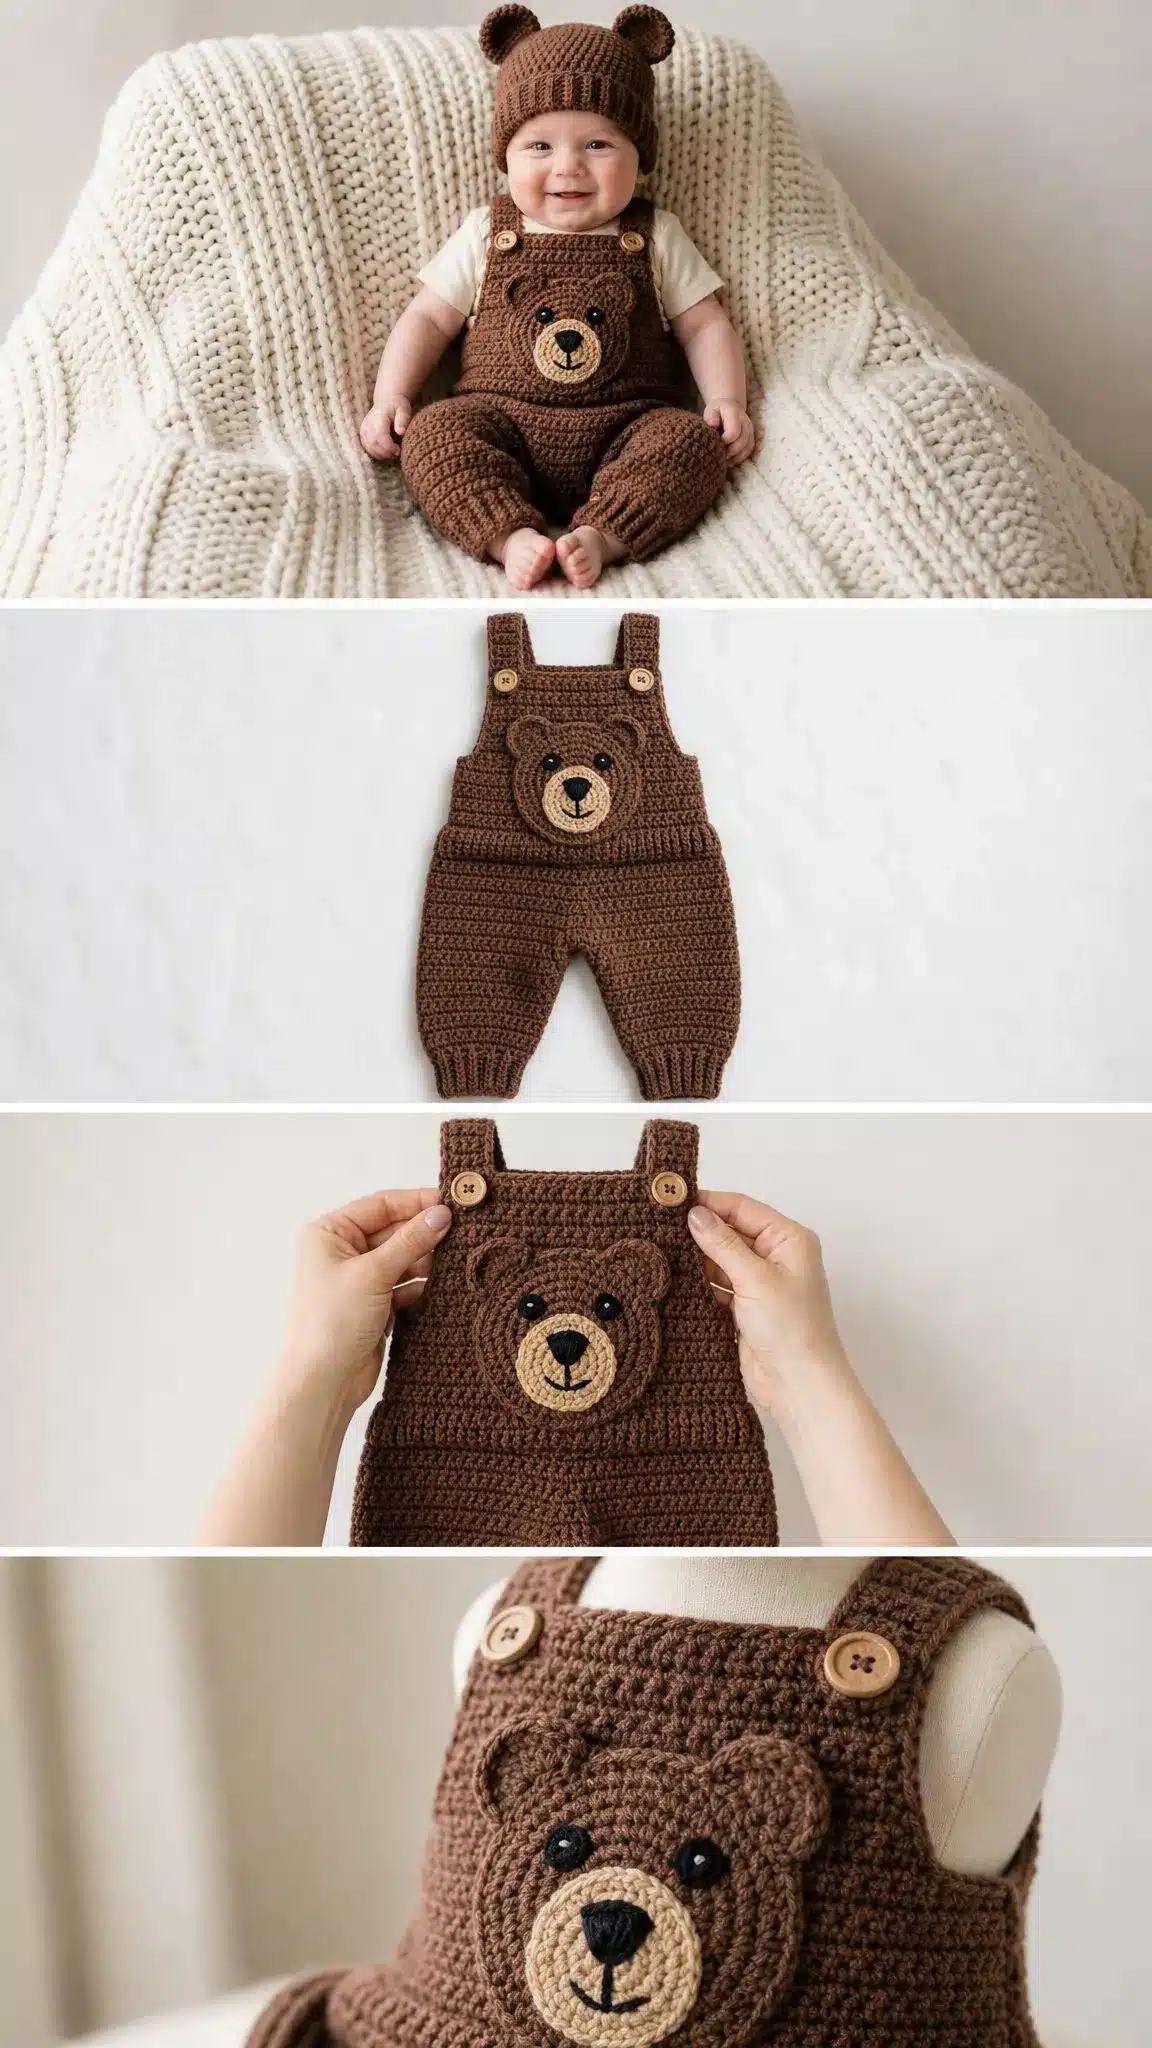
- Yarn: Worsted weight yarn, which is medium weight category 4. You need approximately 400 yards (366 meters) of your main color brown, plus 30 yards (27 meters) of a contrast color in tan or camel for the bear face applique.
- Hook: US size J-10, which is 6.0 mm
- Notions:
- Yarn needle for seaming and weaving in ends
- 8 wooden buttons, 3/4 inch (19 mm) diameter. You need 4 for the shoulder straps and 2 for each leg opening
- Black embroidery floss or black yarn for the bear nose and eyes
- 2 small black safety eyes, 9 mm, for the bear applique face. These are optional. You can embroider the eyes instead
- Stitch markers
- Scissors
- Measuring tape
Yarn Suggestions for This Baby Romper Crochet Pattern
- Lion Brand Pound of Love in Caramel or Cafe Au Lait works beautifully. It is 100% acrylic, soft, machine washable, budget friendly, and widely available. One skein covers the full romper and hat.
- Paintbox Yarns Simply DK used doubled creates a worsted weight equivalent. The color range includes rich browns perfect for this project, and the yarn gives excellent stitch definition.
- Caron Simply Soft in Chocolate or Autumn Maize is another great choice. It has excellent drape for baby garments, washes easily, and you can find it almost anywhere.
When substituting yarn, stick with smooth worsted weight category 4 options. Avoid textured or fluffy yarns because they will obscure the stitch pattern and hide the applique detail. Choose machine washable fibers for practicality. Parents will thank you.
Gauge Information
14 single crochet stitches by 16 rows equals 4 inches (10 cm), worked in single crochet stitch, blocked.
I cannot stress this enough. Gauge matters for this project. Even a small difference significantly changes the finished dimensions on a fitted baby garment. Make a swatch before you start. If your swatch is larger than the gauge, go down one hook size. If your swatch is smaller, go up one hook size.
Stitch Abbreviations and Definitions
Let me define every stitch and term before we dive in.
- ch (chain): The foundation stitch. Yarn over, pull through the loop on your hook.
- sl st (slip stitch): Insert hook, yarn over, pull through both the stitch and the loop on your hook in one motion. Used for joining and moving yarn without adding height.
- sc (single crochet): Insert hook into stitch, yarn over and pull up a loop (2 loops on hook), yarn over and pull through both loops. This is the main stitch for the entire project.
- hdc (half double crochet): Yarn over, insert hook, pull up a loop (3 loops), yarn over and pull through all 3 loops.
- dc (double crochet): Yarn over, insert hook, pull up a loop (3 loops), yarn over and pull through 2 loops (2 loops remain), yarn over and pull through remaining 2 loops.
- sc2tog (single crochet 2 together): A decrease. Insert hook in first stitch, pull up a loop, insert hook in next stitch, pull up a loop (3 loops on hook), yarn over and pull through all 3 loops. You have turned 2 stitches into 1.
- inc (increase): Work 2 single crochet stitches in the same stitch. This adds 1 stitch.
- BLO (back loop only): Instead of inserting your hook under both loops of the V at the top of the stitch, insert it under only the back loop. This creates ribbed texture.
- MR (magic ring): An adjustable loop that closes tightly with no hole in the center. Perfect for starting circles.
- MC (main color): Brown
- CC (contrast color): Tan or camel
- st(s): stitch or stitches
- rnd: round
- RS: right side (the side that faces out when worn)
- WS: wrong side
- pm: place marker
- rep: repeat
- rem: remaining
Special Techniques Used in This Pattern
- Ribbing Row: Work each stitch in the back loop only of the previous row. This creates stretchy ribbed texture perfect for cuffs. Turn at the end of each row as normal.
- Surface Slip Stitch: With right side facing, insert hook through the fabric at your desired point, pull up a loop through the fabric and through the loop on your hook. Continue along a line for decoration or reinforcement.
- Sc Seam Join: Hold two finished pieces together. Insert hook through corresponding stitches of both layers, draw up a loop, pull through the loop on your hook. This creates a neat seam.
Step by Step Crochet Pattern Instructions
Legs (Make 2 Identical Pieces)
You begin at the leg cuff. The cuff is worked flat as a ribbed strip, then joined and continued in the round upward.
Leg Cuff Ribbing:
With MC, ch 8.
Row 1: Sc in 2nd ch from hook and in each ch across. Turn. (7 sc)
Row 2: Ch 1, sc in BLO of each st across. Turn. (7 sc)
Repeat Row 2 until your ribbing strip measures 9 inches (23 cm) long, ending after a right side row. You will have approximately 36 rows total. Do not fasten off.
Joining the Cuff:
Fold the ribbing strip so the short ends meet. Slip stitch the two short ends together using a sc seam join through the end stitches of each row. You now have a joined cuff ring with 36 joining points around the ring.
Picking Up for the Leg Tube:
With RS facing and working along the long edge of the ribbing ring, join MC with a sl st. Ch 1.
Rnd 1: Work 32 sc evenly spaced around the top edge of the cuff ring. Place marker at beginning of round. (32 sc)
Rnd 2 through Rnd 20: Sc in each st around. (32 sc)
Your leg tube measures approximately 5 inches (12.5 cm) above the cuff at this point.
Thigh Increases:
Rnd 21: (Sc in next 7 sts, inc) rep 4 times around. (36 sc)
Rnd 22: Sc in each st around. (36 sc)
Fasten off the first leg, leaving a 12 inch (30 cm) tail for seaming. Leave stitches live on a stitch holder.
Complete the second leg identically. Do not fasten off the second leg.
Checkpoint: Each finished leg tube should measure approximately 6.5 inches (16.5 cm) total from the cast on edge including the cuff. Each leg has 36 live stitches at the top.
Joining Legs and Working the Body
With the second leg still on your hook (36 sts), ch 4. These 4 chains form the crotch bridge at the front.
Insert hook into any stitch at the top of the first leg and sc across all 36 sts of the first leg. Then sc across the 4 ch just made, working into the underside of the chain. Then sc across all 36 sts of the second leg. Then sc across the other side of the 4 ch bridge. Place marker at beginning of round. (80 sc)
Body Rounds:
Rnd 1 through Rnd 6: Sc in each st around. (80 sc)
Waist Shaping:
Rnd 7: (Sc in next 18 sts, sc2tog) rep 4 times around. (76 sc)
Rnd 8 through Rnd 10: Sc in each st around. (76 sc)
Restore Width for Chest:
Rnd 11: (Sc in next 17 sts, inc) rep 4 times around. (80 sc)
Rnd 12 through Rnd 18: Sc in each st around. (80 sc)
Checkpoint: After Rnd 18, the piece from the crotch join to the current working round should measure approximately 5 inches (12.5 cm). Total length from the bottom of the leg cuff to the current row should be approximately 11.5 inches (29 cm).
Dividing for Back and Front Bib
Return the held 40 front stitches to your hook. Join MC with RS facing at the right edge.
Back Panel
Row 1 (WS): Ch 1, sc across 40 sts. Turn. (40 sc)
Row 2 through Row 10: Ch 1, sc across. Turn. (40 sc)
Armhole Shaping:
Row 11: Ch 1, sc2tog, sc to last 2 sts, sc2tog. Turn. (38 sc)
Row 12: Ch 1, sc2tog, sc to last 2 sts, sc2tog. Turn. (36 sc)
Row 13 through Row 18: Ch 1, sc across. Turn. (36 sc)
Back Neck Shaping:
Row 19: Ch 1, sc across 12 sts, turn, leaving remaining 24 sts unworked. (12 sc) This is the right back strap base.
Right Back Strap Extension:
Row 20 through Row 27: Ch 1, sc across 12 sts. Turn. (12 sc)
Fasten off right back strap. Weave in end.
Return to the remaining 24 sts of the back. Skip the center 12 sts (back neck opening) and rejoin yarn to the last 12 sts.
Left Back Strap Extension:
Row 19 through Row 27: Ch 1, sc across 12 sts. Turn. (12 sc)
Fasten off left back strap. Weave in end.
Front Bib Panel
Return the held 40 front stitches to your hook. Join MC with RS facing at the right edge.
Row 1 (RS): Ch 1, sc across 40 sts. Turn. (40 sc)
Row 2 through Row 10: Ch 1, sc across. Turn. (40 sc)
Bib Armhole Shaping:
Row 11: Ch 1, sc2tog, sc to last 2 sts, sc2tog. Turn. (38 sc)
Row 12: Ch 1, sc2tog, sc to last 2 sts, sc2tog. Turn. (36 sc)
Row 13 through Row 18: Ch 1, sc across. Turn. (36 sc)
Bib Neck Shaping:
Row 19: Ch 1, sc2tog, sc to last 2 sts, sc2tog. Turn. (34 sc)
Row 20: Ch 1, sc2tog, sc to last 2 sts, sc2tog. Turn. (32 sc)
Row 21: Ch 1, sc2tog, sc to last 2 sts, sc2tog. Turn. (30 sc)
Row 22 through Row 26: Ch 1, sc across. Turn. (30 sc)
Button Loop Row:
Row 27 (RS): Ch 1, sc in next 3 sts, ch 3, skip 3 sts, sc in next 18 sts, ch 3, skip 3 sts, sc in last 3 sts. Turn. (24 sc + 2 button loops)
Row 28: Ch 1, sc across, working 3 sc into each ch-3 sp. Turn. (30 sc)
Fasten off. Weave in end.
Leg Button Band
With MC and RS facing, join yarn at the crotch join on the inside of the right leg.
Row 1: Ch 1, work 12 sc evenly down the inner leg edge toward the cuff. Turn. (12 sc)
Row 2: Ch 1, sc in first 2 sts, ch 2, skip 2 sts, sc in next 4 sts, ch 2, skip 2 sts, sc in last 2 sts. Turn. (8 sc + 2 buttonholes)
Row 3: Ch 1, sc in each st and 2 sc in each ch-2 sp across. Turn. (12 sc)
Row 4: Ch 1, sc across. (12 sc)
Fasten off. Sew 2 wooden buttons on the opposite leg edge panel to correspond with the buttonholes. Repeat for the left leg.
Bear Face Applique
Head Base Circle (worked in CC):
Make a magic ring.
Rnd 1: Ch 1, 6 sc in MR, pull ring closed. (6 sc)
Rnd 2: Inc in each st around. (12 sc)
Rnd 3: (Inc, sc in next 1 st) rep 6 times. (18 sc)
Rnd 4: (Inc, sc in next 2 sts) rep 6 times. (24 sc)
Rnd 5: (Inc, sc in next 3 sts) rep 6 times. (30 sc)
Rnd 6: (Inc, sc in next 4 sts) rep 6 times. (36 sc)
Rnd 7: (Inc, sc in next 5 sts) rep 6 times. (42 sc)
Sl st to join. Fasten off, leaving a 12 inch (30 cm) tail for sewing. The head base measures approximately 3.5 inches (9 cm) in diameter.
Muzzle Circle (worked in CC):
Make a magic ring.
Rnd 1: Ch 1, 6 sc in MR. (6 sc)
Rnd 2: Inc in each st around. (12 sc)
Rnd 3: (Inc, sc in next 1 st) rep 6 times. (18 sc)
Sl st to join. Fasten off, leaving a tail for sewing. The muzzle measures approximately 1.75 inches (4.5 cm) in diameter.
Ears (Make 2 in MC):
Make a magic ring.
Rnd 1: Ch 1, 6 sc in MR. (6 sc)
Rnd 2: Inc in each st around. (12 sc)
Sl st to join. Fasten off, leaving a tail for sewing. Each ear measures approximately 1.25 inches (3 cm) in diameter.
Applique Assembly:
Position the two ear circles at the top of the head base circle, overlapping slightly so roughly half of each ear extends above the head circle. Sew each ear in place.
Position the muzzle circle in the lower center of the head base. Sew in place.
Using black embroidery floss or black yarn, embroider a small triangular nose at the center top of the muzzle. Embroider a small curved smile below the nose.
Attach safety eyes or embroider round eyes with black yarn, positioned above the muzzle and spaced approximately 1 inch (2.5 cm) apart.
Center the completed applique on the bib front with the top of the ears approximately 1 inch (2.5 cm) below the top edge of the bib. Sew the applique securely around the entire perimeter.
Bear Ear Hat
Crown:
With MC, make a magic ring.
Rnd 1: Ch 1, 6 sc in MR, pull closed. (6 sc)
Rnd 2: Inc in each st around. (12 sc)
Rnd 3: (Inc, sc 1) rep 6 times. (18 sc)
Rnd 4: (Inc, sc 2) rep 6 times. (24 sc)
Rnd 5: (Inc, sc 3) rep 6 times. (30 sc)
Rnd 6: (Inc, sc 4) rep 6 times. (36 sc)
Rnd 7: (Inc, sc 5) rep 6 times. (42 sc)
Rnd 8: (Inc, sc 6) rep 6 times. (48 sc)
Body of Hat:
Rnd 9 through Rnd 20: Sc in each st around. (48 sc)
Hat Brim Ribbing:
Rnd 21 through Rnd 24: Sc in BLO of each st around. (48 sc)
Sl st to join last round. Fasten off and weave in end.
Hat Ears (Make 2 in MC):
Make a magic ring.
Rnd 1: Ch 1, 6 sc in MR. (6 sc)
Rnd 2: Inc in each st around. (12 sc)
Rnd 3: (Inc, sc 1) rep 6 times. (18 sc)
Sl st to join. Fasten off, leaving a tail.
Sew one ear to each side of the hat crown, positioning the bottom edge of each ear approximately 1.5 inches (3.8 cm) from the center top of the hat.
Finishing Your Teddy Bear Baby Romper
Weave in all yarn ends securely with a yarn needle, going through several stitches in different directions to prevent unraveling.
Seam the inner leg on each leg using a whip stitch or slip stitch seam if any open edges remain.
Sew all wooden buttons in place. Reinforce button attachment with extra passes through the button holes.
Block the finished romper and hat by wet blocking. Submerge in lukewarm water, gently squeeze out excess water without wringing, reshape to measurements, and lay flat to dry on a clean towel. Pin straps and bib to shape while drying.
Important safety note: If using this garment for a child under 3 years old, embroider the eyes instead of using safety eye hardware.
Size Customization Tips
- For newborn size: Work only 12 rounds in the leg tube instead of 20. Start the body with 72 sts instead of 80. Reduce bib rows by 4. Finished chest will be approximately 15 inches (38 cm).
- For 6 to 9 month size: Add 4 rounds to the leg tube. Work the body with 88 sts. Add 4 rows to the body. Finished chest will be approximately 19 inches (48 cm).
- For 9 to 12 month size: Add 6 rounds to the leg tube. Work the body with 96 sts. Add 6 rows to the body. Finished chest will be approximately 20 inches (51 cm).
- Always swatch for gauge when adjusting sizes.
FAQs
Can I use a different weight of yarn?
While this pattern is designed for worsted weight (category 4) yarn, you can substitute other smooth worsted weight yarns. Avoid textured or fluffy yarns as they will obscure the stitch pattern and hide the applique detail. Stick to machine washable fibers for practicality.
How do I adjust the size for a larger baby?
You can adjust the size by adding rounds to the leg tube and the body. For a 6-9 month size, add 4 rounds to the leg tube and 4 rows to the body. For a 9-12 month size, add 6 rounds to the leg tube and 6 rows to the body. Always check your gauge to ensure the fit remains accurate.
Is it safe to use safety eyes on this romper?
If the romper is intended for a child under 3 years old, it is recommended to embroider the eyes instead of using safety eye hardware to prevent choking hazards. For older children or display purposes, 9mm safety eyes can be used securely.
How long does it take to complete this project?
Plan for 12 to 18 hours total to complete the romper, hat, and applique. Breaking the project into sessions, such as working on one leg at a time, can make the process more manageable.
Why is my gauge important?
Gauge is critical for fitted baby garments. Even a small difference in stitch tension can significantly change the finished dimensions. Make a swatch before starting, and adjust your hook size if your swatch is too large or too small to match the pattern’s gauge of 14 sc by 16 rows equals 4 inches.
Pin This Crochet Pattern!