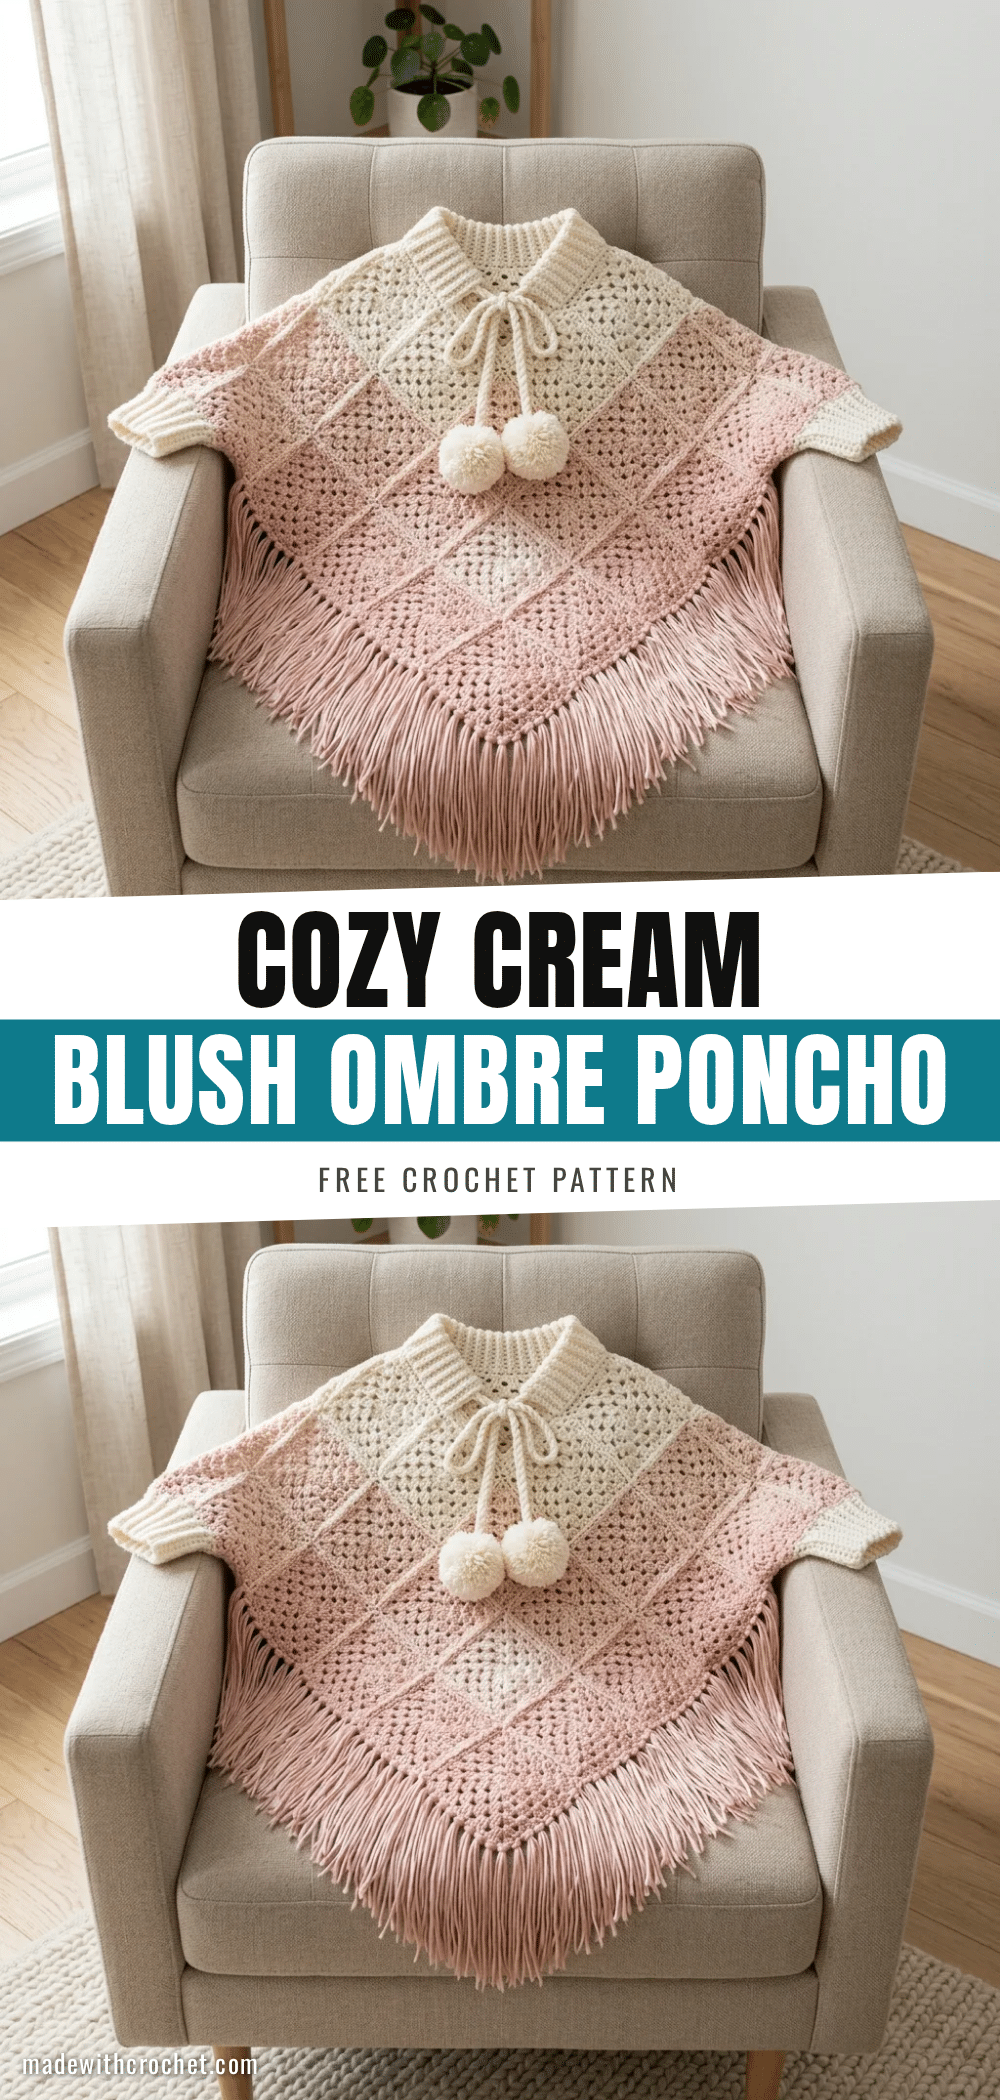
The granny mesh stitch creates an open, lacy texture that drapes beautifully without being too heavy, and the ombre color transition from cream to blush pink is pure elegance. This poncho hits the sweet spot between cozy and stylish. The construction is surprisingly simple, relying on two identical rectangular panels that are seamed at the shoulders to create a beautiful draped silhouette with pointed hems and cozy ribbed details. The diagonal diamond visual effect comes from the stitch pattern and color placement, not from tricky shaping, making this an intermediate project that rewards patience with a boutique-quality finish.
Texture and Stitch Notes
The visual appeal of this poncho lies in the “granny lattice” created by the cluster stitches. By working into chain spaces rather than individual stitches, you create a fabric that is airy yet substantial. The transition from the solid cream top to the blush pink body is handled through specific transition rows, ensuring a soft gradient rather than a harsh line. Pay close attention to the turning chains; in this pattern, a chain 3 counts as a double crochet, while a chain 1 does not count as a stitch. This distinction is crucial for maintaining the correct stitch count and the integrity of the diamond pattern across the rows.
Project Overview
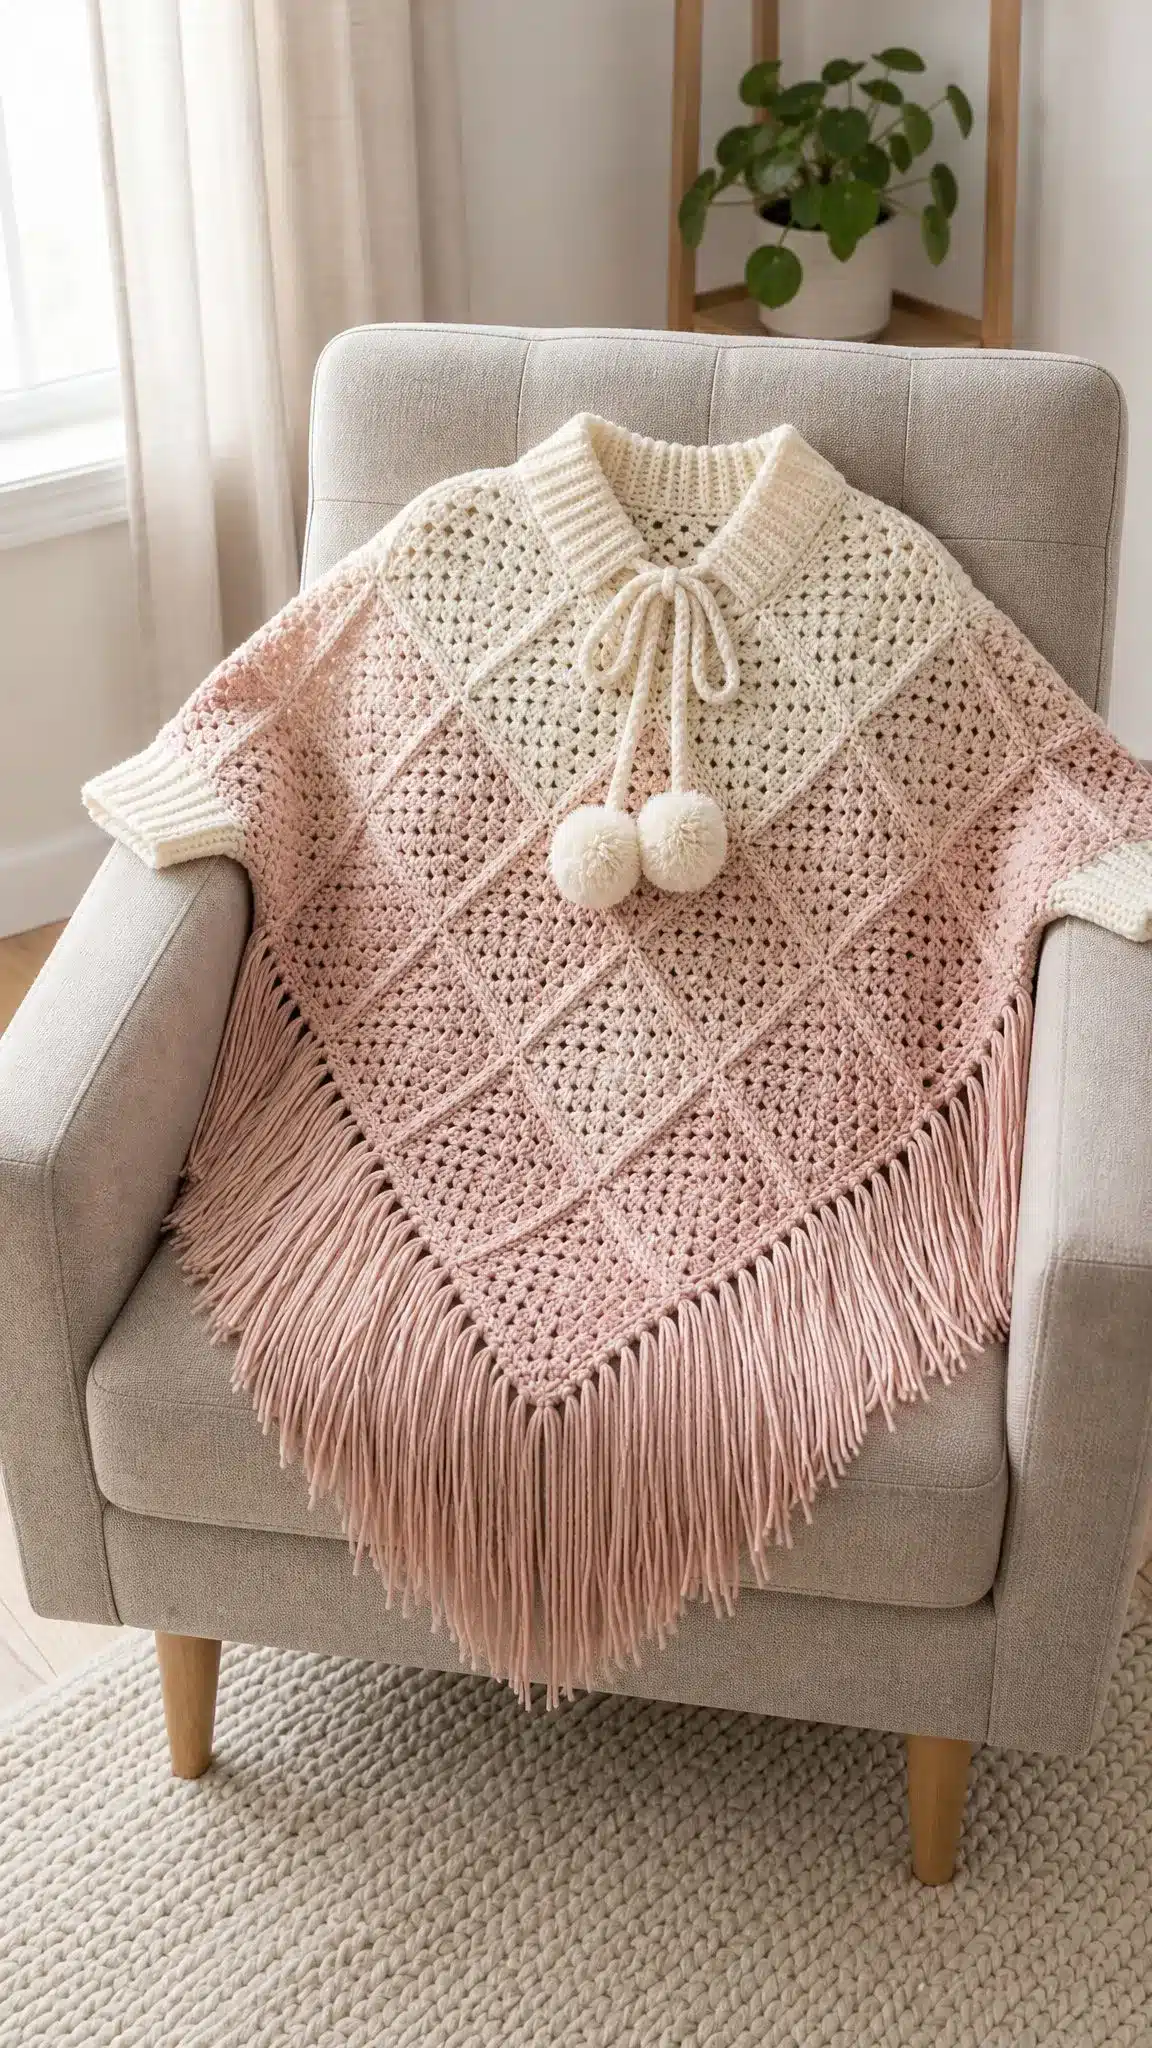
This wearable poncho is designed for comfort and style, featuring a turtleneck collar, twisted cord ties with pompoms, and long fringe. It is worked flat in rows from top to bottom, meaning there is no complex shaping involved. The garment’s structure is defined by the assembly of two identical panels. The pattern is rated intermediate, requiring comfort with granny clusters, basic color changes, seaming, and working in the round for the collar and cuffs.
Materials
Yarn
- Yarn A (Cream): Bulky weight (Category 5), approximately 600 yards / 549 meters.
- Yarn B (Blush Pink): Bulky weight (Category 5), approximately 900 yards / 823 meters.
Yarn Suggestions
Any Category 5 bulky yarn that matches gauge will work. Avoid very fluffy or heavily textured yarns because they will hide the pretty stitch definition. Suggested brands include:
- Lion Brand Wool-Ease Thick and Quick (Fisherman and Rose Heather)
- Bernat Blanket Yarn (Vintage White and Pale Blush)
- Paintbox Yarns Simply Super Chunky (Champagne White and Blush Pink)
Hook
- US K-10.5 / 6.5 mm crochet hook
Additional Supplies
- Yarn needle for weaving ends and seaming
- Scissors
- 4 stitch markers
- Measuring tape
- Cardboard rectangle approximately 5 inches / 13 cm wide for fringe
- Cardboard circle or pompom maker approximately 2.5 inches / 6.5 cm for pompoms
- Ruler
Gauge and Finished Size
Getting gauge right matters for this project since it is a garment. Using your US K-10.5 / 6.5 mm hook:
- 1 granny cluster repeat (1 cluster pair + chain 1 space) = approximately 2 inches / 5 cm wide
- 4 rows in granny mesh pattern = approximately 2 inches / 5 cm tall
- Or: 14 stitches and 8 rows in double crochet = 4 inches / 10 cm square
Please make a 6-inch swatch before starting. If your swatch is too small, go up a hook size. If it is too large, go down a hook size.
Finished Measurements
- Panel width: approximately 28 inches / 71 cm
- Panel height: approximately 22 inches / 56 cm
- Total length from shoulder to hem point: approximately 27 inches / 69 cm (including fringe)
- Fringe length: approximately 5 inches / 13 cm
- Collar height: approximately 4 inches / 10 cm
- Neckline opening: approximately 6 inches / 15 cm across
Abbreviations
Let me define all the abbreviations you will see in this pattern. I will give you the full name, the abbreviation, and explain what it means in plain language.
- Chain (ch): Yarn over, pull through loop on hook. This creates the foundation and spaces between stitches.
- Single crochet (sc): Insert hook, yarn over, pull up a loop (2 loops on hook), yarn over, pull through both loops.
- Double crochet (dc): Yarn over, insert hook, yarn over, pull up a loop (3 loops on hook), yarn over, pull through 2 loops, yarn over, pull through remaining 2 loops.
- Slip stitch (sl st): Insert hook, yarn over, pull through both the stitch and the loop on your hook in one motion.
- Chain space (ch-sp): The gap created by a chain stitch in the previous row. You work into this space, not into the chain itself.
- Skip (sk): Pass over the indicated stitch without working into it.
- Turning chain (t-ch): The chain stitches worked at the beginning of a row to bring your hook up to the correct height.
- Back loop only (blo): Work into only the back loop of the stitch, leaving the front loop unworked. This creates ribbing texture.
- Front loop only (flo): Work into only the front loop of the stitch.
- Right side (RS): The side of the work that will face outward when worn.
- Wrong side (WS): The side that faces inward.
Pattern Notes
- The poncho is made from two identical rectangular panels. Panel 1 becomes the front, Panel 2 becomes the back.
- Panels are worked flat in rows from top to bottom. The diagonal diamond visual effect comes from the stitch pattern and color placement, not from shaping.
- Color change: Yarn A (Cream) is used for the top 8 rows. Yarn B (Blush) is used for the remaining rows. Rows 9 and 10 are transition rows where you blend the colors.
- The collar and cuffs use Yarn A only. Fringe uses Yarn B only.
- All chain 3 turning chains count as the first double crochet of that row. Chain 1 turning chains do not count as a stitch.
- When joining a new color, do so on the last pull-through of the stitch before the new color is needed.
Pattern Instructions
Panel (Make 2)
Both panels are identical. Work through these instructions twice.
Foundation Row
Using Yarn A, chain 99.
Row 1 (RS)
Single crochet in 2nd chain from hook and in each chain across. Turn. (98 sc)
Row 2 (WS, set-up row)
Chain 3 (counts as dc), dc in next 2 sts, [ch 1, sk 1 st, dc in next 3 sts] across, ending dc in last st. Turn. (24 groups of 3 dc with ch-1 spaces)
Here is how Row 2 breaks down: your turning chain counts as the first dc, then you work 2 more dc for your first 3-dc group. Then you repeat [ch 1, skip 1, 3 dc] 23 times. Finally, ch 1, skip 1, dc in last stitch. This creates 24 chain 1 spaces and sets up your granny lattice.
Row 3 (RS, begin granny mesh)
Chain 4 (counts as dc + ch 1), turn. Skip first dc group, [cluster in next ch-1 sp, ch 1, cluster in same ch-1 sp, ch 1, skip 3-dc group] repeat across, ending cluster in last ch-1 sp, ch 1, cluster in same sp, ch 1, dc in top of turning chain. Turn. (48 clusters, 49 ch-1 spaces)
Row 4
Chain 4, turn. [Cluster in next ch-1 sp, ch 1, cluster in same ch-1 sp, ch 1] repeat across all ch-1 spaces, ending dc in 3rd chain of turning chain. Turn. (48 clusters, 49 ch-1 spaces)
Rows 5 through 8
Repeat Row 4. Continue in Yarn A only.
Checkpoint: After Row 8, your cream section should measure approximately 5 to 6 inches / 13 to 15 cm tall.
Rows 9 and 10 (Transition Rows)
These rows blend the colors from Yarn A to Yarn B. Follow the standard Row 4 pattern, joining the new color on the last pull-through of the stitch before the new color is needed.
Rows 11 through 42
Continue working Row 4 pattern in Yarn B only. Repeat the granny mesh row for 32 rows.
Checkpoint: After Row 42, your full panel should measure approximately 22 inches / 56 cm from top to bottom.
Finishing Panels
Fasten off. Weave in all ends on both panels.
Assembly Instructions
Seaming the Panels
Lay both panels side by side with right sides facing up. You will join them at the shoulders using Yarn A and a yarn needle with mattress stitch or slip stitch seam.
Right Shoulder Seam
Hold Panel 1 and Panel 2 with top edges aligned and right sides together. Starting from the right edge, seam across 11 inches / 28 cm (approximately 14 cluster-pair widths). Fasten off.
Neckline Opening
Leave the center 6 inches / 15 cm unseamed. This forms your neck opening.
Left Shoulder Seam
Seam the remaining 11 inches / 28 cm on the left side. Fasten off.
Your two seamed sections create a neck opening in the center. The bottom edges hang free on front and back. The side edges create your sleeve openings.
Checkpoint: Try the poncho on. The neckline opening should measure approximately 6 inches across. The sleeve openings should measure approximately 11 inches from shoulder seam down.
Sleeve Cuff (Make 2)
Work single crochet in back loops only (blo) across the sleeve openings to create ribbed cuffs.
Turtleneck Collar
Work single crochet in back loops only (blo) around the neckline opening using Yarn A only. Continue in rounds to achieve a height of approximately 4 inches / 10 cm.
Finishing Details
Twisted Cord Tie
Create twisted cords using Yarn A to thread through the collar or tie at the waist for a customized fit.
Pompoms (Make 2)
Use Yarn A to create pompoms approximately 2.5 inches / 6.5 cm in diameter using a cardboard circle or pompom maker. Attach to the ends of the twisted cord ties.
Fringe
Cut strands of Yarn B approximately 10 inches / 25 cm long. Fold in half and attach to the bottom hem of the poncho using a yarn needle or crochet hook. Trim to an even length of approximately 5 inches / 13 cm.
Tips
- For a wider poncho: Add stitches to the foundation chain in multiples of 4. Each additional 4-stitch group adds approximately 1.5 to 2 inches per panel.
- For a longer poncho: Add more rows in the lower body section. Each row adds approximately 0.5 inch in length.
- For a larger neckline: Leave more center stitches unseamed during assembly.
- For a taller collar: Add more rounds beyond Round 16. Every 4 rounds adds approximately 1 inch.
FAQs
What type of yarn should I use?
Use a Category 5 bulky yarn. Avoid very fluffy or heavily textured yarns as they will hide the stitch definition of the granny mesh pattern.
How do I join a new color?
When joining a new color, do so on the last pull-through of the stitch before the new color is needed. This creates a clean transition without loose ends.
Can I make this poncho smaller?
Yes, you can reduce the width by decreasing the foundation chain in multiples of 4, and you can shorten the length by working fewer rows in the body section.
How do I block this poncho?
Wet block the finished pieces before assembly if needed to even out the stitches, then block the assembled garment to ensure the drape is correct.
How long does it take to make?
Plan for approximately 15 to 20 hours of crochet time if you work at a steady pace. This breaks down nicely over a week or two of evening crafting sessions.
Pin This Crochet Pattern!