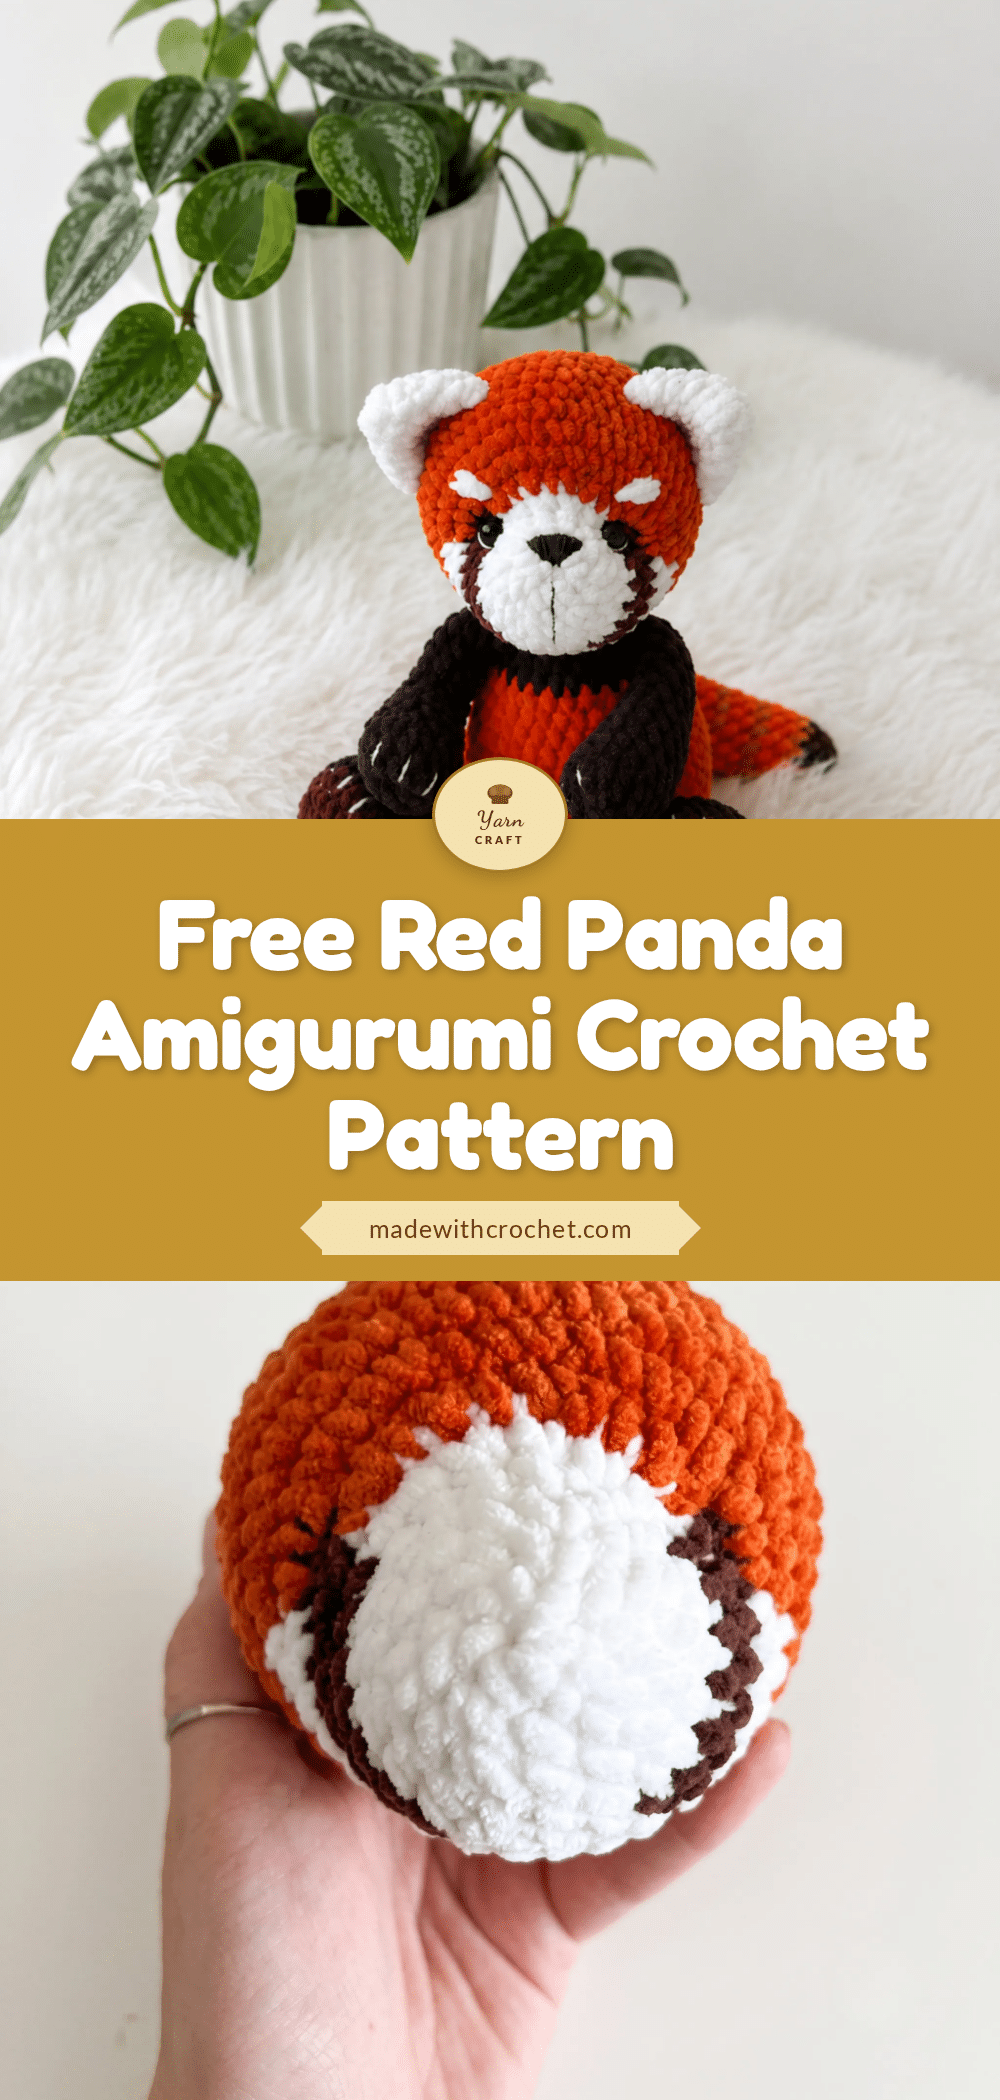
This red panda amigurumi is the kind of project that makes you stop and smile every time you see it. From its ringed tail to its expressive little face, the finished piece is impossibly cute and incredibly giftable. Whether it’s destined for a nursery shelf, a desk companion, or a handmade present for a wildlife lover, this 10-inch plush friend is as rewarding to make as it is to display.
Why the Finished Piece Stands Out
What makes this red panda special is the thoughtful use of color and texture. The combination of rust, brown, white, and sand yarns creates the signature masked face and striped tail that red pandas are known for, while the plush velvet yarn gives it a soft, huggable finish that feels almost like real fur. The hand-embroidered facial details—eyelids, nose, and eyebrows—add personality and expression that safety eyes alone can’t achieve. This pattern is perfect for makers who want to level up their amigurumi skills with color changes, multi-piece assembly, and direct limb attachment.
Project Overview
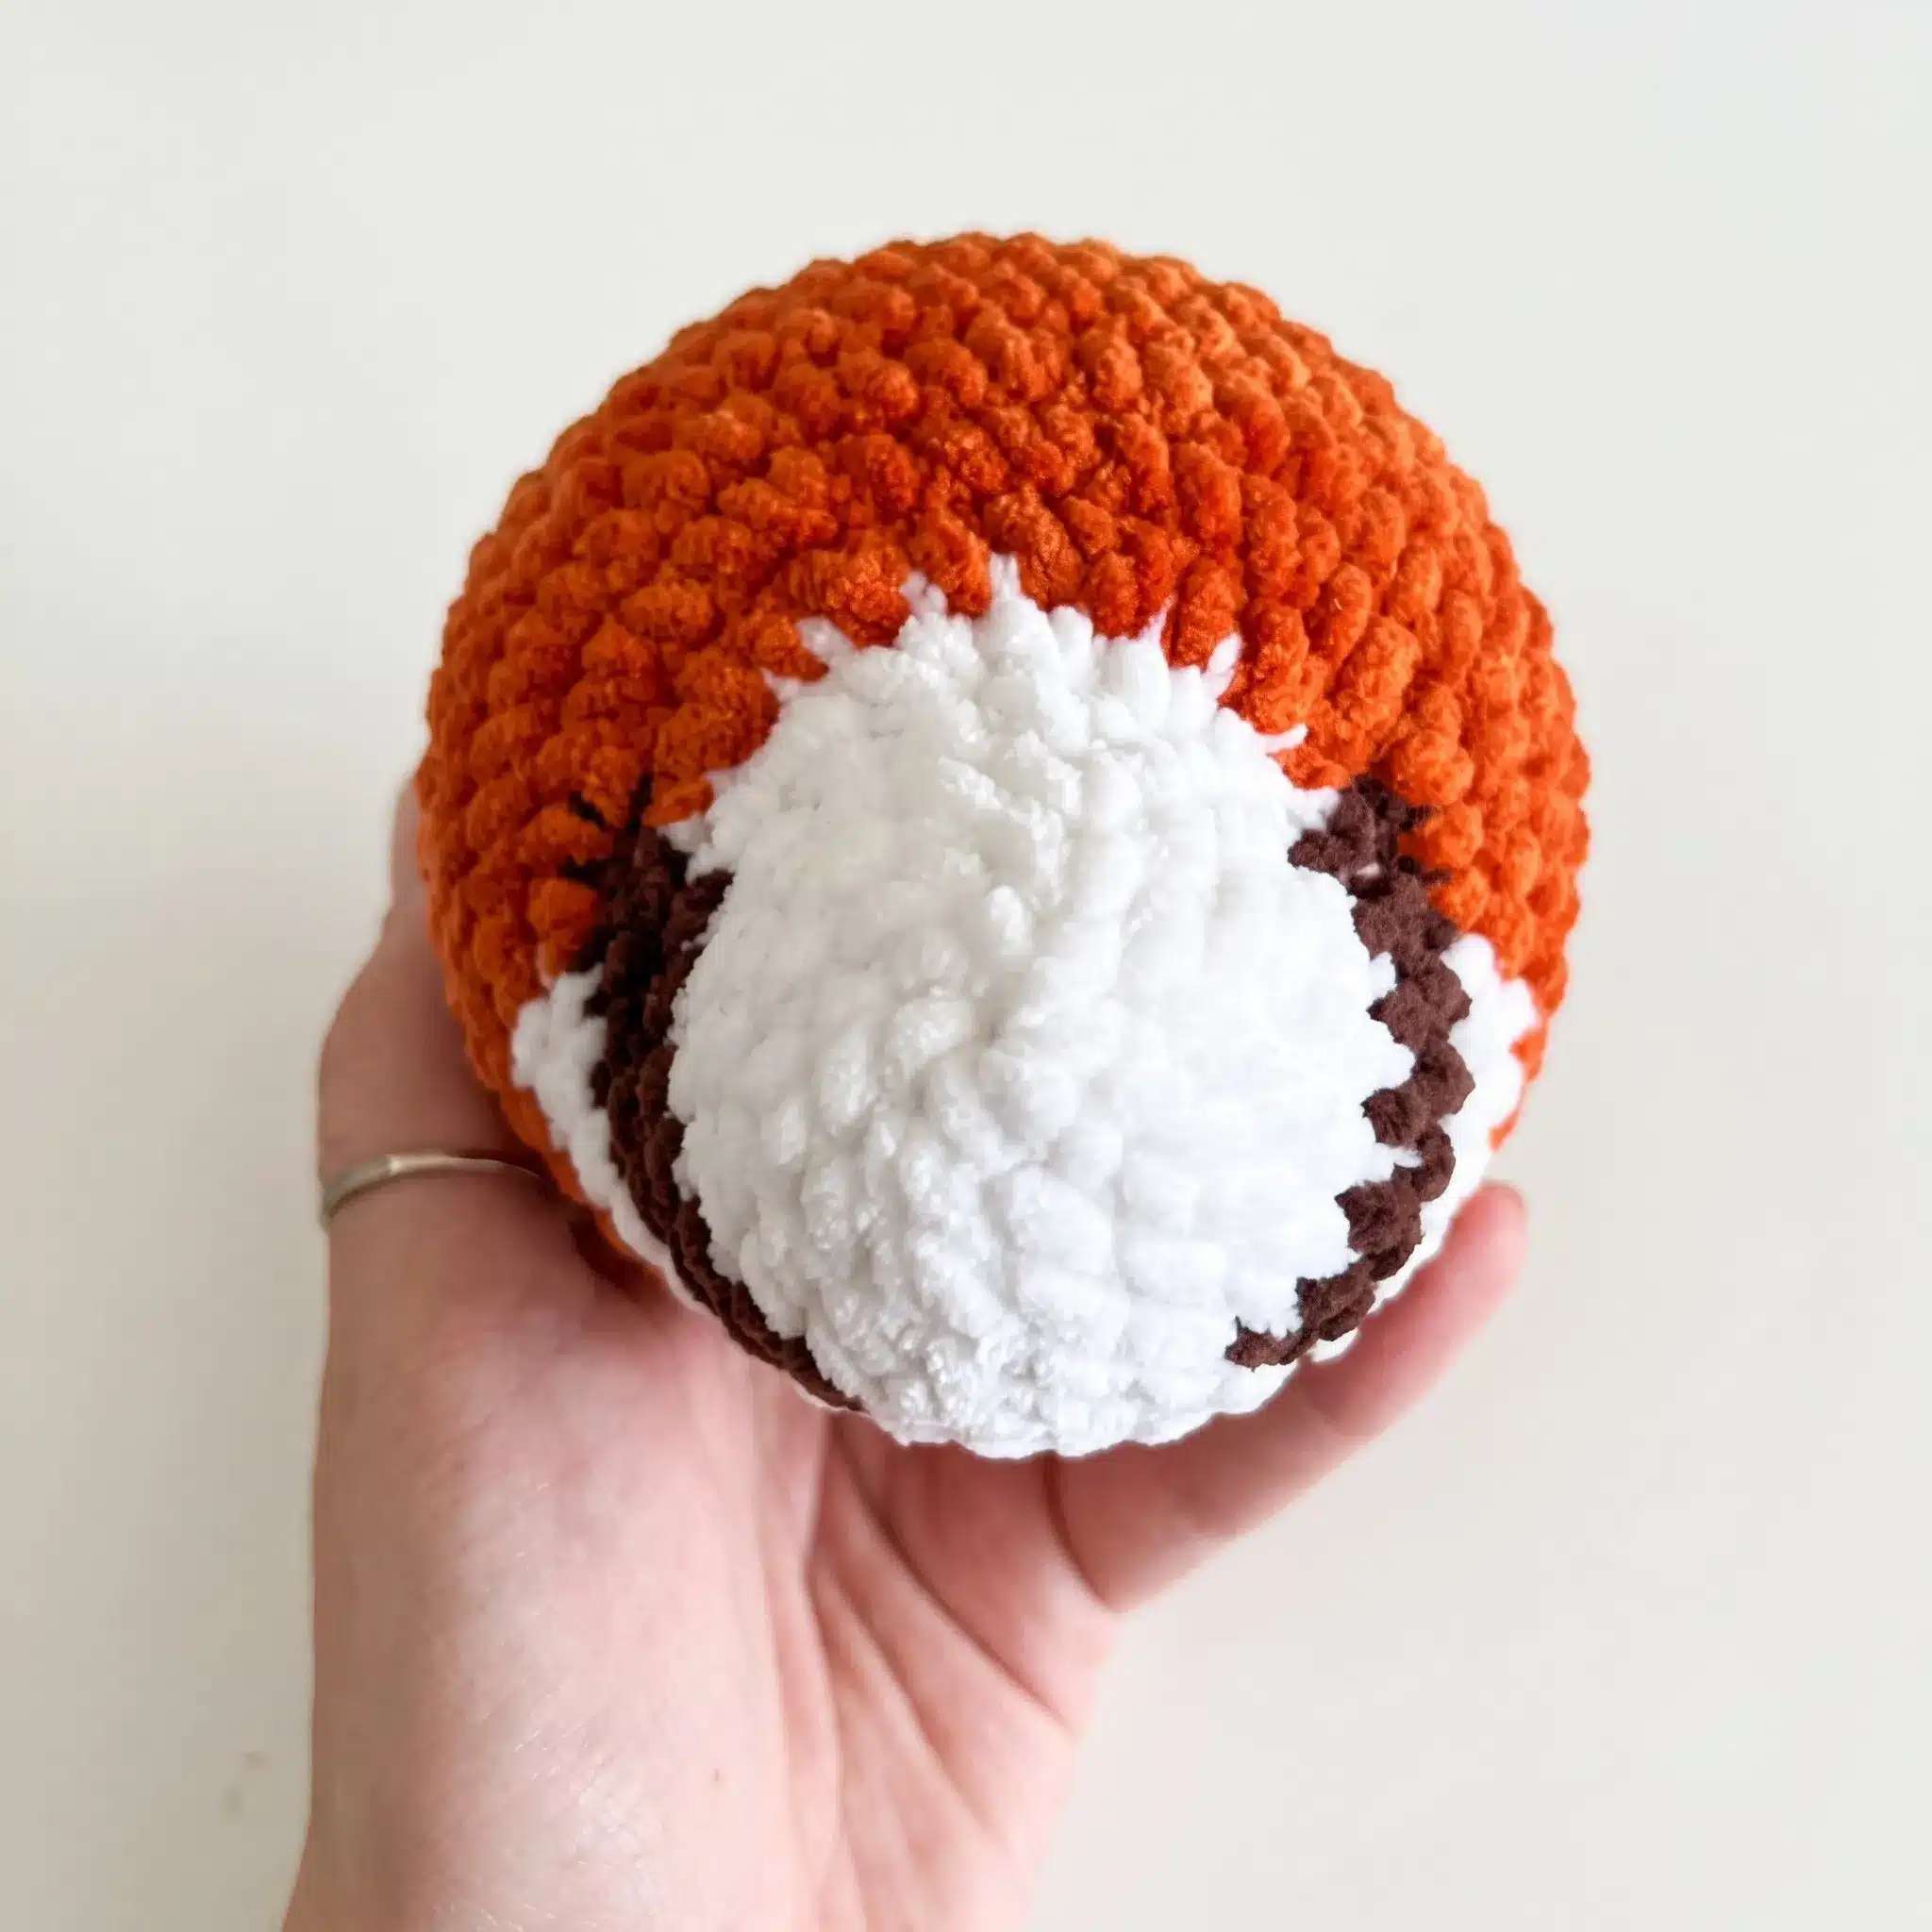
This intermediate-friendly crochet pattern walks you through creating a fully three-dimensional red panda. You’ll work with five yarn colors, shape a head, body, ears, legs, arms, and a striped tail, then assemble everything with a combination of crochet-as-you-go attachment and simple sewing. The finished panda stands approximately 10 inches (25 cm) tall.
Materials
- Plush/velvet yarn (worsted weight), in the following colors: Rust/ginger — main body and head color; White — face, ears, and belly accents; Brown — head shading and leg color; Dark brown — leg, arm, and tail color; Sand — tail stripe color
- Crochet hook: 4 mm (US G-6)
- Safety eyes, 11 mm, 1 pair
- Fiberfill stuffing
- Thin black cotton thread (embroidery weight) for eye and nose details
- Thin white cotton thread (embroidery weight) for eyelid details
- Thin beige cotton thread (embroidery weight) for claw details
- Sturdy cotton sewing thread in a color matching the body, for assembly and eye shaping
- Yarn needle
- Stitch marker
- Scissors
- Optional: dry pastel chalk and a soft makeup brush, for tinting the ears
Abbreviations
- BLO — Back Loop Only
- dec — Decrease (invisible decrease)
- inc — Increase (2 sc in same stitch)
- MR — Magic Ring
- sc — Single Crochet
Pattern Notes
This pattern is written in US crochet terminology. All pieces are worked in continuous spiral rounds — do not join or chain between rounds. Use a stitch marker to track the start of each round. Gauge is not critical for this project. What matters most is a fabric tight enough that stuffing doesn’t peek through, so adjust your hook size if needed to achieve a dense stitch. Stitch counts are given at the end of every round in parentheses, like this: (24). With the materials listed above, the finished red panda stands approximately 10 inches (25 cm) tall. Safety eyes are inserted between Rounds 6 and 7 of the Head, before the head is closed and stuffed — placement details are noted at that round. Legs, arms, and tail are worked separately and then crocheted directly into the Body during specific rounds, rather than sewn on afterward — read the Body section closely for those instructions.
Pattern Instructions
Head
Begin with white.
Rnd 1: 6 sc in MR. (6)
Rnd 2: 6 inc. (12)
Rnd 3: (sc, inc) around. (18)
Rnd 4: sc around. (18)
Rnd 5: (2 sc, inc) around. (24)
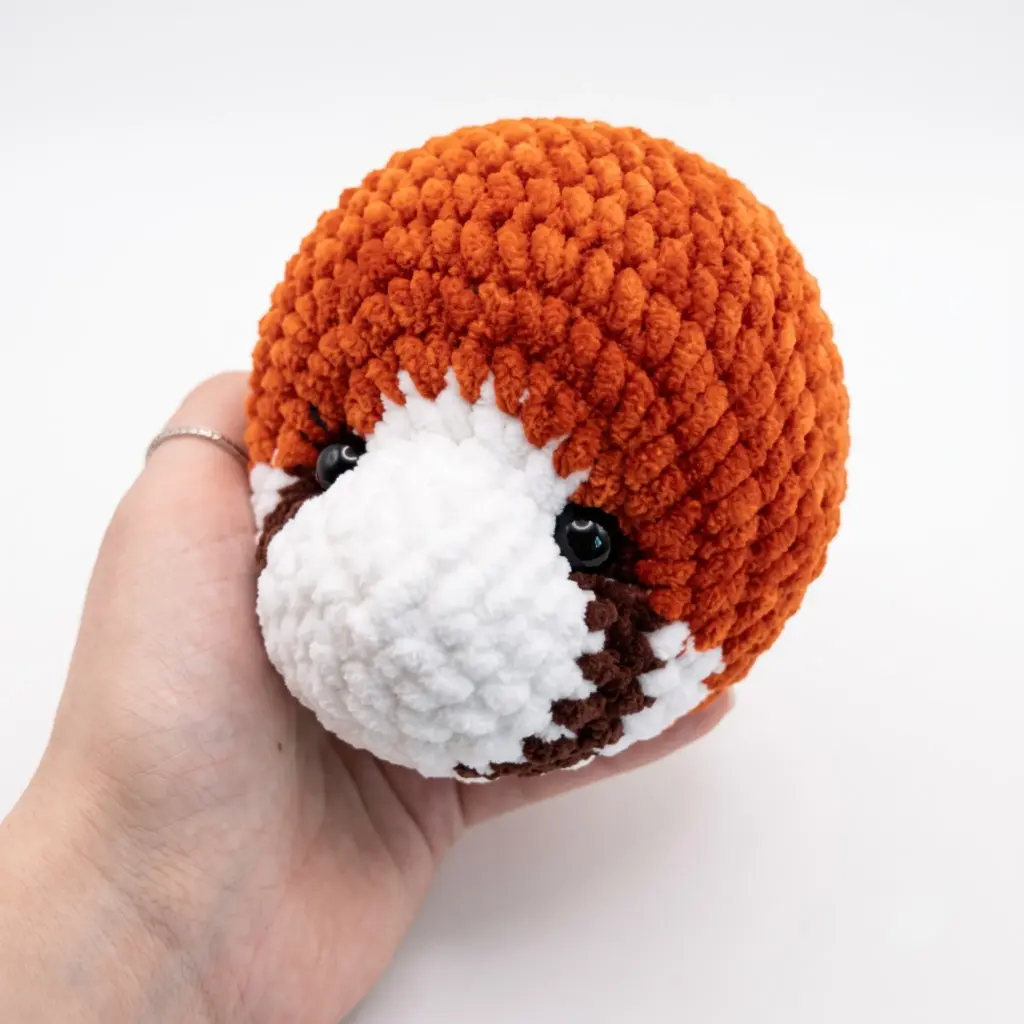
Rnd 6: 2 sc, change to brown: 7 sc, change to white: 6 inc, change to brown: 7 sc, change to white: 2 sc. (30)
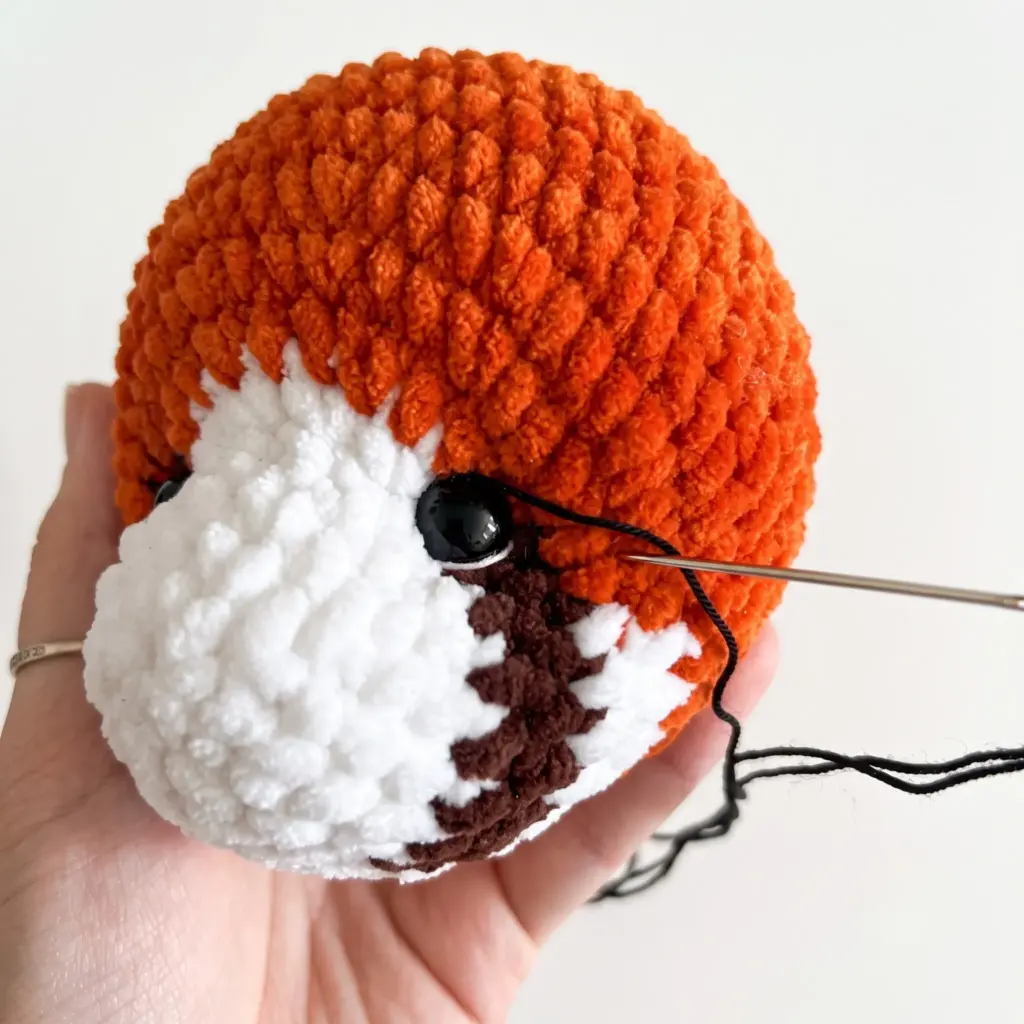
If using safety eyes, insert them now, between the two sc sts of each outer increase of this round.
Rnd 7: 3 sc, change to brown: 6 sc, inc, change to rust: (sc, inc) twice, 2 sc, (inc, sc) twice, change to brown: inc, 6 sc, change to white: 3 sc. (36)
Rnd 8: 9 sc, change to rust: (2 sc, inc) around, change to white: 9 sc. (42)
Rnd 9: 9 sc, change to rust: (3 sc, inc) around, change to white: 9 sc. (48)
Rnds 10–15: Change to rust. sc around. (48)
Rnd 16: (6 sc, dec) around. (42)
Rnd 17: (5 sc, dec) around. (36)
Begin stuffing the head firmly. Continue stuffing as you work the remaining rounds.
Rnd 18: (4 sc, dec) around. (30)
Rnd 19: sc around. (30)
Rnd 20: (3 sc, dec) around. (24)
Rnd 21: (2 sc, dec) around. (18)
Rnd 22: (sc, dec) around. (12)
Rnd 23: 6 dec. (6)
Finish off, leaving a tail for weaving in. Close the opening using the BLO of the final round, then weave in the end.
Face Details
Sew the eyes between Rounds 6 and 7: the left eye between the two sc of the first increase of Round 6, and the right eye between the two sc of the last increase of Round 6. Bring your needle out at the bottom-center of the head, thread on the eye, and pull the anchor thread tight to seat the eye at your desired depth before knotting off inside the head. Embroider the lower eyelid in white thread and the upper eyelid in black thread for a lively, expressive look. Embroider the nose as a small triangle in black thread, with the bottom edge one round above the magic ring and the top edge two rounds above that. Add a short vertical line beneath the nose. Embroider soft eyebrows above each eye using white plush yarn.
Ears (make 2)
Work in white.
Rnd 1: 6 sc in MR. (6)
Rnd 2: (sc, inc) around. (9)
Rnd 3: (2 sc, inc) around. (12)
Rnd 4: (sc, inc) around. (18)
Rnd 5: (5 sc, inc) around. (21)
Rnd 6: (6 sc, inc) around. (24)
Finish off, leaving a long tail for sewing.
Legs (make 2)
Begin with brown.
Rnd 1: 7 sc in MR. (7)
Rnd 2: 7 inc. (14)
Rnd 3: (sc, inc) around. (21)
Rnd 4: (2 sc, inc) around. (28)
Rnds 5–7: Change to dark brown. sc around. (28)
Rnd 8: 7 sc, 7 dec, 7 sc. (21)
Rnd 9: 7 sc, 3 dec, 8 sc. (18)
Rnds 10–15: sc around. (18)
Firmly stuff the foot through approximately Round 10; do not stuff beyond this point.
Rnd 16: (4 sc, dec) around. (15)
Rnd 17: sc around. (15)
Rnd 18: (3 sc, dec) around. (12)
Finish off, leaving a long tail for sewing.
Arms (make 2)
Work in dark brown.
Rnd 1: 6 sc in MR. (6)
Rnd 2: 6 inc. (12)
Rnd 3: (sc, inc) around. (18)
Rnds 4–5: sc around. (18)
Rnd 6: 6 sc, 3 dec, 6 sc. (15)
Rnd 7: 6 sc, dec, 7 sc. (14)
Rnd 8: 6 sc, dec, 6 sc. (13)
Rnd 9: 6 sc, dec, 5 sc. (12)
Firmly stuff the paw through this round; do not stuff beyond this point.
Rnds 10–16: sc around. (12)
Rnd 17: (4 sc, dec) twice. (10)
Finish off, leaving a long tail for sewing.
Tail
Begin with dark brown.
Rnd 1: 6 sc in MR. (6)
Rnd 2: 6 inc. (12)
Rnd 3: (3 sc, inc) around. (15)
Rnd 4: sc around, change to sand. (15)
Rnd 5: sc around, change to dark brown. (15)
Rnds 6–7: sc around, change to sand. (15)
Rnd 8: sc around, change to dark brown. (15)
Rnds 9–10: sc around, change to sand. (15)
Rnd 11: sc around, change to dark brown. (15)
Rnds 12–13: sc around, change to sand. (15)
Rnd 14: sc around, change to dark brown. (15)
Rnd 15: sc around. (15)
Rnd 16: (3 sc, dec) around. (12)
Finish off, leaving a long tail for sewing.
Body
Begin with rust.
Rnd 1: 6 sc in MR. (6)
Rnd 2: 6 inc. (12)
Rnd 3: (sc, inc) around. (18)
Rnd 4: (2 sc, inc) around. (24)
Rnd 5: (3 sc, inc) around. (30)
Rnd 6: (4 sc, inc) around. (36)
Rnd 7: Attach the legs in this round. Fold the left leg in half and work through both layers of the leg together with the body: (5 sc, inc) across the left leg and body, (5 sc, inc) twice, then repeat for the right leg: (5 sc, inc) across the right leg and body, (5 sc, inc) twice. (42)
Rnd 8: sc around. (42)
Rnd 9: Begin attaching the tail. Fold the tail in half and work through both layers: 31 sc, 3 sc across the tail and body (leave the remaining 3 tail stitches unworked for now), 8 sc. (42)
Rnd 10: sc around. (42)
Rnd 11: Continue attaching the tail’s remaining 3 stitches: 34 sc, 3 sc across the tail and body, 5 sc. (42)
Rnd 12: sc around. (42)
Rnd 13: (5 sc, dec) around. (36)
Rnds 14–15: sc around. (36)
Begin stuffing the body firmly. Continue stuffing as you work.
Rnd 16: (4 sc, dec) around. (30)
Rnd 17: sc around. (30)
Rnd 18: (3 sc, dec) around. (24)
Rnd 19: Change to dark brown. sc around. (24)
Rnd 20: (2 sc, dec) around. (18)
Rnd 21: Attach the arms in this round. Fold the left arm in half and work through both layers: sc, 5 sc across the left arm and body, 4 sc, then fold the right arm and work: 5 sc across the right arm and body, 3 sc. Check that both arms sit symmetrically with the legs; work a few offset stitches to correct placement if needed. (18)
Rnd 22: (4 sc, dec) around. (15)
Rnd 23: sc around. (15)
Finish off, leaving a long tail for sewing.
Assembly
Sew the ears to the head, stitching through both layers with cotton thread that matches the body color. Position them in a triangle shape between Rounds 12 and 16, spacing them about 8 stitches apart. If desired, tint the ears with crushed dry pastel chalk applied with a soft makeup brush — brown on the inside of the ear, rust on the back. Sew the head to the body using a whipstitch, working through the yarn tail left at the base of the head. Before closing the last few stitches, firmly stuff the neck area so the head sits securely. Embroider four short claw lines on each paw and foot using beige thread, following the placement of your reference photo.
Weave in all remaining yarn tails and trim any stray ends.
Tips & Tricks
Getting a red panda’s ringed tail to look crisp comes down to tension — keep your stitches snug and consistent through every color change so the sand and dark brown stripes read as clean bands rather than blurring together. When you’re working the invisible decrease throughout the head, body, legs, and arms, always insert your hook into the front loops of the next two stitches only, rather than working through all four loops; this keeps your shaping smooth and nearly invisible on the finished piece.
Stuffing firmness matters more in the head and body than anywhere else on this pattern — aim for a stuffed piece that feels firm to the touch but doesn’t distort your stitch definition, and stop adding fiberfill the moment the fabric starts to look stretched. For the legs and arms, only the foot and paw sections need dense stuffing; leaving the upper portions lightly filled or unstuffed helps the limbs bend naturally when you pose your finished panda.
If you’re substituting yarn, look for a plush or velvet-style worsted weight yarn rather than a smooth cotton or acrylic — the texture is what gives red panda amigurumi that soft, realistic fur look, and swapping to a flatter yarn will change the finished appearance more than you’d expect. Finally, the trickiest part of this whole pattern is Round 7 of the Body, where you’re attaching both legs while simultaneously increasing — work slowly, count your stitches after each leg attachment, and don’t be afraid to use a stitch marker to hold your place mid-round.
Frequently Asked Questions
What skill level is this pattern?
This pattern is best suited for intermediate crocheters who are comfortable with color changes, invisible decreases, and working in continuous rounds. Beginners who have mastered the basics can also give it a try with patience.
Can I use a different yarn weight?
Yes, but the finished size will change. If you substitute yarn, choose a plush or velvet-style worsted weight for the best texture. Adjust your hook size to maintain a tight fabric that hides the stuffing.
How do I make the invisible decrease?
Insert your hook into the front loop only of the next two stitches, yarn over, and pull through both loops, then yarn over and pull through the remaining two loops on your hook. This creates a nearly invisible decrease.
Why are the legs and arms crocheted into the body instead of sewn on?
This method creates a stronger, more secure attachment and eliminates visible seams. It also gives the limbs a more natural, integrated look.
How do I tint the ears with pastel chalk?
Crush a small amount of dry pastel chalk into a powder, then use a soft makeup brush to gently apply it to the ears. Use brown on the inside and rust on the back for a realistic effect.
Can I wash the finished red panda?
Spot cleaning is recommended. If you must wash it, hand wash gently in cool water with mild soap, then reshape and air dry. Avoid machine washing or drying to preserve the plush texture and embroidery.
Pin This Crochet Pattern!