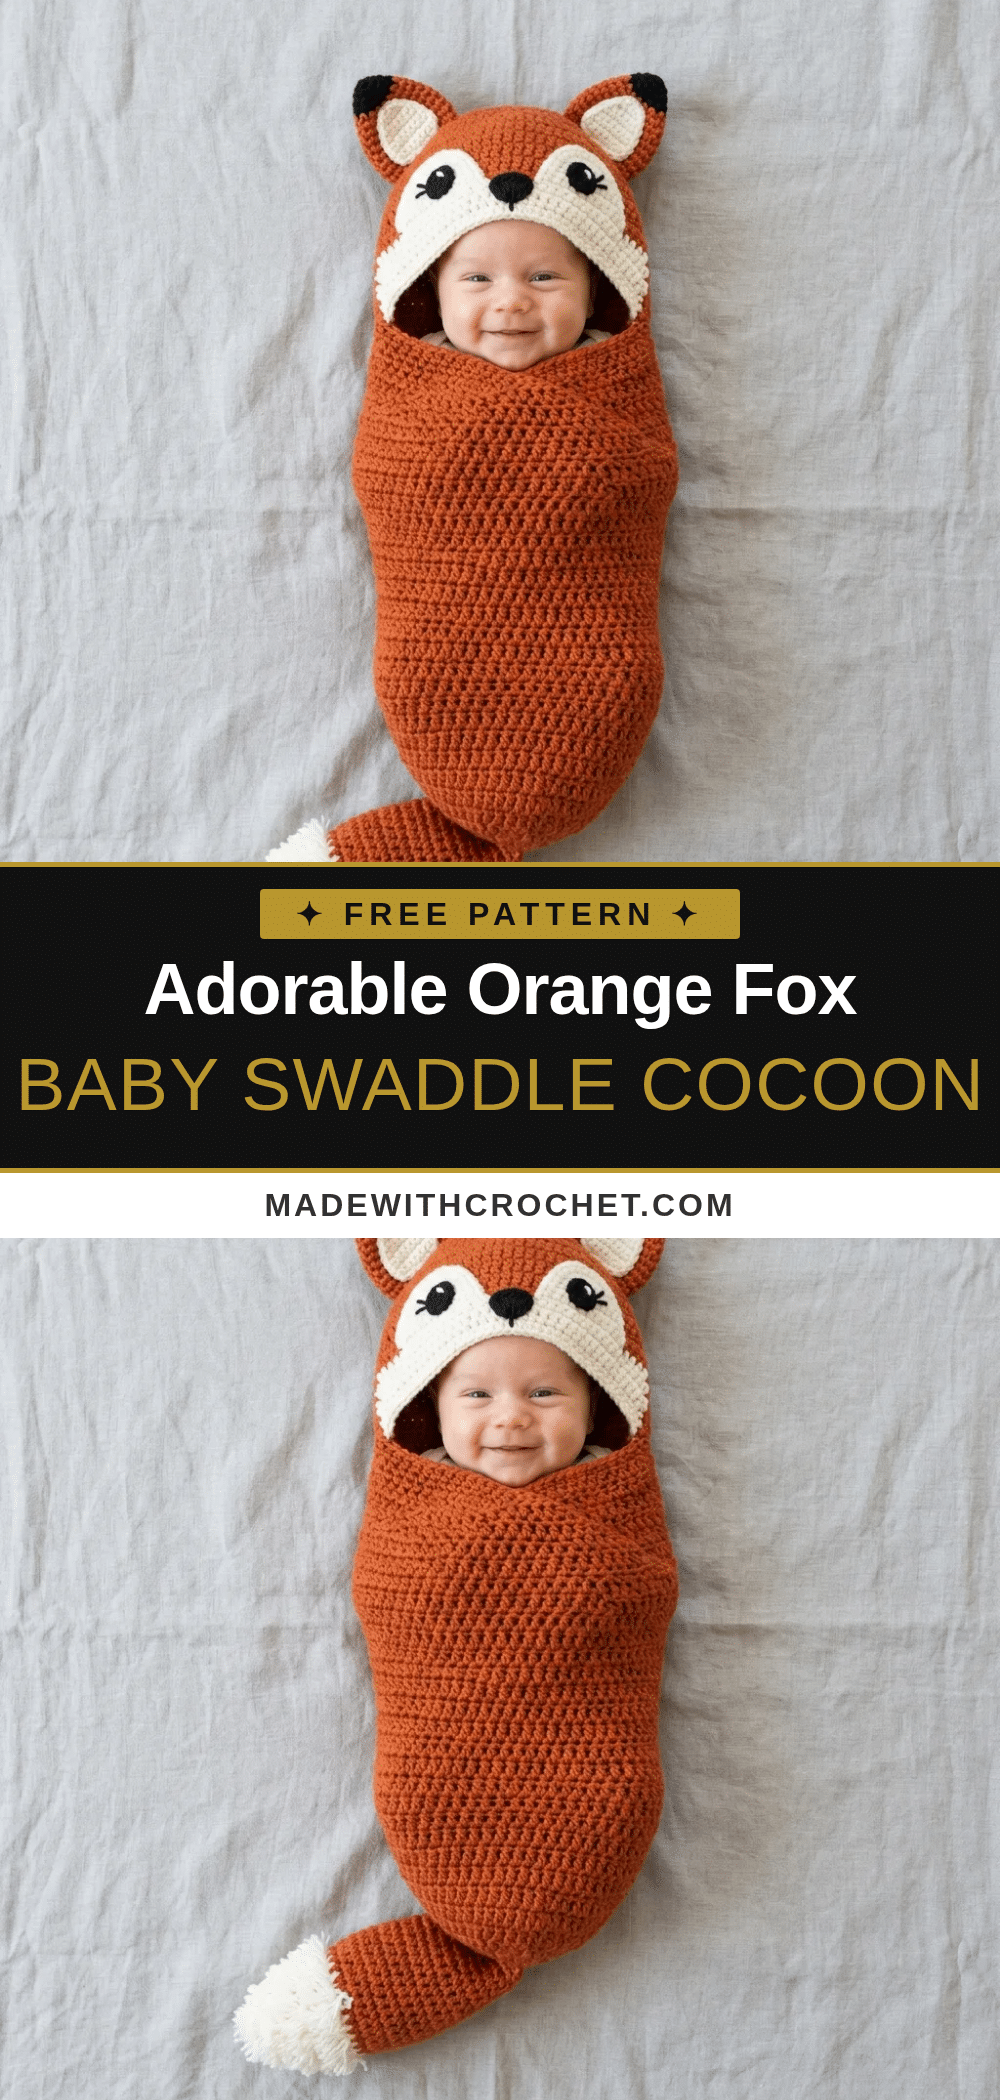
This adorable Orange Fox Baby Swaddle Cocoon is the ultimate handmade gift for a new arrival. Perfect for baby showers, nursery decor, or professional newborn photography, this pattern creates a structured, snuggly cocoon that keeps little ones warm and secure. The dense single crochet fabric ensures a fitted shape, while the charming fox hood and tail add a whimsical woodland touch. Whether you are a seasoned crocheter looking for a meaningful project or a beginner ready to tackle a rewarding intermediate challenge, this tutorial guides you through every step to create a keepsake that will be cherished for years.
Gift and Use Ideas
While this cocoon is undeniably cute, its primary function is to provide a secure, womb-like environment for newborns. The dense fabric of the single crochet stitch offers gentle compression, mimicking the feeling of being held. This makes it an excellent tool for soothing fussy babies or keeping them warm during winter photoshoots. Beyond its practical use as a swaddle, the fox design makes it a standout gift for parents who appreciate unique, handmade items. It serves as a beautiful photo prop that captures the innocence of early infancy, and because it is machine washable, it is durable enough to be used repeatedly for family milestones.
Project Overview
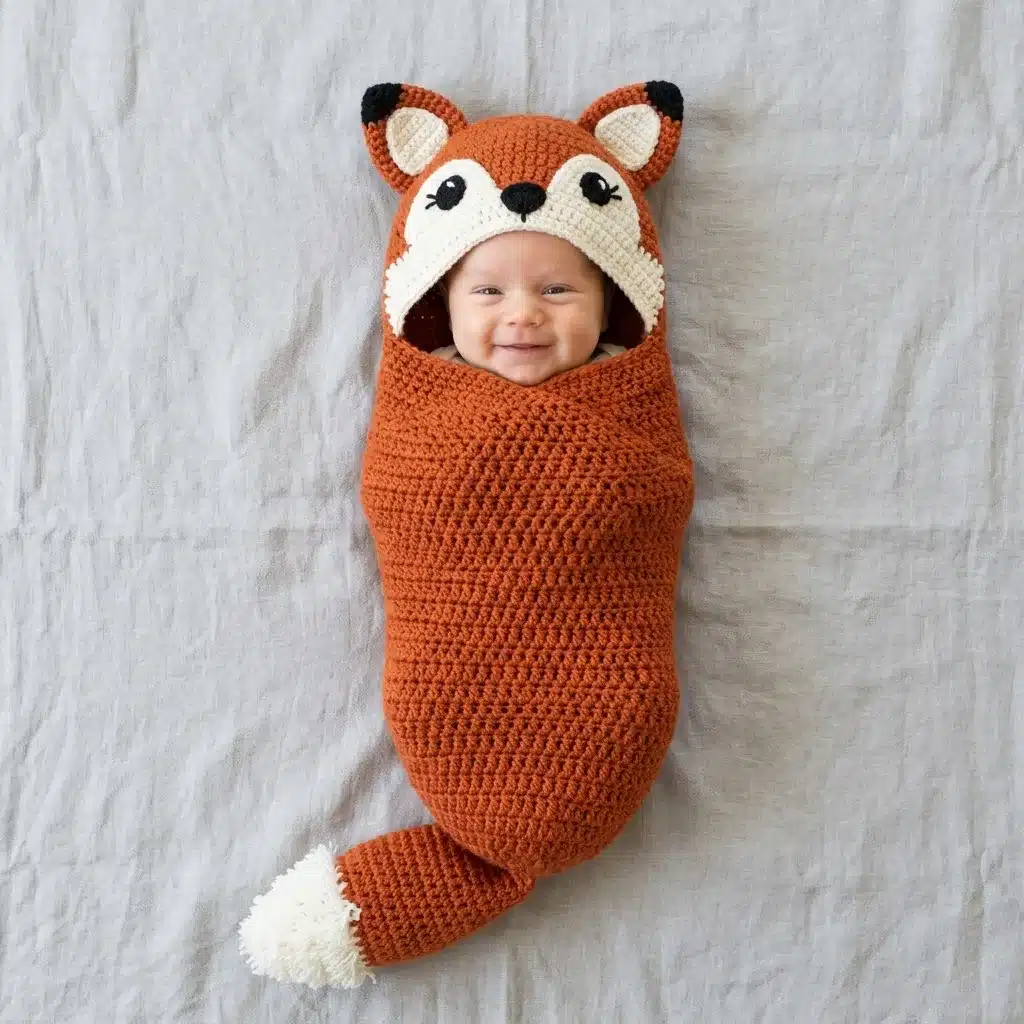
This wearable crochet project creates a fully enclosed baby swaddle with an attached hood shaped like a fox face. The construction is methodical: you begin with a flat oval base that forms the bottom of the cocoon, then work upward in continuous rounds to create the cylindrical body. The hood is constructed separately as a flat panel, seamed along the back, and attached to the cocoon opening. Finally, small components like pointed ears and a tapered tail are sewn on to complete the fox look. The entire piece is worked in simple single crochet, resulting in a dense, structured fabric that holds its shape beautifully.
Materials
- Yarn:
- Color A (Rust Orange): Approximately 700 yards / 640 meters of worsted weight (4) yarn.
- Color B (Cream / Off White): Approximately 150 yards / 137 meters of worsted weight (4) yarn.
- Color C (Black): Approximately 10 yards / 9 meters of worsted weight (4) yarn.
- Hook: US size J-10 / 6.0 mm crochet hook.
- Notions:
- Tapestry needle for seaming and embroidery.
- Stitch markers (at least 4).
- Scissors.
- Small amount of polyester fiberfill for tail tip (optional).
- Rust or orange sewing thread and hand sewing needle (optional, for reinforcing seams).
Yarn Suggestions
Lion Brand Pound of Love is a top pick because it is 100% acrylic, machine washable, and provides 1020 yards per skein, easily covering the Color A requirement. Caron Simply Soft is another excellent choice for its softness against newborn skin. Avoid fuzzy or textured yarns; you want smooth yarn that shows stitches clearly so embroidered facial features remain visible.
Gauge and Finished Size
Gauge
14 single crochet stitches and 16 rows = 4 inches / 10 cm, worked in the round or in rows, using a US J-10 / 6.0 mm hook.
To make a gauge swatch: Chain 19. Row 1: sc in 2nd chain from hook and in each chain across. (18 sc) Turn. Rows 2 through 18: ch 1, sc in each sc across. (18 sc) Turn. Fasten off. Block lightly. Measure the center 14 stitches and center 16 rows. Adjust hook size if needed.
Gauge matters here because this is a fitted item. Too loose and your cocoon will be floppy. Too tight and it won’t fit the baby comfortably.
Finished Size
This size fits newborns to 3 month old infants, roughly 6 to 12 pounds. The dense single crochet fabric has minimal stretch, which is intentional for that structured swaddle shape you see in professional newborn photos.
- Cocoon body length (excluding hood and tail): approximately 18 inches / 46 cm
- Cocoon circumference at widest point: approximately 18 inches / 46 cm
- Hood circumference: approximately 14 inches / 35.5 cm
- Tail length: approximately 8 inches / 20 cm
Abbreviations
Let me define everything you’ll see in this pattern:
- ch = chain
- sc = single crochet: Insert hook into stitch, yarn over, pull up a loop (2 loops on hook), yarn over, pull through both loops
- inc = increase: Work 2 sc in the same stitch, adding one stitch to your total count
- sc2tog = single crochet two together (decrease): Insert hook into next stitch, yarn over, pull up a loop (2 loops on hook), insert hook into following stitch, yarn over, pull up a loop (3 loops on hook), yarn over, pull through all 3 loops
- sl st = slip stitch: Insert hook into stitch, yarn over, pull through stitch and loop on hook in one motion
- st(s) = stitch(es)
- rnd = round
- RS = right side
- WS = wrong side
- pm = place marker
Pattern Notes
The cocoon body is worked in continuous rounds. That means no joining and no turning at the end of each round. Just keep spiraling upward. Use a stitch marker in the first stitch of each round and move it up as you go so you always know where your rounds begin.
When changing color, complete the last sc of the old color until the final yarn over and pull through, then use the new color for that final pull through. This makes your color transitions clean.
The stitch count shown in parentheses at the end of each round tells you exactly how many stitches you should have. For example: (42 sc) means you should count 42 single crochet stitches.
Pattern Instructions
Part One: Cocoon Body Instructions
The cocoon starts with a flat oval base worked in rounds, then transitions into a cylinder.
Foundation Oval Base
Using Color A and a US J-10 / 6.0 mm hook, chain 7.
Round 1: Starting in the 2nd chain from hook, work 1 sc in each of the next 5 chains (5 sc along one side), then work 3 sc in the last chain (corner), rotate work 180 degrees to work along the opposite side of the foundation chain, work 1 sc in each of the next 4 chains (4 sc), then work 2 sc in the same chain as the first sc of the round. Do not join; work in continuous rounds. Place marker in first stitch. (14 sc)
Round 2: Inc in first st, sc in next 4 sts, inc in each of next 3 sts, sc in next 4 sts, inc in last 2 sts. (20 sc)
Round 3: Inc in first st, sc in next st, inc in next st, sc in next st, inc in next st, sc in next 4 sts, inc in next st, sc in next st, inc in next st, sc in next st, inc in next st, sc in next st, inc in next st, sc in next 4 sts, inc in next st, sc in last st. (28 sc)
Round 4: Sc in next 2 sts, inc in next st, sc in next 2 sts, sc in next 4 sts, (sc in next 2 sts, inc in next st) 3 times, sc in next 2 sts, sc in next 4 sts, sc in next 2 sts, inc in next st. (32 sc)
Round 5: Inc in first st, sc in next 6 sts, inc in next st, sc in next 6 sts, inc in next st, sc in next 6 sts, inc in next st, sc in next 10 sts. (36 sc)
Round 6: Sc in first 2 sts, inc in next st, sc in next 7 sts, inc in next st, sc in next 7 sts, inc in next st, sc in next 7 sts, inc in next st, sc in next 8 sts. (40 sc)
Round 7: Sc in first 3 sts, inc in next st, sc in next 8 sts, inc in next st, sc in next 8 sts, inc in next st, sc in next 8 sts, inc in next st, sc in next 7 sts. (44 sc)
Round 8: Sc in first 4 sts, inc in next st, sc in next 10 sts, inc in next st, sc in next 8 sts, inc in next st, sc in next 10 sts, inc in next st, sc in next 8 sts. (48 sc)
Round 9: Sc in first 4 sts, inc in next st, sc in next 11 sts, inc in next st, sc in next 9 sts, inc in next st, sc in next 9 sts, inc in next st, sc in next 9 sts, inc in next st, sc in next 8 sts. (52 sc)
Round 10: Sc in first 5 sts, inc in next st, sc in next 12 sts, inc in next st, sc in next 10 sts, inc in next st, sc in next 10 sts, inc in next st, sc in next 10 sts, inc in next st, sc in next 9 sts. (56 sc)
Round 11: Sc in first 6 sts, inc in next st, sc in next 13 sts, inc in next st, sc in next 11 sts, inc in next st, sc in next 11 sts, inc in next st, sc in next 11 sts, inc in next st, sc in next 10 sts. (60 sc)
Round 12: Sc in first 7 sts, inc in next st, sc in next 14 sts, inc in next st, sc in next 12 sts, inc in next st, sc in next 12 sts, inc in next st, sc in next 12 sts, inc in next st, sc in next 11 sts. (64 sc)
Round 13: Sc in first 8 sts, inc in next st, sc in next 15 sts, inc in next st, sc in next 13 sts, inc in next st, sc in next 13 sts, inc in next st, sc in next 13 sts, inc in next st, sc in next 12 sts. (68 sc)
Round 14: Sc in first 9 sts, inc in next st, sc in next 16 sts, inc in next st, sc in next 14 sts, inc in next st, sc in next 14 sts, inc in next st, sc in next 14 sts, inc in next st, sc in next 13 sts. (72 sc)
Round 15: Sc in first 10 sts, inc in next st, sc in next 17 sts, inc in next st, sc in next 15 sts, inc in next st, sc in next 15 sts, inc in next st, sc in next 15 sts, inc in next st, sc in next 14 sts. (76 sc)
Round 16: Sc in first 11 sts, inc in next st, sc in next 18 sts, inc in next st, sc in next 16 sts, inc in next st, sc in next 16 sts, inc in next st, sc in next 16 sts, inc in next st, sc in next 15 sts. (80 sc)
Cylinder Body
Rounds 31 through 60: Sc in each st around. (80 sc per round)
These 30 rounds of even single crochet form the straight cylindrical body. At gauge, this equals approximately 7.5 inches of length.
At the end of Round 60, sl st to join the final round, then fasten off and weave in end.
Part Two: Hood Instructions
The hood is a flat panel worked in rows, then seamed along the back.
Using Color A and US J-10 / 6.0 mm hook, chain 51.
Row 1 (WS): Sc in 2nd ch from hook and in each ch across. Turn. (50 sc)
Row 2 (RS): Ch 1, sc in each st across. Turn. (50 sc)
Rows 3 through 28: Ch 1, sc in each st across. Turn. (50 sc per row)
Row 29 (RS): Ch 1, sc in first 12 sts with Color A, join Color B, sc in next 26 sts with Color B, join Color A, sc in last 12 sts with Color A. Turn. (50 sc total: 12 A + 26 B + 12 A)
Row 30: Ch 1, sc in first 11 sts with Color A, sc in next 28 sts with Color B, sc in last 11 sts with Color A. Turn. (50 sc)
Row 31: Ch 1, sc in first 10 sts with Color A, sc in next 30 sts with Color B, sc in last 10 sts with Color A. Turn. (50 sc)
Row 32: Ch 1, sc in first 9 sts with Color A, sc in next 32 sts with Color B, sc in last 9 sts with Color A. Turn. (50 sc)
Row 33: Ch 1, sc in first 8 sts with Color A, sc in next 34 sts with Color B, sc in last 8 sts with Color A. Turn. (50 sc)
Rows 34 through 35: Ch 1, sc in first 8 sts with Color A, sc in next 34 sts with Color B, sc in last 8 sts with Color A. Turn. (50 sc)
Fasten off Color B. Continue in Color A only.
Row 36: Ch 1, sc in each st across. Turn. (50 sc)
Fasten off.
Part Three: Ears (Make 2)
Outer Ear
Using Color C (Black) and US J-10 hook, chain 2.
Round 1: Work 6 sc in 2nd ch from hook. Do not join; place marker. (6 sc)
Round 2: Inc in each st around. (12 sc)
Round 3: (Sc in next st, inc in next st) 6 times. (18 sc)
Fasten off Color C. Join Color A.
Rounds 4 through 6: With Color A, sc in each st around. (18 sc)
Sl st to join. Fasten off, leaving a 12 inch tail. Pinch the bottom flat and whipstitch the base closed.
Inner Ear
Using Color B (Cream), chain 2.
Round 1: Work 5 sc in 2nd ch from hook. (5 sc)
Round 2: Inc in each st around. (10 sc)
Round 3: (Sc in next st, inc in next st) 5 times. (15 sc)
Sl st to join. Fasten off.
Whipstitch the inner ear to the front of the outer ear. Sew completed ears to the top of the hood, approximately 2 inches from center, tilting slightly outward.
Part Four: Tail Instructions
Using Color A, chain 2.
Round 1: Work 8 sc in 2nd ch from hook. Place marker. (8 sc)
Round 2: Inc in each st around. (16 sc)
Round 3: (Sc in next st, inc in next st) 8 times. (24 sc)
Rounds 4 through 6: Sc in each st around. (24 sc)
Round 7: (Sc in next 4 sts, sc2tog) 4 times. (20 sc)
Rounds 8 through 10: Sc in each st around. (20 sc)
Round 11: (Sc in next 3 sts, sc2tog) 4 times. (16 sc)
Rounds 12 through 14: Sc in each st around. (16 sc)
Round 15: (Sc in next 2 sts, sc2tog) 4 times. (12 sc)
Rounds 16 through 24: Sc in each st around. (12 sc)
Switch to Color B (Cream).
Round 25: Inc in each st around. (24 sc)
Rounds 26 through 27: Sc in each st around. (24 sc)
Round 28: (Sc in next 2 sts, sc2tog) 6 times. (18 sc)
Round 29: (Sc in next st, sc2tog) 6 times. (12 sc)
Round 30: Sc2tog 6 times. (6 sc)
Lightly stuff the cream tip with fiberfill. Fasten off, thread tail through remaining stitches, and pull tight to close.
Sew the wide end of the tail to the lower right side of the cocoon, positioning it to curve naturally away from the body.
Assembly
- Fold the panel so the two short edges meet. Seam them together using whipstitch or mattress stitch. This seam runs along the back of the head.
- With Color B, join yarn to any stitch along the face opening edge. Work 1 round of sc evenly around the face opening. Join with sl st to first sc. Fasten off.
- Attach the hood to the cocoon body by positioning it so the back seam aligns with the back of the cocoon. Whipstitch the hood to the cocoon around the entire circumference.
- Weave in all ends securely, burying them through at least 1 inch of stitches.
- For blocking, submerge the finished cocoon in cool water, gently squeeze out water, reshape while damp, and let dry flat for 24 hours. Reinforce all seams by stitching back across them a second time.
Important: This cocoon is designed for supervised photography sessions only. It is not intended for unsupervised infant sleep. Always follow safe sleep guidelines.
Tips
- For a 3 to 6 month old: Increase to 90 stitches before the cylinder section. Work the cylinder for 35 rounds instead of 30. Add 2 rows to the hood panel.
- For a premature newborn: Stop increasing at 60 to 64 stitches. Work the cylinder for 25 rounds. Reduce the hood chain to 43.
- To adjust length only: Add or subtract rounds from the cylinder section. Every 4 rounds equals approximately 1 inch.
FAQs
Is this pattern suitable for beginners?
This is considered an intermediate project. While the stitches are simple single crochet, the pattern requires juggling multiple components, seaming pieces together, and changing colors. If you have completed a project involving joining pieces, you can handle this.
How long does it take to make?
Plan for 12 to 18 hours of work. The embroidery and seaming might take longer if you are newer to those techniques.
Can I wash the finished cocoon?
Yes. Machine wash cold on a gentle cycle. Lay flat to dry. Do not tumble dry or iron directly. Store folded loosely to maintain the shape.
What yarn is best for this pattern?
Worsted weight (4) yarn is recommended. Lion Brand Pound of Love or Caron Simply Soft are excellent choices. Avoid fuzzy or textured yarns to ensure facial features and stitches remain clear.
Is this safe for unsupervised sleep?
No. This cocoon is designed for supervised photography sessions only. It is not intended for unsupervised infant sleep. Always follow safe sleep guidelines.
Pin This Crochet Pattern!