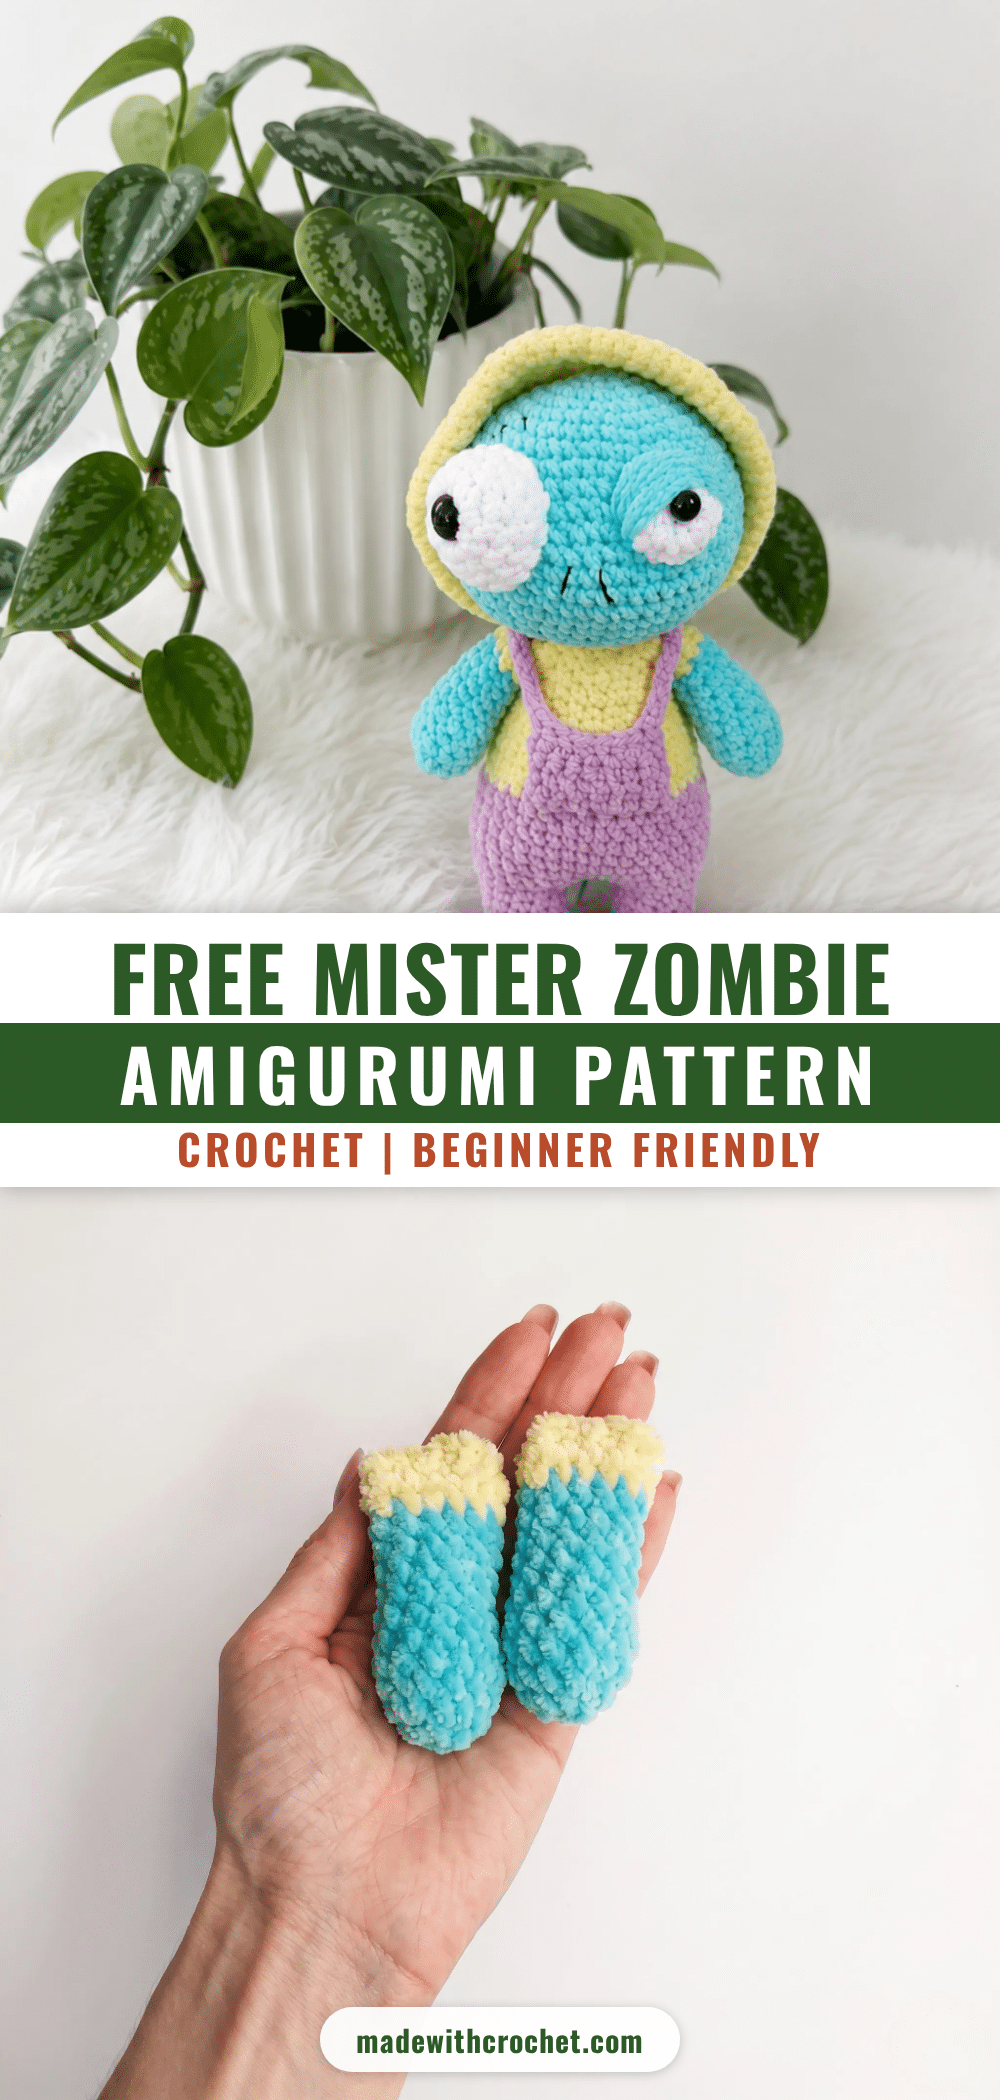
This Mister Zombie amigurumi is the perfect blend of spooky and sweet. With his mismatched eyes, soft pastel colors, and a cozy hood, he’s as cuddly as he is charming. Whether he ends up on a nursery shelf or as a quirky Halloween decoration, he’s sure to be a conversation starter and a beloved handmade gift.
Why the Finished Piece Stands Out
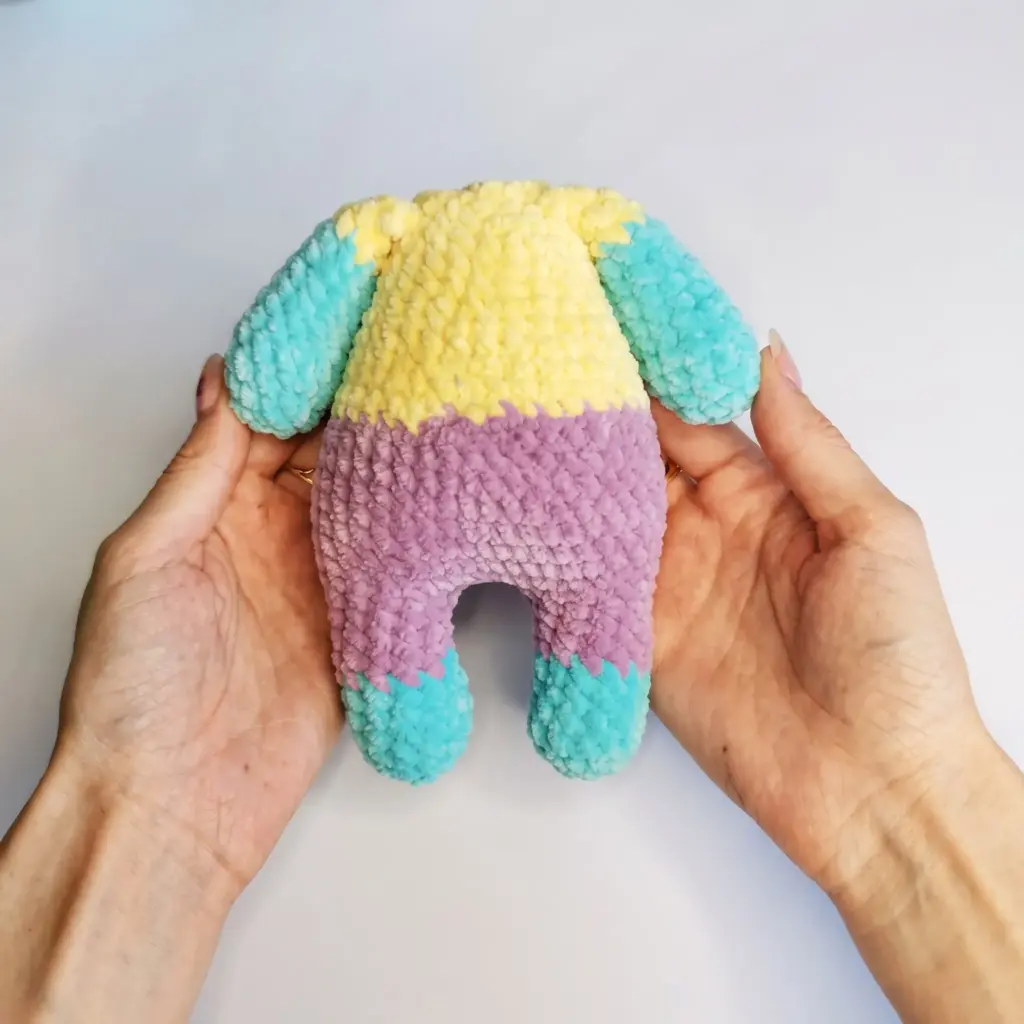
What makes this pattern so special is its clever construction and unique character. The arms are joined directly into the body as you crochet, eliminating the need for tricky sewing later. The back loop only round creates a crisp, clean color change between the pants and sweater, giving the finished toy a polished, professional look. The mismatched safety eyes and the sewn-on pocket with a strap add personality and detail that make Mister Zombie truly one-of-a-kind.
Project Overview
This amigurumi pattern is written for confident beginners and intermediate makers. You’ll learn new techniques like joined-in-place arms, a back loop only color change, and a sewn-on pocket. The head and body are worked as one continuous piece, and the hood is crocheted separately and sewn on. The result is a soft, pastel green zombie with a yellow sweater and hood, lavender pants, and a wide, curious expression.
Materials
- Worsted weight yarn (Aran/Medium 4) in three colors: soft green (head and body), yellow (sweater and hood), and lavender/purple (pants) — approximately 50g of each color is sufficient
- Hook: US E-4 / 3.5 mm (general use), and US 7 / 4.5 mm (for the hood only)
- Safety eyes: one 10 mm and one 12 mm, on safety backings
- Fiberfill stuffing
- Stitch markers
- Yarn needle (large-eye tapestry needle) and a regular sewing needle
- Black yarn for embroidering the mouth
- Scissors
- Straight pins (for marking the face placement)
Abbreviations Used
- BLO — Back Loop Only
- ch — Chain
- dec — Decrease (invisible decrease)
- FLO — Front Loop Only
- inc — Increase (2 sc in same stitch)
- MR — Magic Ring
- sc — Single Crochet
- sl st — Slip Stitch
- st(s) — Stitch(es)
Pattern Notes
- This pattern is written in US crochet terminology.
- All pieces are worked in continuous spirals — do not join or chain up unless a step tells you to.
- Gauge isn’t critical for this project, but a tighter gauge than your usual amigurumi tension will keep stuffing from peeking through.
- The stitch count is given at the end of every round in parentheses, like this: (12).
- The head and body are worked as a single continuous piece — there’s no separate head to sew on later.
- The arms are joined directly into the body as you work Round 29 of the body, rather than being sewn on afterward.
- Stuff each piece firmly but evenly as you go; it’s much harder to add stuffing once a piece is closed.
Pattern Instructions
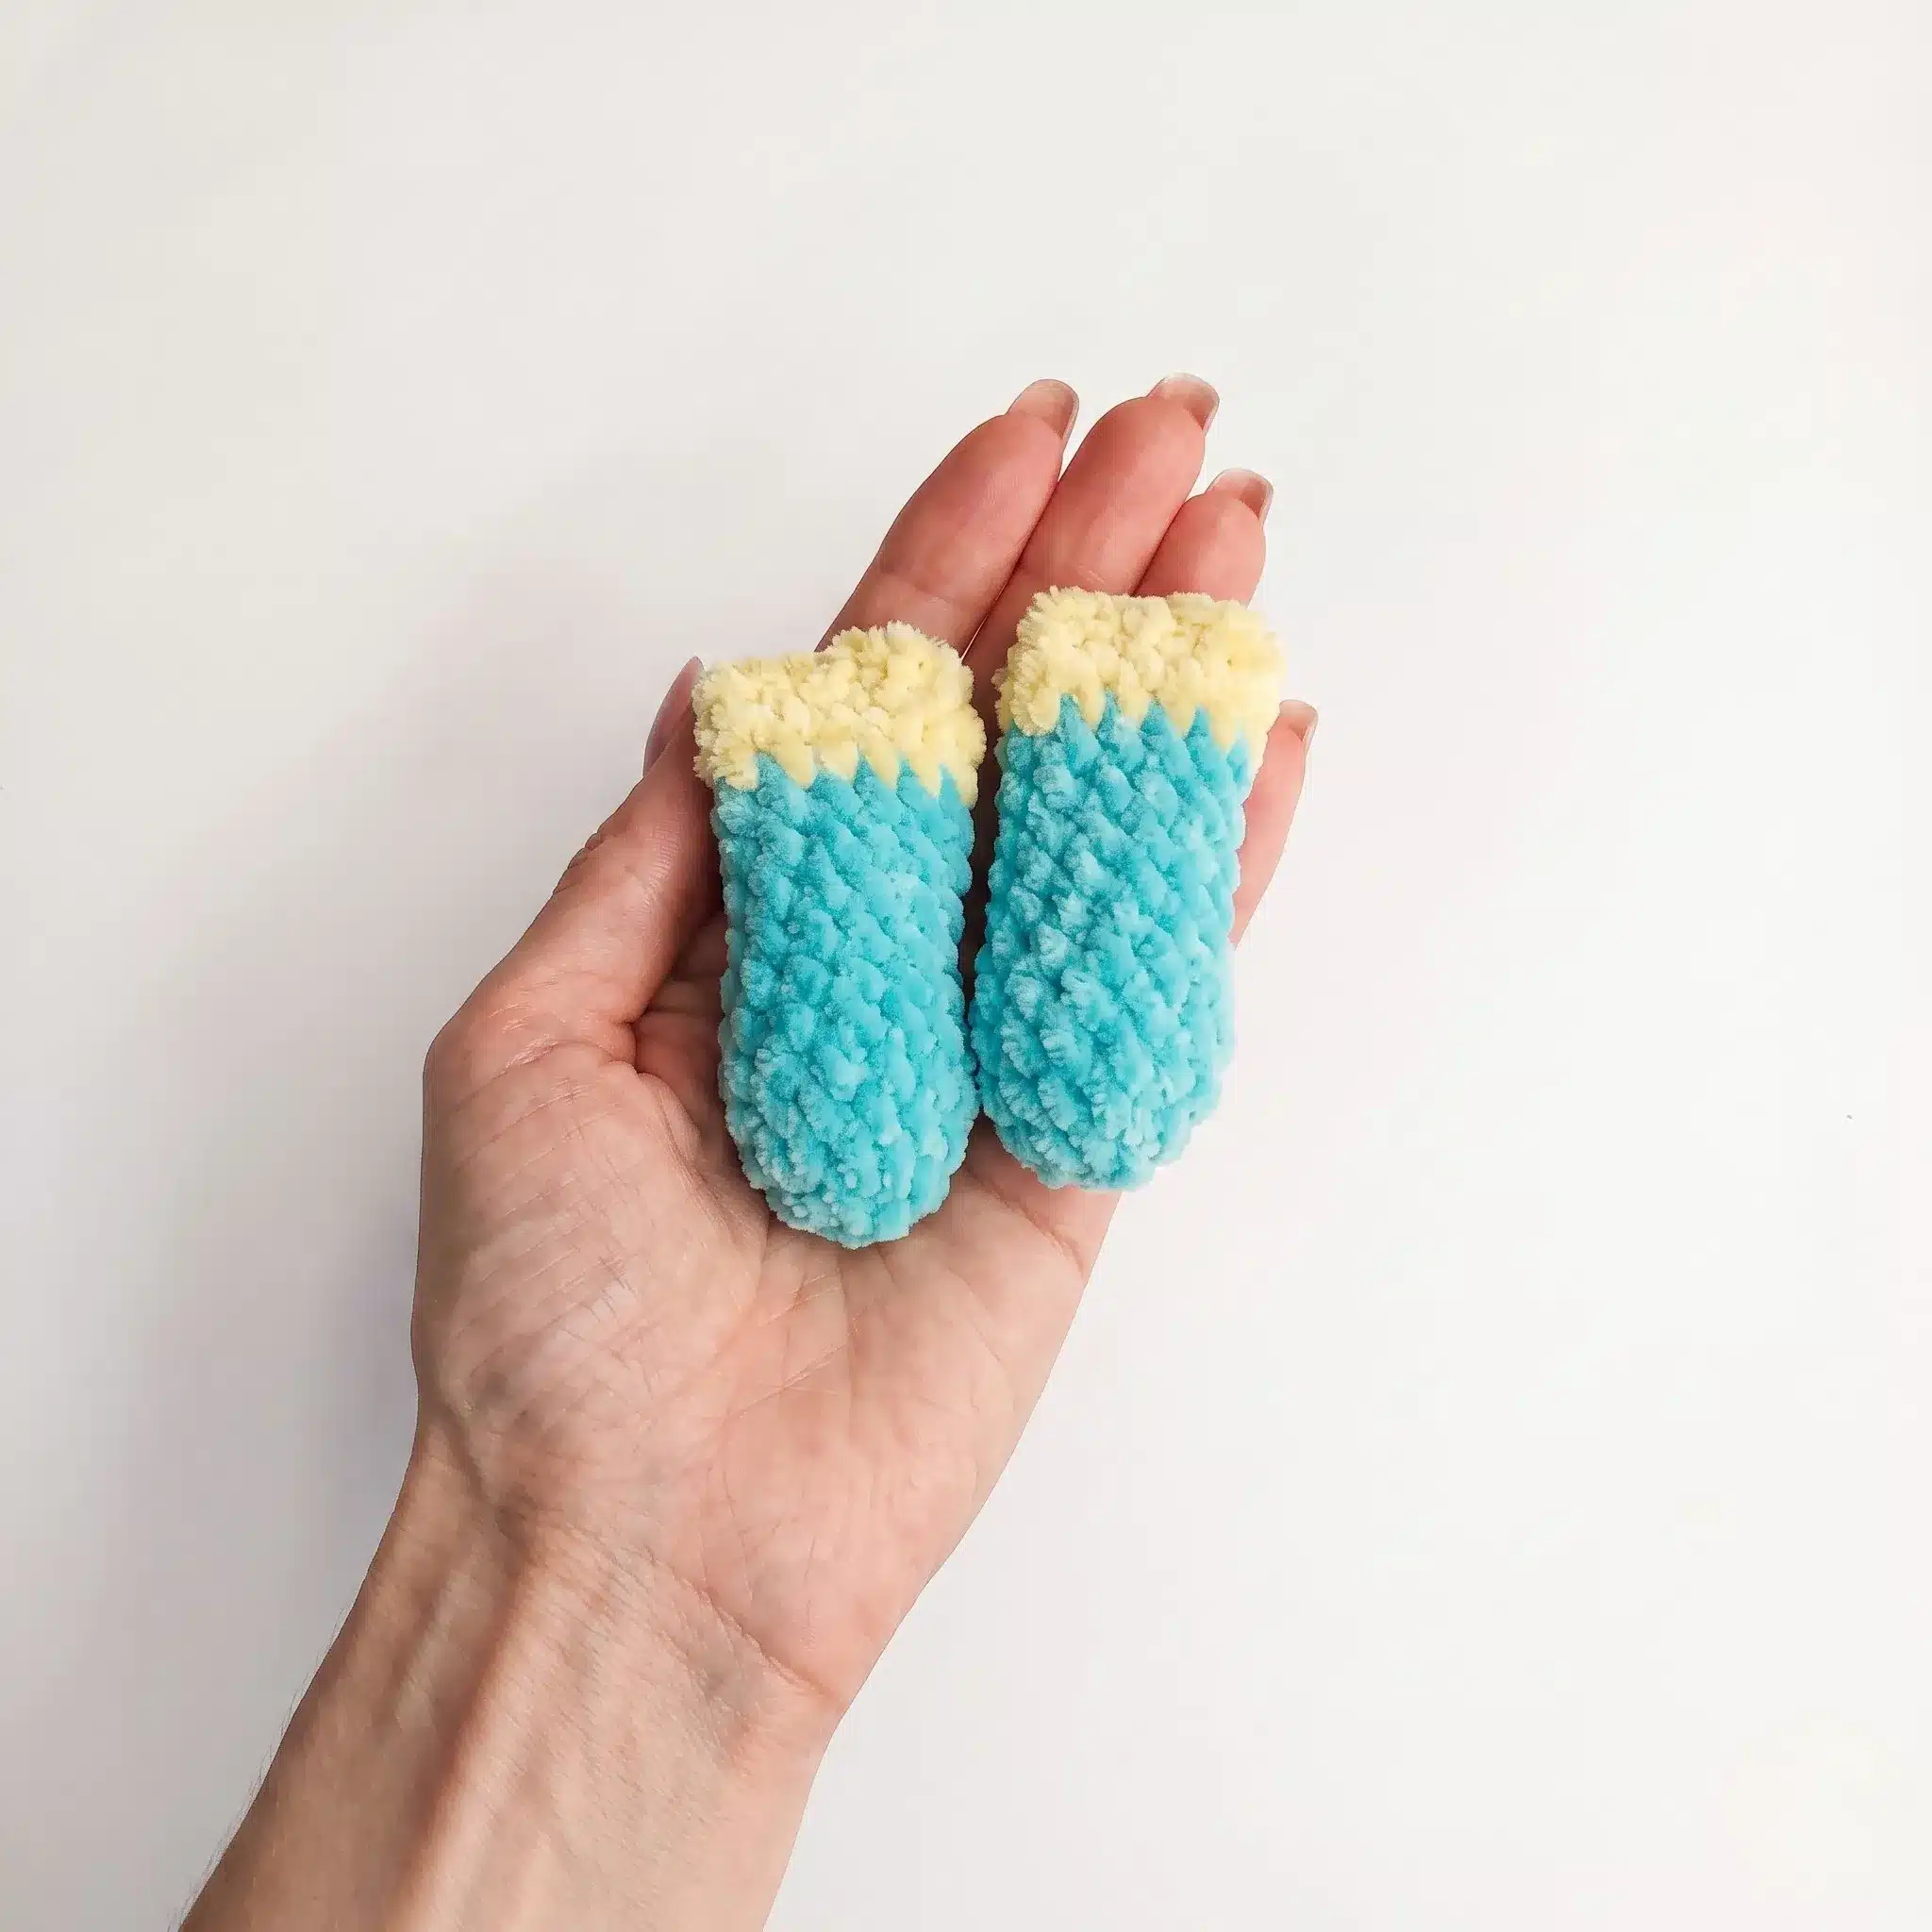
Arms (make 2)
Rnd 1: Ch 2, 6 sc in 2nd ch from hook. (6)
Rnd 2: inc in each st around. (12)
Rnds 3–11: sc in each st around. (12) Work 9 rounds total at this count.
Change to sweater color (yellow).
Rnd 12: sc in each st around. (12)
Stuff lightly. Flatten the piece and sc through both layers together to close (6 sc across). Fasten off, weave in ends. Set aside — you will join these to the body later rather than sewing them on.
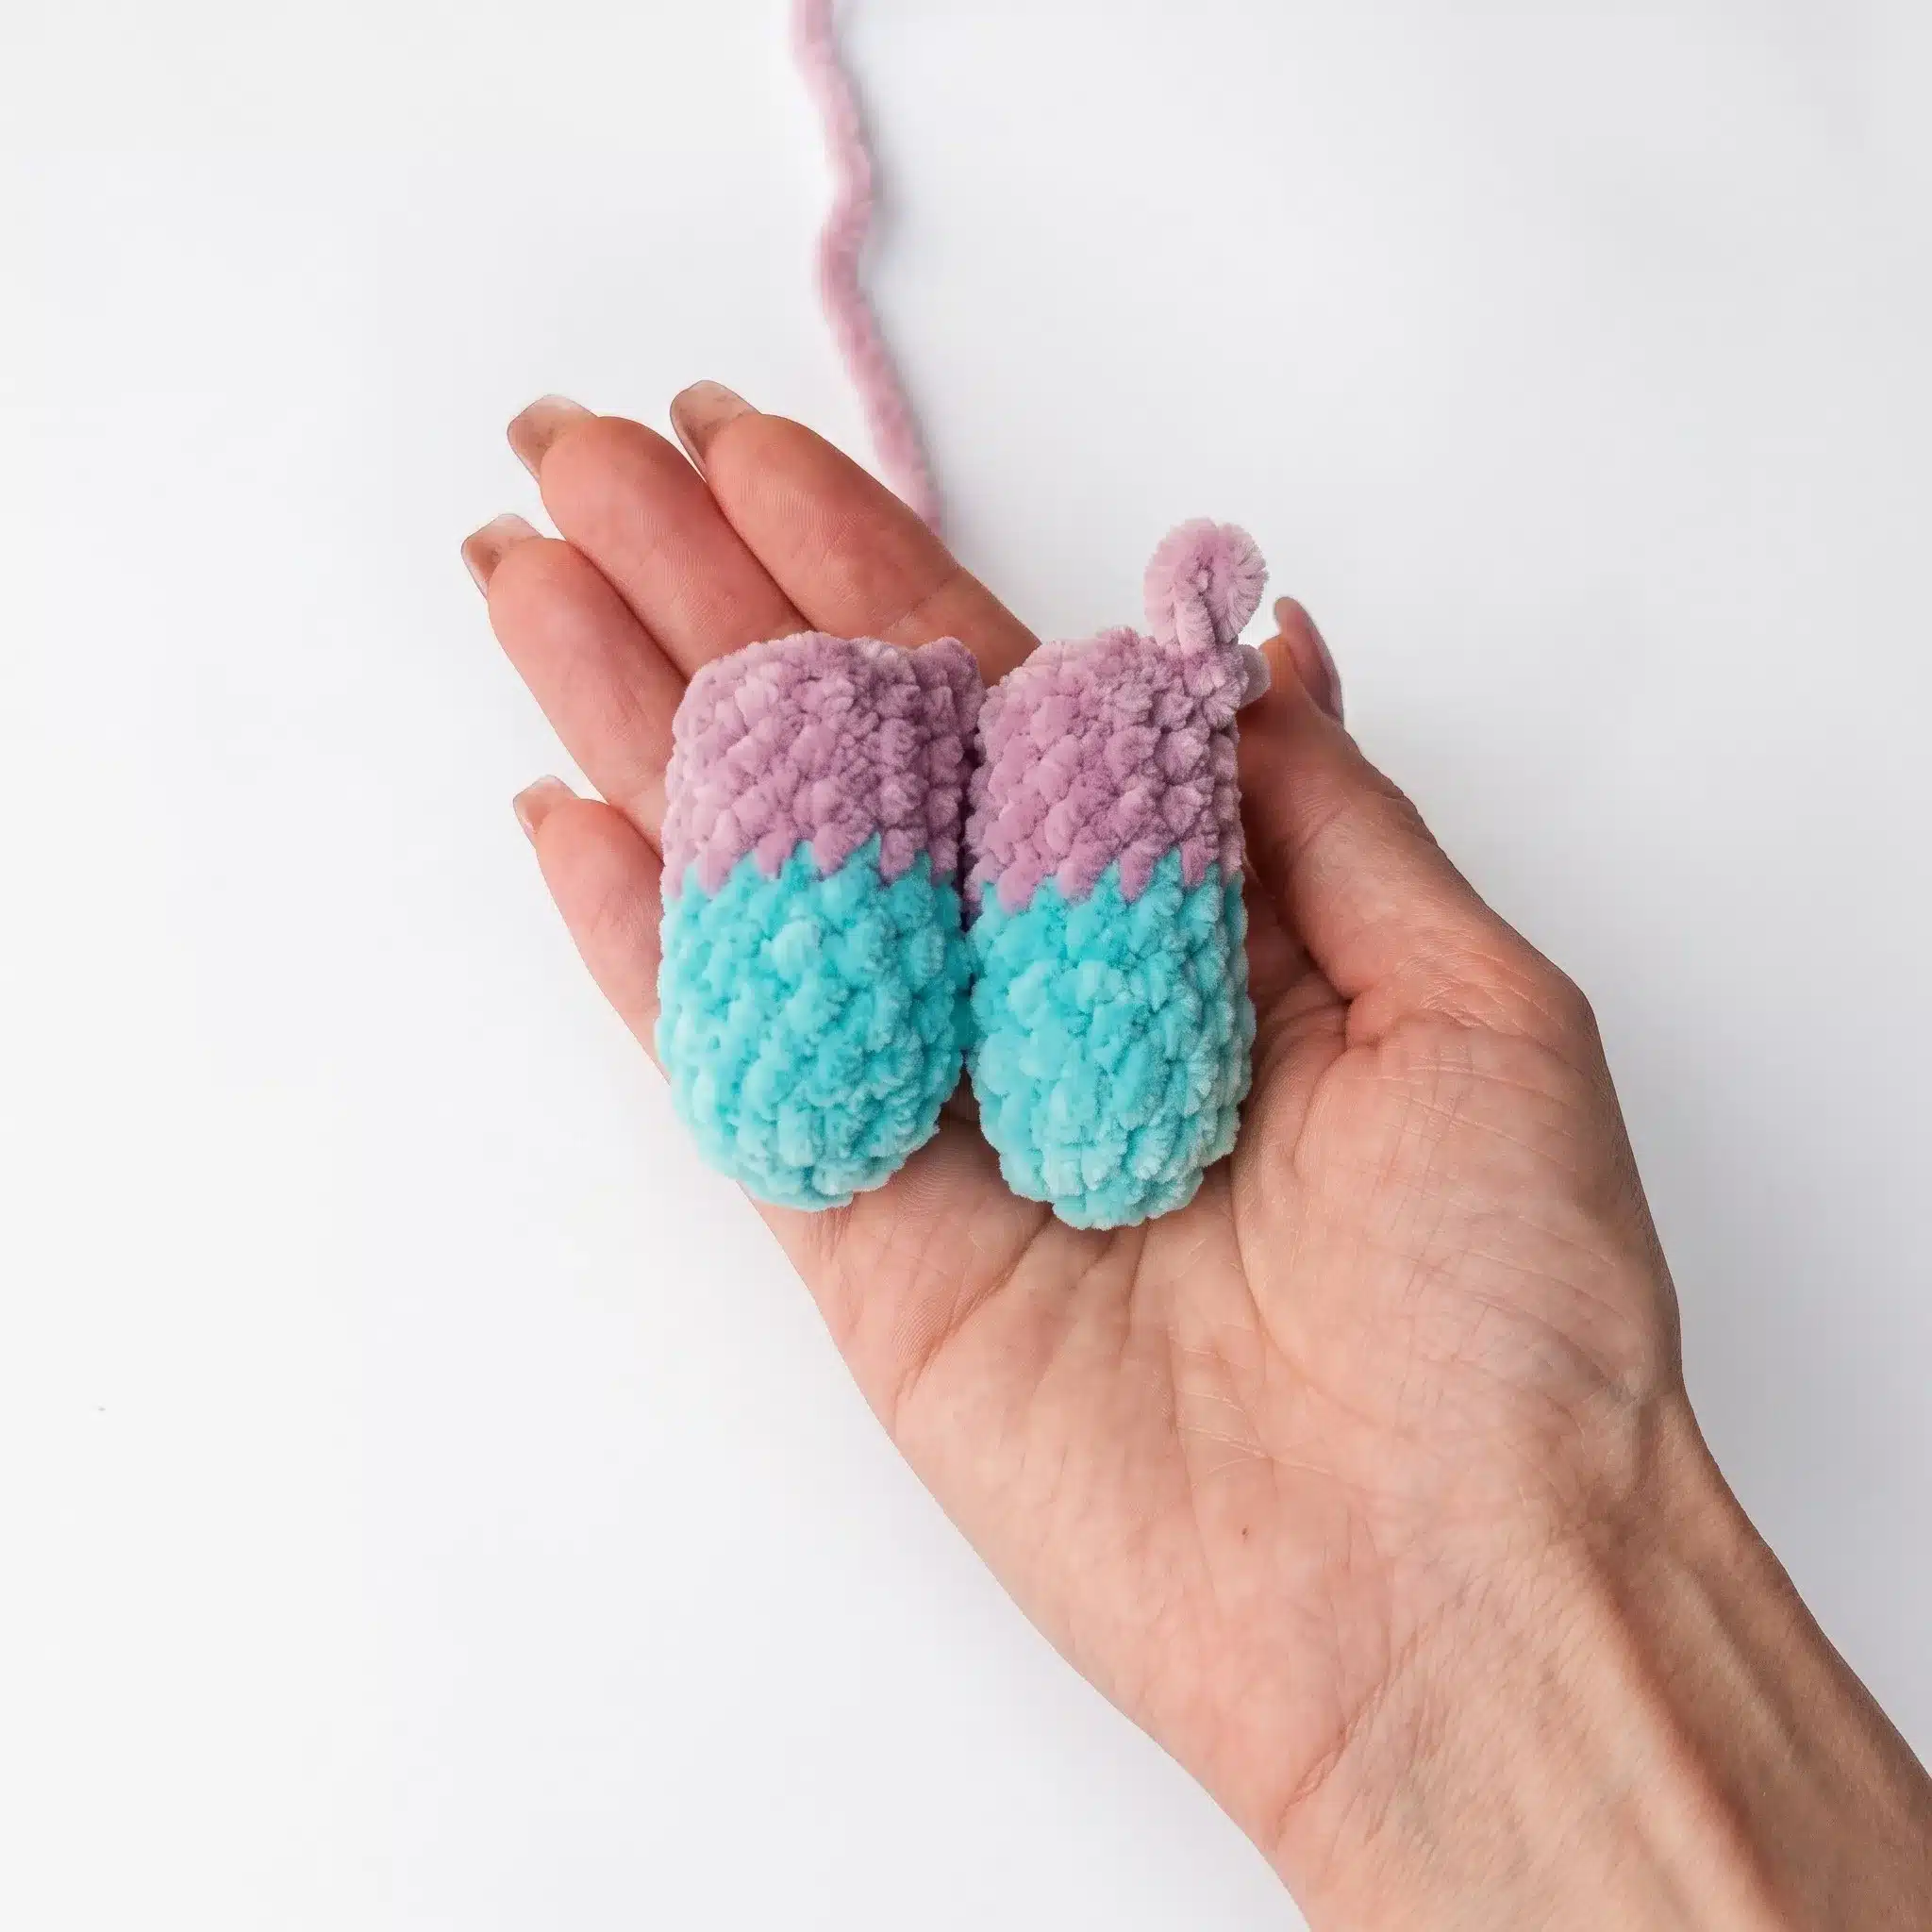
Legs (make 2)
Rnd 1: Ch 2, 6 sc in 2nd ch from hook. (6)
Rnd 2: inc in each st around. (12)
Rnds 3–6: sc in each st around. (12) Work 4 rounds total at this count.
Change to pants color (lavender).
Rnds 7–10: sc in each st around. (12) Work 4 rounds total at this count.
On the second leg only, do not fasten off. Ch 3, then join both legs together in the next round to begin the body.
Body
Stuff as you go throughout this section.
Rnd 11: 12 sc across right leg, inc x3 across ch-3 sts, 12 sc across left leg, inc x3 across ch-3 sts. (36)
Rnd 12: [5 sc, inc] repeat around. (42)
Rnds 13–18: sc in each st around. (42) Work 6 rounds total at this count.
Rnd 19: [5 sc, dec] repeat around. (36)
Change to sweater color (yellow).
Rnd 20: Working in BLO, sc in each st around. (36)
Rnd 21: sc in each st around. (36)
Rnd 22: [4 sc, dec] repeat around. (30)
Rnds 23–24: sc in each st around. (30) Work 2 rounds total at this count.
Rnd 25: [3 sc, dec] repeat around. (24)
Rnds 26–27: sc in each st around. (24) Work 2 rounds total at this count.
Rnd 28: [2 sc, dec] repeat around. (18)
Now join the arms — check that they sit symmetrically above the legs before securing.
Rnd 29: 2 sc, 6 sc across right arm, 3 sc, 6 sc across left arm, 1 sc. (18)
Rnd 30: sc in each st around. (18)
Fasten off, weave in end.
Head
Stuff as you go throughout this section.
Rnd 1: Ch 2, 6 sc in 2nd ch from hook. (6)
Rnd 2: inc in each st around. (12)
Rnd 3: [sc, inc] repeat around. (18)
Rnd 4: [2 sc, inc] repeat around. (24)
Rnd 5: [3 sc, inc] repeat around. (30)
Rnd 6: [4 sc, inc] repeat around. (36)
Rnd 7: [5 sc, inc] repeat around. (42)
Rnd 8: [6 sc, inc] repeat around. (48)
Rnd 9: [7 sc, inc] repeat around. (54)
Rnd 10: [8 sc, inc] repeat around. (60)
Rnds 11–15: sc in each st around. (60) Work 5 rounds total at this count.
Rnd 16: [8 sc, dec] repeat around. (54)
Rnd 17: [7 sc, dec] repeat around. (48)
Rnd 18: [6 sc, dec] repeat around. (42)
Rnd 19: [5 sc, dec] repeat around. (36)
Rnd 20: [4 sc, dec] repeat around. (30)
Rnd 21: [3 sc, dec] repeat around. (24)
Rnd 22: [2 sc, dec] repeat around. (18)
Rnd 23: [sc, dec] repeat around. (12)
Rnd 24: dec around. (6)
Fasten off, weave in end.
Eyes (make 2, worked differently)
Eye 1
Rnd 1: Ch 2, 6 sc in 2nd ch from hook. (6)
Rnd 2: inc in each st around. (12)
Rnd 3: sc in each st around. (12)
Fasten off, cut yarn, weave in ends.
Eye 2
Rnd 1: Ch 2, 6 sc in 2nd ch from hook. (6)
Rnd 2: inc in each st around. (12)
Rnd 3: sc in each st around. (12)
Rnd 4: [sc, inc] repeat around. (18)
Rnd 5: sc in each st around. (18)
Fasten off, cut yarn, weave in ends.
Insert a safety eye post through the center of each white piece, then sew both eyes onto the head at your desired placement — the two different sizes give Mister Zombie his lopsided, wide-eyed expression.
Hood
Rnd 1: Ch 2, 6 sc in 2nd ch from hook. (6)
Rnd 2: inc in each st around. (12)
Rnd 3: sc in each st around. (12)
Rnd 4: [sc, inc] repeat around. (18)
Rnd 5: sc in each st around. (18)
Rnd 6: [2 sc, inc] repeat around. (24)
Rnd 7: sc in each st around. (24)
Rnd 8: [3 sc, inc] repeat around. (30)
Rnd 9: sc in each st around. (30)
Rnd 10: [4 sc, inc] repeat around. (36)
Rnd 11: sc in each st around. (36)
Rnd 12: [5 sc, inc] repeat around. (42)
Rnd 13: sc in each st around. (42)
Rnd 14: [6 sc, inc] repeat around. (48)
Rnd 15: sc in each st around. (48)
Rnd 16: [7 sc, inc] repeat around. (54)
Rnd 17: sc in each st around. (54)
Rnd 18: [8 sc, inc] repeat around. (60)
Rnd 19: sc in each st around. (60)
If your hood feels too snug once finished, work one more increase round before fastening off.
Fasten off, weave in ends.
Rejoin yarn at Round 20 of the body, working into the front loops only that were left unused during the BLO round. Secure the yarn and tuck the tail inside the body.
Row 1: 8 sc, ch 1, turn. (8)
Rows 2–4: sc in each st across, ch 1, turn. (8) Work 3 rows total at this count.
Row 5: sc in each st across. (8)
Chain 18, join to the back of the body (in the front loops) with a sl st, chain 18 more, then join to the front of the pocket with a sl st to form the strap.
Fasten off, weave in ends.
Assembly
- Sew the Head to the Body along the neck edge using a whipstitch, matching the front of the face to the front of the sweater.
- Sew the Hood onto the top and sides of the Head, positioning it so it frames the face like a hood, not a hat.
- Insert and secure both safety eyes onto the head front, spacing them for a wide, curious expression.
- Pin the mouth line with straight pins before stitching so you can adjust placement freely.
- Insert your needle at the base of the head and bring it out at one corner of the mouth. Pull the black yarn taut over the pinned line and anchor it with small securing stitches to embroider a clean, even mouth.
- Attach the finished Pocket strap across the front of the sweater as described in the Pocket section, then weave in every remaining yarn tail.
Tips & Tricks
- Amigurumi tension makes or breaks a project like this one, so if your stitches feel loose or gappy, drop down a hook size rather than fighting your natural grip — a snug fabric keeps the fiberfill from showing through, especially on the large, single-color head.
- When you reach the invisible decreases throughout the head and body, insert your hook under the front loops of both stitches only (skip the back loops) before pulling through; this keeps the decrease nearly invisible instead of leaving a visible bump.
- Stuff firmly as you close each section rather than trying to stuff after the fact — for the head especially, add stuffing in small handfuls every few rounds so it stays evenly distributed instead of lumpy in the center.
- If you substitute a different yarn weight, remember that a bulkier yarn will produce a larger finished toy and use up your safety eyes’ proportions differently, so test your eye placement before committing to glue or backings.
- Finally, the Back Loop Only round at Round 20 of the body is easy to miss if you’re moving quickly — slow down there, since it’s what creates the clean color-block line between the pants and sweater, and it’s also where you’ll pick up stitches later for the pocket.
Frequently Asked Questions
What skill level is this pattern?
This pattern is written for confident beginners and intermediate makers who have tackled a basic amigurumi before and are ready for a few new tricks.
Can I use a different yarn weight?
Yes, but remember that a bulkier yarn will produce a larger finished toy and change the proportions of the safety eyes. Test your eye placement before committing.
How do I make the invisible decrease?
Insert your hook under the front loops of both stitches only (skip the back loops) before pulling through. This keeps the decrease nearly invisible.
Why is the Back Loop Only round important?
Round 20 of the body is worked in BLO to create a clean color-block line between the pants and sweater. It also leaves front loops available for picking up the pocket stitches later.
How do I attach the arms?
The arms are joined directly into the body as you work Round 29. Check that they sit symmetrically above the legs before securing them.
How do I get the mismatched eye look?
Use one 10 mm and one 12 mm safety eye. Crochet two different sized white eye bases (one smaller, one larger) and sew them onto the head at your desired placement for a lopsided, wide-eyed expression.
Pin This Crochet Pattern!