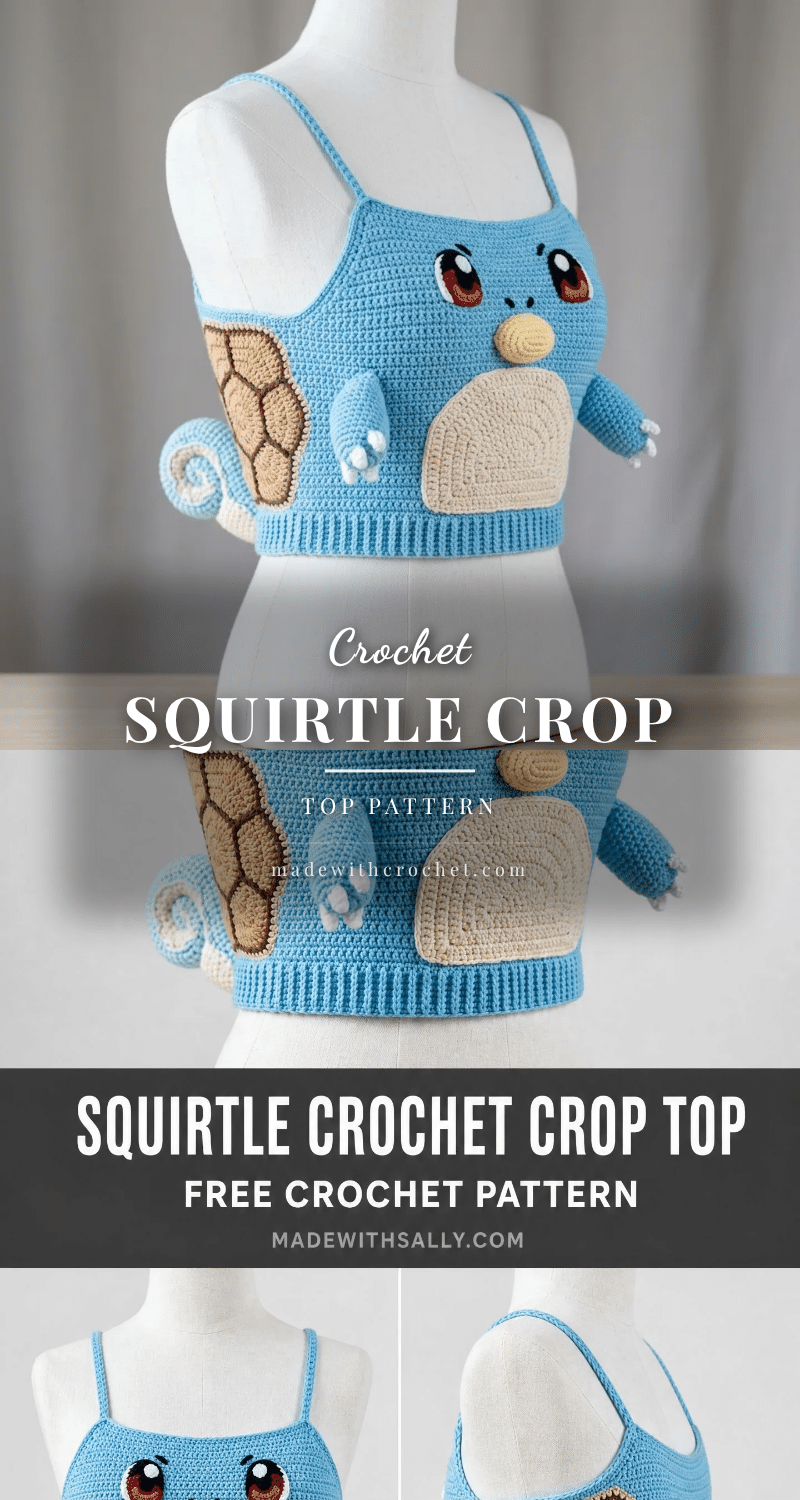
I remember standing in my yarn stash, holding two shades of sky blue, trying to decide which one felt more like Squirtle. The lighter one was cheerful and soft, the deeper one more like ocean water. I went with the light sky blue because it reminded me of a sunny day at the beach, the kind of day that makes you want to wear something fun and handmade. That single choice set the tone for the whole project, making every stitch feel intentional from the very first chain.
Yarn and Color Notes
The color palette for this Squirtle crop top is what brings the character to life. The light sky blue main body captures Squirtle’s friendly, approachable vibe, while the cream belly patch adds that classic contrast. The tan and dark brown shell panels give a warm, earthy feel that balances the cool blue. When choosing your yarn, think about how the colors will work together. A slightly warmer blue can make the whole piece feel cozier, while a cooler blue keeps it fresh and crisp. The white and black for the eyes and details are non-negotiable for that recognizable face, but feel free to play with the exact shades of brown for the shell to match your personal style.
Project Overview
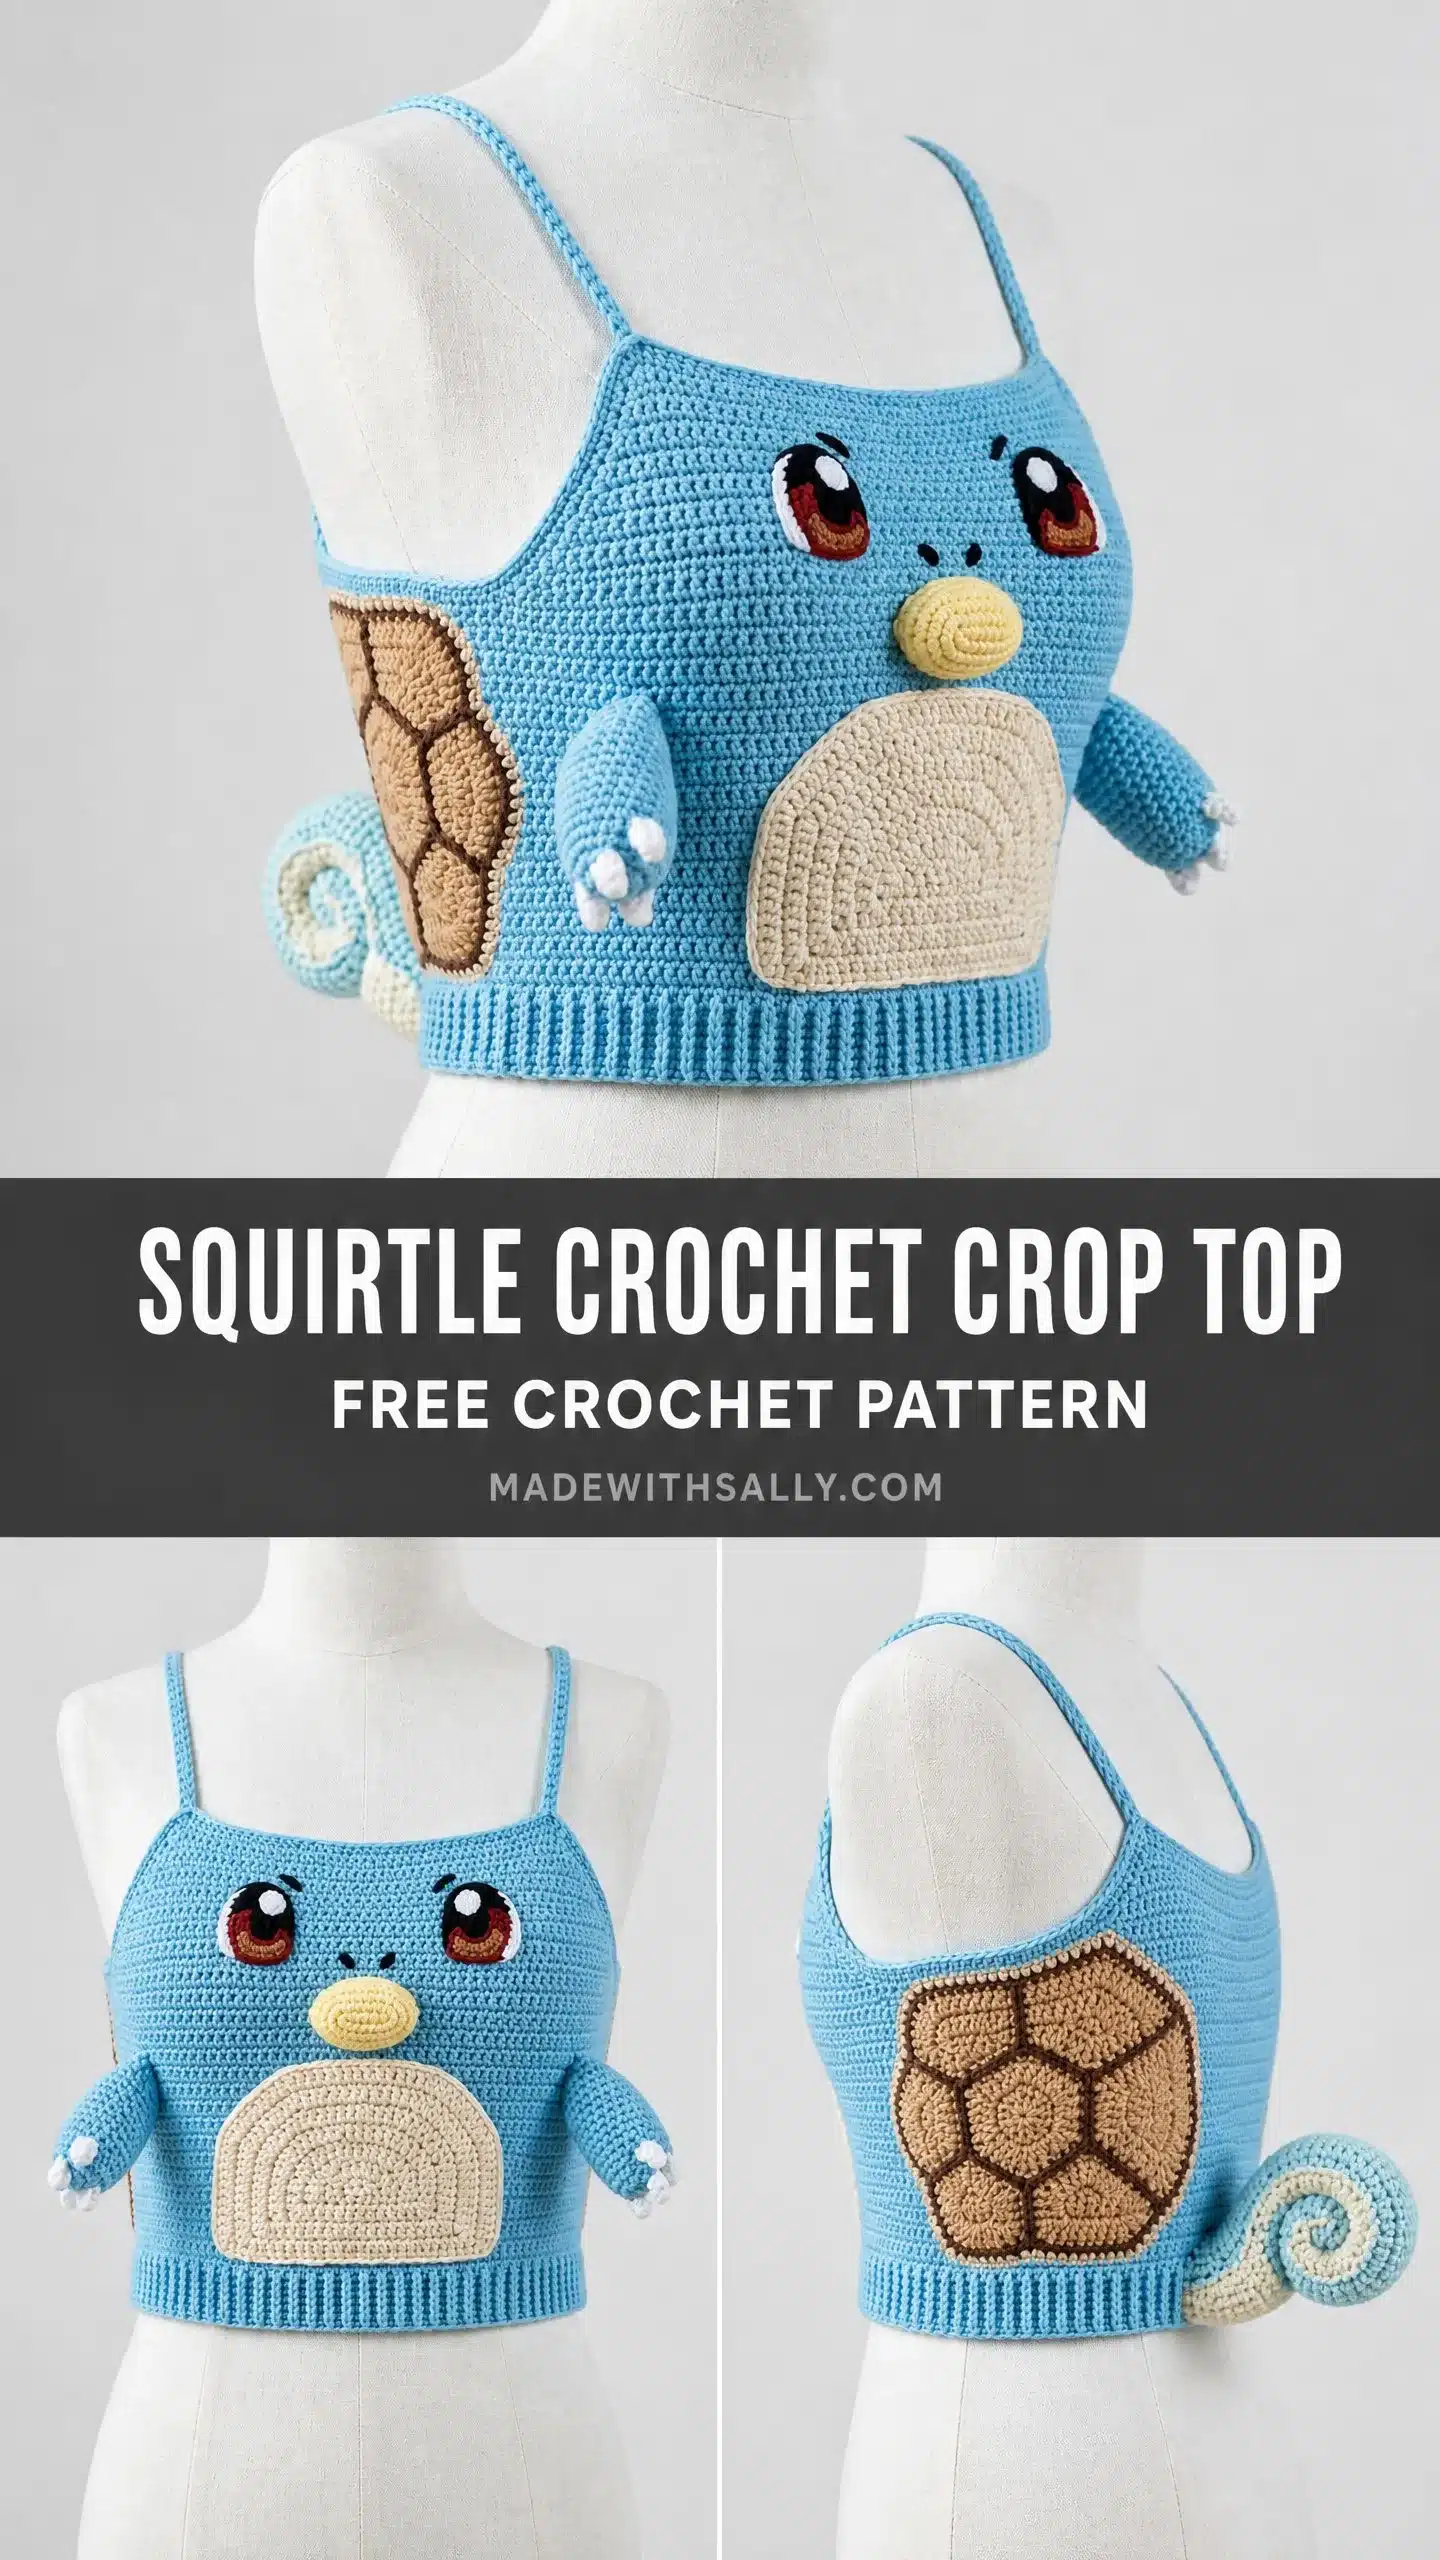
This Squirtle crochet crop top pattern is rated intermediate to advanced. You will need experience working flat panels, seaming pieces together, creating colorwork, doing surface embroidery for facial details, and constructing multiple three-dimensional applique pieces. If you have made garments before and dabbled in amigurumi, you have got this. The construction is simpler than the finished piece looks. You will make two flat rectangular panels for the front and back body, join them at the sides, add thin spaghetti straps, then attach all the fun stuff: the face, belly patch, shell panels, arms, and that adorable curled tail. The magic happens in the applique work. The base pattern fits a size Small/Medium, designed for a 32 to 36 inch bust with approximately 12 to 13 inches of ease. The finished garment measures about 28 inches around at the hem and 7 inches from hem to underarm.
Materials
Gather your supplies before diving in. Nothing kills momentum like realizing you are out of the right color halfway through.
Yarn (all worsted weight)
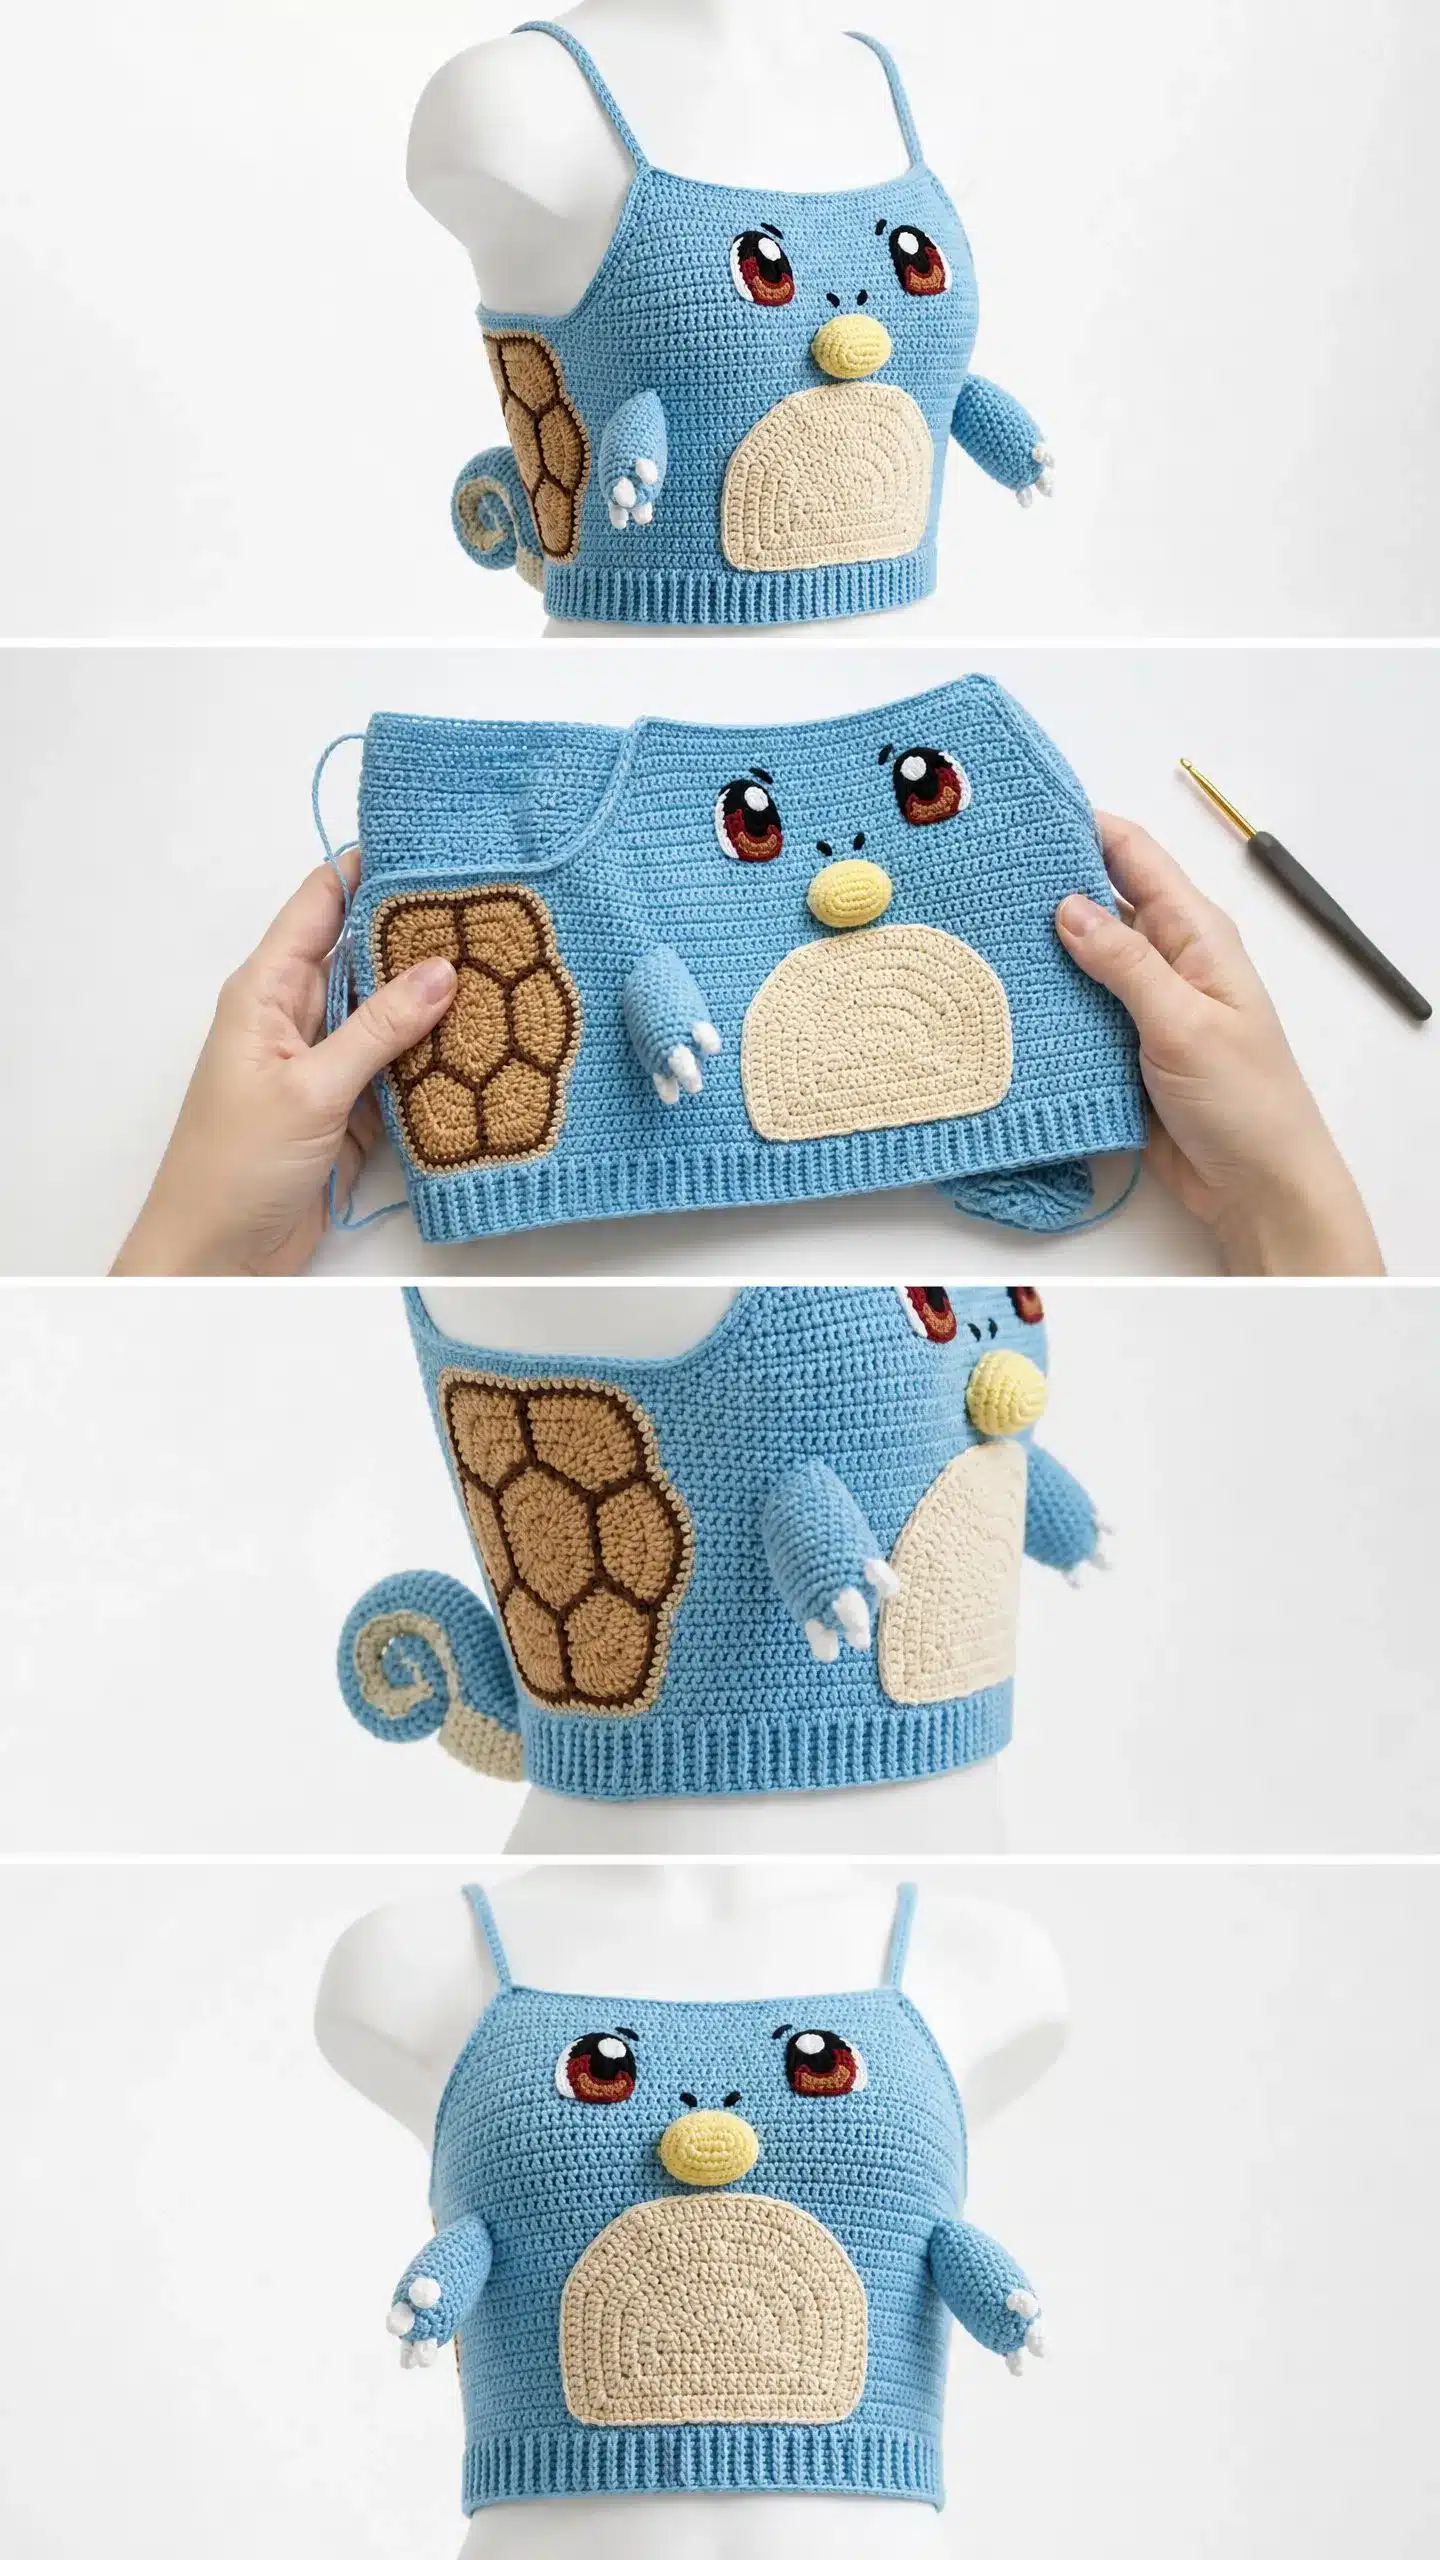
- Color A – Light sky blue: 450 to 500 yards for the main body
- Color B – Cream or off-white: 80 yards for the belly
- Color C – Tan or caramel brown: 60 yards for the shell panels
- Color D – Dark brown or chocolate: 20 yards for shell outlines and embroidery
- Color E – Yellow: 10 yards for the snout
- Color F – Red-brown or brick red: 15 yards for the eyes
- Color G – White: 15 yards for eye highlights and toe tips
- Color H – Black: 10 yards for pupils and facial details
Hooks
- US Size H-5 / 5.0 mm for the main body
- US Size G-6 / 4.0 mm for applique pieces and straps
Additional supplies
- Yarn needle for seaming
- At least 8 stitch markers
- Scissors
- Small amount of fiberfill stuffing
- Straight pins
- Blocking mats and rust-proof pins
- Measuring tape
Yarn recommendations: Lion Brand Pound of Love works beautifully and is budget-friendly. Paintbox Yarns Simply DK at a tighter gauge gives excellent stitch definition. For a splurge, Cascade 220 Superwash adds lovely drape and holds its shape. Avoid fuzzy or textured yarns because your applique details will get lost.
Gauge and Finished Size
16 stitches and 18 rows = 4 inches (10 cm) in single crochet using the H-5 hook.
Please do not skip this step. I know swatching feels tedious, but gauge matters enormously for garments. Even half a stitch difference over 4 inches multiplies across 70 stitches and will throw off your entire fit. Swatch it, block it, measure it, then start.
Abbreviations
- ch chain: Yarn over, pull through the loop on your hook. This creates your foundation.
- sl st slip stitch: Insert hook, yarn over, pull through both the stitch and the loop on your hook in one motion. Used for joining and surface work.
- sc single crochet: Insert hook into the stitch, yarn over and pull up a loop (two loops on hook), yarn over and pull through both loops. Your bread and butter stitch for this entire project.
- hdc half double crochet: Yarn over, insert hook, pull up a loop (three loops), yarn over and pull through all three.
- dc double crochet: Yarn over, insert hook, pull up a loop, yarn over and pull through two loops, yarn over and pull through remaining two loops.
- sc2tog single crochet two together (decrease): Insert hook in first stitch, pull up a loop, insert hook in next stitch, pull up a loop (three loops on hook), yarn over and pull through all three. This decreases your stitch count by one.
- inc increase: Work two single crochets into the same stitch.
- BLO back loop only: Instead of inserting your hook under both loops of the V, insert it only under the back loop. Creates a ribbed texture.
- RS right side: The side that faces outward when worn.
- WS wrong side: The inside of the garment.
Pattern Notes
This is not a quick weekend project. It is a labor of love that takes around 25 to 40 hours depending on your pace. But every single hour is worth it when you slip this over your head and become the coolest Pokemon trainer at any convention, party, or grocery store run.
Pattern Instructions
Section 1: Hem Ribbing
The hem is worked sideways first, then you pick up stitches along the long edge to build the body upward. Make two identical strips.
Hem Ribbing Strip (make 2)
Using Color A and your H-5 hook:
- Row 1: Ch 9. Sc in 2nd ch from hook and in each ch across, turn. (8 sc)
- Row 2: Ch 1, sc in BLO across, turn. (8 sc)
- Row 3: Ch 1, sc in BLO across, turn. (8 sc)
- Repeat Row 2 until your strip measures 14 inches long. This takes approximately 63 rows. Do not fasten off. Rotate the strip 90 degrees to work along the long edge.
Checkpoint: Each ribbing strip should measure 14 inches long and about 2 inches wide.
Picking Up Stitches for the Body
With the long edge facing you and right side up, sc evenly along the long edge. Place 1 sc per row end. You should have approximately 56 sc across the 14-inch edge.
If your count is slightly off, add or skip pickup points every few inches to reach exactly 56 stitches. This becomes Row 1 of your body panel.
Section 2: Body Panels (Make 2)
Both front and back panels are worked identically at this stage.
- Rows 1 through 32: Ch 1, sc in each st across, turn. (56 sc)
Work straight for 32 rows total. Fasten off on the front panel. You can fasten off on the back panel too or leave it live for seaming.
Checkpoint: Each panel should measure approximately 14 inches wide and 7 inches tall above the ribbing. Total height including the ribbing band is about 9 inches.
Section 3: Seaming the Panels
Turn both panels right sides together (wrong sides facing out). Seam only the lower 5 inches of each side edge using the single crochet join method or mattress stitch. Leave the upper portion open for the arms. The straps will bridge the front and back at the top corners.
Turn right side out when finished.
Section 4: Straps (Make 2)
Switch to your G-6 hook for a firmer texture. Using Color A:
- Row 1: Ch 5. Sc in 2nd ch from hook and in each ch across, turn. (4 sc)
- Row 2: Ch 1, sc in each st across, turn. (4 sc)
- Repeat Row 2 until the strap measures 11 inches long, approximately 50 rows. Fasten off, leaving a long tail.
Sew one end to the top front corner and the other end to the corresponding back corner. Try the top on or use a dress form to adjust length before securing permanently.
Section 5: Upper Trim Band
Using Color A and G-6 hook, work a row of sc evenly along the top edge of both the front and back panels to create a clean finish. Fasten off and weave in ends.
Applique Pieces
Squirtle Face
Using Color A and G-6 hook:
- Rnd 1: Magic ring, 6 sc in ring, sl st to join. (6 sc)
- Rnd 2: Ch 1, 2 sc in each st around, sl st to join. (12 sc)
- Rnds 3 and 4: Ch 1, sc in each st around, sl st to join. (12 sc)
- Rnd 5: Ch 1, (sc2tog, sc in next 4 sts) 2 times, sl st to join. (10 sc)
- Rnds 6 through 9: Ch 1, sc in each st around, sl st to join. (10 sc)
Stuff lightly. Flatten the open end and seam closed.
Squirtle Eyes (Make 2)
Using Color F and G-6 hook, create small oval shapes. Embroider a white highlight (Color G) and a black pupil (Color H) onto each eye. Sew onto the face piece.
Squirtle Snout
Using Color E and G-6 hook, create a small oval. Sew onto the face piece below the eyes.
Belly Patch
Using Color B and G-6 hook, create an oval shape approximately 4 inches wide and 3 inches tall. Sew onto the front body panel, centered below the face.
Shell Side Panels (Make 2)
Using Color C and G-6 hook:
- Ch 14.
- Row 1: Sc in 2nd ch from hook and in each ch across, turn. (13 sc)
- Row 2: Ch 1, 2 sc in first st, sc to last st, 2 sc in last st, turn. (15 sc)
- Row 3: Ch 1, 2 sc in first st, sc to last st, 2 sc in last st, turn. (17 sc)
- Rows 4 through 11: Ch 1, sc across, turn. (17 sc)
- Row 12: Ch 1, sc2tog, sc to last 2 sts, sc2tog, turn. (15 sc)
- Row 13: Ch 1, sc2tog, sc to last 2 sts, sc2tog, turn. (13 sc)
Fasten off. Work an sc border around the perimeter.
Adding Hexagon Outlines
Using Color D and the surface slip stitch method, create hexagonal cell shapes across each shell panel. Each hexagon should span about 1 to 1.25 inches across. Arrange 4 to 6 hexagons per panel in a honeycomb pattern. Slight irregularity is charming here.
Attaching Shell Panels
Sew one shell panel to each side of the crop top, between the side seam and back center, about 1 to 1.5 inches above the hem.
Squirtle Arms (Make 2)
Using Color A and G-6 hook:
- Rnd 1: Magic ring, 6 sc in ring, sl st to join. (6 sc)
- Rnd 2: Ch 1, 2 sc in each st around, sl st to join. (12 sc)
- Rnds 3 through 5: Ch 1, sc in each st around, sl st to join. (12 sc)
- Rnd 6: Ch 1, (sc2tog, sc in next 4 sts) 2 times, sl st to join. (10 sc)
- Rnds 7 through 10: Ch 1, sc in each st around, sl st to join. (10 sc)
- Rnd 11: Ch 1, (sc2tog, sc in next 3 sts) 2 times, sl st to join. (8 sc)
- Rnds 12 through 14: Ch 1, sc in each st around, sl st to join. (8 sc)
- Rnd 15: Ch 1, (sc2tog, sc in next 2 sts) 2 times, sl st to join. (6 sc)
- Rnds 16 and 17: Ch 1, sc in each st around, sl st to join. (6 sc)
- Rnd 18: Ch 1, sc2tog, sc in next 4 sts, sl st to join. (5 sc)
- Rnd 19: Ch 1, sc in each st around, sl st to join. (5 sc)
- Rnd 20: Ch 1, sc2tog, sc in next 3 sts, sl st to join. (4 sc)
Fasten off and close the tip. Stuff very lightly throughout.
Attaching Arms
Sew one arm to each side of the front panel, angled slightly downward, about 1 inch to each side of the belly.
Squirtle Tail
Using Color A and G-6 hook:
- Rnd 1: Magic ring, 6 sc in ring, sl st to join. (6 sc)
- Rnd 2: Ch 1, 2 sc in each st around, sl st to join. (12 sc)
- Rnds 3 through 5: Ch 1, sc in each st around, sl st to join. (12 sc)
- Rnd 6: Ch 1, (sc2tog, sc in next 4 sts) 2 times, sl st to join. (10 sc)
- Rnds 7 through 10: Ch 1, sc in each st around, sl st to join. (10 sc)
- Rnd 11: Ch 1, (sc2tog, sc in next 3 sts) 2 times, sl st to join. (8 sc)
- Rnds 12 through 14: Ch 1, sc in each st around, sl st to join. (8 sc)
- Rnd 15: Ch 1, (sc2tog, sc in next 2 sts) 2 times, sl st to join. (6 sc)
- Rnds 16 and 17: Ch 1, sc in each st around, sl st to join. (6 sc)
- Rnd 18: Ch 1, sc2tog, sc in next 4 sts, sl st to join. (5 sc)
- Rnd 19: Ch 1, sc in each st around, sl st to join. (5 sc)
- Rnd 20: Ch 1, sc2tog, sc in next 3 sts, sl st to join. (4 sc)
Fasten off and close the tip. Stuff very lightly throughout.
Creating the Curl
Wrap the tail around a pen or dowel and steam block or mist with water. Let it dry in place to set the curled shape. Alternatively, sew the tip to a point about two-thirds down the tail’s length to force a permanent curl.
Attaching the Tail
Sew the open base of the tail to the left side seam at the lower edge, with the curl spiraling outward.
Assembly
Weave in all your ends. Block the entire garment gently to even out your stitches. Take photos because you just made something incredible.
Tips
- Use stitch markers to keep track of your rows, especially on the ribbing strips where it is easy to lose count.
- When sewing on applique pieces, use matching yarn and a sharp needle for invisible stitches.
- Block each piece before assembly to ensure everything lies flat and fits together properly.
- If you want to adjust the fit, add or subtract rows on the body panels or straps. Each row adds about 0.25 inches in height.
FAQs
Can I make this top larger or smaller?
Yes. The base pattern fits a 32 to 36 inch bust. To size up, add stitches to the foundation chain of the ribbing and corresponding rows to the body panels. To size down, reduce the stitch count. Keep the gauge consistent for the best fit.
How do I clean my Squirtle crop top?
Hand wash in cool water with a gentle detergent. Lay flat to dry, reshaping as needed. Avoid wringing or machine drying to prevent stretching.
Can I use a different yarn weight?
You can, but you will need to adjust your hook size and gauge. A lighter yarn will make a smaller, more delicate top, while a heavier yarn will create a bulkier garment. Always swatch first.
How long does it take to make this top?
Expect to spend 25 to 40 hours depending on your crochet speed and experience level. The applique pieces take the most time, but they are also the most rewarding.
What if my shell hexagons look uneven?
That is part of the charm. Slight irregularity in the honeycomb pattern gives the shell a more organic, handcrafted look. As long as the outlines are visible, you are good.
Can I skip the tail curl?
You can, but the tail is one of Squirtle’s most iconic features. If you prefer a straight tail, simply skip the curling step and sew it on as is. It will still look cute, just less Squirtle-like.
Pin This Crochet Pattern!