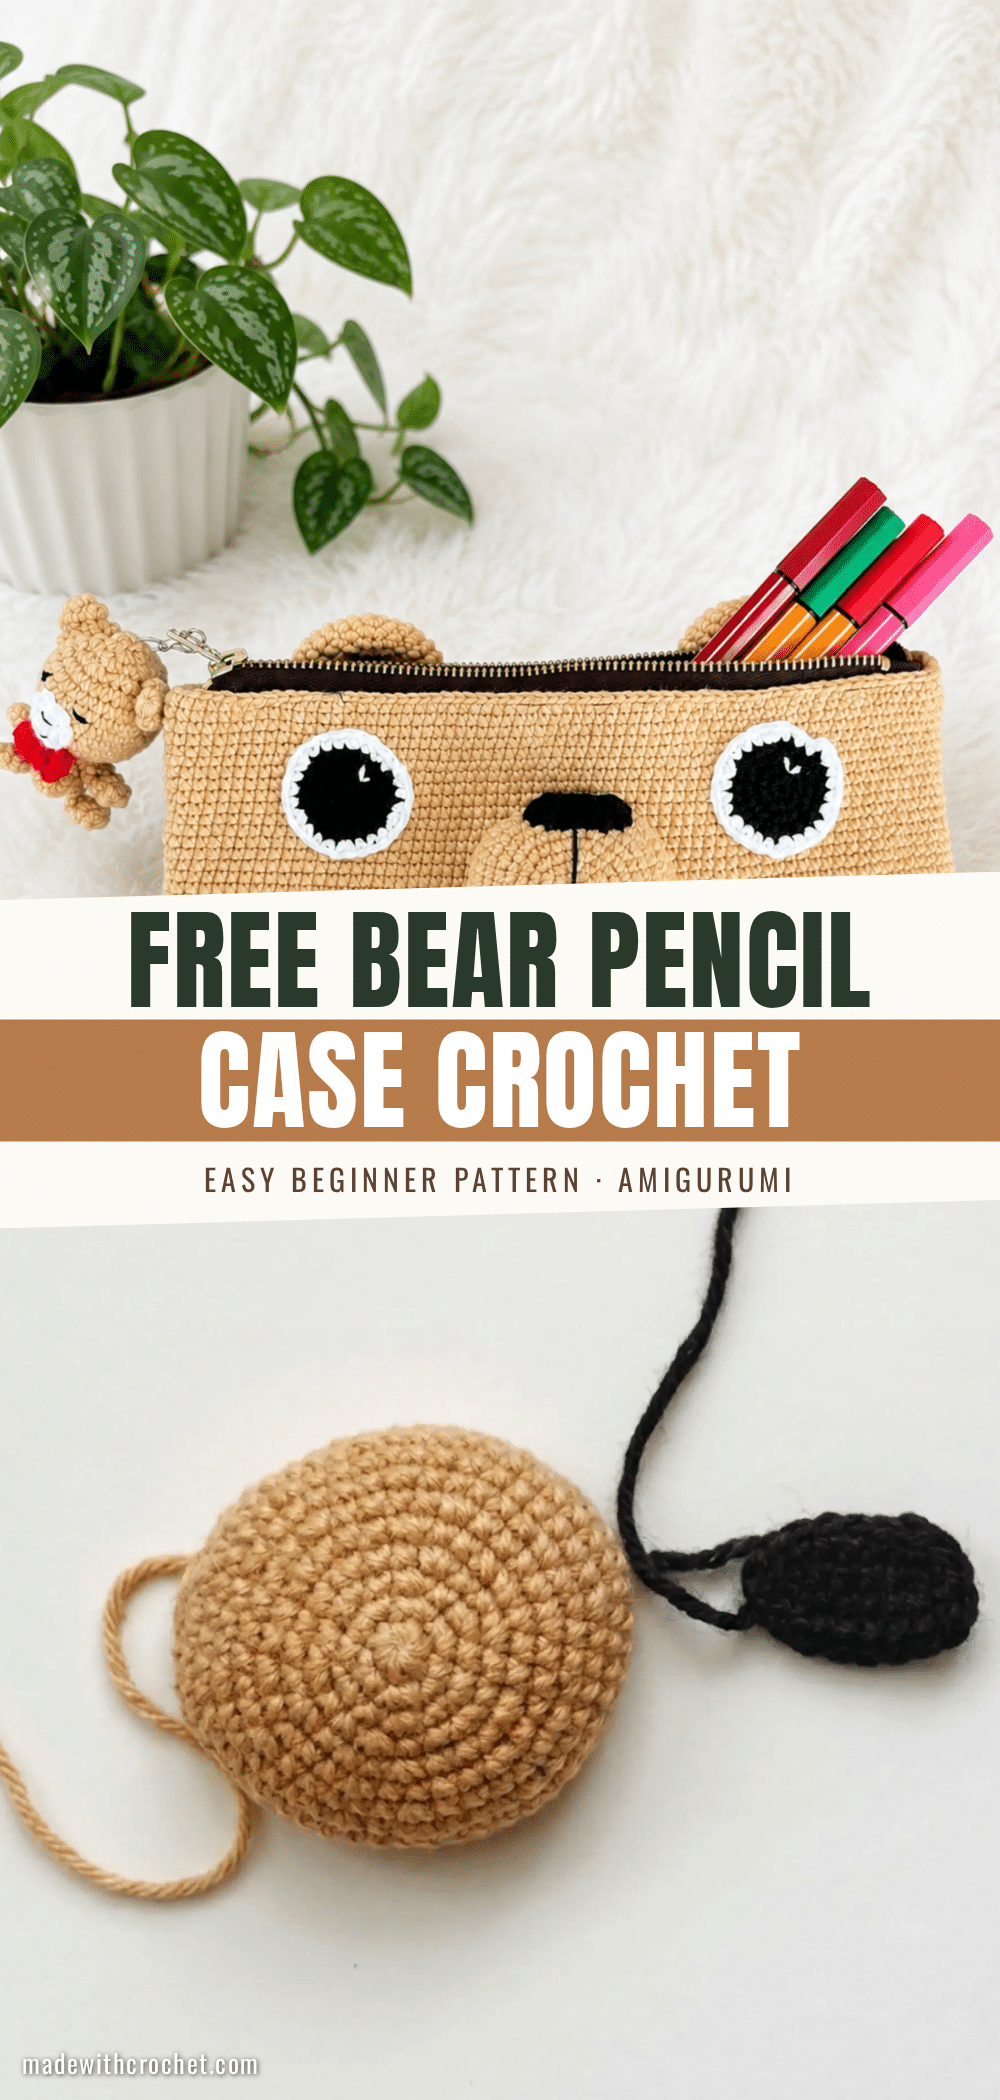
I remember standing in front of my yarn stash, holding a skein of soft tan acrylic-cotton blend and wondering if it was the right choice for a pencil case. It needed to be sturdy enough for daily use but soft enough to feel good in the hands. That moment of decision—choosing a yarn that balances structure with comfort—is exactly what makes this bear pencil case feel intentional from the very first stitch.
Yarn and Color Notes
The tan/beige worsted weight acrylic-cotton blend recommended for this pattern is a perfect choice. The cotton content gives the pouch structure and durability, while the acrylic keeps it soft and easy to care for. If you want to customize the look, consider using a warm caramel for a honey bear vibe, or a light grey for a more neutral, modern aesthetic. The black and white accents for the eyes and nose will pop beautifully against any light-to-medium base color.
Project Overview
This easy crochet bear pencil case is a delightful project for confident beginners who have mastered basic single crochet and are ready to try their first zippered pouch. The pattern combines a simple rectangular base with adorable amigurumi-style face pieces, creating a functional and charming accessory. You’ll pick up skills like working in joined rounds, creating flat appliqué pieces, and sewing in a zipper—all of which carry over into countless other projects.
Materials
- Yarn: Worsted weight (Aran/CYCA #4) acrylic-cotton blend yarn in tan/beige (approx. 1 skein), plus small amounts of black and white yarn for the eyes
- Hook: Size B-1 (2.0-2.25 mm)
- Zipper: 1 zipper, sized to fit a finished pouch approximately 9-10 inches wide
- Stuffing: Small amount of fiberfill (for the muzzle only)
- Yarn needle for sewing pieces together
- Stitch marker
- Scissors
Abbreviations Used
- ch — Chain
- inc — Increase (2 sc in same stitch)
- MR — Magic Ring
- sc — Single Crochet
Pattern Notes
This pattern is written in US crochet terminology. The base is worked in joined rounds, back and forth in rows once the initial oval is established; the face, nose, ears, and eyes are worked in continuous spiral rounds without joining. Gauge is not critical for this project—a slightly tighter or looser tension simply changes the finished size of the pouch. Stitch count is given at the end of each round or row in parentheses: (##). Stuff the muzzle lightly—you want a soft, slightly rounded shape, not a firm ball, since it needs to sit flat against the pouch front. The eyes are worked as flat two-tone circles (black center, white outer round) rather than safety eyes, so they’re sewn on rather than snapped in place.
Pattern Instructions
Base (Pencil Case Body)
Row 1: Ch 60. Working into 2nd ch from hook, inc, sc 57, 4 sc in last st, continue along the opposite side of the foundation chain: sc 57, inc in first st. (122)
Row 2: 2 inc, sc 57, 4 inc, sc 57, 2 inc. (130)
Row 3: sc, inc repeat twice, sc 57, sc, inc repeat 4 times, sc 57, sc, inc repeat twice. (138)
Rows 4-30: sc in each st around. (138) Work 27 rows total at this stitch count.
Fasten off, leaving a yarn tail for weaving in.
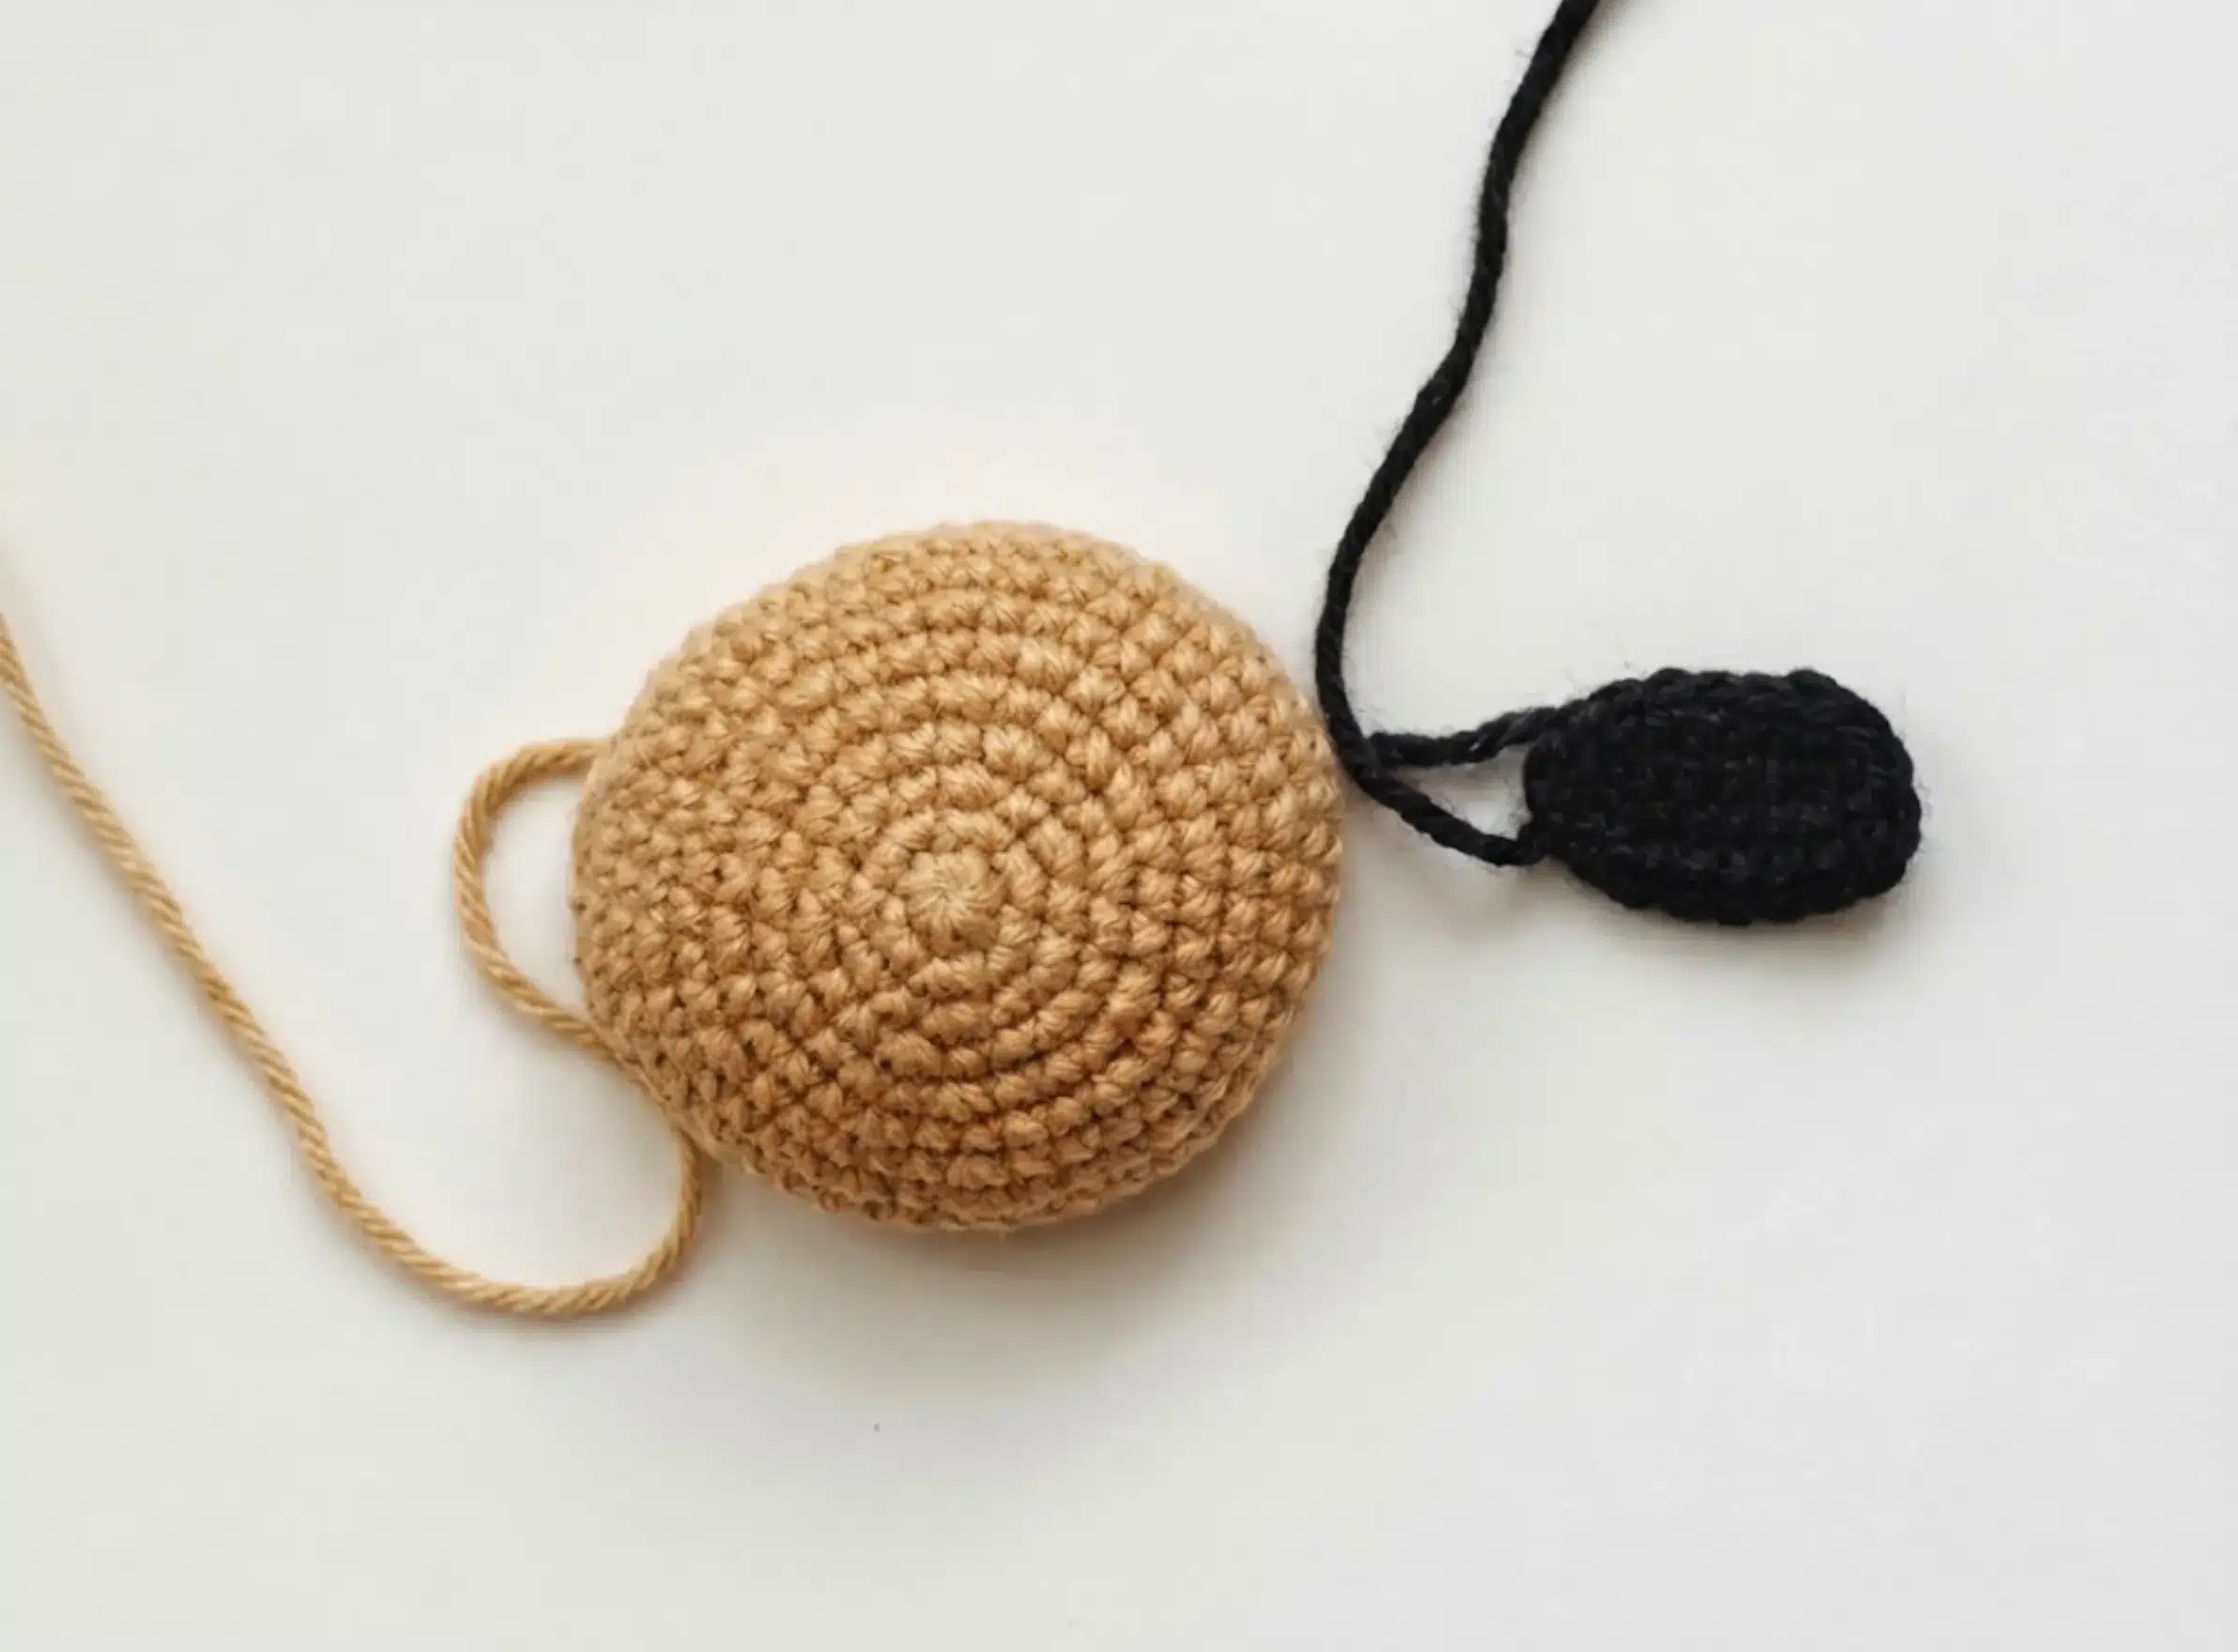
Muzzle
Rnd 1: 6 sc in MR. (6)
Rnd 2: inc in each st around. (12)
Rnd 3: sc, inc repeat around. (18)
Rnd 4: sc, inc, 2 sc, inc repeat 5 times, sc. (24)
Rnd 5: 3 sc, inc repeat around. (30)
Rnd 6: 2 sc, inc, 4 sc, inc repeat 5 times, 2 sc. (36)
Rnd 7: 5 sc, inc repeat around. (42)
Rnd 8: 3 sc, inc, 6 sc, inc repeat 5 times, 3 sc. (48)
Rnds 9-11: sc in each st around. (48) Work 3 rounds total at this stitch count. Stuff lightly before closing.
Fasten off, leaving a yarn tail for sewing.
Nose
Rnd 1: Ch 6. Working into 2nd ch from hook, inc, sc 3, 4 sc in last st, sc 3, inc in first st. (14)
Rnd 2: sc, inc, sc 3, sc, inc repeat twice, sc 3, sc, inc. (18)
Fasten off, leaving a yarn tail for sewing.
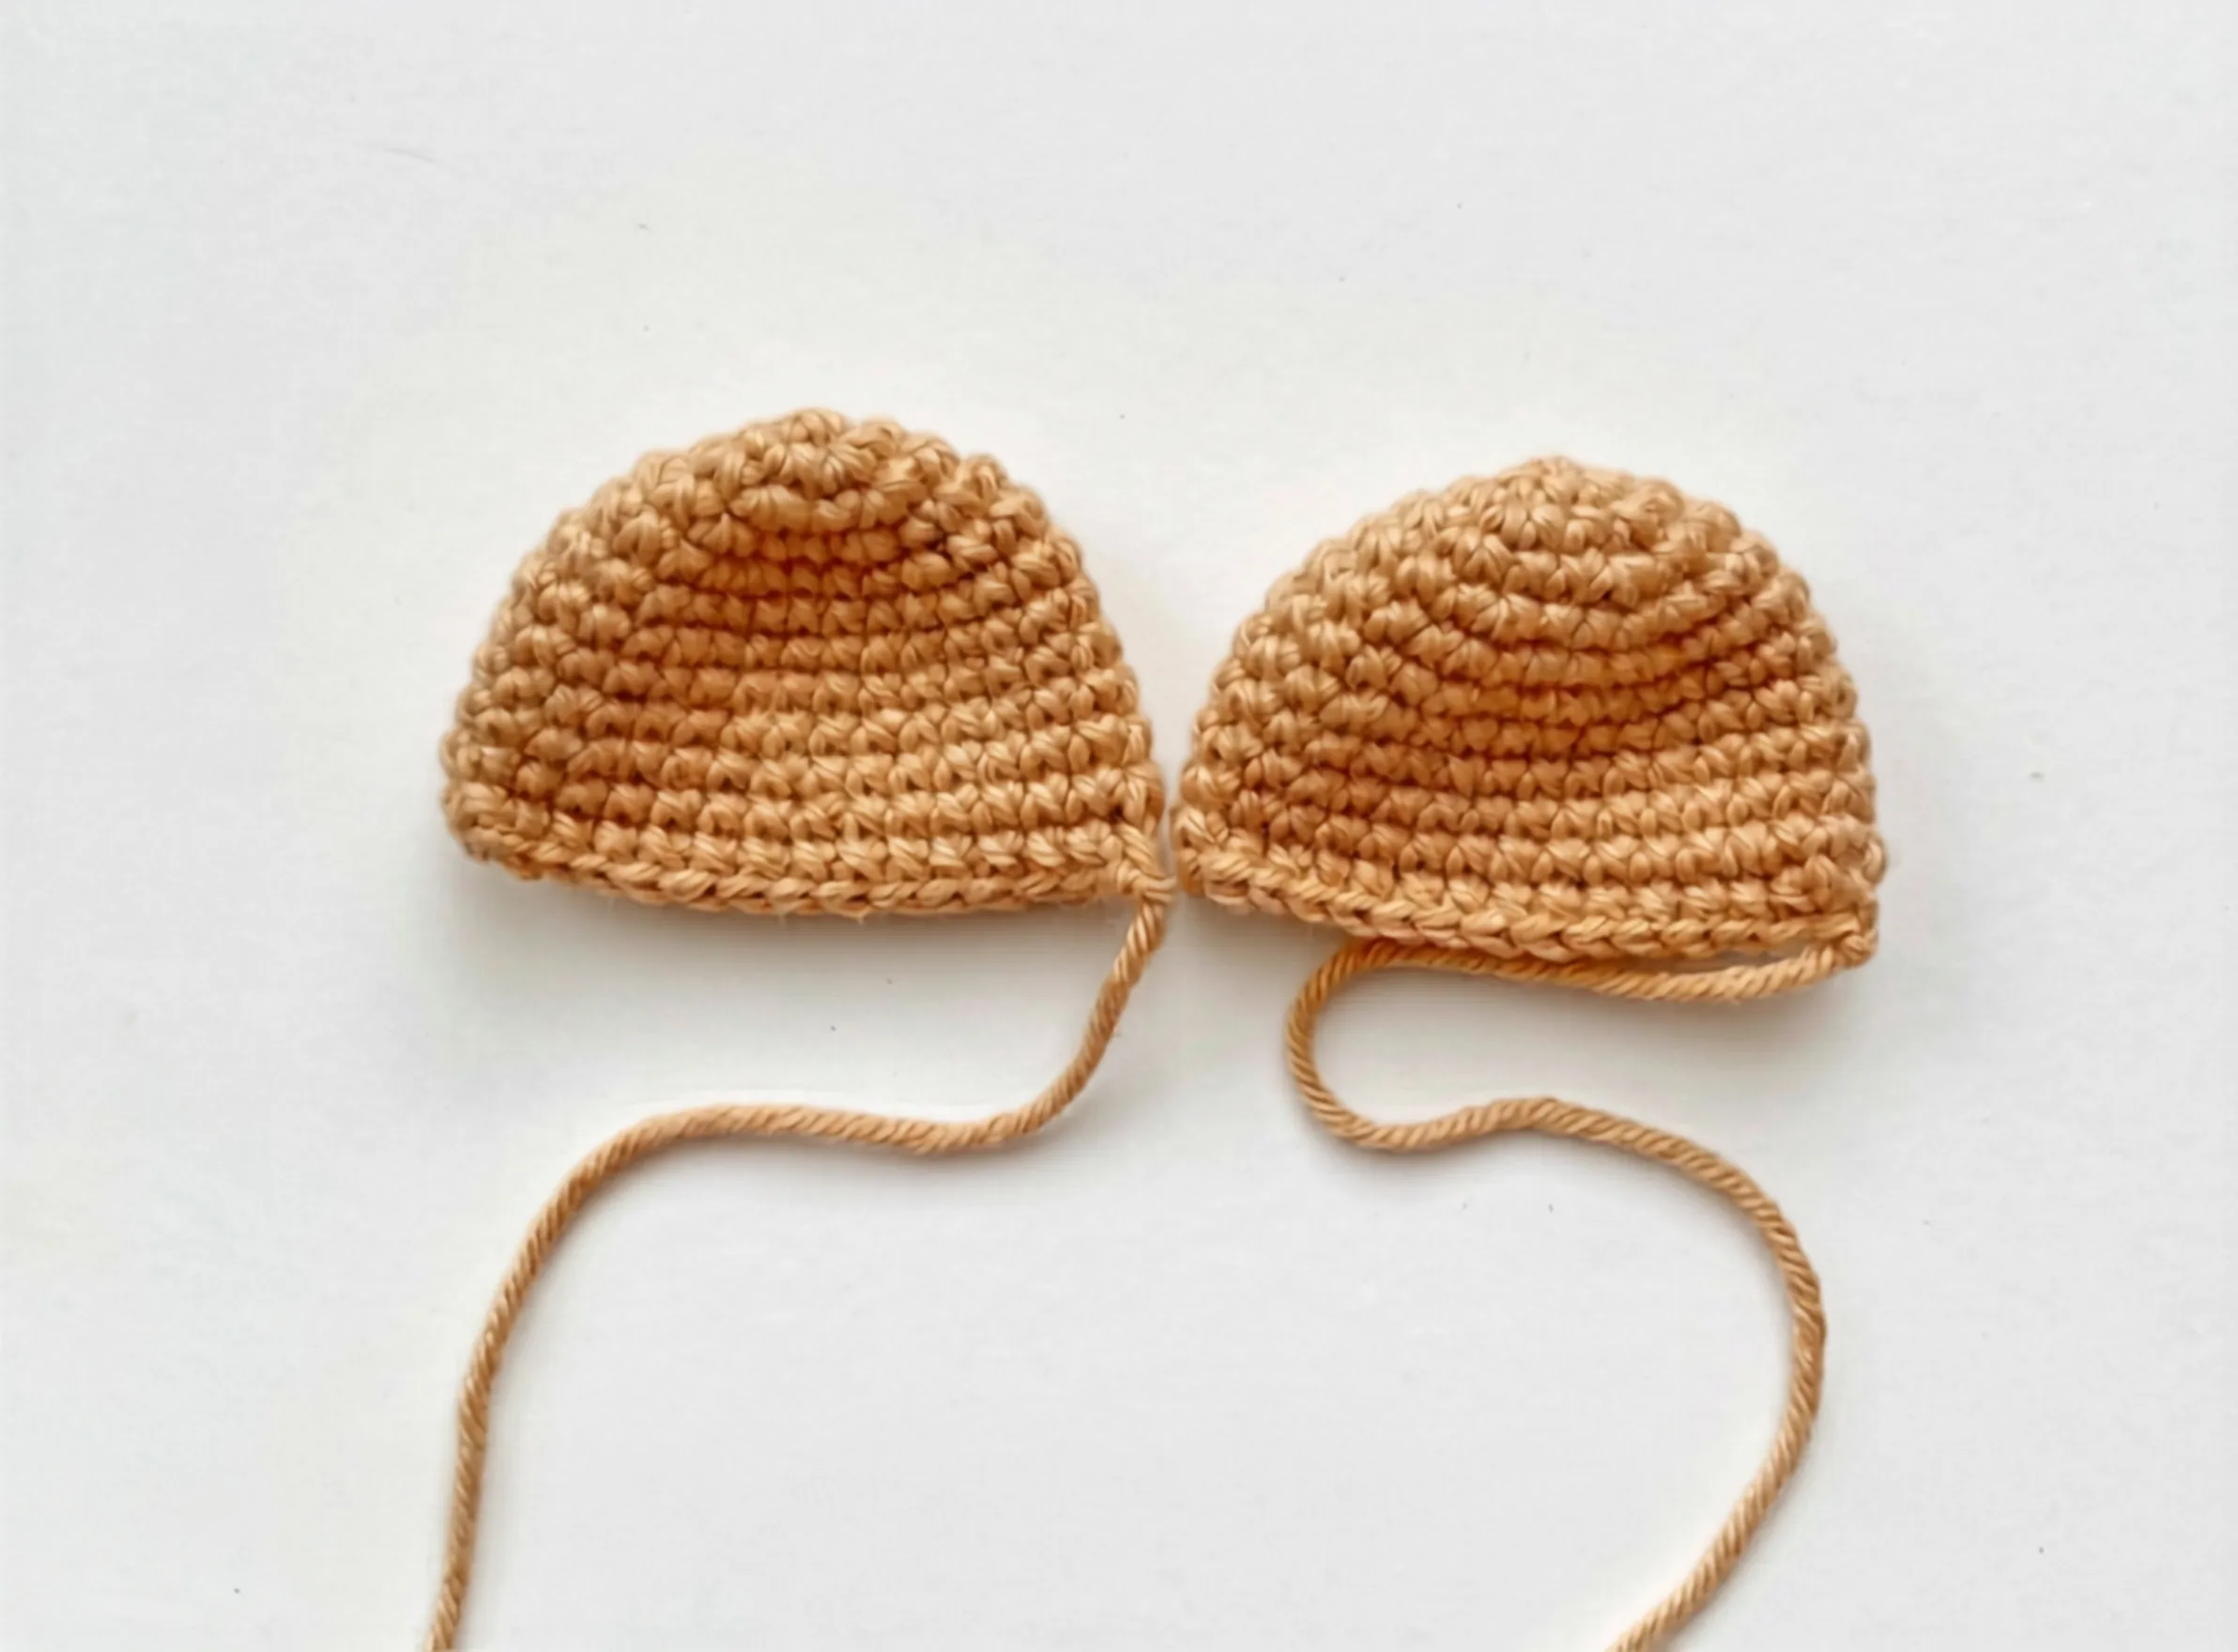
Ear (make 2)
Rnd 1: 6 sc in MR. (6)
Rnd 2: inc in each st around. (12)
Rnd 3: sc, inc repeat around. (18)
Rnd 4: sc, inc, 2 sc, inc repeat 5 times, sc. (24)
Rnd 5: 3 sc, inc repeat around. (30)
Rnds 6-11: sc in each st around. (30) Work 6 rounds total at this stitch count.
Closing round: Fold the piece flat in half and, working through both layers together, sc 14 across to close.
Fasten off, leaving a yarn tail for sewing.
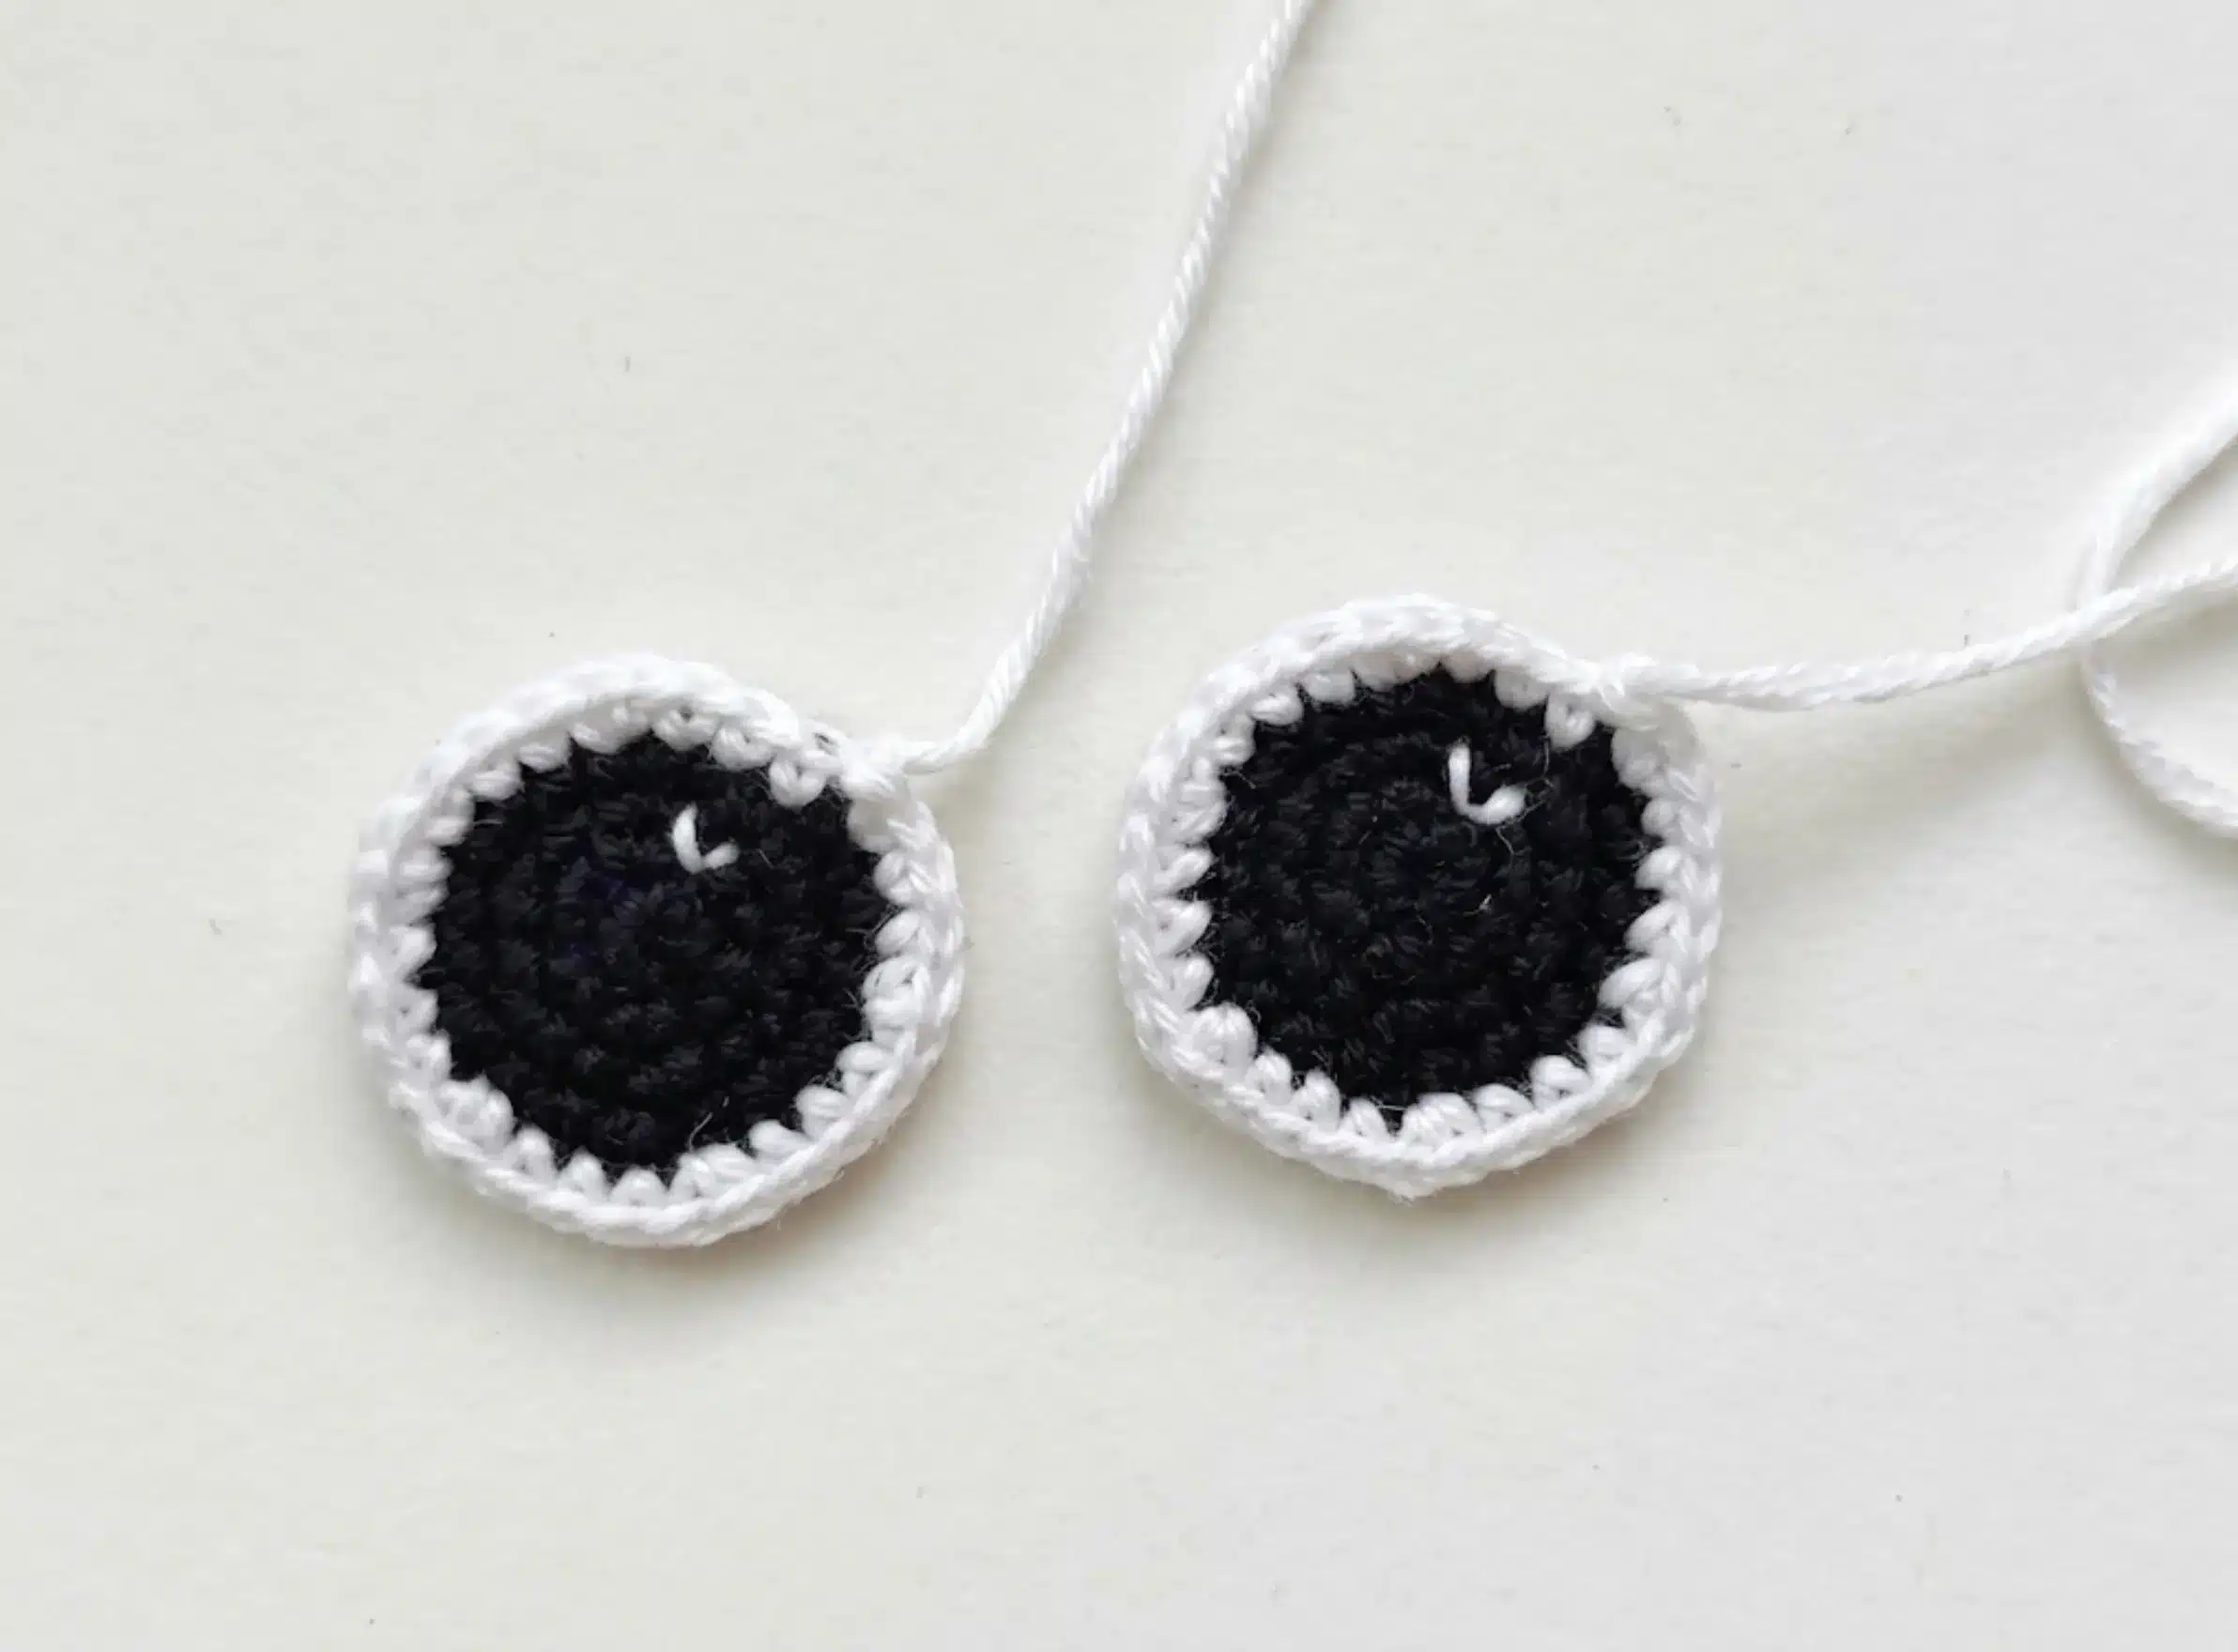
Eye (make 2)
Worked in black, then switched to white for the final round.
Rnd 1 (black): 6 sc in MR. (6)
Rnd 2 (black): inc in each st around. (12)
Rnd 3 (black): sc, inc repeat around. (18)
Rnd 4 (black): sc, inc, 2 sc, inc repeat 5 times, sc. (24)
Rnd 5 (white): 3 sc, inc repeat around. (30)
Fasten off, leaving a yarn tail for sewing.
Assembly
Lightly stuff the Muzzle piece and pin it to the center front of the Base, positioning it a few rows up from the zipper edge so it reads as the bear’s snout. Whipstitch the Muzzle in place around its entire edge, keeping your stitches small and even so the seam disappears into the surrounding stitches.
Sew the Nose onto the top center of the Muzzle using the same whipstitch technique, then use a length of black yarn to embroider a simple smile beneath it in a straight or curved stitch.
Position the two Eye pieces above the Muzzle, spaced evenly apart, and sew each one in place using the yarn tail left from that piece.
Flip the Base over and sew the two Ear pieces to the top edge of the back side, spacing them to mirror where ears would naturally sit on a bear’s head.
Pin the zipper along the top opening of the Base and hand-sew it in place using a whipstitch or backstitch, keeping tension even so the pouch lies flat when closed.
If desired, cut and sew in a fabric lining to finish the interior and give the pouch extra structure. Weave in all remaining yarn ends securely before trimming.
Tips & Tricks
- Keep your tension consistent throughout the Base rows—since this piece is worked flat rather than in the round, uneven tension shows up more obviously as puckering or waviness along the sides. If you notice your rectangle curling at the edges, try going up half a hook size for the straight rows only.
- When shaping the Muzzle’s increase rounds, place a stitch marker at the start of each round so you never lose track of where a round begins. Amigurumi pieces are notoriously easy to over-increase by one stitch if you lose your place, and that single extra stitch throws off the symmetry of the finished face.
- Don’t overstuff the Muzzle. Because it’s sewn flat against the Base rather than left as a standalone ball, a firm stuffing job will make it bulge oddly instead of sitting naturally against the pouch front. Add just enough fiberfill to give it gentle dimension.
- If you want to substitute yarn, stick with a worsted weight acrylic or acrylic blend for structure—a bulkier yarn will make the Base rows work up faster but will also make the finished pouch noticeably larger, so you may need to adjust your zipper length accordingly.
- For invisible seams when sewing the Ears and Eyes, work your whipstitch through the back loops only on the Base side, catching just the outer loops of the appliqué piece. This keeps the join thin and nearly invisible from the right side.
Frequently Asked Questions
What size zipper do I need for this pencil case?
You’ll want a zipper close to 9 to 10 inches long to match the width of the finished Base piece. If your zipper runs a bit shorter or longer, you can adjust by sewing it slightly gathered or trimming the excess and stitching over the cut end to prevent fraying.
Can I use safety eyes instead of crocheted eyes?
Yes, you can substitute safety eyes if you prefer a faster finish, though you’ll lose the soft two-tone look of the crocheted version. If you do switch, attach them before sewing the Muzzle onto the Base so you have full access to the back side for securing the washers.
Why is my Base piece curling instead of lying flat?
Curling usually means your single crochet stitches are a little tight, which pulls the fabric inward. Try loosening your tension slightly or going up half a hook size, and block the finished piece by lightly steaming it flat before assembly.
Do I need to line the pencil case?
A lining is optional but recommended if you plan to store pens or pencils with sharp tips, since it adds durability and prevents items from poking through the crochet fabric. A simple cotton fabric lining sewn to match the Base shape works well.
Can I make this pencil case larger or smaller?
Yes, you can adjust the size by changing your foundation chain length. For a larger case, add stitches in multiples of 2 to the initial chain, and work more straight rows. For a smaller case, reduce the chain length and work fewer rows. Just remember to adjust your zipper length accordingly.
How do I keep the zipper from bunching when sewing it in?
Pin the zipper in place evenly before sewing, and use a whipstitch with consistent tension. Work slowly, checking that the fabric lies flat against the zipper tape as you go. If you notice bunching, unpin and reposition before continuing.
Pin This Crochet Pattern!