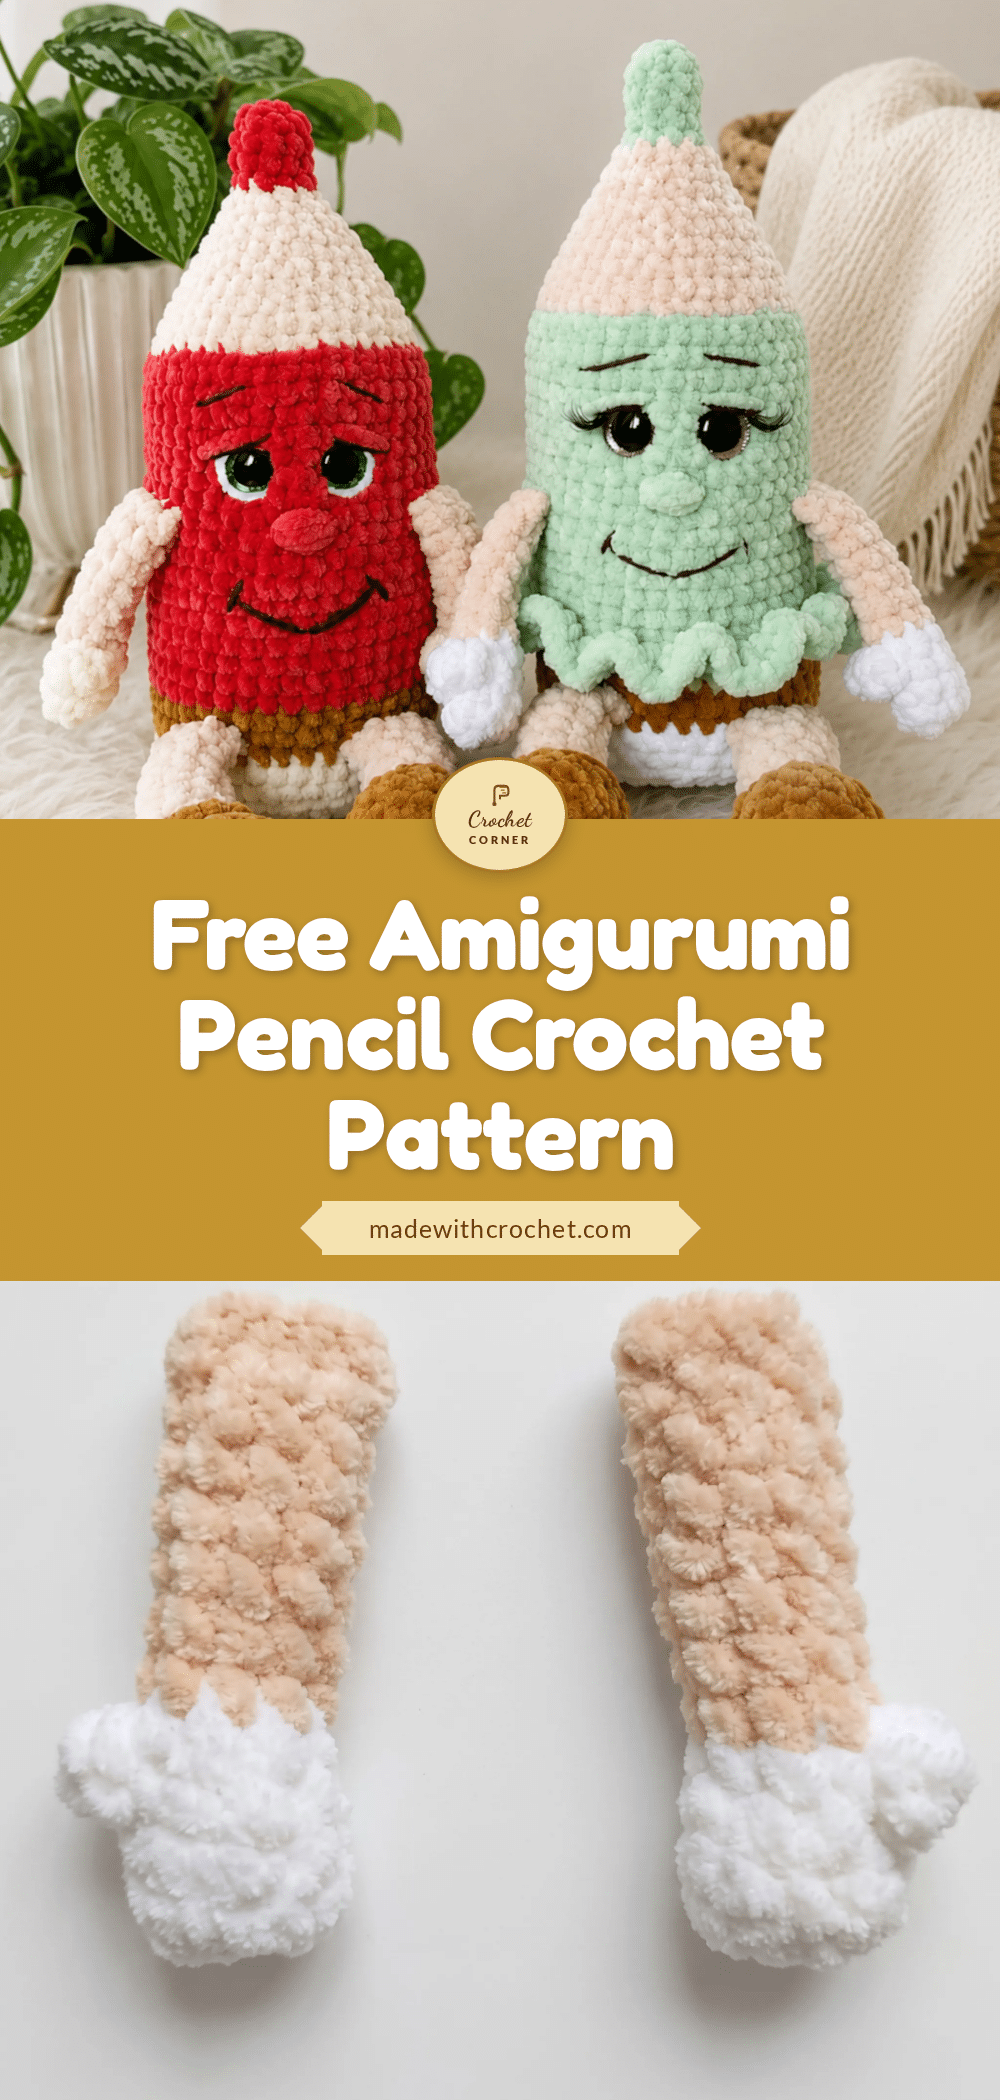
This cheerful amigurumi pencil makes a wonderful handmade gift for teachers, students, or anyone who loves desk decor. It’s equally at home on a market table, tucked into a back-to-school gift basket, or perched on a bookshelf as a playful reminder of the joy of learning. With its soft plush texture and sweet embroidered face, this little pencil is sure to bring a smile to anyone who sees it.
Gift and Use Ideas
This adorable pencil is versatile enough for many occasions. Give it as a teacher appreciation gift, a back-to-school surprise for a child, or a fun desk buddy for a home office. It also works beautifully as a handmade addition to a craft fair booth or as a cheerful decoration for a study nook. The “girl” version with a ruffled skirt adds an extra touch of whimsy, making it perfect for a little one’s desk.
Project Overview
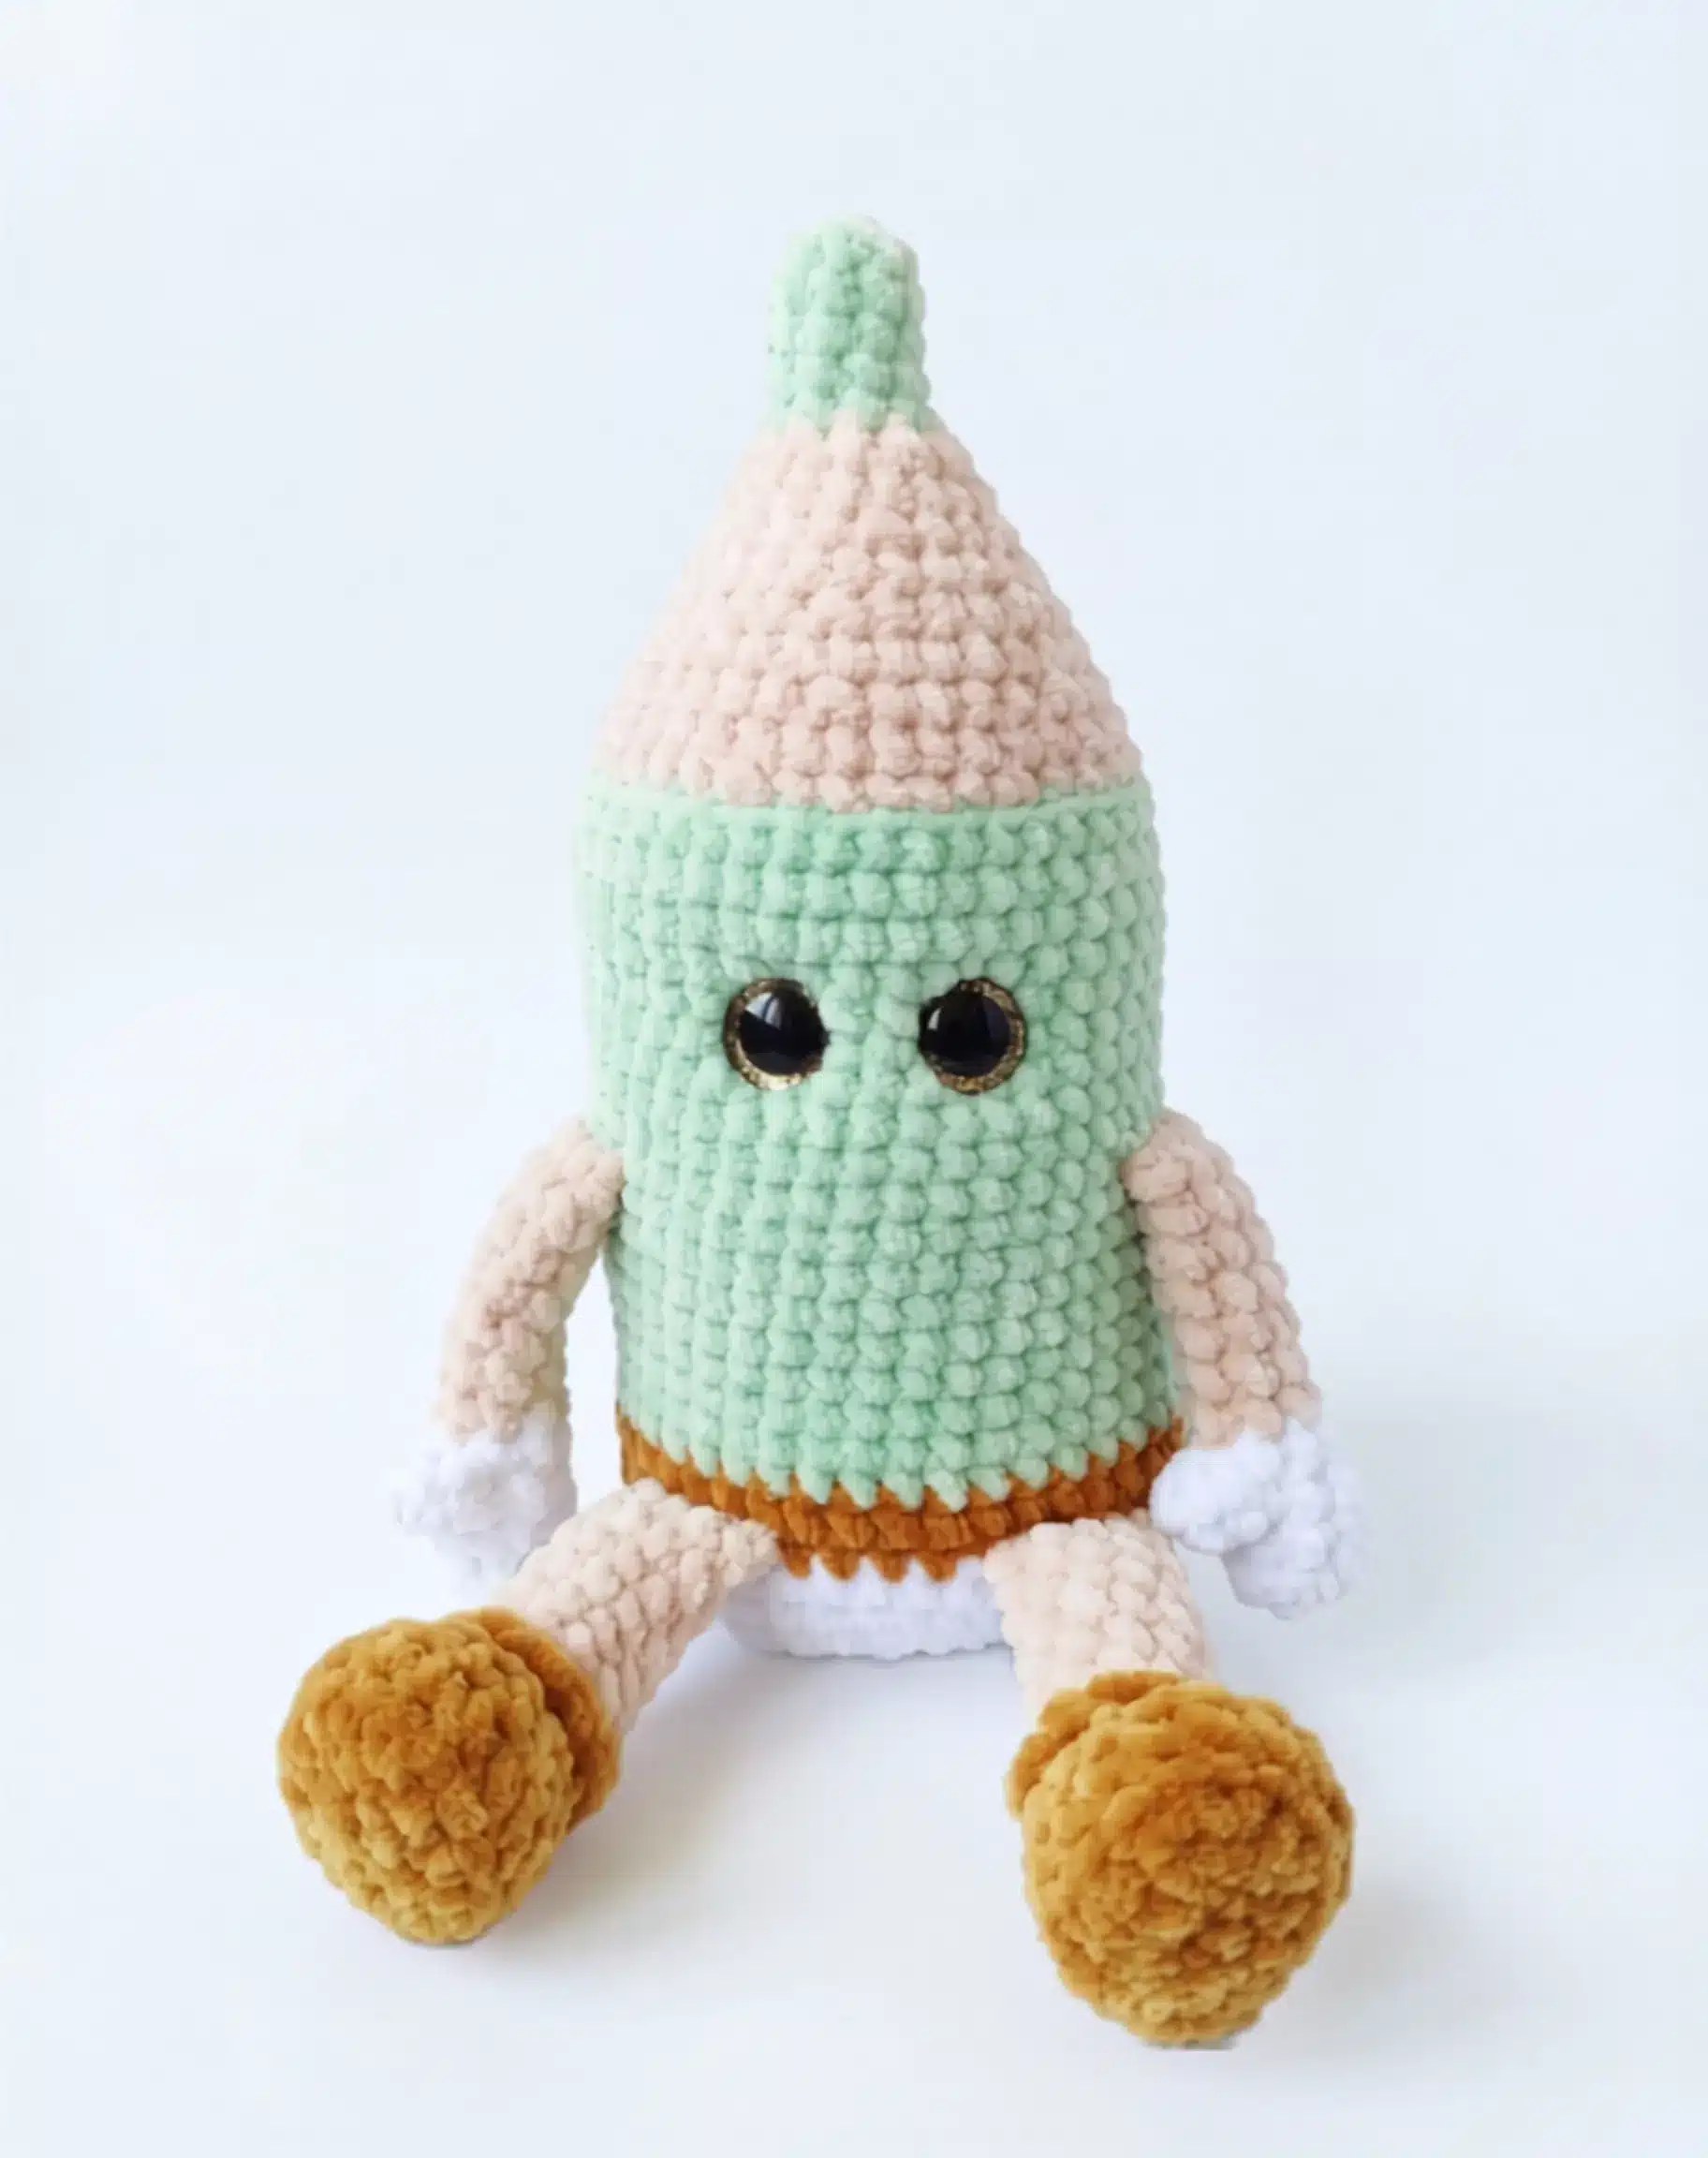
This amigurumi pencil is worked in continuous spirals from the bottom up, with the arms and legs crocheted directly into the body as you go. The pattern uses plush or velvet-style yarn for a soft, huggable finish. A simple embroidered face and optional ruffled skirt bring the character to life. The finished pencil stands on its own thanks to plastic lid inserts in the boots and base.
Materials
- Yarn: Worsted weight (Medium, #4) plush or velvet-style yarn (such as Dolphin Baby or a similar chenille yarn) in cream/white, brown, skin-tone/blush, and a main color of your choice
- Hook: US G-6 (4mm), or US E-4 (3.5mm) for a slightly tighter fabric
- Safety eyes: 18–20mm, 1 pair
- Fiberfill stuffing
- Stitch markers
- Yarn or tapestry needle
- Scissors
- Thin brown yarn or embroidery floss, for facial details
- Fabric-safe craft glue
- Two small pieces cut from a plastic lid (such as a yogurt or sour cream container), to stiffen the base of the feet and body
Abbreviations
- BLO — Back Loop Only
- ch — Chain
- dc — Double Crochet
- dec — Decrease (invisible decrease)
- FLO — Front Loop Only
- inc — Increase
- MR — Magic Ring
- sc — Single Crochet
- st(s) — Stitch(es)
- tr — Treble Crochet
Pattern Notes
- This pattern is written in US crochet terminology.
- Worked in continuous spirals throughout — do not join or turn unless a note says otherwise.
- Gauge is not critical for this project; aim for a fabric tight enough that stuffing won’t peek through.
- Stitch count is given in parentheses at the end of each round.
- Safety eyes are inserted mid-Body, then the face is completed with embroidery after stuffing.
- Use a stitch marker to track the start of each round, since rounds are worked continuously.
- Arms and Legs are made separately, then attached directly into the Body as you crochet — save time by having both pairs finished before you start the Body.
Pattern Instructions
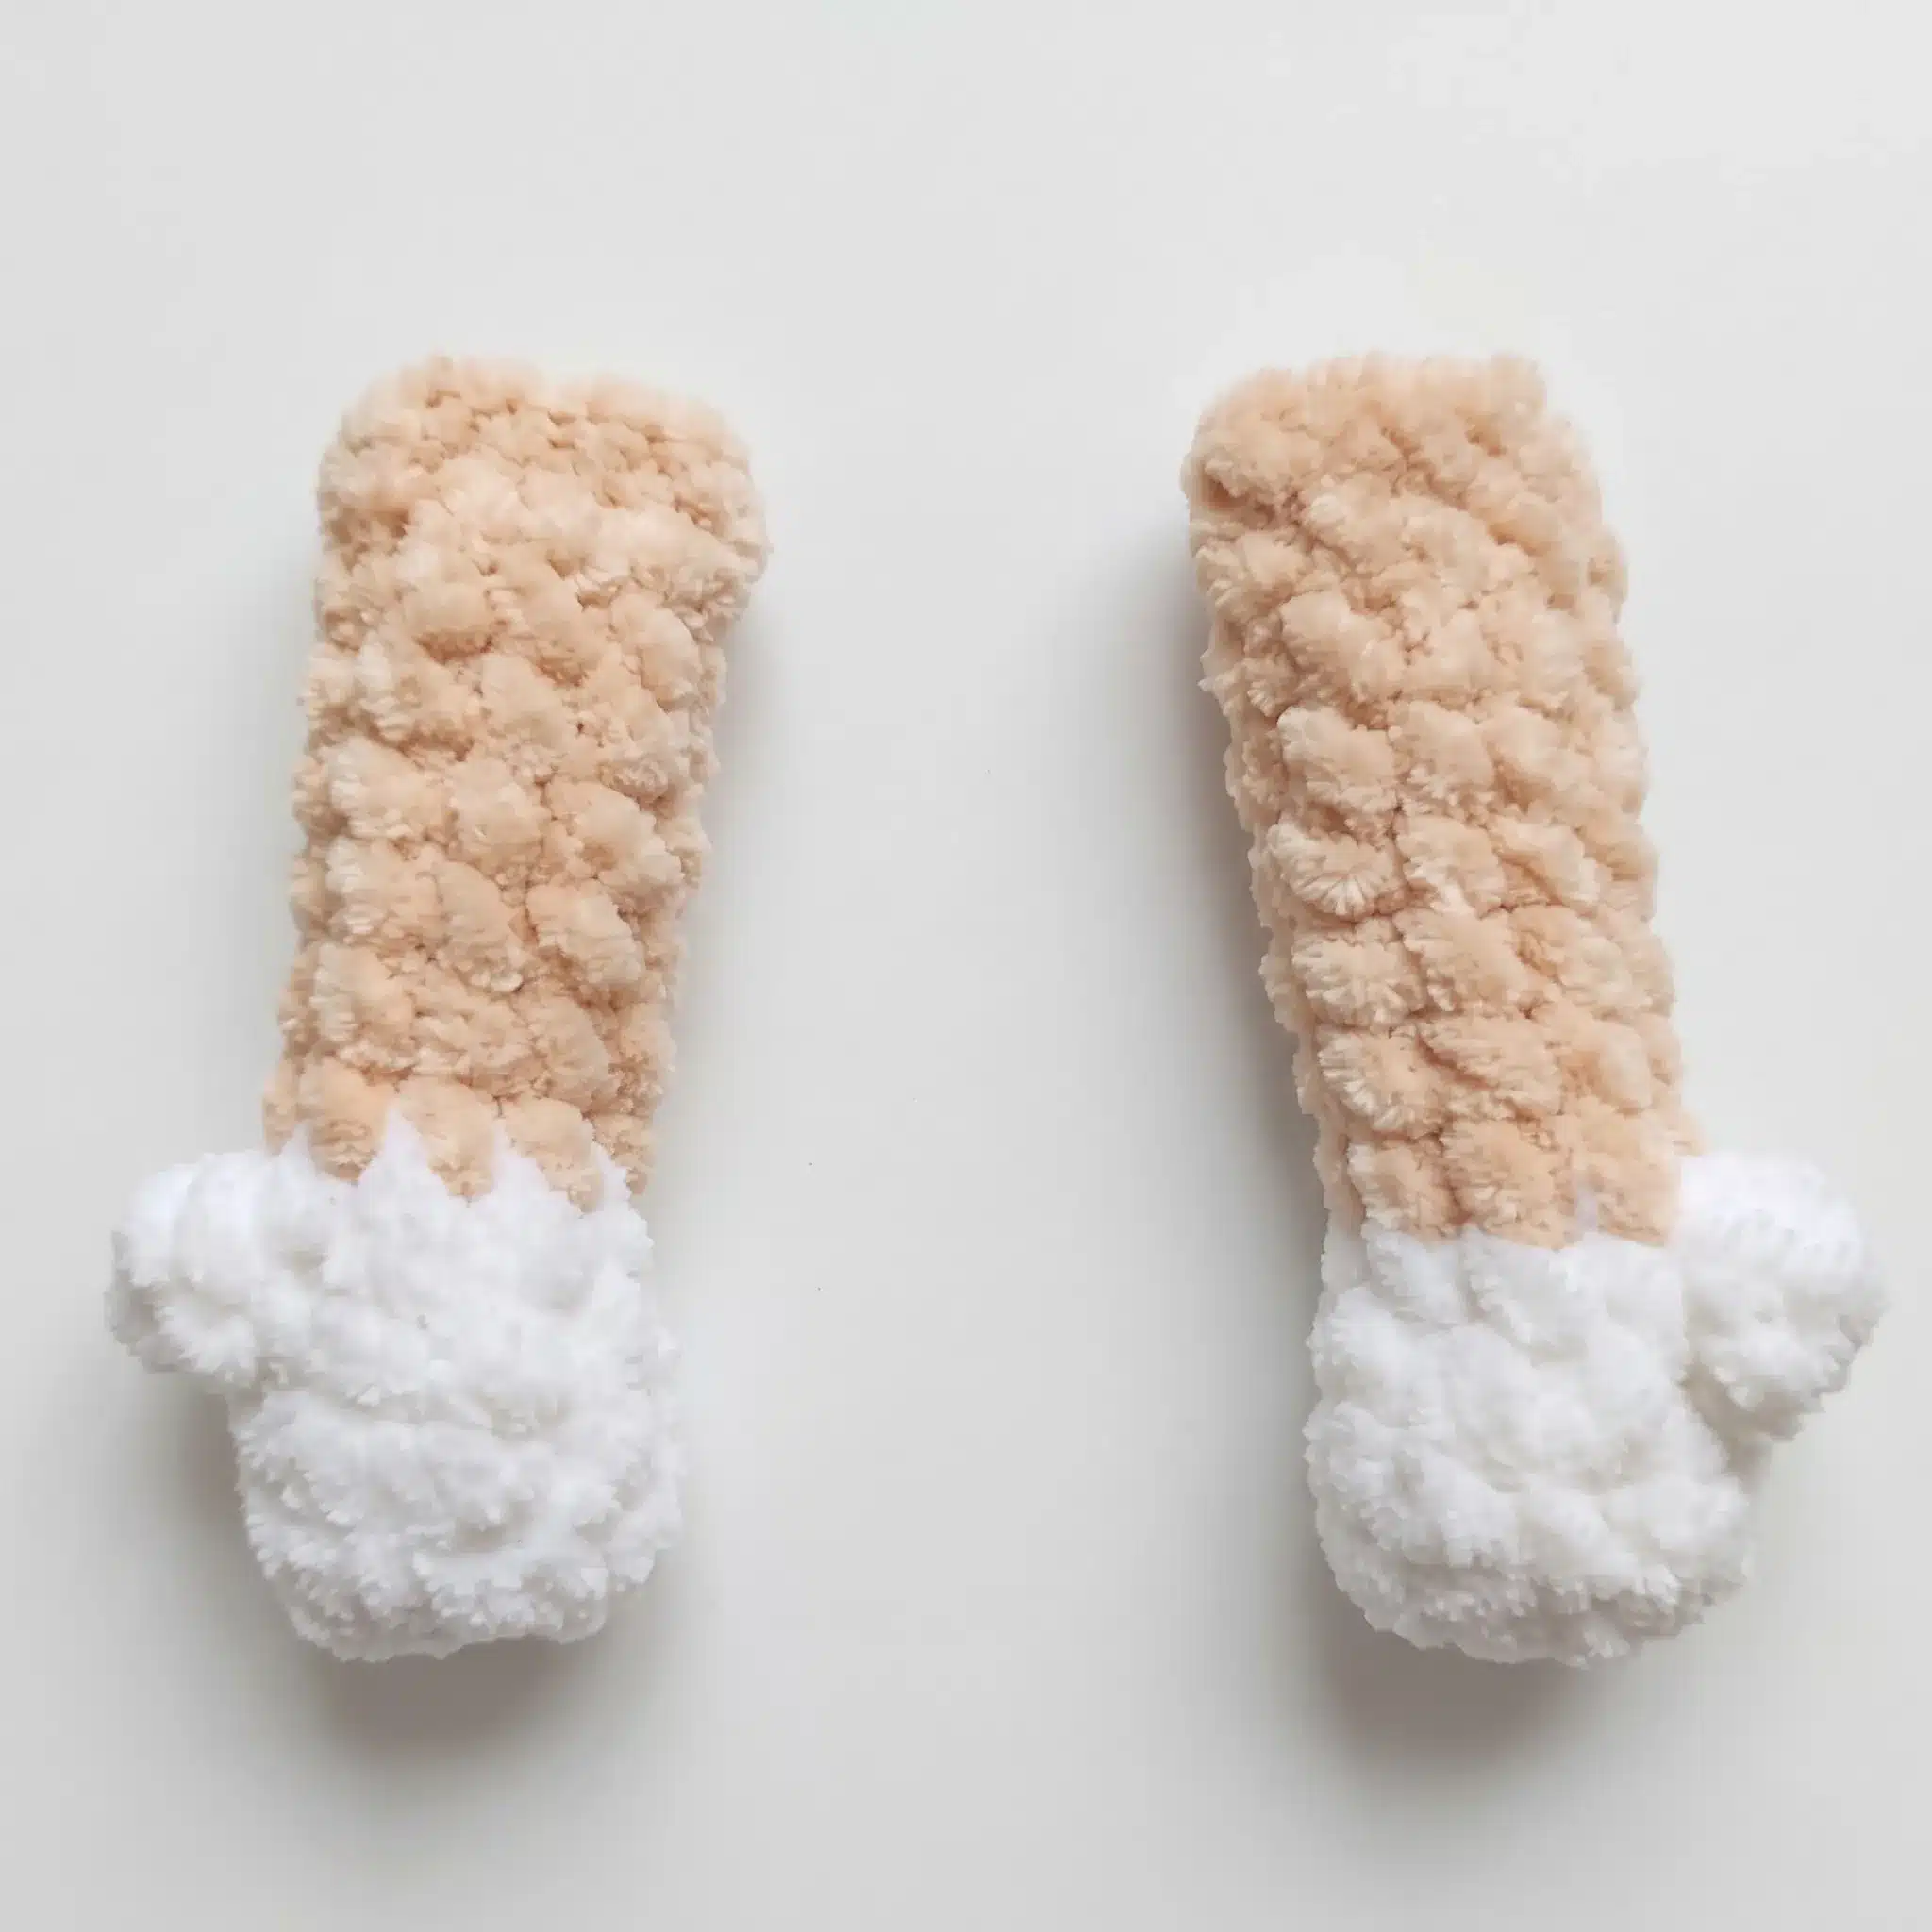
Arms (make 2)
Begin with white or cream yarn.
- Rnd 1: Ch 4; working in the 2nd ch from hook: inc, sc 1, 3 sc in next st; continue into the back ridge of the foundation chain: sc 2. (8)
- Rnds 2–3: sc in each st around. (8)
- Rnd 4: tr3tog (3 tr crocheted together into one cluster) in next st, sc 7. (8)
- Change to skin-tone yarn.
- Rnds 5–11: sc in each st around, shifting your starting point by 1 st on the final round. (8)
Stuff the cuff (glove) section only, and only lightly. Fold the piece flat and sc 4 through both layers to close it. Fasten off, leaving a yarn tail for attaching later.
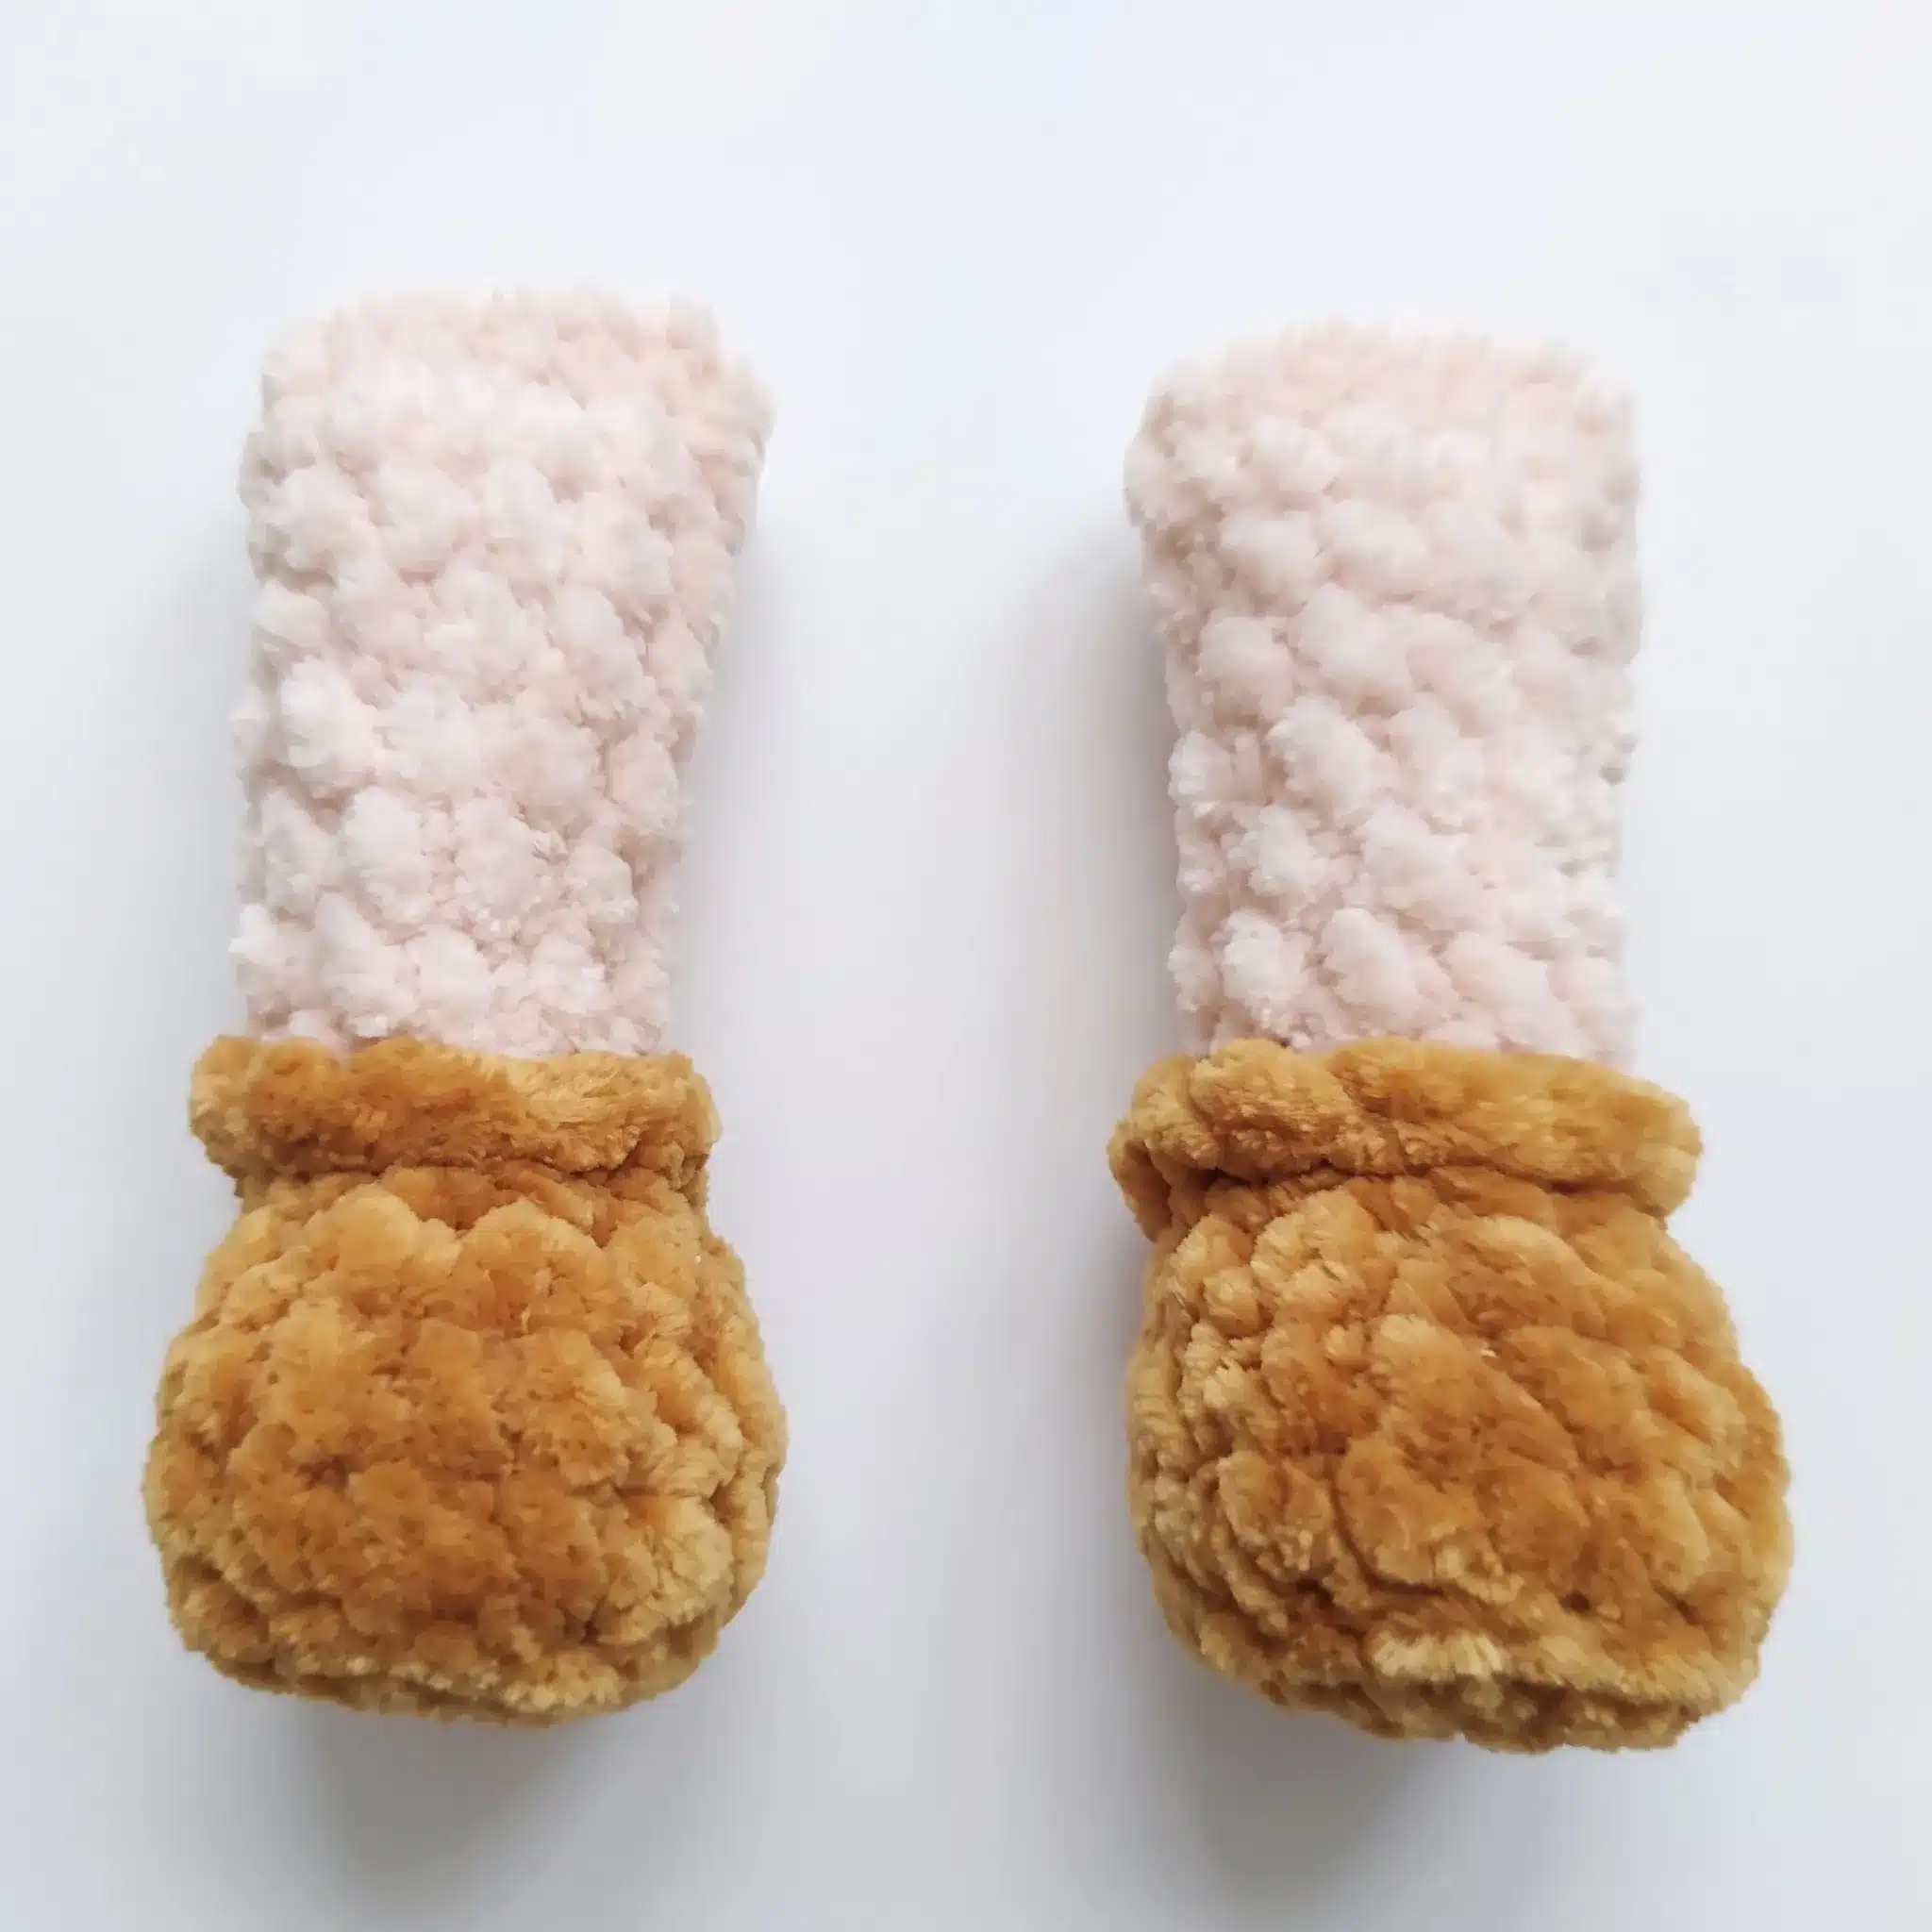
Legs (make 2)
Stuff the boot section firmly; stuff the leg section lightly as you go. Begin with brown yarn.
- Rnd 1: Ch 5; working in the 2nd ch from hook: inc, sc 2, 3 sc in next st; continue into the back ridge of the foundation chain: sc 3. (10)
- Rnd 2: inc, inc, sc 2, inc, inc, inc, sc 2, inc. (16)
- Once Rnd 2 is complete, cut two oval shapes from your plastic lid to match the sole of this piece.
- Rnd 3: sc in BLO around. (16)
- After Rnd 3, glue the plastic ovals to the wrong side of the piece — this keeps the boot sole flat and stable so your pencil can stand.
- Rnd 4: sc in each st around. (16)
- Rnd 5: sc 4, dec 5 times, sc 2. (11)
- Rnd 6: sc 6, dec, sc 3. (10)
- Do not fasten off the brown yarn. Bring it forward and work one edging round in FLO with sc before continuing to the next round.
- Change to skin-tone yarn.
- Rnd 7: sc in BLO around. (10)
- Rnds 8–13: sc in each st around. (10)
Fold the piece flat and sc 5 through both layers to close it. Fasten off, leaving a yarn tail for attaching later.
Body
Stuff as you go throughout this section. Begin with white or cream yarn.
- Rnd 1: 6 sc in MR. (6)
- Rnd 2: inc in each st around. (12)
- Rnd 3: sc 1, inc repeat around. (18)
- Rnd 4: sc 2, inc repeat around. (24)
- Rnd 5: sc 3, inc repeat around. (30)
- Rnd 6: sc 4, inc repeat around. (36)
- Rnd 7: sc 5, inc repeat around. (42)
- Once Rnd 7 is complete, cut a circle from your plastic lid to match the base of this piece.
- Rnd 8: sc in BLO around. (42)
- After Rnd 8, glue the plastic circle to the wrong side of the base for stability.
- Rnd 9: sc in each st around. (42)
- Change to brown yarn.
- Rnd 10: sc 14, attach one Leg with sc 5 through both layers, sc 4, attach the second Leg with sc 5 through both layers, sc 14. (42)
- Rnds 11–12: sc in each st around. (42)
- Change to your main color (MC).
- Rnds 13–20: sc in each st around. (42)
- If you’re making the “girl” version of the pencil, work Rnd 15 in BLO instead of both loops. Later, when you reach this point in finishing, join MC yarn into the free front loops left from Rnd 15 and work 2 more rounds: first sc in FLO around, then inc using dc in every st. This creates a ruffled skirt around the pencil’s middle.
- Rnd 21: sc 12, attach one Arm with sc 4 through both layers, sc 13, attach the second Arm with sc 4 through both layers, sc 9. (42)
- Rnds 22–30: sc in each st around. (42)
- Insert the safety eyes between Rnds 25 and 26, spacing them 5 sts apart.
- Change to skin-tone yarn.
- Rnd 31: in BLO, sc 5, dec repeat around. (36)
- Rnd 32: sc in each st around. (36)
- Rnd 33: sc 4, dec repeat around. (30)
- Rnd 34: sc in each st around. (30)
- Rnd 35: sc 3, dec repeat around. (24)
- Rnd 36: sc in each st around. (24)
- Rnd 37: sc 2, dec repeat around. (18)
- Rnd 38: sc in each st around. (18)
- Rnd 39: sc 1, dec repeat around. (12)
- Change to main color (MC).
- Rnd 40: sc 2, dec repeat around 3 times. (9)
- Rnds 41–43: sc in each st around. (9)
- Rnd 44: sc 1, dec repeat around 3 times. (6)
Finish stuffing firmly, then close the opening. Fasten off and weave in the end.
Assembly
Your Arms and Legs are already attached directly into the Body at Rnd 10 (Legs) and Rnd 21 (Arms), so most of the assembly happens as you crochet. Once the Body top is closed, use a leftover yarn tail and a whipstitch to reinforce any small gaps around the Arm and Leg attachment points. Embroider the nose with plush yarn, positioned 2–3 rounds below the safety eyes. Layer white and skin-tone yarn or felt directly around each safety eye to build up eye whites and eyelids. Using thin brown yarn, embroider soft eyebrows and a gentle smile. For the “girl” pencil version, glue on small eyelashes just above the eyes. Weave in all remaining yarn ends and trim neatly.
Tips
- Track your rounds carefully: Plush or chenille yarn hides your stitches, making it easy to lose your place mid-round. Keep a stitch marker at the start of every round so you never have to recount.
- Master the invisible decrease: For the head-shaping rounds (31–44), insert your hook into the front loops of the next two stitches only, rather than both full stitches. This keeps the plush texture smooth instead of bulky.
- Balance your stuffing firmness: Stuff the boots and cuffs firmly for structure, but keep the connecting leg and arm tubes lightly filled so the finished pencil stays soft and easy to pose.
- Choose yarn substitutes wisely: If you swap in a different yarn, stick to another worsted-weight plush or chenille. A smooth cotton or acrylic worsted will work structurally, but you’ll lose the soft, velvety look that makes this design pop.
- Let the glue set before stuffing: When attaching the plastic lid pieces, allow the glue to fully dry before continuing to stuff around them, so the base doesn’t shift out of place.
Frequently Asked Questions
What yarn works best for this amigurumi pencil pattern?
A worsted-weight plush or chenille yarn, such as Dolphin Baby, gives this pattern its soft, velvety texture. You can use a smooth worsted-weight acrylic or cotton, but the finished pencil will have a different look and feel.
Can I use a different hook size?
Yes. The pattern calls for a US G-6 (4mm) hook, but you can use a US E-4 (3.5mm) hook for a slightly tighter fabric. The key is to create a fabric dense enough that the stuffing doesn’t show through.
How do I make the pencil stand on its own?
The plastic lid inserts in the boots and the base of the body provide stability. Be sure to let the glue dry completely before continuing to stuff around them, and stuff the boots firmly.
What is the “girl” version of the pencil?
The “girl” version includes a ruffled skirt worked into the free front loops of Rnd 15. After completing the body, you join the main color yarn into those loops and work a round of sc in FLO, followed by a round of dc increases to create the ruffle.
How do I attach the arms and legs?
The arms and legs are crocheted directly into the body as you work Rnd 10 (for legs) and Rnd 21 (for arms). You simply sc through both layers of the limb and the body to join them. Make sure both pairs are finished before you start the body.
Can I embroider the face instead of using safety eyes?
Yes. If you prefer, you can embroider the eyes with yarn or embroidery floss instead of using safety eyes. This is a great option if the pencil is for a very young child.
Pin This Crochet Pattern!