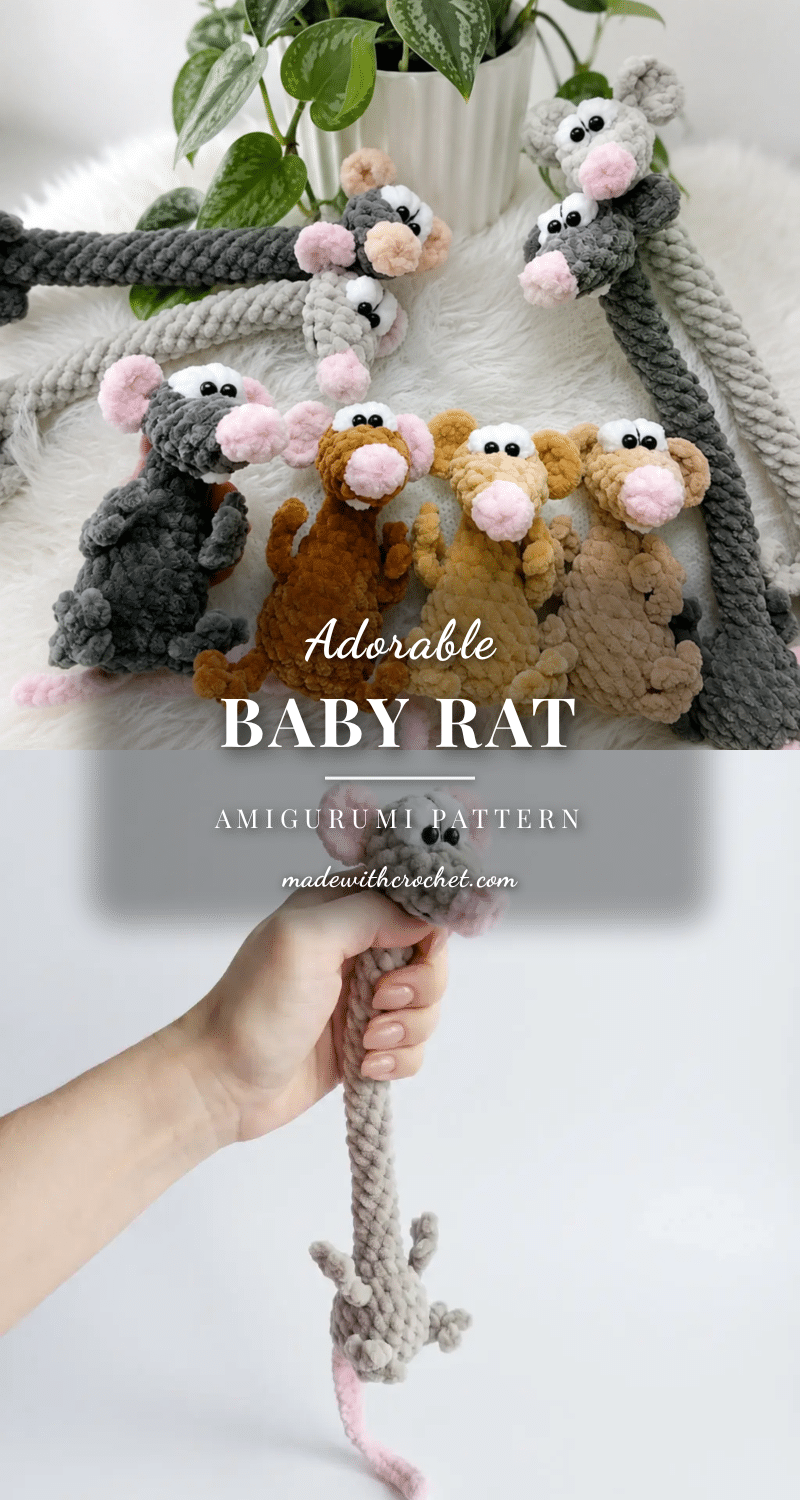
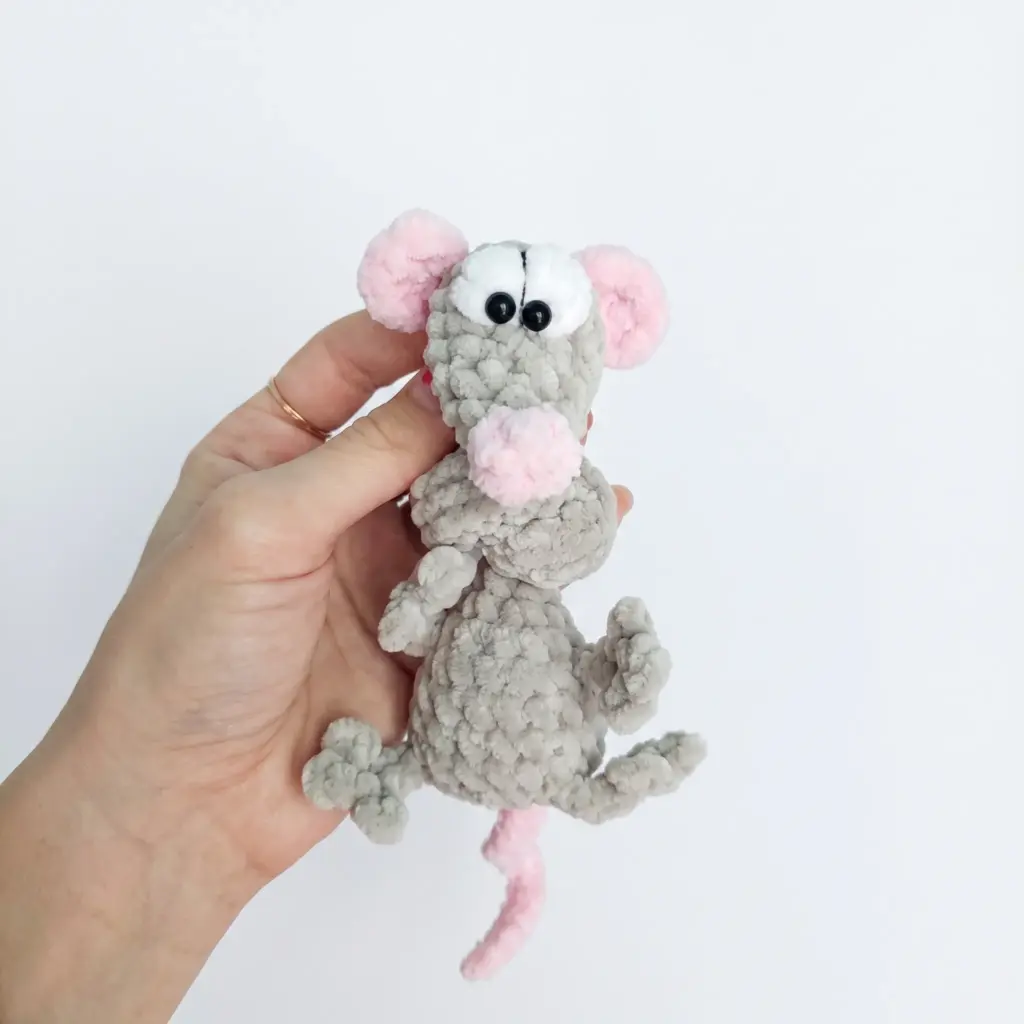
Tuck one of these little rats into a birthday card, clip it to a diaper bag, or line up a whole litter on a nursery shelf—either way, you’re making a character with round cheeks, pink ears, and a curled tail that people can’t help but pick up. This baby rats amigurumi pattern gives you two versions to choose from: a Long-Neck Rat with a slender, poseable neck perfect for draping over curtain rods or bag straps, and a Little Baby Rat with a compact, huggable body that’s ideal for smaller hands. Both are worked at a beginner-to-intermediate level, so if you’ve made a handful of amigurumi before, you’re ready. Each rat starts the same way—a rounded head with tucked-in eyes, soft pink ears, and a velvety plush texture—before branching into two distinct body shapes.
Our Touch: Gift and Use Ideas
While the plush texture makes these rats naturally appealing as nursery decor, their unique construction opens up some creative gifting opportunities. The Long-Neck Rat is exceptionally versatile for “surprise” gifts; its flexible neck allows you to weave it through the handles of tote bags or drape it over the edge of a crib mobile for a whimsical touch. For a more traditional gift, the Little Baby Rat’s compact, sturdy body makes it a perfect companion for toddlers, offering a safe, soft toy that holds its shape well during play. Consider creating a “litter” of three in varying shades of gray to serve as a charming centerpiece for a baby shower or a themed birthday party. The subtle pink ears and bobble-stitch nose add just enough character to make each one feel like a distinct personality, whether you are making them for a market stall or a personal keepsake.
Project Overview
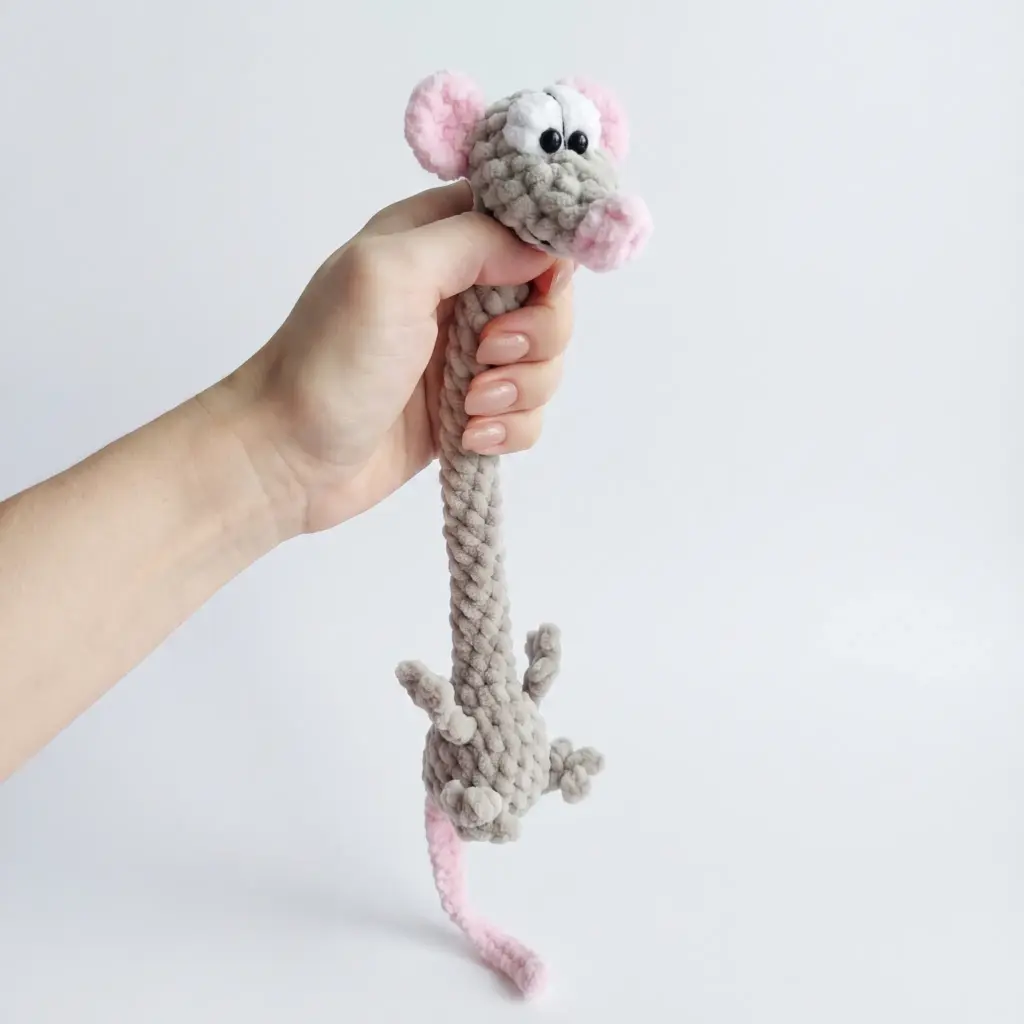
This pattern provides instructions for two distinct amigurumi rat designs that share a common head construction. The project is worked in continuous spiral rounds using US crochet terminology. Key features include built-in arms and tails created via chain and slip stitch techniques, eliminating the need for sewing separate limbs. The design utilizes plush or velvet weight yarn to achieve a soft, velvety finish that hides stitch definition.
Materials
- Yarn: Plush/velvet weight yarn (Bulky, 5) in White, Light Gray, or Dark Gray (main color), and Soft Pink.
- Hook: 4mm (US G-6).
- Safety Eyes: 6mm, 1 pair.
- Stuffing: Fiberfill stuffing.
- Tools: Stitch markers, yarn needle, scissors.
- Embroidery: Black cotton embroidery thread (for the mouth and optional stripe between the eyes).
- Details: White plush yarn scrap (for embroidering small teeth).
- Optional: Gel glue (for securing eyes).
Gauge and Finished Size
Gauge is not critical for this project. However, ensure your stitches are tight enough that stuffing doesn’t peek through, particularly around the white bobble-stitch patch on the head.
Abbreviations
- ch — Chain
- dc — Double Crochet
- dec — Decrease (invisible decrease)
- inc — Increase (2 sc in same stitch)
- MR — Magic Ring
- sc — Single Crochet
- sl st — Slip Stitch
Pattern Notes
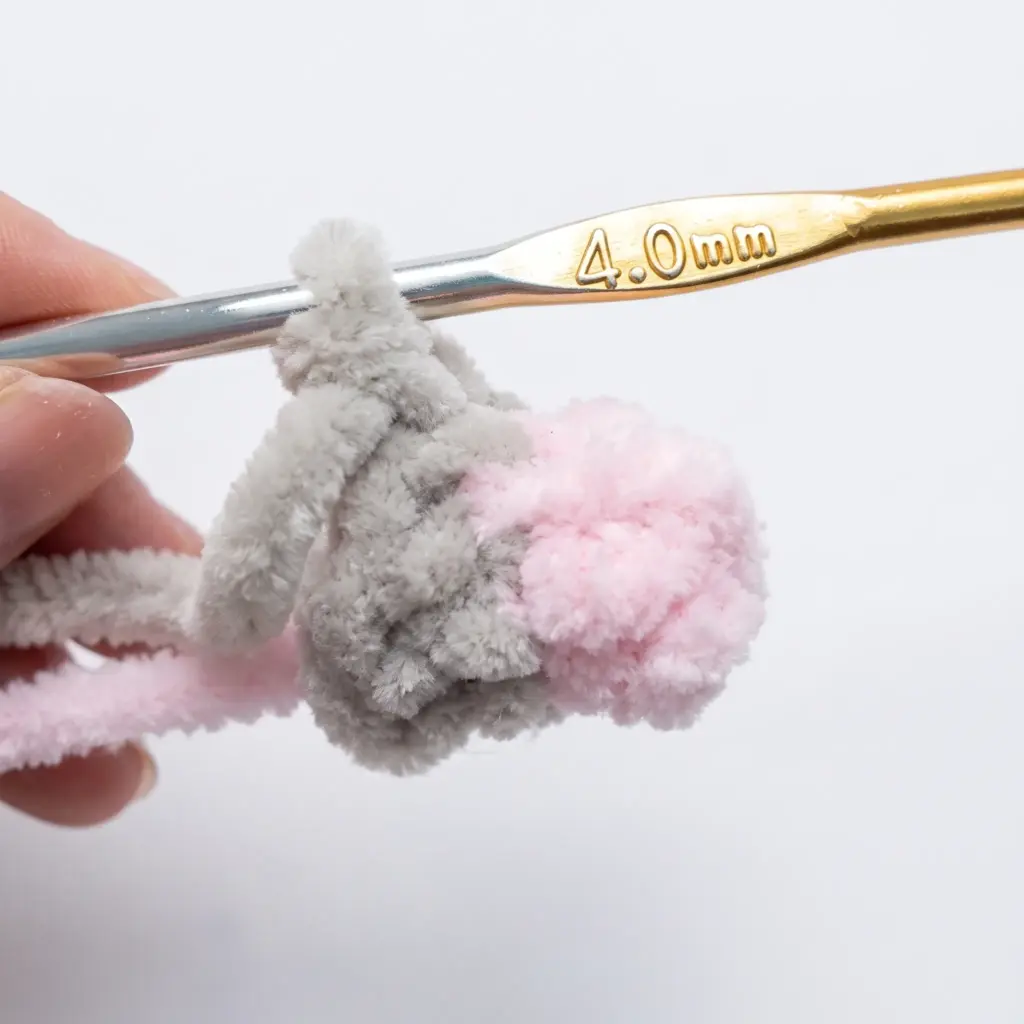
The head, neck, and body are worked in continuous spiral rounds; do not join or chain between rounds unless otherwise noted. Stitch counts are given at the end of each round in parentheses, like this: (12). Safety eyes are placed after the head is partially stuffed, then the head is cinched afterward so the eyes sit slightly recessed and the head nestles snugly against the neck. Arms and the tail are built directly into the body rounds using chains and slip stitches, rather than as separate pieces to sew on later.
Pattern Instructions
Head (make 1 per rat — used for both versions)
Work in Soft Pink.
Rnd 1: 6 sc in MR. (6)
Rnd 2: dec, sc repeat around, then switch to main color. (4) If you’d like pink ears later, leave the pink yarn attached instead of cutting it.
Rnd 3: 1 sc, inc repeat 2 times. (6)
Rnd 4: 1 sc, inc repeat 3 times. (9)
Rnd 5: sc in each st around. (9)
Rnd 6: 2 sc, inc repeat 3 times. (12)
Rnd 7: 5 sc, switch to White, work 2 bobble stitches (3 dc worked together with one shared top and base), fasten off and cut the white yarn, continue in main color with 5 sc. (12)
Rnd 8: sc in each st around. (12)
Rnd 9: 4 sc, then work the first ear: switch to Soft Pink if desired, ch 3, work 4 dc in the 3rd chain from hook, ch 2, then slip stitch into that same 3rd chain space. Switch back to main color if needed. Continue with 5 sc across the head, then work the second ear the same way — switch to Soft Pink if desired, ch 3, work 4 dc in the 3rd chain from hook, ch 2, slip stitch into the same space, switch back to main color (fasten off and cut the pink yarn if used). Continue with 2 sc across the head, then ch 3 and skip the next 3 stitches on the head to create the neck opening. Stuff the head firmly before closing. This is a good point to attach the safety eyes, positioning them on either side of the white bobble-stitch patch.
Rnd 10: dec 6 times, beginning right where the neck opening was created. Fasten off and close the opening. You can add more stuffing through the neck opening later if the head feels too soft.
Neck & Body — Long-Neck Rat
Join main-color yarn in the neck opening left above and work 6 sc to start the neck.
Rnds 11–36: sc in each of the 6 sts around (26 rounds total, 156 stitches). Do not stuff the neck — this is what allows it to bend and pose.
Rnd 37: inc in each st around. (12)
Rnd 38: 2 sc, then work the first arm: ch 7, starting from the 2nd chain from hook work 2 sl st, ch 2, starting from the 2nd chain work 2 sl st (one into the chain, one into the fork), ch 2, starting from the 2nd chain work 2 sl st, then work 4 sl st along the remaining chain of the arm. Continue across the body with 5 sc. Work the second arm the same way: ch 7, starting from the 2nd chain work 2 sl st, ch 2, starting from the 2nd chain work 2 sl st (one into the chain, one into the fork), ch 2, starting from the 2nd chain work 2 sl st, then 4 sl st along the remaining chain. Continue across the body with 5 sc. (12)
Rnd 39: 1 sc, inc repeat 6 times. (18)
Rnds 40–41: sc in each st around. (18)
Rnd 42: 4 sc, then work an arm the same way as before: ch 7, 2 sl st from the 2nd chain, ch 2, 2 sl st from the 2nd chain, ch 2, 2 sl st from the 2nd chain, then 4 sl st along the remaining chain. Continue across the body with 6 sc, then work the second arm identically, followed by 6 sc across the body. Continue with 6 more sc, then switch to Soft Pink and work the tail: ch 26, starting from the 2nd chain work 25 sl st, switch back to main color, fasten off and cut the pink yarn, then continue across the body with 2 sc. (18)
Rnd 43: 1 sc, dec repeat 6 times. (12) Stuff the body firmly at this point.
Rnd 44: dec 6 times. Fasten off and close the opening.
Neck & Body — Little Baby Rat
Join main-color yarn in the neck opening left above and work 6 sc to start the neck.
Rnds 11–12: sc in each st around. (6) Do not stuff this section — leaving it soft here lets the head press down snugly once you cinch it later.
Rnd 13: 1 sc, inc repeat 3 times. (9)
Rnd 14: 2 sc, inc repeat 3 times. (12)
Rnd 15: sc in each st around. (12)
Rnd 16: Work the first arm: ch 7, starting from the 2nd chain from hook work 2 sl st, ch 2, starting from the 2nd chain work 2 sl st (one into the chain, one into the fork), ch 2, starting from the 2nd chain work 2 sl st, then 4 sl st along the remaining chain. Continue across the body with 5 sc. Work the second arm the same way, then continue across the body with 7 sc. (12)
Rnd 17: 1 sc, inc repeat 6 times. (18) Stuff the neck now, except for the very first section worked in Rnds 11–12.
Rnds 18–20: sc in each st around. (18)
Rnd 21: 1 sc, then work the first arm: ch 7, 2 sl st from the 2nd chain, ch 2, 2 sl st from the 2nd chain (one into the chain, one into the fork), ch 2, 2 sl st from the 2nd chain, then 4 sl st along the remaining chain. Continue across the body with 6 sc. Work the second arm identically, then continue with 6 sc. Switch to Soft Pink and work the tail: ch 26, starting from the 2nd chain work 25 sl st, switch back to main color, fasten off and cut the pink yarn, then continue across the body with 5 sc. (18)
Rnd 22: 1 sc, dec repeat 6 times. (12) Stuff the body firmly at this point.
Rnd 23: dec 6 times. Fasten off and cinch the opening closed.
Assembly
With the Head already stuffed and its opening closed (Rnd 10 of the Head), and the Neck & Body already worked directly from that same opening, there are no separate pieces to sew together — the head, neck, arms, and tail are all built in one continuous piece. Thread a yarn needle with white cotton thread and cinch the top of the head slightly, pulling gently so the safety eyes sink in a touch and the head tips forward against the neck. Using black cotton thread, embroider a small mouth at the front of the muzzle, centered or offset slightly to one side. If desired, embroider a short straight stitch between the eyes for a subtle facial marking. Using a small scrap of white plush yarn, add two short stitches at the center of the mouth to suggest little front teeth. Weave in all remaining yarn tails through the body and trim close to the surface.
Tips
- Tension: Keep your tension snug and even throughout. Amigurumi worked in plush yarn hides small tension inconsistencies well, but stitches that are too loose will let stuffing show through, especially around the white bobble-stitch patch on the head.
- Invisible Decrease: For a clean invisible decrease, insert your hook into the front loop of the next stitch and the front loop of the following stitch before pulling up a loop and completing as normal. This keeps the decrease rounds smooth rather than bumpy.
- Stuffing: Stuff firmly but don’t overstuff. The head and body should feel dense and hold their shape when squeezed, but you shouldn’t be straining to close the final round. For the Long-Neck Rat especially, leaving the neck completely unstuffed is essential.
- Yarn Substitution: If you substitute yarn, stick with a plush or chenille-style yarn in a comparable bulky weight. Thinner yarns will make the rat noticeably smaller and may not hide stitch definition the way plush yarn does.
- Arms and Tail: The arm and tail construction — chaining, then working slip stitches back along that chain with a small fork at the base — is the trickiest part of this pattern. Go slowly on Rnd 38, 42, 16, and 21, and don’t be afraid to frog and retry the fork section a few times until the two little “toes” sit evenly.
Frequently Asked Questions
Can I use regular acrylic yarn instead of plush yarn?
While you can use other bulky yarns, the specific look of this pattern relies on the plush or velvet texture to hide stitch definition. Standard acrylic may show every stitch clearly, changing the aesthetic from “soft and velvety” to “textured and defined.”
How do I attach the safety eyes securely?
The pattern suggests placing eyes after the head is partially stuffed. You can use gel glue on the washer side of the safety eye for extra security, especially if the rat will be handled frequently by children. Ensure the eyes are positioned on either side of the white bobble-stitch patch.
Why are the arms and tail made with chains?
Building the limbs directly into the body rounds using chains and slip stitches creates a seamless look with no visible seams where limbs attach. It also allows for the unique “forked” toe detail at the base of the arms.
What is the difference between the two rat versions?
The primary difference is the neck and body length. The Long-Neck Rat has a 26-round neck that remains unstuffed for poseability, while the Little Baby Rat has a short neck and compact body, making it sturdier and more huggable.
How do I make the head tip forward?
During assembly, use a yarn needle and white cotton thread to cinch the top of the head slightly. Pulling gently will cause the safety eyes to sink in a touch and the head to tip forward against the neck, giving the rat a cute, inquisitive expression.
Pin This Crochet Pattern!