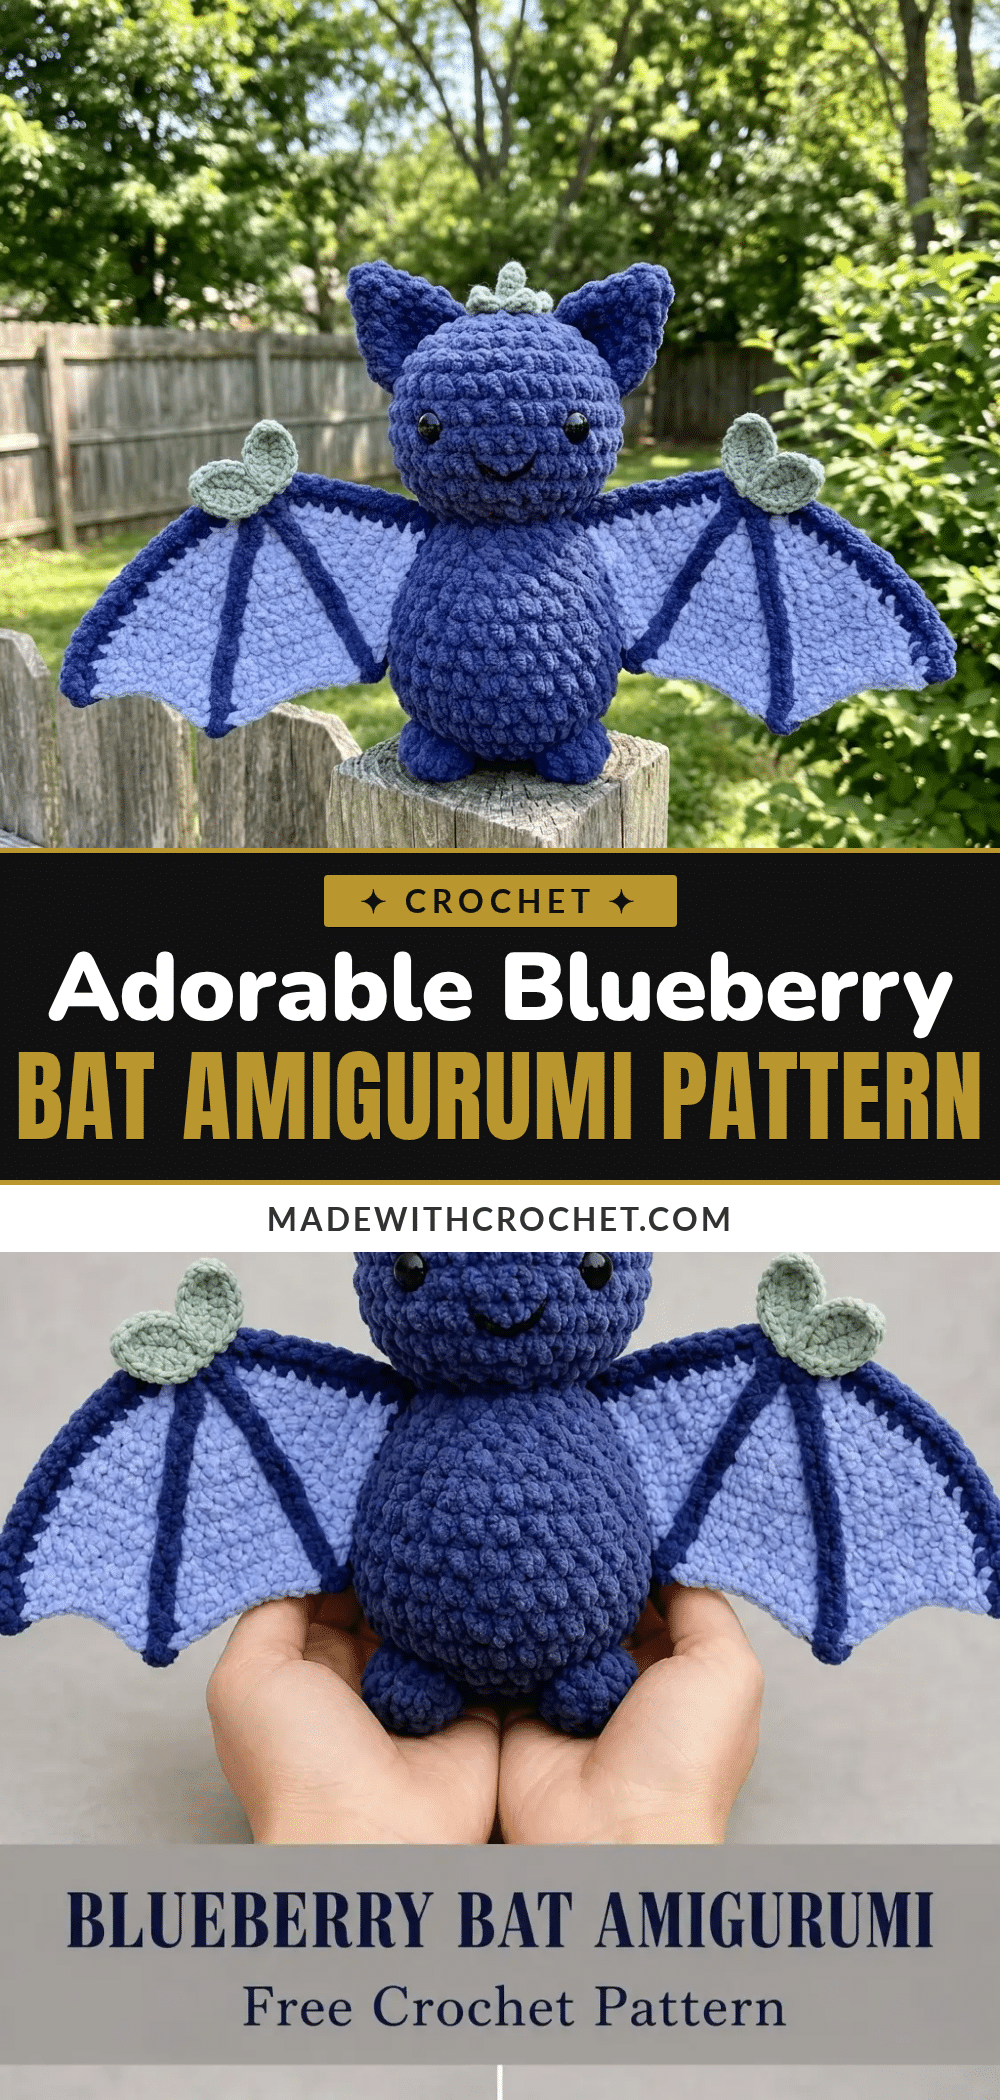
You know that gorgeous skein of velvet yarn you’ve been hoarding? The deep blue one that feels like a cloud but you can’t figure out what to make with it? This is the project. Dig into your stash and grab those chenille and velvet yarns, because this blueberry bat amigurumi is begging to be made. The construction is genuinely interesting. You’ll work bobble stitches that create a bumpy, berry-like texture on the body, then build flat wing panels with contrasting membrane sections and surface slip stitch veins. It all comes together into the cutest chubby bat you’ve ever seen. Fair warning: this is an intermediate project. If you’ve made a couple of simple amigurumi before, you can absolutely handle it. But if you’re brand new to crochet, I’d suggest starting with something simpler first. This one has multiple pieces, color changes, and flat panel construction mixed with working in the round. Totally doable with patience, just not a first project.
Why the Finished Piece Stands Out
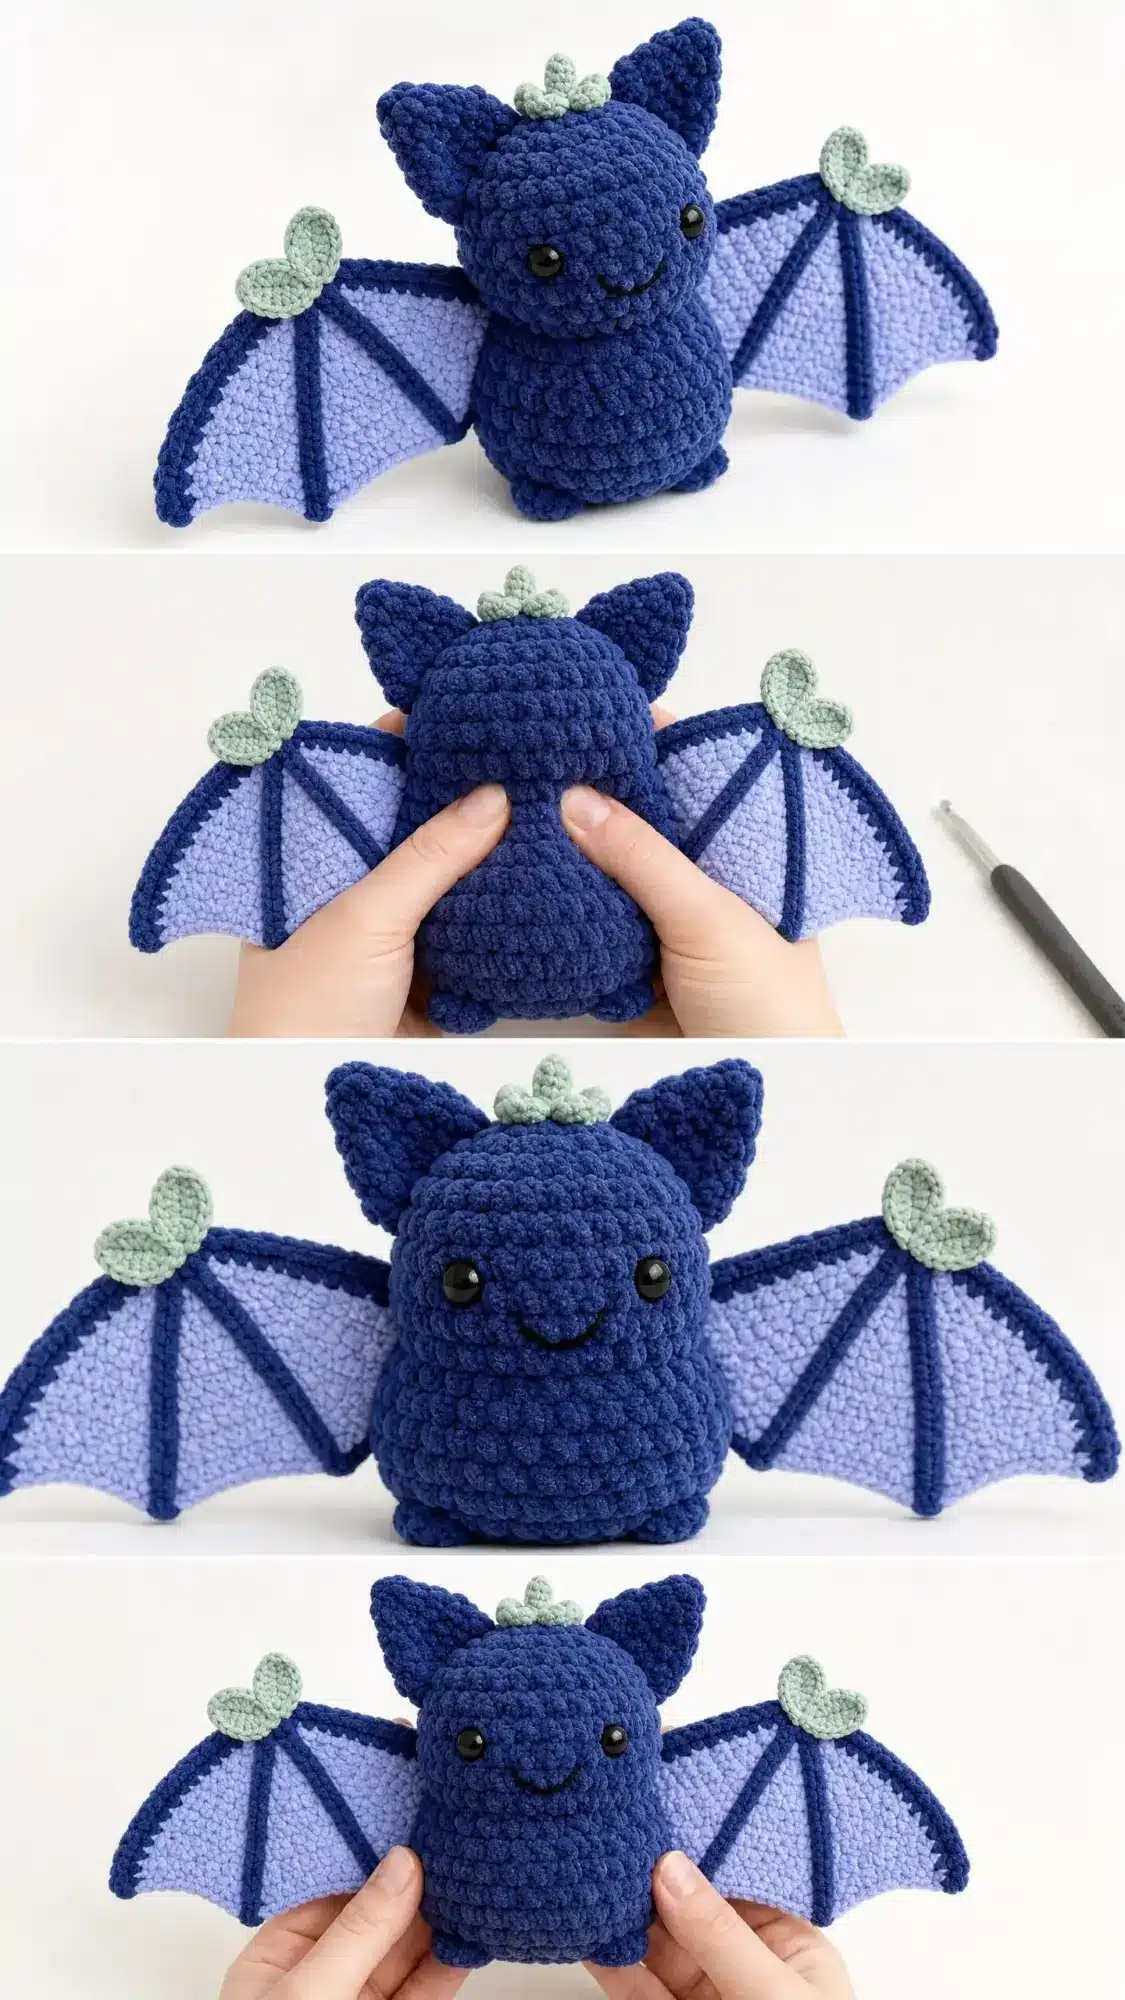
This little guy stands about 7 inches tall with a 10-inch wingspan when finished. He’s got that irresistible top-heavy chibi proportion with a big round head, tiny body, and outstretched wings that make him look like he’s ready for a hug. The bobble stitch texture on the body creates that distinctive blueberry cluster look. When you use velvet or chenille yarn, the nap of the fibers enhances this effect beautifully. Add in the pale periwinkle wing membranes, sage green leaf accents on top of his head, and those adorable safety eyes, and you’ve got a finished piece that looks far more complicated than it actually is. Perfect for gifts for bat lovers, Halloween decor that isn’t scary, nursery decorations, or just treating yourself to a satisfying project.
Project Overview
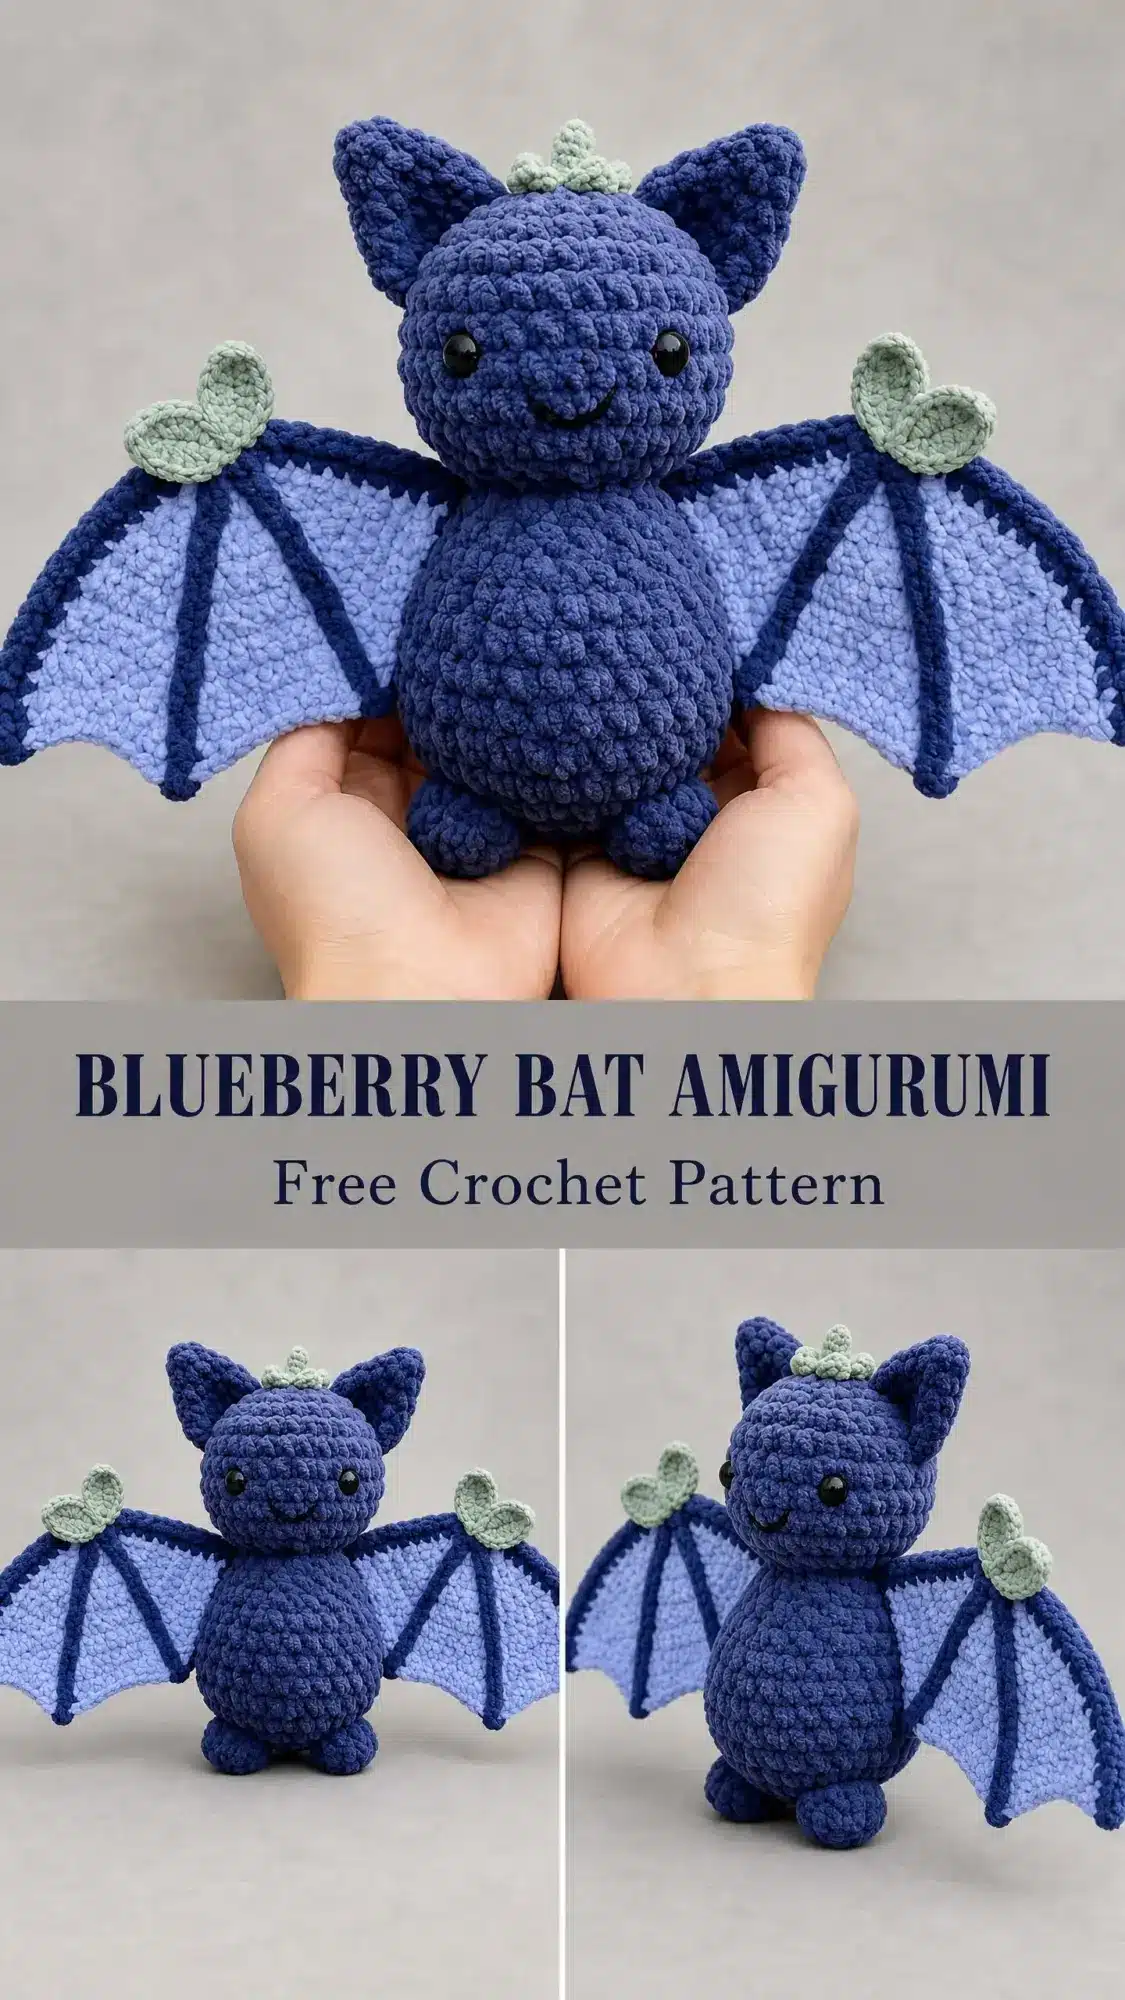
This Blueberry Bat Amigurumi is an intermediate-level crochet project. You will create a chubby bat with a bumpy blueberry-textured body, large round head, flat wings with contrasting membrane panels, and leafy accents. The finished bat is adorable, giftable, and perfect for display.
Materials
Yarn
You’ll need three colors of medium weight worsted (size 4) chenille or velvet yarn:
- Color A (Main, dark blueberry blue): approximately 200 yards (183 m)
- Color B (Wing membrane, pale periwinkle blue): approximately 80 yards (73 m)
- Color C (Accent, sage green): approximately 25 yards (23 m)
Yarn suggestions: Bernat Velvet works beautifully for this. Try “Blackbird” or “Navy Night” for Color A, “Blue Sapphire” for Color B, and “Sage” for Color C. Lion Brand Pound of Love Velvet also works well. Important: Velvet or chenille yarn is strongly recommended because the nap creates that distinctive blueberry-cluster texture. If you substitute smooth worsted yarn, work the bobble stitch on every round instead of every other round to maintain the visual effect.
Hook and Notions
- US size G-6 (4.0 mm) crochet hook
- Pair of 12 mm black safety eyes
- Polyester fiberfill stuffing
- At least 3 stitch markers
- Yarn needle
- Scissors
- Straight pins
- Optional: small amount of black embroidery floss for the smile
Gauge and Finished Size
With velvet worsted yarn and US G-6 (4.0 mm) hook in single crochet (sc) spiral rounds: 16 sc = 4 inches (10 cm) and 18 rounds = 4 inches (10 cm). Gauge matters here for achieving the correct finished size and a tight enough fabric to hold the stuffing securely.
Abbreviations
Let me walk you through every stitch and abbreviation you’ll encounter:
- sc (single crochet): Insert hook in stitch, yarn over, pull up a loop, yarn over, pull through both loops
- sl st (slip stitch): Insert hook, yarn over, pull through stitch and loop on hook in one motion
- ch (chain): Yarn over, pull through loop on hook
- st(s) (stitch/stitches): The individual loops you work into
- inc (increase): Work 2 sc in the same stitch, turning one stitch into two
- dec (invisible decrease): Insert hook in front loop only of next stitch, then insert hook in front loop only of following stitch, yarn over, pull through both front loops, yarn over, pull through remaining 2 loops
- BLO (back loop only): Work into only the back loop of the stitch
- FLO (front loop only): Work into only the front loop of the stitch
- MR (magic ring): An adjustable starting ring that closes completely with no hole
- pm (place marker): Put a stitch marker in the indicated stitch
- rnd(s) (round/rounds): One complete trip around the work
- bo (bobble stitch): See special stitch instructions below
Special Stitches
Bobble Stitch (bo)
This creates the bumpy blueberry texture. Here’s how to work it:
- Yarn over, insert hook into indicated stitch
- Yarn over and pull up a loop (3 loops on hook)
- Yarn over and pull through 2 loops only (2 loops remain)
- Yarn over, insert hook into the SAME stitch again
- Yarn over and pull up a loop (4 loops on hook)
- Yarn over and pull through 2 loops (3 loops on hook)
- Yarn over, insert hook into the SAME stitch again
- Yarn over and pull up a loop (5 loops on hook)
- Yarn over and pull through 2 loops (4 loops on hook)
- Yarn over and pull through all 4 loops on hook
One bobble complete. It counts as 1 stitch and pops to the outside of your work.
Surface Slip Stitch (for wing veins)
With right side facing and yarn attached, insert hook through the fabric, pull up a loop, then continue inserting the hook through the fabric at even intervals and pulling each new loop through the previous loop. This creates a raised cord on the surface.
Pattern Notes
- The body and head are worked in continuous spiral rounds. Don’t join or turn at round ends. Use a stitch marker to track the first stitch of each round.
- Bobble texture rounds alternate with plain sc rounds on the body and head. The bobble side faces outward.
- The wings are worked flat in rows with color changes for the membrane sections.
- Stuff firmly as you go. Add more stuffing before the final closure rounds.
- Insert safety eyes before closing the head. You cannot add them after the head is fully closed.
- The construction order is: body, head, ears, crown leaves, wings, thumb claw leaves, assembly, finishing.
Pattern Instructions
Body
Work in continuous spiral rounds with Color A.
- Rnd 1: MR, 6 sc in ring. (6 sc)
- Rnd 2: Inc in each st around. (12 sc)
- Rnd 3: (Sc in next st, inc in next st) rep 6 times. (18 sc)
- Rnd 4: (Sc in next 2 sts, inc in next st) rep 6 times. (24 sc)
- Rnd 5: (Sc in next 3 sts, inc in next st) rep 6 times. (30 sc)
- Rnd 6: (Sc in next 4 sts, inc in next st) rep 6 times. (36 sc)
- Rnd 7: (Bo in next st, sc in next st) rep 18 times. (36 sts)
- Rnd 8: Sc in each st around. (36 sc)
- Rnd 9: (Bo in next st, sc in next st) rep 18 times. (36 sts)
- Rnd 10: Sc in each st around. (36 sc)
- Rnd 11: (Bo in next st, sc in next st) rep 18 times. (36 sts)
- Rnd 12: Sc in each st around. (36 sc)
- Rnd 13: (Bo in next st, sc in next st) rep 18 times. (36 sts)
- Rnd 14: Sc in each st around. (36 sc)
- Rnd 15: (Sc in next 4 sts, dec over next 2 sts) rep 6 times. (30 sc)
- Rnd 16: (Sc in next 3 sts, dec over next 2 sts) rep 6 times. (24 sc)
Do not fasten off. Begin stuffing body firmly with fiberfill.
- Rnd 17: (Sc in next 2 sts, dec over next 2 sts) rep 6 times. (18 sc)
- Rnd 18: (Sc in next st, dec over next 2 sts) rep 6 times. (12 sc)
- Rnd 19: Dec over next 2 sts rep 6 times. (6 sc)
Add final stuffing. Thread yarn needle with tail, run through all 6 remaining sts, pull tight to close. Fasten off and weave in end.
Body Checkpoint: Should measure approximately 3 inches tall by 3.5 inches wide. Should feel firm to the touch.
Head
Work in continuous spiral rounds with Color A.
- Rnd 1: MR, 6 sc in ring. (6 sc)
- Rnd 2: Inc in each st around. (12 sc)
- Rnd 3: (Sc in next st, inc in next st) rep 6 times. (18 sc)
- Rnd 4: (Sc in next 2 sts, inc in next st) rep 6 times. (24 sc)
- Rnd 5: (Sc in next 3 sts, inc in next st) rep 6 times. (30 sc)
- Rnd 6: (Sc in next 4 sts, inc in next st) rep 6 times. (36 sc)
- Rnd 7: (Bo in next st, sc in next st) rep 18 times. (36 sts)
- Rnd 8: Sc in each st around. (36 sc)
- Rnd 9: (Bo in next st, sc in next st) rep 18 times. (36 sts)
- Rnd 10: Sc in each st around. (36 sc)
- Rnd 11: (Bo in next st, sc in next st) rep 18 times. (36 sts)
- Rnd 12: Sc in each st around. (36 sc)
- Rnd 13: (Bo in next st, sc in next st) rep 18 times. (36 sts)
- Rnd 14: Sc in each st around. (36 sc)
Insert safety eyes now between Rnds 9 and 10, approximately 8 stitches apart centered on the front of the head. Position them in the lower half of the head sphere for that wide-eyed look. Secure backings firmly.
- Rnd 15: (Sc in next 4 sts, dec over next 2 sts) rep 6 times. (30 sc)
Begin stuffing head firmly.
- Rnd 16: (Sc in next 3 sts, dec over next 2 sts) rep 6 times. (24 sc)
- Rnd 17: (Sc in next 2 sts, dec over next 2 sts) rep 6 times. (18 sc)
Add final stuffing.
- Rnd 18: (Sc in next st, dec over next 2 sts) rep 6 times. (12 sc)
- Rnd 19: Dec over next 2 sts rep 6 times. (6 sc)
Close as for body. Fasten off, leaving a 12-inch (30 cm) tail for sewing to body.
Head Checkpoint: Should measure approximately 4 inches in diameter, noticeably larger than the body.
Ears (Make 2)
Worked flat in rows with Color A.
- Ch 2 to start (does not count as a stitch).
- Row 1 (RS): 3 sc in second ch from hook. Turn. (3 sc)
- Row 2: Ch 1, inc in first st, sc in next st, inc in last st. Turn. (5 sc)
- Row 3: Ch 1, inc in first st, sc in next 3 sts, inc in last st. Turn. (7 sc)
- Row 4: Ch 1, inc in first st, sc in next 5 sts, inc in last st. Turn. (9 sc)
- Row 5: Ch 1, sc in each st across. Turn. (9 sc)
- Row 6: Ch 1, inc in first st, sc in next 7 sts, inc in last st. Turn. (11 sc)
- Row 7: Ch 1, sc in each st across. Turn. (11 sc)
- Row 8: Ch 1, sc in each st across. Turn. (11 sc)
- Row 9: Ch 1, dec over first 2 sts, sc in next 7 sts, dec over last 2 sts. Turn. (9 sc)
- Row 10: Ch 1, dec over first 2 sts, sc in next 5 sts, dec over last 2 sts. Turn. (7 sc)
- Row 11: Ch 1, dec over first 2 sts, sc in next 3 sts, dec over last 2 sts. Turn. (5 sc)
- Row 12: Ch 1, dec over first 2 sts, sc in next st, dec over last 2 sts. Turn. (3 sc)
- Row 13: Ch 1, draw up loop in each of 3 sts, yo, pull through all 4 loops. Fasten off leaving a sewing tail.
Do not stuff ears. Fold the ear base slightly (pinch the bottom corners together) to create a cupped ear shape.
Crown Leaf Points (Make 3)
Worked in rows with Color C.
- Ch 2 to start (does not count as a stitch).
- Row 1 (RS): 3 sc in second ch from hook. Turn. (3 sc)
- Row 2: Ch 1, inc in first st, sc in next st, inc in last st. Turn. (5 sc)
- Row 3: Ch 1, inc in first st, sc in next 3 sts, inc in last st. Turn. (7 sc)
- Row 4: Ch 1, inc in first st, sc in next 5 sts, inc in last st. Turn. (9 sc)
- Row 5: Ch 1, sc in each st across. Turn. (9 sc)
- Row 6: Ch 1, inc in first st, sc in next 7 sts, inc in last st. Turn. (11 sc)
- Row 7: Ch 1, sc in each st across. Turn. (11 sc)
- Row 8: Ch 1, sc in each st across. Turn. (11 sc)
- Row 9: Ch 1, dec over first 2 sts, sc in next 7 sts, dec over last 2 sts. Turn. (9 sc)
- Row 10: Ch 1, dec over first 2 sts, sc in next 5 sts, dec over last 2 sts. Turn. (7 sc)
- Row 11: Ch 1, dec over first 2 sts, sc in next 3 sts, dec over last 2 sts. Turn. (5 sc)
- Row 12: Ch 1, dec over first 2 sts, sc in next st, dec over last 2 sts. Turn. (3 sc)
- Row 13: Ch 1, draw up loop in each of 3 sts, yo, pull through all 4 loops. Fasten off leaving a sewing tail.
Do not stuff leaves.
Wings (Make 2)
Each wing is a flat panel using Color A for the border and veins, Color B for the inner membrane.
Wing Foundation
With Color A, ch 42.
- Row 1 (RS): Sc in 2nd ch from hook and each ch across. (41 sc)
- Row 2: Ch 1, turn. Sc in each st across. (41 sc)
- Row 3: Ch 1, turn. Sc in first 33 sts. Leave last 8 sts unworked. (33 sc)
- Row 4: Ch 1, turn. Sc in each st across. (33 sc)
- Row 5: Ch 1, turn. Dec over first 2 sts, sc in next 29 sts, dec over last 2 sts. (31 sc)
- Row 6: Ch 1, turn. Sc in each st across. (31 sc)
- Row 7: Ch 1, turn. Dec over first 2 sts, sc in next 27 sts, dec over last 2 sts. (29 sc)
- Row 8: Ch 1, turn. Sc in each st across. (29 sc)
Mark stitch 6, stitch 12, stitch 18, stitch 24, and stitch 29.
Wing Finger Projections
Finger 1 (innermost, shortest): Work on sts 1 through 5 only.
- Row 9a: Ch 1, turn. Sc in first 5 sts. Turn. (5 sc)
- Row 10a: Ch 1, dec, sc in next st, dec. Turn. (3 sc)
- Row 11a: Ch 1, draw up loop in all 3 sts, yo, pull through all 4 loops. Fasten off.
Rejoin Color A at st 6 of Row 8 base.
Finger 2:
- Row 9b: Ch 1, sc in sts 6 through 11. Turn. (6 sc)
- Row 10b: Ch 1, dec, sc in next 2 sts, dec. Turn. (4 sc)
- Row 11b: Ch 1, dec, dec. Turn. (2 sc)
- Row 12b: Ch 1, draw up loop in both sts, yo, pull through all 3 loops. Fasten off.
Rejoin Color A at st 12 of Row 8 base.
Finger 3:
- Row 9c: Ch 1, sc in sts 12 through 18. Turn. (7 sc)
- Row 10c: Ch 1, dec, sc in next 3 sts, dec. Turn. (5 sc)
- Row 11c: Ch 1, dec, sc in next st, dec. Turn. (3 sc)
- Row 12c: Ch 1, draw up loop in all 3 sts, yo, pull through 4 loops. Fasten off.
Rejoin Color A at st 19 of Row 8 base.
Finger 4:
- Row 9d: Ch 1, sc in sts 19 through 25. Turn. (7 sc)
- Row 10d: Ch 1, dec, sc in next 3 sts, dec. Turn. (5 sc)
- Row 11d: Ch 1, dec, sc in next st, dec. Turn. (3 sc)
- Row 12d: Ch 1, draw up loop in all 3 sts, yo, pull through 4 loops. Fasten off.
Rejoin Color A at st 26 of Row 8 base.
Finger 5 (outer tip, longest):
- Row 9e: Ch 1, sc in sts 26 through 29. Turn. (4 sc)
- Row 10e: Ch 1, sc in each st. Turn. (4 sc)
- Row 11e: Ch 1, dec, dec. Turn. (2 sc)
- Row 12e: Ch 1, sc in each st. Turn. (2 sc)
- Row 13e: Ch 1, draw up loop in both sts, yo, pull through 3 loops. Fasten off.
Wing Membrane Fill
With Color B, work surface single crochet across each interior panel between the fingers, filling the spaces between vein lines. Cover all Color A base rows in those areas with Color B.
Wing Veins
With Color A, work surface slip stitch from the base of each finger down to the bottom edge of the wing. This creates 4 to 5 dark vein lines. Fasten off each vein separately.
Wing Edging
With Color A, work 1 round of sc evenly around the entire wing perimeter, placing 3 sc in each corner and decreasing at inner corners between fingers to keep work flat. Sl st to first sc to join. Fasten off.
Wing Checkpoint: Each wing should measure approximately 5 inches tall by 5.5 inches wide.
Thumb Claw Leaves (Make 2)
Worked in rows with Color C.
- Ch 2 to start (does not count as a stitch).
- Row 1 (RS): 3 sc in second ch from hook. Turn. (3 sc)
- Row 2: Ch 1, inc in first st, sc in next st, inc in last st. Turn. (5 sc)
- Row 3: Ch 1, inc in first st, sc in next 3 sts, inc in last st. Turn. (7 sc)
- Row 4: Ch 1, inc in first st, sc in next 5 sts, inc in last st. Turn. (9 sc)
- Row 5: Ch 1, sc in each st across. Turn. (9 sc)
- Row 6: Ch 1, inc in first st, sc in next 7 sts, inc in last st. Turn. (11 sc)
- Row 7: Ch 1, sc in each st across. Turn. (11 sc)
- Row 8: Ch 1, sc in each st across. Turn. (11 sc)
- Row 9: Ch 1, dec over first 2 sts, sc in next 7 sts, dec over last 2 sts. Turn. (9 sc)
- Row 10: Ch 1, dec over first 2 sts, sc in next 5 sts, dec over last 2 sts. Turn. (7 sc)
- Row 11: Ch 1, dec over first 2 sts, sc in next 3 sts, dec over last 2 sts. Turn. (5 sc)
- Row 12: Ch 1, dec over first 2 sts, sc in next st, dec over last 2 sts. Turn. (3 sc)
- Row 13: Ch 1, draw up loop in each of 3 sts, yo, pull through all 4 loops. Fasten off leaving a sewing tail.
Do not stuff leaves.
Assembly
- Sew body to head. Position the closed base of the head centered on top of the body. Using the long tail and yarn needle, sew through every stitch for a firm join.
- Attach ears. Position each ear on the upper portion of the head at approximately the 10 o’clock and 2 o’clock positions, angled upward and outward. Pin and sew firmly.
- Attach crown leaves. Sew the 3 Color C leaf points to the top center of the head in a small fan shape with tips pointing upward.
- Attach wings. Position each wing against the side of the body, with the straight top edge at approximately mid-body level. Pin both wings before sewing to ensure symmetry.
- Attach thumb claw leaves. Sew one Color C leaf to the leading top edge of each wing, tip pointing upward.
- Embroider smile. Using black embroidery floss, embroider a small curved smile below and centered between the eyes. Use 3 to 4 straight stitches in a gentle upward curve.
- Weave in all remaining ends.
Finishing
Do not wet block the finished amigurumi. The stuffing will absorb water and take forever to dry. For the wings only, hold a steam iron about 1 inch above the fabric to relax any curl. Shape gently with your hands while warm.
Care Instructions
Machine wash cold on gentle cycle in a mesh laundry bag. Lay flat to dry. Do not put in the dryer. Do not iron directly on the body.
Safety note: This item contains small parts and is not suitable for children under 3 unless safety eyes are replaced with embroidered eyes.
Tips
- Use a stitch marker to keep track of the first stitch of each round when working in spirals.
- Stuff firmly as you go to achieve the correct shape and firmness.
- Pin wings in place before sewing to ensure they are symmetrical.
- If using smooth worsted yarn instead of velvet, work the bobble stitch on every round to maintain the blueberry texture.
FAQs
Can I use a different yarn weight for this pattern?
This pattern is designed for medium weight worsted (size 4) yarn. Using a different weight will change the finished size and gauge, and you may need to adjust your hook size accordingly.
How do I make the bobble stitch pop more?
Using velvet or chenille yarn enhances the bobble texture naturally. You can also work the bobble stitch slightly tighter to make it stand out more against the single crochet rounds.
Can I embroider the eyes instead of using safety eyes?
Yes, you can embroider the eyes with black yarn or embroidery floss. This is recommended if the amigurumi is intended for a child under 3 years old.
My wings are curling. What should I do?
You can gently steam block the wings by holding a steam iron about 1 inch above the fabric to relax any curl. Shape with your hands while warm.
How do I keep the head from flopping over?
Ensure you stuff the head and body firmly, especially at the neck area. Sewing the head securely to the body with a tight join will also help.
Can I make this pattern larger or smaller?
You can experiment with different yarn weights and hook sizes to change the scale, but this will affect the gauge and finished size. Adjust the number of stitches and rounds proportionally if you want to maintain the shape.
Pin This Crochet Pattern!