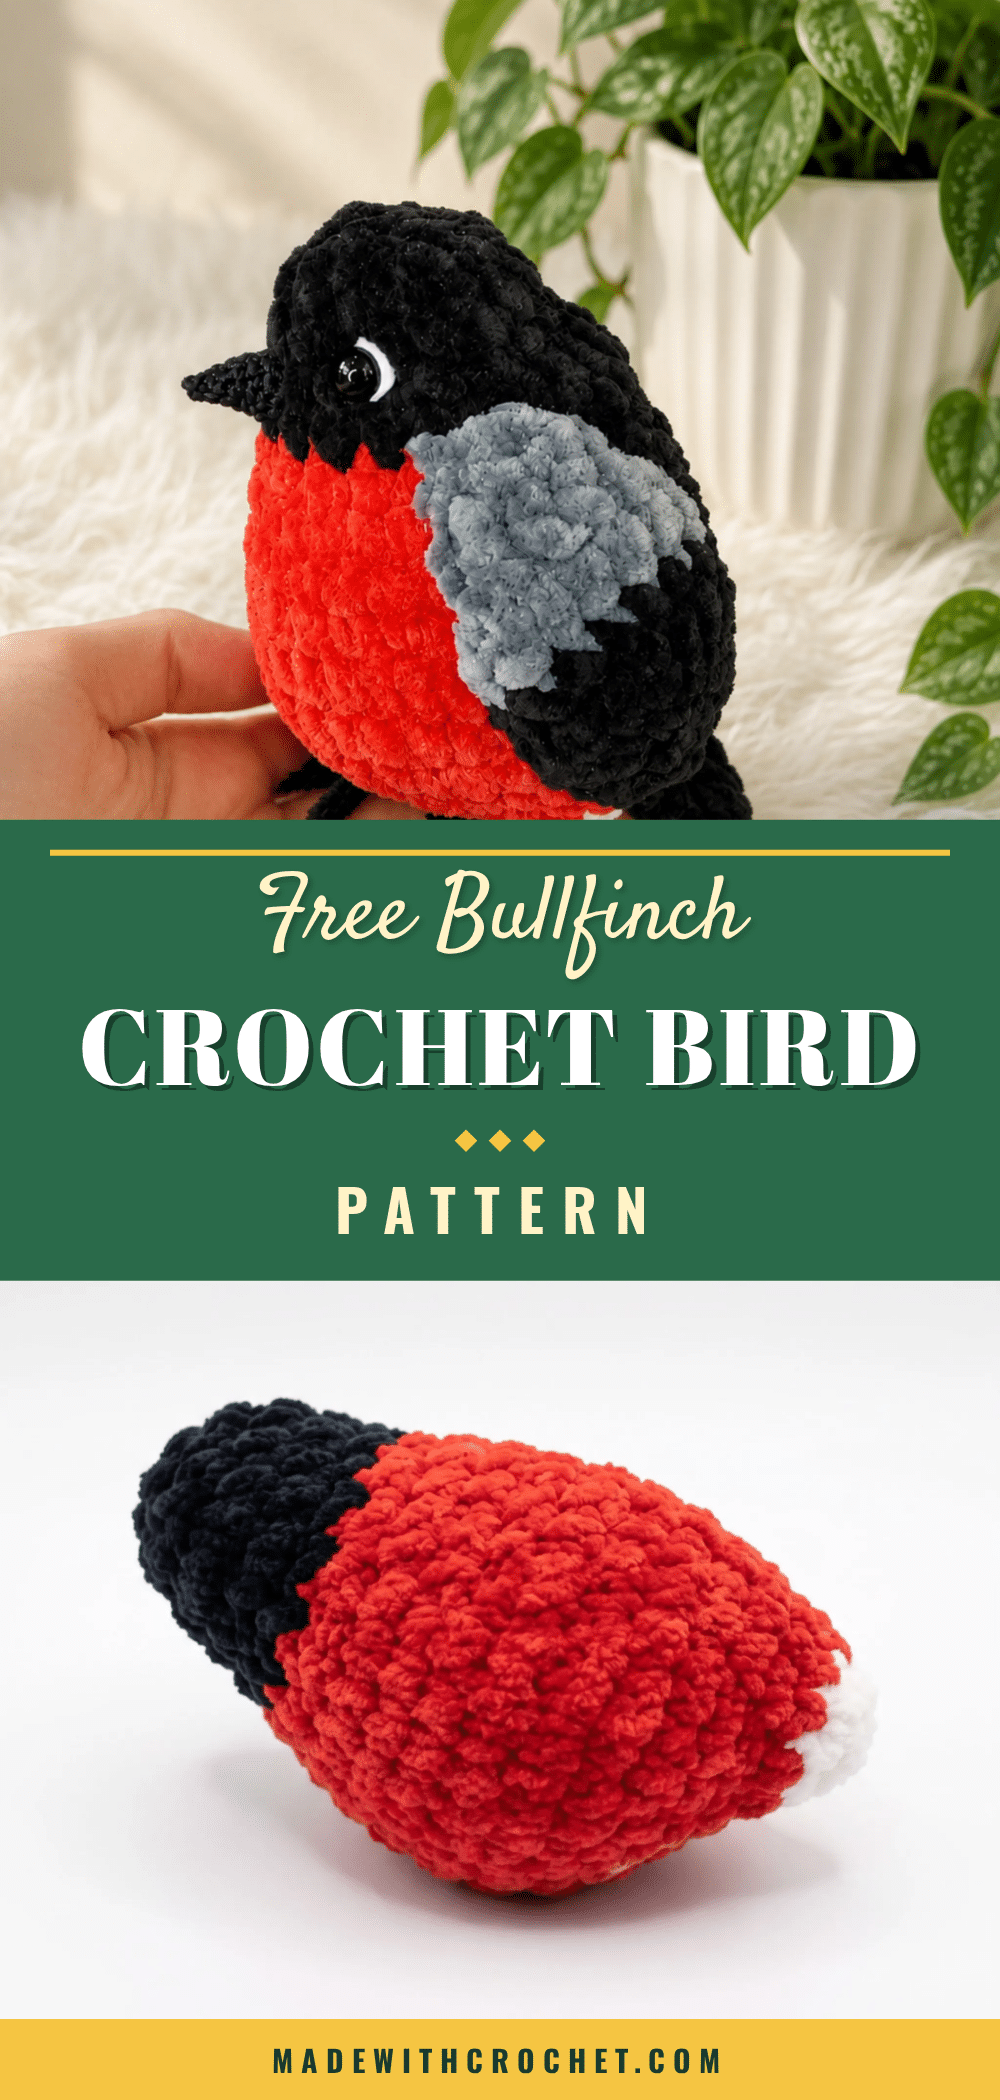
There’s something deeply satisfying about watching a ball of yarn transform into a tiny, three-dimensional creature, and this bullfinch amigurumi pattern delivers that joy in every round. The magic lies in the details: the way the red belly swells into a perfect curve, the precise color change that separates the black head from the gray wings, and the tiny beak that gives the bird its character. Each stitch builds on the last, creating a texture that feels both soft and structured. If you love projects where shaping and stitch work tell the story, this little bullfinch is ready to become your new favorite make.
Texture and Stitch Notes
This pattern shines because of its thoughtful construction. The body is worked in continuous spiral rounds, which creates a seamless, smooth surface that’s perfect for the bird’s rounded silhouette. The color changes are strategically placed to define the red belly, black head, and gray wings without any bulky joins. The back panel and wings are worked in flat, turned rows, adding a subtle texture contrast that mimics real feathers. The small, pointed beak, worked with a finer hook, adds a delicate finishing touch. Every element is designed to be both visually appealing and structurally sound, making this a project that’s as rewarding to crochet as it is to display.
Project Overview
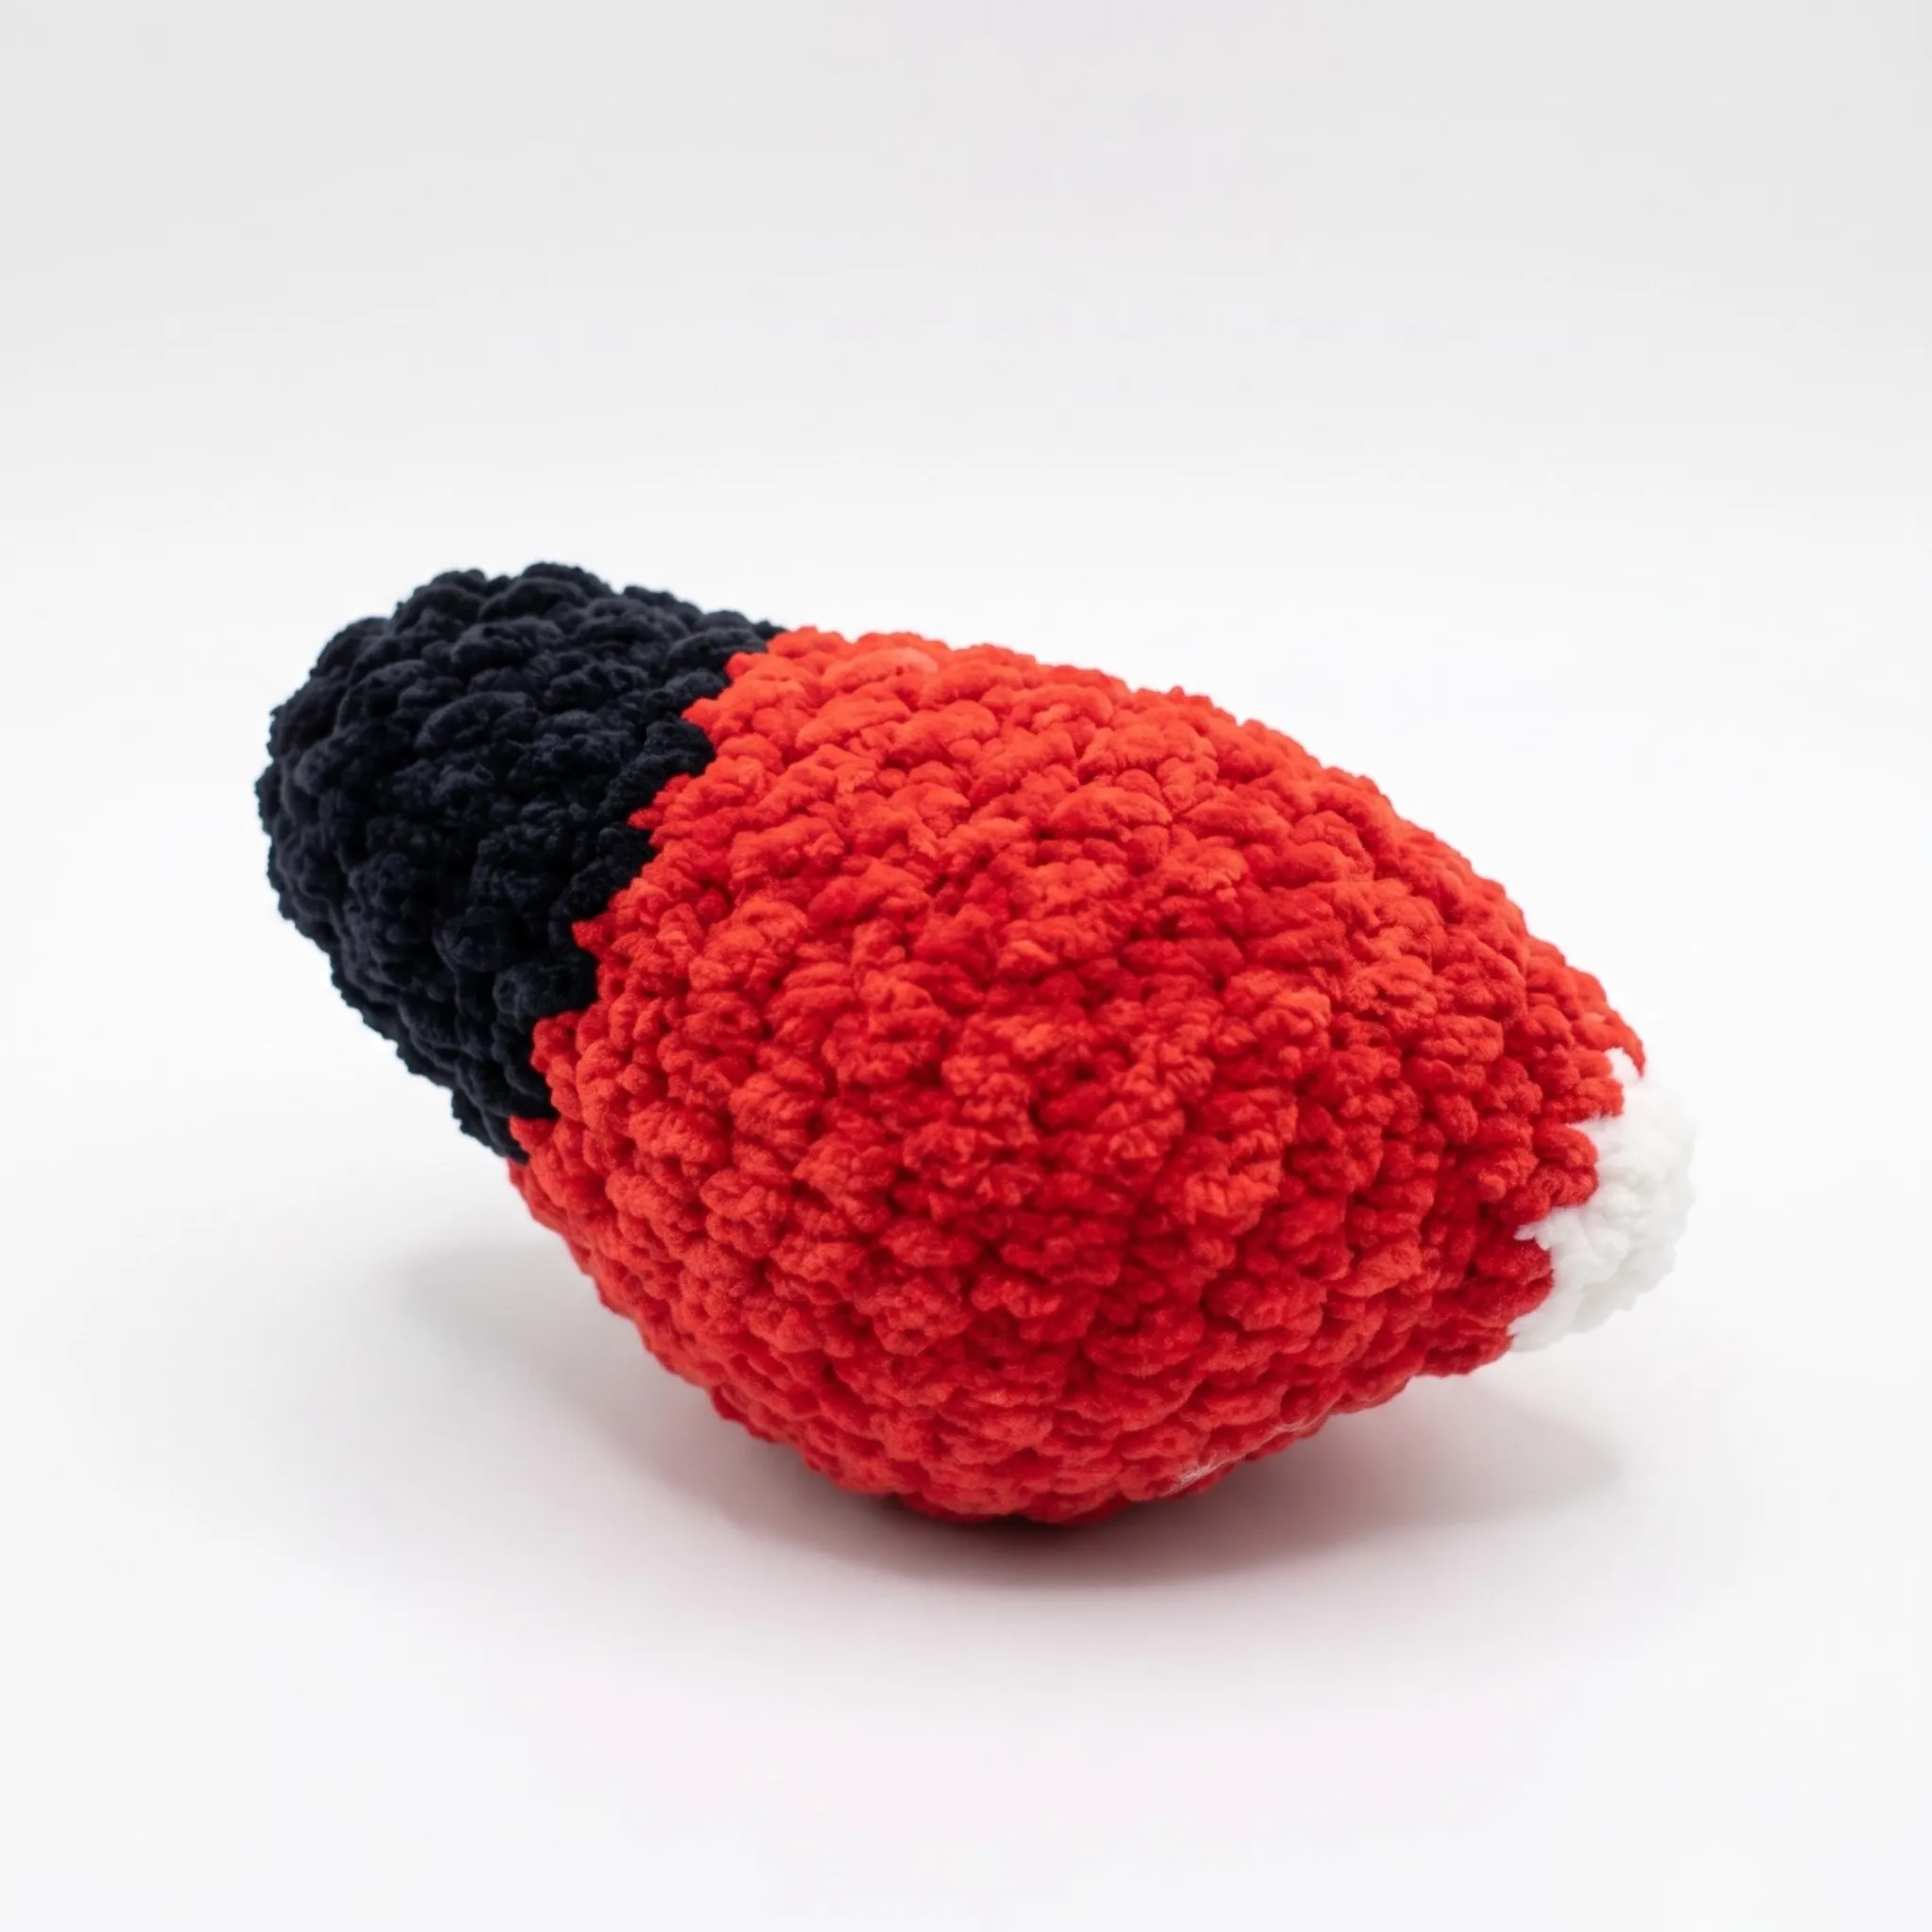
This bullfinch amigurumi pattern is written for confident beginners and intermediate crocheters who are comfortable with basic amigurumi shaping. You’ll build this bird piece by piece: a rounded body, a fitted back panel, two soft wings, and a tiny pointed beak, all finished with safety eyes for a lifelike expression. The whole project comes together with simple single crochet shaping, so if you’ve made an amigurumi animal before, you already have the skills you need.
Materials
- Yarn: Worsted weight plush/velvet yarn in black, red, small amounts of white, and gray
- Hook: US G-6 (4 mm) for the main pieces
- Hook: US steel size 8 (1.5 mm) for fine detail work on the beak
- Safety eyes: 6–8 mm, 1 pair
- Stuffing / fiberfill
- Stitch marker
- Yarn needle
- Scissors
- Sewing thread or fine black yarn for attaching the back panel, wings, and beak
Abbreviations
- ch — Chain
- dec — Decrease
- inc — Increase
- MR — Magic Ring
- Rnd — Round
- Row — Row
- sc — Single Crochet
- sl st — Slip Stitch
- st(s) — Stitch(es)
Pattern Notes
- This pattern is written in US crochet terminology.
- The body and beak are worked in continuous spiral rounds—do not join or chain between rounds; use a stitch marker to track the start of each round.
- The back panel and wings are worked in flat, turned rows; chain 1 and turn at the start of each new row.
- Gauge is not critical for this project—work at a tension tight enough that stuffing doesn’t peek through the stitches.
- Stitch counts are given at the end of each round or row in parentheses, like this: (12).
- Stuff the body firmly, paying extra attention to the belly area, before closing the final rounds.
- Safety eyes should be placed before you sew on the back panel, so you can check the finished expression from the front.
Pattern Instructions
Body
Begin with white yarn.
Rnd 1: 6 sc in MR. (6)
Rnd 2: inc in each st around. (12)
Change to red yarn.
Rnd 3: sc in each st around. (12)
Rnd 4: sc, inc repeat around. (18)
Rnd 5: 3 sc, sc, inc repeat around x6, 3 sc. (24)
Rnd 6: 3 sc, 2 sc, inc repeat around x6, 3 sc. (30)
Rnds 7–9: sc in each st around. (30)
Rnd 10: 3 sc, 2 sc, dec repeat around x6, 3 sc. (24)
Rnds 11–12: sc in each st around. (24)
Rnd 13: 3 sc, sc, dec repeat around x6, 3 sc. (18)
Change to black yarn.
Rnd 14: 7 sc, dec repeat around x2. (16)
Rnds 15–16: sc in each st around. (16)
Rnd 17: 2 sc, dec repeat around x4. (12)
Stuff the body firmly now, paying close attention to the belly, before closing the final round.
Rnd 18: 6 dec. (6)
Fasten off, leaving a yarn tail for closing.
Back Panel
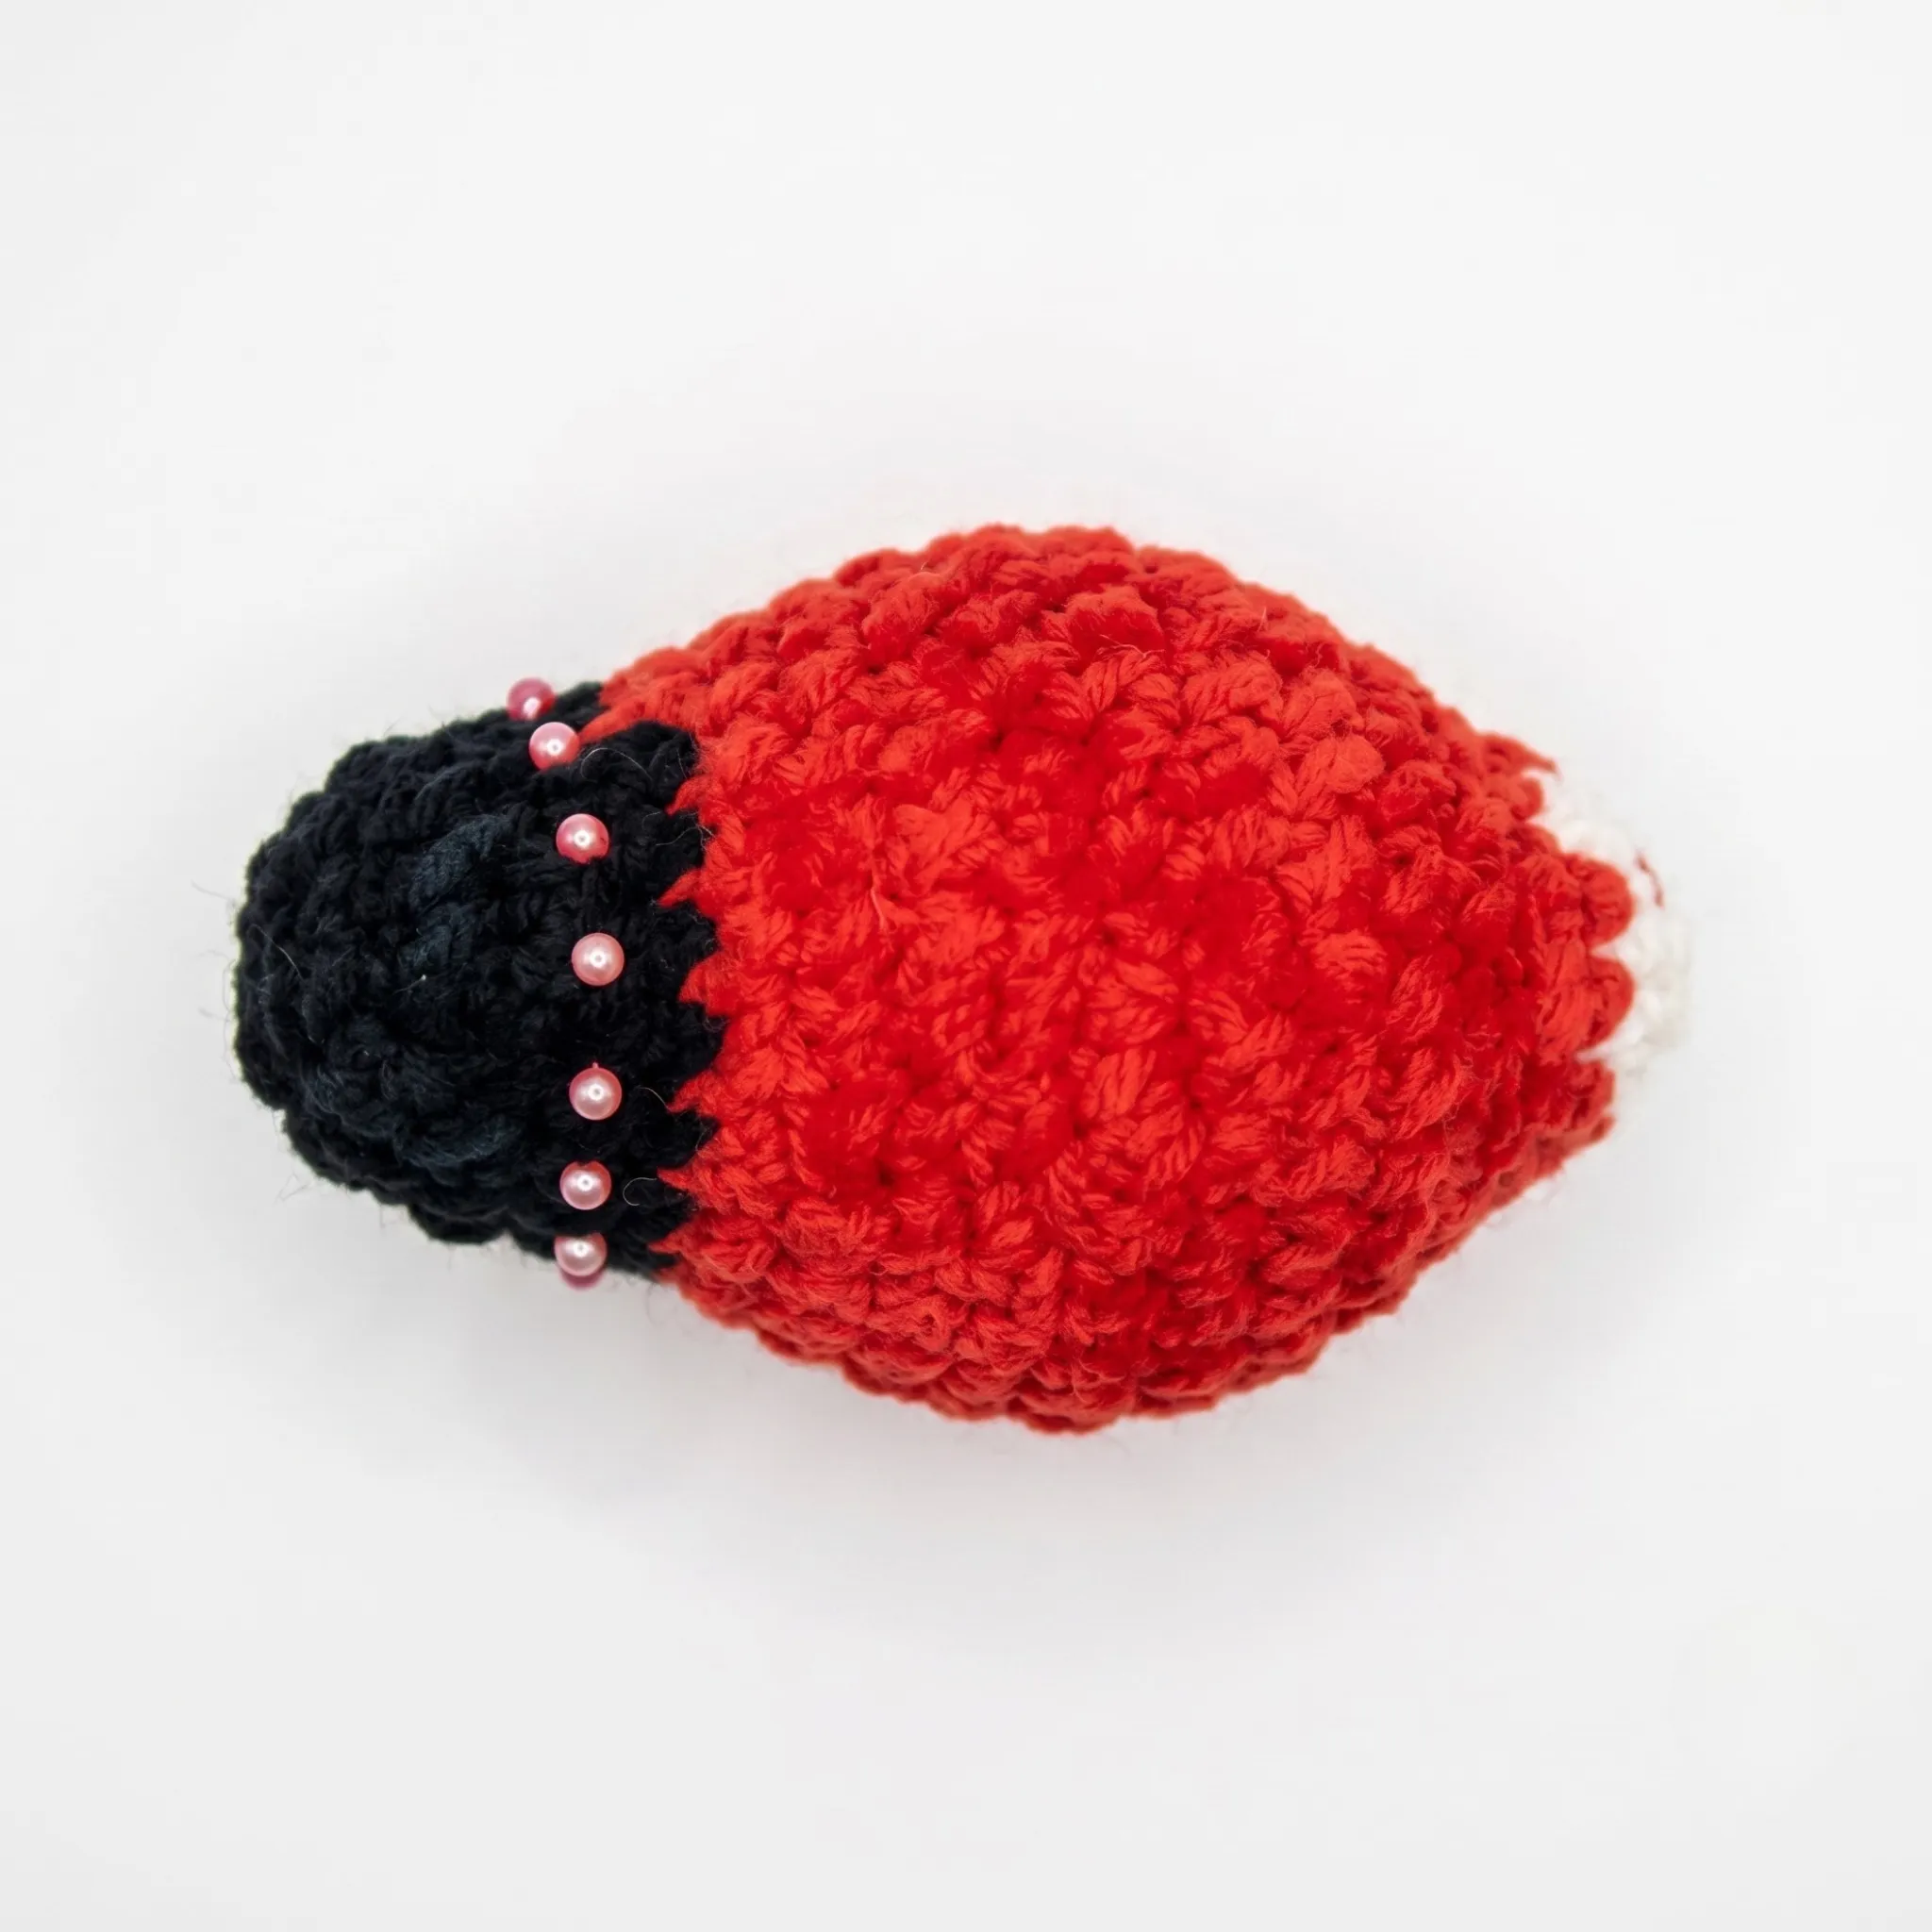
On the back of the head, mark 7 sts symmetrically and work 7 sc into them to begin. Chain 1 and turn at the start of every row that follows.
Row 1: sc across. (7)
Row 2: sc across. (7)
Row 3: inc, 5 sc, inc. (9)
Row 4: sc across. (9)
Row 5: sc across. (9)
Row 6: sc across. (9)
Row 7: sc, dec, 3 sc, dec, sc. (7)
Row 8: sc across. (7)
Row 9: sc, dec, sc, dec, sc. (5)
Row 10: sc across. (5)
Row 11: sc across. (5)
Row 12: sc across. (5)
Row 13: sc across. (5)
Row 14: sc, 2 dec. (3)
Row 15: sc across. (3)
Row 16: sc across. (3)
Row 17: sc across. (3)
Row 18: inc, sc, inc. (5)
Fasten off, leaving a long tail for sewing.
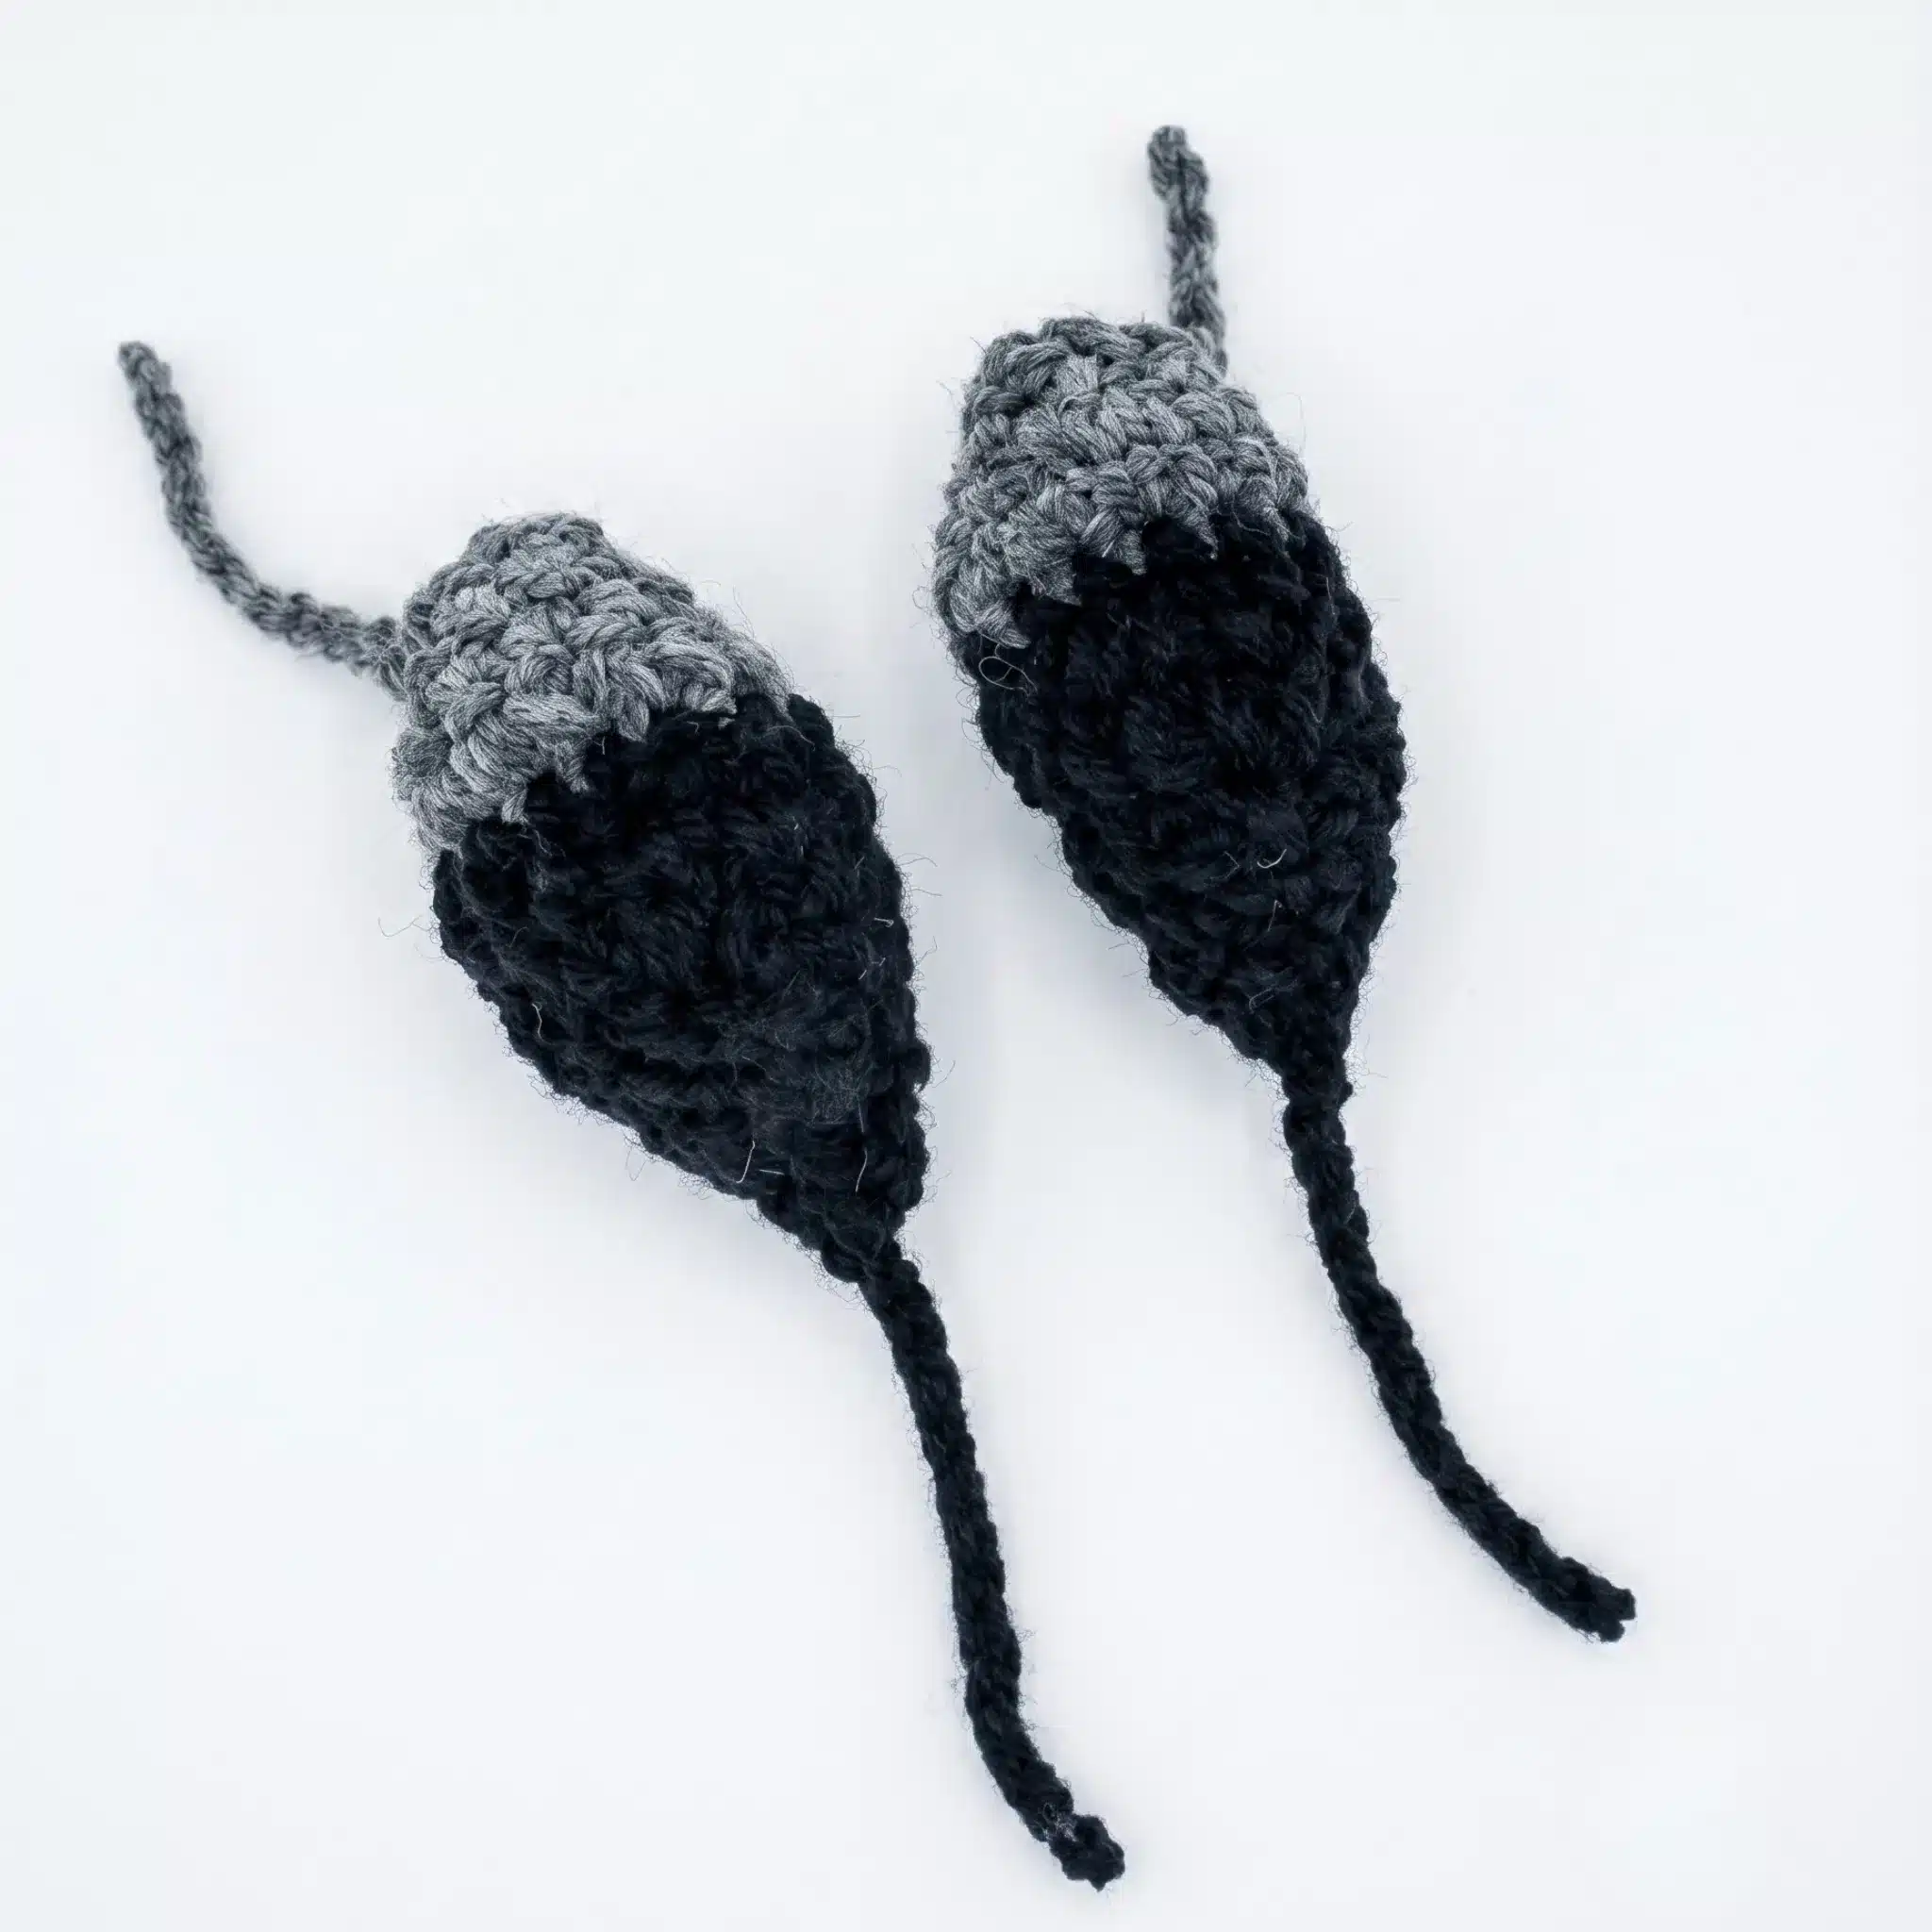
Wing (make 2)
Begin with gray yarn. Chain 4, turn, and beginning in the 2nd chain from the hook, work Row 1.
Row 1: sc across. (3)
Row 2: inc, sc, inc. (5)
Row 3: inc, 3 sc, inc. (7)
Row 4: inc, 5 sc, inc. (9)
Change to black yarn.
Row 5: sc across. (9)
Row 6: sc across. (9)
Row 7: sc across. (9)
Row 8: sc across. (9)
Row 9: sc, dec, 3 sc, dec, sc. (7)
Row 10: sc, dec, sc, dec, sc. (5)
Row 11: sc, 2 dec. (3)
Row 12: sc, dec. (2)
Fasten off, closing the last stitch and leaving a tail for sewing.
Beak
Using black yarn and the smaller hook, chain 10 and join with a sl st to form a ring. Begin counting rounds.
Rnd 1: sc in each st around. (9)
Rnd 2: sc in each st around. (9)
Rnd 3: sc in each st around. (9)
Rnd 4: sc, dec repeat around x3. (6)
Rnd 5: sc in each st around. (6)
Rnd 6: 3 dec.
Fasten off, weaving the tail end into the inside of the beak to close it.
Assembly
- Before attaching the Back Panel, decide on eye placement and insert the safety eyes into the Body, securing them from the inside.
- Pin the Back Panel to the Body, aligning it at the back of the head. Using black yarn and a whipstitch, sew neatly around the entire perimeter. Let the tail edge of the Back Panel extend past the edge of the belly by approximately 3–4 rows to form the bird’s tail.
- Pin each Wing symmetrically to the Body, relative to the Back Panel and the belly, and whipstitch neatly in place using the yarn tail left from Row 12.
- Sew the Beak onto the front of the head, centering it below the eyes.
- Using white yarn, work a few small stitches along the top edge of each eye so it stands out clearly against the black head.
- Weave in all remaining yarn ends and trim any excess.
Tips
- Keep your tension slightly tighter than you would for a garment—amigurumi pieces need dense stitches so stuffing doesn’t show through the gaps, especially on the bright red belly where any gapping is easy to spot.
- For the invisible decreases throughout the Body, insert your hook into the front loops of the next two stitches only, then pull the yarn through both before completing the single crochet; this keeps your decrease rounds smooth rather than bumpy.
- When stuffing the Body, add small pieces at a time and push them toward the belly first, since Round 17 asks you to shape that area before the final closing round—a firm, evenly packed belly is what gives the finished bird its rounded silhouette.
- If you’re substituting yarn, look for a plush or velvet-style worsted weight, since the halo-free, dense texture of that yarn type is part of what gives this pattern its soft, realistic feather look; a fuzzy or halo-heavy yarn will blur the color-block shaping.
- When sewing the Back Panel and Wings on, work from the wrong side where possible and use small, even whipstitches close to the edge—this keeps the seam nearly invisible and lets the color contrast between the red belly and black back do the visual work.
Frequently Asked Questions
What type of yarn is best for this bullfinch pattern?
This pattern is designed for a worsted weight plush or velvet-style yarn. The dense, halo-free texture of this yarn type is key to achieving the soft, realistic feather look. A fuzzy or halo-heavy yarn will blur the color-block shaping.
Do I need to use a smaller hook for the beak?
Yes, the pattern calls for a US steel size 8 (1.5 mm) hook for the beak. This smaller hook allows for finer detail work and a tighter stitch, which is essential for the beak’s small, pointed shape.
When should I place the safety eyes?
Safety eyes should be placed before you sew on the back panel. This allows you to check the finished expression from the front and make any adjustments to the eye placement before the back panel is permanently attached.
How do I make the invisible decrease?
For the invisible decrease, insert your hook into the front loops of the next two stitches only, then pull the yarn through both before completing the single crochet. This technique keeps your decrease rounds smooth rather than bumpy.
How do I form the bird’s tail?
When sewing the back panel to the body, let the tail edge of the back panel extend past the edge of the belly by approximately 3–4 rows. This extension forms the bird’s tail.
Can I substitute the yarn for this pattern?
Yes, you can substitute the yarn, but look for a plush or velvet-style worsted weight yarn. The dense texture is important for the pattern’s look. Avoid fuzzy or halo-heavy yarns as they will blur the color-block shaping.
Pin This Crochet Pattern!