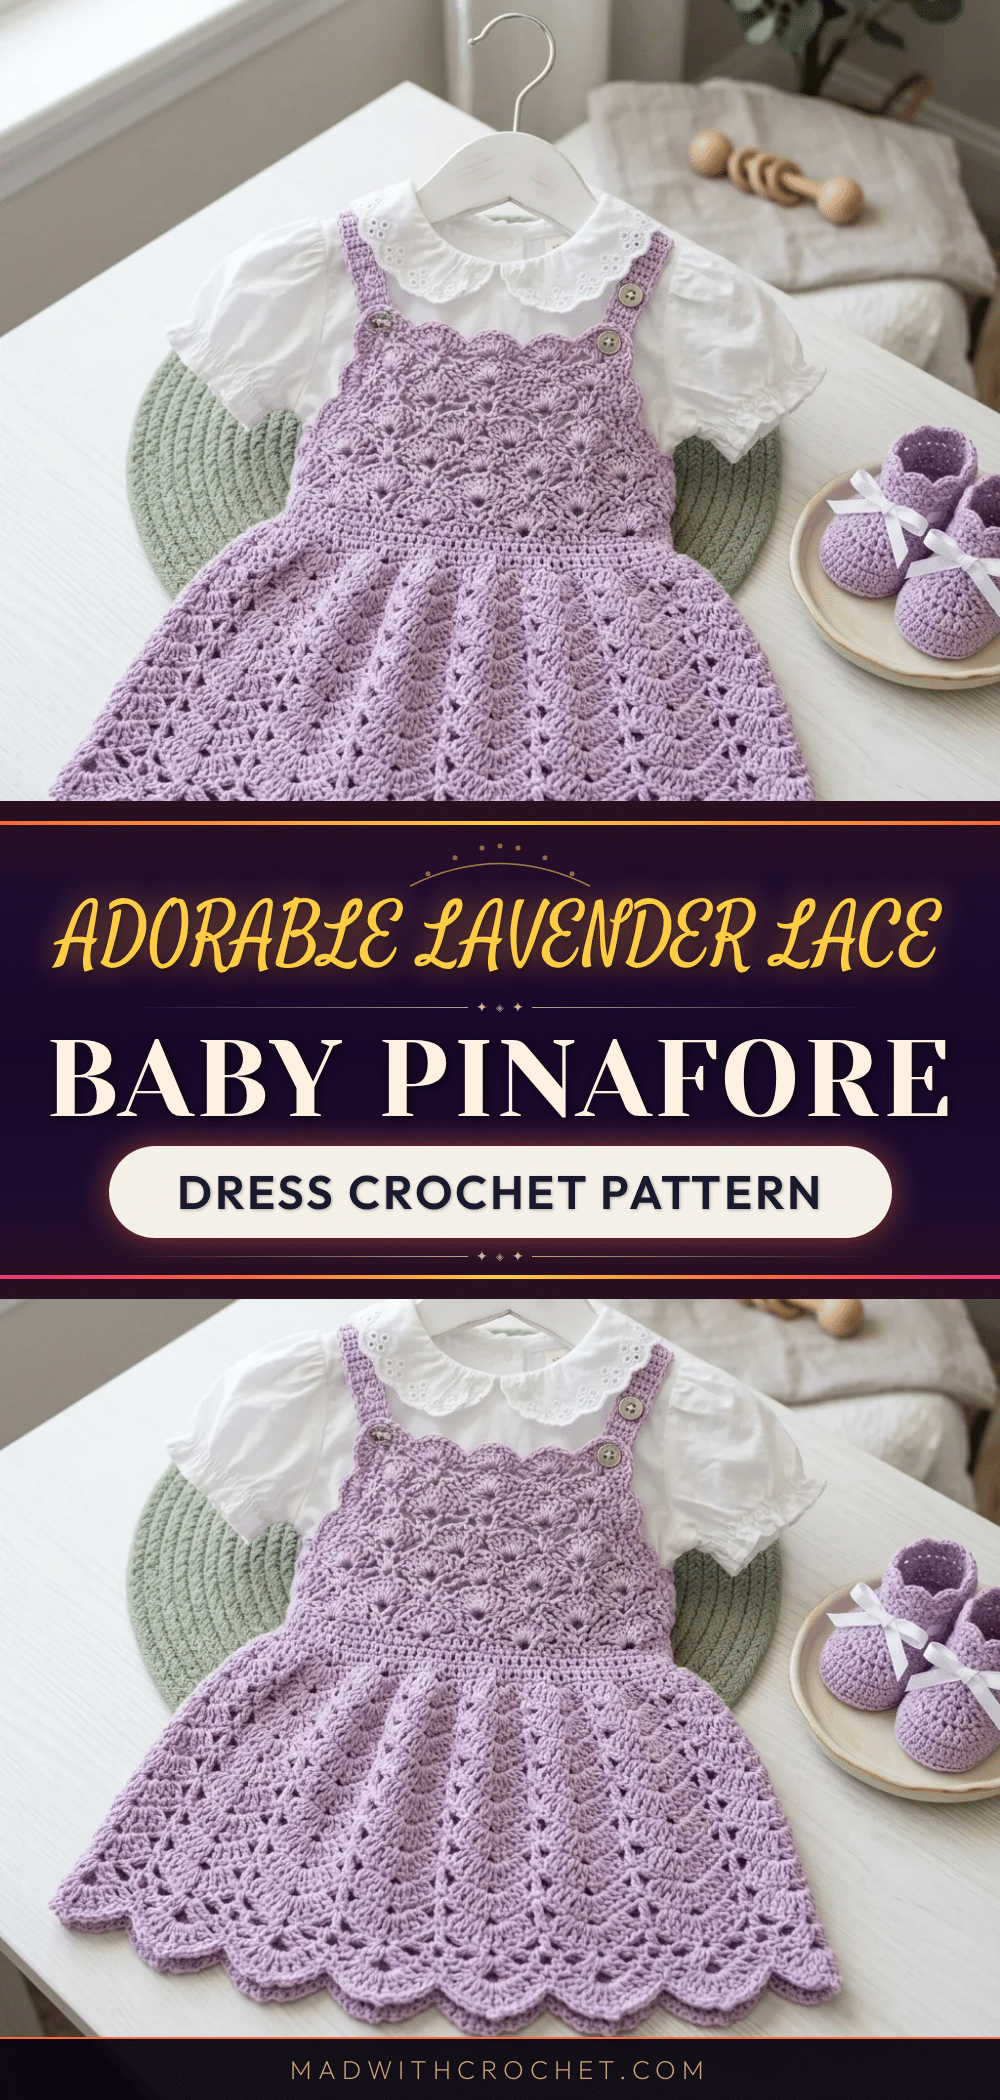
It is incredibly common for new crocheters to panic when they see a pattern that requires a specific stitch count divisible by a number like six. You might worry that your math is wrong, or that you have already ruined the project by missing a stitch in the first row. Rest assured, this is a normal part of learning lace. The beauty of this lavender pinafore is that the instructions are built with “math checks” to help you verify your work. Once you understand the rhythm of the fan stitch, the pattern flows logically, and that initial worry quickly turns into the satisfaction of creating a beautiful heirloom piece.
Maker Notes
There is something timeless about a baby garment that combines structure with softness. This pinafore is designed to layer beautifully over a white blouse or a simple onesie, making it a versatile staple for spring and summer photos. I chose a soft lavender for the source pattern because it allows the lace texture to shine without the distraction of busy colors. While the source suggests solid colors, the stitch definition is the star here. If you decide to experiment with yarn, avoid fuzzy or hairy varieties, as they will obscure the intricate fan and shell details. This project is a wonderful way to practice working in the round and mastering lace motifs, resulting in a garment that feels as special to make as it is to wear.
Project Overview
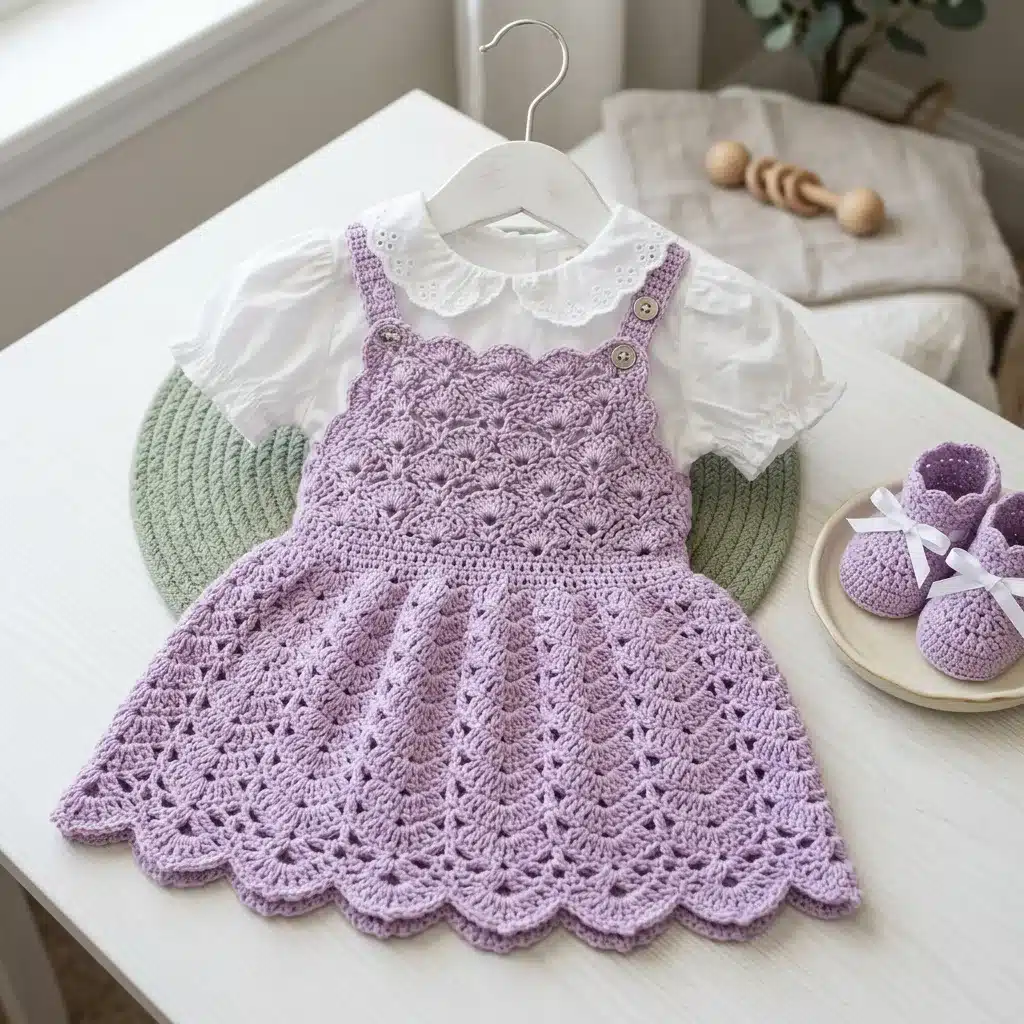
This adorable baby pinafore dress is worked in DK weight yarn, featuring a lace bodice that transitions into a flared skirt. The construction is straightforward: the bodice is worked flat to keep the button strap openings separate, and then the body joins to work in the round from the waistband down. Adjustable button straps allow for a customizable fit as the baby grows. The finished piece fits babies 6 to 12 months, with instructions provided to size up to 24 months.
Materials
- Yarn: DK weight (CYCA 3), approximately 300 to 350 yards (275 to 320 m) in lavender.
- Hook: US size E-4 / 3.5 mm crochet hook.
- Notions: 4 small buttons (approximately 5/8 inch or 15 mm diameter), yarn needle for weaving ends, stitch markers, scissors, and rust-proof pins for blocking.
Gauge and Finished Size
Finished Measurements
- Size: 6 to 12 months.
- Chest Circumference: Approximately 18 inches (46 cm).
- Bodice Height: Approximately 5.5 inches (14 cm).
- Skirt Length: Approximately 6.5 inches (16.5 cm).
- Total Length: Approximately 12 inches (30.5 cm), excluding straps.
- Strap Length: Approximately 7 inches (18 cm) each.
Gauge
After blocking:
- 18 stitches and 10 rows = 4 inches (10 cm) in half double crochet (hdc).
- One 12-stitch fan repeat = approximately 2.5 inches (6.4 cm) wide.
- One fan repeat = approximately 1 inch (2.5 cm) tall.
Note: Gauge matters here. This is a garment. If your gauge is off, the fit will be off. Make a swatch, block it, measure it, and adjust your hook size if needed.
Abbreviations
- beg: beginning
- BPdc: back post double crochet
- ch: chain
- ch-sp: chain space
- dc: double crochet (yarn over, insert hook, pull up loop, yarn over and draw through 2 loops twice)
- FPdc: front post double crochet
- hdc: half double crochet (yarn over, insert hook, pull up loop, yarn over and draw through all 3 loops)
- rep: repeat
- rnd: round
- RS: right side
- sc: single crochet (insert hook, pull up loop, yarn over and draw through both loops)
- sk: skip
- sl st: slip stitch
- sp: space
- st(s): stitch(es)
- t-ch: turning chain
- WS: wrong side
- yo: yarn over
Special Stitches
Fan Stitch
This creates the lacy, petal-like texture throughout the skirt.
- Yarn over and insert hook into the designated stitch or chain space.
- Yarn over and pull up a loop.
- Yarn over and draw through two loops on hook. First double crochet (dc) made.
- Work 4 more dc into the same stitch or chain space. You now have 5 dc total in one location. That cluster is one fan.
Shell Stitch
- Work 3 dc into the designated stitch.
- Chain 1.
- Work 3 more dc into the same designated stitch. This 6-stitch shell with a chain-1 center creates the scalloped hem border.
Scallop Border Stitch
- Slip stitch into first stitch.
- Chain 3 (counts as first dc).
- Work 4 dc into the same stitch (5 dc total).
- Skip 2 stitches.
- Slip stitch into next stitch.
- Skip 2 stitches.
- Repeat from step 2 across.
Bodice Lace Repeat
- Skip 2 stitches.
- Work 5 dc into the next stitch (fan made).
- Skip 2 stitches.
- Single crochet into the next stitch. This 6-stitch repeat creates the open lace texture in the bodice.
Back Post Double Crochet (BPdc)
- Yarn over.
- Insert hook from back to front to back around the post of the designated stitch in the row below.
- Yarn over and pull up a loop.
- Yarn over and draw through two loops twice.
Front Post Double Crochet (FPdc)
- Yarn over.
- Insert hook from front to back to front around the post of the designated stitch in the row below.
- Yarn over and pull up a loop.
- Yarn over and draw through two loops twice.
Pattern Notes
- The bodice works flat (back and forth in rows). This keeps the button strap openings separate. The pinafore body joins and works in the round from the waistband down.
- Turning chains: Chain 3 at the beginning of a dc row counts as the first dc. Chain 1 at the beginning of a sc row does NOT count as a stitch.
- Place stitch markers at the side seam points to track increases during the skirt section.
- Straps work separately and attach with buttons. Front straps use buttonholes built into the strap. Back attachment uses buttons sewn to the bodice.
- The fan stitch repeat is a 6-stitch repeat. Your stitch counts must be divisible by 6. Math checks are built into the instructions.
- All rounds in the skirt are joined rounds unless noted.
- Right side faces outward throughout.
Pattern Instructions
Bodice Front Panel
The bodice front works flat. It joins to the back panel later.
Foundation: Chain 43.
Row 1 (WS): Starting in 2nd ch from hook, sc across. Turn. (42 sc)
Row 2 (RS, scallop neckline setup): Ch 1, sc in first st. [Skip 2 sts, work 5 dc into next st (fan), skip 2 sts, sc in next st] repeat across. Turn. (42 sts in pattern, 7 fans)
Row 3 (WS): Ch 3 (counts as dc), dc in same st, [ch 1, sc in center dc of next fan, ch 1, 2 dc in next sc] repeat across, ending ch 1, sc in center dc of last fan, ch 1, dc in last sc. Turn. (42 sts and ch-sps)
Row 4 (RS): Ch 1, sc in first st. [Skip ch-1 sp, 5 dc in next sc, skip ch-1 sp, sc in space between dc-groups] repeat 6 times, then skip ch-1 sp, 5 dc in last sc, skip ch-1 sp, sc in top of t-ch. Turn. (42 sts in pattern, 7 fans)
Row 5: Repeat Row 3. (42 sts and ch-sps)
Row 6: Repeat Row 4. (42 sts in pattern, 7 fans)
Row 7: Repeat Row 3. (42 sts and ch-sps)
Row 8 (RS, transition to solid bodice): Ch 1, sc evenly across all sts and ch-sps. Turn. (42 sc)
Row 9: Ch 1, sc across. Turn. (42 sc)
Row 10: Ch 1, sc across. Turn. (42 sc)
Row 11: Ch 1, sc across. Turn. (42 sc)
Checkpoint: Bodice front panel should measure approximately 4.5 inches (11.5 cm) tall and 9.5 inches (24 cm) wide.
Do not fasten off. Set front panel aside.
Bodice Back Panel
Work exactly as Bodice Front Panel through Row 11. (42 sc)
Do not fasten off. Both panels should look identical.
Joining Bodice Panels
With RS facing and both panels on your work surface:
Setup Round (joining rnd): Starting with the back panel still on your hook, ch 1 (does not count as st). Place the front panel next to the back panel with RS facing outward. Sc across back panel (42 sc), then sc across front panel (42 sc), then join with sl st to first sc of this round. (84 sc)
Place stitch markers at stitch 42 and stitch 84 to mark side seams.
Straps (Make 2)
Straps work separately and attach with buttons. Front straps use buttonholes built into the strap. Back attachment uses buttons sewn to the bodice.
Neckline Finish
Finish the neckline edge to complete the bodice structure.
Strap Attachment
Attach the completed straps to the bodice using the buttons and buttonholes as described in the notes.
Assembly
Once the main body and straps are complete:
- Weave in all yarn ends thoroughly.
- Wet blocking: Fill a basin with cool water. Submerge the pinafore and gently press to saturate. Do not wring. Press out excess water between clean towels. Lay flat on a blocking mat. Use rust-proof pins to spread the skirt scallops open. Pin the hem border into its peak-and-valley shape. Allow to dry completely.
- Steam blocking (for acrylic): Hold a steam iron 1 to 2 inches above the fabric. Do not touch iron to yarn. Steam and gently shape with fingers. Allow to cool before moving.
Care Instructions
Machine wash on gentle cycle in cool water if using acrylic. Use a mesh laundry bag. Lay flat to dry. Do not tumble dry. Do not iron directly on lace sections. For cotton or non-superwash wool, hand wash only in cool water.
Tips
- To size up to 12 to 18 months: Increase the foundation chain by 12 stitches (chain 55, giving 54 sc). Add 12 more stitches when joining panels (total 108 sc). Begin skirt with 108 sc. Increase to 120 sc for the fan increase round. Add 2 extra rows to each skirt section. Add 4 to 6 additional strap rows.
- To size up to 18 to 24 months: Increase the foundation chain by 24 stitches (chain 67, giving 66 sc). 66 x 2 panels = 132 sc joined. Round up to 138 sc (23 fan repeats). Add 4 extra rows to each skirt section. Add 8 additional strap rows.
- General rule: Every 6 extra stitches adds approximately 1.3 inches (3.3 cm) of circumference. Every 2 extra rows add approximately 0.4 inch (1 cm) of height.
FAQs
What yarn is best for this pattern?
Use a smooth DK weight yarn (CYCA 3) with good stitch definition. Paintbox Yarns Simply DK in Dusty Lilac or Drops Safran in Lavender are excellent choices. Avoid fuzzy or variegated yarns, as they can hide the lace details.
How do I adjust the size for an older baby?
The pattern includes specific instructions for sizing up to 12-18 months and 18-24 months. These adjustments involve increasing the foundation chain, the joined stitch count, and adding extra rows to the skirt and straps.
Do I need to block the finished dress?
Yes, blocking is essential to open up the lace stitches and shape the scalloped hem. Wet blocking is recommended for natural fibers, while steam blocking works well for acrylic yarns.
Is this pattern suitable for beginners?
This is an intermediate pattern. You should be comfortable with shell stitches, fan lace motifs, working in the round, and reading stitch repeat instructions. If you are new to lace, practice the fan stitch on a swatch first.
How long does it take to complete?
Expect 8 to 12 hours if you crochet regularly. Allow 14 to 18 hours if you are newer to lace patterns or prefer to work slowly.
Pin This Crochet Pattern!