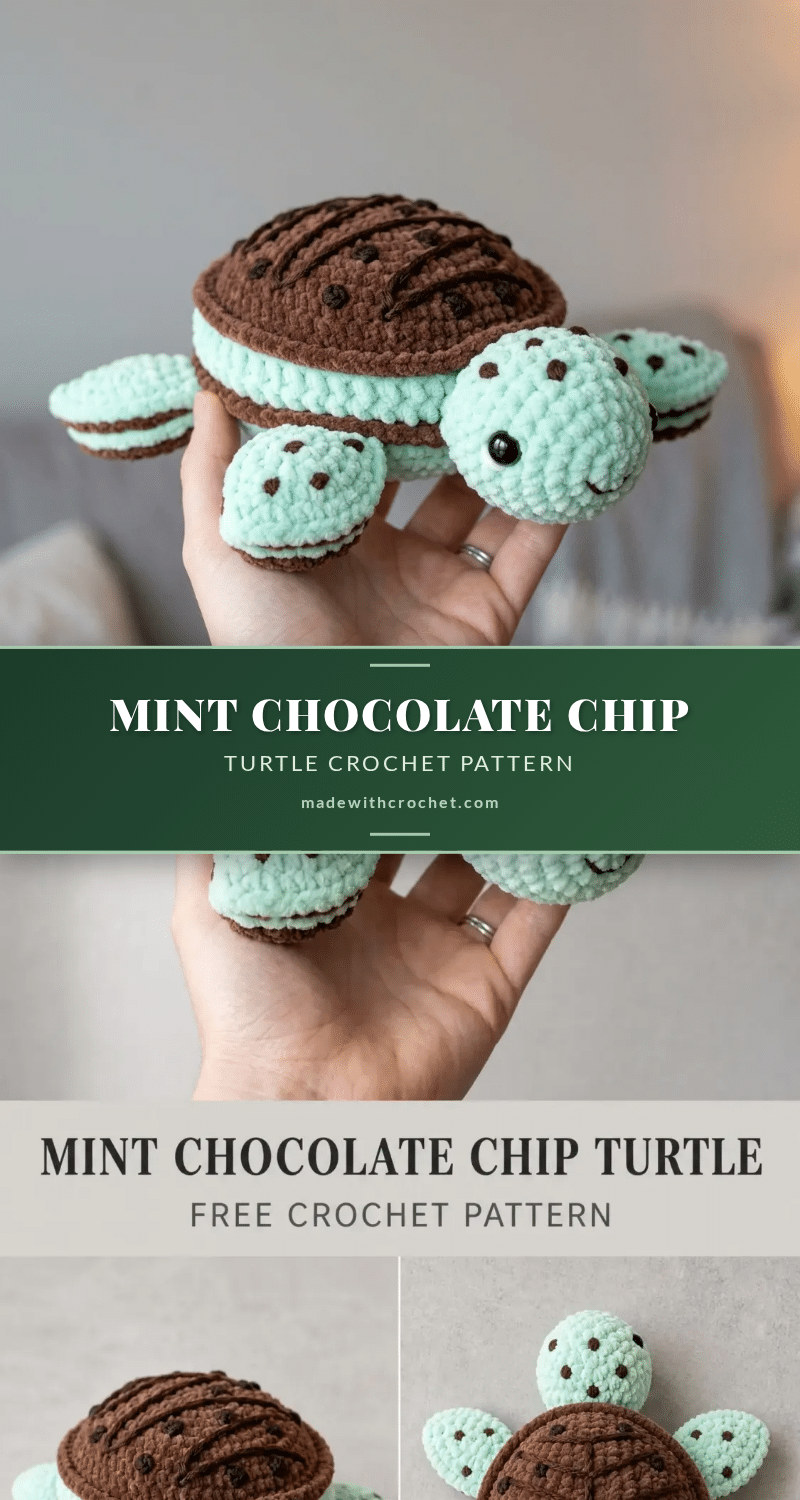
Every round of this mint chocolate chip turtle builds a little more of its irresistible charm. From the precise increases that shape the flat-bottomed body to the crisp color changes that create the sandwich cookie banding, each stitch is a deliberate step toward a finished friend. The magic ring start, the steady climb of stitch counts, and the satisfying invisible decreases that close each piece—these are the details that make amigurumi so rewarding. You’ll find yourself looking forward to the next round, the next color switch, the next little milestone that brings this turtle to life.
Texture and Stitch Notes
The beauty of this pattern lies in its clever construction. The mint green body and chocolate brown shell are worked separately, then assembled to create a layered ice cream sandwich effect. The contrast bands—worked in chocolate brown between sections of mint green—appear on the body, head, flippers, and shell brim, tying the whole design together. The surface embroidery, with its French knot “chocolate chips” and straight stitch shell lines, adds a playful, handcrafted touch that makes each turtle unique. This is a project that rewards attention to detail, from the firm stuffing that gives the turtle its shape to the careful placement of the safety eyes that give it personality.
Project Overview
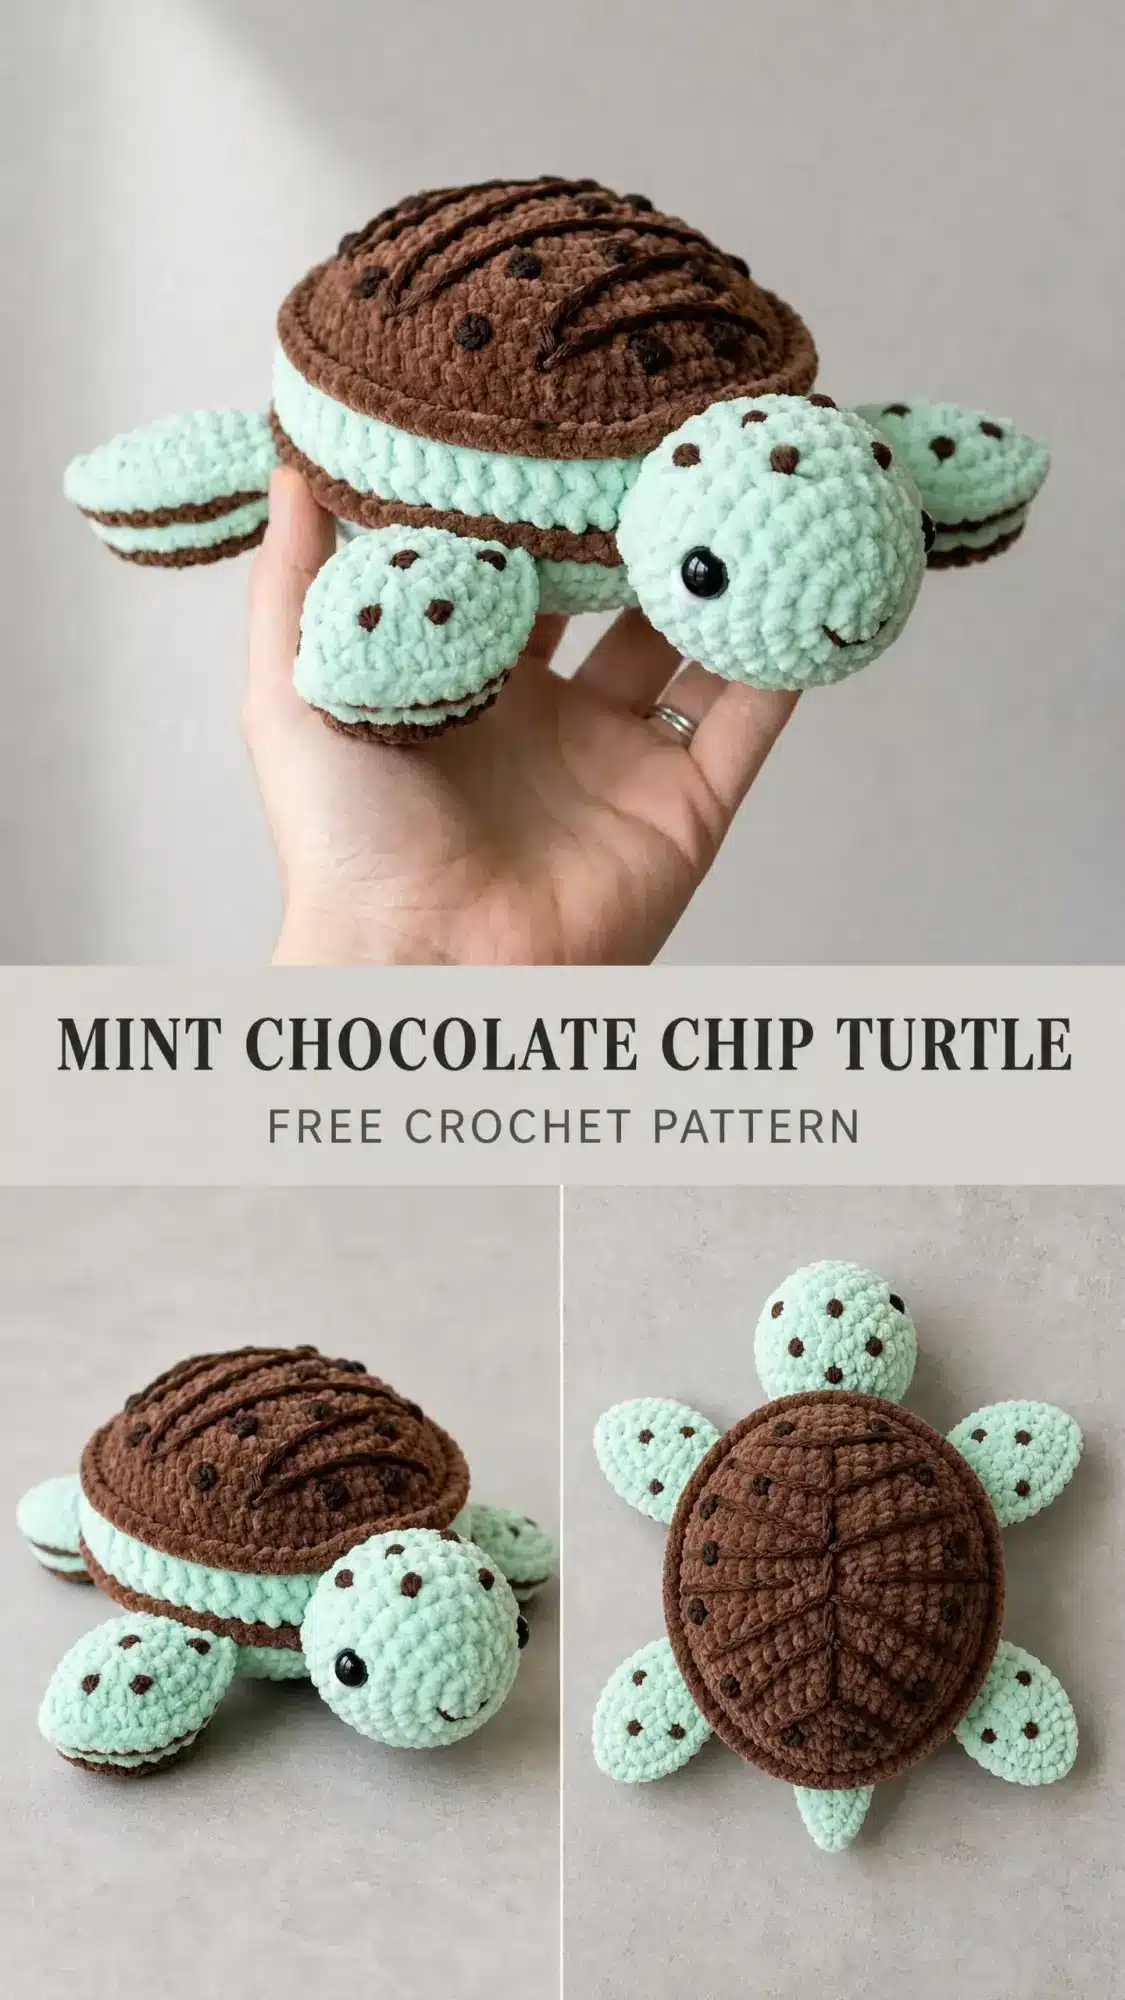
This amigurumi turtle measures approximately 7 inches wide by 5 inches tall when complete. The construction is straightforward: you’ll work each piece separately in the round, stuff them firmly, then sew everything together. The body forms a rounded base, the domed shell sits on top, and the flippers and head attach around the edges to create that classic turtle silhouette. The sandwich cookie banding visible on every piece—those chocolate brown stripes around the head, flippers, and shell brim—creates the layered mint chip ice cream sandwich effect.
Skill Level
This pattern is intermediate level. You should feel comfortable working in a continuous spiral, sewing pieces together neatly, and doing basic surface embroidery. If you’ve completed at least one amigurumi project before, you’ll find this turtle totally manageable. The stitches themselves are simple. Single crochet (sc) is your main player, with basic increases and decreases for shaping. The trickiest parts? Positioning the safety eyes evenly and keeping your embroidered French knots consistent. Neither is difficult, just takes a bit of patience. Time estimate: Plan for 6 to 10 hours depending on your speed and how meticulous you are with assembly.
Materials
Gather these supplies before you start:
Yarn
- Color A (Mint Green): Approximately 120 yards of worsted weight yarn
- Color B (Chocolate Brown): Approximately 140 yards of worsted weight yarn
Hook
- US size G-6 / 4.0 mm crochet hook, or size needed to achieve gauge
Notions
- Stitch marker
- Yarn needle for seaming and embroidery
- Polyester fiberfill stuffing, approximately 3 to 4 ounces
- Two 12 mm black safety eyes
- Scissors
Gauge and Finished Size
5 single crochet stitches x 5 rows = 1 inch (2.5 cm) when worked in the round, unblocked.
To check your gauge, work this quick swatch: Work a magic ring, sc 6 in ring (6 stitches). Increase in each stitch around (12 stitches). [Sc 1, inc] x 6 (18 stitches). [Sc 2, inc] x 6 (24 stitches). Fasten off. Measure the diameter. It should be approximately 2 inches across. If your swatch is larger, try a smaller hook. If smaller, go up a hook size. Gauge matters here because all your pieces need to fit together during assembly. If they’re different sizes, your turtle will look lopsided.
Finished size: Approximately 7 inches wide by 5 inches tall.
Abbreviations
Let me walk you through every stitch and abbreviation used in this pattern:
- ch: chain
- sl st: slip stitch
- sc: single crochet
- inc: increase (2 sc in same stitch)
- dec: invisible decrease (explained below)
- st(s): stitch or stitches
- MR: magic ring
- BLO: back loop only
- FLO: front loop only
- pm: place marker
- rep: repeat
- x: times
- rnd: round
- ( ): stitch count at end of round
- [ ]: instructions worked as a complete set
Pattern Notes
Read through these tips before starting. They’ll save you frustration later:
- Work in a continuous spiral unless instructed otherwise. Do not join rounds with a slip stitch. Use a stitch marker in the first stitch of each round and move it up as you go.
- Leave long tails when fastening off pieces you’ll sew together. About 18 inches gives you plenty to work with.
- Stuff firmly. Well-stuffed pieces hold their shape and make assembly much easier.
- Insert safety eyes before closing the head. Once you sew that opening shut, you can’t add them.
- Color changes: When switching colors, complete the last yarn over of your final stitch using the new color. Cut the old color and weave in the tail, or carry it loosely inside if you’ll use it again soon.
- The banded effect comes from working accent rounds in chocolate brown between sections of mint green. These contrast rounds create the sandwich cookie striping.
Pattern Instructions
Body (Make 1, Color A Mint Green)
The body forms the flat-bottomed, rounded base of your turtle. You’ll work from the bottom upward.
- Rnd 1: MR, sc 6 in ring. (6)
- Rnd 2: Inc in each st around. (12)
- Rnd 3: [Sc 1, inc] x 6. (18)
- Rnd 4: [Sc 2, inc] x 6. (24)
- Rnd 5: [Sc 3, inc] x 6. (30)
- Rnd 6: [Sc 4, inc] x 6. (36)
- Rnd 7: [Sc 5, inc] x 6. (42)
- Rnd 8: [Sc 6, inc] x 6. (48)
- Rnd 9: [Sc 7, inc] x 6. (54)
- Rnd 10: [Sc 8, inc] x 6. (60)
- Rnd 11: Sc in each st around. (60)
- Rnd 12: Sc in each st around. (60)
- Rnd 13: Sc in each st around. (60)
- Rnd 14: Sc in each st around. (60)
- Switch to Color B for round 15.
- Rnd 15 (Color B): Sc in each st around. (60)
- Rnd 16 (Color B): Sc in each st around. (60)
- Switch to Color A for round 17.
- Rnd 17 (Color A): Sc in each st around. (60)
- Rnd 18: [Sc 8, dec] x 6. (54)
- Rnd 19: [Sc 7, dec] x 6. (48)
- Rnd 20: [Sc 6, dec] x 6. (42)
- Checkpoint: After round 20, your body should measure approximately 4.5 inches in diameter and about 2.5 inches tall. Begin stuffing firmly and continue stuffing as you close.
- Rnd 21: [Sc 5, dec] x 6. (36)
- Rnd 22: [Sc 4, dec] x 6. (30)
- Rnd 23: [Sc 3, dec] x 6. (24)
- Rnd 24: [Sc 2, dec] x 6. (18)
- Rnd 25: [Sc 1, dec] x 6. (12)
- Rnd 26: Dec x 6. (6)
- Fasten off, leaving a 6 inch tail. Thread tail through remaining 6 stitches, pull tight, and secure. Weave in end.
Head (Make 1)
The head is a large round sphere. Remember to insert safety eyes before closing. With Color A (mint green):
- Rnd 1: MR, sc 6 in ring. (6)
- Rnd 2: Inc in each st around. (12)
- Rnd 3: [Sc 1, inc] x 6. (18)
- Rnd 4: [Sc 2, inc] x 6. (24)
- Rnd 5: [Sc 3, inc] x 6. (30)
- Rnd 6: [Sc 4, inc] x 6. (36)
- Rnd 7: Sc in each st around. (36)
- Rnd 8: Sc in each st around. (36)
- Rnd 9: Sc in each st around. (36)
- Insert safety eyes now between rounds 8 and 9, approximately 5 to 6 stitches apart from center front. Attach safety eye backs firmly.
- Switch to Color B.
- Rnd 10 (Color B): Sc in each st around. (36)
- Rnd 11 (Color B): Sc in each st around. (36)
- Switch to Color A.
- Rnd 12 (Color A): [Sc 4, dec] x 6. (30)
- Rnd 13: [Sc 3, dec] x 6. (24)
- Begin stuffing firmly.
- Rnd 14: [Sc 2, dec] x 6. (18)
- Rnd 15: [Sc 1, dec] x 6. (12)
- Rnd 16: Dec x 6. (6)
- Fasten off, leaving a 16 inch tail. Thread tail through remaining 6 stitches, pull tight, secure, and leave tail for seaming.
- Checkpoint: The head should measure approximately 2.75 inches in diameter.
Flipper (Make 4)
Work each flipper in Color A (mint green) with a Color B band.
- Rnd 1: MR, sc 6 in ring. (6)
- Rnd 2: Inc in each st around. (12)
- Rnd 3: [Sc 1, inc] x 6. (18)
- Rnd 4: [Sc 2, inc] x 6. (24)
- Rnd 5: Sc in each st around. (24)
- Rnd 6: Sc in each st around. (24)
- Switch to Color B.
- Rnd 7 (Color B): Sc in each st around. (24)
- Rnd 8 (Color B): Sc in each st around. (24)
- Switch to Color A.
- Rnd 9 (Color A): [Sc 2, dec] x 6. (18)
- Rnd 10: [Sc 1, dec] x 6. (12)
- Stuff firmly.
- Rnd 11: Dec x 6. (6)
- Fasten off, leaving a 12 inch tail. Thread tail through remaining 6 stitches, pull tight, secure, and leave tail for seaming.
Shell Top (Make 1, Color B Chocolate Brown)
The shell is a domed piece that sits on top of the body.
- Rnd 1: MR, sc 6 in ring. (6)
- Rnd 2: Inc in each st around. (12)
- Rnd 3: [Sc 1, inc] x 6. (18)
- Rnd 4: [Sc 2, inc] x 6. (24)
- Rnd 5: [Sc 3, inc] x 6. (30)
- Rnd 6: [Sc 4, inc] x 6. (36)
- Rnd 7: [Sc 5, inc] x 6. (42)
- Rnd 8: [Sc 6, inc] x 6. (48)
- Rnd 9: [Sc 7, inc] x 6. (54)
- Rnd 10: [Sc 8, inc] x 6. (60)
- Rnd 11: Sc in each st around. (60)
- Rnd 12: Sc in each st around. (60)
- Rnd 13: Sc in each st around. (60)
- Rnd 14: Sc in each st around. (60)
- Rnd 15: Sc in each st around. (60)
- Rnd 16: Sc in each st around. (60)
- Fasten off, leaving a 20 inch tail for seaming. Do not stuff the shell top.
Shell Brim / Band (Make 1, Alternating Color B and Color A)
This ring attaches to the bottom edge of the shell top and wraps around the body.
- With Color B, ch 61. Join with sl st to form a ring, being careful not to twist.
- Rnd 1 (Color B): Ch 1, sc in each ch around. (60)
- Rnd 2 (Color B): Sc in each st around. (60)
- Switch to Color A.
- Rnd 3 (Color A): Sc in each st around. (60)
- Rnd 4 (Color A): Sc in each st around. (60)
- Switch to Color B.
- Rnd 5 (Color B): Sc in each st around. (60)
- Rnd 6 (Color B): Sc in each st around. (60)
- Fasten off, leaving a 20 inch tail for seaming.
Assembly
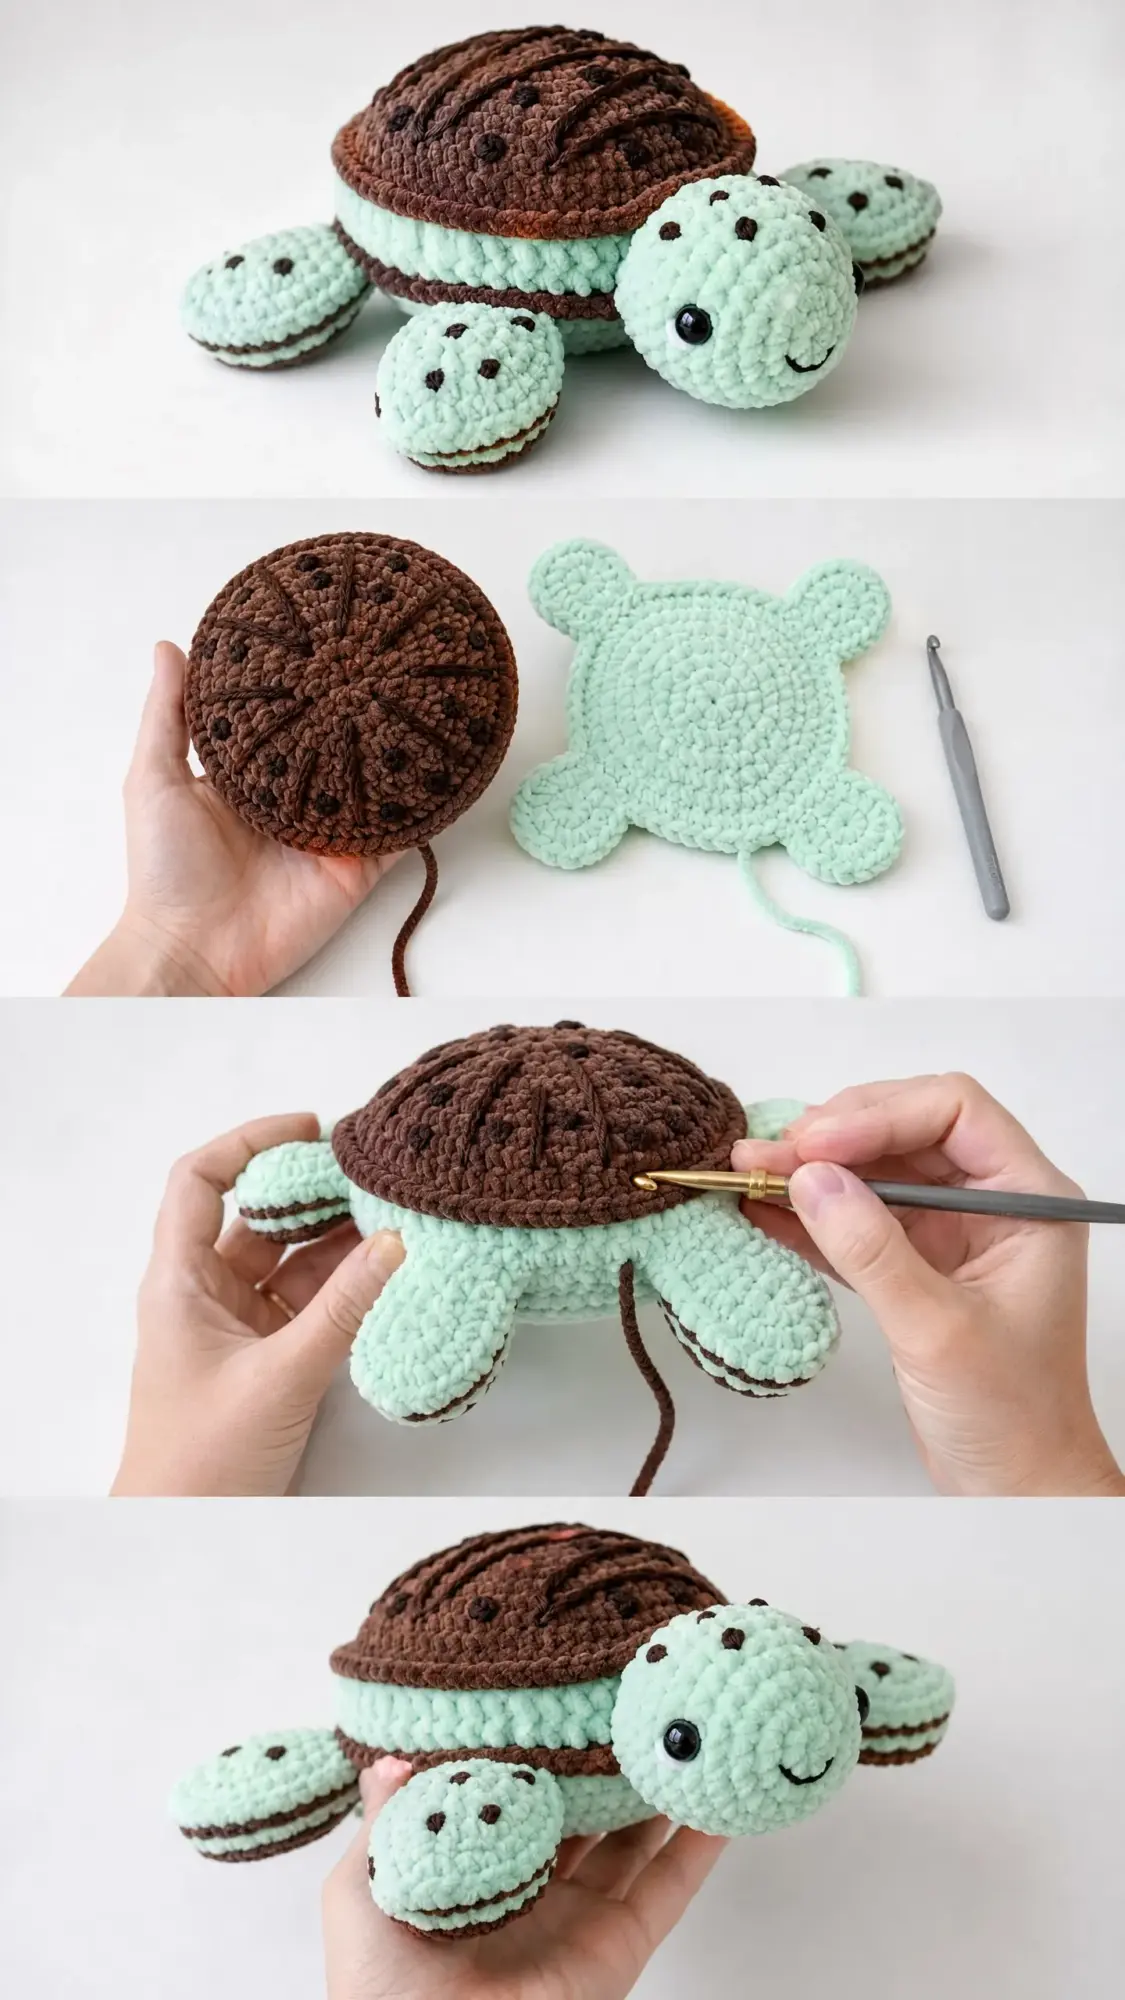
Now comes the satisfying part. Putting your turtle together.
- Lay the body flat with the top side up. Find the Color B band at rounds 15 and 16. This is where the shell brim will attach.
- Pin the shell brim ring around the body at the Color B band level. Using your yarn needle and Color B yarn, whip stitch the bottom edge of the brim to the body, working through corresponding stitches all the way around.
- Place the shell top, open side down, onto the center top of the body. The shell should sit centered with the brim extending around the lower edge. Pin in place. Using the long tail from the shell, sew through the outer edge of the shell bottom and the top edge of the brim band, working around the entire circumference.
- Attach the head to the front of the body, centering it at approximately the front center. It should slightly overlap the lower edge of the shell brim. The brown band on the head should align visually with the brim. Sew using the tail, working through 10 to 12 stitches.
- Attach the two front flippers on either side of the head at the front left and front right positions. The flat face of each flipper should face upward. The brown band should align with the brim band. Sew securely through 8 to 10 stitches.
- Attach the two rear flippers symmetrically at the back left and back right, slightly behind the midpoint of the body. Angle them slightly outward and backward. Sew securely through 8 to 10 stitches each.
Embroidery Details
These finishing touches bring your turtle’s personality to life.
- Shell lines: Using Color B and your yarn needle, work 3 to 4 long straight stitches radiating from the center top of the shell outward toward the brim edge. These represent the scutes of a real turtle shell. Space them evenly.
- Shell French knots: Scatter 10 to 14 French knots across the surface of the shell in Color B. Cluster a few near the shell lines and spread the rest irregularly. These are your chocolate chips.
- Head freckles: Work 3 small French knots across the top of the head, between the eyes and the crown. Space them slightly irregularly.
- Flipper freckles: Work 2 to 3 small French knots on the face of each flipper.
- Smile: Work a small curved straight stitch below and between the safety eyes. Two or three stitches in a shallow arc create a gentle, sweet expression.
Tips
Once assembly is complete, weave in all remaining ends securely. Knot once inside the stuffed cavity before trimming. Pull your yarn needle and tail through the stuffing and out a different exit point, trim close to the surface, and the tail will retract invisibly inside.
If any seams look puckered, use a blunt needle to gently manipulate the stitches from the outside.
For a crisper shell edge, you can work one additional round of slip stitch around the bottom opening of the shell in Color B before assembly.
Want a different size? Here’s how to adjust:
- Smaller turtle (approximately 5 inches wide): Use fingering or sport weight yarn with a US B-1 / 2.25 mm or C-2 / 2.75 mm hook. Keep the same stitch counts. Use 9 mm safety eyes instead of 12 mm.
- Larger turtle (approximately 9 to 10 inches wide): Use bulky weight yarn with a US J-10 / 6.0 mm hook. Use 15 mm safety eyes. You may need to add 2 to 3 additional plain rounds to the body for proper proportions.
- Puffier flippers: Add one additional plain round between rounds 6 and 7 of the flipper. Stuff more firmly before closing.
FAQs
Can I use a different yarn weight?
Yes, but you will need to adjust your hook size to match the gauge. The finished size will change accordingly. For a smaller turtle, use fingering or sport weight yarn. For a larger turtle, use bulky weight yarn.
How do I make this toy safe for a baby or toddler?
Substitute embroidered eyes for the safety eyes. Work a satin stitch in black yarn to create the eyes. This eliminates any choking hazard from the plastic hardware.
My shell top won’t stay domed. What did I do wrong?
The shell top should not be stuffed. It is designed to sit loosely on top of the body. If it is collapsing, check that you did not accidentally add extra rounds or stitches. The stitch counts are designed to create a gentle dome.
Can I use a different color combination?
Absolutely. The pattern is written for mint green and chocolate brown, but you can substitute any two contrasting colors. The key is to use a light color for the body and a darker color for the shell to maintain the visual contrast.
How do I keep my French knots consistent?
Practice on a scrap piece of fabric first. The key is to wrap the yarn around the needle the same number of times each time (twice is standard for this pattern) and to insert the needle back into the fabric very close to the entry point. Hold the wrapped yarn taut with your thumb as you pull through.
My turtle looks lopsided. How can I fix it?
Check your gauge first. If your pieces are different sizes, the assembly will be off. You can also try adjusting the stuffing level—firm, even stuffing helps maintain shape. If the head is crooked, you may need to unpick the seam and reattach it at a slightly different angle.
Pin This Crochet Pattern!