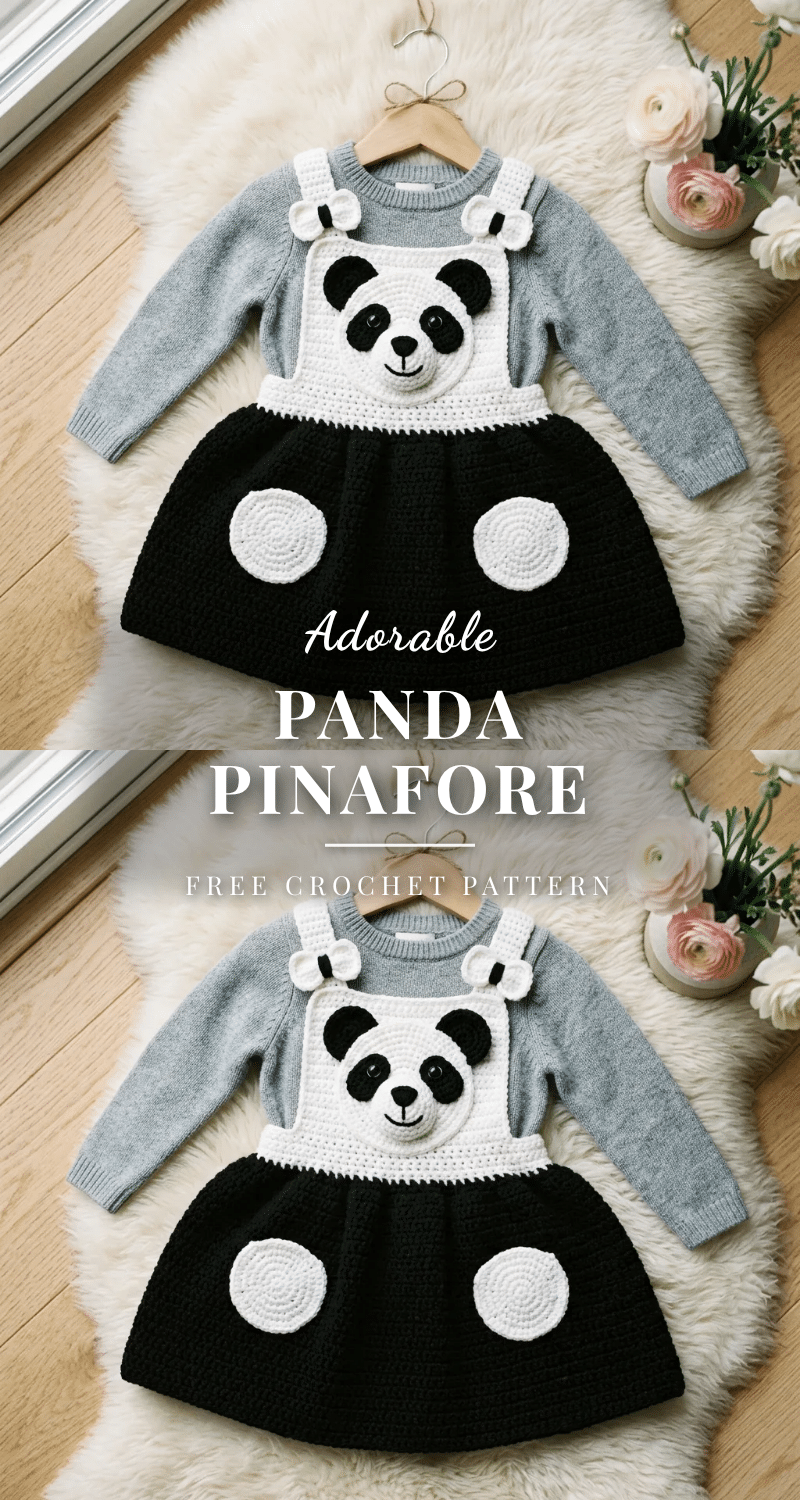
There is something undeniably heartwarming about seeing a toddler dressed in a handmade outfit that captures pure whimsy. This panda pinafore dress is the kind of project that elicits immediate smiles from everyone who sees it. The combination of a classic black-and-white color palette with the playful, dimensional panda face on the bib creates a piece that is as functional as it is adorable. It is sturdy enough for active play yet delicate enough to be a cherished keepsake. Whether you are making this for a special occasion or just for everyday adventures, the finished object is a tidy, display-worthy masterpiece that brings a touch of zoo-inspired charm to any wardrobe.
Why the Finished Piece Stands Out
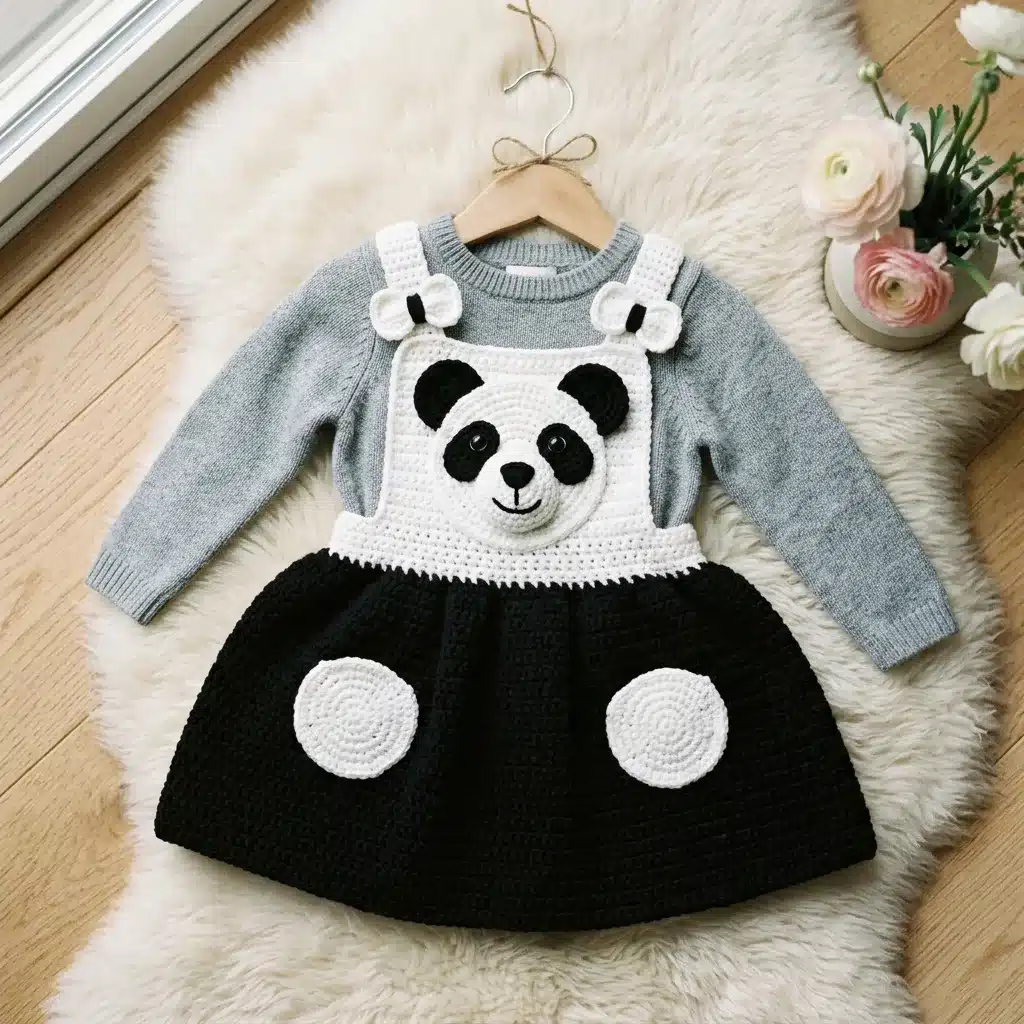
What truly makes this pinafore special is the clever construction that mimics a layered look. The design features a crocheted overlay worn over a simple gray long-sleeve sweater, creating a cozy, professional finish without the bulk of multiple garments. The black skirt tapers gently to the waist, offering a flattering silhouette for toddlers, while the white panda face adds a focal point that is sure to make everyone smile. The use of smooth worsted weight yarn ensures that the stitch definition remains crisp, allowing the panda’s features to pop. Additionally, the decorative white pocket circles on the skirt add a sweet, textural detail that elevates the design from a simple dress to a statement piece. The bow embellishments on the straps provide a final touch of sweetness, making this dress perfect for photos or playdates.
Project Overview
This panda pinafore dress is designed to fit toddler sizes 2T to 3T, accommodating a chest measurement of 20 to 21 inches and a height of approximately 34 to 38 inches. The skill level is intermediate, requiring comfort with working in joined rounds, counting stitches carefully, making color changes, and assembling multiple pieces. A confident beginner can also complete this project if they take their time. The estimated time to complete the project is 12 to 18 hours total.
Materials
Yarn:
- Color A (White): Approximately 250 yards of worsted weight yarn.
- Color B (Black): Approximately 200 yards of worsted weight yarn.
- Color C (Light heather gray): Approximately 50 yards of worsted weight yarn for ear inner and eye patches.
Recommended Yarns:
- Lion Brand Pound of Love: Available in White, Black, and Heather Gray. This 100% acrylic yarn is machine washable, durable for children’s wear, and holds stitch definition beautifully.
- Paintbox Yarns Simply DK: Available in Paper White, Pure Black, and Light Grey Mix. If you use this DK weight option, switch to a US size E-4 (3.5 mm) hook and check your gauge. You will need approximately 4 balls white, 2 balls black, and 1 ball gray.
- Drops Safran: Available in White, Black, and Light Grey. This 100% cotton option gives crisp stitch definition and breathability. Use a US size E-4 (3.5 mm) hook.
Substitution Note: Any smooth worsted weight yarn that meets gauge will work. Avoid fuzzy or textured yarns because they will obscure the panda’s facial details.
Hook: US size G-6 (4.0 mm)
Additional Supplies:
- Tapestry needle for weaving ends and embroidery
- At least 6 stitch markers
- Scissors
- 2 black safety eyes, 12 mm
- Small amount of black yarn for nose embroidery
- Small amount of white yarn for eye highlight embroidery
- Sewing pins for applique placement
- Optional: Thin cardboard circles (2.5 inches) for blocking pocket circles flat
Gauge
18 single crochet stitches x 20 rows = 4 inches (10 cm) worked in the round with single crochet, using a US size G-6 (4.0 mm) hook and worsted weight yarn, blocked.
Gauge matters here because it affects the fit. Work a swatch of at least 5 inches square, block it, and measure the center 4 inches. If you have more stitches than listed, go up a hook size. Fewer stitches means go down a hook size.
Abbreviations
Here are all the abbreviations you’ll need, with plain-English explanations:
- ch = chain (wrap yarn over hook and pull through the loop on your hook)
- sl st = slip stitch (insert hook, pull up a loop, and pull it directly through the loop on your hook)
- sc = single crochet (insert hook, pull up a loop, yarn over, pull through both loops)
- sc2tog = single crochet two together, which is a decrease (insert hook in next stitch and pull up a loop, insert hook in following stitch and pull up a loop, yarn over and draw through all 3 loops on hook)
- inc = increase (work 2 single crochet stitches in the same stitch)
- st(s) = stitch(es)
- rnd = round
- RS = right side
- WS = wrong side
- BLO = back loop only
- FLO = front loop only
- sp = space
- pm = place marker
- sm = slip marker
- rem = remaining
- rep = repeat
- beg = beginning
- yo = yarn over
- MR = magic ring
Special Techniques
Magic Ring (MR)
Make a loop with the yarn, leaving a 6-inch tail. Insert your hook through the loop, pull up the working yarn, chain 1 (or as directed), then work the required number of stitches into the ring. Pull the tail to close the ring tightly before continuing. If magic rings intimidate you, you can substitute by chaining 2 and working your stitches into the first chain. The center won’t close as tightly, but it works.
Invisible Join
This eliminates the visible jog where rounds meet. Cut your yarn leaving a 6-inch tail and thread it onto your tapestry needle. Insert the needle under the front loop of the second stitch of the round (the stitch after the beginning stitch), then insert the needle down through both loops of the last stitch you made. Pull snug to simulate a stitch.
Surface Slip Stitch
With the right side facing, make a slip knot and place it on your hook. Insert your hook through the fabric at your desired starting point, catch the working yarn from behind the fabric, and pull up a loop. Continue inserting your hook through the fabric at even intervals, pulling a loop through the fabric and through the loop on your hook. This creates a chain on the surface and is used for facial detail lines if desired.
Pattern Notes
Before you begin, read through these important notes:
- The skirt is worked in joined rounds from the bottom hem up. After each round, join with a slip stitch to the first stitch of the round, chain 1, then begin the next round in the same stitch as the join (not in the chain). The chain 1 does NOT count as a stitch.
- The bib is worked flat in rows, attached to the waist edge of the skirt at the front only.
- The straps are worked as long flat strips and cross at the back.
- The panda face, ears, and pocket circles are worked as separate flat pieces and sewn on after blocking.
- Place a stitch marker in the first stitch of each round and move it up as you work to keep track of round beginnings.
- Stitch counts given at the end of each row or round in parentheses represent the total stitch count in that row or round.
- All increases (inc) are worked as 2 sc in the indicated stitch unless otherwise noted.
- The white circular pockets on the skirt are purely decorative appliques. They are not functional pockets.
- Safety eyes should be inserted and secured before sewing the panda face pieces together or before the face is fully stuffed and closed.
- Lightly stuff the panda face with a small amount of fiberfill or scrap yarn before closing if you want a dimensional effect, or leave it flat by not stuffing.
Pattern Instructions
Skirt
The skirt is worked in the round from the bottom hem upward to the waist using Color B (black). The hem begins wider and is shaped to taper slightly to the waist.
Foundation: With Color B and G-6 hook, ch 118. Being careful not to twist, join with a sl st to first ch to form a ring.
Rnd 1: Ch 1 (does not count as st here and throughout), sc in same st as join, sc in each ch around, join with sl st to first sc. (118 sc)
Rnd 2: Ch 1, sc in each st around, join. (118 sc)
Rnds 3 through 42: Ch 1, sc in each st around, join. (118 sc each round)
You now have 42 rounds of even single crochet, building approximately 8.4 inches of length. Begin waist shaping (decreases to taper from 118 to 90 sts):
Rnd 43: Ch 1, [sc in next 13 sts, sc2tog] 8 times, sc in rem 6 sts, join. (90 sts)
Waist Border
Continue working in the round for the waist border as directed in the full pattern to establish the waistline before attaching the bib.
Bib
The bib is worked flat in rows, attached to the waist edge of the skirt at the front only.
Back Straps (Make 2)
The straps are worked as long flat strips and cross at the back.
Panda Face
The panda face is worked as a separate flat piece and sewn on after blocking.
Eye Patches (Make 2 in Color B)
Worked as separate flat pieces for the panda’s distinctive eye markings.
Panda Ears (Make 2)
Outer Ear (Color A):
Rnd 1: MR, ch 1, 6 sc in ring, pull to close, join. (6 sc)
Rnd 2: Ch 1, inc in each st around, join. (12 sc)
Rnd 3: Ch 1, [sc in next st, inc] 6 times, join. (18 sc)
Fasten off.
Inner Ear (Color B):
Rnd 1: MR, ch 1, 6 sc in ring, pull to close, join. (6 sc)
Rnd 2: Ch 1, inc in each st around, join. (12 sc)
Fasten off.
Place the black inner ear circle centered on the white outer ear circle. Whipstitch the inner ear to the outer ear around its perimeter using Color B.
Sew completed ears (outer ear facing up, inner ear visible) to the top of the face circle, one on each upper side. Position the bottom edge of each ear at approximately Rnd 2 of the face circle, spaced so the ears sit at the 10 o’clock and 2 o’clock positions. Whipstitch securely.
Pocket Circles (Make 2 in Color A)
Worked as separate flat pieces to be sewn onto the skirt front.
Assembly
Step 1: Weave in all ends on all separate pieces.
Step 2: Block all pieces. Wet block the skirt by soaking in cool water, pressing out water in a towel, and pinning to finished measurements. Block the bib flat. Block the panda face flat (or allow slight dimension if stuffed). Block the pocket circles flat.
Step 3: Position the panda face on the center of the bib, centering it horizontally and placing the bottom edge of the face approximately 0.5 inches above the waistband. Pin in place. Whipstitch around the entire perimeter of the face circle using Color A yarn and a tapestry needle, leaving the bottom 1 inch open if you wish to add a small amount of fiberfill for dimension before closing.
Step 4: If adding fiberfill, stuff lightly through the opening, then close with whipstitch.
Step 5: Position pocket circles on the skirt front, one on the left side and one on the right side, approximately 2 inches below the waistband and 2 inches from the center front on each side. Pin in place and whipstitch around the full perimeter of each circle.
Step 6: Sew the back straps to the inside back waist of the pinafore. Place the end of each strap at the side seams of the waistband, right and left. The left strap crosses over the back and attaches to the top of the right bib strap. The right strap crosses over the back and attaches to the top of the left bib strap. Sew or button the strap ends to the bib strap tops. For a permanent version, simply whipstitch. For adjustability, sew a button to each bib strap top and work a ch-4 button loop at the end of each back strap.
Step 7: Add strap flower/bow embellishments at the junction of each front strap top as shown, using Color A.
Step 8: Try the pinafore on over the gray long-sleeve underlayer sweater to check fit. Adjust strap length if needed by adding or removing rows from the back straps before the final attachment.
Final checkpoint: The completed pinafore should have a waist circumference of approximately 20 inches, a skirt length of 10 inches, a bib height of 5.5 inches, and lay flat with the panda face centered on the bib and pocket circles evenly placed on the skirt front.
After all pieces are assembled, weave in any remaining ends with a tapestry needle, pulling ends through several stitches in different directions for security. Trim ends to 0.25 inches.
Tips
To size up to 4T (chest 22 to 23 inches): Add 10 sts to the foundation chain (ch 128). Adjust decrease rounds to end at 100 sts at the waist instead of 90. Add 2 more rows to the bib and 10 rows to the back straps.
To size down to 18M to 2T (chest 18 to 19 inches): Reduce the foundation chain to ch 108. Adjust decreases to end at 80 sts at waist. Reduce bib to 30 sts wide and reduce bib rows by 2.
General rule: Each additional inch of circumference requires approximately 4 to 5 additional stitches at gauge. Each additional inch of length requires approximately 5 additional rows at gauge.
For a longer dress that falls below the knee on a 3T toddler: Add 10 to 12 rounds to the even-stitch section of the skirt before beginning waist shaping, and adjust the starting stitch count and decrease rounds proportionally to maintain the same waist size.
Finishing and Blocking
Wet blocking is recommended for acrylic or acrylic blend yarns. Submerge the finished pinafore in cool water for 10 to 15 minutes. Press out excess water by rolling in a clean towel. Do not wring. Lay flat on blocking mats and pin to the finished measurements listed above. Allow to air dry completely before removing pins, approximately 24 hours.
For cotton yarn: Wet block as above or steam block by holding a steam iron 0.5 inches above the surface and allowing the steam to penetrate the fabric. Do not press the iron directly onto the crochet.
Care Instructions
Machine wash cold on gentle cycle. Lay flat to dry. Do not tumble dry, as heat may distort the dimensional panda face applique and cause acrylic yarn to lose its shape. Do not iron directly. Remove safety eyes before washing if concerned about small children or rough machine cycles. For infants under 3 years, replace safety eyes with embroidered eyes as a safety precaution. Store flat or folded rather than hanging to preserve the shape of the bib and skirt.
About the Underlayer Sweater
This pinafore is designed to be worn over a simple gray long-sleeve sweater, creating that layered look you see in the photo. The gray underlayer complements the panda theme and adds warmth.
FAQs
Can I use a different yarn weight?
Yes, but you must adjust your hook size and check your gauge. For example, if using Paintbox Yarns Simply DK (DK weight), switch to a US size E-4 (3.5 mm) hook. If using Drops Safran (cotton), also use a US size E-4 (3.5 mm) hook. Avoid fuzzy or textured yarns as they obscure facial details.
How do I adjust the size for a larger toddler?
To size up to 4T, add 10 stitches to the foundation chain (ch 128) and adjust the decrease rounds to end at 100 stitches at the waist. You will also need to add 2 more rows to the bib and 10 rows to the back straps.
Are the pockets functional?
No, the white circular pockets on the skirt are purely decorative appliques. They are not functional pockets.
Can I make this for an infant?
For infants under 3 years, it is recommended to replace the safety eyes with embroidered eyes as a safety precaution. You can also size down to 18M to 2T by reducing the foundation chain to ch 108 and adjusting the waist decreases to end at 80 stitches.
How do I prevent the panda face from looking flat?
When assembling, leave the bottom 1 inch of the face circle open. Lightly stuff the face with a small amount of fiberfill or scrap yarn through this opening before closing it with a whipstitch. This adds a dimensional effect.
How should I store the finished dress?
Store the pinafore flat or folded rather than hanging. Hanging can distort the shape of the bib and skirt over time.
Pin This Crochet Pattern!