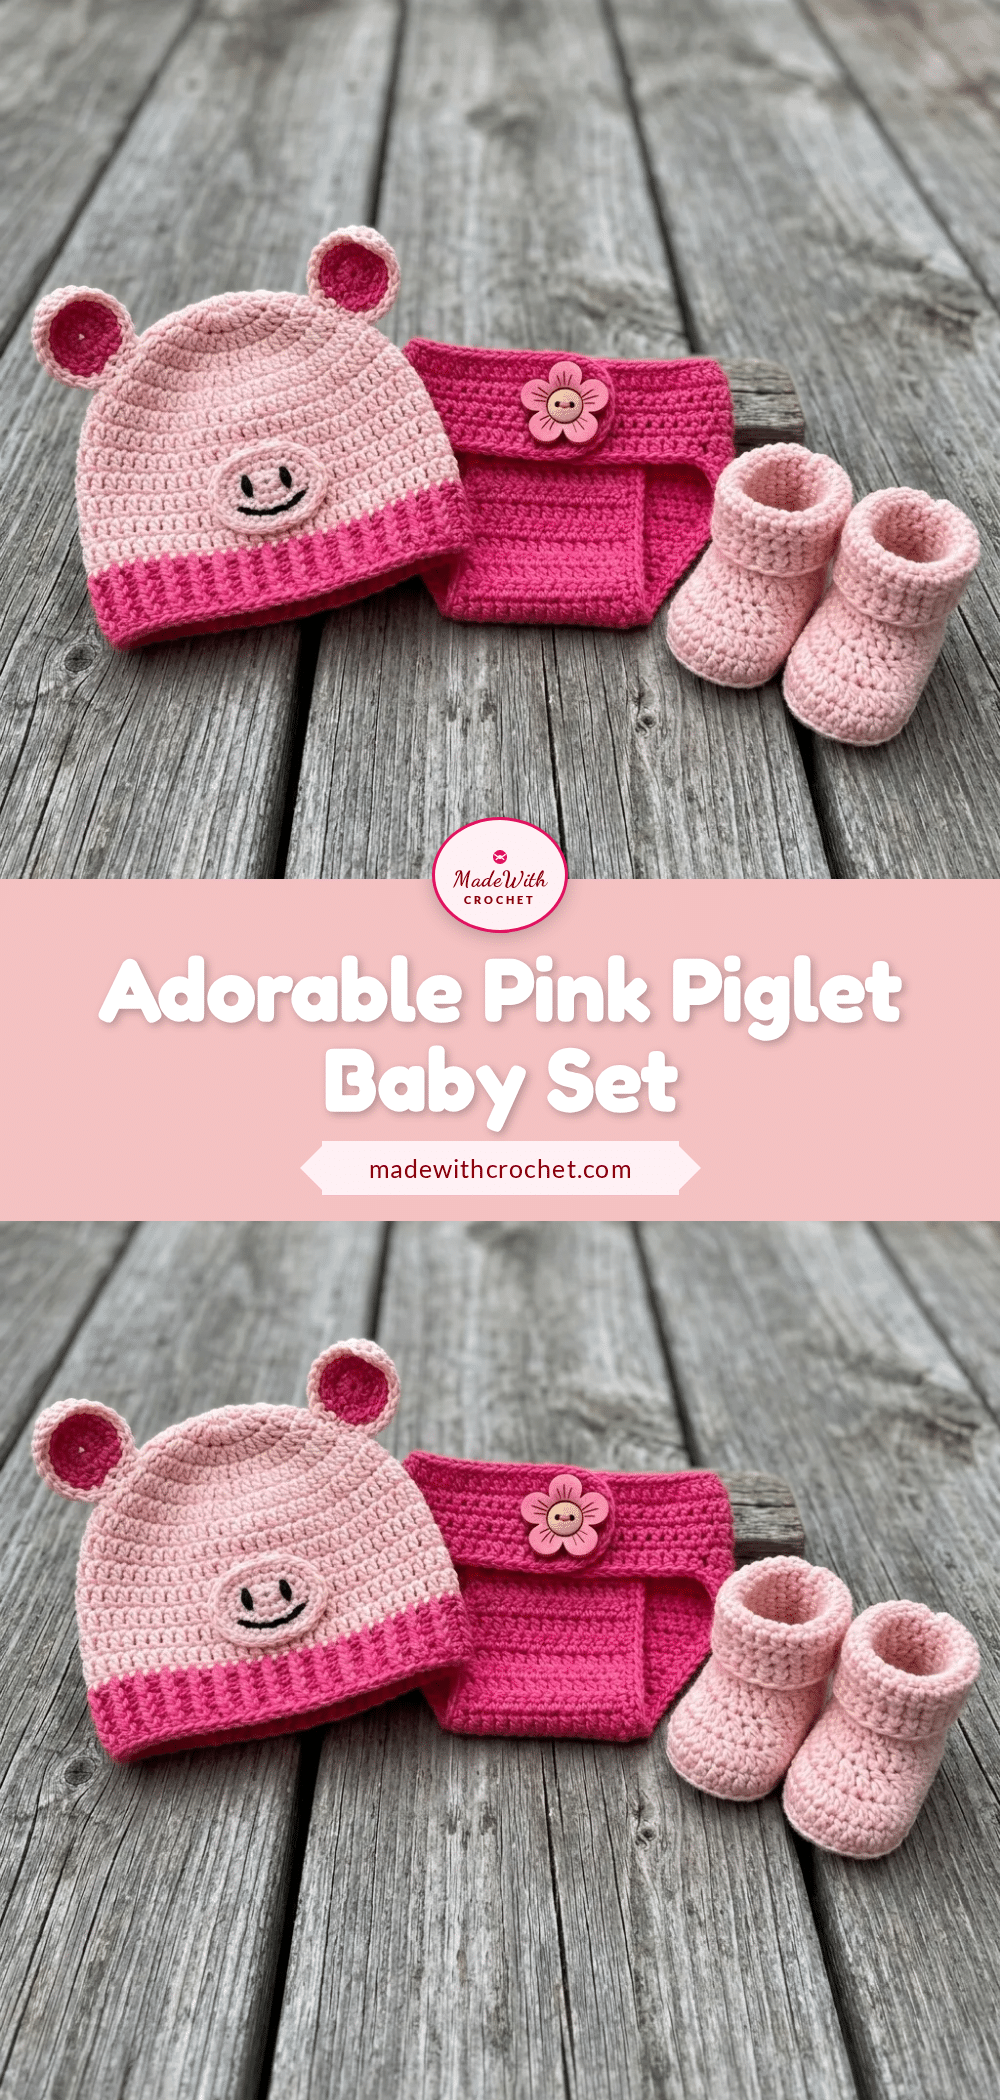
Have you ever started a project with high hopes, only to panic when your stitches look slightly uneven or your magic ring refuses to close? It happens to the best of us. Maybe you pulled the yarn too tight, or perhaps you just aren’t sure if you are holding the hook correctly. But here is the secret: this adorable pink piglet baby set is forgiving. It relies on simple single crochet stitches and straightforward shaping, meaning you don’t need to be a perfectionist to get a professional-looking result. The charm of this set comes from its cute details—the snout, the ears, and the color blocking—rather than complex technical wizardry. It is the perfect project to build confidence while creating something truly special.
Maker Notes
There is something undeniably sweet about a handmade gift that tells a story. This piglet set is more than just a collection of baby items; it is a cohesive look that photographs beautifully. The contrast between the soft pastel pink and the vibrant hot pink brim gives the hat a playful, modern feel that stands out in newborn photos. I love that the construction is mostly worked in single crochet, which creates a dense, sturdy fabric that holds its shape well. This is important for a baby item that will be washed and worn frequently. The addition of the snout and ears adds a three-dimensional element that elevates the set from a simple beanie to a character piece. Plus, the diaper cover and booties tie everything together, making it a complete outfit that is as functional as it is adorable.
Project Overview
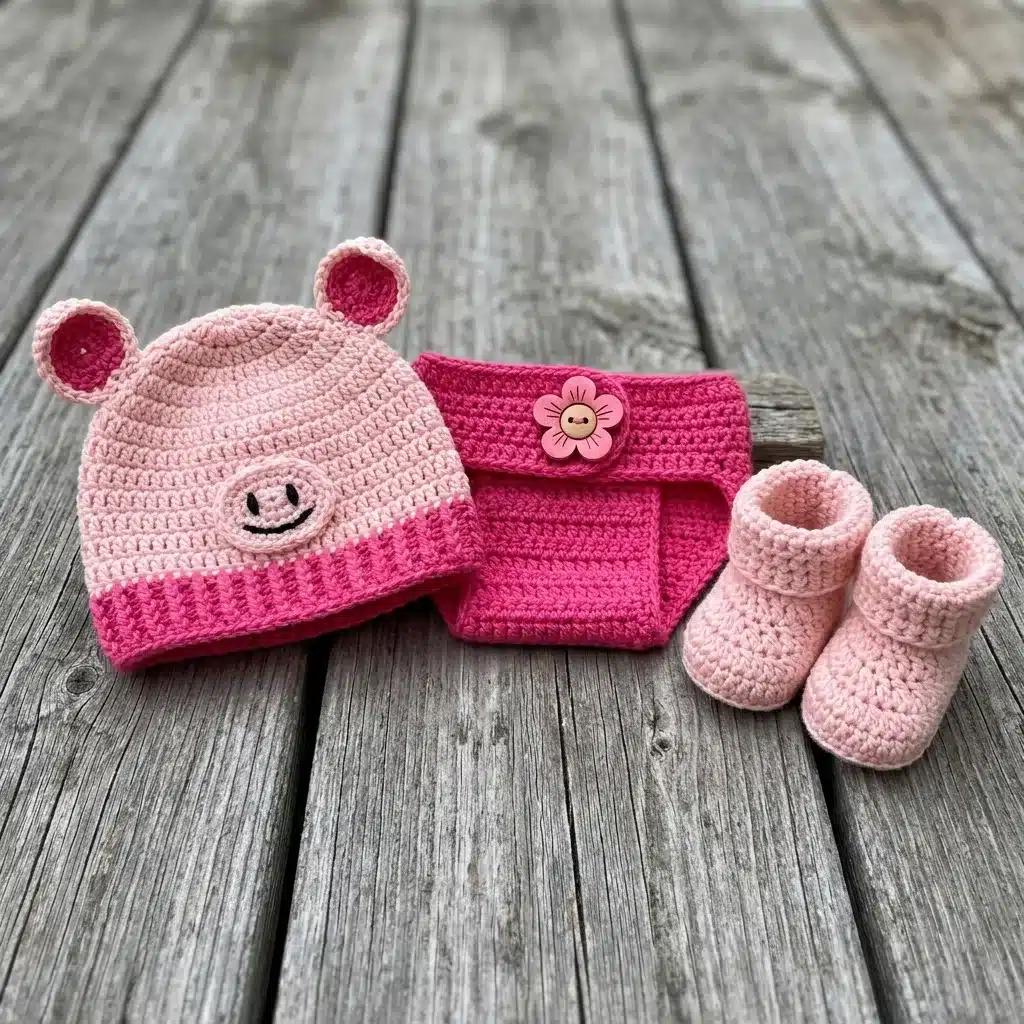
This three-piece piglet set includes a beanie with a dimensional snout and ears, a diaper cover with a flower button closure, and matching booties. The construction is straightforward, relying mostly on single crochet worked in the round. This technique creates a dense, structured fabric that is perfect for newborn photo props. The pattern is considered beginner-intermediate level, suitable for crocheters who are comfortable with increases, decreases, and sewing pieces together. The entire set can be completed in approximately 4 to 6 hours.
Materials
Gathering your supplies first makes the whole process smoother. Here is everything required for the complete pink piglet baby set:
- Yarn A (Light Pink): Approximately 200 yards / 183 meters. Both yarns should be DK to light worsted weight. Look for machine-washable options since this is a baby item.
- Yarn B (Hot Pink or Magenta): Approximately 120 yards / 110 meters.
- Hook: US size G-6 / 4.00 mm.
- Notions: 4 stitch markers, yarn needle, scissors, one flower-shaped button (approx. 1 inch / 2.5 cm diameter), black embroidery thread or yarn for snout details, small amount of fiberfill stuffing (optional), sewing needle and thread for the button.
Yarn Suggestions
- Lion Brand Pound of Love in Pastel Pink: Works beautifully for the main color. It is 100% premium acrylic, machine washable, and incredibly soft.
- Paintbox Yarns Simply DK: An excellent choice. If you go this route, drop down to a US size F-5 / 3.75 mm hook and check your gauge.
- Drops Safran: 100% Egyptian cotton creates a firmer, cooler fabric. Perfect if the baby will be photographed in warmer weather.
Gauge and Finished Size
Getting gauge right matters here, especially for the hat circumference and diaper cover fit.
- Gauge: 18 single crochet stitches x 22 rows = 4 inches / 10 cm worked in the round with a US size G-6 / 4.00 mm hook. To check: Work a flat swatch of 20 single crochet (sc) stitches across for 22 rows. Block lightly and measure the center 18 stitches and 22 rows. Adjust your hook size up or down as needed.
- Hat: Approximately 13 inches / 33 cm circumference, 6 inches / 15.25 cm tall (fits newborn to 0-3 months).
- Diaper Cover: Approximately 14 inches / 35.5 cm waist unstretched, 6 inches / 15.25 cm rise.
- Booties: Approximately 3.5 inches / 9 cm sole length, 2.5 inches / 6.5 cm tall.
Abbreviations
Let me walk you through every abbreviation used in this crochet tutorial. I’ll define each one so you never have to wonder.
- sc = single crochet (insert hook, yarn over, pull up a loop, yarn over, pull through both loops)
- sl st = slip stitch (insert hook, yarn over, pull through stitch and loop on hook in one motion)
- ch = chain (yarn over, pull through loop on hook)
- st / sts = stitch / stitches
- rnd = round
- inc = increase (work 2 sc in the same stitch, so if you had 10 stitches and work an inc in one of them, you now have 11)
- dec = invisible decrease (explained in detail below)
- BLO = back loop only (insert your hook under just the back loop of the stitch, not both loops)
- FLO = front loop only
- pm = place marker
- MR = magic ring (adjustable starting ring)
- sk = skip
- sp = space
- rep = repeat
- rem = remaining
Pattern Notes
Read through these before starting. They’ll save you confusion later.
- The hat is worked in continuous rounds from the crown down. Use a stitch marker to mark the first stitch of each round and move it up as work progresses.
- The hat brim is worked in BLO to create a turning ridge, then folds inward. The hot pink contrast color forms the lower body and folded brim.
- The snout is worked as a separate flat oval and sewn onto the hat front. Nostrils and a smile are embroidered with black yarn after attachment.
- Ears are worked as two small flat discs (outer ear in light pink, inner ear detail in hot pink) and sewn to the top of the hat.
- The diaper cover is worked flat for the back gusset section, then joined and worked in continuous rounds for the body, with a folded waistband worked last.
- Booties are worked from the sole up in continuous rounds, then shaped with decreases across the toe box.
- When instructed to join, use a sl st into the first sc of the round unless otherwise noted.
- Do not turn between rounds unless specifically instructed.
Pattern Instructions
Pink Piglet Hat Instructions
Crown (Yarn A, Light Pink, Continuous Rounds)
Rnd 1: Start with MR, work 6 sc into ring, pull ring closed, do not join. (6 sc)
Rnd 2: Inc in each st around. (12 sc)
Rnd 3: [Sc 1, inc] rep 6 times. (18 sc)
Rnd 4: [Sc 2, inc] rep 6 times. (24 sc)
Rnd 5: [Sc 3, inc] rep 6 times. (30 sc)
Rnd 6: [Sc 4, inc] rep 6 times. (36 sc)
Rnd 7: [Sc 5, inc] rep 6 times. (42 sc)
Rnd 8: [Sc 6, inc] rep 6 times. (48 sc)
Rnd 9: [Sc 7, inc] rep 6 times. (54 sc)
Rnd 10: [Sc 8, inc] rep 6 times. (60 sc)
Checkpoint: After Rnd 10, the flat crown circle should measure approximately 5.25 inches / 13.5 cm across.
Hat Body (Yarn A, Continuous Rounds)
Rnds 11 through 16: Sc in each st around. 6 rounds even. (60 sc each round)
Hat Color Change Section (Yarn B, Hot Pink)
Switch to Yarn B at the end of Rnd 16 using the color change method.
Rnds 17 through 22: Sc in each st around in Yarn B. 6 rounds even. (60 sc each round)
Checkpoint: After Rnd 22, the hat body should measure approximately 5.5 inches / 14 cm from the crown center to the lower edge. The circumference should be approximately 13 inches / 33 cm.
Hat Brim
Rnd 23: Working in BLO only, sc in each st around. (60 sc)
Rnds 24 through 26: Sc in each st around through both loops. 3 rounds even. (60 sc each round)
Sl st to next st and fasten off. Weave in end. The brim will fold inward naturally at the BLO ridge created in Rnd 23.
Hat Outer Ear (Make 2 in Yarn A)
Rnd 1: MR, work 6 sc into ring, pull closed, do not join. (6 sc)
Rnd 2: Inc in each st around. (12 sc)
Rnd 3: [Sc 1, inc] rep 6 times. (18 sc)
Sl st to next st. Fasten off, leaving a 10 inch / 25 cm tail for sewing.
Hat Inner Ear (Make 2 in Yarn B)
Rnd 1: MR, work 6 sc into ring, pull closed, do not join. (6 sc)
Rnd 2: Inc in each st around. (12 sc)
Sl st to next st. Fasten off, leaving a 10 inch / 25 cm tail for sewing.
Ear Assembly
Place one inner ear (Yarn B, 12 sc) on top of one outer ear (Yarn A, 18 sc), right sides facing up, centering the smaller disc on the larger. Using Yarn B tail, whip stitch around the perimeter of the inner ear to attach it to the outer ear. The outer ring of the outer ear will remain visible as a light pink border. Repeat for second ear.
Position ears on the hat crown approximately 1.5 inches / 3.8 cm from the center top on either side, at roughly the 10 o’clock and 2 o’clock positions. Pin in place and sew down securely through the base of the outer ear into the hat fabric using Yarn A tail. Flatten the base of each ear slightly before sewing for a cupped appearance.
Snout (Yarn A)
Worked as a separate flat oval. (Specific row-by-row instructions for the oval shape are not provided in the source data, but it is described as a separate flat oval sewn onto the hat front.)
Snout Embroidery
Nostrils and a smile are embroidered with black yarn after attachment. The embroidered smile should face forward on the lower half of the snout.
Snout Attachment
Confirm snout is centered and securely whipstitched all the way around.
Diaper Cover Instructions
Back Gusset Panel (Yarn B, Hot Pink)
The diaper cover is worked flat for the back gusset section, then joined and worked in continuous rounds for the body, with a folded waistband worked last.
Ch 13.
Row 1: Starting in the 2nd ch from hook, sc across. Turn. (12 sc)
Rows 2 through 16: Ch 1, sc across. Turn. (12 sc each row)
This panel forms the narrow crotch/gusset strip. It should measure approximately 1.5 inches / 3.8 cm wide and 3 inches / 7.5 cm long after Row 16. Do not fasten off.
Joining and Body (Working in Rounds)
After Row 16, do not turn. Rotate the gusset panel 90 degrees and work 18 sc evenly along the long right edge of the gusset (approximately 1 sc per row, adjusting to 18). Ch 1, then work 12 sc across the foundation chain edge of the gusset. Ch 1, then work 18 sc evenly along the long left edge. Do not work across the top open edge; this forms the waistband opening. Join with sl st to the first sc worked after the last row.
Place marker at join. (48 sc plus 2 ch-1 corner spaces; work the ch-1 spaces as 1 sc each in subsequent rounds for a total working count of 50 sc)
Adjustment note: On the first body round, work the 2 ch-1 spaces as 1 sc each. Total stitches in round = 50.
Rnd 1 (Body): Sc in each st around. (50 sc)
Rnds 2 through 10: Sc in each st around. (50 sc each round)
Rnd 11: [Sc 8, inc] rep 5 times, sc 5. (55 sc)
Rnd 12: Sc in each st around. (55 sc)
Rnd 13: [Sc 10, inc] rep 5 times. (60 sc)
Rnds 14 through 16: Sc in each st around. (60 sc each round)
Checkpoint: After Rnd 16 of the body, the diaper cover should measure approximately 5 inches / 12.75 cm in rise from the bottom of the gusset to the top of the body. The circumference should be approximately 13.5 inches / 34 cm.
Waistband (Yarn B)
Worked last as a folded waistband.
Button Loop Closure
Sew the flower button centered on the front waistband at the position described. The button is decorative as well as functional with the ch-8 loop closure.
Bootie Instructions (Make 2)
Sole (Yarn A, Light Pink)
Worked from the sole up. (Specific row-by-row instructions for the sole are not provided in the source data, but it is the starting point for the booties.)
Bootie Sides (Continuous Rounds)
Worked in continuous rounds from the sole up.
Toe Shaping
Shaped with decreases across the toe box.
Bootie Cuff
Fold the cuff outward. No additional seaming is needed.
Assembly
Weave in all remaining yarn ends securely, especially at color change points and magic ring closures.
- For the hat: Ensure ears are firmly attached at the base. Reinforce ear sewing with an additional pass of yarn if needed. Confirm snout is centered and securely whipstitched all the way around.
- For the diaper cover: Sew the flower button centered on the front waistband. Ensure the gusset panel is smooth and untwisted.
- For the booties: Fold the cuff outward. No additional seaming is needed.
Tips
Need a different size? Here’s how to adjust:
- For 3-6 months: Add 4 rounds to the flat crown section of the hat before beginning the body. This adds approximately 1 inch to the circumference. For the diaper cover, add 2 rounds to the body section and work the waistband over 4 additional stitches per side. For booties, add 2 rounds to the sole before beginning the sides.
- For premature newborn: Reduce the flat crown by 2 rounds and remove 2 rounds from each boot side.
FAQs
What type of yarn is best for this project?
Both yarns should be DK to light worsted weight. Machine-washable options are recommended since this is a baby item. Lion Brand Pound of Love or Paintbox Yarns Simply DK are excellent choices.
How do I fix a gap when doing an invisible decrease?
For the invisible decrease (dec), insert your hook into the front loop only of the next stitch, then into the front loop only of the following stitch. Yarn over and pull through both front loops, then yarn over and pull through the remaining 2 loops. This minimizes the gap on the right side.
Can I wash the finished set?
Yes. Machine wash cold on a gentle cycle. Lay flat to dry. Do not tumble dry, iron, or dry clean. Store flat or loosely folded to preserve the three-dimensional ear and snout shapes.
How do I change colors without a visible line?
Work the last sc of the old color up to the final yarn over (2 loops on hook). Drop the old color to the back, pick up the new color, yarn over with the new color, and pull through both loops to complete the stitch. Continue the next round in the new color.
What if my hat doesn’t fit the newborn size?
You can adjust the size by adding or removing rounds. For a 3-6 month size, add 4 rounds to the flat crown section. For a premature newborn, reduce the flat crown by 2 rounds.
Pin This Crochet Pattern!