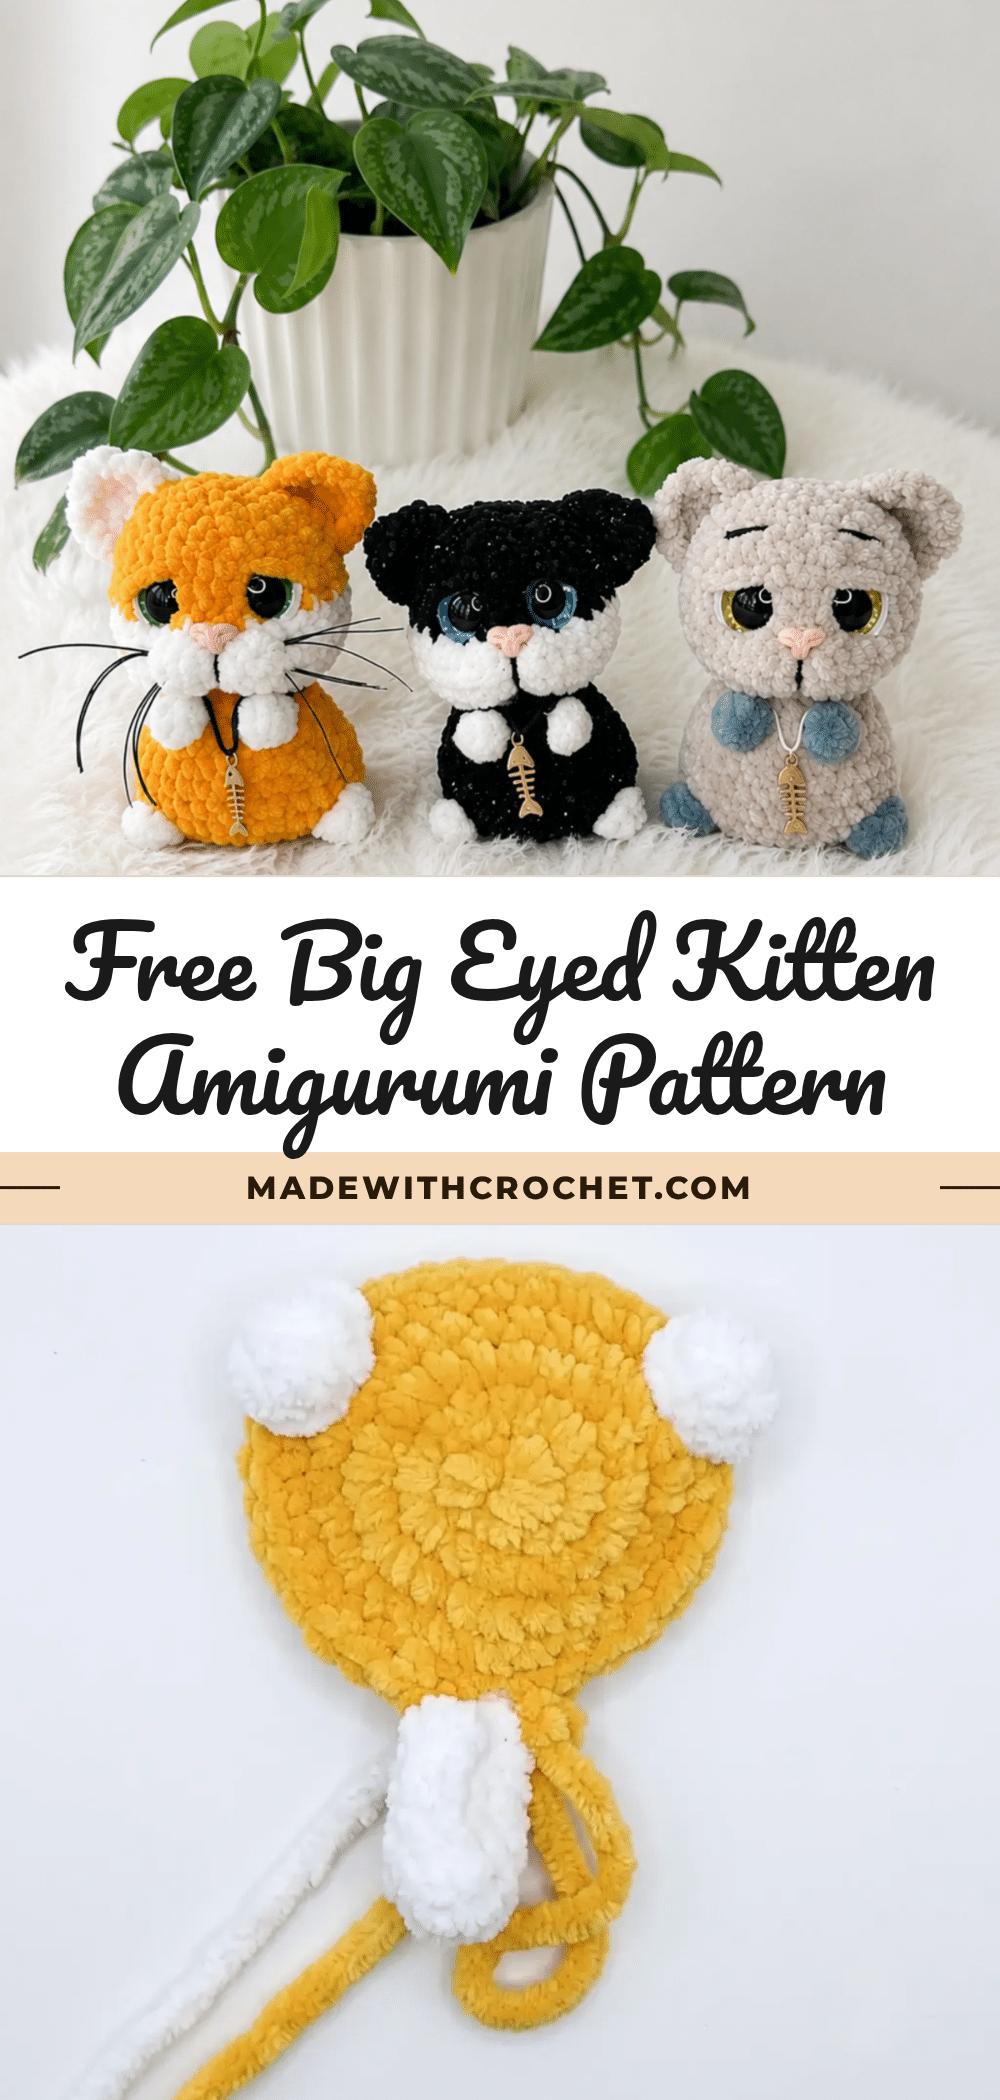
There’s something deeply soothing about settling in for a quiet evening with a small batch of yarn, counting stitches as the world outside fades away. The gentle rhythm of single crochet, the satisfying pull of a magic ring, and the slow emergence of a tiny face from your hands—this is the heart of amigurumi. This Big-Eyed Kitten pattern invites you into that cozy ritual, offering a relaxing repeat that builds into an impossibly cute companion. Whether you’re a seasoned maker or an adventurous intermediate, this project is a perfect way to unwind and create something full of personality.
Small Details That Make It Better
What sets this kitten apart is the thoughtful interplay of texture and expression. The oversized 16 mm safety eyes are the undeniable star, giving the kitten that wide-eyed, soulful gaze that makes it impossible to resist. The contrast between a smooth worsted-weight yarn and the crisp definition of the bobble-stitch paws adds a tactile charm, while the option to work the muzzle in a contrasting color creates a soft, two-tone face that feels polished. This pattern is a wonderful canvas for personalization—choose a classic orange tabby, a sleek grey, or even a pastel hue for a whimsical twist. The result is a small, huggable friend that looks right at home on a shelf, desk, or in the hands of a little one.
Project Overview
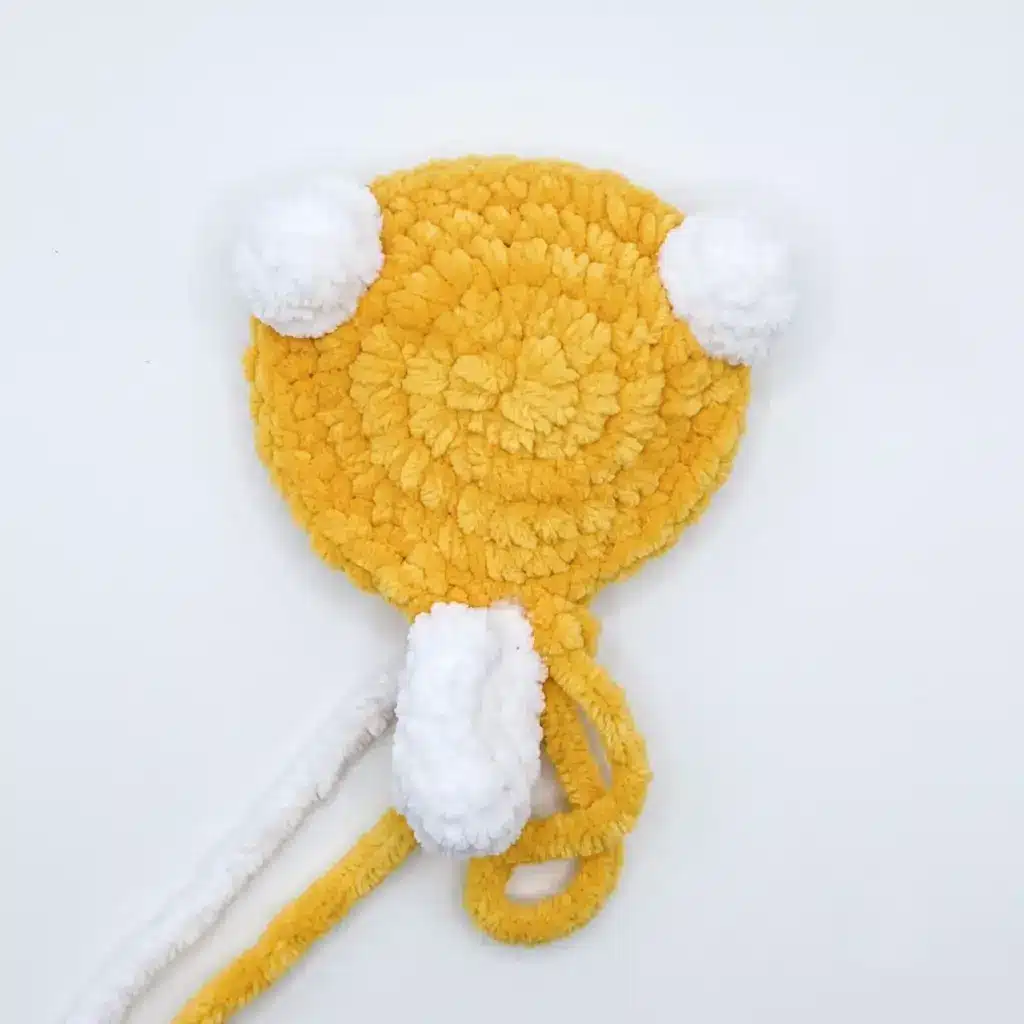
This Big-Eyed Kitten is an intermediate-friendly amigurumi project. It features a seamless head-body worked in continuous spiral rounds, with flat-worked ears and integrated paw and tail details. The oversized safety eyes and delicate embroidery give the kitten its signature expression. The pattern is written in US crochet terminology.
Materials
- Worsted weight (Medium, 4) yarn in Main Color (orange or your choice)
- Small amount of worsted weight yarn in Contrast Color (white, for the muzzle and paws)
- Crochet hook size E-4 (3.5 mm), or size needed to achieve a tight, gap-free fabric
- Safety eyes, 16 mm, 1 pair
- Fiberfill stuffing
- Stitch markers
- Yarn needle / tapestry needle
- Scissors
- Craft glue (for attaching the nose)
- Embroidery thread (black or dark brown, for eye whites, eyelids, eyebrows, and face details)
Abbreviations Used
- BLO — Back Loop Only
- ch — Chain
- dc — Double Crochet
- dec — Decrease
- hdc — Half Double Crochet
- inc — Increase
- MC — Main Color
- CC — Contrast Color
- mr — Magic Ring
- sc — Single Crochet
- sl st — Slip Stitch
- st(s) — Stitch(es)
Pattern Notes
- This pattern is written in US crochet terminology.
- The Head-Body is worked in continuous spiral rounds; use a stitch marker to track the start of each round, since the marker runs down the center back of the piece.
- The Ears are worked in flat turning rows.
- Gauge is not critical for this project — focus on working tightly enough that stuffing doesn’t peek through the stitches.
- Stitch count is given at the end of each round or row in parentheses.
- Safety eyes are inserted between specific rounds as noted below; always test eye placement before securing, since it determines the kitten’s final expression.
- The paw and tail details are worked directly into the Head-Body rounds using bobble stitches and a small chain extension — read each round fully before starting it.
Pattern Instructions
Head-Body
Marker runs down the center back throughout. Join with a slip stitch at any point if needed. Work in Main Color (MC) unless otherwise noted.
- Rnd 1: 8 sc in mr. (8)
- Rnd 2: inc in each st around. (16)
- Rnd 3: 2 sc, 4 inc, 4 sc, 4 inc, 2 sc. (24)
- Rnd 4: 2 sc, (1 sc, 1 inc) repeat 4 times, 4 sc, (1 sc, 1 inc) repeat 4 times, 2 sc. (32)
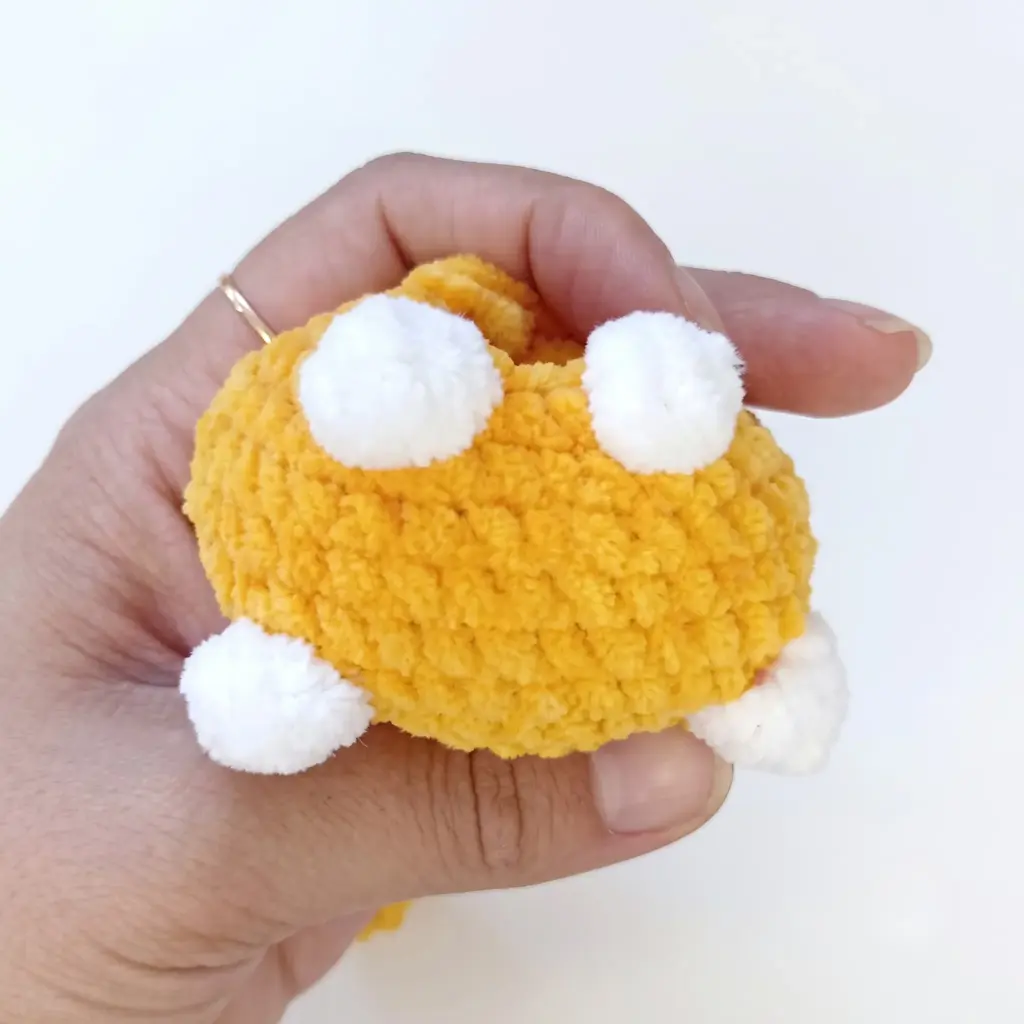
- Rnd 5: 10 sc, paw: 1 Bobble Stitch (4 dc worked into the same st, joined at the top), 10 sc, paw: 1 Bobble Stitch (4 dc worked into the same st, joined at the top), 10 sc, tail (ch 11; starting in 2nd ch from hook: 3 sl st, 3 sc, 4 hdc). (32)
- Rnds 6-8: sc in each st around, 3 rounds even. (32)
- Rnd 9: 7 sc, 1 dec, 14 sc, 1 dec, 7 sc. (30)
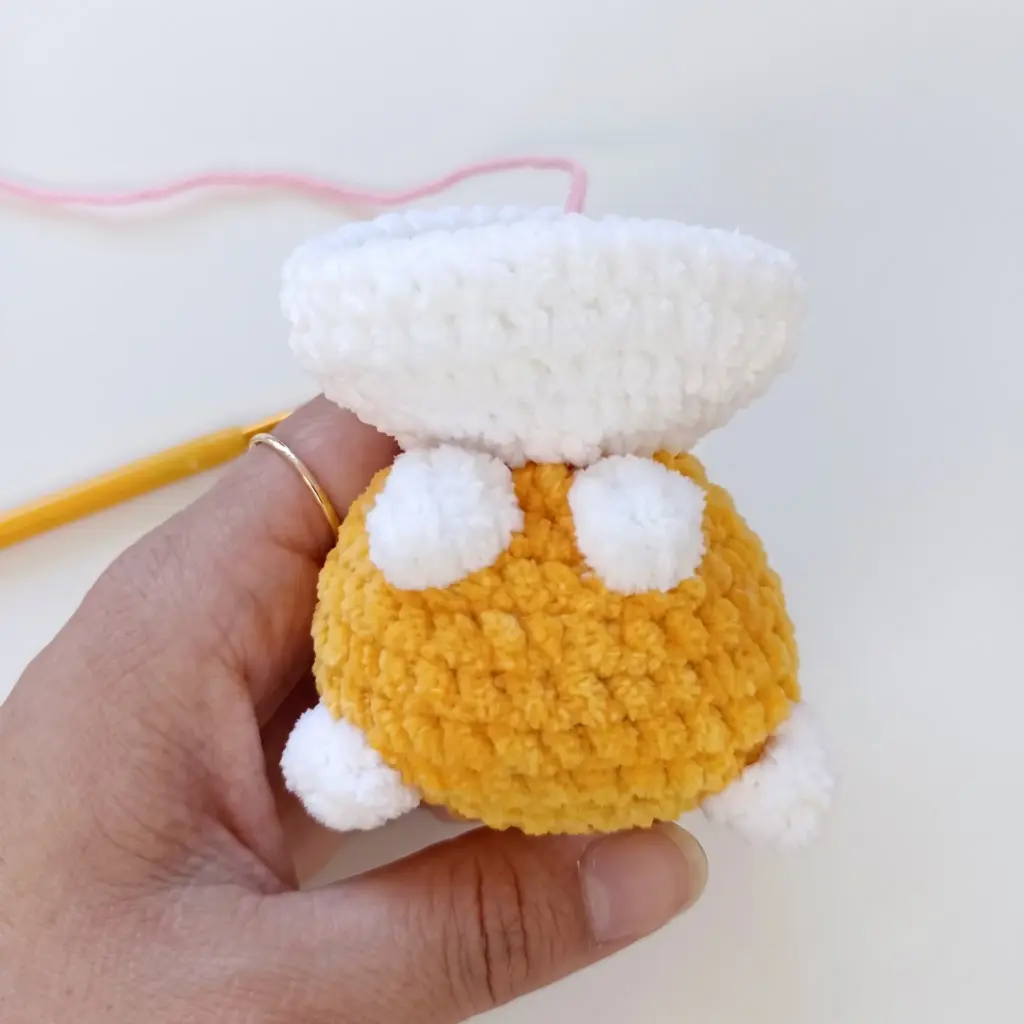
- Rnd 10: (3 sc, 1 dec) repeat 2 times, 2 sc, paw: 1 Bobble Stitch (4 hdc worked into the same st, joined at the top), 1 dec, 2 sc, paw: 1 Bobble Stitch (4 hdc worked into the same st, joined at the top), 1 dec, (3 sc, 1 dec) repeat 2 times. (24)
- Rnd 11: (2 sc, 1 dec) repeat 6 times. (18)
- Rnd 12: (1 sc, 1 dec) repeat 6 times. (12)
Continue in Main Color from here. If you’d like to define the muzzle, switch to Contrast Color (CC) for Rounds 13-17.
- Rnd 13: Working in BLO: inc in each st around. (24)
- Rnd 14: (1 sc, 1 inc) repeat 12 times. (36)
- Rnds 15-17: sc in each st around, 3 rounds even. (36)
- Rnd 18: 9 sc, (1 sc, 1 dec) repeat 6 times, 9 sc. (30)
- Rnds 19-21: sc in each st around, 3 rounds even. (30)
- Rnd 22: (3 sc, 1 dec) repeat 6 times. (24)
Insert the 16 mm safety eyes between Rounds 19 and 20, leaving 3-4 sc between the eyes. Begin stuffing the Head-Body firmly at this point, adding more as you close the remaining rounds.
- Rnd 23: (2 sc, 1 dec) repeat 6 times. (18)
- Rnd 24: dec in each st around. (9)
Fasten off, leaving a long tail. Close the remaining opening using the yarn needle, working through the back loops only.
Ear (make 2)
Worked in flat turning rows.
- Ch 8; starting in 2nd ch from hook: 7 sc, ch 1, turn.
- Row 1: Starting in 2nd st: 1 dec, 3 sc, 1 dec, ch 1, turn. (5)
- Row 2: Starting in 2nd st: 1 dec, 1 sc, 1 dec, ch 1, turn. (3)
- Row 3: Starting in 2nd st: 1 triple decrease. (1)
Fasten off, leaving a 20-30 cm tail for sewing. Weave the working tail down through the piece using the yarn needle so it’s ready for attaching later.
Assembly
- Finish stuffing the Head-Body firmly, making sure the shape stays round and there are no soft or lumpy spots.
- Using the long tail left at the top of the Head-Body, work the tightening sequence: pass the needle through points T3, T1, T2, T4 in order, then pull to cinch the stitches together and secure with a double knot.
- With the same yarn, work a second tightening pass through points T5 and T6, pulling to cinch and securing with a double knot. Bury both yarn ends inside the head.
- Position the two Ears between Rounds 18 and 22 of the Head-Body, leaving 4 sc of space between them. Pin in place first to check symmetry, then whipstitch each Ear securely using its own yarn tail.
- Using embroidery thread, stitch the eye whites, eyelids, eyebrows, and the center seam of the muzzle to build out the kitten’s expression.
- Glue the nose in place at the center of the muzzle.
- Weave in any remaining yarn ends throughout the piece.
Tips & Tricks
- Keep your tension snug throughout the Head-Body — amigurumi pieces need tight stitches to keep stuffing from showing through, especially around the color-changed muzzle section. If your stitches feel loose, try dropping down half a hook size.
- When you reach the decrease rounds near the top of the head (Rounds 23 and 24), work slowly and check your stitch placement after every few stitches. These final rounds shape the crown of the head, and rushing here is the most common way to end up with a lopsided finish.
- Stuff as you go rather than waiting until the piece is closed. Add small amounts of fiberfill after each round from Round 18 onward, pushing it into the corners near the eyes so the face stays smooth and rounded rather than flat.
- For the paw bobble stitches in Rounds 5 and 10, pull your working loop snug after each of the four stitches before joining them at the top. This keeps the bobble compact and prevents it from looking floppy against the body.
- If you want to substitute yarn, stick with a smooth worsted weight rather than a fuzzy or textured yarn — the fine facial embroidery and the visible increase/decrease pattern on the muzzle look their best on a smooth stitch definition.
Frequently Asked Questions
What size finished kitten does this pattern make?
Using worsted weight yarn and a 3.5 mm hook, this pattern produces a small kitten roughly palm-sized, ideal for shelf display or as a pocket-sized gift. The exact size can vary slightly depending on your tension and stuffing firmness.
Can I skip the contrast color for the muzzle?
Yes, you can work Rounds 13 through 17 in your Main Color instead of switching to Contrast Color. The shaping will look identical; you’ll simply lose the two-tone muzzle detail, which you can still suggest later through embroidery.
Why are my safety eyes uneven after inserting them?
This usually happens when the eyes are placed before checking symmetry on both sides. Insert the posts loosely first, count the stitches between them to confirm they match, and hold the piece at arm’s length to check the angle before pushing the backs on permanently.
What is a triple decrease and how do I work it?
A triple decrease combines three stitches into one by pulling up a loop in each of three consecutive stitches, then pulling the yarn through all four loops on the hook. This is used in the final row of the ear to create a neat point.
Can I use a different size of safety eyes?
Yes, but the 16 mm eyes are key to the “big-eyed” look. If you use smaller eyes, the kitten’s expression will be less dramatic. If you use larger eyes, you may need to adjust the spacing between them.
How do I keep the bobble stitches from looking loose?
After working each of the four stitches that make up the bobble, pull the working loop snug before completing the join at the top. This tightens the bobble and prevents it from sagging against the body.
Pin This Crochet Pattern!