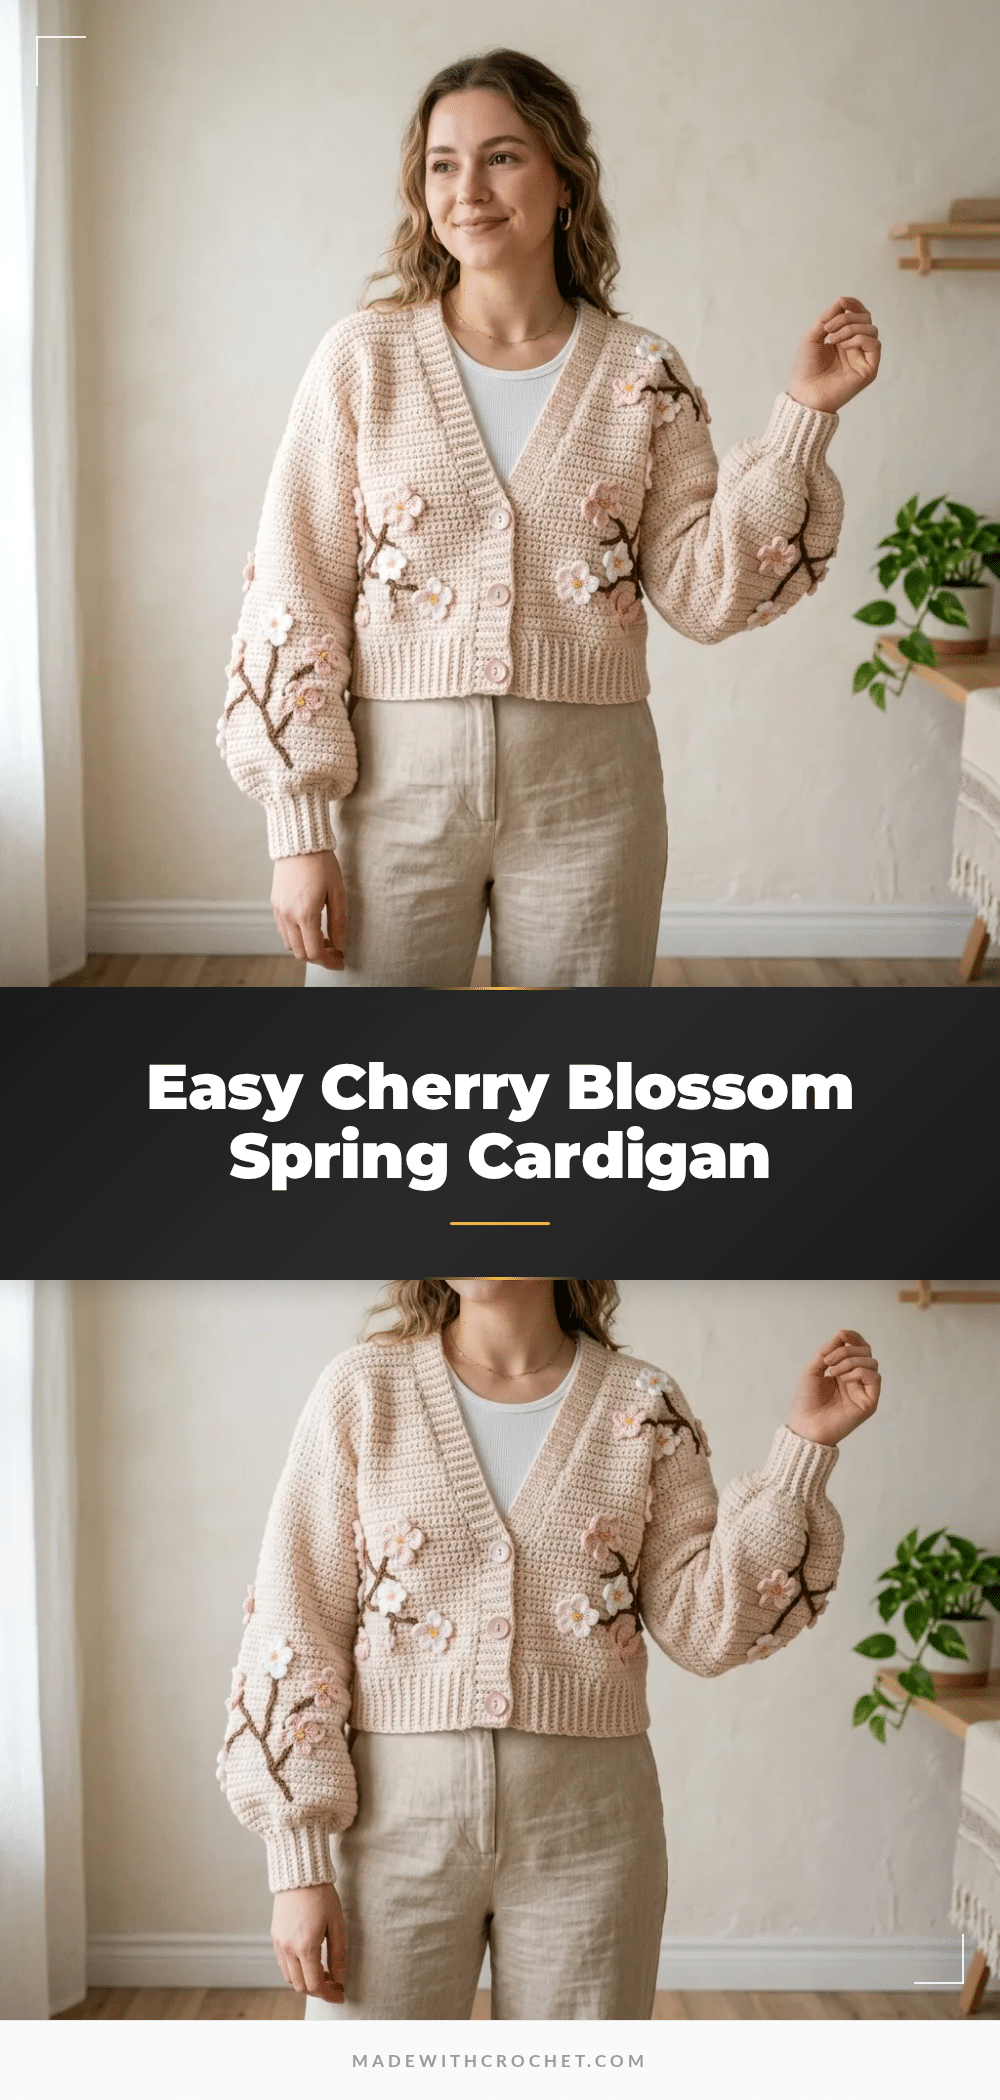
The yarn is on the table, the hook is in your hand, and the first row of ribbing is just beginning to take shape. There is a specific kind of calm that comes with starting a wearable project, especially one as delicate as this Cherry Blossom Spring Cardigan. It feels like the beginning of a season. The body works up quickly in half double crochet, but the magic happens in the details—the dimensional flowers and the winding branches that transform a simple boxy silhouette into something that feels like wearing springtime itself.
Why This Project Works
This cardigan is designed to be approachable without sacrificing visual impact. The main fabric relies entirely on half double crochet, creating a soft, slightly drapey fabric that is perfect for layering. The construction is straightforward: you work the body flat in one piece from the bottom up, divide for the armholes, and then work the sleeves separately. This method avoids complicated seaming until the very end.
The real charm lies in the finishing. The branches are added using a surface slip stitch technique, meaning you don’t need to worry about complex colorwork while crocheting the main pieces. The flowers are small and meditative to make; once you get the rhythm, each one takes about five minutes. It is a project that rewards patience with a stunning, high-end look that is far more complicated than it actually is.
Project Overview
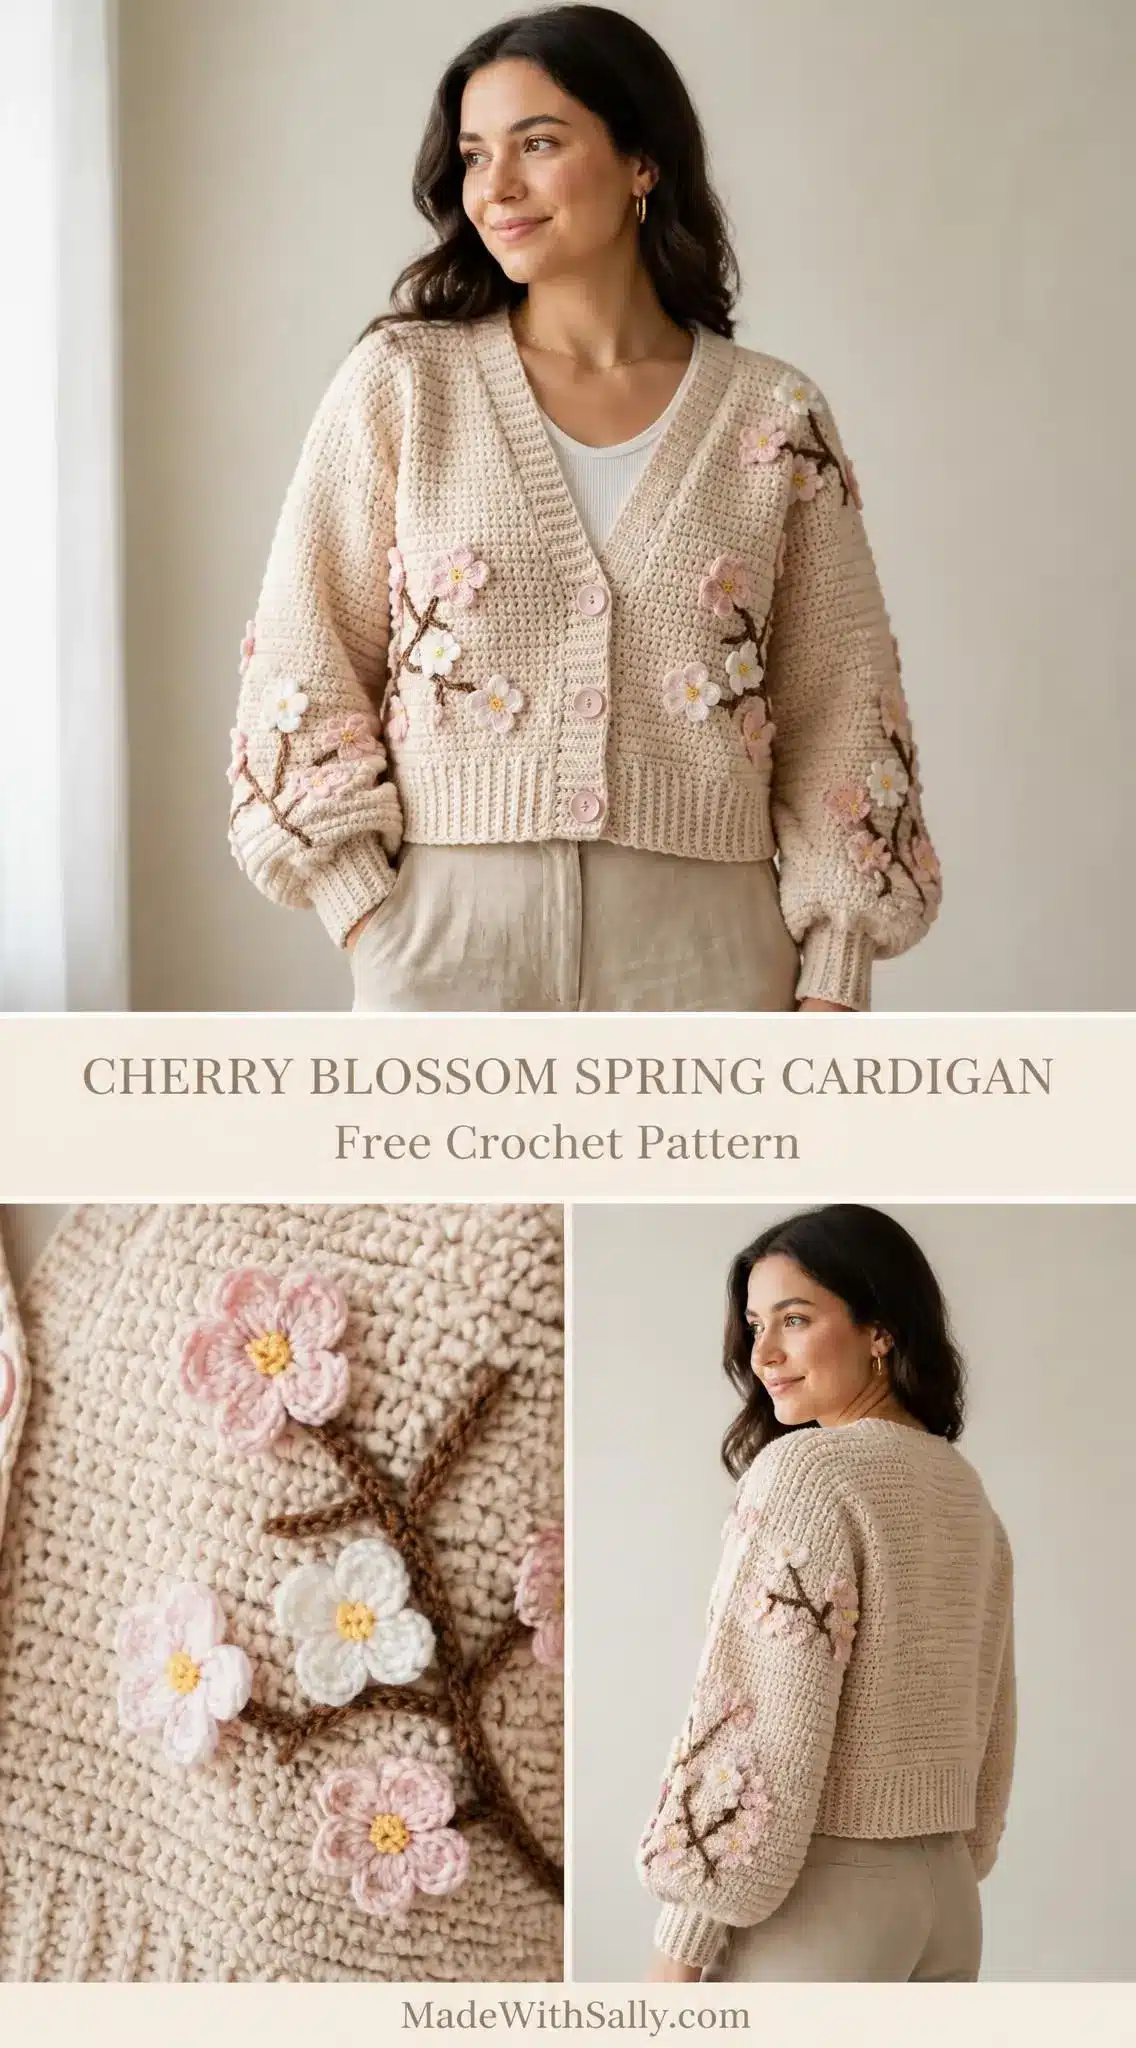
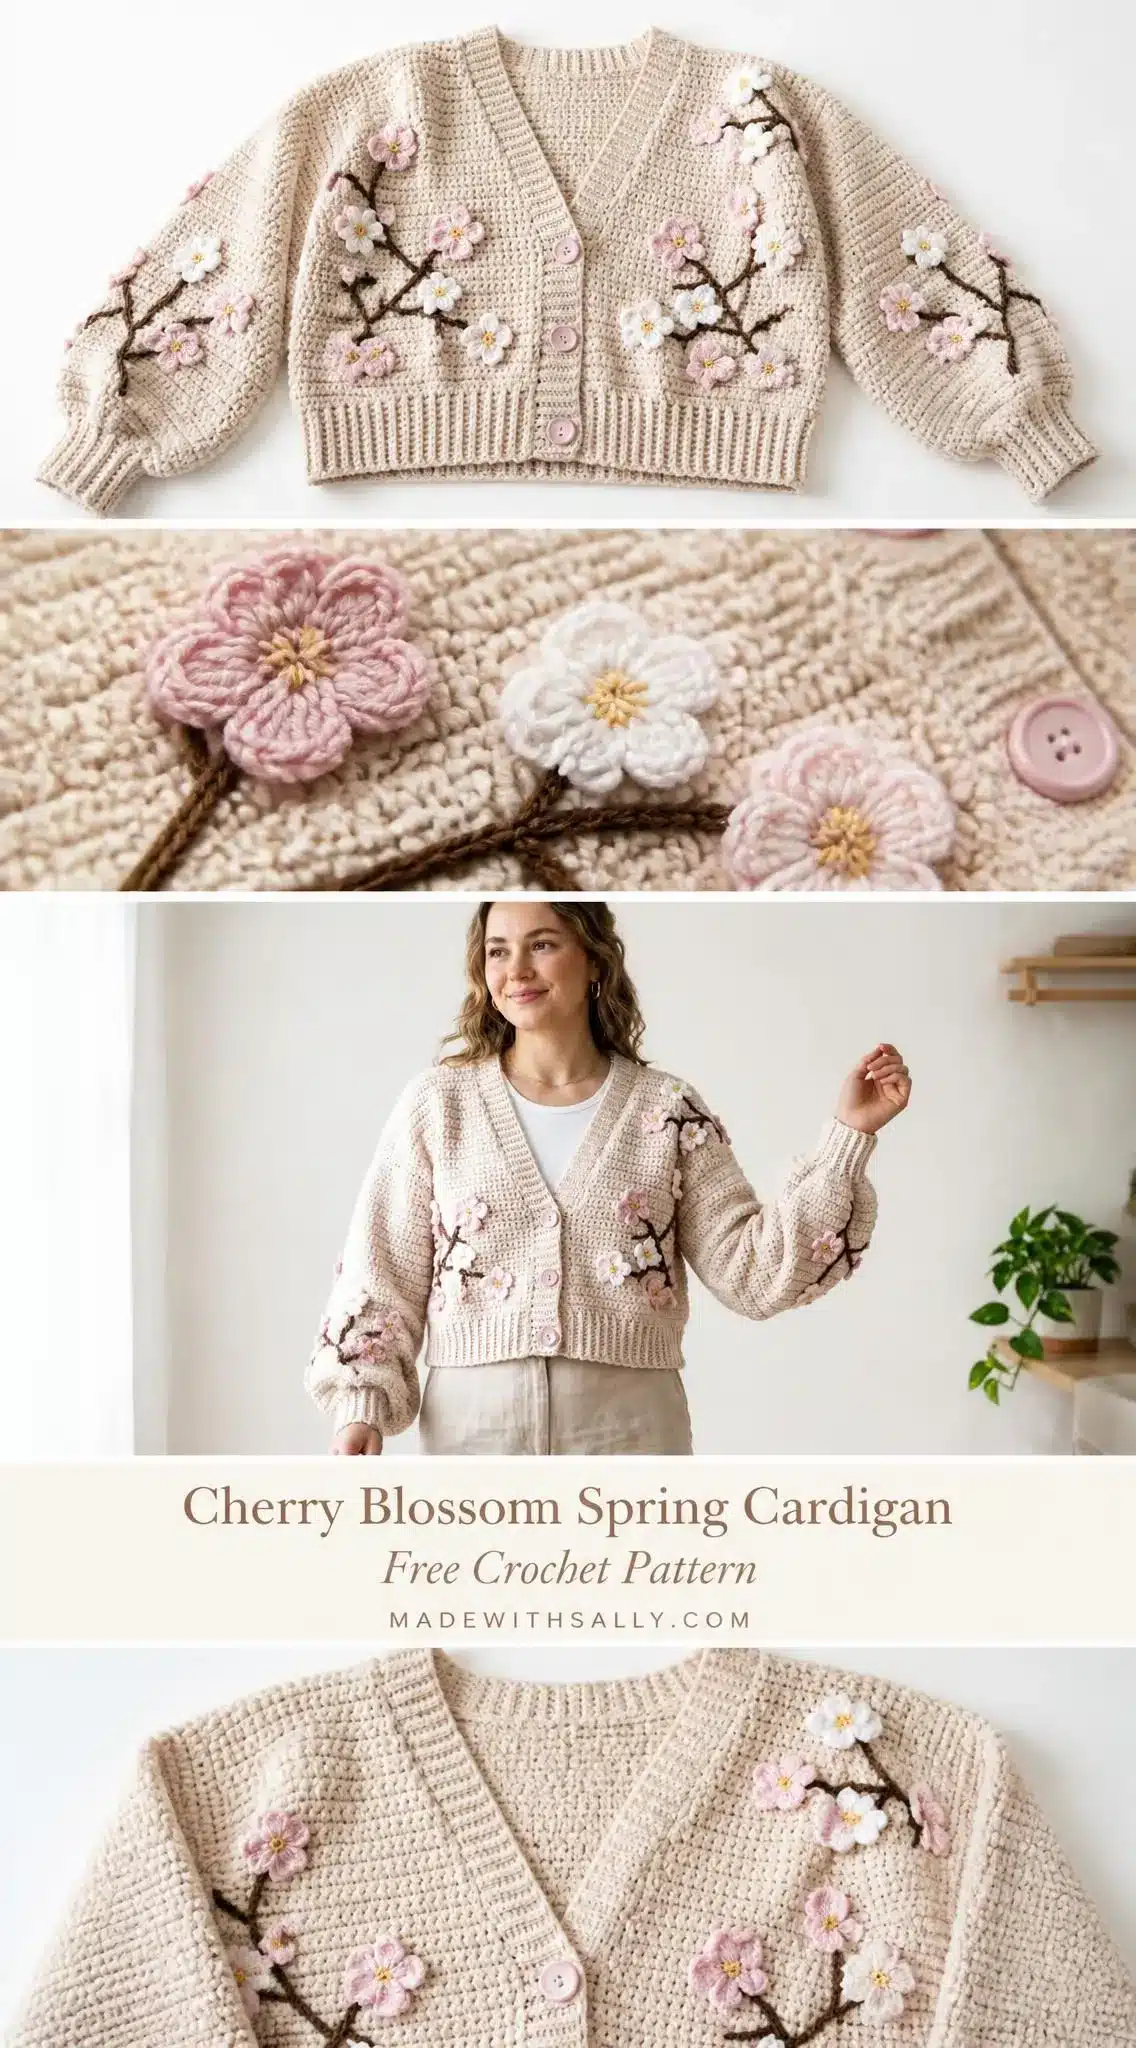
This cropped cardigan features a relaxed, boxy fit that hits just below the natural waist. It is designed with 4 to 6 inches of positive ease for comfort. The garment is constructed flat in one piece, with sleeves worked separately, and finished with dimensional floral appliques and branch embroidery. Four pink buttons close the front.
Materials
Yarn Requirements
Main Color (MC): Worsted weight (CYCA 4), approximately 1,000 (1,150, 1,300) yards / 915 (1,050, 1,190) meters. Recommended in warm oatmeal or ecru.
Color A (Blush Pink): Approximately 50 yards / 46 meters.
Color B (White): Approximately 50 yards / 46 meters.
Color C (Brown/Taupe): Approximately 30 yards / 28 meters.
Color D (Pale Pink/Light Blush): Approximately 15 yards / 14 meters (for centers).
Color E (Gold/Yellow): Approximately 10 yards / 9 meters (for flower centers).
Recommended Yarns
- Lion Brand Yarn Heartland (100% acrylic, 251 yards per 5 oz skein)
- Paintbox Yarns Simply DK used double-stranded
- We Are Knitters The Wool (100% merino wool, 186 yards per 3.5 oz skein)
Note: Choose a smooth-plied yarn without heavy texture. Avoid chenille or boucle, as these will obscure stitch definition and make applique attachment difficult.
Tools and Notions
- US size J-10 / 6.0 mm hook (for main fabric)
- US size I-9 / 5.5 mm hook (for ribbing and appliques)
- Four 3/4 in / 19 mm pink buttons
- Yarn needle
- Stitch markers (at least 6)
- Scissors
- Blocking mat and pins
- Rust-proof T-pins
Gauge and Finished Size
Gauge
With MC and J-10 / 6.0 mm hook, in half double crochet:
- 14 stitches = 4 in / 10 cm
- 10 rows = 4 in / 10 cm
Gauge is essential for fit. Make a 6 x 6 inch swatch, block it, and measure before beginning. Adjust hook size up if your stitches are too small, down if too large.
Finished Measurements
The following measurements are for the finished garment, not blocked flat. The cardigan is designed with 4 to 6 inches of positive ease for a relaxed, boxy fit. Instructions are written for Size Small with Size Medium and Size Large in parentheses: S (M, L).
- Size Small: Chest circumference 38 in / 96.5 cm, length from shoulder 17 in / 43 cm, sleeve length 19 in / 48 cm
- Size Medium: Chest circumference 42 in / 106.5 cm, length from shoulder 17.5 in / 44.5 cm, sleeve length 19.5 in / 49.5 cm
- Size Large: Chest circumference 46 in / 117 cm, length from shoulder 18 in / 45.5 cm, sleeve length 20 in / 51 cm
Abbreviations
- beg = beginning
- BLO = back loop only
- ch = chain
- ch-sp = chain space
- cont = continue
- dc = double crochet (yarn over, insert hook, yarn over and pull up loop, yarn over and pull through 2 loops twice)
- dec = decrease
- hdc = half double crochet (yarn over, insert hook, yarn over and pull up loop, yarn over and pull through all 3 loops)
- hdc2tog = half double crochet two together (a decrease stitch)
- inc = increase (two stitches in one stitch)
- MR = magic ring
- pm = place marker
- rem = remaining
- rep = repeat
- rnd = round
- RS = right side
- sc = single crochet
- sk = skip
- sl st = slip stitch
- sm = slip marker
- sp = space
- st(s) = stitch(es)
- t-ch = turning chain
- WS = wrong side
- yo = yarn over
Special Stitches
Half Double Crochet Two Together (hdc2tog)
This is your decrease stitch. Yarn over, insert hook in first stitch, yarn over and pull up a loop (3 loops on hook). Without completing the stitch, yarn over, insert hook in next stitch, yarn over and pull up a loop (5 loops on hook). Yarn over and draw through all 5 loops. You have turned two stitches into one.
Slip Stitch Ribbing
This creates the stretchy ribbed texture at the hem and cuffs. Work each row in back loop only (BLO).
- Row 1: Chain the desired number plus 1, slip stitch in second chain from hook and in each chain across. Turn.
- Row 2 and onward: Chain 1, slip stitch BLO in each stitch across. Turn. The chain 1 does not count as a stitch.
Five-Petal Flower Applique
With smaller hook and Color A or B, make a magic ring.
- Round 1: Chain 1, work 5 single crochet into the ring, pull ring closed, slip stitch to first single crochet to join. (5 sc)
- Round 2 (petals): For each of the 5 stitches, work the following in the same stitch: chain 3, work 3 double crochet in that same stitch, chain 3, slip stitch in that same stitch. That is one petal. After completing all 5 petals, slip stitch to base of first petal. Fasten off, leaving a tail for sewing.
With Color E (gold), thread yarn needle and stitch 3 to 4 short straight stitches through the center of each completed flower to suggest stamens.
Branch Outline (Surface Stitch)
After the cardigan body is complete, use Color C and the smaller hook. Insert hook from the right side through a stitch on the surface, catch a loop of Color C from behind the work, and pull up a loop. Working along your planned branch path, insert hook through the next stitch diagonally or along the row, catch Color C, and pull through both the work and the loop on the hook (a surface slip stitch). Continue to create branch lines. Secure ends on the wrong side.
Pattern Notes
- The body is worked flat in one piece from the lower hem to the underarms, then divided into three sections: left front, back, and right front.
- Throughout the body and sleeves, chain 1 at the beginning of each row does NOT count as a stitch. Always insert your hook into the first stitch of the row, not into the chain 1.
- The ribbed hem is worked separately as a horizontal strip, then stitches are picked up from the long edge to begin the body.
- Applique flowers and branches are added last, after all blocking is complete.
- When only one number appears in the instructions, it applies to all sizes.
Pattern Instructions
Body Hem Ribbing
With MC and smaller (I-9) hook, ch 8.
- Ribbing Row 1: Sl st in second ch from hook and in each ch across. Turn. (7 sl sts)
- Ribbing Rows 2 through 130 (146, 162): Ch 1, sl st BLO in each st across. Turn.
After completing the final row, do not fasten off. The long side of the ribbing strip now has 130 (146, 162) row-end ridges. Rotate the work 90 degrees to begin picking up stitches along this long edge. Switch to larger (J-10) hook.
Checkpoint: The ribbing strip should measure approximately 37 in / 94 cm (41.5 in / 105 cm, 46 in / 117 cm) along its long edge.
Body Setup Row
Working across the long edge of the ribbing:
- Setup Row (RS): Ch 1, work 1 hdc in each row-end ridge across the ribbing edge. Turn. (130, 146, 162 hdc)
Body
- Row 1 (WS): Ch 1, hdc in each st across. Turn. (130, 146, 162 hdc)
- Row 2 (RS): Ch 1, hdc in each st across. Turn. (130, 146, 162 hdc)
Repeat Rows 1 and 2 until the body measures 10 in / 25.5 cm (10.5 in / 26.5 cm, 11 in / 28 cm) from the top edge of the ribbing. This is approximately 25 (26, 27) total hdc rows above the pickup row.
Checkpoint: After completing the body to the underarm, your piece should measure approximately 12 in / 30.5 cm total height including ribbing and be 130 (146, 162) stitches wide.
Dividing for Armholes
The stitch allocation is:
- Division Row (RS): Ch 1, hdc in first 30 (34, 38) sts for Right Front. Ch 5, sk next 5 sts for Right Underarm. Hdc in next 60 (68, 76) sts for Back. Ch 5, sk next 5 sts for Left Underarm. Hdc in last 30 (34, 38) sts for Left Front. Turn.
Right Front
Work in half double crochet until the front panel matches the length of the back panel from the underarm division. Fasten off.
Left Front
Work in half double crochet until the front panel matches the length of the back panel from the underarm division. Fasten off.
Back
Work in half double crochet until the back panel matches the desired length. Fasten off.
Sleeve Cuff Ribbing (Make 2)
Follow the same ribbing instructions as the body hem, adjusting the chain count and row count to fit the sleeve opening. Pick up stitches along the long edge to begin the sleeve body.
Sleeves
Work in half double crochet from the cuff up. Increase stitches evenly to shape the sleeve cap as required by the pattern dimensions.
Sleeve Cap Shaping
Decrease stitches at the top of the sleeve to create the cap shape, ensuring it fits into the armhole of the body.
Front Band
Pick up stitches along the front opening edges to create a finished band. Work in half double crochet or ribbing as desired.
Cherry Blossom Appliques
Crochet the five-petal flowers using the instructions in the Special Stitches section. Create 24 to 30 flowers in total using Color A and B.
Branch Construction
Using Color C and the surface slip stitch technique, embroider branch lines across the body and sleeves according to your design layout.
Attaching Flowers
Securely sew the flowers onto the branches and body using the tails left from crocheting.
Button Attachment
Attach the four 3/4 in / 19 mm pink buttons to the front band.
Assembly
Weave in all ends securely. Block the completed cardigan before attaching appliques by wet-blocking in cool water, gently squeezing out excess water in a towel, and laying flat on a blocking mat pinned to measurements. Allow to dry completely.
Attach appliques to the blocked and dried cardigan. Lightly steam from the wrong side only using a pressing cloth to relax any puckering around applique attachment points.
Tips
- Length: To make the cardigan longer, add rows to the body section before the underarm divide. Each additional 2.5 rows adds approximately 1 inch of length.
- Chest Circumference: To adjust chest circumference, add or remove stitches in multiples of 2 to the foundation pickup count. Distribute equally between fronts and back.
- Sleeve Length: To lengthen the sleeves, add more even rows between increase rows and add total length before the sleeve cap.
FAQs
What is the skill level for this pattern?
This pattern is rated Advanced Beginner to Intermediate. The main fabric uses half double crochet, which is accessible, but making the appliques and setting in the sleeves requires some garment construction experience.
How long does it take to make?
Plan for approximately 40 to 60 hours to complete this cardigan, including all the appliques and finishing work.
Can I use a different yarn weight?
The pattern is designed for worsted weight yarn. If you use a different weight, you will need to adjust hook sizes and stitch counts to achieve the correct gauge and finished measurements.
How do I care for the cardigan?
Hand wash in cool water with a gentle wool wash. Do not wring or twist. Press flat between two towels to remove moisture. Lay flat to dry, reshaping to measurements. Do not hang while wet. Store folded, never on a hanger. For 100% acrylic yarns, follow label instructions; most can tolerate a gentle machine wash in a mesh laundry bag.
Why is my stitch definition blurry?
Ensure you are using a smooth-plied yarn. Avoid chenille or boucle, as these textures obscure stitch definition and make applique attachment difficult.
Pin This Crochet Pattern!