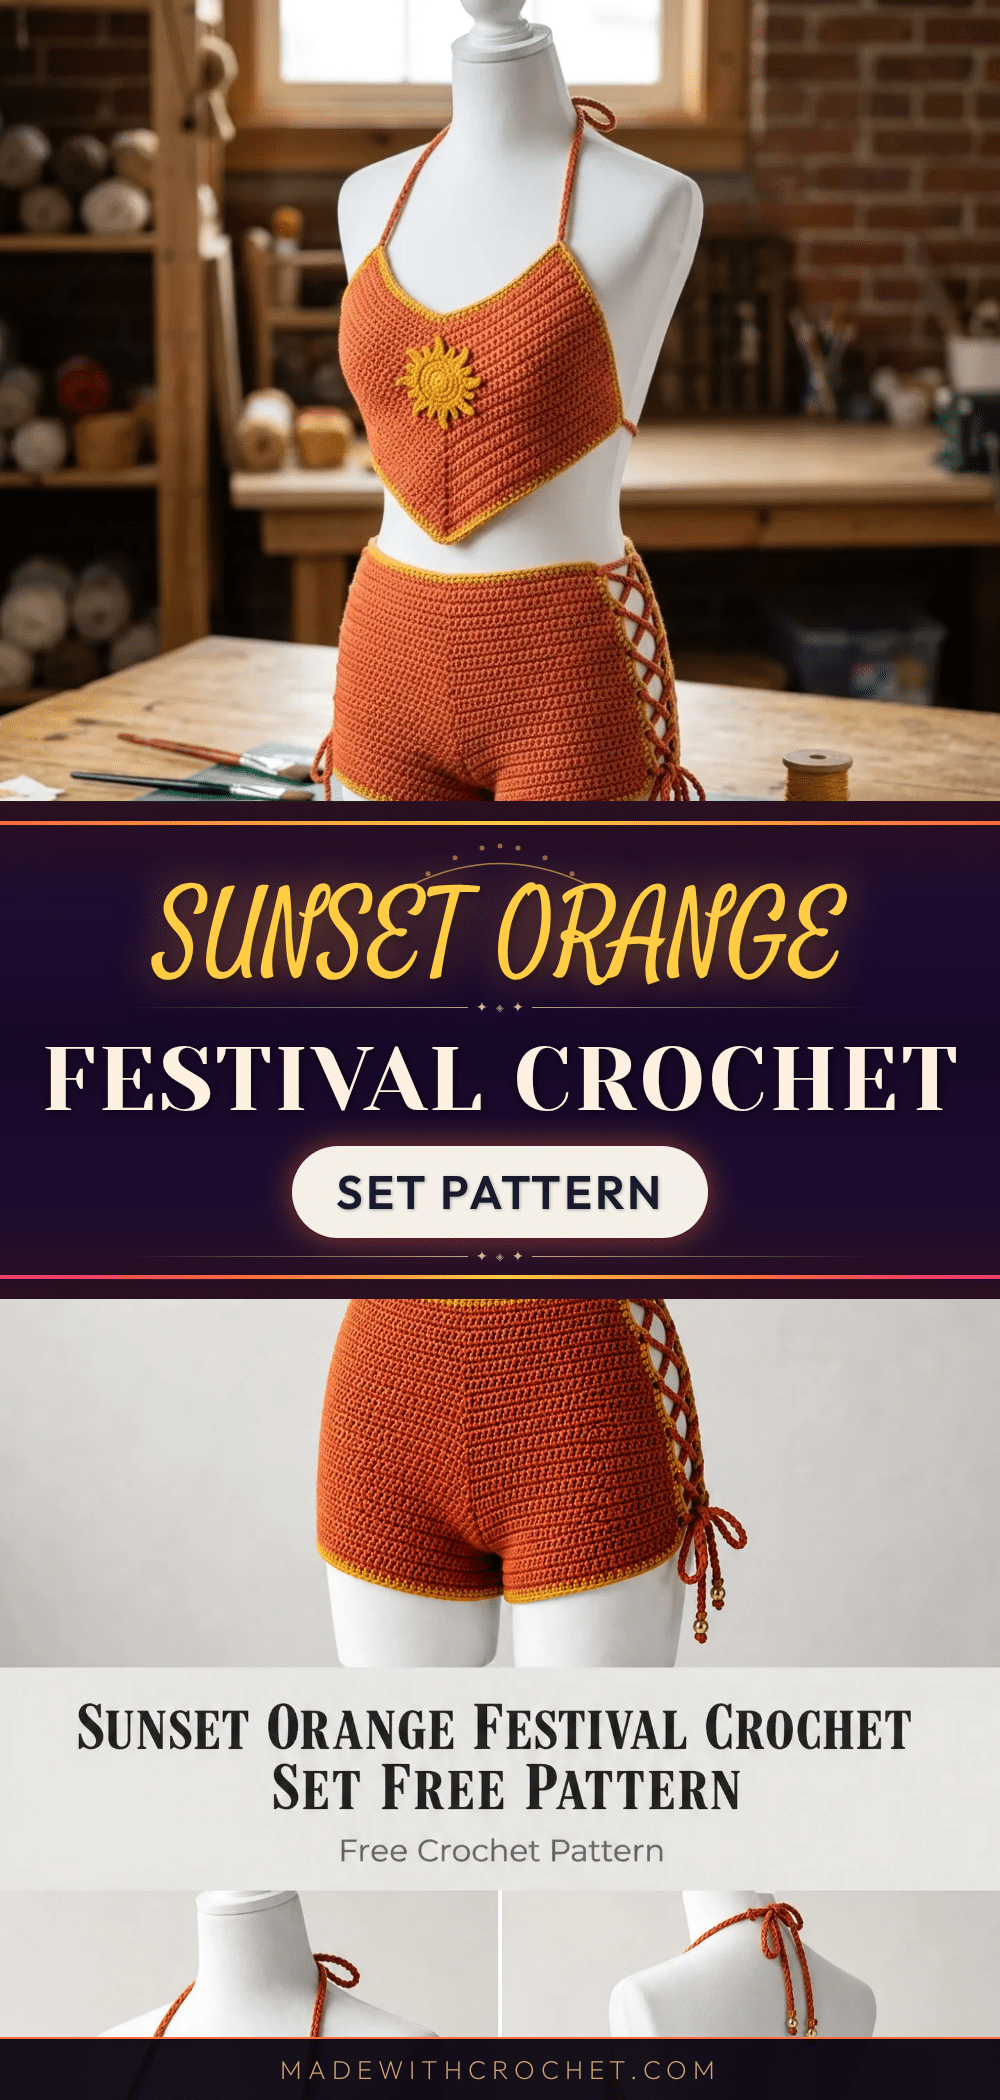
Looking for a handmade gift that feels both personal and show-stopping? This Sunset Orange Festival Crochet Set is exactly that kind of project. Whether you are making it for a festival-loving friend, a beach-day essential for yourself, or a standout piece for your market table, this two-piece set delivers. The warm terracotta and golden yellow combination feels like sunshine you can wear, and the corset-style lace-up sides add a unique touch that sets it apart from basic crochet sets. It is a gift that says you put real thought and time into something special.
Gift and Use Ideas
This set is incredibly versatile. It works beautifully as a festival outfit, a beach cover-up, or a summer staple for backyard lounging. The halter top pairs well with high-waisted jeans or skirts, while the shorts can be styled with a simple tank top. Consider making it as a thoughtful handmade gift for a friend who loves music festivals or beach vacations. The warm orange and yellow tones also make it a cheerful addition to any summer wardrobe. The sun appliqué on the top cup is a sweet detail that can be personalized or omitted entirely.
Project Overview
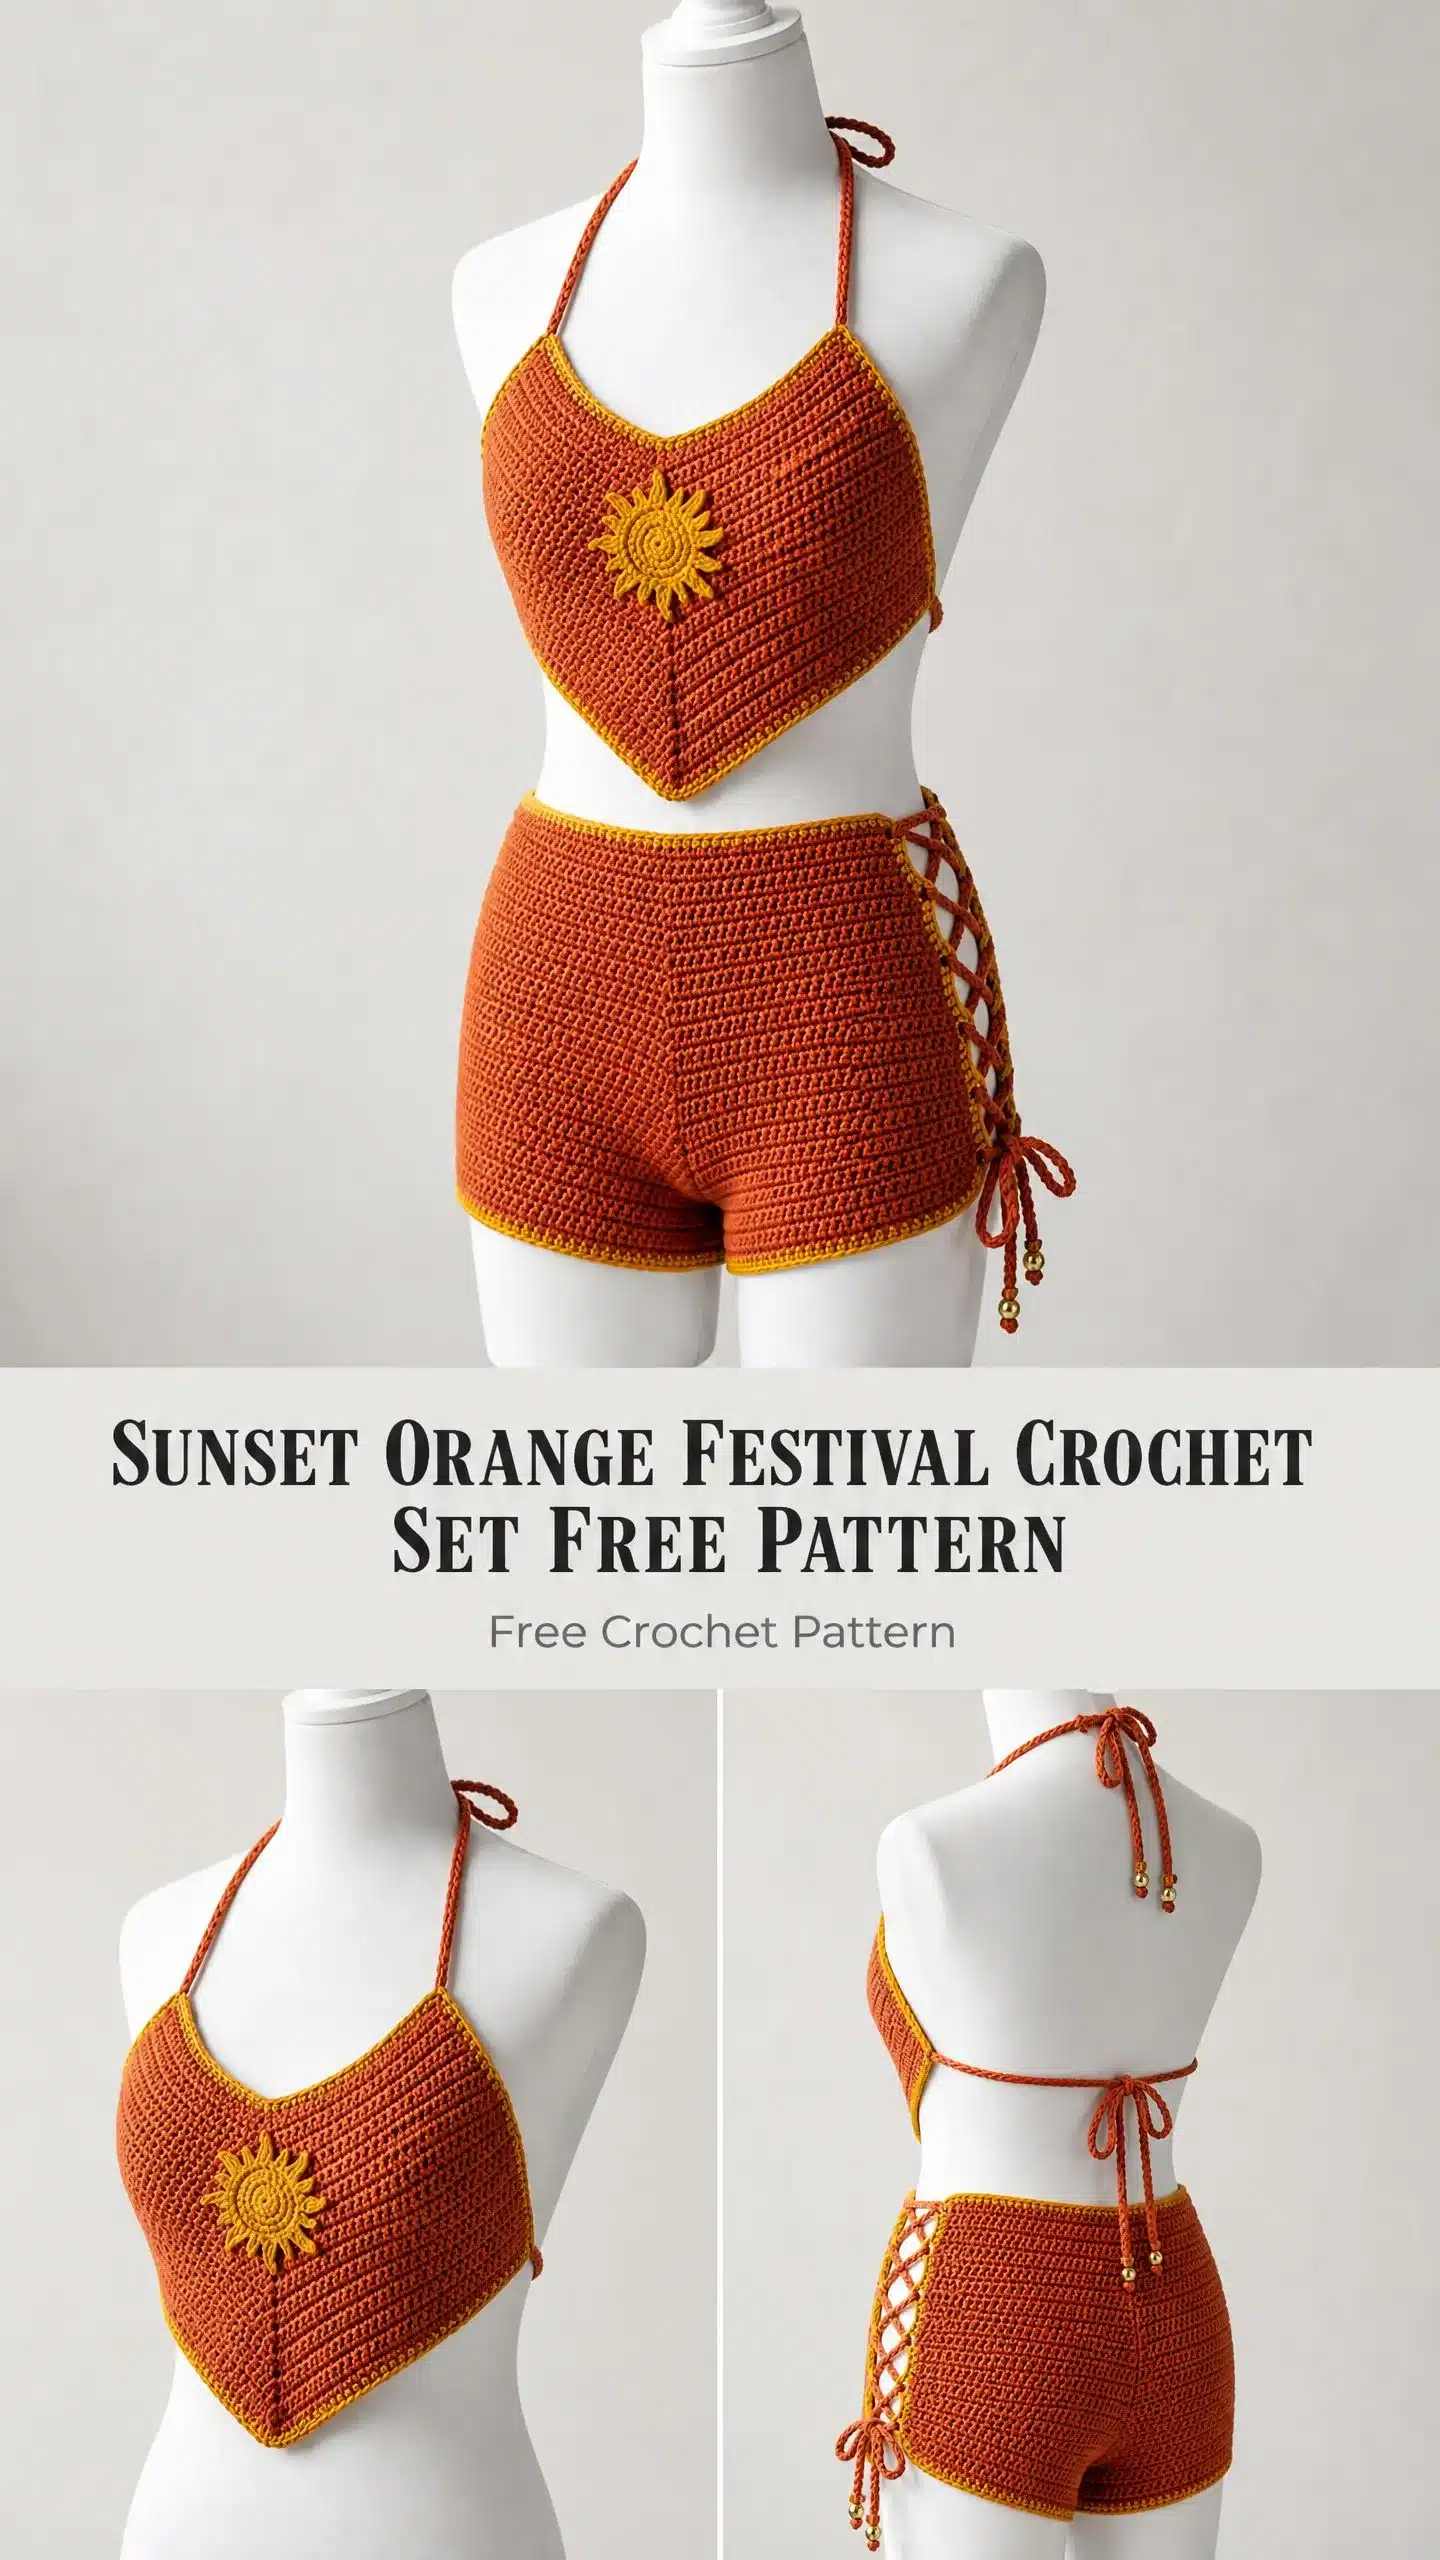
This intermediate-level pattern creates a coordinating two-piece set featuring a halter crop top and high-waist shorts with corset-style lace-up side panels. The halter top is worked in two mirrored triangle panels that are seamed together at the center front. The shorts are worked in two identical panels from the waistband down, with side edges left open for lacing. The golden yellow trim and sun appliqué add personality without adding complexity. Total project time is approximately 22 to 33 hours, with the halter top taking 8 to 12 hours and the shorts taking 12 to 18 hours.
Materials
- Yarn A (Main Color): Terracotta orange, worsted weight (Category 4), approximately 600 yards / 549 meters for the complete set
- Yarn B (Contrast Color): Golden yellow, worsted weight (Category 4), approximately 150 yards / 137 meters for trim, lacing, ties, and sun appliqué
- Yarn Suggestions: Lion Brand Pound of Love in Terracotta and Mustard, Paintbox Yarns Simply DK worked doubled, or Cascade 220 Superwash in Ginger and Sunflower
- Hooks: US Size J / 6.0 mm for main fabric, US Size I / 5.5 mm for trim and appliqué (optional)
- Additional Materials: Stitch markers (at least 8), yarn needle, scissors, rust-proof pins for blocking, 8 small gold or amber beads (optional, for bottom of lacing ties on shorts), measuring tape
Gauge and Finished Size
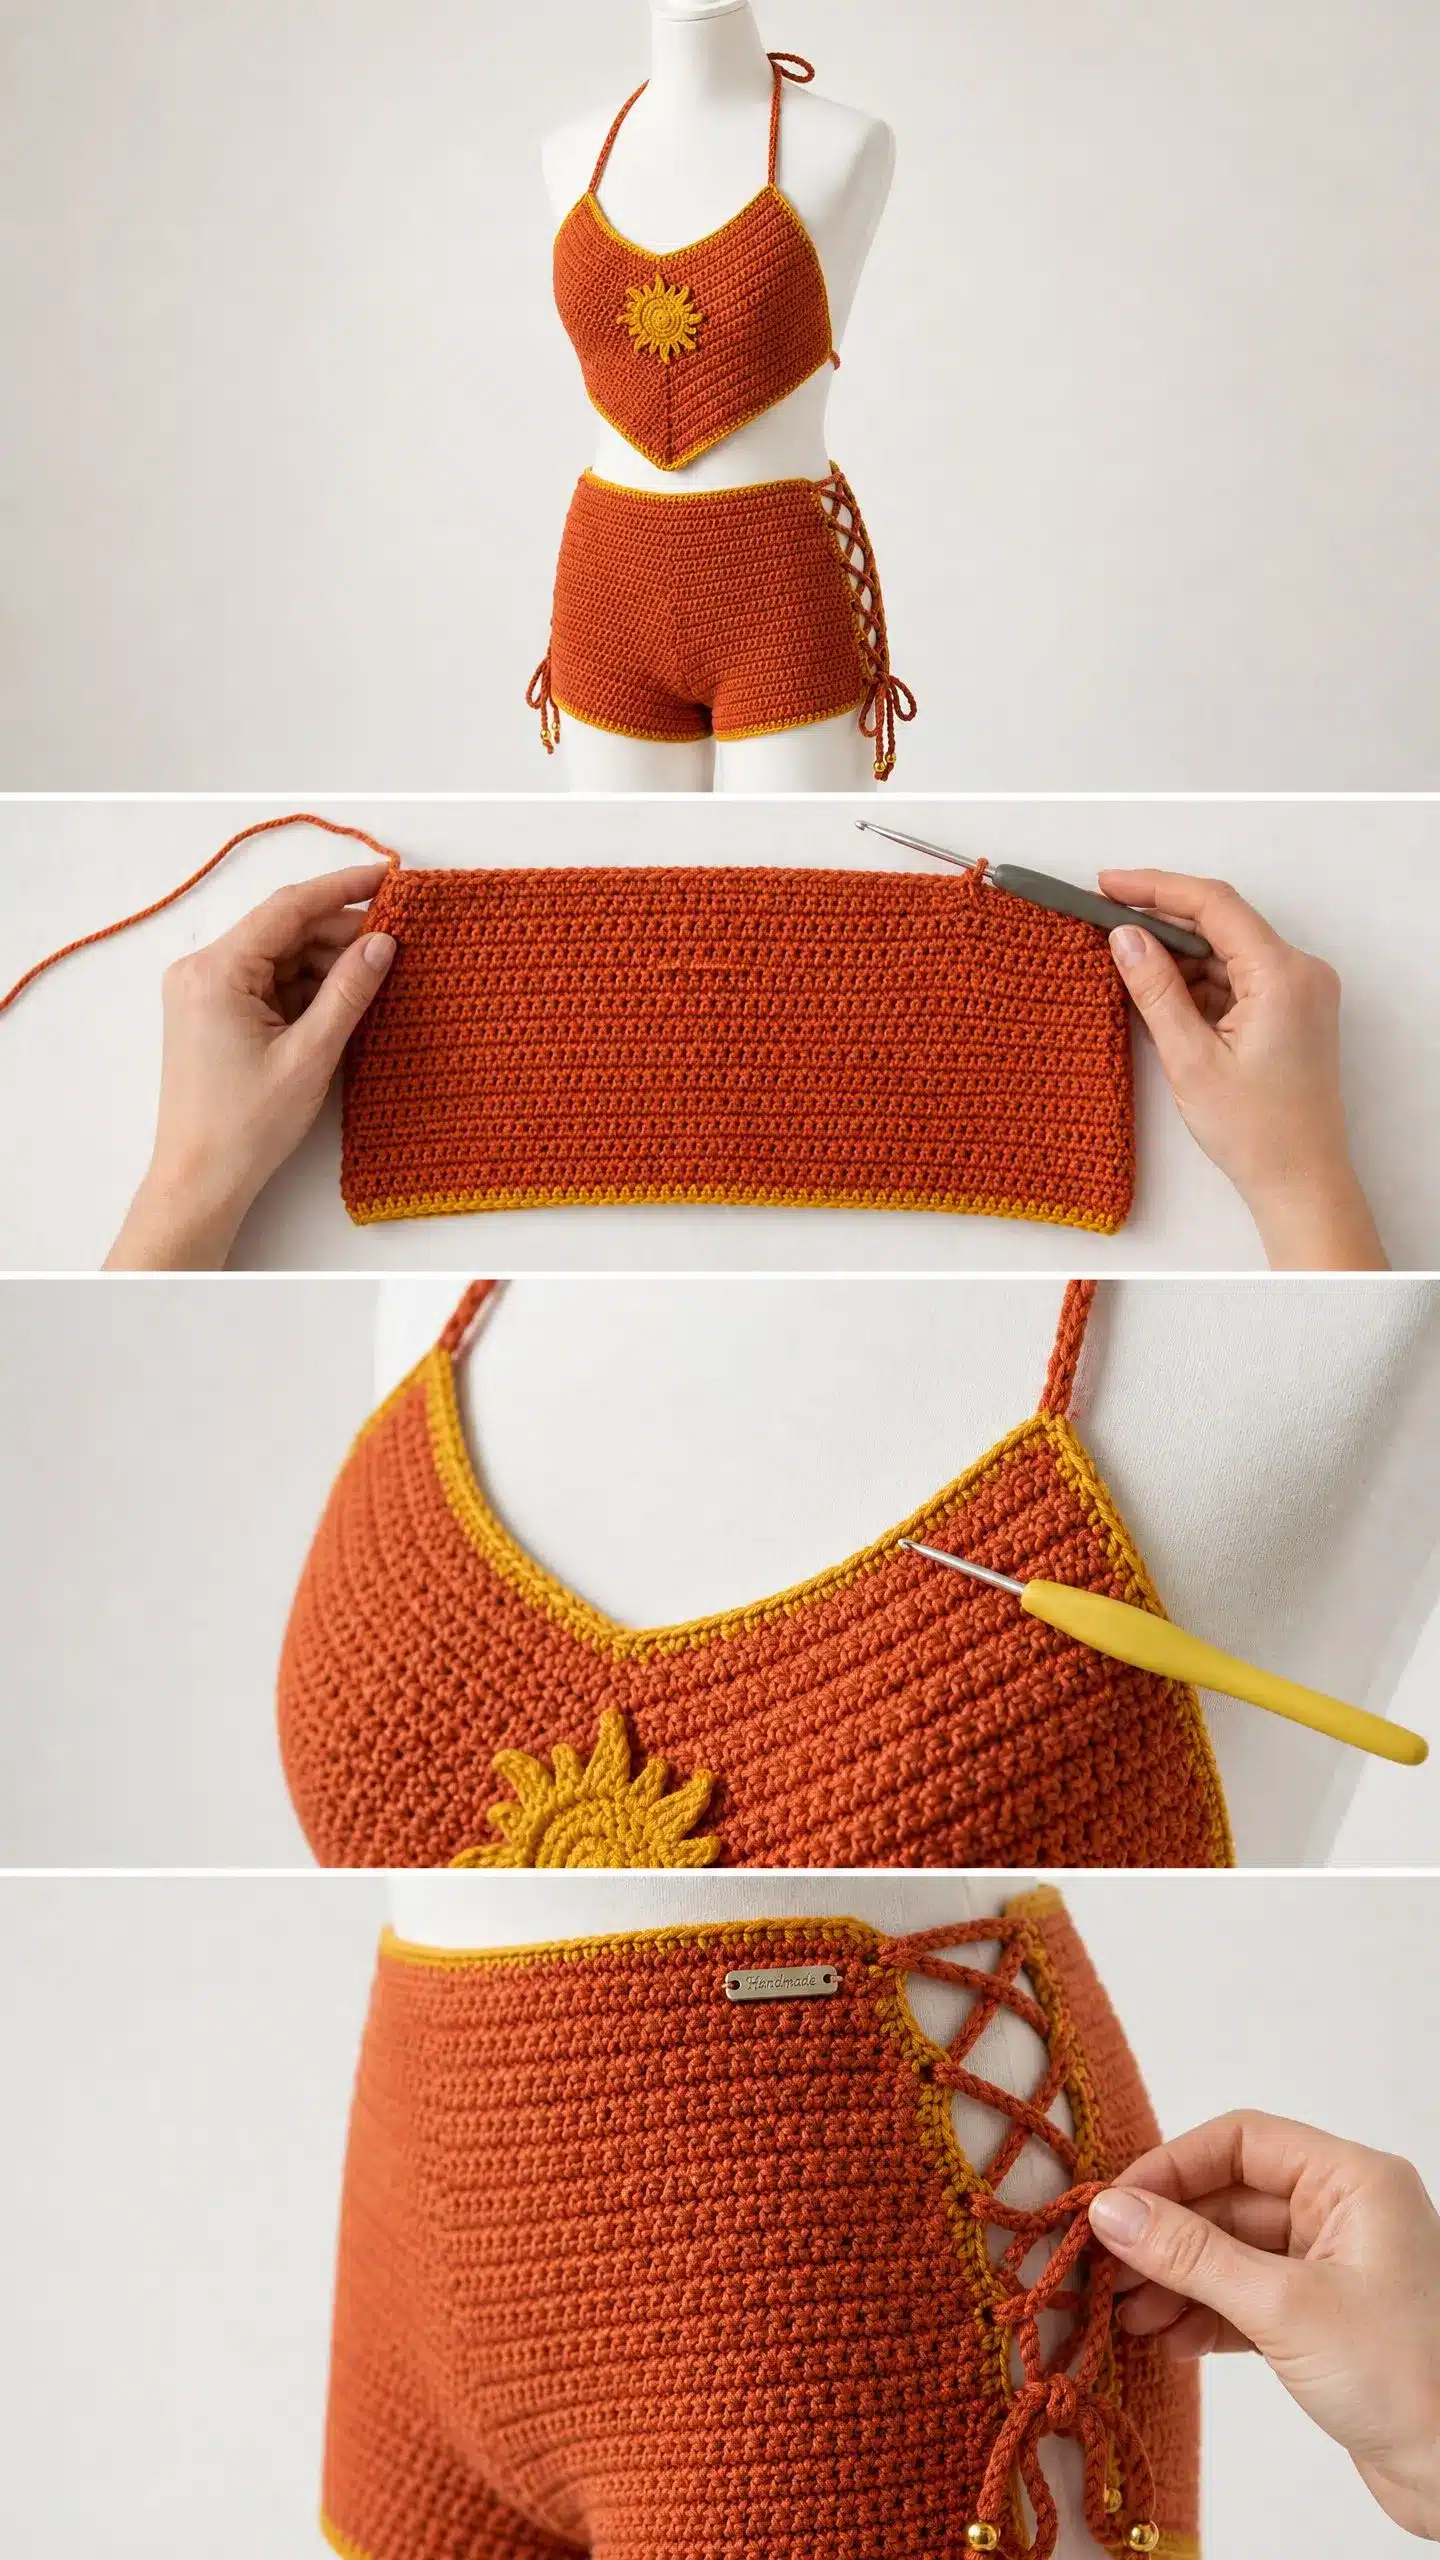
Gauge
18 single crochet (sc) by 22 rows equals 4 inches by 4 inches (10 cm by 10 cm), measured in single crochet worked flat and blocked. Gauge is mandatory for this pattern. Work a swatch of at least 20 stitches by 24 rows, block it, and measure from the center of the swatch.
Finished Size
This pattern is written for size Small/Medium (US size 4/6) with customization notes at the end.
- Halter Top: Bust circumference: 32 to 34 inches (81 to 86 cm), Length from neckline to hem: 10 inches (25.5 cm), Width across widest point laid flat: 16 inches (40.5 cm)
- Shorts: Hip circumference: 34 to 36 inches (86 to 91 cm), Waistband circumference unstretched: 26 inches (66 cm), Rise from waistband to crotch: 10 inches (25.5 cm), Inseam: 3 inches (7.5 cm), Total length from waistband to hem: 13 inches (33 cm)
Abbreviations
- beg = beginning
- BLO = back loop only
- ch = chain
- cont = continue
- dc = double crochet
- dec = decrease
- FLO = front loop only
- hdc = half double crochet
- inc = increase (work 2 sc in the same stitch)
- MC = main color (Yarn A, terracotta orange)
- CC = contrast color (Yarn B, golden yellow)
- rem = remaining
- rep = repeat
- rnd = round
- RS = right side
- sc = single crochet
- sc2tog = single crochet two together
- sk = skip
- sl st = slip stitch
- sp = space
- st(s) = stitch(es)
- t-ch = turning chain
- WS = wrong side
- yo = yarn over
Special Stitches
Surface Slip Stitch
With RS facing, insert hook from front to back through the fabric at the marked position. Pull up a loop of yarn from behind the fabric to the front. Insert hook into the next stitch or row end to the right. Pull up another loop and draw it through the loop on your hook. Continue working along the surface to create a raised chain-like line. Fasten off and weave in ends.
Shell Edging
Skip 1 stitch, work 5 dc in next stitch, skip 1 stitch, slip stitch in next stitch. This 4-stitch repeat requires stitch counts divisible by 4.
Pattern Notes
- The halter top is worked in two mirrored triangle panels. Each is worked flat from the bottom point upward with increases. The two panels join at the center front seam.
- The shorts are worked in two identical panels from waistband to hem. Side edges are partially left open for corset lacing. Only the inseam and crotch curve are seamed.
- Work with MC (terracotta orange) unless the pattern specifies CC (golden yellow).
- Turning chains: At the beginning of every row, chain 1 and turn. This chain 1 does NOT count as a stitch. Work the first stitch of every row in the first stitch at the base of the turning chain.
- Mark the right side with a stitch marker from the first row. Always work trim rows with the right side facing outward.
- The side lace-up panels are created by leaving a 3-inch opening on each side edge rather than seaming those sections closed.
- Block all pieces before final seaming. Crochet fabric can grow or shrink up to 10 percent during blocking.
Pattern Instructions
Part One: Halter Top Instructions
The halter top consists of two mirror-image triangle panels called the Right Cup and Left Cup. Work them separately, then seam them together at the center front.
Right Cup Panel
Worked flat from the bottom point upward. Increases happen along the outer side edge only. The inner edge stays straight and becomes your center front seam.
Foundation: With MC and size J hook, ch 3.
Row 1 (RS): Sc in 2nd ch from hook, sc in next ch, turn. (2 sc)
Row 2: Ch 1, 2 sc in first sc, sc to end, turn. (3 sc)
Row 3: Ch 1, sc to last st, 2 sc in last st, turn. (4 sc)
Row 4: Ch 1, 2 sc in first sc, sc to end, turn. (5 sc)
Row 5: Ch 1, sc to last st, 2 sc in last st, turn. (6 sc)
Row 6: Ch 1, 2 sc in first sc, sc to end, turn. (7 sc)
Row 7: Ch 1, sc to last st, 2 sc in last st, turn. (8 sc)
Row 8: Ch 1, 2 sc in first sc, sc to end, turn. (9 sc)
Row 9: Ch 1, sc to last st, 2 sc in last st, turn. (10 sc)
Row 10: Ch 1, 2 sc in first sc, sc to end, turn. (11 sc)
Row 11: Ch 1, sc to last st, 2 sc in last st, turn. (12 sc)
Row 12: Ch 1, 2 sc in first sc, sc to end, turn. (13 sc)
Row 13: Ch 1, sc to last st, 2 sc in last st, turn. (14 sc)
Row 14: Ch 1, 2 sc in first sc, sc to end, turn. (15 sc)
Row 15: Ch 1, sc to last st, 2 sc in last st, turn. (16 sc)
Row 16: Ch 1, 2 sc in first sc, sc to end, turn. (17 sc)
Row 17: Ch 1, sc to last st, 2 sc in last st, turn. (18 sc)
Row 18: Ch 1, 2 sc in first sc, sc to end, turn. (19 sc)
Row 19: Ch 1, sc to last st, 2 sc in last st, turn. (20 sc)
Row 20: Ch 1, 2 sc in first sc, sc to end, turn. (21 sc)
Row 21: Ch 1, sc to last st, 2 sc in last st, turn. (22 sc)
Row 22: Ch 1, 2 sc in first sc, sc to end, turn. (23 sc)
Row 23: Ch 1, sc to last st, 2 sc in last st, turn. (24 sc)
Row 24: Ch 1, 2 sc in first sc, sc to end, turn. (25 sc)
Row 25: Ch 1, sc to last st, 2 sc in last st, turn. (26 sc)
Row 26: Ch 1, 2 sc in first sc, sc to end, turn. (27 sc)
Row 27: Ch 1, sc to last st, 2 sc in last st, turn. (28 sc)
Row 28: Ch 1, 2 sc in first sc, sc to end, turn. (29 sc)
Row 29: Ch 1, sc to last st, 2 sc in last st, turn. (30 sc)
Row 30: Ch 1, 2 sc in first sc, sc to end, turn. (31 sc)
Row 31: Ch 1, sc to last st, 2 sc in last st, turn. (32 sc)
Row 32: Ch 1, 2 sc in first sc, sc to end, turn. (33 sc)
Row 33: Ch 1, sc to last st, 2 sc in last st, turn. (34 sc)
Row 34: Ch 1, 2 sc in first sc, sc to end, turn. (35 sc)
Row 35: Ch 1, sc to last st, 2 sc in last st, turn. (36 sc)
Checkpoint: After Row 35, your Right Cup panel should measure approximately 6.5 inches (16.5 cm) wide and 6.5 inches (16.5 cm) tall along the outer angled edge.
Now work straight with no more increases for the top band section:
Rows 36 through 40: Ch 1, sc across all 36 sts, turn. (36 sc each row)
Top Shaping with decreases on the outer edge only:
Row 41: Ch 1, sc to last 2 sts, sc2tog, turn. (35 sc)
Row 42: Ch 1, sc across, turn. (35 sc)
Row 43: Ch 1, sc to last 2 sts, sc2tog, turn. (34 sc)
Row 44: Ch 1, sc across, turn. (34 sc)
Row 45: Ch 1, sc to last 2 sts, sc2tog, turn. (33 sc)
Row 46: Ch 1, sc across, turn. (33 sc)
Row 47: Ch 1, sc to last 2 sts, sc2tog, turn. (32 sc)
Row 48: Ch 1, sc across, turn. (32 sc)
Fasten off MC, leaving a 20-inch (51 cm) tail for seaming.
Left Cup Panel
Work exactly as the Right Cup Panel through all 48 rows, but mirror the increases and decreases. For the Left Cup, increases happen at the END of odd rows and BEGINNING of even rows:
Row 1 (RS): Sc in 2nd ch from hook, sc in next ch, turn. (2 sc)
Row 2: Ch 1, sc to last st, 2 sc in last st, turn. (3 sc)
Row 3: Ch 1, 2 sc in first sc, sc to end, turn. (4 sc)
Continue this mirrored increase pattern through Row 35 (ending with 36 sc), then work Rows 36 through 40 straight.
For Rows 41 through 48, work decreases at the BEGINNING of odd rows:
Row 41: Ch 1, sc2tog, sc to end, turn. (35 sc)
Row 42: Ch 1, sc across, turn. (35 sc)
Row 43: Ch 1, sc2tog, sc to end, turn. (34 sc)
Row 44: Ch 1, sc across, turn. (34 sc)
Row 45: Ch 1, sc2tog, sc to end, turn. (33 sc)
Row 46: Ch 1, sc across, turn. (33 sc)
Row 47: Ch 1, sc2tog, sc to end, turn. (32 sc)
Row 48: Ch 1, sc across, turn. (32 sc)
Fasten off MC, leaving a 20-inch (51 cm) tail for seaming.
Joining the Cup Panels
Lay the Right Cup and Left Cup with right sides together. The straight inner edges are your seam edges. Using the long tail from the Right Cup, whipstitch through both inner edges from the bottom point upward to the top. The seam runs approximately 6.5 inches (16.5 cm). Turn right side out. The two triangle points meet at the center bottom hem.
Part Two: Shorts Instructions
Shorts Front Panel (make 1)
With MC and size J hook, ch 79.
Foundation Row: Sc in 2nd ch from hook and in each ch across, turn. (78 sc)
Rows 1 through 8: Ch 1, sc in each sc across, turn. (78 sc each row)
This establishes your waistband section.
Rows 9 through 30: Ch 1, sc in each sc across, turn. (78 sc each row)
Checkpoint: After Row 30, your panel should measure approximately 5.5 inches (14 cm) from the foundation edge.
Crotch Shaping:
Row 31: Ch 1, sc2tog, sc to last 2 sts, sc2tog, turn. (76 sc)
Row 32: Ch 1, sc across, turn. (76 sc)
Row 33: Ch 1, sc2tog, sc to last 2 sts, sc2tog, turn. (74 sc)
Row 34: Ch 1, sc across, turn. (74 sc)
Row 35: Ch 1, sc2tog, sc to last 2 sts, sc2tog, turn. (72 sc)
Row 36: Ch 1, sc across, turn. (72 sc)
Row 37: Ch 1, sc2tog, sc to last 2 sts, sc2tog, turn. (70 sc)
Row 38: Ch 1, sc across, turn. (70 sc)
Row 39: Ch 1, sc2tog, sc to last 2 sts, sc2tog, turn. (68 sc)
Row 40: Ch 1, sc across, turn. (68 sc)
Row 41: Ch 1, sc2tog, sc to last 2 sts, sc2tog, turn. (66 sc)
Row 42: Ch 1, sc across, turn. (66 sc)
Row 43: Ch 1, sc2tog, sc to last 2 sts, sc2tog, turn. (64 sc)
Row 44: Ch 1, sc across, turn. (64 sc)
Inseam/Leg Section:
Rows 45 through 50: Ch 1, sc across, turn. (64 sc each row)
Fasten off MC, leaving a 24-inch (61 cm) tail for seaming.
Shorts Back Panel (make 1)
Work exactly the same as the Shorts Front Panel, all 50 rows.
Seaming the Shorts
With right sides together, seam the crotch curve and inseam using the long tails. Leave the side edges partially open for corset lacing. The side lace-up panels are created by leaving a 3-inch opening on each side edge rather than seaming those sections closed.
Leg Hem Trim
With RS facing and CC, join yarn at the inseam of the right leg opening. Work 1 sc per stitch around the leg hem, approximately 64 sc around. Shell Edging Rnd: Ch 3, (sk 1 st, 5 dc in next st, sk 1 st, sl st in next st) 16 times, sl st to base of starting ch 3. Fasten off CC. Repeat for the left leg opening.
Assembly
- Weave in all remaining ends securely, working in at least two directions.
- Fill a basin with lukewarm water. Submerge both pieces completely. Gently press to saturate. Do not wring or twist.
- Press out excess water between clean towels.
- Lay flat on a blocking surface. Pin the halter top to 16 inches (40.5 cm) wide and 10 inches (25.5 cm) long. Pin the shorts to 13 inches (33 cm) long and 17 to 18 inches (43 to 46 cm) wide at hips.
- Allow to dry completely (24 to 48 hours).
- Attach the sun appliqué and add the corset lacing.
Tips
- To size down to XS (US 0/2): Chain 77 instead of 79 for shorts (76 sc). Work top cup panels through Row 32 instead of Row 35 before straight rows. Reduce ties by 10 chains each.
- To size up to Large (US 12/14): Chain 83 instead of 79 for shorts (82 sc). Work top cup panels through Row 39 instead of Row 35. Add 10 chains to ties.
- To size up to XL (US 16/18): Chain 87 for shorts (86 sc). Work top cup panels through Row 43 instead of Row 35. Add 20 chains to ties.
- General Rule: Every 4 stitches added to the shorts waist adds approximately 0.9 inch (2.25 cm) to circumference. Every 2 extra rows on top cup panels increases cup width by approximately 0.5 inch (1.25 cm).
- For longer shorts inseam: Add rows at the inseam section before leg hem trim. Every 4 rows adds approximately 0.75 inch (2 cm).
Care Instructions
For acrylic or acrylic-blend yarn, machine wash on gentle cycle in cold water and lay flat to dry. Do not tumble dry, iron, or dry clean. For superwash wool, hand wash in cool water with gentle wool wash. Press out excess water in a towel and lay flat to dry. Store folded flat rather than hung. Avoid prolonged exposure to direct sunlight to prevent color fading.
Frequently Asked Questions
What skill level is this pattern?
This is an intermediate level pattern. You should be comfortable with increases, decreases, and basic seaming. If you have made a few garments before, you can absolutely do this.
Can I use a different yarn weight?
This pattern is designed for worsted weight yarn (Category 4). If you use a different weight, you will need to adjust hook size and work a gauge swatch to ensure proper fit. The pattern notes that Paintbox Yarns Simply DK worked doubled is a good alternative for a softer drape.
How do I adjust the size?
Size customization notes are included in the Tips section. For XS, chain 77 instead of 79 for shorts and work top cup panels through Row 32. For Large, chain 83 and work through Row 39. For XL, chain 87 and work through Row 43.
How do I create the corset lacing on the shorts?
The side lace-up panels are created by leaving a 3-inch opening on each side edge rather than seaming those sections closed. Use the Surface Slip Stitch technique to create channels for the lacing, then thread a CC yarn through to create the corset effect.
Can I skip the sun appliqué?
Yes, the sun appliqué is optional. It is worked separately and stitched on at the end, so you can easily customize the placement or skip it entirely.
How long does this project take?
Total project time runs between 22 and 33 hours depending on your experience level. The halter top takes roughly 8 to 12 hours, the shorts need 12 to 18 hours, and finishing touches add another 2 to 3 hours.
Pin This Crochet Pattern!