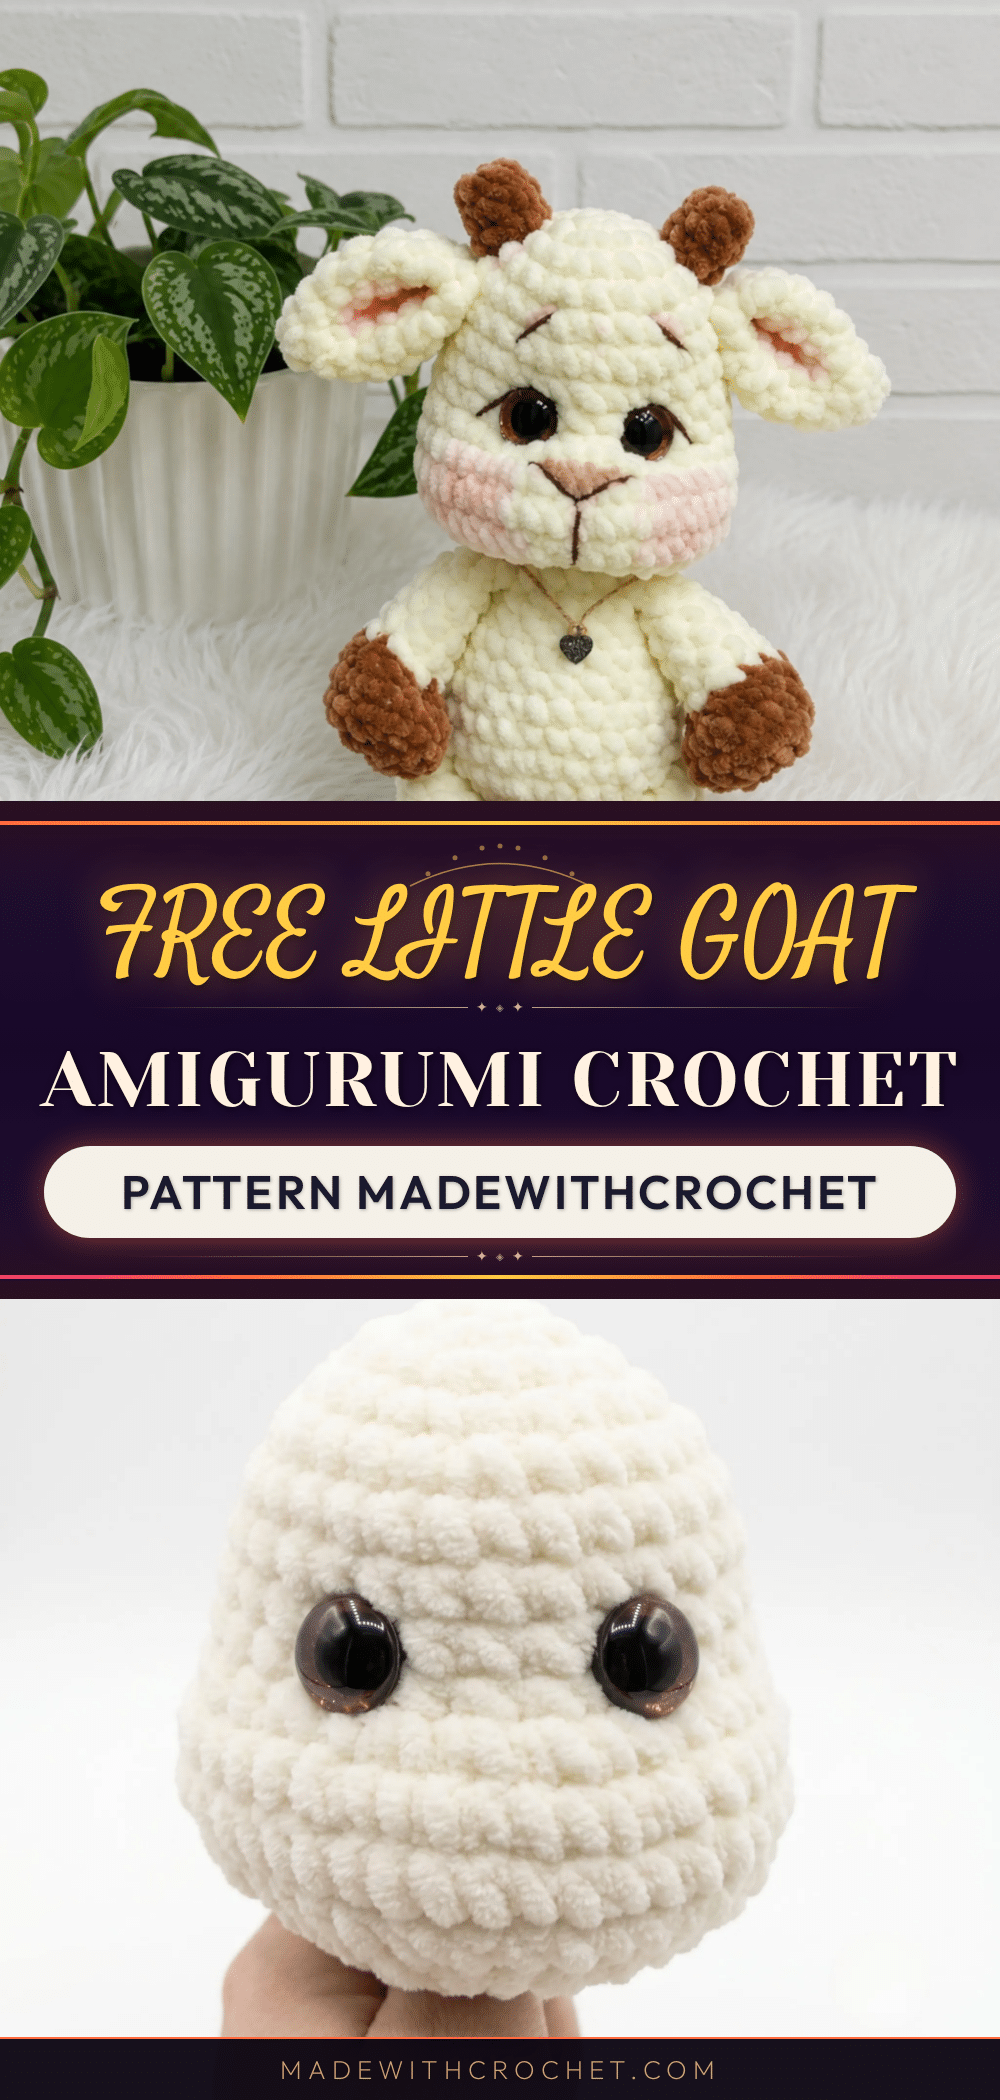
You settle into your chair, the afternoon light falling across your workspace. A fresh skein of creamy velvet yarn sits beside your hook, and you can already picture the round cheeks and tiny horns taking shape. This is that perfect moment when a project feels full of promise — just you, your materials, and a pattern that’s about to become something special. Let’s bring this little goat to life.
Why This Project Works
There’s a reason this little goat has become a favorite among amigurumi makers. The combination of soft chenille yarn and simple shaping creates a plush, huggable friend that feels luxurious in your hands. The pattern hits a sweet spot — it’s detailed enough to keep experienced crocheters engaged, with techniques like cinched hooves and BLO rounds, yet accessible enough for confident beginners who want to stretch their skills. The finished goat has real personality, from its floppy ears to its expressive eyes, making it a gift that feels truly handmade.
Project Overview
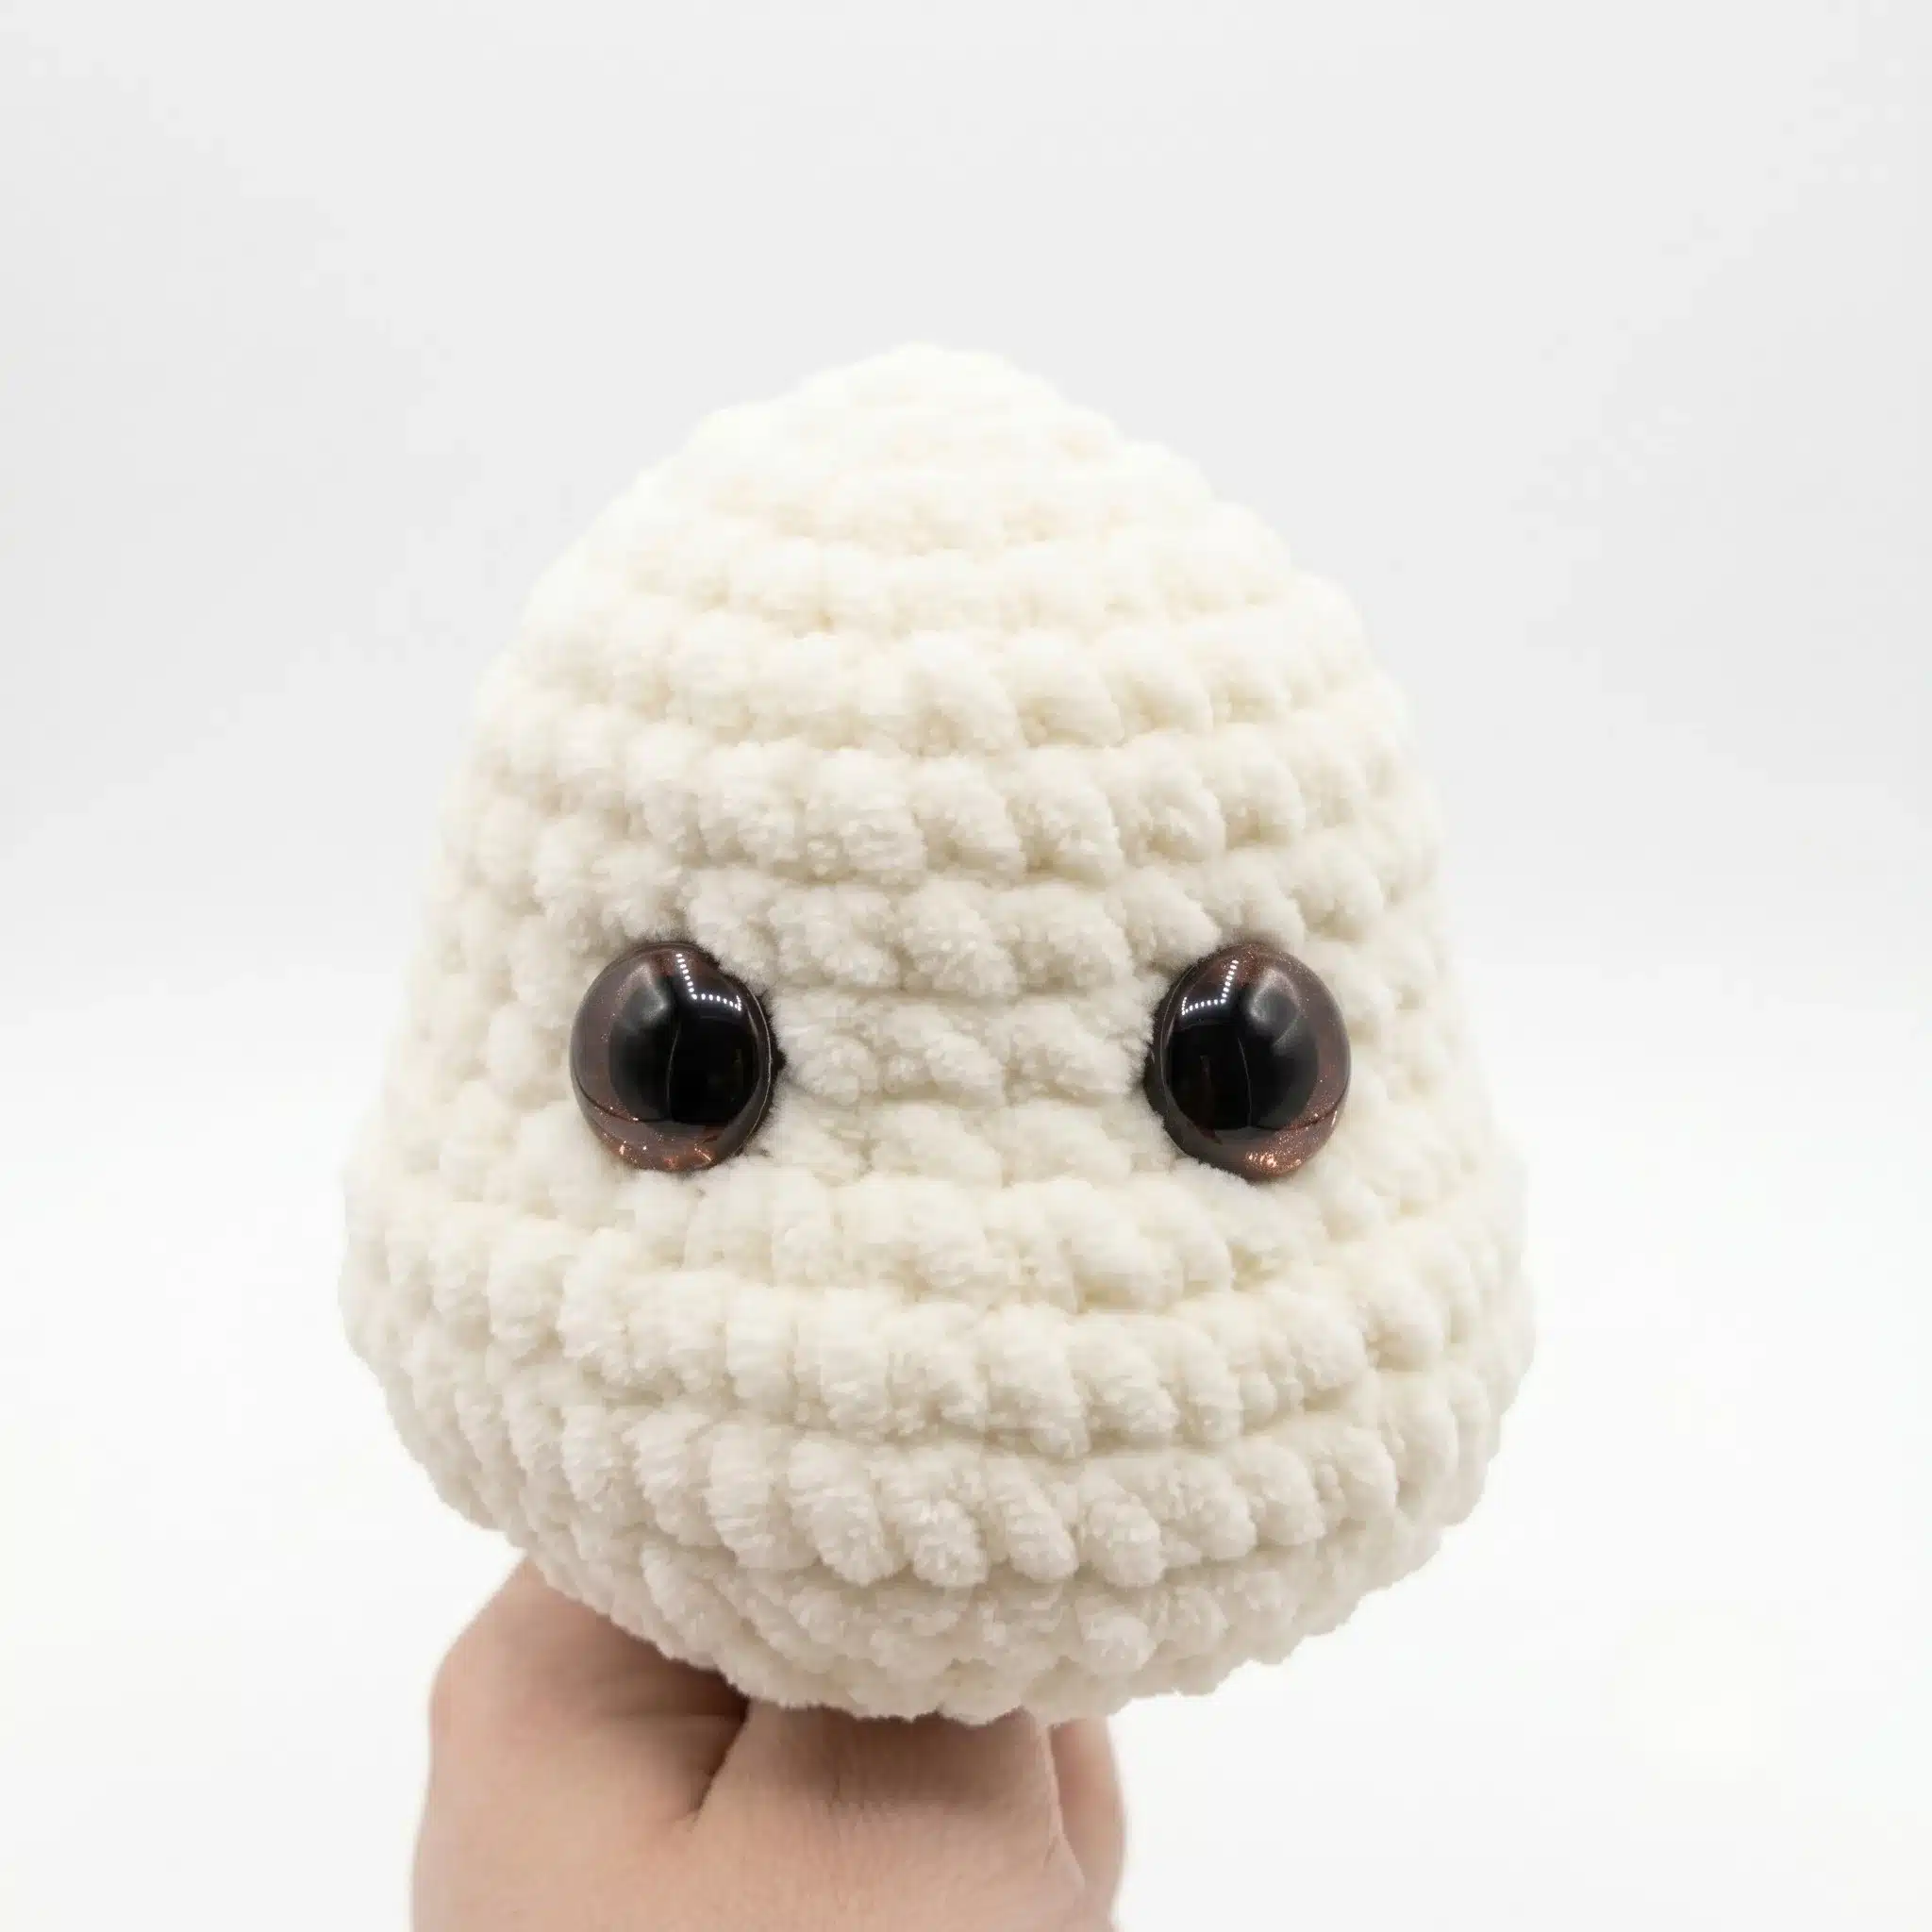
This beginner-to-intermediate amigurumi pattern creates a sweet little goat with a soft, rounded body, curved horns, and floppy ears. Worked in continuous spiral rounds, the project uses basic stitches and simple shaping to build a charming keepsake. The pattern includes detailed instructions for each piece, plus assembly tips for a polished finish.
Materials
- Yarn: Worsted weight (CYCA #4) velvet/chenille yarn in a main body color (cream, white, or your choice) and brown for the hooves and horns
- Hook: US size G/6 (4mm)
- Safety eyes: 16mm, 1 pair
- Stuffing: Polyester fiberfill
- Stitch markers: 1–2, for tracking round starts
- Yarn needle (tapestry needle) for sewing pieces together
- Scissors
- Brown embroidery thread for the nose, eyebrows, and eye accents
- Optional: a thin dowel, wooden skewer, or stiff wire wrapped in tape for neck support
- Optional: jute cord and a small charm for a neck strap
- Optional: blush or pastel chalk for tinting the muzzle
Abbreviations
- BLO — Back Loop Only
- ch — Chain
- dec — Decrease (invisible decrease)
- inc — Increase (2 sc in same stitch)
- MR — Magic Ring
- sc — Single Crochet
- sl st — Slip Stitch
- st(s) — Stitch(es)
Pattern Notes
This pattern is written in US crochet terminology. All pieces are worked in continuous spiral rounds unless otherwise noted; do not join or chain up between rounds. Gauge is not critical for this project — a tighter tension is recommended to keep stuffing from showing through the stitches. Stitch count is given at the end of each round in parentheses, like this: (12). Safety eyes are inserted before the head is fully closed; placement instructions are included at the correct round. Stuff the head and body firmly, but stuff the ears, horns, and tail lightly or not at all, as noted in each section. Legs and arms begin with a small foundation chain rather than a magic ring, so read the first round of each carefully.
Pattern Instructions
Head
Rnd 1: 6 sc in MR. (6)
Rnd 2: inc in each st around. (12)
Rnd 3: sc, inc repeat around. (18)
Rnd 4: sc, inc, 2 sc, inc repeat around 5 times, sc. (24)
Rnd 5: 3 sc, inc repeat around. (30)
Rnds 6–9: sc in each st around. (30)
Rnd 10: 7 sc, inc, sc repeat 3 times, inc 4 times, sc, inc repeat 3 times, 7 sc. (40)
Rnd 11: 16 sc, inc, 6 sc, inc, 16 sc. (42)
Rnd 12: sc in each st around. (42)
Insert safety eyes between Rnds 8 and 9, spacing them 5 stitches apart along Rnd 9. Use the four consecutive increases in Rnd 10 as a guide for centering, then offset 3 stitches to the left and 2 stitches to the right from that center point.
Rnd 13: 5 sc, dec repeat around. (36)
Rnd 14: 2 sc, dec, 4 sc, dec repeat around 5 times, 2 sc. (30)
Rnd 15: 3 sc, dec repeat around. (24)
Rnd 16: sc, dec, 2 sc, dec repeat around 5 times, sc. (18)
Fasten off, leaving a short tail. Stuff the head firmly, paying extra attention to the cheeks and muzzle area.
Ears (make 2)
Do not stuff these pieces.
Rnd 1: 6 sc in MR. (6)
Rnd 2: sc, inc repeat around 3 times. (9)
Rnd 3: 2 sc, inc repeat around 3 times. (12)
Rnd 4: 3 sc, inc repeat around 3 times. (15)
Rnd 5: 4 sc, inc repeat around 3 times. (18)
Rnd 6: 5 sc, inc repeat around 3 times. (21)
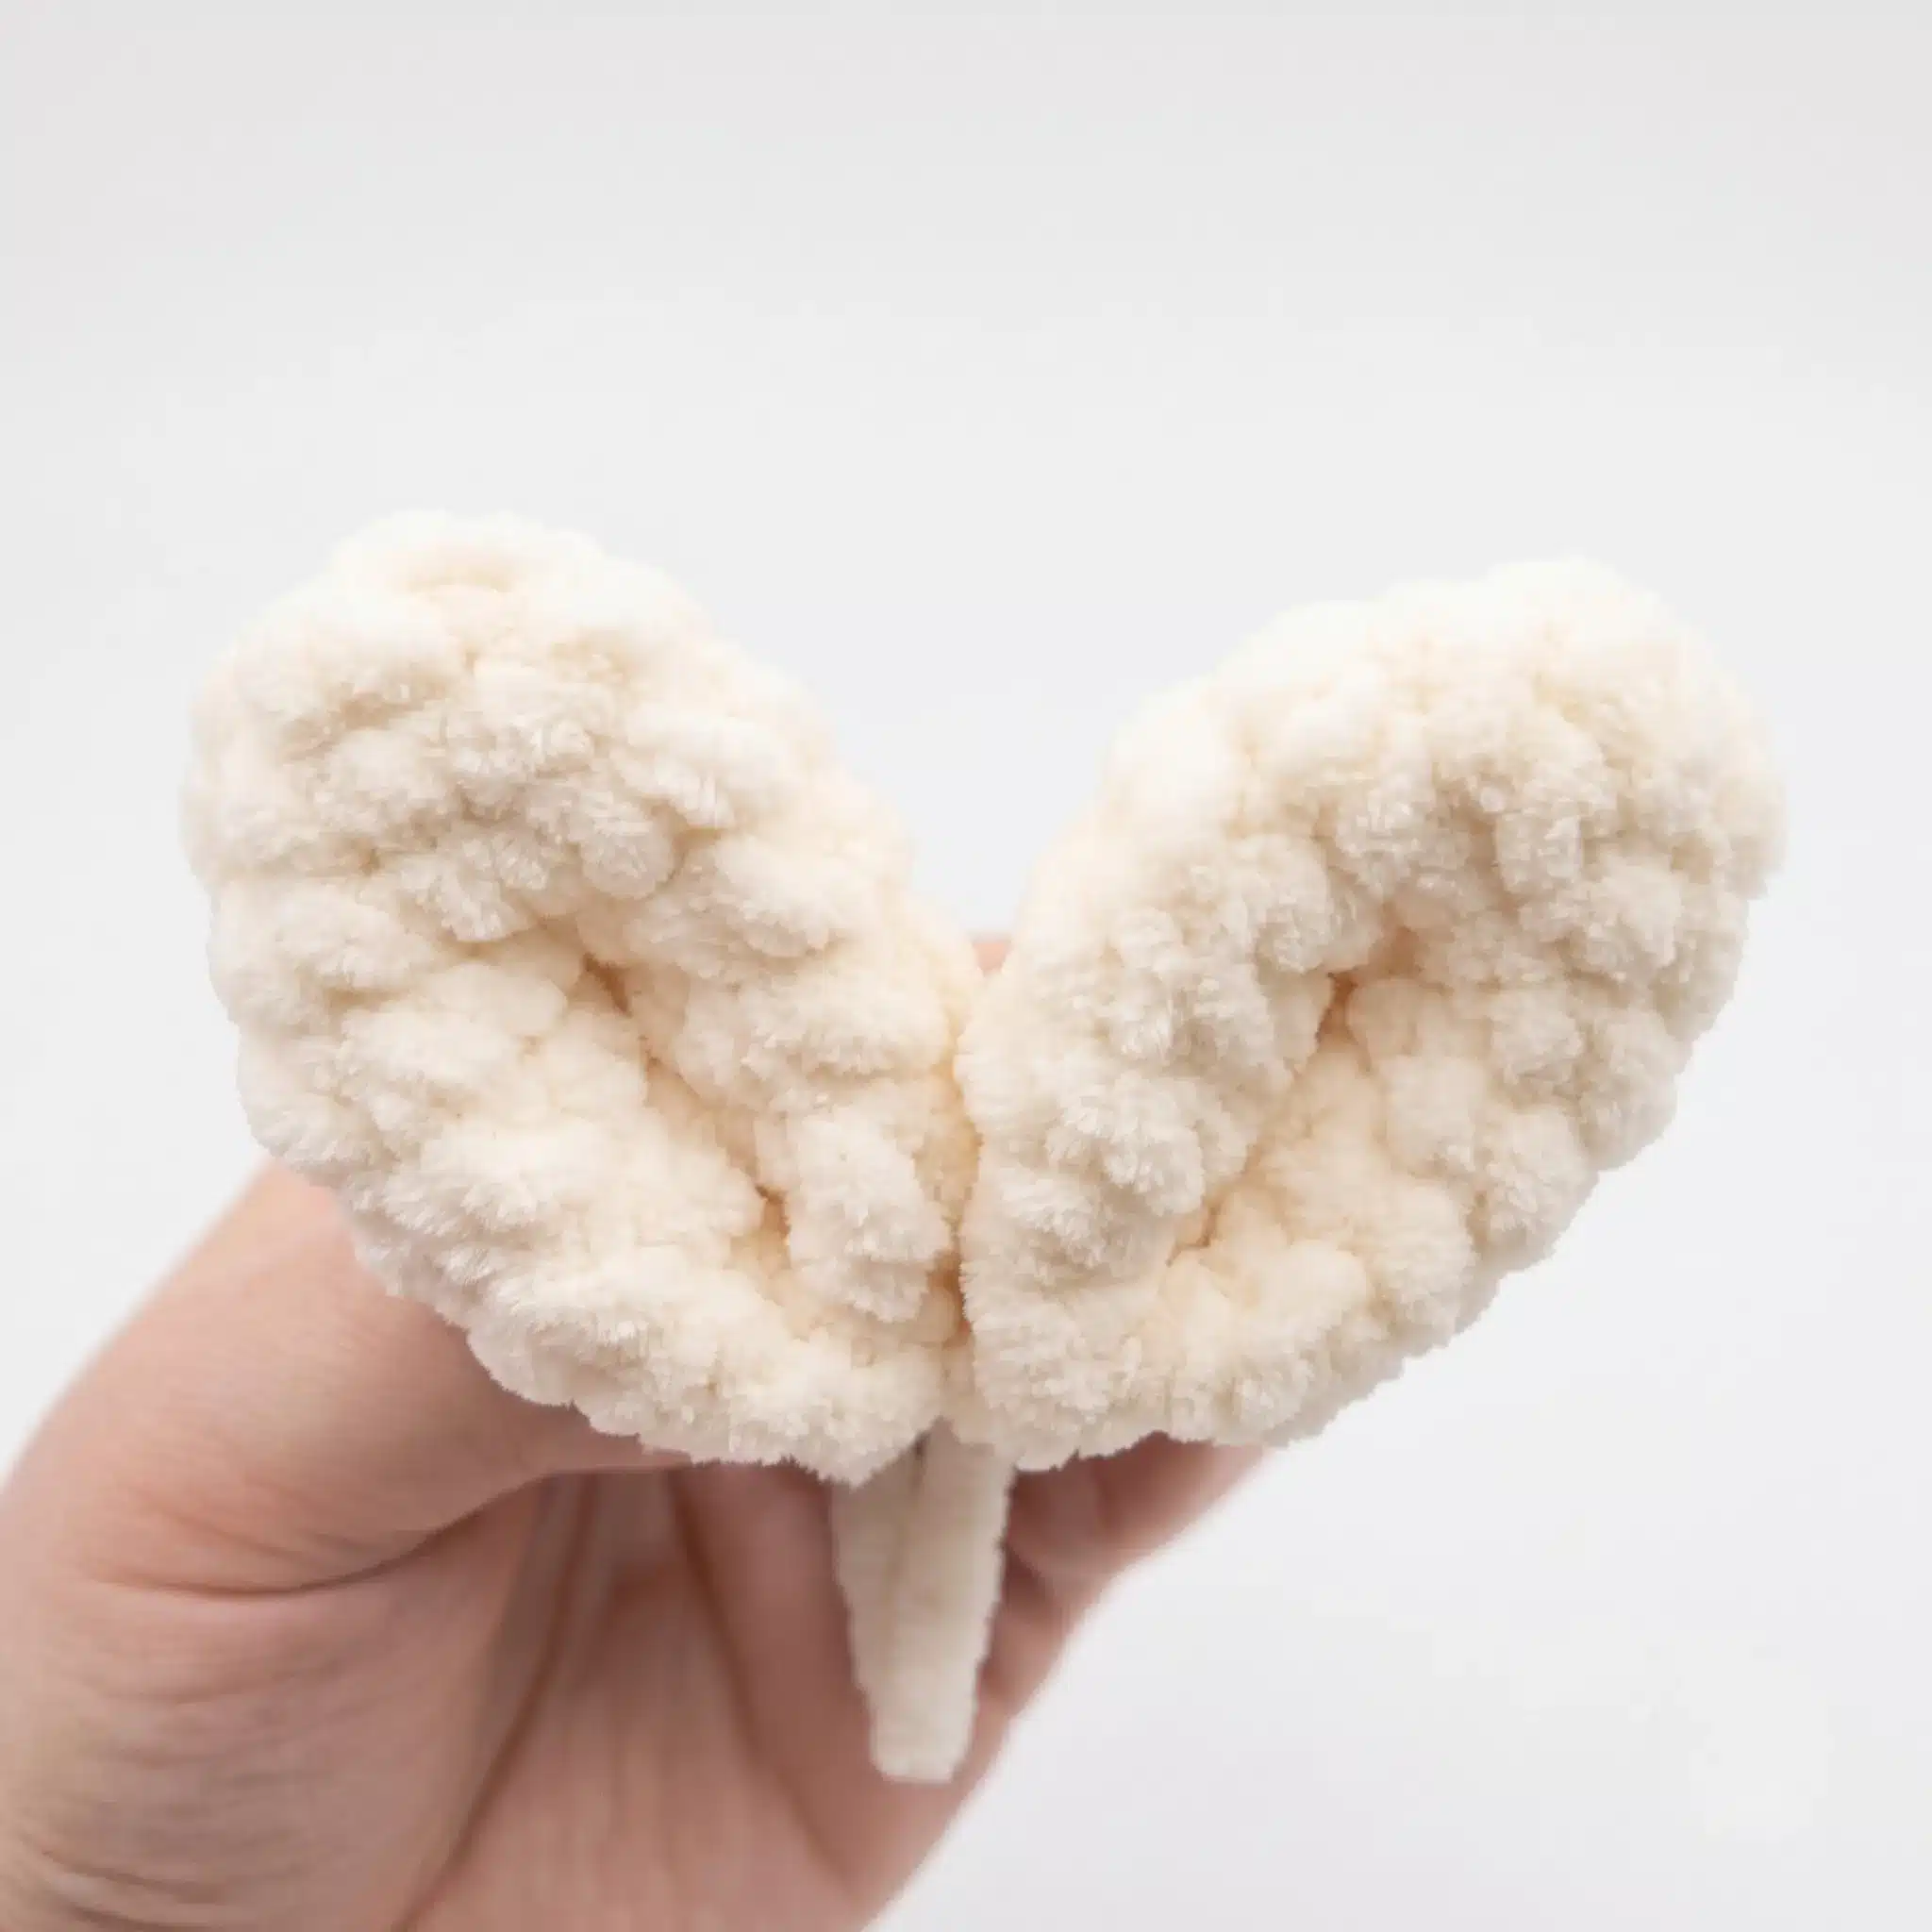
Fold the piece flat and single crochet through both layers across 10 stitches. Fold again and single crochet through both layers across 5 stitches. Fasten off.
Horns (make 2)
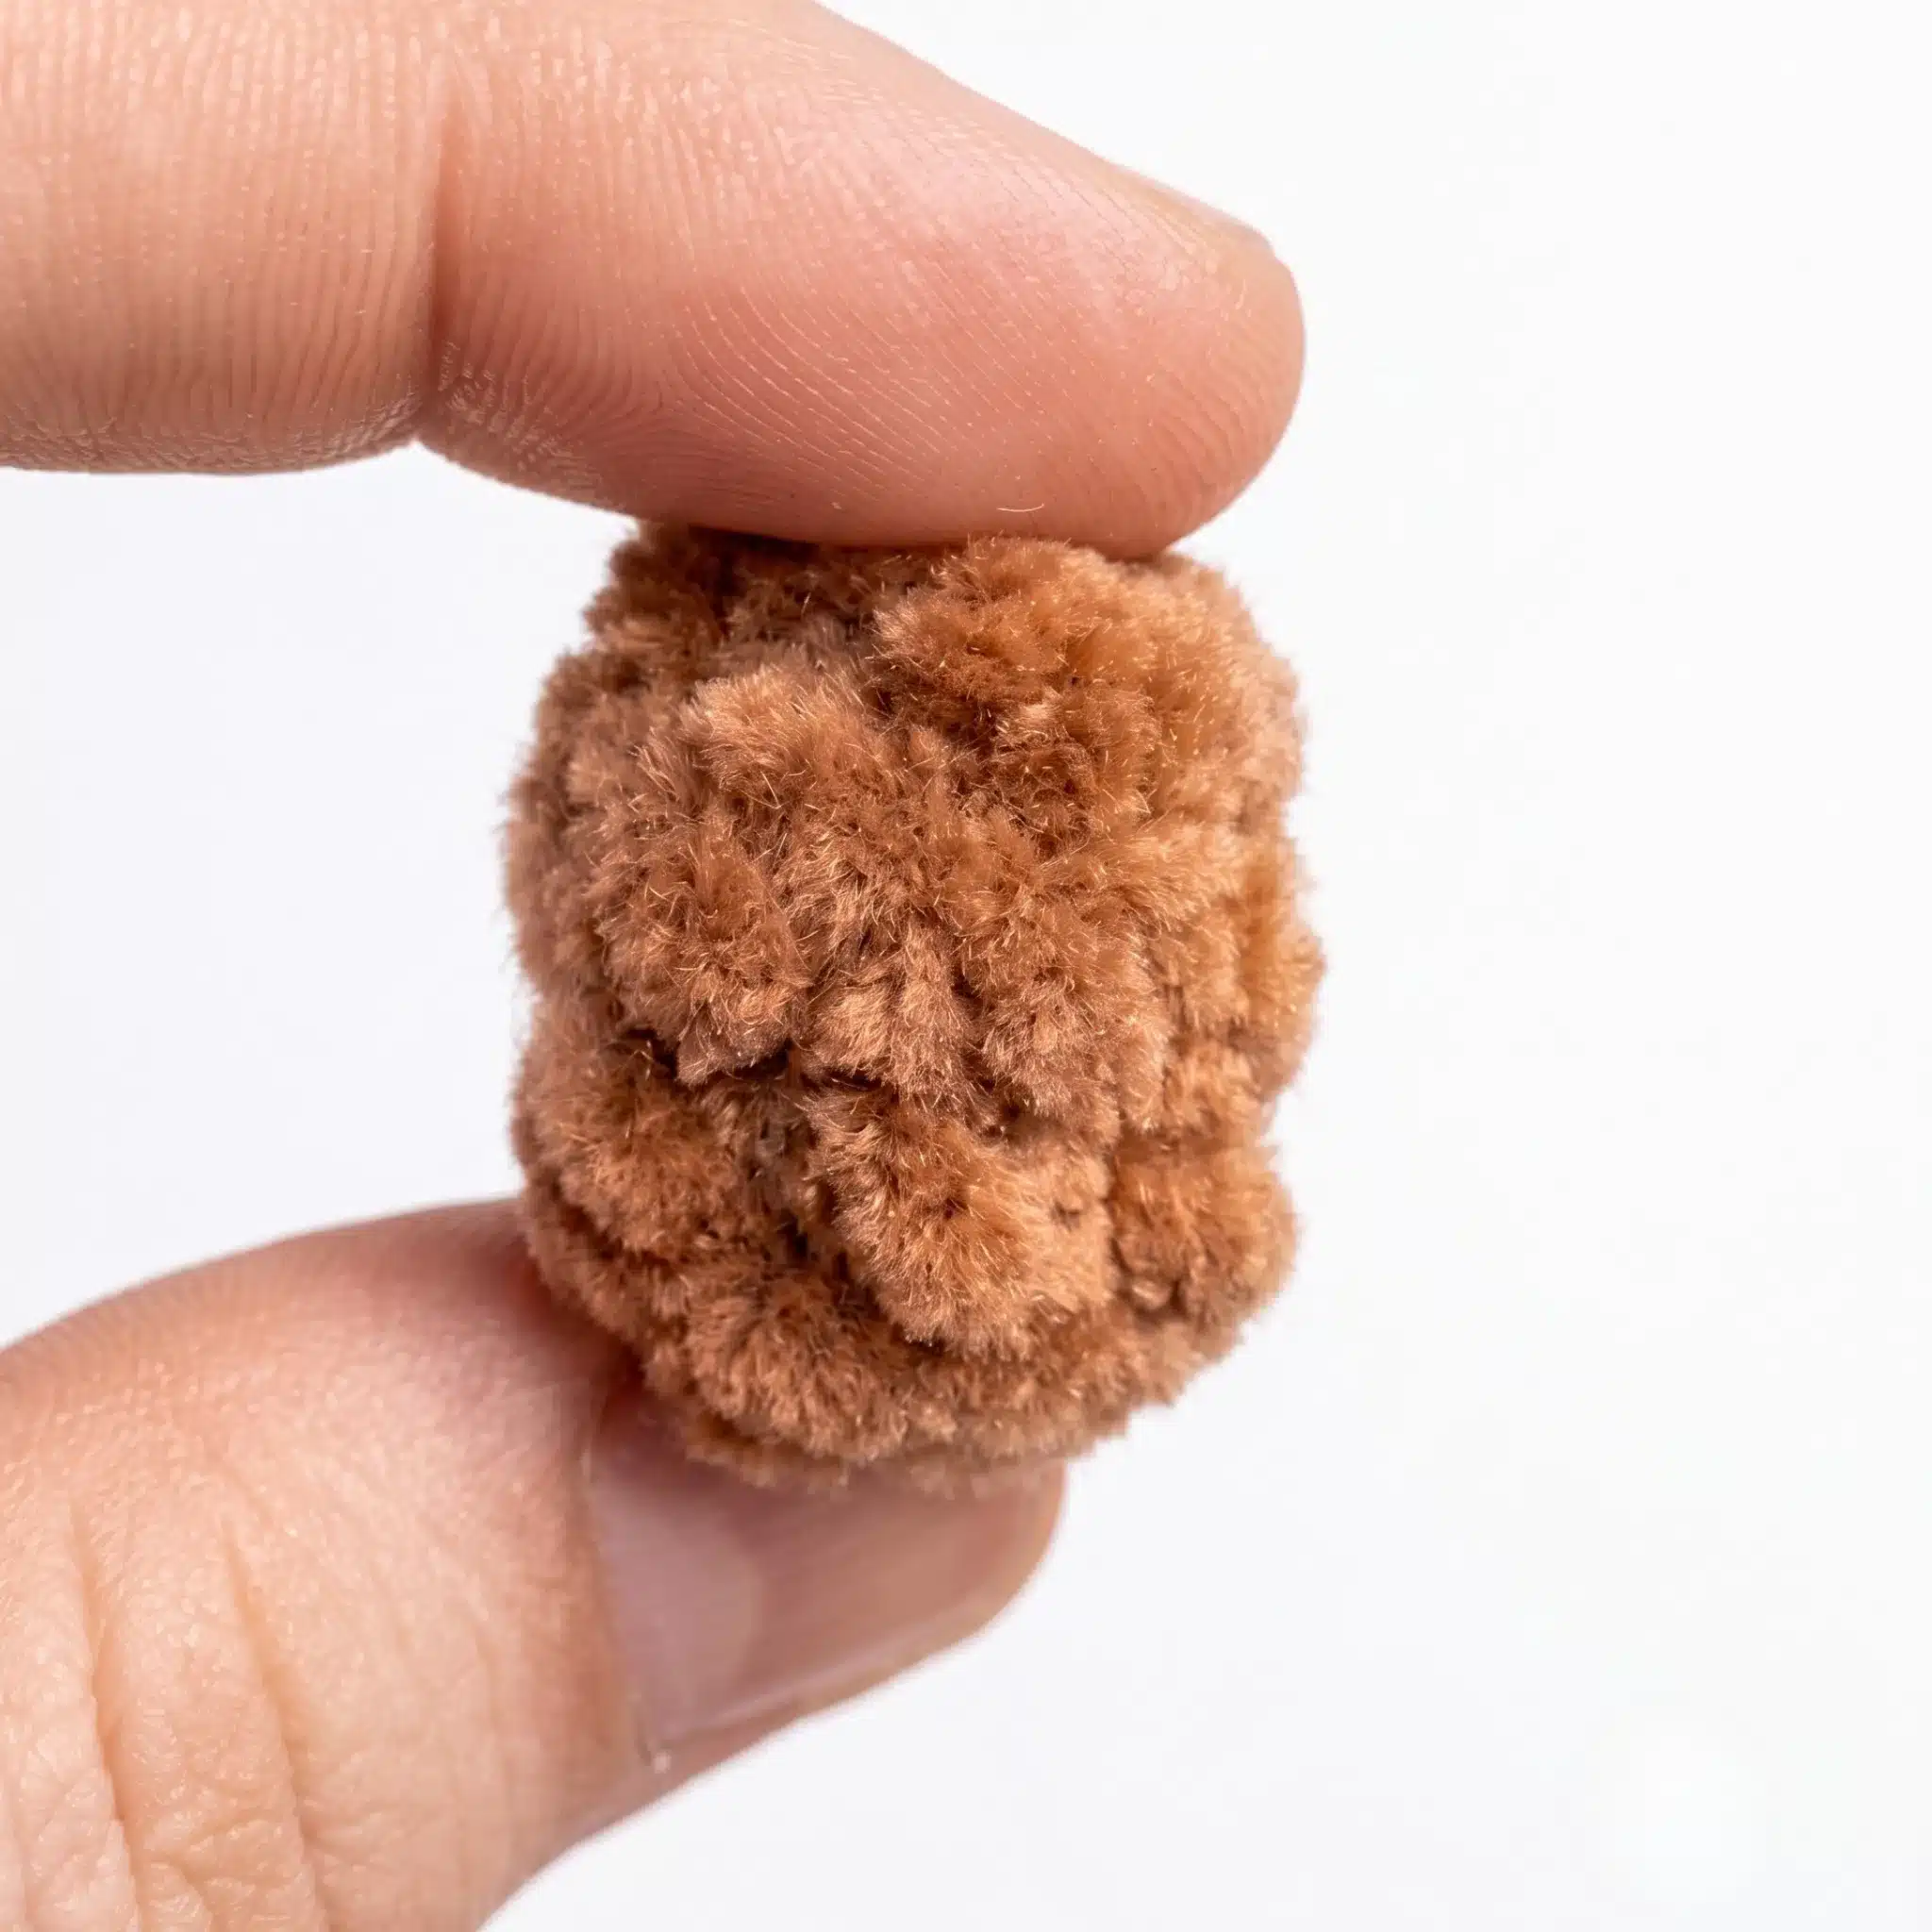
Do not stuff this piece.
Rnd 1: 6 sc in MR. (6)
Rnds 2–3: sc in each st around. (6)
Fasten off, leaving a tail for sewing.
Tail
Do not stuff this piece.
Rnd 1: 6 sc in MR. (6)
Rnd 2: inc in each st around. (12)
Rnd 3: dec in each st around. (6)
Fold flat and single crochet through both layers across 3 stitches. Fasten off.
Legs (make 2)
Begin with brown yarn.
Foundation: Chain 4. Starting in the 2nd chain from the hook, work Rnd 1.
Rnd 1: 2 sc, 5 sc in next ch, sc, inc. (10)
Rnd 2: inc, sc, inc 5 times, 2 sc, inc. (17)
Rnd 3: Work this round in BLO. sc in each st around. (17)
Rnd 4: 3 sc, dec 5 times, 4 sc. (12)
Change to main color yarn.
Rnd 5: Work this round in BLO. sc in each st around. (12)
Stuff the hoof and cinch it closed, using the foundation chain as a reference point for a neat, rounded shape. To cinch, bring the needle out from inside the hoof, insert it into the center of the sole catching some stuffing, and bring it back out at the same starting point. Repeat once more, then pull tight and tie off securely inside the piece.
Rnds 6–8: sc in each st around. (12)
Stuff loosely. Before closing, check that the leg is angled the way you want it, adjusting with a stitch or two of offset if needed. Fold flat and single crochet through both layers across 6 stitches. Fasten off.
Arms (make 2)
Begin with brown yarn.
Foundation: Chain 4. Starting in the 2nd chain from the hook, work Rnd 1.
Rnd 1: 2 sc, 5 sc in next ch, sc, inc. (10)
Rnd 2: inc, sc, inc 5 times, 2 sc, inc. (17)
Rnd 3: Work this round in BLO. sc in each st around. (17)
Rnd 4: 3 sc, dec 5 times, 4 sc. (12)
Change to main color yarn.
Rnd 5: Work this round in BLO. 2 sc, dec repeat around 3 times. (9)
Stuff and cinch the same way as the legs.
Rnds 6–9: sc in each st around. (9)
Stuff loosely. Fold flat and single crochet through both layers across 4 stitches. Angle the arms slightly inward as you close by working a few offset stitches. Fasten off.
Body
Rnd 1: 6 sc in MR. (6)
Rnd 2: inc in each st around. (12)
Rnd 3: sc, inc repeat around. (18)
Rnd 4: sc, inc, 2 sc, inc repeat around 5 times, sc. (24)
Rnd 5: 3 sc, inc repeat around. (30)
Rnd 6: Attach the legs in this round. 6 sc across the left leg, 8 sc, 6 sc across the right leg, 10 sc. (30)
Rnd 7: Attach the tail in this round. 23 sc, 3 sc joining the tail, 4 sc. (30)
Rnds 8–9: sc in each st around. (30)
Rnd 10: 3 sc, dec repeat around. (24)
Rnd 11: sc in each st around. (24)
Rnd 12: sc, dec, 2 sc, dec repeat around 5 times, sc. (18)
Rnd 13: sc in each st around. (18)
Rnd 14: Attach the arms in this round. Check that the arms line up symmetrically with the legs before securing them. sc, 4 sc across the left arm, 4 sc, 4 sc across the right arm, 5 sc. (18)
Rnd 15: sc in each st around. (18)
Fasten off and stuff the body firmly.
Assembly
Because the Head is large, insert a wooden skewer, dowel, or wire support wrapped in tape into the neck opening of the Body before attaching the Head. This keeps the finished goat from tipping forward. Sew the Head onto the Body using a whipstitch and matching yarn, working around the neck opening.
Cinch each safety eye individually to give the eyes a rounded, expressive shape: insert the needle at one point near the eye and bring it out at a second, then insert at a third point and bring it out at a fourth. Pull the thread taut and tie a secure knot. Repeat for the second eye, checking that both sides are symmetrical.
Pin the Ears in place between Rnds 5 and 6 from the magic ring center, testing a few placements before you commit. Sew them on with a whipstitch using the yarn tail.
Pin the Horns above the Ears and adjust until you like the angle, then sew them in place using the yarn tail.
Using a long strand of brown embroidery thread, embroider the nose by inserting the needle at the center back of the neck and bringing it out at the center bottom of the muzzle. Stitch a V-shape connecting to points just under each eye, then bring the thread out at the back and tie off. Without cutting the thread, embroider small eyebrow and eye-accent lines above and beside the eyes.
If desired, tint the muzzle lightly with blush or pastel chalk for a soft, rosy finish. Add a jute cord neck strap with a small charm, if desired. Weave in all remaining ends securely.
Tips
- Keep your tension snug and even throughout, especially on the Head and Body, since a looser gauge lets stuffing peek through the stitches on textured yarn.
- If you’re new to invisible decreases, practice the motion a few times on scrap yarn first — insert your hook into the front loops of both stitches, then complete as a normal single crochet for a smooth, seamless dip in your rounds.
- When stuffing the Head, add fiberfill in small amounts and check the shape often, especially around the cheeks and muzzle, so the face stays symmetrical rather than lopsided.
- For the Legs and Arms, remember that the cinching step is what gives the hooves their rounded, defined shape, so don’t skip it even though it takes an extra minute.
- When sewing the Head to the Body, pin it in a few test positions first and step back to check the angle before you commit to stitching, since a slightly tilted head can completely change your goat’s expression.
Frequently Asked Questions
What yarn weight works best for this pattern?
Worsted weight (CYCA #4) velvet or chenille yarn is recommended. The soft texture gives the goat a plush, huggable finish, and a tighter tension helps prevent stuffing from showing through.
Can I use a different hook size?
US size G/6 (4mm) is specified to work with the worsted weight yarn. Using a different hook size will change the finished size and may affect the tightness of your stitches.
How do I keep the goat’s head from flopping forward?
Insert a wooden skewer, dowel, or stiff wire wrapped in tape into the neck opening of the body before attaching the head. This provides internal support and keeps the goat upright.
What if I can’t find 16mm safety eyes?
You can substitute a different size, but the proportions of the face will change. If using smaller eyes, you may need to adjust the placement slightly to keep the expression balanced.
How do I make the invisible decrease?
Insert your hook into the front loop only of the first stitch, then into the front loop only of the next stitch. Yarn over and pull through both loops, then yarn over and pull through the remaining two loops on your hook. This creates a nearly invisible decrease.
Can I wash the finished goat?
Hand washing in cool water with a mild detergent is recommended. Gently squeeze out excess water and lay flat to dry. Avoid wringing or machine drying, as this can distort the shape.
Pin This Crochet Pattern!