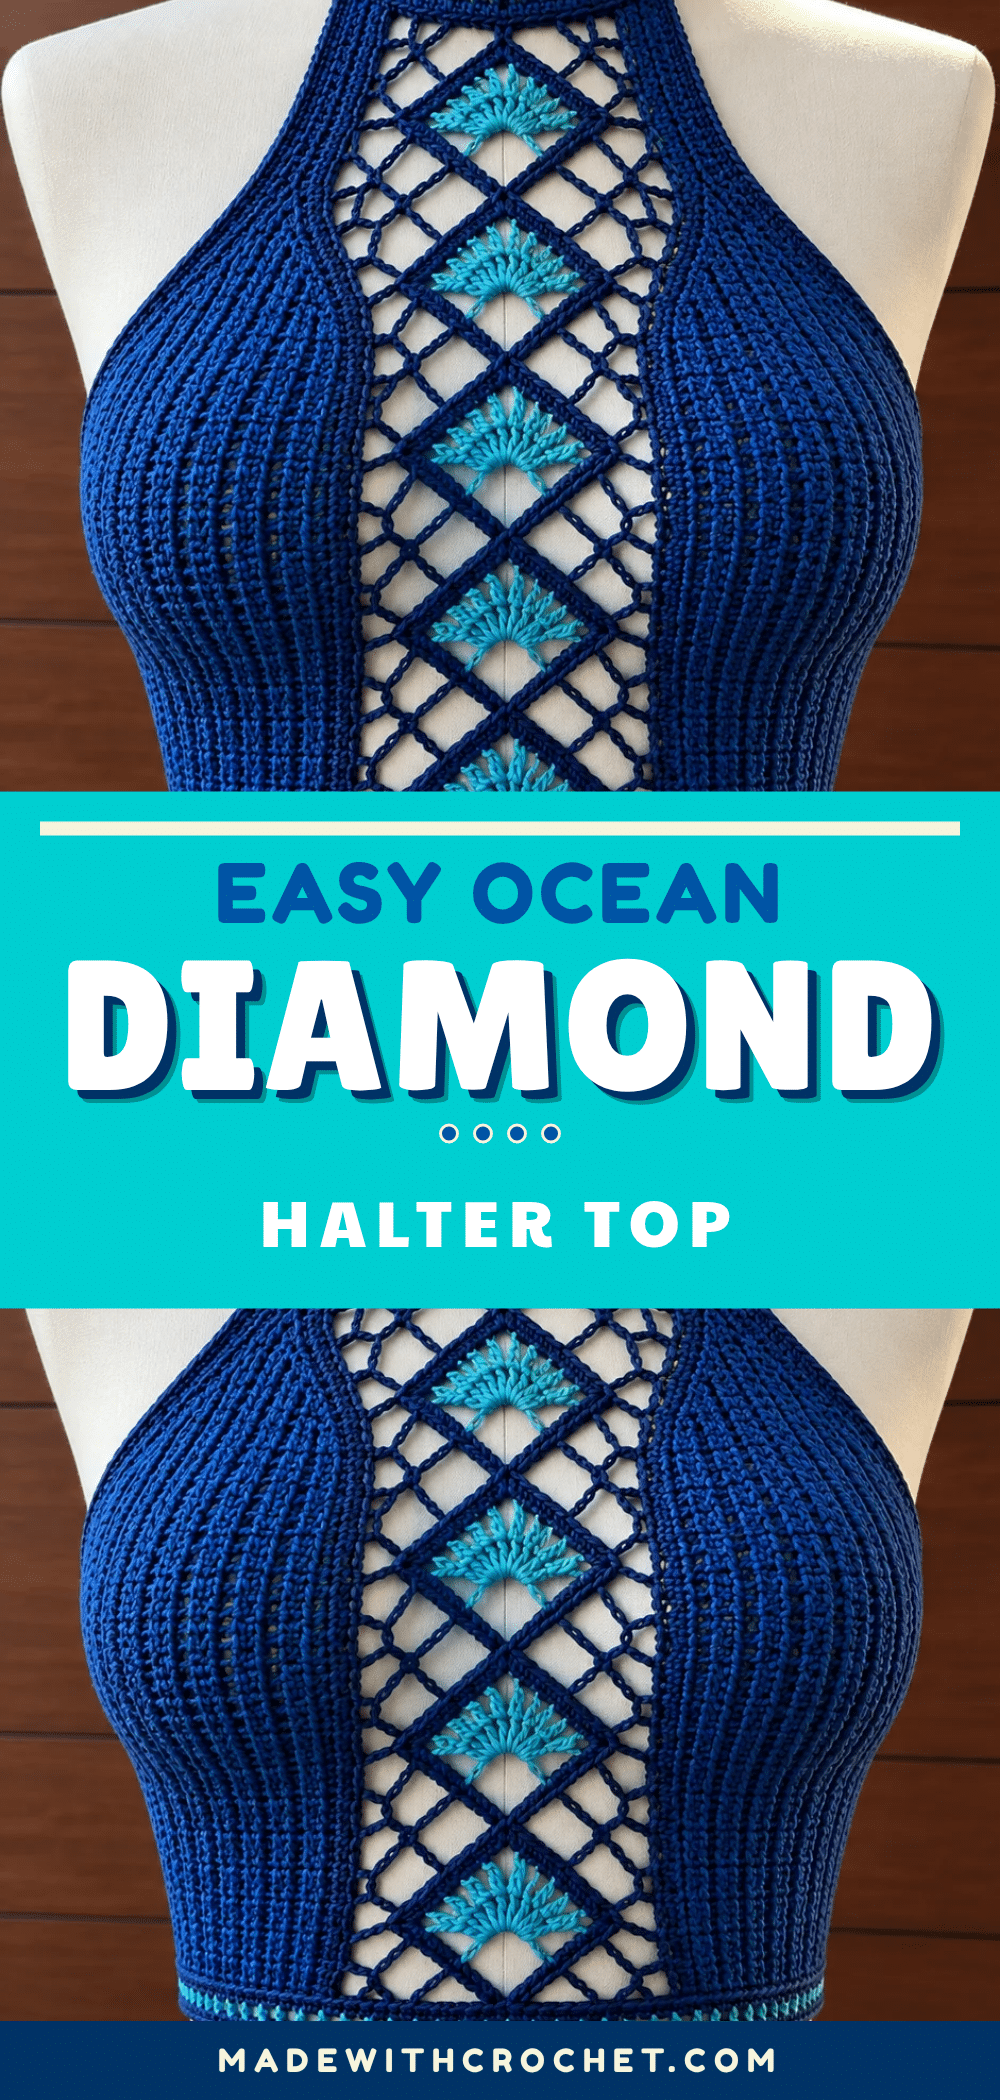
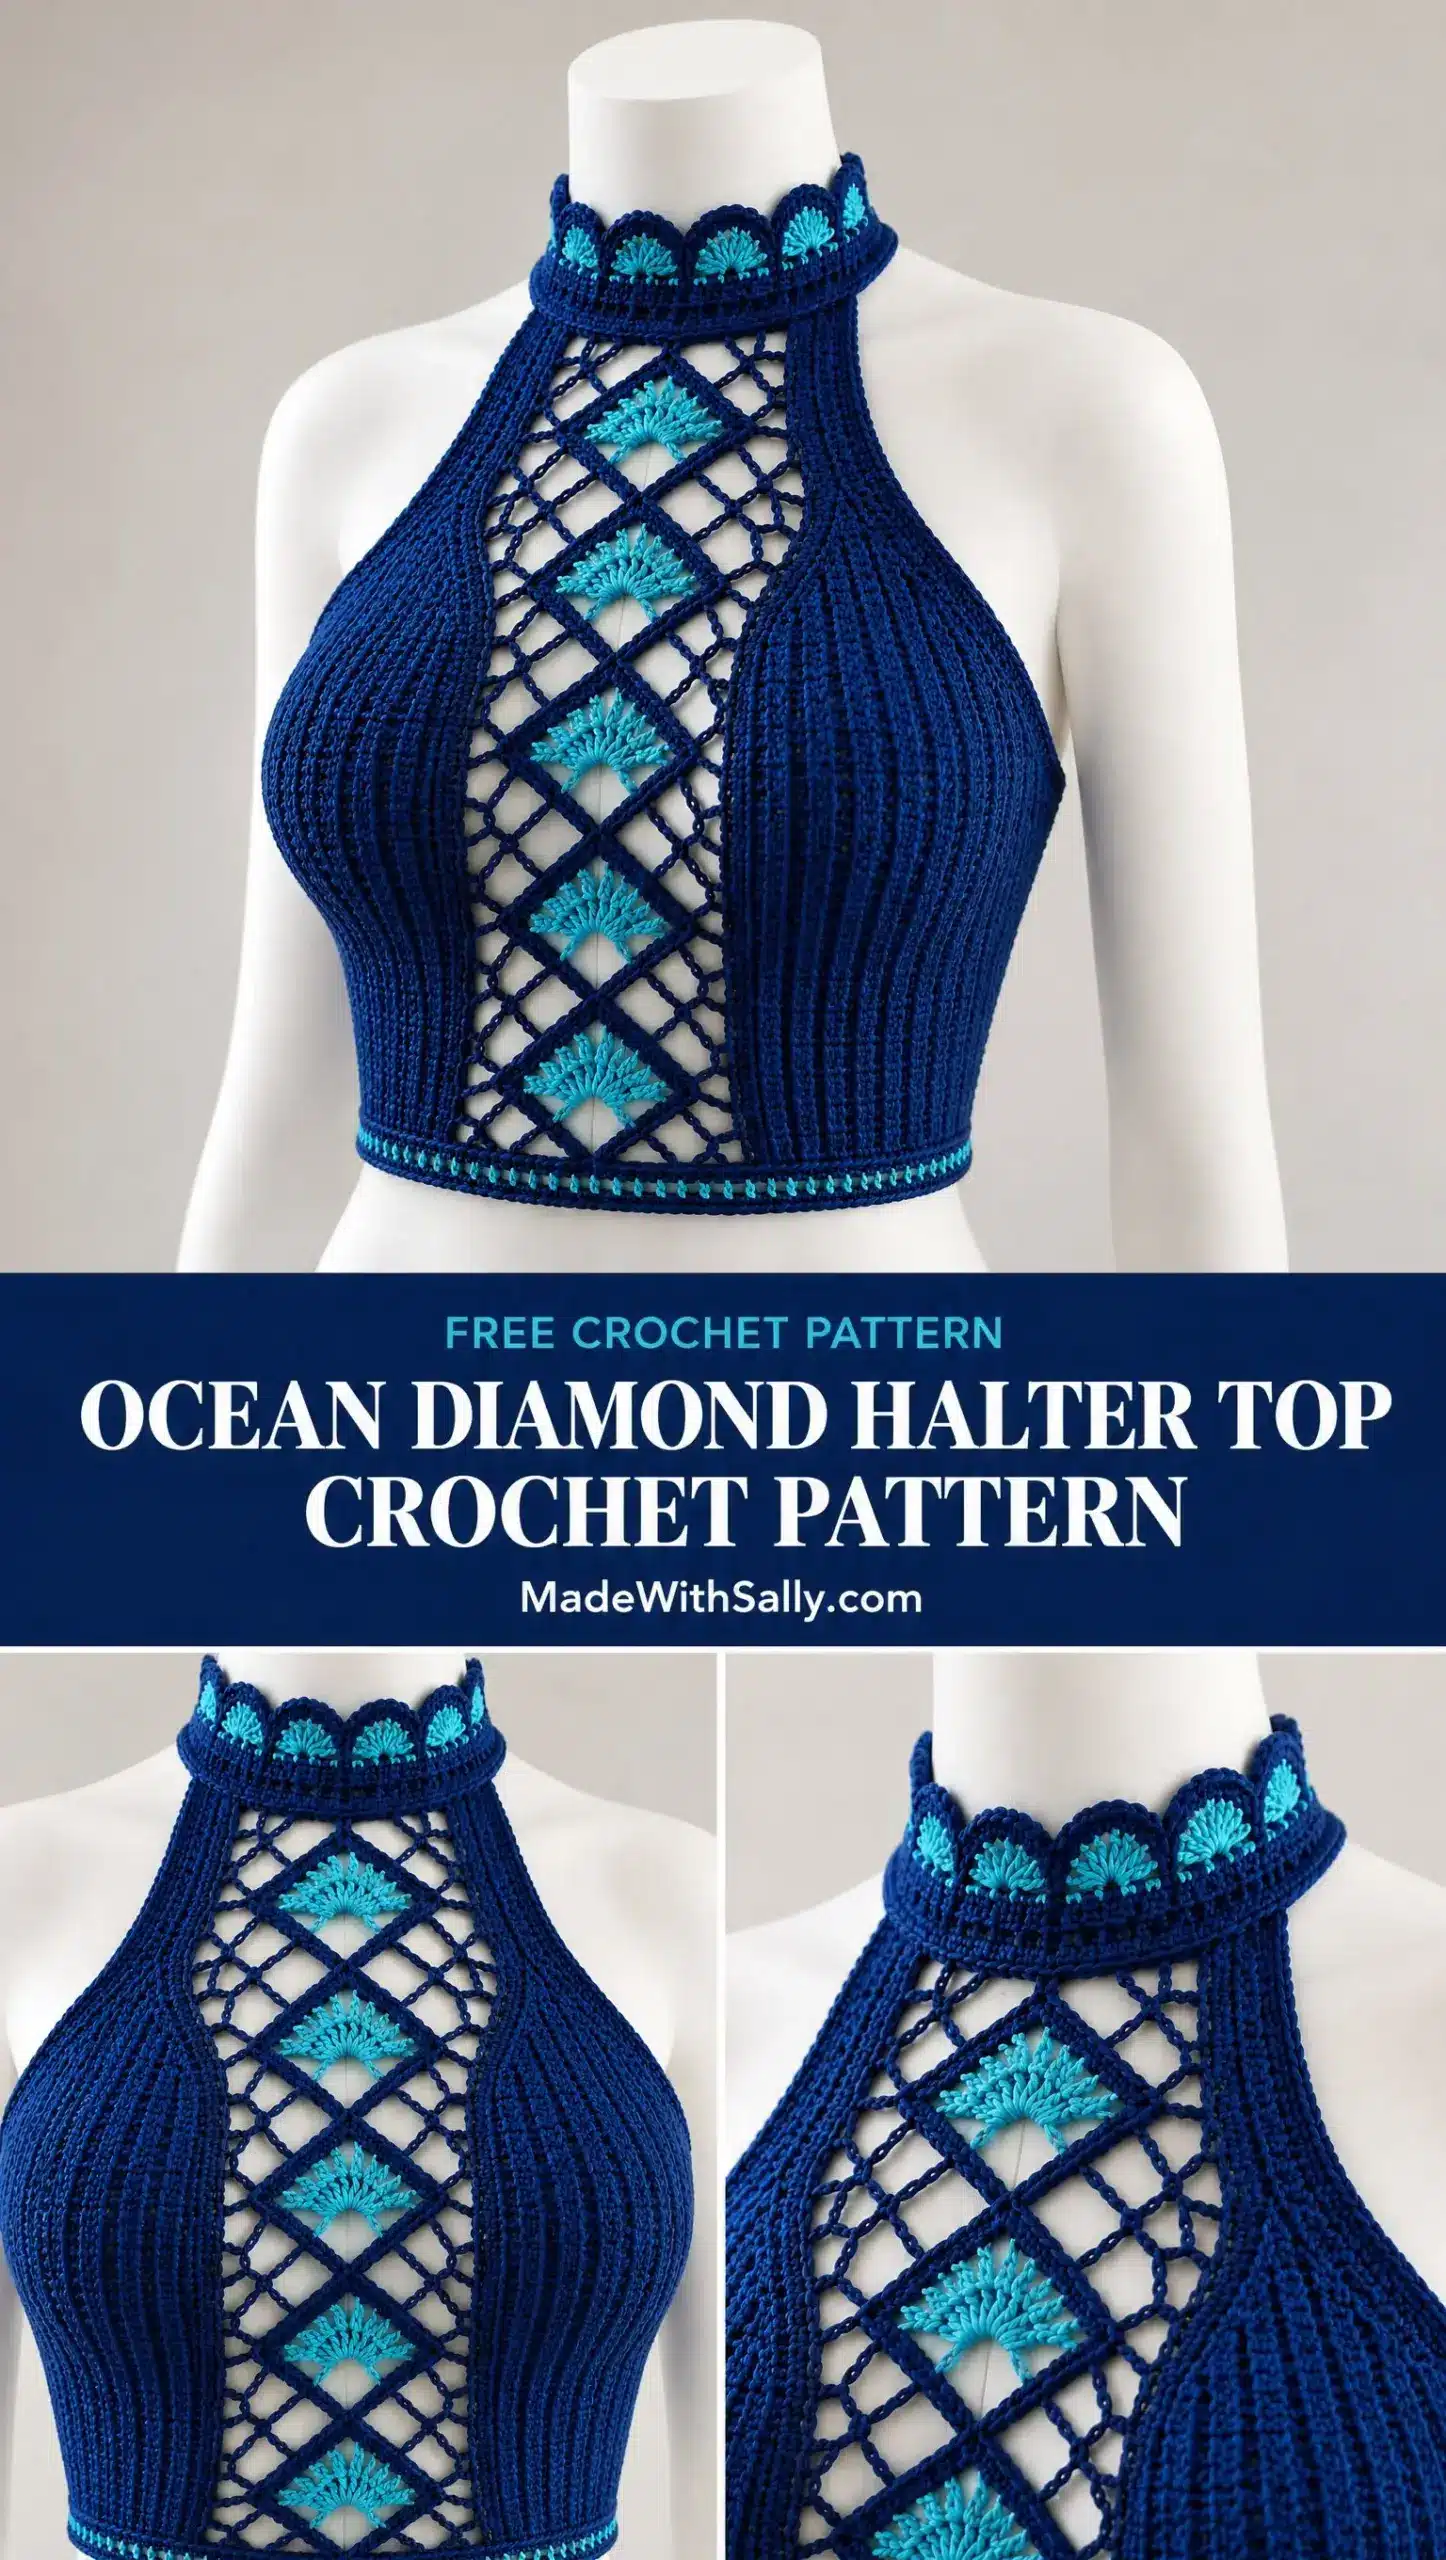
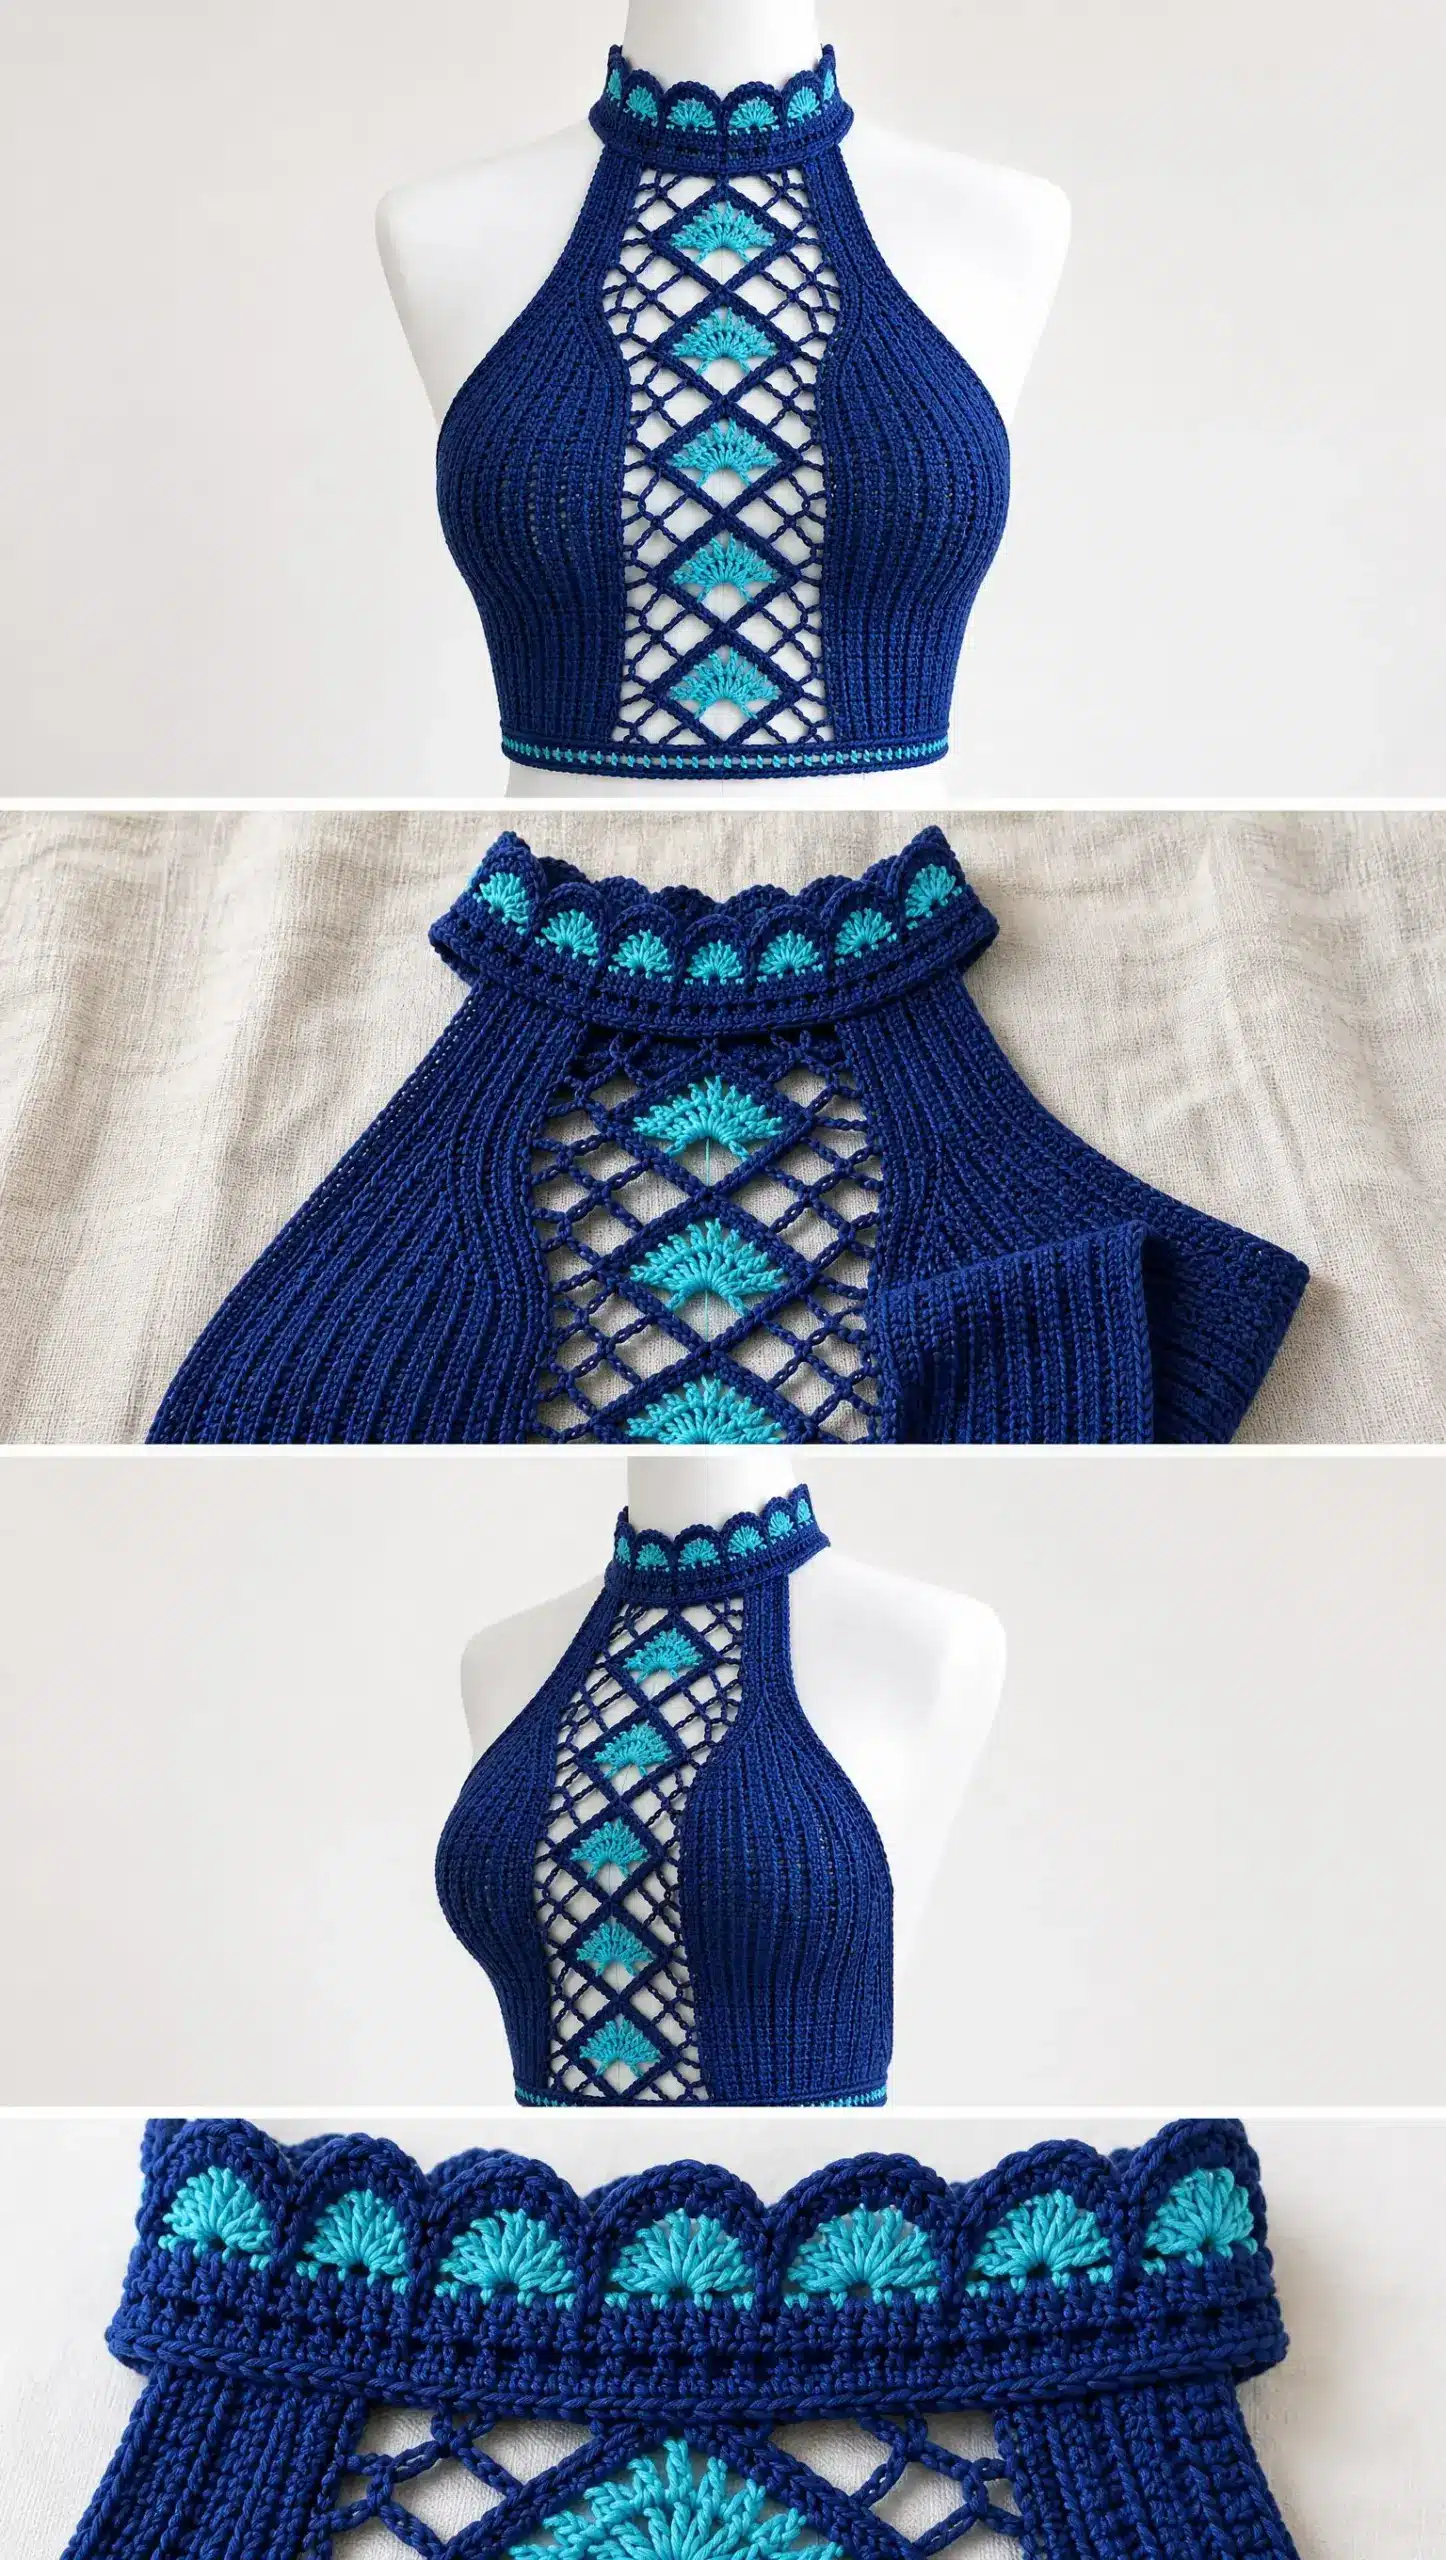
The Ocean Diamond Halter Top is a fitted, waist-length crop top featuring exposed shoulders and a striking high collar. The star of the design is the vertical center panel of open diamond mesh worked in deep navy, with turquoise fan motifs nestled inside alternating diamonds. Flanking this center panel are two solid cobalt ribbed side panels that provide structure and a close, flattering fit.
Texture is the heartbeat of this design. The narrow vertical cobalt ribs create a tactile, structured foundation, while the open navy mesh offers a delicate, airy contrast. The turquoise fans add a pop of color and intricate detail, transforming simple chain spaces into a visual focal point. Working with post stitches, chain spaces, and color changes requires patience, but the result is a garment that feels elegant and professionally crafted.
Texture and Stitch Notes
The contrast between the solid, ribbed side panels and the open, lacy center panel is what makes this halter top truly unique. The ribbing provides necessary stretch and support, hugging the body, while the diamond mesh allows for breathability and movement. The turquoise fans are not just decorative; they anchor the open mesh, preventing it from looking too loose and adding a burst of ocean-inspired color. Paying close attention to the tension of the post stitches and the placement of the fans will ensure your top hangs beautifully.
Project Overview
This pattern uses US crochet terminology and is written for sizes XS, S, M, L, and XL. The sample shown is closest to size M. You’ll work the pieces in modular sections, then join them together and add the finishing edges last. This modular construction means you can adjust the fit as you go, which is helpful for customizing the garment to your specific body shape.
Materials
Gathering the right supplies before you begin makes the whole process smoother. Here’s everything you’ll need:
Yarn
Sport weight or fine DK mercerized cotton, approximately 250 to 320 meters per 100 grams. Smooth, firm yarn is strongly recommended for crisp mesh definition.
- MC (Main Color): Cobalt blue
- CC1 (Contrast Color 1): Deep navy
- CC2 (Contrast Color 2): Turquoise or aqua
The color breakdown is approximately 70% cobalt, 20% navy, and 10% turquoise.
Yardage by Size
- XS: 520 meters total
- S: 570 meters total
- M: 630 meters total
- L: 700 meters total
- XL: 780 meters total
Hook
3.0 mm hook for main fabric. A 2.75 mm hook is optional for borders if your edges tend to flare.
Notions
4 locking stitch markers, tapestry needle, scissors, flexible tape measure, rustproof blocking pins.
Gauge and Finished Size
Getting your gauge right is essential for this fitted top. The center panel controls the visual width, while the side ribs control the actual fit around your body.
Gauge
- Main gauge: 22 double crochet (dc) stitches and 11 rows equals 10 cm or 4 inches in blocked double crochet fabric.
- Center mesh gauge: One diamond repeat measures approximately 5.0 cm wide by 5.5 cm tall.
I highly recommend blocking and measuring one diamond repeat before beginning the full garment. Adjust your hook size up or down until your diamond measures close to these dimensions.
Finished Measurements
Choosing your size: For the fitted look shown in the photos, choose 4 to 8 cm (about 1.5 to 3 inches) of negative ease at the bust. This means your finished garment measurement should be slightly smaller than your actual body measurement. If you fall between sizes, use the smaller center panel count and add width to the side ribs instead.
| Size | Body Bust | Finished Bust | Bottom Width Laid Flat | Body Length | Collar Circumference |
|---|---|---|---|---|---|
| XS | 76-81 cm | 72 cm | 34 cm | 36 cm | 32 cm |
| S | 82-87 cm | 78 cm | 37 cm | 37 cm | 34 cm |
| M | 88-94 cm | 84 cm | 40 cm | 38 cm | 36 cm |
| L | 95-102 cm | 92 cm | 44 cm | 40 cm | 38 cm |
| XL | 103-112 cm | 101 cm | 48 cm | 42 cm | 40 cm |
Abbreviations
Let me walk you through all the abbreviations and special techniques you’ll encounter in this pattern.
Standard Abbreviations
- ch = chain
- sl st = slip stitch
- sc = single crochet (insert hook, yarn over, pull through, yarn over, pull through both loops)
- hdc = half double crochet
- dc = double crochet (yarn over, insert hook, yarn over, pull through, yarn over, pull through two loops, yarn over, pull through remaining two loops)
- tr = treble crochet
- FPdc = front post double crochet (yarn over, insert hook from front to back to front around the post of the indicated stitch, complete as regular dc)
- BPdc = back post double crochet (yarn over, insert hook from back to front to back around the post of the indicated stitch, complete as regular dc)
- sp = space
- st(s) = stitch(es)
- RS / WS = right side / wrong side
Special Stitches
- Rib Pair: Work FPdc around the next dc, then BPdc around the following dc. Repeat this sequence across your row. This creates the narrow vertical cobalt ribs you see in the solid side panels.
- Navy Stitch Bar: Work 2 dc together into the same chain space edge area, then 1 dc into the next anchor point. These bars outline each diamond and visually separate the mesh sections.
- Turquoise Fan: In the indicated center chain space, work (sc, ch 2, 5 dc, ch 2, sc). For a smaller fan near the collar, use 4 dc instead of 5.
- Picot: Chain 3, then slip stitch into the first chain. Used sparingly on the collar scallops for a delicate finish.
Pattern Notes
This pattern is advanced intermediate. You should be comfortable with shaping, chain spaces, post stitches, joining techniques, and reading stitch repeats before starting this project. The front view shown works beautifully with either a closed back or a laced back. This version uses a short laced opening at center back for the cleanest fit and easiest sizing adjustments.
Pattern Instructions
Center Diamond Mesh Panel
The center panel is a vertical ladder of open diamonds. You’ll work this section in CC1 (navy), inserting CC2 (turquoise) fans as you go. The bottom begins with a half diamond so your hem remains level.
Foundation Chain by Size
- XS: 31 ch (3 full diamonds wide, 5 vertical diamonds)
- S: 31 ch (3 full diamonds wide, 5 vertical diamonds)
- M: 35 ch (3 full diamonds wide, 5 vertical diamonds)
- L: 35 ch (3 full diamonds wide, 6 vertical diamonds)
- XL: 39 ch (4 full diamonds wide, 6 vertical diamonds)
Row 1 (WS)
Dc in 4th ch from hook and in each ch across. Turn.
Row 2 (RS)
Ch 3, dc in next 2 sts, ch 3, skip 2 sts, sc in next st, ch 3, skip 2 sts, dc in next 3 sts ; repeat from * across, ending with dc in last 3 sts. Turn.
Row 3
Ch 3, dc in next dc, ch 2, sc in next ch-3 sp, ch 5, sc in next ch-3 sp, ch 2, dc in center dc of next 3-dc group ; repeat from * across; dc in final 2 edge sts. Turn.
Row 4
Ch 3, ch 3, sc in ch-5 sp, ch 3, 3 dc in next center anchor ; repeat from * across, keeping 2 dc at each outer edge. Turn.
Row 5
Ch 3, dc in next st, ch 2, sc in next ch-3 sp, ch 5, sc in next ch-3 sp, ch 2, dc in center dc of 3-dc group ; repeat from * across. Turn.
Row 6
Repeat Row 2, aligning the new open spaces over the previous row so a complete diamond is formed.
Diamond Repeat
Rows 3 through 6 form one full diamond unit. Repeat these four rows until you have the number of vertical diamonds listed for your size. End after a Row 6 equivalent.
Adding the Turquoise Fans
This is where the magic happens! The turquoise fans transform the navy mesh into something truly special.
- With RS facing, join CC2 into the central ch-5 space of the lowest complete diamond.
- Work one turquoise fan (sc, ch 2, 5 dc, ch 2, sc). Fasten off neatly to the WS.
- Place fans in alternating diamonds up the vertical center line. For sizes XS, S, and M, add fans to diamonds 1, 3, and 5. For sizes L and XL, add fans to diamonds 1, 3, and 5, with an optional smaller 4-dc fan in the 6th diamond near the collar.
- For the look shown in the sample, keep the side diamonds open. Only the central vertical diamonds receive turquoise fans.
Fitted Cobalt Side Panels
Make two mirror-image side panels in MC (cobalt). These panels are worked from the center outward using ribbed post-stitch fabric for structure. You can either attach each panel to the center as you work or seam them afterward using mattress stitch.
Side Panel Specifications
Size Sts at Lower Edge Per Side Approx. Panel Width Armhole Shaping Begins XS 34 1
Foundation / Row 1
Chain the listed stitch count plus 2. Hdc in 3rd ch from hook and across. Turn.
Row 2
Ch 2, dc in each st across. Turn.
Row 3
Ch 2, FPdc around next dc, BPdc around next dc across. If one stitch remains, dc in last st. Turn.
Rows 4 through 12 (13, 13, 14, 15 depending on size)
Repeat Row 3, maintaining the post-stitch ribs. Work straight until the panel reaches lower bust or underarm level.
Armhole Shaping
At the outer armhole edge only, decrease 2 sts at the beginning of the next 2 RS rows. Then decrease 1 st at that edge on each RS row 4 (5, 6, 7, 8) times depending on your size. Keep the center edge straight for joining to the diamond panel.
Upper Side Shaping
Continue working in the rib pattern while decreasing 1 st at the armhole edge every other RS row until 10 (11, 12, 13, 14) sts remain at the top. These remaining stitches become your collar extension strip.
Collar Extension
Continue working the collar extension strip in the rib pattern until it reaches halfway around the back neck. This should measure approximately 15 (16, 17, 18, 19) cm from the top of the diamond panel. Fasten off, leaving a long tail for seaming.
Bust Shaping Option
For a fuller bust, add short rows before armhole shaping. Work across 70% of the side panel, turn, and work back. Then work 85%, turn, and work back. Resume full rows after that. This adds depth without widening the hem.
Crisp Armhole Binding
A clean armhole finish makes the whole garment look polished and professional.
- Join CC1 at the underarm.
- Round 1: Sc evenly around the armhole, working approximately 2 sc per 3 row ends on straight sections. Do not overfill the curve.
- Round 2: Work reverse sc (also called crab stitch) around for a narrow rope-like navy binding. Alternatively, use a firm sl st round for a flatter edge.
- Repeat for the second armhole. Block both armholes to matching curves.
Assembly
Take your time with this step. Good blocking and careful pinning make all the difference.
- Block all three body sections lightly to the schematic dimensions before joining. Do not stretch the mesh aggressively.
- Place one side panel beside the center panel with RS facing up. Pin the lower edges level and align the side panel inner edge with the center panel outer dc edge.
- Using MC or CC1, seam with a flat mattress stitch. Catch one full stitch from the solid panel and the outer edge loops of the center panel. Keep your seam tension elastic but firm.
- Repeat on the opposite side.
- Check that the turquoise fans run exactly down the center front and that the lower edge lies perfectly straight.
- Try it on! The side panels should wrap the bust snugly while the center mesh lies flat without bowing outward. If needed, adjust by removing or adding one rib repeat at the outer side seam.
Tips
Proper finishing transforms your handmade piece from “homemade looking” to “professionally crafted.” Weave in all tails on the WS, following stitch paths for at least 4 to 5 cm. Split the mercerized cotton plies once when changing direction so ends remain secure. Wet block in cool water with a small amount of wool-safe or delicate wash. Roll in a towel but do not wring. Pin the center diamonds open to consistent dimensions. Pin the lower hem perfectly level and both armhole curves symmetrically. Shape the collar upright rather than flattening it. Let everything dry completely before unpinning. Lightly steam from a distance only if needed. Avoid pressing the raised ribs or fans flat.
FAQs
What type of yarn is best for this pattern?
Sport weight or fine DK mercerized cotton is recommended. Smooth, firm yarn is strongly recommended for crisp mesh definition.
How do I adjust the fit for a fuller bust?
For a fuller bust, add short rows before armhole shaping. Work across 70% of the side panel, turn, and work back. Then work 85%, turn, and work back. Resume full rows after that.
Can I make the collar softer?
Yes, use a 3.25 mm hook for collar rounds 1 through 4 and omit the final navy slip stitch rim.
How do I determine my size?
Choose 4 to 8 cm (about 1.5 to 3 inches) of negative ease at the bust. This means your finished garment measurement should be slightly smaller than your actual body measurement.
What is the skill level for this pattern?
This pattern is advanced intermediate. You should be comfortable with shaping, chain spaces, post stitches, joining techniques, and reading stitch repeats.
How do I block the mesh panel?
Pin the center diamonds open to consistent dimensions. Pin the lower hem perfectly level and both armhole curves symmetrically. Let everything dry completely before unpinning.
Pin This Crochet Pattern!