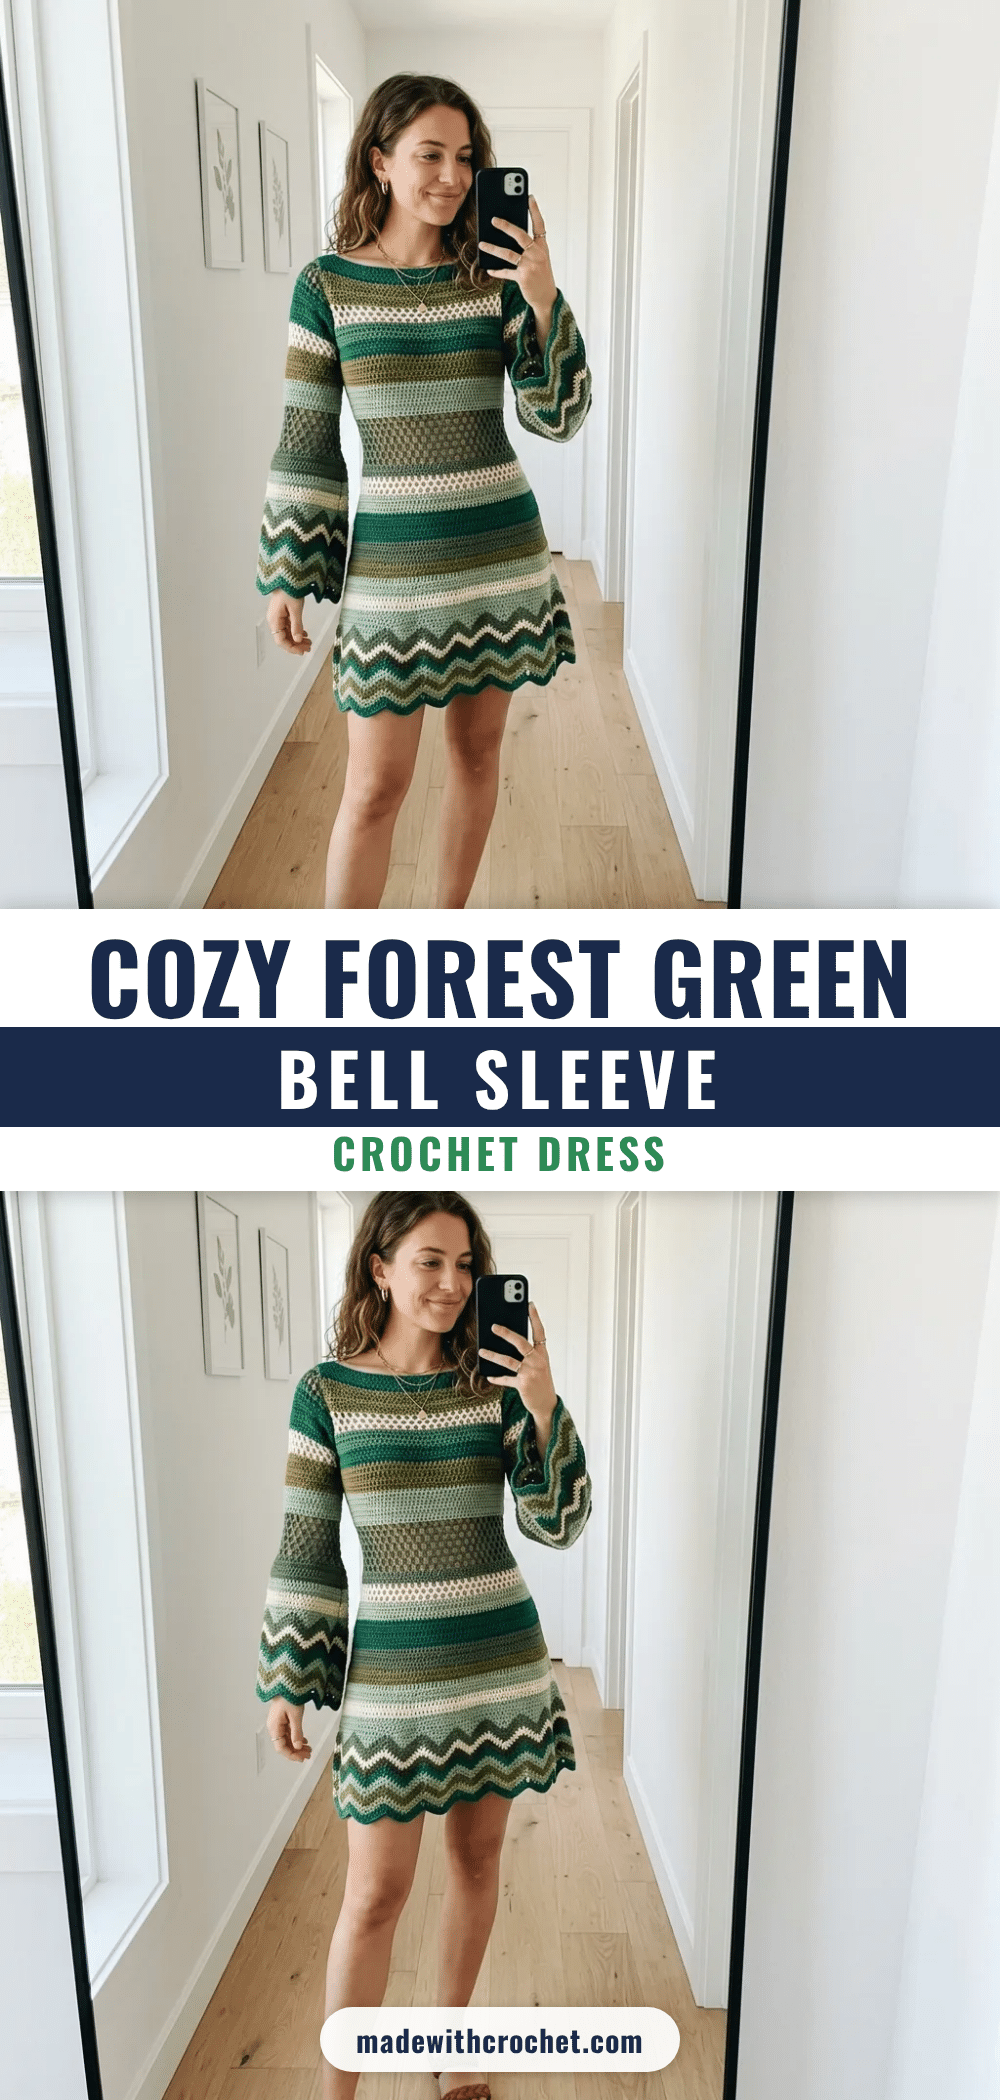
There is a specific kind of magic that happens when you slip into a garment you made yourself, and this Forest Green Bell Sleeve Dress delivers that feeling in spades. The moment you finish the final scalloped hem, you will likely find yourself spinning in front of the mirror, admiring the way the chevron ripple catches the light and how the bell sleeves frame your hands. It is a display-worthy masterpiece that feels like a vintage bohemian dream come to true. Whether you are heading to a summer festival or just want to feel elegant on a warm afternoon, this dress is a showstopper that invites compliments and admiration.
Why the Finished Piece Stands Out
What truly makes this dress stand out is the interplay of textures and the retro silhouette. The bodice is not just a flat canvas; it is a rich tapestry of solid stripes, airy mesh panels, and raised bobble stitches that create a tactile, three-dimensional surface. This textural depth contrasts beautifully with the fluid, rhythmic zigzag of the chevron skirt, which flares out to create a natural scalloped edge without any extra edging work. The color palette, ranging from deep forest greens to soft mint and cream, enhances these stitch definitions, making the garment look intricate and high-effort. It is a piece that feels luxurious and intentional, proving that crochet can be both structured and flowy at the same time.
Project Overview
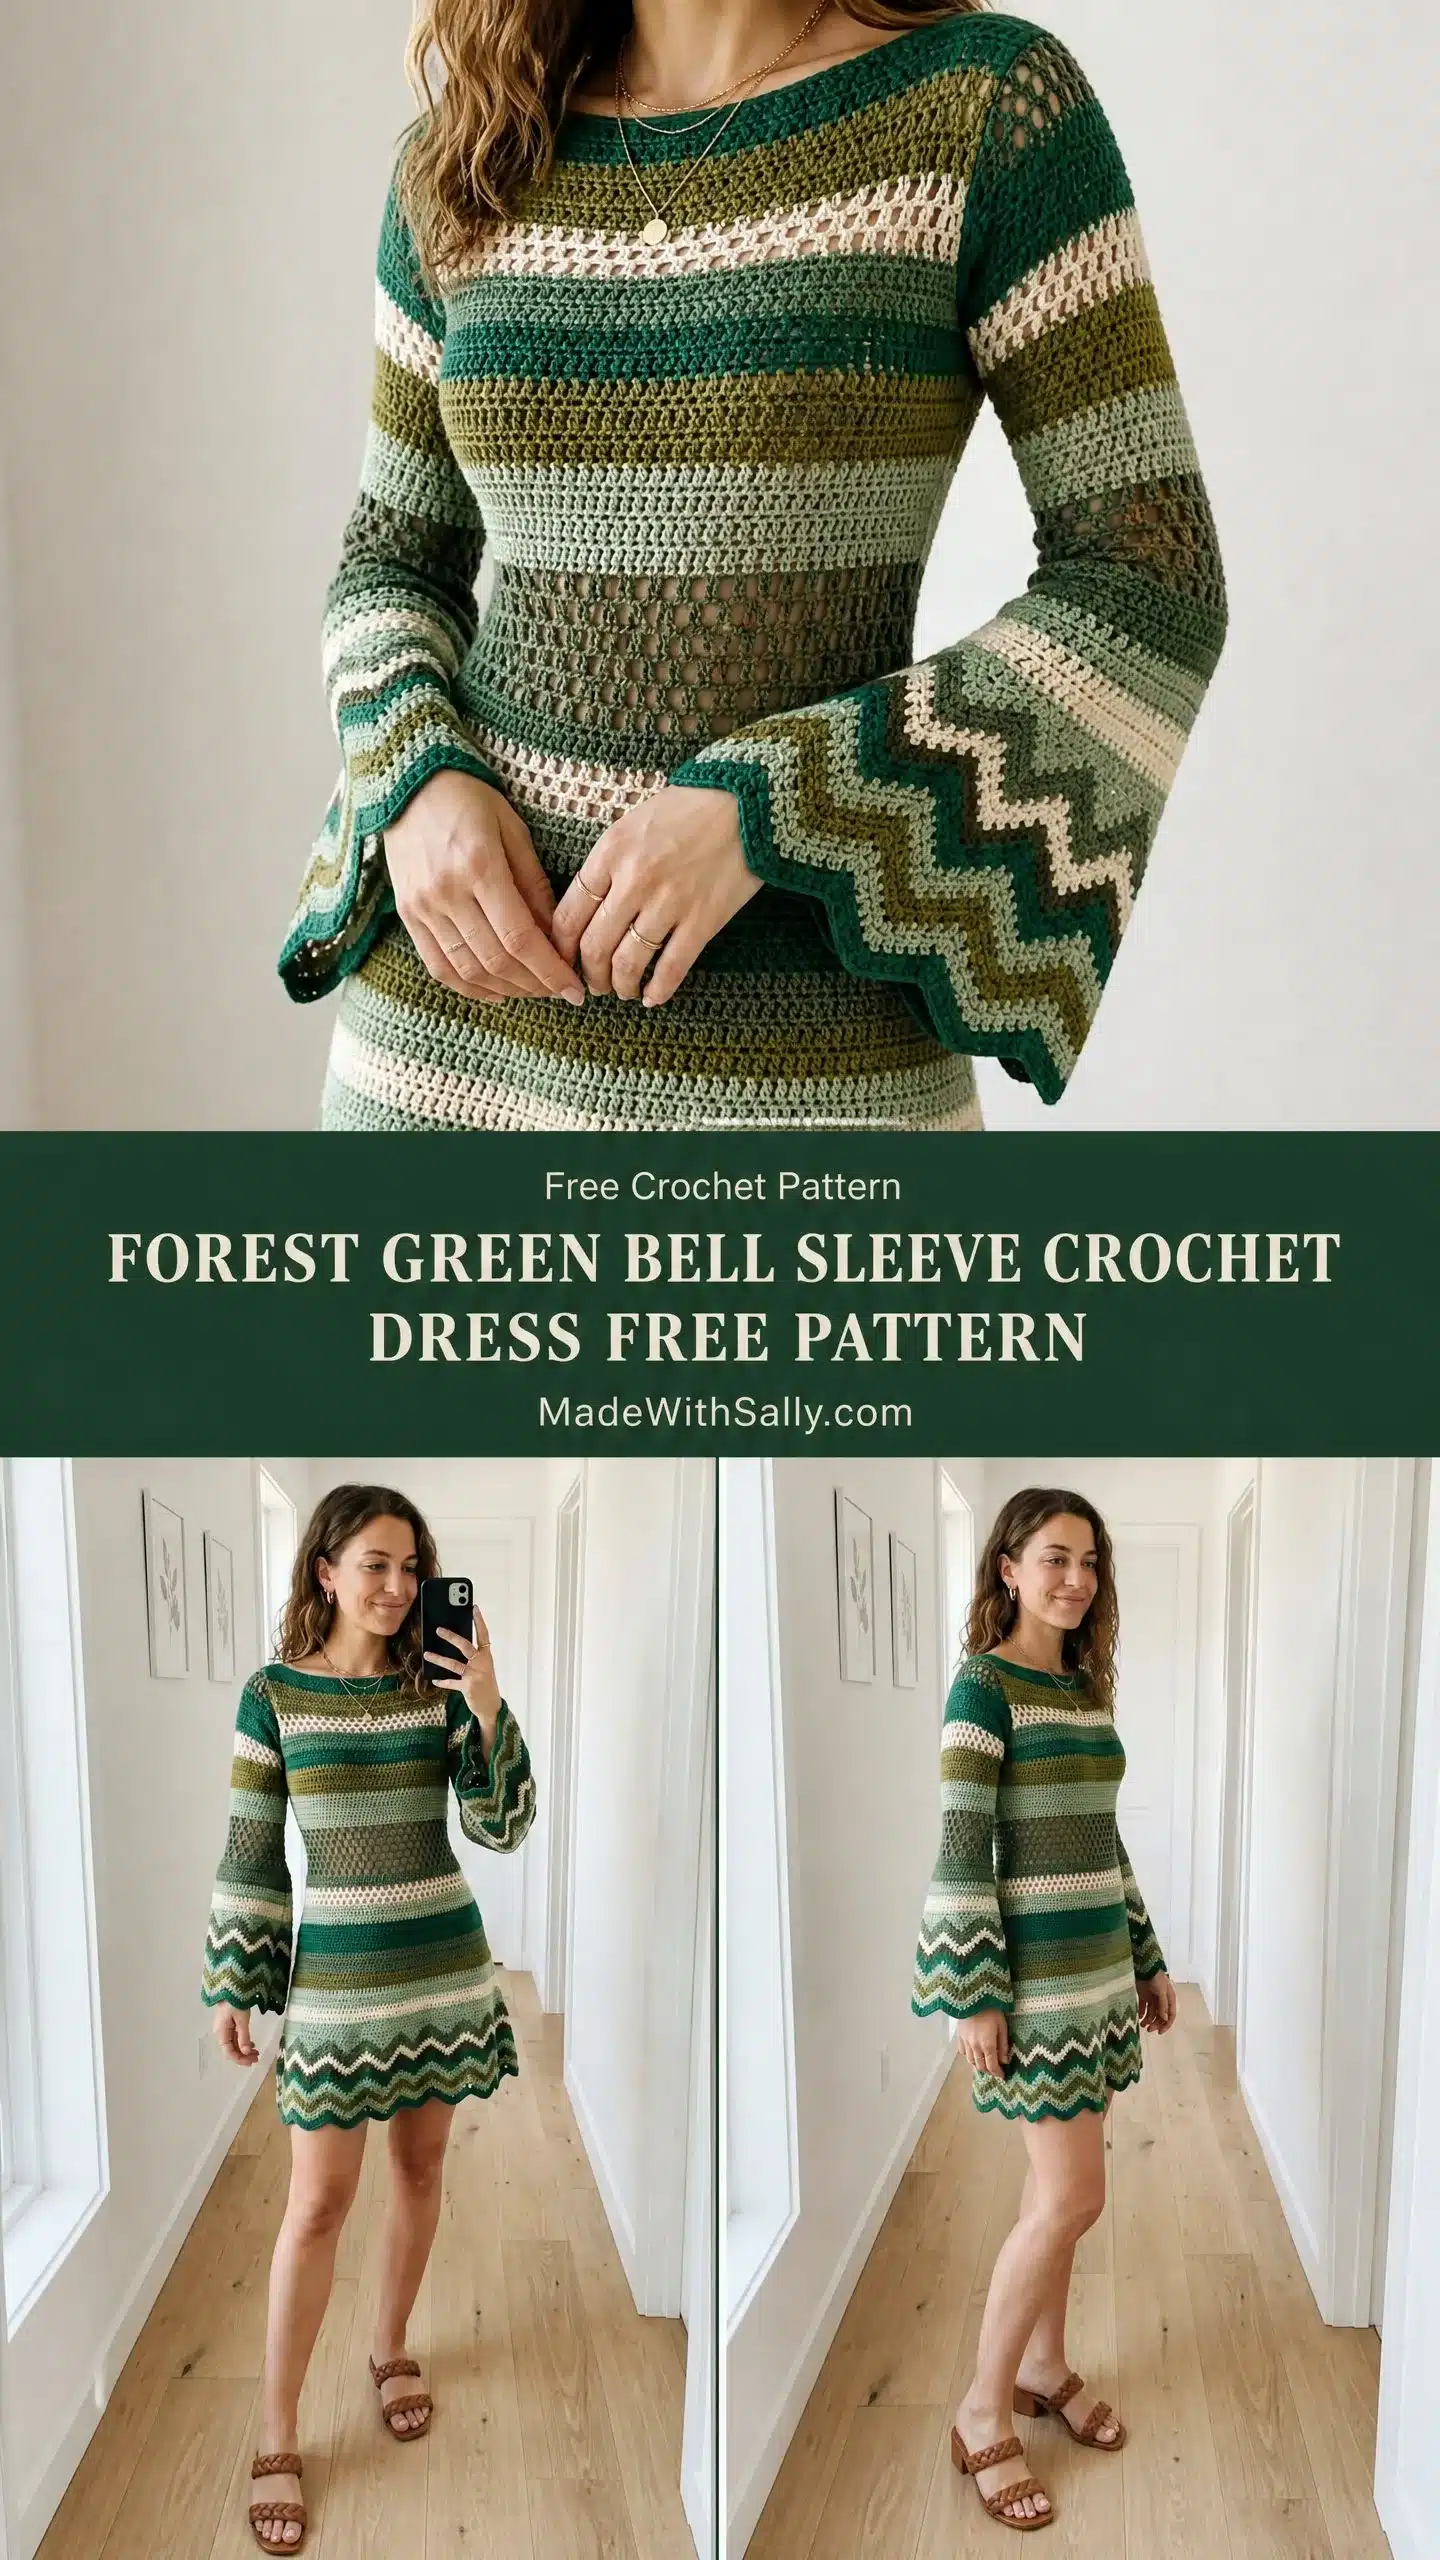
This retro-inspired mini dress is worked top-down in the round, starting from a wide boatneck and moving through a raglan-style yoke. The construction is seamless in the body, meaning less finishing work and a cleaner look. The bodice features alternating stripe textures, while the skirt section utilizes a ripple chevron stitch for a stunning zigzag hem. The bell sleeves are worked separately after the body is complete, starting narrow and flaring dramatically into matching chevron cuffs. The dress is designed to be body-skimming through the torso with a mini length that hits approximately 3 to 4 inches above the knee.
Materials
Yarn
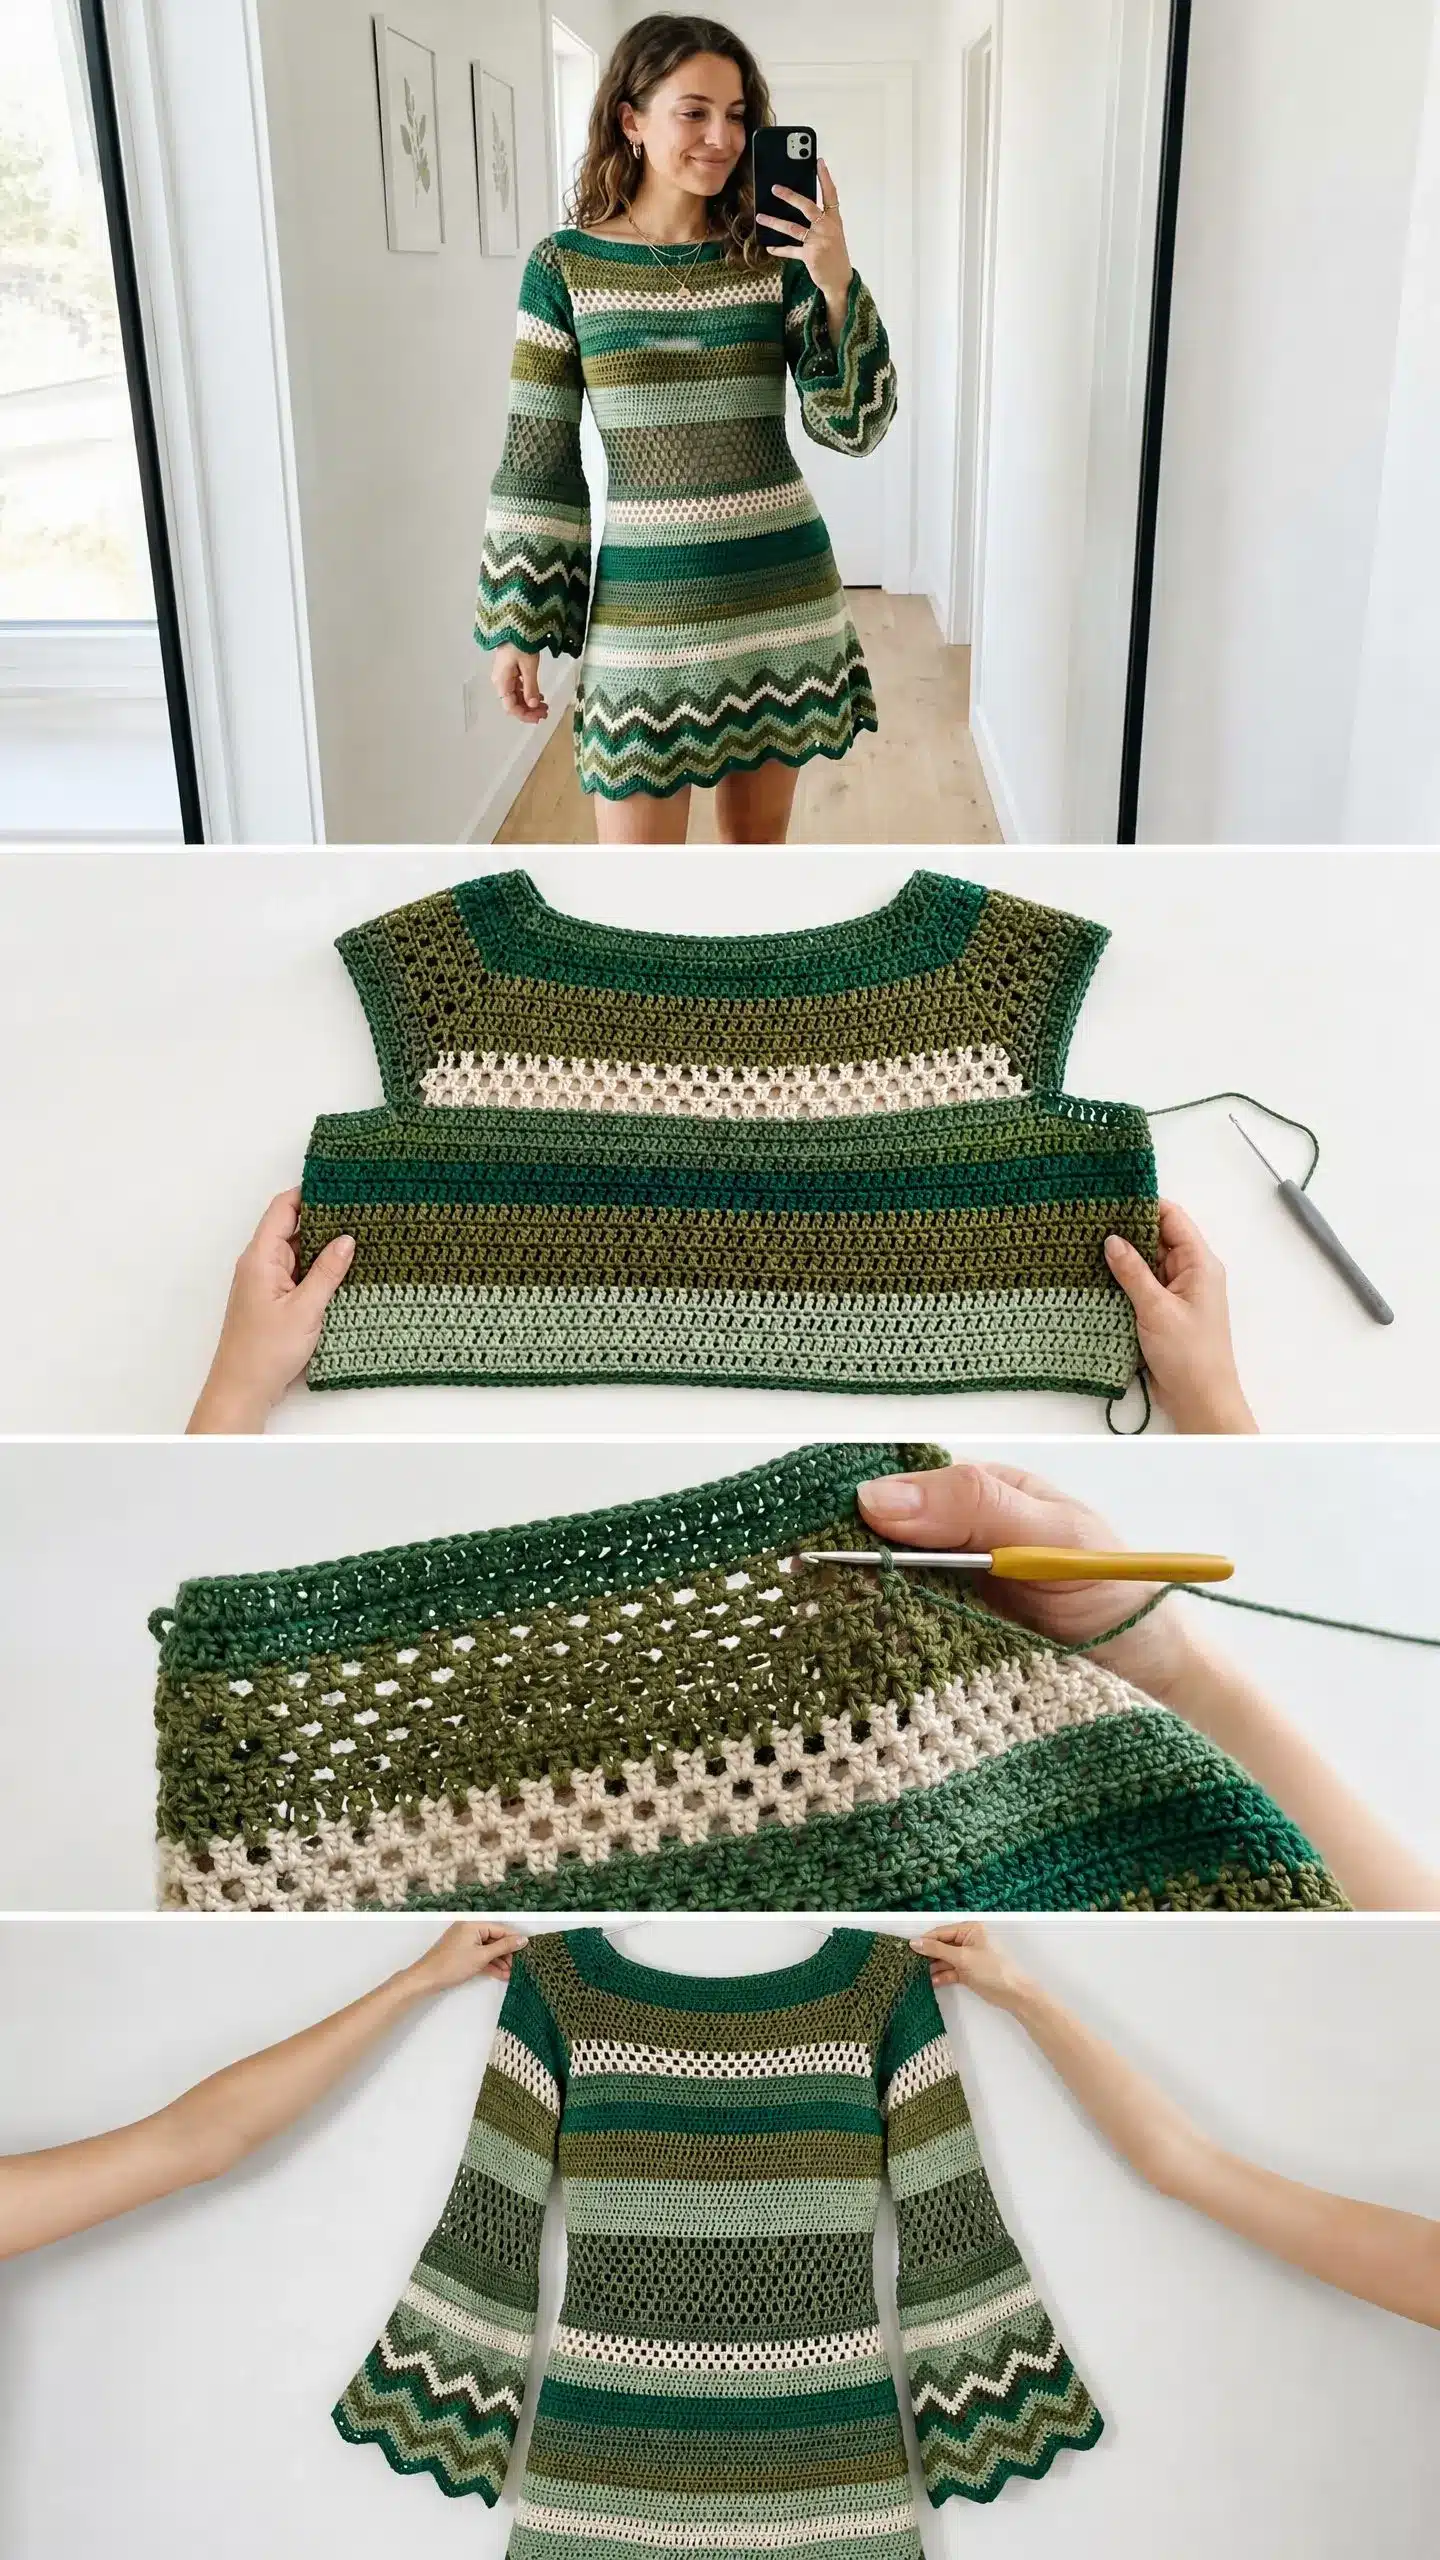
You will need approximately 1,400 yards (1,280 meters) total across six colors. Use a DK weight or light worsted weight yarn with good stitch definition and slight elasticity. It is important to choose a yarn that is smooth, not fuzzy or heavily textured, so the chevron and mesh sections have clear stitch visibility.
- Color A (Deep Forest Green): 350 yards / 320 m (Approx. 3 balls)
- Color B (Olive Green): 250 yards / 229 m (Approx. 2 balls)
- Color C (Sage or Light Green): 250 yards / 229 m (Approx. 2 balls)
- Color D (Muted Teal Green): 200 yards / 183 m (Approx. 1.5 balls)
- Color E (Pale Mint or Seafoam): 200 yards / 183 m (Approx. 1.5 balls)
- Color F (Cream or Off-White): 150 yards / 137 m (Approx. 1.5 balls)
Yarn Suggestions: Paintbox Yarns Simply DK works beautifully for this project. Other great options include Lion Brand Pound of Love (work with a smaller hook and swatch carefully) or Cascade 220 Superwash Sport for a more luxurious wool option.
Hooks
- US size G-6 / 4.0 mm for body and sleeves
- US size F-5 / 3.75 mm for neckline ribbing and cuffs (optional, for a tighter fit)
Additional Supplies
- 8 locking stitch markers
- Yarn needle for weaving ends
- Scissors
- Measuring tape
Gauge and Finished Size
Gauge
Gauge is critical for a fitted garment. Swatch in the round if possible and block your swatch before measuring. A difference of even half a stitch per inch will result in a significantly different finished size. Adjust hook size as needed to achieve gauge.
- In single crochet (sc) using US G-6 / 4.0 mm hook: 18 stitches = 4 inches / 10 cm; 20 rows = 4 inches / 10 cm
- In chevron/ripple stitch pattern: One full repeat (18 stitches) = 4 inches / 10 cm wide; 4 rows = 1.25 inches / 3.2 cm tall
Finished Size
The pattern is written for size Small (US 4-6) with notes for adjusting to Medium and Large.
- Small: Bust: 34 in / 86 cm; Waist: 28 in / 71 cm; Hip: 36 in / 91 cm; Length (shoulder to hem): 32 in / 81 cm; Sleeve length (underarm to cuff): 18 in / 46 cm
- Medium (US 8-10): Bust: 38 in / 97 cm; Waist: 32 in / 81 cm; Hip: 40 in / 102 cm
- Large (US 12-14): Bust: 42 in / 107 cm; Waist: 36 in / 91 cm; Hip: 44 in / 112 cm
Abbreviations
Let me define all the abbreviations you will encounter. I know this looks like a lot, but you will use most of these over and over until they become automatic.
- beg: beginning
- BLO: back loop only
- bob: bobble (see Special Stitches below)
- ch: chain
- ch-sp: chain space
- cl: cluster (see Special Stitches below)
- dc: double crochet (yarn over, insert hook, pull up loop, yarn over and pull through 2 loops twice)
- dec: decrease
- FLO: front loop only
- hdc: half double crochet
- inc: increase (2 sc in same stitch)
- lp(s): loop(s)
- pm: place marker
- rem: remaining
- rep: repeat
- rnd: round
- RS: right side
- sc: single crochet (insert hook, pull up loop, yarn over and pull through both loops)
- sc2tog: single crochet two together (decrease by working 2 stitches together)
- sk: skip
- sl st: slip stitch
- sm: slip marker
- sp: space
- st(s): stitch(es)
- tr: treble crochet
- WS: wrong side
- yo: yarn over
Special Stitches
Bobble (bob)
This creates a raised, textured bump. Yarn over, insert hook into designated stitch or space, yarn over and pull up a loop, yarn over and pull through 2 loops (one incomplete double crochet made). Repeat this two more times in the same stitch. You now have 4 loops on your hook. Yarn over and pull through all 4 loops. Chain 1 to close and lock the bobble. This creates a 3-dc bobble.
Cluster (cl)
Yarn over, insert hook into designated stitch, yarn over and pull up a loop, yarn over and pull through 2 loops. Without completing the double crochet, yarn over, insert hook into the NEXT stitch, yarn over and pull up a loop, yarn over and pull through 2 loops. You now have 3 loops on hook. Yarn over and pull through all 3 loops. This joins two stitches into one decrease cluster.
Mesh Stitch (worked in the round)
Chain 2, skip 1 stitch, single crochet in next stitch. Repeat around. Join with slip stitch to first single crochet. On the following round, single crochet into each chain-2 space AND each single crochet around to restore your full stitch count. This creates the lovely open, lacy sections visible in the bodice.
Chevron / Ripple Stitch (worked in the round)
The chevron repeat is 18 stitches. Each repeat creates one full V-shaped zigzag. Here is the sequence within one repeat:
Sc2tog over 2 stitches (decrease at valley), sc in each of next 6 stitches, 3 sc in next stitch (increase at peak), sc in each of next 6 stitches, sc2tog over 2 stitches.
When worked in the round, the decrease at the valley spans the last stitch of one repeat and the first stitch of the next repeat. Your stitch count remains constant because each decrease is balanced by the 3-sc increase at the peak.
Picot Scallop Border
Slip stitch in next stitch, chain 3, slip stitch in same stitch to form a picot. Slip stitch in each of next 2 stitches. Repeat around. This creates the delicate scalloped edge along the hem and cuffs.
Pattern Notes
- The dress is worked top-down in the round. The yoke uses raglan increases at 4 points to shape the neckline and flare into the chest.
- Sleeves are worked separately after completing the body. Join yarn at the underarm and work downward to the cuff.
- Color changes happen at the beginning of a new round. To avoid jogs, after completing the first stitch of the new color, drop the old color. On the first stitch of the next same-color round, lift the loop of the old color up behind the first stitch. This is optional but improves appearance.
- Carry unused colors loosely up the inside for stripes of 2 rounds or fewer. For longer gaps, cut and weave in ends.
- The neckline is a wide, slightly scooped boatneck that sits about 1 inch off the natural neckline.
- Any size customization must use a stitch count divisible by 18 to maintain the chevron pattern.
Pattern Instructions
Neckline and Yoke
The yoke is worked flat for the first 2 rows, then joined and continued in the round.
Foundation Row: Using Color A and G-6 hook, ch 90. (90 ch)
Row 1 (RS): Sc in 2nd ch from hook and in each ch across. Turn. (89 sc)
Row 2 (WS): Ch 1, sc in each st across. Turn. (89 sc)
Now join into a round by connecting the two short ends with a slip stitch. Be careful not to twist. Place 4 stitch markers for raglan points:
Each increase round places 2 sc increases at each of the 4 raglan points (8 increases total per round). The increase is worked as: sc in stitch before marker, 3 sc in marked stitch (increase made, middle stitch of 3 becomes new marked stitch), sc in stitch after marker.
Raglan Yoke Increase Rounds
Rnd 1 (Increase Round, Color A): Join Color A at right shoulder. Ch 1. Work sc around, placing increases at all 4 raglan markers. Sl st to first sc to join. (97 sc)
Rnd 2 (Plain Round, Color A): Ch 1, sc in each st around. Sl st to join. (97 sc)
Rnd 3 (Increase Round, Color A): Sc around with 8 increases at raglan points. (105 sc)
Rnd 4 (Plain Round, Color B): Change to Color B. Sc around. (105 sc)
Rnd 5 (Increase Round, Color B): 8 increases at raglan points. (113 sc)
Rnd 6 (Plain Round, Color B): Sc around. (113 sc)
Rnd 7 (Increase Round, Color C): Change to Color C. 8 increases. (121 sc)
Rnd 8 (Plain Round, Color C): Sc around. (121 sc)
Rnd 9 (Increase Round, Color A): Change to Color A. 8 increases. (129 sc)
Rnd 10 (Plain Round, Color A): Sc around. (129 sc)
Rnd 11 (Increase Round, Color D): Change to Color D. 8 increases. (137 sc)
Rnd 12 (Plain Round, Color D): Sc around. (137 sc)
Checkpoint: Your piece should measure approximately 3.5 inches from the neckline edge to the base of the yoke. The total circumference should be approximately 30.5 inches.
Separating Body and Sleeves
Rnd 13: Continue with Color D. Sc across Right Front section (33 sts), ch 4 (underarm bridge), skip 33 sleeve sts (place these on a stitch holder or scrap yarn), sc across Back section (33 sts), ch 4 (underarm bridge), skip remaining 33 sleeve sts (place on holder), sc across Left Front section (33 sts). Sl st to join. (99 sc plus 8 ch = 107 working sts)
Rnd 14: Sc in each sc and each ch around. (107 sc)
Bodice Instructions
Rnd 15 (Color D): Sc around, increasing 1 st evenly near each side (2 total). (109 sc)
Rnd 16 (Color E): Change to Color E. Sc around. (109 sc)
Rnd 17 (Color E): Mesh round. Ch 2, sk 1, sc in next st. Rep around. (109 working points)
Rnd 18 (Color E): Sc in each ch-2 sp and each sc around. (109 sc)
Rnd 19 (Color F): Change to Color F. Sc around. Inc 1 st. (110 sc)
Rnd 20 (Color F): Sc around. (110 sc)
Rnd 21 (Color A): Change to Color A. Sc around. Inc 2 sts evenly. (112 sc)
Rnd 22 (Color A): Sc around. (112 sc)
Rnd 23 (Color B): Change to Color B. Sc around. Inc 2 sts evenly. (114 sc)
Rnd 24 (Color B): Sc around. (114 sc)
Rnd 25 (Color C): Change to Color C. Sc around. Inc 2 sts evenly. (116 sc)
Rnd 26 (Color C): Sc around. (116 sc)
Rnd 27 (Color D): Change to Color D. Bobble round. Ch 1, bob in first st, ch 1, sk 1, sc in next st. Rep around. (116 working sts)
Rnd 28 (Color D): Sc in each bob-sp and each sc around. Inc 2 sts evenly. (118 sc)
Rnd 29 (Color E): Change to Color E. Mesh round. Ch 2, sk 1, sc in next. Rep around. (118 working points)
Rnd 30 (Color E): Sc in each ch-2 sp and sc around. (118 sc)
Rnd 31 (Color A): Change to Color A. Sc around. Inc 2 sts evenly. (120 sc)
Rnd 32 (Color A): Sc around. (120 sc)
Rnd 33 (Color F): Change to Color F. Sc around. (120 sc)
Rnd 34 (Color F): Sc around. Inc 2 sts evenly. (122 sc)
Rnd 35 (Color B): Change to Color B. Sc around. Inc 2 sts evenly. (124 sc)
Rnd 36 (Color B): Sc around. (124 sc)
Rnd 37 (Color C): Change to Color C. Sc around. Inc 2 sts evenly. (126 sc)
Rnd 38 (Color C): Sc around. (126 sc)
Checkpoint: The bodice should measure approximately 9 inches from the underarm. Total circumference should be approximately 28 inches.
Transition to Chevron Skirt
Rnd 39 (Color A): Change to Color A. Sc around. Inc 9 sts evenly spaced. (135 sc)
Rnd 40 (Color A): Sc around. Inc 9 sts evenly spaced. (144 sc)
Chevron Skirt Section
Continue working the Chevron / Ripple Stitch pattern described in the Special Stitches section. Maintain the 18-stitch repeat count. Continue increasing or working even as needed to reach desired length, keeping the chevron pattern intact. The stitch count should remain a multiple of 18.
Hem Scallop Border
Picot Scallop Border: Slip stitch in next stitch, chain 3, slip stitch in same stitch to form a picot. Slip stitch in each of next 2 stitches. Repeat around. This creates the delicate scalloped edge along the hem.
Bell Sleeves (Make 2)
Join yarn at the underarm of the sleeve stitches held on the holder. Work in the round down to the desired sleeve length. Work solid sc rounds or simple stripe patterns to match the bodice.
Bell Cuff Transition
Once the straight sleeve section is complete, begin flaring the sleeve to create the bell shape. Increase stitches evenly around to widen the circumference.
Bell Cuff Chevron Section
Switch to the Chevron / Ripple Stitch pattern for the cuff. Work the chevron repeat to match the skirt hem.
Cuff Scallop Border
Picot Scallop Border: Slip stitch in next stitch, chain 3, slip stitch in same stitch to form a picot. Slip stitch in each of next 2 stitches. Repeat around. This creates the delicate scalloped edge along the cuffs.
Assembly
Weave in all yarn ends on the wrong side using your yarn needle. Work each end in two directions for security.
Block your finished dress by soaking it in lukewarm water with a small amount of wool wash or gentle detergent. Gently squeeze out excess water without wringing. Lay flat on blocking mats or towels, shaping the chevron points at the hem and cuffs. Allow to dry completely before wearing.
Tips
- To add bust circumference: Increase the foundation chain by 18 stitches (one full chevron repeat) for each size up. This adds approximately 4 inches of circumference.
- To add length: Add 2-round chevron stripes in the skirt section. Each 2 rounds adds approximately 0.6 inches.
- To lengthen sleeves: Add additional sc stripe rounds before the bell cuff transition.
- To add waist definition: Work 4 rounds of sc2tog decreases at the waist position, then increase back out over 4 rounds. Adjust so you still arrive at a multiple of 18 for the chevron section.
FAQs
Is this pattern suitable for beginners?
This pattern is rated intermediate to advanced. You should feel comfortable with working in the round, managing multiple yarn colors, reading stripe sequences, and executing top-down garment construction with raglan shaping. If you have never worked a chevron or ripple stitch before, I recommend practicing on a small swatch first.
How do I avoid color jogs when changing colors?
Color changes happen at the beginning of a new round. To avoid jogs, after completing the first stitch of the new color, drop the old color. On the first stitch of the next same-color round, lift the loop of the old color up behind the first stitch. This is optional but improves appearance.
Can I make this dress in a different size?
Yes. Any size customization must use a stitch count divisible by 18 to maintain the chevron pattern. To add bust circumference, increase the foundation chain by 18 stitches for each size up.
What type of yarn should I use?
Choose a yarn that is smooth, not fuzzy or heavily textured. The chevron and mesh sections need clear stitch visibility to really pop. DK weight or light worsted weight yarn with good stitch definition and slight elasticity works best.
How do I handle the sleeve stitches while working the body?
When separating the body and sleeves, skip the sleeve stitches and place them on a stitch holder or scrap yarn. You will return to these stitches later to join the yarn and work the bell sleeves separately.
Do I need to block the dress?
Yes, blocking is highly recommended. It helps to shape the chevron points at the hem and cuffs and ensures the garment lays flat and looks professional.
Pin This Crochet Pattern!