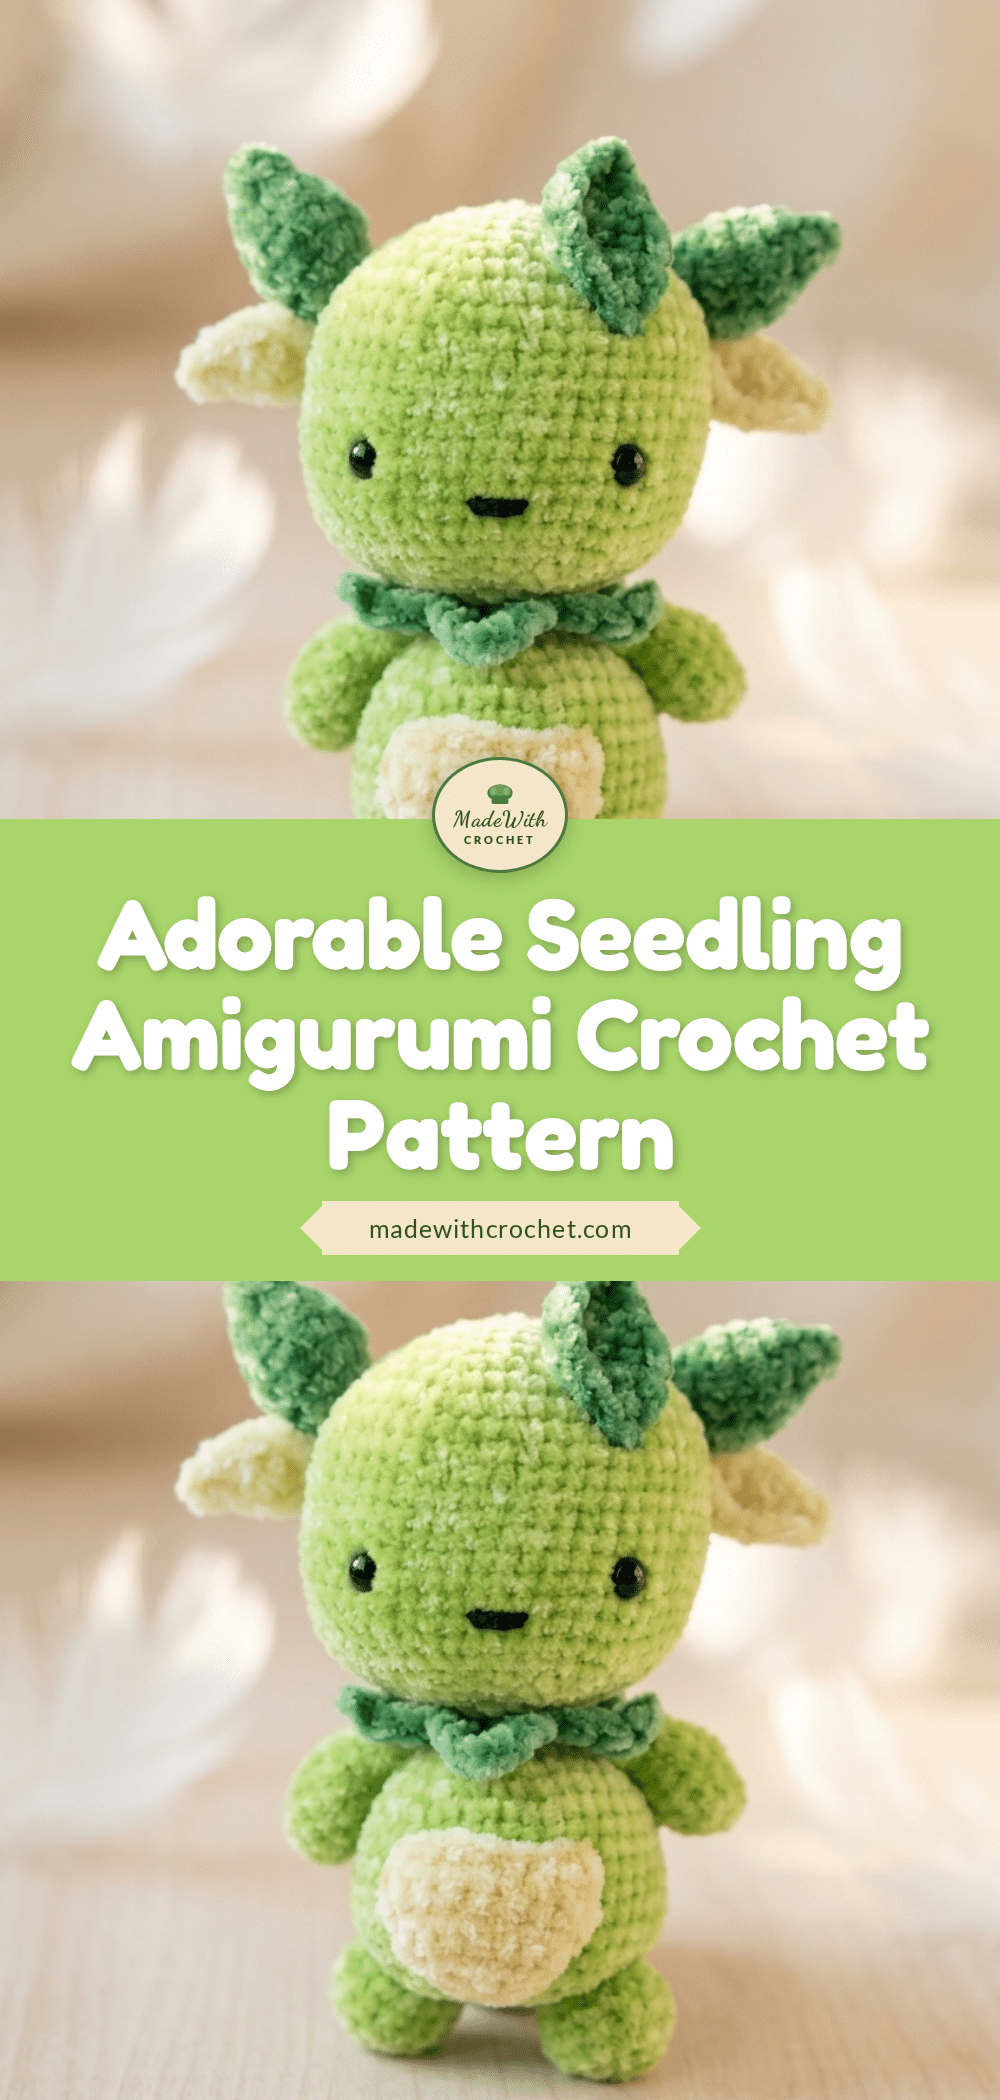
Yarn is draped over the table, the hook is warm in your hand, and you’re just about to make that first chain. The Seedling Amigurumi pattern is one of those projects that feels like a breath of fresh air. It’s small, it’s sweet, and it comes together with a satisfying rhythm that keeps you hooked from the very first round. There is something deeply calming about watching a simple circle of yarn transform into a character with personality.
Why This Project Works
What makes the Seedling Amigurumi stand out isn’t just its appearance, but how the construction is broken down. The design relies on separate pieces that are worked independently and then assembled at the end. This approach turns the project into a series of small, manageable wins. You aren’t wrestling with a large, unwieldy piece of fabric; instead, you are building a character piece by piece. The little details—the belly patch, the collar ruffle, and the tiny leaf horns—are worked on their own and attached later. It sounds like extra steps, but it actually makes the final assembly incredibly satisfying. It’s a beginner-friendly project that produces a polished result, making it perfect for gifting or keeping as a desk companion.
Project Overview
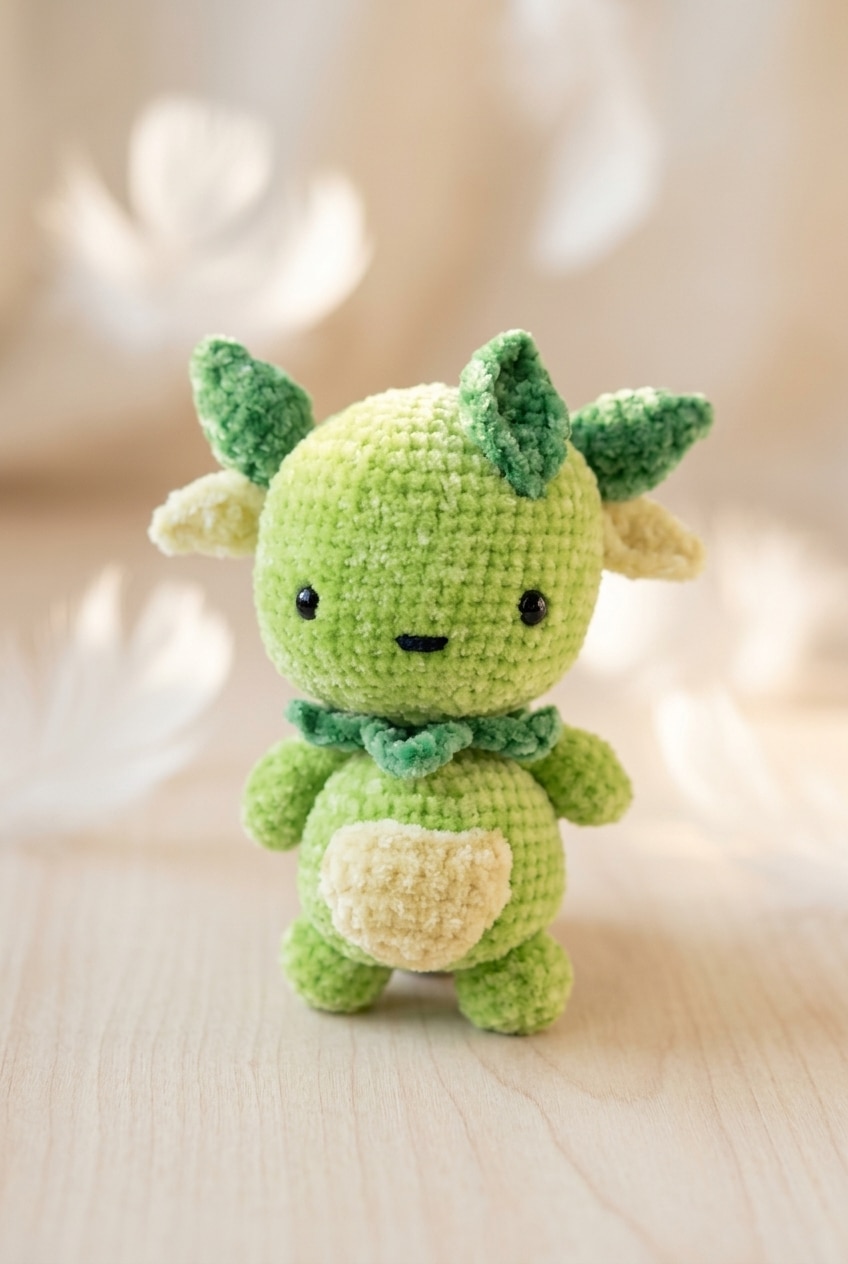
This is a soft, chenille amigurumi worked in multiple colors. The construction features a head and body worked as a single continuous piece, with decorative elements like a leaf necklace and face leaf added after the main body is fully assembled. It is a great way to practice working separate attached pieces, a core amigurumi skill.
Materials
- Yarn: DK Weight Chenille Yarn in four colors:
- Light Green (LG): Budget around 50 to 80 meters.
- Dark Green (DG): Budget around 30 to 50 meters.
- Cream (C): Small amount.
- Black (B): Small scrap (used only for mouth embroidery).
- Hook: 3.50 mm Crochet Hook.
- Eyes: 8 mm Toy Safety Eyes (x2).
- Stuffing: Toy Stuffing (Polyfil).
- Notions: Yarn needle, scissors, stitch marker.
Alternative Yarn Suggestions
Chenille can be tricky to frog if you make mistakes. If you prefer a more forgiving yarn, consider these swaps:
- DK Weight Cotton: Mercerized DK cotton gives clean stitch definition and holds its shape well. It won’t have the velvety look of chenille, but the result will be neat and sturdy. Most DK cotton runs 200 to 250 meters per 100 g.
- DK Weight Acrylic: Smooth DK acrylic is widely available, easy to frog, and consistent. It runs 280 to 300 meters per 100 g. The texture will be softer than cotton but won’t replicate the chenille pile.
Gauge and Finished Size
Gauge: Gauge is not critical for this project. Use a hook size that creates a tight, firm fabric so stuffing does not show through.
Finished Size: Approx. 6–8 in (15–20 cm) tall (estimated from DK chenille, 3.50 mm hook, and stitch counts).
Abbreviations
US Terminology
- B = Black
- C = Cream
- ch = chain
- dc = double crochet
- DG = Dark Green
- hdc = half double crochet
- LG = Light Green
- sc = single crochet
- sc2tog = single crochet 2 together (decrease)
- sl st = slip stitch
- st(s) = stitch(es)
- tr = treble crochet
- * * = repeat between asterisks as stated
Pattern Notes
- Chenille Tension: Chenille has a tendency to hide your stitches. Count carefully as you go, especially during decreases. Because the fabric is plush, any gaps will show stuffing through, so keep your tension snug.
- Safety Eyes: Eyes must be inserted before you close the head. Once the opening is gone, you cannot get the backings on properly. Insert them between Rounds 16 & 17, 8–10 sts apart.
- Decorative Elements: The face leaf, small leaves, and leaf necklace are added after the main body is fully assembled.
- Continuous Spiral: The head and body are worked in a continuous spiral. Do not join rounds.
- Safety Note: For children under three, embroider the eyes instead of using safety eyes, as no backing system is truly choking-proof. Check seams on arms, legs, and tail periodically for durability.
Special Stitches
Picot (ch-2 picot): ch 2, sl st in first ch made.
Pattern Instructions
Main Body (Head + Body in One Piece)
Work in LG. Work in a continuous spiral throughout — do not join rounds.
- Round 1: Ch 4, sl st in first ch to form a loop, 7 sc in center of loop. (Magic ring can be used instead.) Do not join rounds. [7 sc]
- Round 2: 2 sc in each st around. [14 sc]
- Round 3: 1 sc in next st, 2 sc in next st repeat to end. [21 sc]
- Round 4: 1 sc in next 2 sts, 2 sc in next st repeat to end. [28 sc]
- Round 5: 1 sc in next 3 sts, 2 sc in next st repeat to end. [35 sc]
- Round 6: 1 sc in next 4 sts, 2 sc in next st repeat to end. [42 sc]
- Round 7: 1 sc in next 5 sts, 2 sc in next st repeat to end. [49 sc]
- Round 8: 1 sc in next 6 sts, 2 sc in next st repeat to end. [56 sc]
- Rounds 9–20: 1 sc in each st around. [56 sc] Twelve even rounds across the widest part of the head.
- Round 21: 1 sc in next 6 sts, sc2tog repeat to end. [49 sc]
- Round 22: 1 sc in next 5 sts, sc2tog repeat to end. [42 sc]
- Round 23: 1 sc in next 4 sts, sc2tog repeat to end. [35 sc]
- Round 24: 1 sc in next 3 sts, sc2tog repeat to end. [28 sc]
- Round 25: 1 sc in next 2 sts, sc2tog repeat to end. [21 sc]
- Round 26: 1 sc in next st, sc2tog repeat to end. [14 sc]
- Round 27: 1 sc in each st around. Stuff head now. Add safety eyes between Rounds 16 & 17, 8–10 sts apart. [14 sc]
- Round 28: 1 sc in next st, 2 sc in next st repeat to end. [21 sc] The neck narrows and then expands again here — this is where the body begins to widen out from that narrow join.
- Round 29: 1 sc in next 2 sts, 2 sc in next st repeat to end. [28 sc]
- Round 30: 1 sc in next 3 sts, 2 sc in next st repeat to end. [35 sc]
- Round 31: 1 sc in next 4 sts, 2 sc in next st repeat to end. [42 sc]
- Rounds 32–41: 1 sc in each st around. [42 sc] Ten even rounds for the body.
- Round 42: sc2tog repeat to end. [21 sc]
- Round 43: sc2tog repeat to last st, 1 sc in last st. Stuff body now. [11 sc]
- Round 44: sc2tog repeat to last st, 1 sc in last st. Fasten off, sew hole closed, tie in all ends. [6 sc]
Arms (Make 2)
Work in LG. Work in a continuous spiral — do not join rounds. These are small and work up quickly.
- Round 1: Ch 4, sl st in first ch to form a loop, 6 sc in center. Do not join rounds. [6 sc]
- Round 2: 2 sc in each st around. [12 sc]
- Rounds 3–6: 1 sc in each st around. [12 sc]
- Round 7: 1 sc in next st, sc2tog repeat to end. [8 sc]
- Rounds 8–10: 1 sc in each st around. Fasten off, stuff slightly, fold flat at top and sew onto body. [8 sc]
Legs (Make 2)
Work in LG. Work in a continuous spiral — do not join rounds.
- Round 1: Ch 4, sl st in first ch to form a loop, 7 sc in center. Do not join rounds. [7 sc]
- Round 2: 2 sc in each st around. [14 sc]
- Rounds 3–6: 1 sc in each st around. Fasten off, stuff slightly, sew onto body. [14 sc]
Large Leaves / Horns (Make 2)
Worked in DG. These sit on top of the head as the signature plant-like horns. Work in a continuous spiral — do not join rounds.
- Round 1: Ch 8, sl st in first ch to form a large loop. Ch 1. [8]
- Round 2: Starting in same ch as previous sl st, 1 sc in each ch around. Do not join rounds. [8 sc]
- Round 3: 1 sc in next st, 2 sc in next st repeat to end. [12 sc]
- Rounds 4–5: 1 sc in each st around. [12 sc]
- Round 6: 1 sc in next st, sc2tog repeat to end. [8 sc]
- Round 7: 1 sc in each st around. [8 sc]
- Round 8: sc2tog repeat to end. [4 sc]
- Round 9: 1 sc in each st around. Fasten off, sew hole closed, stuff slightly and sew onto head. [4 sc]
Small Leaves (Make 2)
Worked in rows in color C, crocheting back along the foundation chain to create a two-sided leaf shape. They sit under the large leaves on the head.
- Row 1: In C, ch 7, sl st in second ch from hook, 1 sc in next ch, 1 dc in next 2 chs, 1 sc in next ch, sl st in last ch. [6 sts]
- Row 2: Crochet back along chains in the opposite direction: sl st in same last ch as previous sl st, 1 sc in next ch, 1 dc in next 2 chs, 1 sc in next ch, sl st in last ch, ch 2, sl st in first st from Row 1. Fasten off and sew onto head under large leaves.
Leaf Necklace
This decorative necklace is worked in DG in a single row along a foundation chain, with leaf points formed by the stitch combination. It wraps around the neck of the body.
- Row 1: In DG, ch 21. Starting in second ch from hook: [1 sc, 1 hdc] in next ch, [1 dc, 1 tr, ch 2, sl st in top of previous tr, 1 dc] in next ch, [1 hdc, 1 sc] in next ch, sl st in next ch repeat to end. Fasten off and wrap around neck, sew into place.
Face Leaf
This leaf is worked in DG across three rows, building up a fuller shape by working back along the foundation and then adding a final row of stitches. It gets sewn onto the face once complete.
- Row 1: In DG, ch 9, sl st in second ch from hook, 1 sc in next ch, 1 hdc in next ch, 1 dc in next 2 chs, 1 hdc in next ch, 1 sc in next ch, sl st in last ch. [8 sts]
- Row 2: Crochet back along chains in the opposite direction: sl st in same last ch as previous sl st, 1 sc in next ch, 1 hdc in next ch, 1 dc in next 2 chs, 1 hdc in next ch, 1 sc in next ch, sl st in last ch.
- Row 3: Ch 1, sl st in next st (first st from Row 1), 1 sc in next st, 1 hdc in next st, 2 dc in next 2 sts, 1 hdc in next st, 1 sc in next st, sl st in last st. Fasten off and sew onto head.
The pocket is worked flat in rows in color C, with a simple decrease at the top to give it a rounded finish. It gets sewn onto the front of the body.
- Row 1: In C, ch 9, 1 sc in second ch from hook and in each ch along. TURN. [8 sc]
- Row 2: 1 sc in each st along. TURN. [8 sc]
- Row 3: 1 sc in each st along. TURN. [8 sc]
- Row 4: 1 sc in each st along. TURN. [8 sc]
- Row 5: 1 sc in each st along. TURN. [8 sc]
- Row 6: sc2tog until end. TURN. [4 sc]
- Row 7: sc2tog until end. Fasten off and sew onto body. [2 sc]
Tail
The tail is worked in DG in a continuous spiral, tapering down in two stages. Do not join rounds.
- Round 1: In DG, ch 16, sl st in first ch to form a large loop, ch 1, then starting in same ch as previous sl st. [16]
- Rounds 2–4: 1 sc in each st around. Do not join rounds. [16 sc]
- Round 5: 1 sc in next st, sc2tog repeat to last st, 1 sc in last st. [11 sc]
- Rounds 6–9: 1 sc in each st around. [11 sc]
- Round 10: sc2tog repeat to last st, 1 sc in last st. [6 sc]
- Rounds 11–13: 1 sc in each st around. [6 sc]
- Round 14: sc2tog repeat to end. Fasten off, sew hole closed, stuff slightly and sew onto body. [3 sc]
Assembly
One last detail to bring the face to life before final assembly.
- Step 1: In B, sew on a small mouth over 3 sts.
Attach the arms, legs, tail, large leaves, small leaves, face leaf, and pocket to the main body using a yarn needle. Ensure the leaf necklace is wrapped around the neck and sewn securely in place.
Tips
- Stuffing: Stuff the arms and legs slightly, not firmly. Overstuffing makes them stiff and hard to position when sewing them on. A light fill is enough to give them shape.
- Stitch Markers: Keep a stitch marker going so you always know where you are in the count, especially since the head and body are one piece.
- Chenille Care: Chenille can mat if roughed up. Hand wash in cool water with gentle soap. Press out excess water with a towel instead of wringing. Air dry completely; heat from a dryer can warp plastic safety eyes. Fluff with fingers once dry.
FAQs
When do I insert the safety eyes, and can I go back and add them later?
You must insert the safety eyes between Rounds 16 and 17, about 8 to 10 stitches apart. Once the head is closed and stuffed, you cannot get the backings on properly, so do not skip this step.
The head and body are crocheted as one piece. How do I know when to stuff each section?
Stuff the head at Round 27, right before the body starts expanding again. Then, stuff the body at Round 43, just before you close it off. The pattern instructions indicate exactly when to stuff at each point.
How are the small leaves and face leaf made, and where do they go?
The small leaves are worked in Cream yarn in two rows along a foundation chain and sewn onto the head underneath the large dark green leaf horns. The face leaf is a slightly larger version worked in Dark Green across three rows and sewn directly onto the head.
Does the leaf necklace actually stay on, or will it need to be sewn down?
It is attached permanently. You wrap it around the neck and stitch it down after fastening off. It is not removable once it is on, which keeps it from getting pulled off during play.
Is chenille yarn difficult to work with for this kind of project?
It is not difficult, but it hides stitches more than cotton or acrylic. Counting carefully matters more with chenille because you can’t always see where one stitch ends and the next begins. The payoff is a really soft, velvety feel.
How much stuffing should I use for the arms and legs?
Stuff them slightly, not firmly. The arms and legs are small pieces, and overstuffing makes them stiff and hard to position when you sew them on. A light fill is enough to give them a little shape without fighting you during assembly.
Pin This Crochet Pattern!