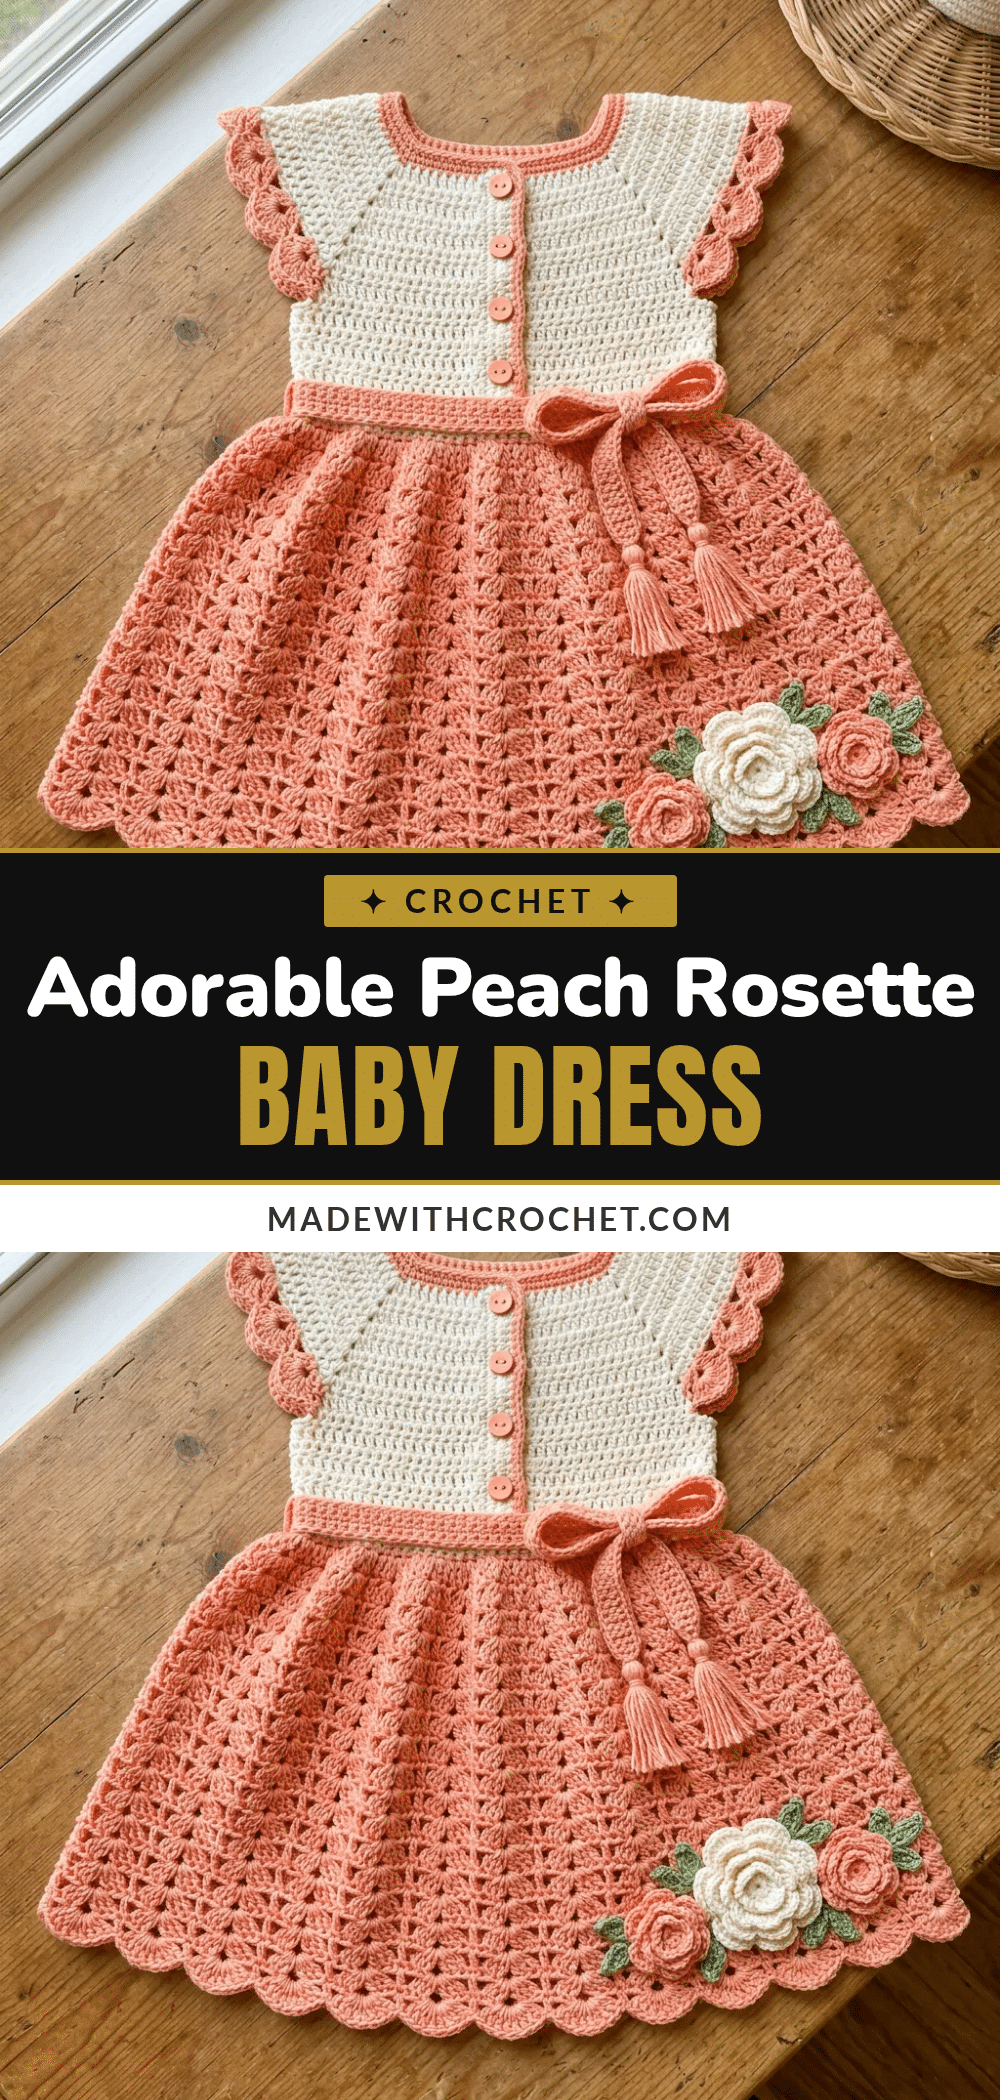
There is a specific kind of magic that happens when you pull a skein of soft, buttery cotton from your stash and decide it is destined for a tiny human. For this Peach Rosette Baby Dress, the choice felt like finding a missing puzzle piece. I reached for a creamy, 100% cotton DK that promised crisp stitch definition, paired with a warm Peach Coral shade that glows against skin. It wasn’t just about matching colors; it was about the drape. Cotton has a natural weight and structure that acrylic simply cannot mimic, ensuring that the delicate lace skirt hangs beautifully rather than puffing up. This project is a love letter to slow crafting, where every shell stitch and rolled rose petal is placed with intention.
Yarn and Color Notes
The visual appeal of this dress relies heavily on the contrast between the structured bodice and the airy skirt. The cream bodice acts as a clean canvas, allowing the Peach Coral shell-stitch skirt to take center stage. When selecting your yarn, prioritize fibers that offer memory and strength. Cotton blends are ideal here because they withstand the tension of the lace pattern without losing their shape. The slight sheen found in certain cotton yarns catches the light beautifully, making the scalloped edges of the sleeves and the hem pop. This color combination is timeless, evoking a sense of vintage charm that works perfectly for spring gatherings, photo shoots, or everyday wear.
Project Overview
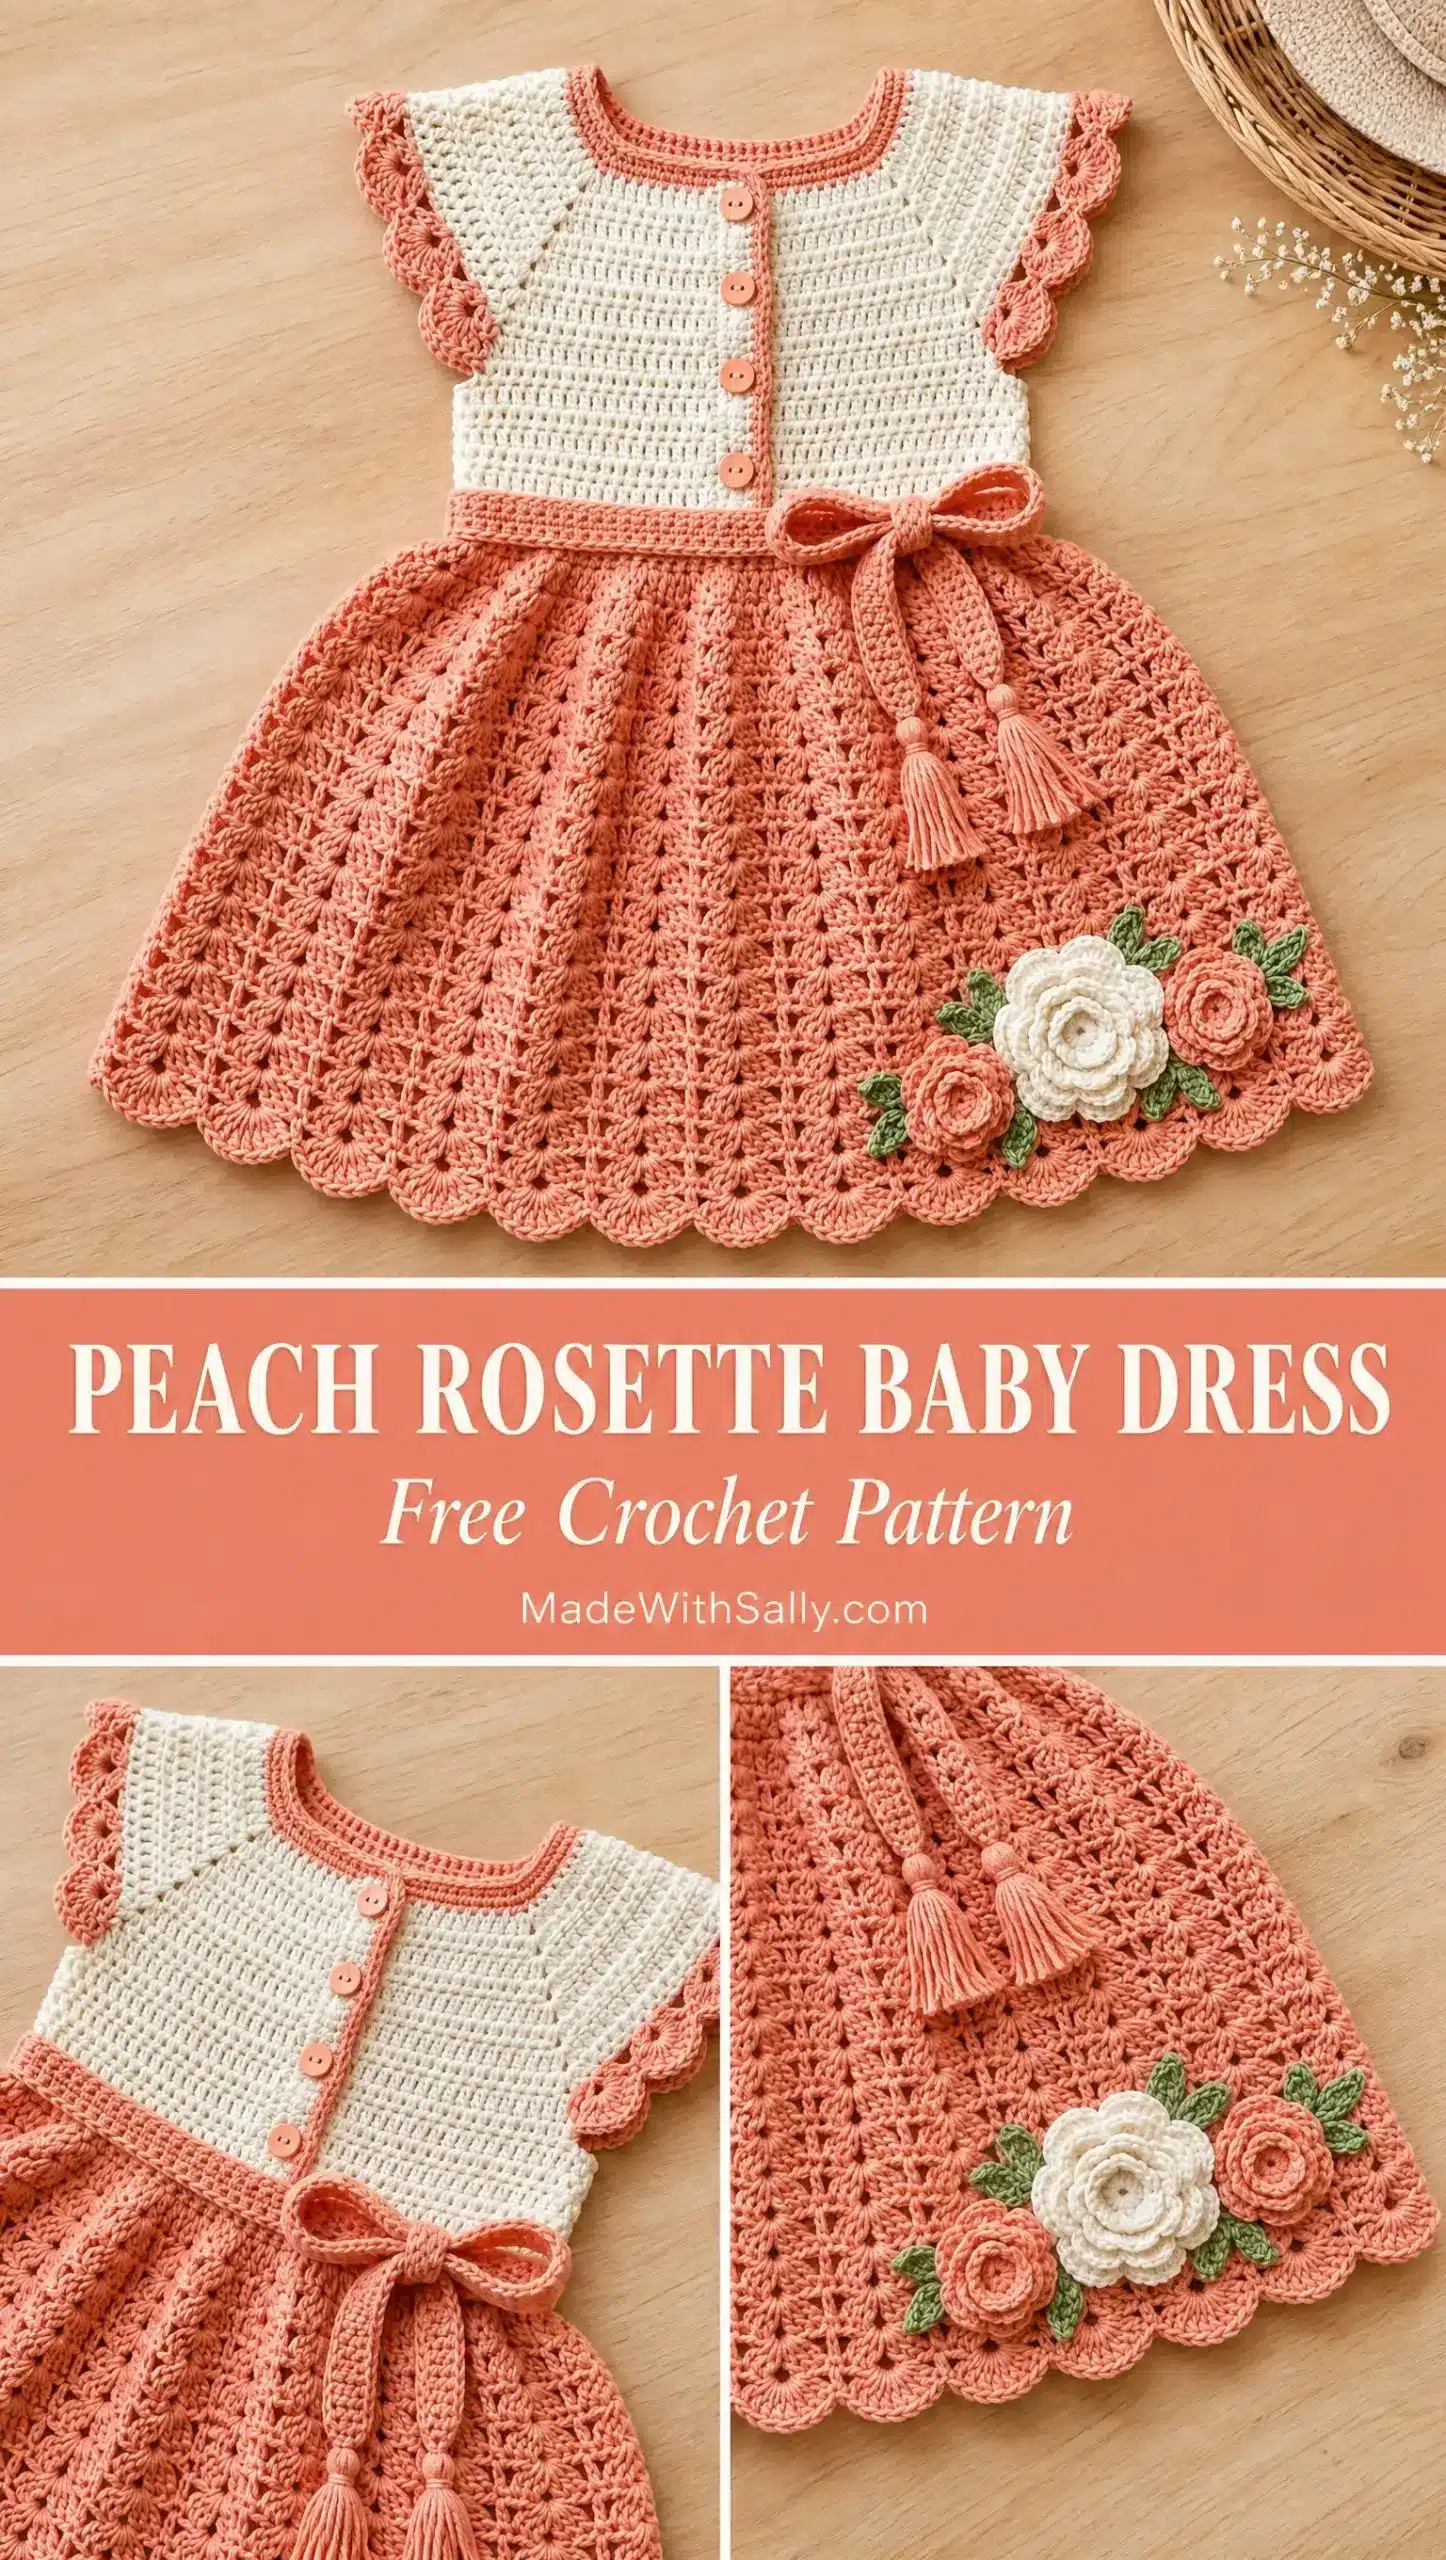
This gorgeous dress is designed for babies aged 12 to 18 months. The finished chest circumference measures approximately 19 inches (48 cm), with a total length from shoulder to hem of about 13.5 inches (34 cm). The skirt portion alone adds 7.5 inches (19 cm) of length, giving the dress that lovely full look you see in the photos. The construction method is what makes this pattern special. You’ll work the bodice flat in three separate panels, which are then joined at the shoulders. This creates the center front button opening naturally. After adding the adorable flutter sleeve ruffles and neckline edging, you’ll join everything at the waist and work the lace skirt downward in rounds.
Skill Level: I’d call this intermediate to advanced intermediate. You should be comfortable working both flat and in the round, reading stitch pattern repeats, and making basic garment joins. If you’ve never crocheted a shell stitch pattern or worked 3D appliques before, this might be a stretch. But if you’ve completed a few intermediate projects, you can absolutely handle this.
Time Estimate: Plan for 20 to 30 hours of work. The rose and leaf appliques add another 2 to 4 hours. This is not a weekend project, but the result is absolutely worth the time investment.
Materials
Yarn
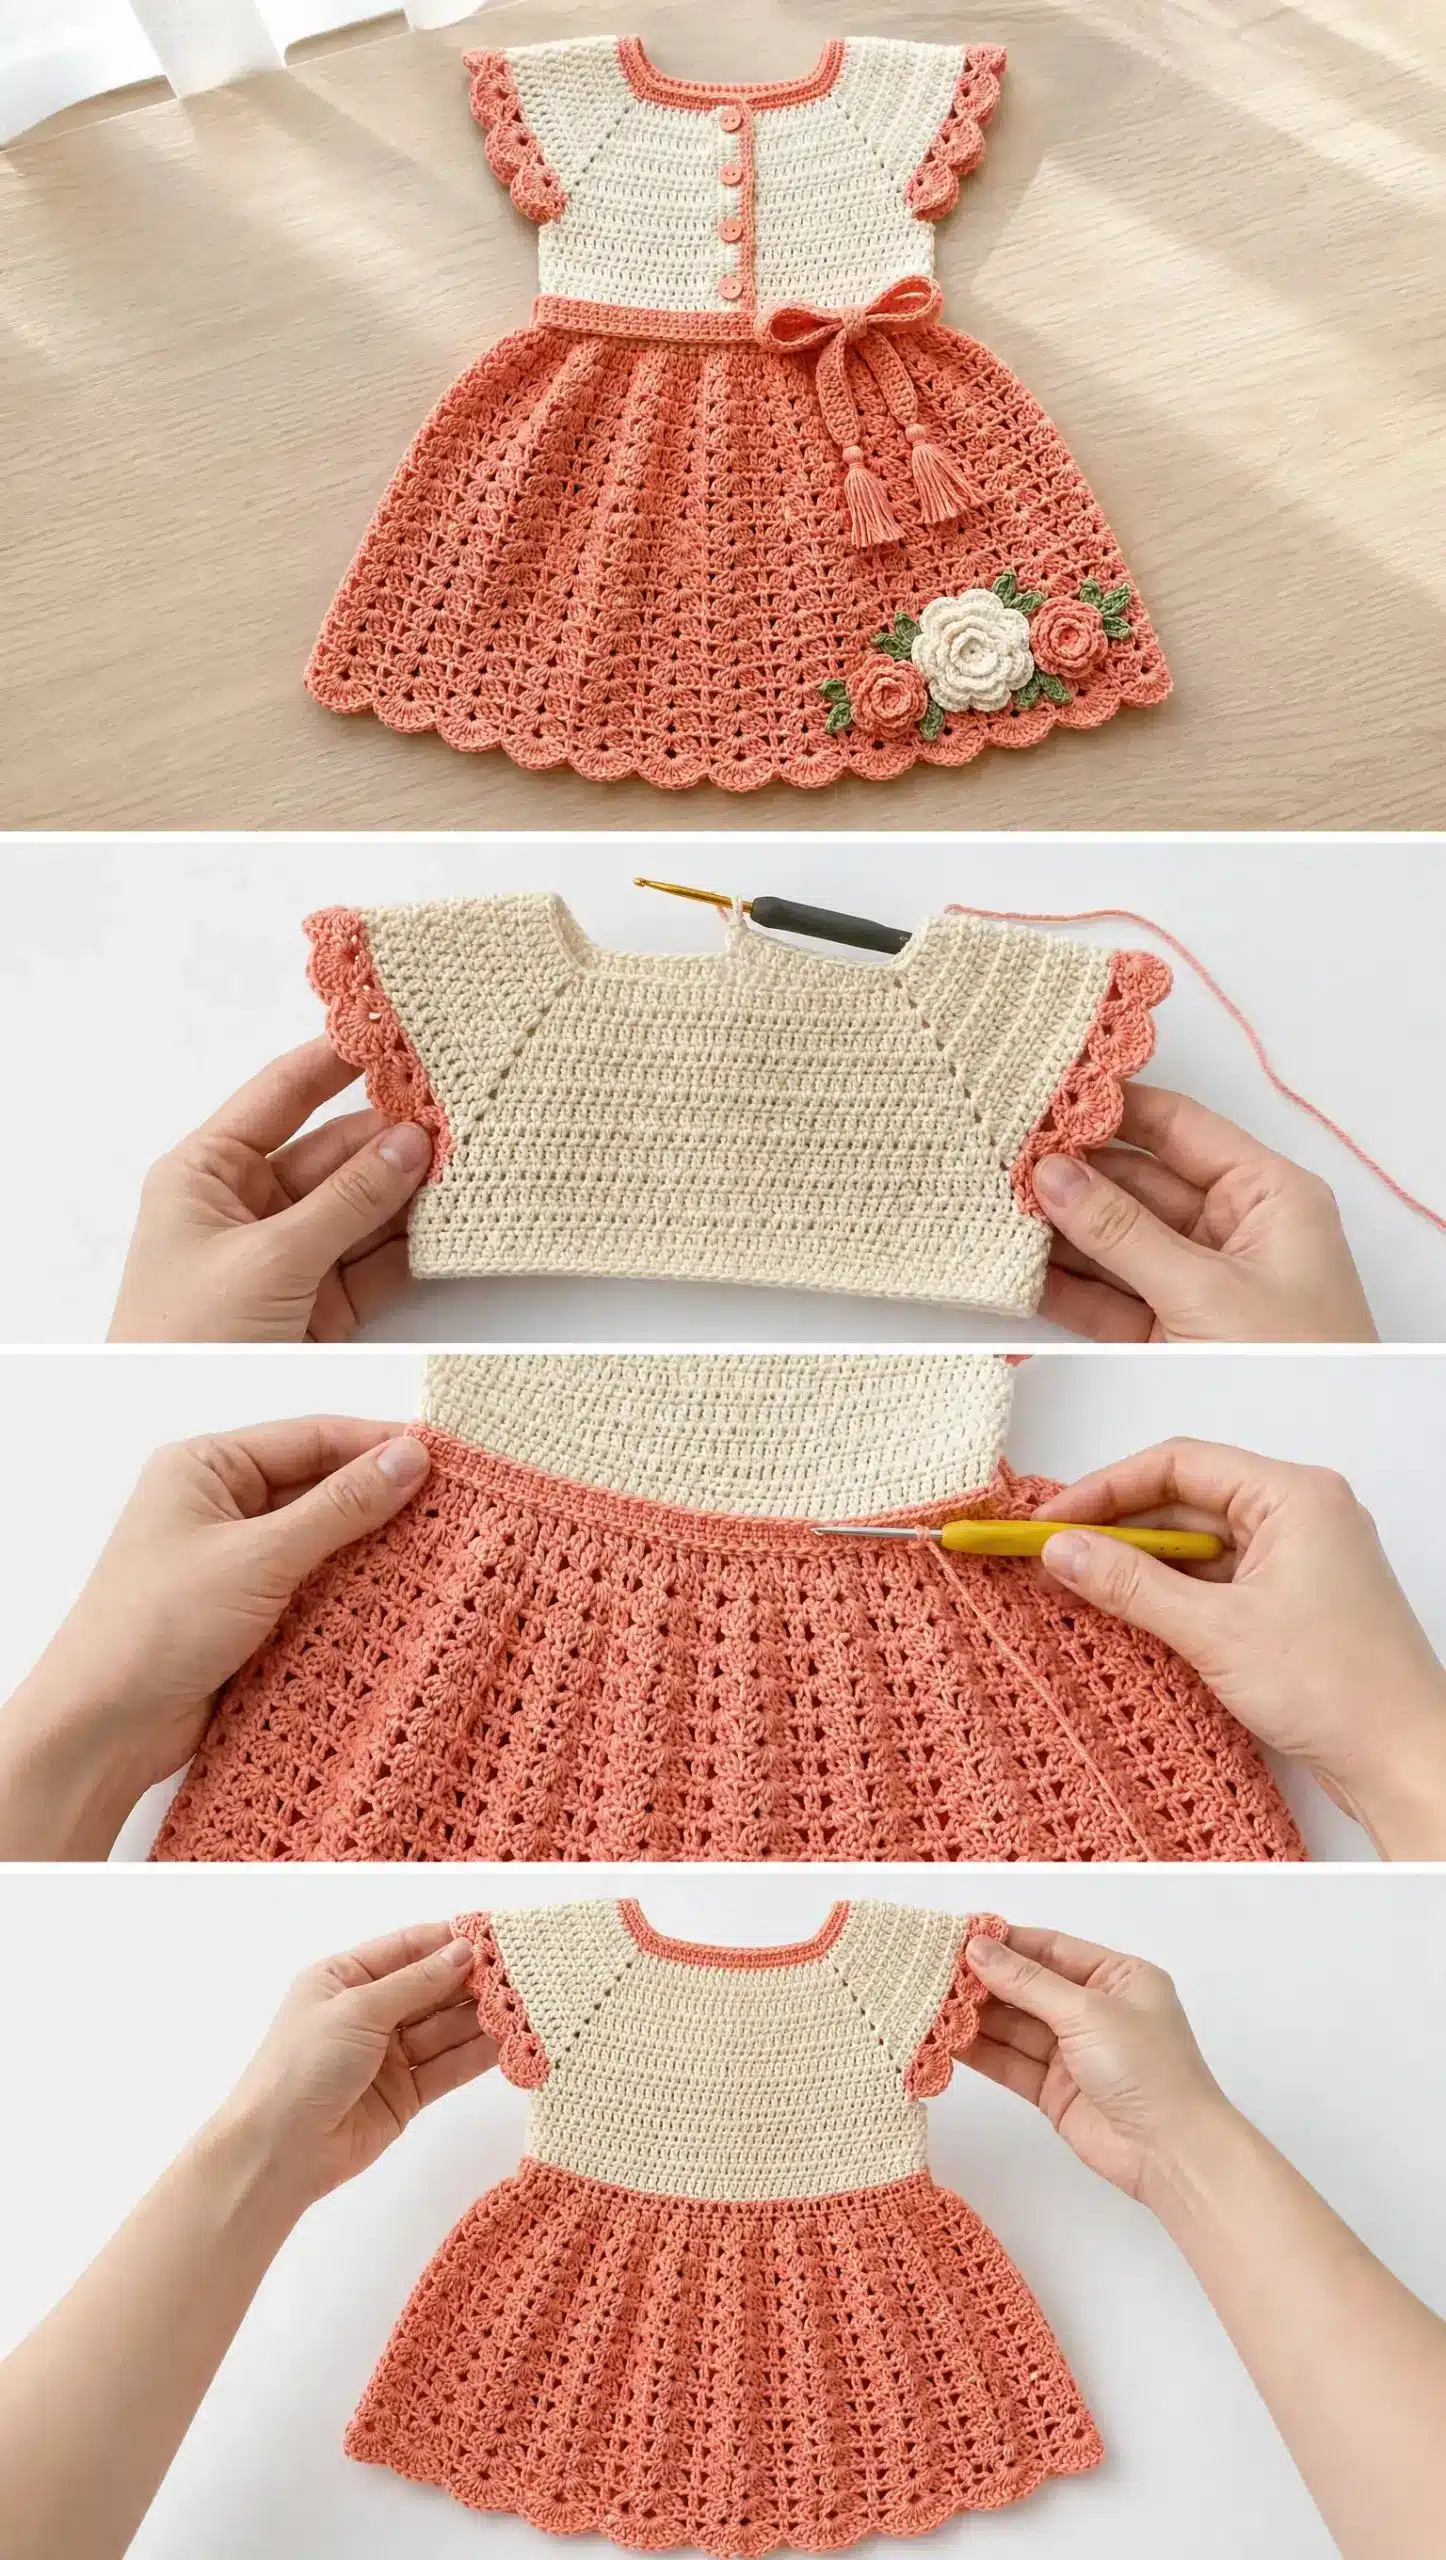
- Yarn A (Cream): DK weight, 100% cotton or cotton blend, approximately 220 yards (200 meters)
- Yarn B (Peach Coral): DK weight, 100% cotton or cotton blend, approximately 350 yards (320 meters)
- Green Yarn: Small amount of green DK yarn for the leaf appliques
Recommended Yarns:
- Paintbox Yarns Simply DK in Champagne White and Melon Sorbet. This 100% cotton yarn has excellent stitch definition and washes like a dream.
- Lion Brand 24/7 Cotton DK in Ecru and Peach. It’s widely available, soft against baby skin, and holds its shape well.
- WeCrochet Dishie in Cream and Salmon. This one has a slight sheen that photographs gorgeously.
Whatever you choose, stick with cotton or cotton blends. Acrylic heavy yarns won’t hold the lace stitch pattern properly, and the dress needs structure to drape correctly.
Hook and Notions
- Crochet hook: US size E-4 (3.5 mm) for the entire project. You can try a US F-5 (3.75 mm) for the skirt if you prefer a more relaxed drape.
- Buttons: 4 small buttons, approximately 3/8 inch (10 mm) diameter in coral or peach
- Yarn needle: For weaving ends and seaming
- Stitch markers: At least 6
- Scissors
- Blocking pins and mat
Gauge and Finished Size
I know checking gauge feels tedious, but this is a garment. If your gauge is off by even one stitch per inch, the dress won’t fit. Trust me on this one.
Using your E-4 hook, work a swatch in single crochet (sc). That’s where you insert your hook into a stitch, yarn over, pull up a loop, yarn over again, and pull through both loops on your hook.
Your gauge should be:
- 20 sc = 4 inches (10 cm)
- 22 rows of sc = 4 inches (10 cm)
Chain 26 stitches. Work a sc in the second chain from the hook and in each chain across (25 sc). Continue for 27 more rows. Block lightly. Your swatch should measure 5 inches by 5 inches. If your swatch is too big, try a smaller hook. Too small? Go up a hook size.
Abbreviations
Before we dive in, let me define all the stitches and abbreviations you’ll encounter.
- ch = chain
- sc = single crochet (insert hook, yarn over, pull up loop, yarn over, pull through both loops)
- dc = double crochet (yarn over, insert hook, yarn over, pull up loop, yarn over, pull through 2 loops, yarn over, pull through remaining 2 loops)
- hdc = half double crochet (yarn over, insert hook, yarn over, pull up loop, yarn over, pull through all 3 loops)
- tr = treble crochet (yarn over twice, insert hook, yarn over, pull up loop, then yarn over and pull through 2 loops three times)
- sl st = slip stitch (insert hook, yarn over, pull through stitch and loop on hook)
- sk = skip
- st(s) = stitch(es)
- sp = space
- RS = right side
- WS = wrong side
Special Stitches:
- Shell (sh): Work 5 dc in the same stitch or space. This creates the fan shape in the lace skirt.
- Scallop Edging: Slip stitch into next stitch, chain 1, work 5 dc in next stitch, slip stitch in next stitch.
- Picot: Chain 3, slip stitch in first chain of the chain 3.
Pattern Instructions
Bodice Back Panel
With Yarn A (Cream) and your E-4 hook, chain 49.
Foundation Row (WS): Sc in 2nd ch from hook and in each ch across. Turn. (48 sc)
Row 1 (RS): Ch 1, sc in each sc across. Turn. (48 sc)
Rows 2 through 20: Repeat Row 1. Turn after each row. (48 sc per row)
Your back panel should measure approximately 3.5 inches wide by 3.75 inches tall. Don’t finish off. Place a stitch marker in each end stitch of Row 20 to mark your shoulder line. Set this piece aside.
Bodice Front Right Panel (Button Band Side)
This panel will have the buttonholes worked into it.
With Yarn A and E-4 hook, chain 25.
Foundation Row (WS): Sc in 2nd ch from hook and in each ch across. Turn. (24 sc)
Rows 1 through 6: Ch 1, sc in each sc across. Turn. (24 sc per row)
Row 7 (Buttonhole Row, RS): Ch 1, sc in first 2 sc, [ch 1, sk 1 sc, sc in next 4 sc] 3 times, ch 1, sk 1 sc, sc in last 2 sc. Turn. (20 sc + 4 ch-1 spaces = 24 sts total)
Row 8 (WS): Ch 1, sc in each sc and in each ch-1 sp across. Turn. (24 sc)
Rows 9 through 20: Ch 1, sc in each sc across. Turn. (24 sc per row)
Don’t finish off. Place a marker in the last stitch of Row 20. Set aside.
Bodice Front Left Panel (Button Side)
With Yarn A and E-4 hook, chain 25.
Foundation Row (WS): Sc in 2nd ch from hook and in each ch across. Turn. (24 sc)
Rows 1 through 20: Ch 1, sc in each sc across. Turn. (24 sc per row)
Don’t finish off. Place a marker in the last stitch of Row 20. Set aside.
Shoulder Seaming
Now we join everything together. Lay your pieces out with the right side facing up.
Align the Front Right Panel with the Back Panel at the right shoulder. The outer 12 stitches of the Front Right Row 20 should line up with the outer 12 stitches of Back Row 20.
Using a yarn needle and a 20 inch length of Yarn A, whipstitch these 12 stitches together. Fasten off and weave in the end.
Repeat for the left shoulder, joining the Front Left Panel to the opposite side of the Back Panel.
After seaming, your shoulder to shoulder width should be approximately 9.6 inches. The center front opening runs the full height of both front panels.
Neckline Edging
Join Yarn B (Peach Coral) with a slip stitch at the top right corner of the right front panel, RS facing.
Round 1 (RS): Ch 1, sc evenly around the entire neckline opening. Work 1 sc in each row end along the right front (20 sc), 1 sc in each of the 24 sc across the back neck (24 sc), and 1 sc in each row end down the left front (20 sc). Do not join. (64 sc total)
Round 2 (Scallop Edging): [Sl st in next sc, ch 1, 5 dc in next sc, sl st in next sc] across all three neck edges, working 1 sl st in each corner. Finish off and weave in ends.
Side Seaming
Before adding the sleeve ruffles, you need to seam the lower sides of the bodice.
With Yarn A and your yarn needle, align the side edge of the Front Right Panel (Rows 1 to 10) with the corresponding side edge of the Back Panel (Rows 1 to 10). Whipstitch these 10 rows together. Repeat for the left side.
This creates the bodice body and leaves the upper 10 rows of each side open as armholes.
Flutter Sleeve Ruffles
Join Yarn B with a slip stitch at the bottom of the right armhole, at the seam junction, RS facing.
Round 1: Ch 1, work 2 sc in each row end stitch around the armhole opening. (40 sc) Join with sl st to first sc.
Round 2: Ch 3 (counts as dc), work 2 dc in same st, [sk 1 st, sl st in next st, sk 1 st, 5 dc in next st] 9 times, sk 1 st, sl st in next st, sk 1 st, 2 dc in same as beg ch 3, sl st to top of beg ch 3. (10 scallop shells)
Round 3 (Picot Trim): Join Yarn B at top of any dc in Round 2. [Sl st in next dc, ch 3, sl st back in same dc (picot made)] repeat in each dc of each shell. Slip stitch between shells as needed. Finish off and weave in ends.
Repeat for the left armhole.
Waistband
With RS facing, join Yarn B with a slip stitch at the bottom right corner of the bodice.
Row 1: Ch 1, work 1 sc in each stitch across the bottom of all three panels, working in the original foundation chain loops. 24 sc (front right) + 48 sc (back) + 24 sc (front left). (96 sc total)
Row 2 (Eyelet Row): Ch 3 (counts as dc), dc in next 7 sts, [ch 2, sk 2 sts, dc in next 6 sts] 10 times, ch 2, sk 2, dc in last 6 sts. (72 dc + 12 ch-2 spaces = 96 sts total)
Row 3: Ch 1, sc in each dc and 2 sc in each ch-2 sp across. (96 sc)
Don’t finish off. Join the waistband into a round with a slip stitch into the first sc of Row 3.
Round 1 (Setup): Join yarn at any sc. Ch 1, sc in same st, sk 2, sh in next st, sk 2, [sc in next st, sk 2, sh in next st, sk 2] 15 times. Join with sl st to first sc. (16 sc + 16 shells)
Round 2: Sl st to center dc of first shell, ch 1, sc in same dc, sk 2 dc, ch 2, sh in next sc, ch 2, [sc in center dc of next shell, ch 2, sh in next sc, ch 2] 15 times. Join with sl st to first sc. (16 sc + 16 shells + 32 ch-2 spaces)
Round 3: Sl st to first ch-2 sp, ch 3, 4 dc in same ch-2 sp, ch 2, sc in center of next shell, ch 2, [sh in next ch-2 sp, ch 2, sc in center of shell, ch 2] 15 times. Join with sl st to top of beg ch-3. (16 shells + 16 sc + 32 ch-2 spaces)
Round 4: Sl st to center of first shell, ch 1, sc in center dc, [ch 2, sh in sc between shells, ch 2, sc in center of shell] 15 times, ch 2, sh in last sc, ch 2. Join with sl st to first sc. (16 sc + 16 shells + 32 ch-2 spaces)
Rounds 5 and 6: Repeat Rounds 3 and 4.
Round 7 (Increase Round): Sl st to center dc of first shell, ch 1, sc in same, [ch 2, work (sh, ch 2, sc) in next sc, ch 2, sh in next ch-2 sp, ch 2, sc in center of next shell] 15 times, ch 2, work (sh, ch 2, sc) in last sc, ch 2, sh in last ch-2 sp, ch 2. Join with sl st to first sc.
You now have 32 fan repeats, creating the full gathered skirt.
Skirt
Rounds 8 through 16: Continue alternating the fan pattern over 32 repeats.
Even rounds (8, 10, 12, 14, 16): [Sc in center of shell, ch 2, sh in sc, ch 2] x 32. Join. (32 sc + 32 shells)
Odd rounds (9, 11, 13, 15): [Sh in sc, ch 2, sc in center of shell, ch 2] x 32. Join. (32 shells + 32 sc)
Hem Scallop Edging
Round 17 (Transition to Hem): Sl st to center of first shell, ch 1, sc in same, [2 sc in ch-2 sp, 5 sc in shell, 2 sc in ch-2 sp, sc in sc] x 32 around. Add 1 sc to one group for 321 sc total. Join with sl st to first sc. (321 sc)
Round 18: [Sl st in next sc, ch 1, 5 dc in next sc, ch 1, sl st in next sc] x 107 times. Join. Finish off. Weave in all ends. (107 scallops)
Finishing Details
Rose Appliques (Make 3)
Large Rose (Cream): With Yarn A, make a magic ring. Ch 1, work 10 sc in ring, join with sl st. (10 sc)
Round 2: Ch 1, work 2 sc in each sc around, join with sl st. (20 sc)
Round 3: Ch 3 (counts as dc), work 2 dc in same st, [sk 1 st, sl st in next st, ch 3, work 3 dc in same st] 9 times, sk last st, sl st in base of beg ch-3. (10 petals)
Roll the piece tightly to form a rose bud with petals facing outward. Tack the base securely. Leave a 12 inch tail for sewing.
Make one medium rose in Yarn B using the full pattern.
Make one small rose in Yarn B, but work only Rounds 1 and 2, then work Round 3 with [sk 1, sl st, ch 2, 3 dc in same st] 9 times.
Leaf Appliques (Make 5 to 7)
With green yarn, chain 9.
Row 1: Sc in 2nd ch from hook, hdc in next, dc in next 2, hdc in next, sc in next 2, 3 sc in last ch (now working on opposite side), sc in next 2, hdc in next, dc in next 2, hdc in next, sc in last, sl st to first sc. Finish off leaving a tail for sewing.
Waist Tie Cord
With Yarn B, chain 120 (approximately 22 inches). Sc in 2nd ch from hook and each ch across. Finish off.
Tassels (Make 2): Cut 20 strands of Yarn B, each 5 inches long. Fold all strands in half. Using a separate 8 inch strand, tie tightly around the fold about 1/2 inch from the top. Trim ends evenly. Attach one tassel to each end of the tie cord.
Thread the tie through the waistband eyelets, going over and under. Tie in a bow at center front.
Assembly
Arrange the three roses in a cluster at the lower right front of the skirt, about 1.5 inches above the hem edge. Place the large cream rose at center. Sew each rose securely through all layers.
Arrange 2 to 3 leaves peeking out behind the roses and one on each side. Sew in place.
Sew 4 buttons to the Front Left Panel, aligned with the buttonholes on the Front Right Panel.
Block the entire dress gently with steam or by pinning damp.
Tips
- Work your gauge swatch honestly. I cannot stress this enough for garments.
- Use stitch markers generously, especially when joining sections and working the fan pattern repeats.
- Block each piece before seaming for crisp, professional results.
- When working the shell stitch skirt, count your repeats every few rounds. It’s much easier to fix a mistake early than to rip back six rounds.
- The rose appliques take practice. Make a test rose first to get comfortable with the rolling and tacking technique.
FAQs
Can I make this dress for a smaller baby?
The pattern is written for 12-18 months. To adjust for a smaller size, you would need to reduce the number of stitches in the foundation chains for the bodice panels and decrease the number of repeats in the skirt rounds. However, because this is a complex garment, I recommend checking out our Lavender Ruffle Baby Dress Set for a simpler size-adjustable option.
What is the best yarn to use for the lace skirt?
Cotton or cotton blends are essential for this pattern. The lace pattern requires a fiber with structure to hold the shell stitches open. Acrylics tend to be too soft or heavy, which can cause the skirt to lose its shape.
How do I fix mistakes in the shell stitch skirt?
Because the skirt is worked in continuous rounds of repeating shells, it is vital to count your shells every few rounds. If you notice a mistake, you can usually unravel back to the error and rework the shells. The pattern is designed so that each round builds on the previous one, making it easier to spot where a shell might be missing.
Do I need to block the dress?
Yes, blocking is highly recommended. It will even out your stitches, open up the lace pattern in the skirt, and give the scalloped edges a professional finish. Use steam or wet blocking depending on your yarn care instructions.
Can I use a different hook size?
The pattern calls for a US E-4 (3.5 mm) hook. You can use a US F-5 (3.75 mm) for the skirt if you prefer a more relaxed, looser drape, but be aware this may affect the fit of the bodice if you are not careful with your gauge.
I really hope you love making this beautiful little dress as much as I enjoyed writing out this pattern for you. It’s the kind of project that feels like a real accomplishment when you’re done, and it makes the most precious gift for a special baby in your life. Thank you so much for being here.
Pin This Crochet Pattern!