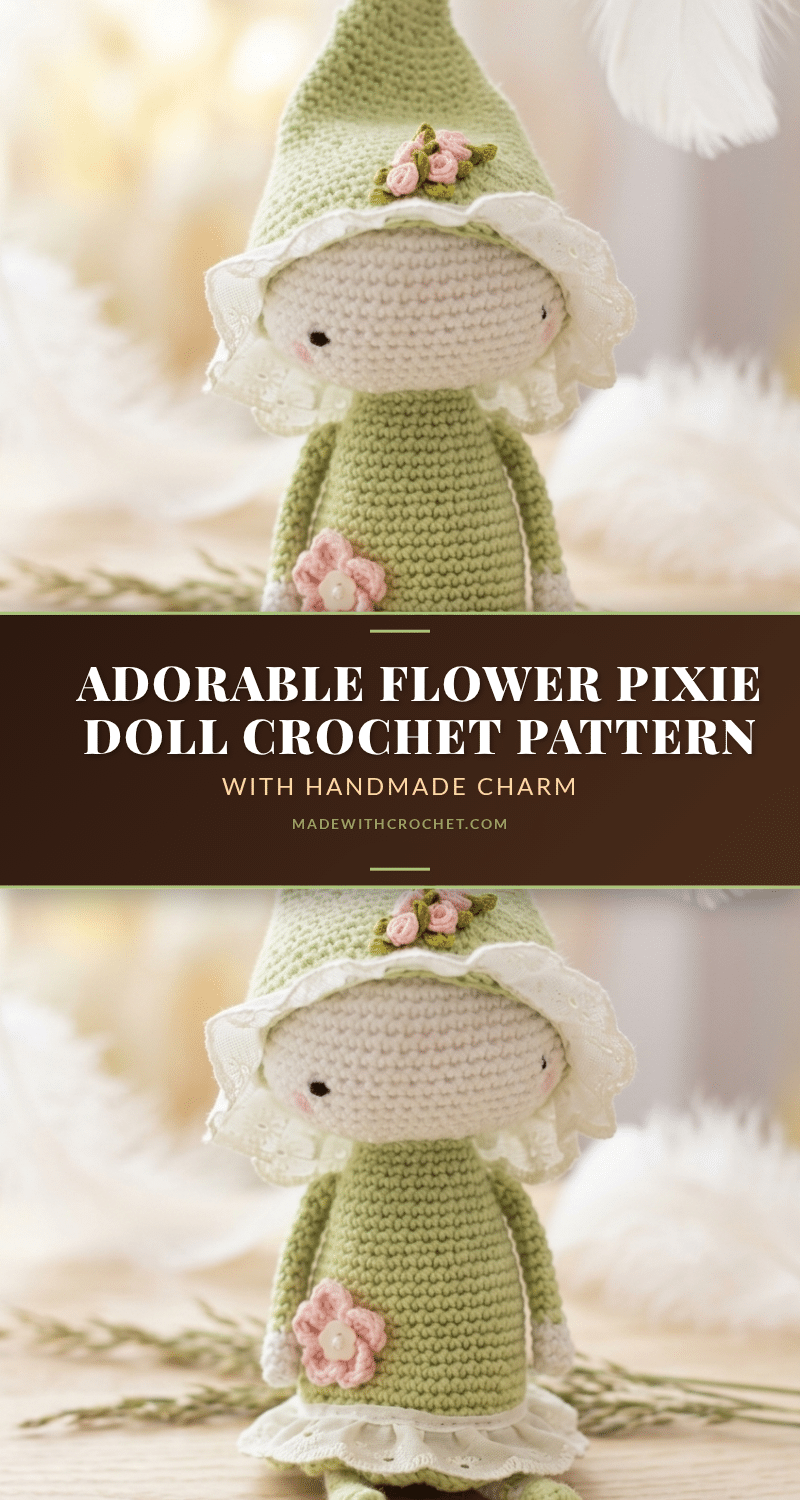
There is a specific kind of magic in amigurumi that comes from the rhythm of the stitches—the steady pull of single crochets forming a tight, firm fabric that slowly takes shape round by round. The Flower Pixie Doll pattern is a delightful example of this, where the texture of the DK yarn and the careful shaping of the head, dress, and hat create a figure that feels both whimsical and substantial. What makes this project particularly satisfying is how the construction flows seamlessly from one component to the next, with clever stitch techniques like front loop only (FLO) and back loop only (BLO) rounds creating clean transitions and structural integrity without the need for messy seams. It is a beginner-friendly project that rewards patience with a charming, 13-inch tall doll that stands proudly on its own.
Texture and Stitch Notes
One of the most satisfying aspects of this pattern is how the stitch work defines the doll’s silhouette. The head is worked from the top down, expanding and then decreasing to form a perfect sphere that transitions smoothly into the neck. The dress continues directly from the head, utilizing a clever FLO stitch round to create a decorative collar before picking up the skipped back loops to continue the body. This technique keeps the fabric dense and prevents gaps, which is essential for amigurumi. The legs feature alternating color stripes that mimic the look of boots or stockings, and carrying the yarn loosely up the inside of the leg saves time on weaving ends. The pointed hat is worked in gradual decrease rounds, creating a classic pixie shape that sits perfectly on the doll’s head. These textural details and structural tricks make the finished doll look professionally crafted.
Project Overview
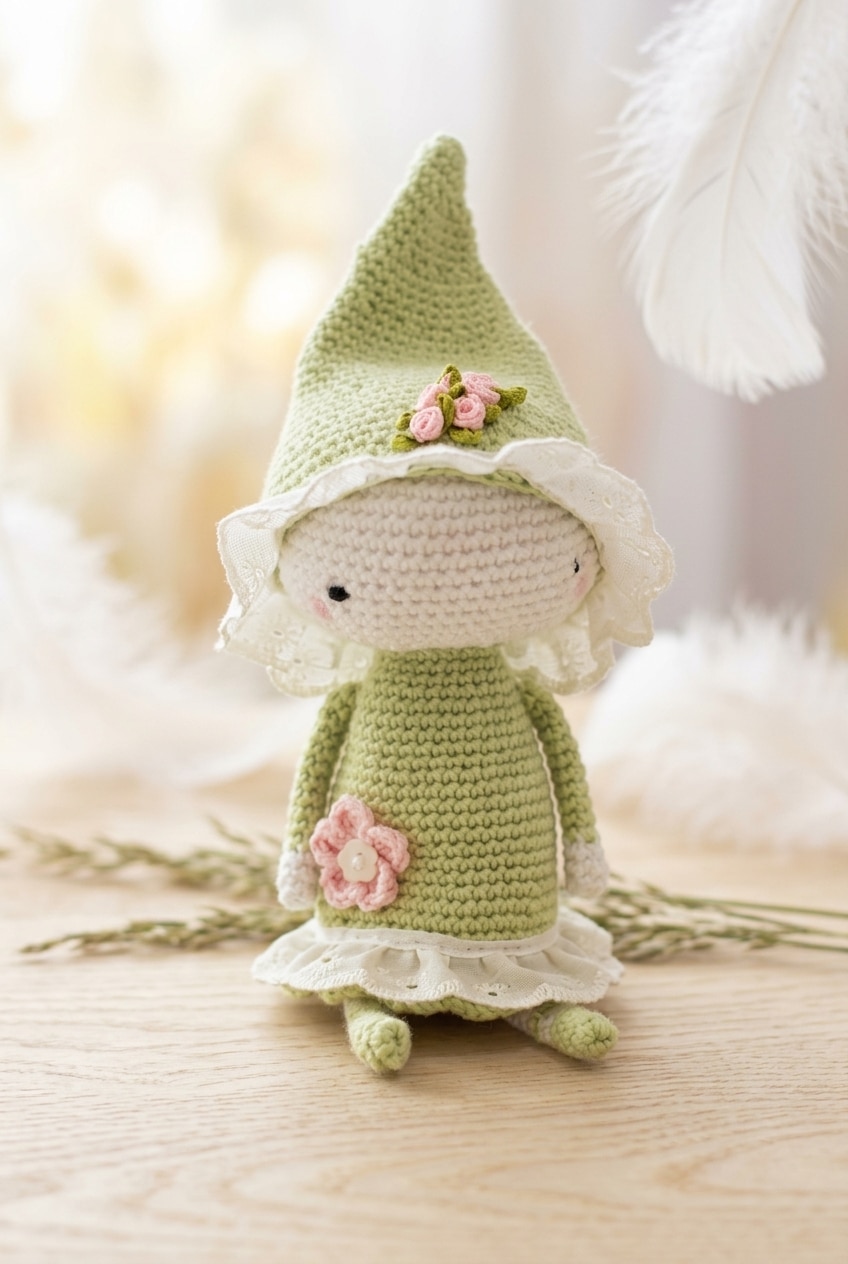
This whimsical doll is a beginner project that actually looks like you tried really hard. It is a wonderful choice for those looking to practice doll construction and small decorative appliques. The pattern is designed to be approachable, using standard US crochet terms and techniques that are easy to follow.
Why You’ll Love This Pattern
- Beginner Friendly: No advanced techniques here, so it’s a no-trouble project even if you’re fairly new to amigurumi.
- Great Gift Potential: It finishes up into something that genuinely looks handcrafted and special, which makes it a really solid gift option.
- Good Size: At around 13 inches tall, it’s substantial enough to feel like a real keepsake rather than a tiny trinket.
- Technique Practice: If you want to get more comfortable with doll construction and small decorative appliques, this pattern is actually a fun one to learn on.
Materials
- Yarn: DK Weight Yarn (Weight 3 Light) in White, Green, Black, and Pink.
- White: Main color for skin areas (head, arms, base). You will need roughly 50–100 yards.
- Green: Used for the dress, hat, and alternating stripes on the legs.
- Black: Short length for knotted eyes.
- Pink: Short length for the flower and blush details.
- Crochet Hook: 3.50 mm (E/4). This size pairs well with DK weight to give you a firm, tight fabric.
- Stuffing: Toy stuffing or yarn scraps.
- Needles: Standard or felting needle (for attaching eyes and blushies).
- Notions: Yarn needle, scissors.
- Optional Trims:
- Lace trim (approx. 21 inches / 53 cm).
- Ribbon roses (approx. 6).
- Small button (1).
Gauge and Finished Size
Gauge: Gauge is not critical for this project. Use a hook size that creates a tight, firm fabric so stuffing does not show through.
Finished Size: Approx. 13 inches (33 cm) tall when standing.
Skill Level: Beginner
Abbreviations
Most of this is standard stuff you’ve probably worked before.
- Colors: B = Black, G = Green, P = Pink, W = White
- Stitches: ch = chain, sl st = slip stitch, sc = single crochet, hdc = half double crochet, dc = double crochet
- Decreases: sc2tog = single crochet 2 together
- Loops: FLO = front loop only, BLO = back loop only
- Other: * * = repeat between asterisks as stated, ( ) = total stitch count
Pattern Notes
- The ch 1 at the start of each round does not count as a stitch anywhere in this pattern. Keep that in mind especially during the decrease rounds — it trips people up.
- The doll is worked in continuous rounds throughout. The head flows directly into the dress body with no seaming between them.
- Round 26 creates the decorative collar using FLO stitches, and then Round 27 picks back up in those skipped back loops to carry on with the dress.
- Round 49 is worked in front loops only. Those free back loops are used afterward to attach the flat base, which is what lets the doll stand on her own without tipping.
- The hat is its own separate piece, worked from the brim upward and decreased gradually to a narrow pointed tip.
- The legs are worked with color-striped bands in G/W/G to suggest boots or stockings.
Pattern Instructions
Head
The head is worked in the round from the top down, expanding out to the widest point and then decreasing back in to form the neck. It’s the foundation everything else builds from, so take your time getting the shaping even.
Round 1: In W, ch 4, sl st in first ch to form a loop, ch 1, 8 sc in center of loop, sl st in first sc to join. [8 sc] (Magic ring can be used instead.)
Round 2: Ch 1, 2 sc in same st as previous sl st, 2 sc in each st around, sl st in first sc to join. [16 sc]
Round 3: Ch 1, 1 sc in same st, 2 sc in next st, 1 sc in next st, 2 sc in next st repeat to end, sl st to join. [24 sc]
Round 4: Ch 1, 1 sc in same st, 1 sc in next st, 2 sc in next st, 1 sc in next 2 sts, 2 sc in next st repeat to end, sl st to join. [32 sc]
Round 5: Ch 1, 1 sc in same st, 1 sc in next 2 sts, 2 sc in next st, 1 sc in next 3 sts, 2 sc in next st repeat to end, sl st to join. [40 sc]
Round 6: Ch 1, 1 sc in same st, 1 sc in next 3 sts, 2 sc in next st, 1 sc in next 4 sts, 2 sc in next st repeat to end, sl st to join. [48 sc]
Round 7: Ch 1, 1 sc in same st, 1 sc in next 4 sts, 2 sc in next st, 1 sc in next 5 sts, 2 sc in next st repeat to end, sl st to join. [56 sc]
Rounds 8–17: Ch 1, 1 sc in same st, 1 sc in each st around, sl st to join. [56 sc]
Round 18: Ch 1, 1 sc in same st, 1 sc in next 4 sts, sc2tog, 1 sc in next 5 sts, sc2tog repeat to end, sl st to join. [48 sc]
Round 19: Ch 1, 1 sc in same st, 1 sc in next 3 sts, sc2tog, 1 sc in next 4 sts, sc2tog repeat to end, sl st to join. [40 sc]
Round 20: Ch 1, 1 sc in same st, 1 sc in next 2 sts, sc2tog, 1 sc in next 3 sts, sc2tog repeat to end, sl st to join. [32 sc]
Round 21: Ch 1, 1 sc in same st, 1 sc in next st, sc2tog, 1 sc in next 2 sts, sc2tog repeat to end, sl st to join. [24 sc]
Round 22: Ch 1, 1 sc in same st, sc2tog, 1 sc in next st, sc2tog repeat to end, sl st to join. [16 sc]
Rounds 23–24: Ch 1, 1 sc in same st, 1 sc in each st around, sl st to join. [16 sc] These two even rounds form the neck before the dress begins.
Round 25: Ch 1, 1 sc in same st, 2 sc in next st, 1 sc in next st, 2 sc in next st repeat to end, sl st joining G in first sc to join. [24 sc] Stuff head now if desired.
Dress
The dress continues directly from the head — you’re picking up where Round 25 left off, now working in G. The collar detail in Round 26 is worked in FLO, and Round 27 picks up the skipped back loops to carry the body downward, so pay attention to which loops you’re working into at each transition.
Round 26: Continuing in G, working in FLO, ch 1, sl st in next 12 sts, [1 sc, 1 hdc] in next st, 2 dc in next st, [1 hdc, 1 sc] in next st, sl st in next 2 sts repeat once more, sl st to end, sl st in first sl st to join. The collar shaping here uses a mix of slip stitches and taller stitches to create the neckline detail. Working in FLO leaves the back loops free for Round 27.
Round 27: Working in skipped BLO of Round 26, ch 1, 1 sc in same st, 1 sc in each st around, sl st to join. [24 sc] Make sure you’re going back to pick up those unworked back loops from Round 26 — this is what closes the collar and continues the body cleanly.
Round 28: Ch 1, 1 sc in same st, 1 sc in each st around, sl st to join. [24 sc]
Round 29: Ch 1, 1 sc in same st, 1 sc in next st, 2 sc in next st, 1 sc in next 2 sts, 2 sc in next st repeat to end, sl st to join. [32 sc]
Rounds 30–34: Ch 1, 1 sc in same st, 1 sc in each st around, sl st to join. [32 sc]
Round 35: Ch 1, 1 sc in same st, 1 sc in next 2 sts, 2 sc in next st, 1 sc in next 3 sts, 2 sc in next st repeat to end, sl st to join. [40 sc]
Rounds 36–42: Ch 1, 1 sc in same st, 1 sc in each st around, sl st to join. [40 sc]
Round 43: Ch 1, 1 sc in same st, 1 sc in next 3 sts, 2 sc in next st, 1 sc in next 4 sts, 2 sc in next st repeat to end, sl st to join. [48 sc]
Rounds 44–48: Ch 1, 1 sc in same st, 1 sc in each st around, sl st to join. [48 sc]
Round 49: Working in FLO, ch 1, 1 sc in same st, 1 sc in each st around, sl st to join. [48 sc] Like Round 26, working in FLO here leaves the back loops open — the base will be joined to those skipped loops later.
Round 50: Ch 1, 1 sc in same st, 1 sc in each st around, sl st to join. [48 sc]
Round 51: Ch 1, starting in same st 1 sc in next st, [1 hdc, 1 dc] in next st, [1 dc, 1 hdc] in next st, 1 sc in next st repeat to end, sl st to join. Fasten off and tie in all tails. The alternating stitch heights in this round create the scalloped hem of the dress.
Legs (Make 2)
Make two legs. They’re worked in the round from the foot up, with a color stripe near the base before switching to white for the stocking portion.
Round 1: In G, ch 4, sl st in first ch to form a loop, ch 1, 6 sc in center, sl st to join. [6 sc]
Rounds 2–4: Ch 1, 1 sc in same st, 1 sc in each st around, sl st to join, joining W on last round. [6 sc] Carry the color change at the end of Round 4 by joining W on the final pull-through of the last sl st.
Round 5: In W, ch 1, 1 sc in same st, 1 sc in each st around, sl st to join, joining G on last round. [6 sc]
Round 6: In G, ch 1, 1 sc in same st, 1 sc in each st around, sl st to join, joining W on last round. [6 sc]
Rounds 7–14: In W, ch 1, 1 sc in same st, 1 sc in each st around, sl st to join. [6 sc] Fasten off. Repeat for second leg.
Arms (Make 2)
Make two arms. Like the legs, they start at the hand end and work upward, with a short color transition before the main length of the arm.
Round 1: In W, ch 4, sl st in first ch to form a loop, ch 1, 6 sc in center, sl st to join. [6 sc]
Rounds 2–3: Ch 1, 1 sc in same st, 1 sc in each st around, sl st to join, joining G on last round. [6 sc]
Rounds 4–14: In W, ch 1, 1 sc in same st, 1 sc in each st around, sl st to join, joining G on last round. [6 sc] Fasten off. Repeat for second arm. Sew arms to body, hide tails inside, and stuff body now.
Base
The base is a flat circle that closes off the bottom of the dress and anchors the legs. It mirrors the increase rounds from the head, so the construction will feel familiar.
Rounds 1–6: In W, repeat Rounds 1–6 of Head. [48 sc] Fasten off. Sew feet to base. Sew or crochet base to the skipped BLO of Round 49 of body, matching stitch count (48 sts on base, 48 sts on body).
Hat
The hat is worked from the brim upward, decreasing in stages to form a tall pointed crown. It starts with a large foundation round and gradually narrows over several decrease rounds separated by even sections.
Round 1: In G, crochet 56 sc foundation sts, sl st in first sc to form a large loop. [56 sc] (Alternatively: ch 57, 1 sc in second ch from hook and each ch along. [56 sc] Sl st in first sc to join.) The foundation sc method gives a neater, stretchier brim edge than a standard chain start, but either works fine.
Rounds 2–4: Ch 1, 1 sc in same st, 1 sc in each st around, sl st to join. [56 sc]
Round 5: Ch 1, 1 sc in same st, 1 sc in next 4 sts, sc2tog, 1 sc in next 5 sts, sc2tog repeat to end, sl st to join. [48 sc]
Rounds 6–9: Ch 1, 1 sc in same st, 1 sc in each st around, sl st to join. [48 sc]
Round 10: Ch 1, 1 sc in same st, 1 sc in next 3 sts, sc2tog, 1 sc in next 4 sts, sc2tog repeat to end, sl st to join. [40 sc]
Rounds 11–14: Ch 1, 1 sc in same st, 1 sc in each st around, sl st to join. [40 sc]
Round 15: Ch 1, 1 sc in same st, 1 sc in next 2 sts, sc2tog, 1 sc in next 3 sts, sc2tog repeat to end, sl st to join. [32 sc]
Rounds 16–19: Ch 1, 1 sc in same st, 1 sc in each st around, sl st to join. [32 sc]
Round 20: Ch 1, 1 sc in same st, 1 sc in next st, sc2tog, 1 sc in next 2 sts, sc2tog repeat to end, sl st to join. [24 sc]
Rounds 21–24: Ch 1, 1 sc in same st, 1 sc in each st around, sl st to join. [24 sc]
Round 25: Ch 1, 1 sc in same st, sc2tog, 1 sc in next st, sc2tog repeat to end, sl st to join. [16 sc]
Rounds 26–29: Ch 1, 1 sc in same st, 1 sc in each st around, sl st to join. [16 sc]
Round 30: Ch 1, sc2tog, sc2tog repeat to end, sl st to join. [8 sc]
Rounds 31–34: Ch 1, 1 sc in same st, 1 sc in each st around, sl st to join. [8 sc] Fasten off and sew remaining hole closed. Hide tails inside.
Flower
A small five-petal flower worked in P that gets sewn to the dress. It’s quick and the petal shaping happens all in Round 2.
Round 1: In P, ch 4, sl st in first ch to form a loop, ch 1, 5 sc in center, sl st in first sc to join. [5 sc]
Round 2: Starting in same st as previous sl st, ch 3, [1 hdc, 1 dc, 1 hdc] in next st, ch 3, sl st in same st, sl st in next st repeat until you have 5 petals. Fasten off. Sew button on top if desired. Sew flower to dress. Each petal is formed by the ch-3 arch, the three stitches into the next sc, and the closing ch-3 and sl st — work through the repeat until all 5 petals are complete.
Assembly
With all the pieces made, here’s how I put the doll together. The arms get sewn to the body first — I hide the tails inside the dress before stuffing the body fully, so do that before closing anything off. The legs attach to the base: sew each foot to the flat base circle, then sew or crochet the base to the skipped back loops of Round 49 on the dress, matching the 48-stitch count all the way around. That join closes the bottom of the doll completely. The flower goes onto the dress wherever it looks right to you, with an optional button sewn on top. The hat sits on the head and can have ribbon flowers or lace trim added before or after placing it. I usually position everything loosely first, then sew once I’m happy with the arrangement.
Tips
- If you’re working the striped legs, it’s worth keeping your green and white lengths nearby rather than cutting and rejoining each time, since the bands repeat and carrying the yarn loosely up the inside of the leg is less fuss than weaving in a dozen extra ends.
- Pin the eye placement before committing — it’s much easier to adjust now than after the yarn is sewn through.
- Stuffing in stages like this makes it much easier to get an even shape without fighting the piece.
- The felting needle works better because it tangles the fibers into the crochet fabric as you poke. Keep working at it until it feels secure and isn’t lifting at the edges.
FAQs
When do I stuff the doll, and does it matter?
Stuff the head in Round 25 before starting the dress. Stuff the body as you work the dress rounds, but ensure it is fully stuffed and shaped before you reach Round 49, as the base will be attached to the back loops of that round, closing the bottom.
What’s the purpose of working Round 49 in front loops only?
Working Round 49 in FLO leaves the back loops free. These skipped loops are used later to attach the flat base, which allows the doll to stand on its own without tipping.
How do the knotted yarn eyes work exactly?
Take a long length of black yarn. Tie 2–3 knots on top of each other in the center. Sew each end onto the face, catching the knots for one eye, then bring both ends out for the second eye and tie 2–3 more knots. Hide tails inside.
What does Round 26 actually do, and why does it look different from the other rounds?
Round 26 creates the decorative collar using a mix of slip stitches and taller stitches (hdc, dc) worked in FLO. This technique creates a distinct neckline detail and leaves the back loops open for Round 27 to continue the body seamlessly.
Do I have to use the optional lace trim and ribbon roses?
No, they are purely decorative. However, the lace trim adds a delicate, finished look to the hem or collar, and the ribbon roses can be sewn onto the hat or dress for extra embellishment.
How do I attach the blushies so they actually stay on?
Fluff a small length of pink yarn. Using a standard or felting needle, stab the fluffed yarn into each cheek until attached. A felting needle helps tangle the fibers into the fabric for a secure hold.
Final Thoughts
This Flower Pixie Doll is a charming project that balances simplicity with delightful details. From the striped legs to the pointed hat, every stitch contributes to a figure that feels like a storybook character come to life. It is a perfect addition to any amigurumi collection, and a wonderful gift for a child or a collector. For more beginner-friendly amigurumi inspiration, you might also enjoy our O Lenya Amigurumi Deer or our Adorable Crochet Pumpkin Trio.
Pin This Crochet Pattern!