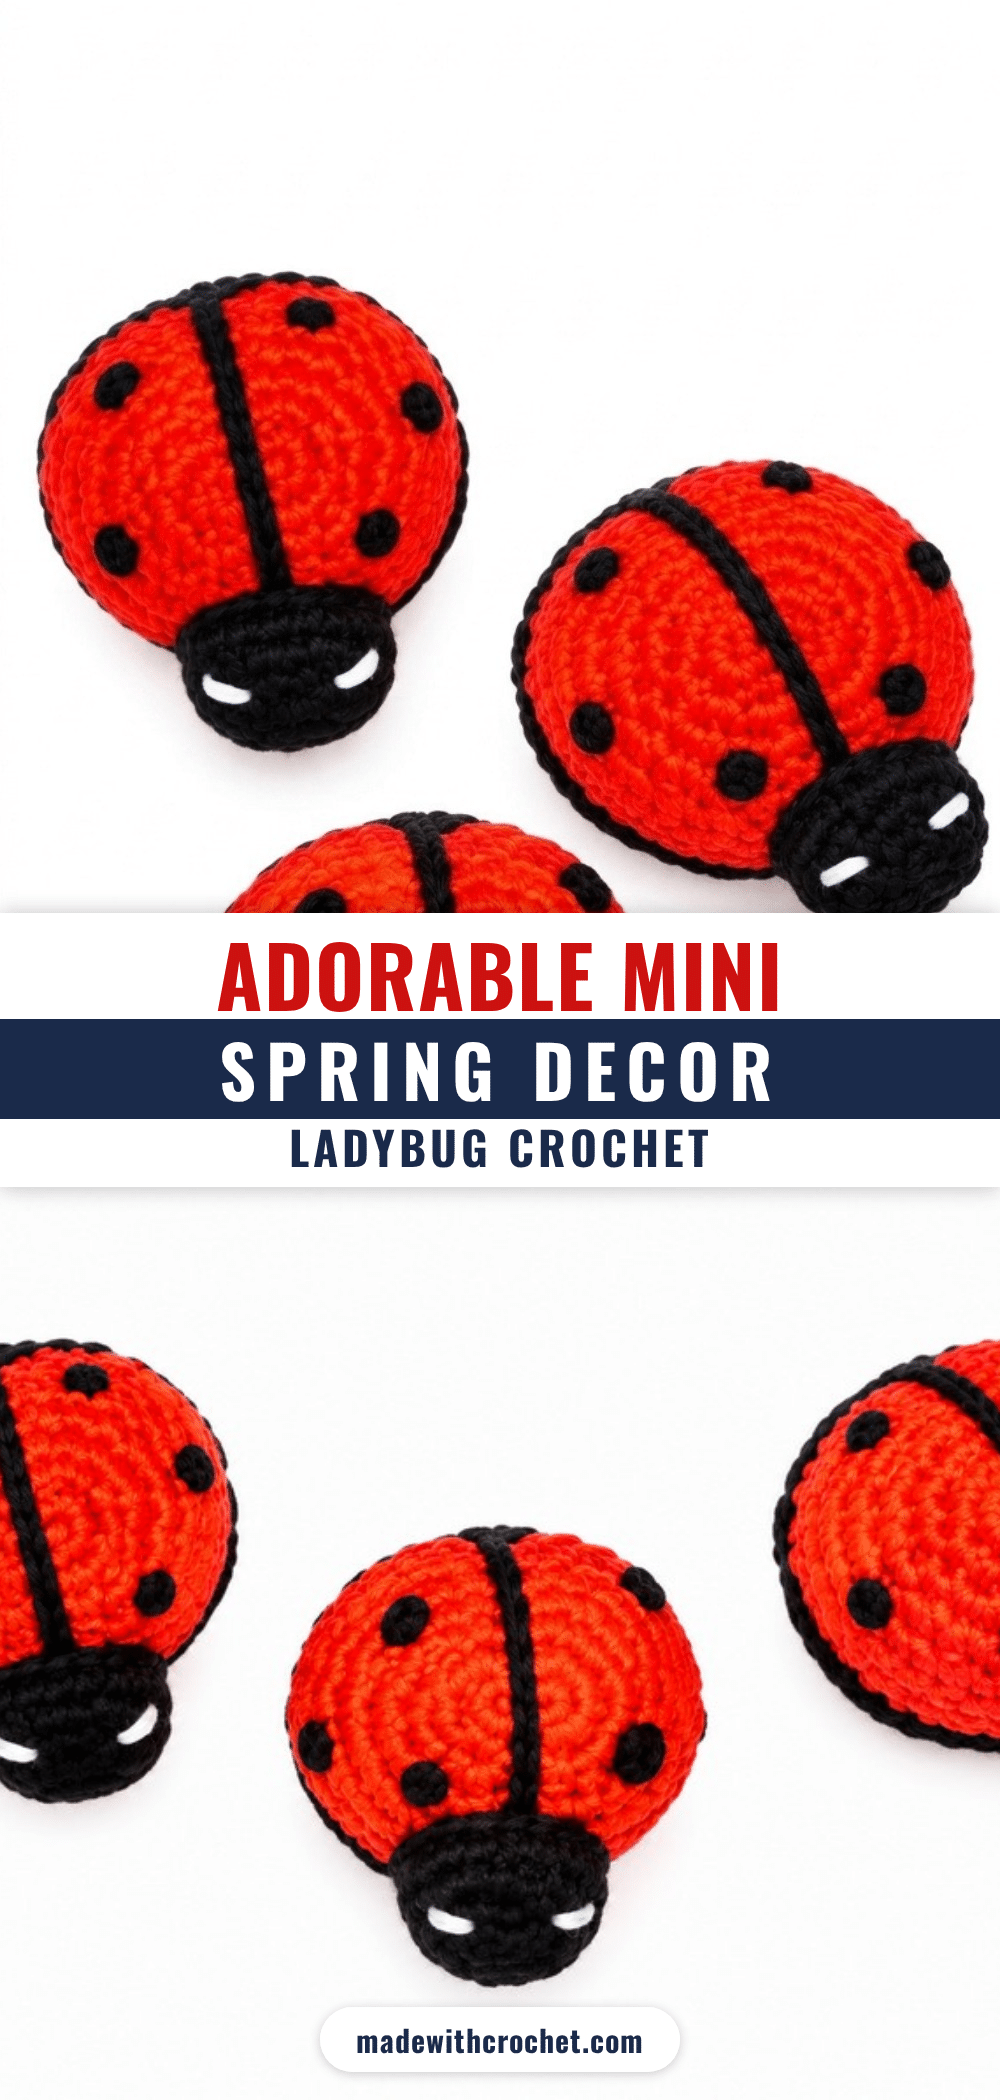
It is incredibly common to worry that your magic ring will be too loose or that your tension is inconsistent when starting a new amigurumi project. You might find yourself pulling the tail until your fingers ache, fearing that one tiny gap will ruin the entire shape. Rest assured, this approachable Mini Crochet Ladybug pattern is designed to forgive those early jitters. With its small scale and forgiving structure, even if your first round isn’t perfect, the final result remains a charming, tidy insect that is perfect for spring decor. This project focuses on building confidence through manageable steps rather than complex techniques.
Maker Notes
There is something undeniably cheerful about bringing a tiny garden friend to life with yarn. This miniature ladybug is designed to be a quick, satisfying project that rewards you with a bright pop of color. The red yarn stays vibrant over time, creating a striking contrast against the black spots and head. Because of its petite size, it is not just a shelf ornament; it makes for a delightful keychain, a desk companion, or a thoughtful little gift. Working on this pattern helps improve hand coordination and patience, resulting in a sturdy, neat figure that feels almost alive thanks to the careful attention to detail in its assembly and embroidery.
Project Overview
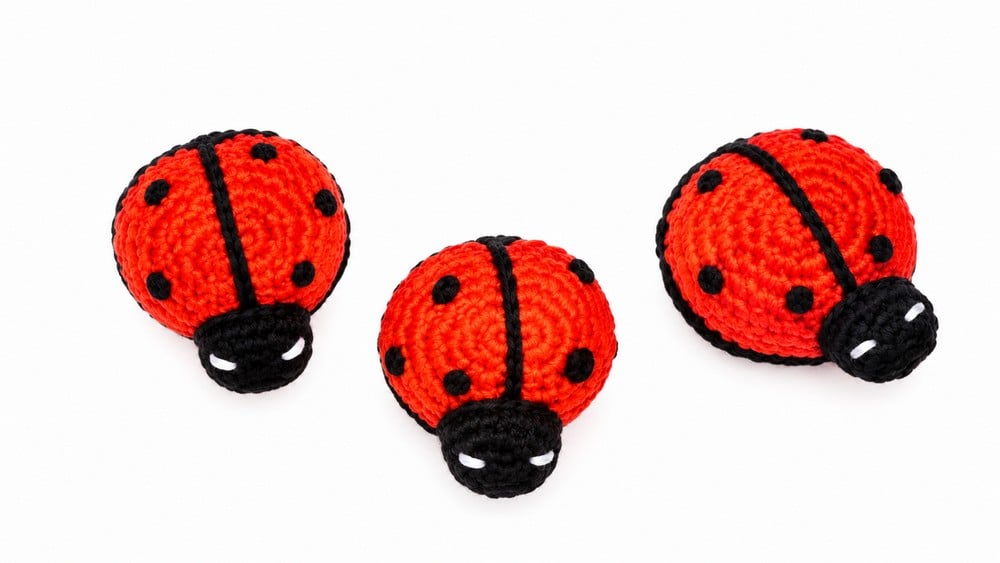
This finely detailed miniature ladybug amigurumi pattern uses progressive rounds, tidy joining, and decorative embroidery to replicate nature’s favorite garden insect. Each segment is designed for structural balance and a playful sense of proportion, while thoughtful touches like the center seam and Rococo spots add lifelike dimension. The project encourages practice with seamless joining, miniature shaping, and surface embellishment, resulting in a tiny collectible with broad appeal. It blends foundational shaping techniques with creative embroidery to create a lifelike, charming ornament or accessory.
Pattern at a Glance
The pattern is worked in four concise, sequential sections:
- Red Body (Top Shell): Increases and plain rounds form a smooth upper dome.
- Black Base: Replicates the red shell base for a snug, layered finish.
- Head: Built using chain foundations and progressive rounds for an oval-shaped front.
- Assembly and Finishing: Strategic joining, stuffing, sewing, and embroidery enhance realism and structure.
Each phase is crafted to promote structural evenness, minimal seam lines, and ample opportunity for expressive finishing touches. If you enjoy making small, character-driven figures, you might also appreciate the detailed features found in our adorable festive crochet amigurumi trio pattern.
Difficulty Level
This project is aimed at ambitious beginners and up. It presumes command of standard amigurumi methods: magic rings, increases, invisible joins, basic embroidery, and surface closure techniques.
Supplies Needed
- Yarn: DK or light worsted in red (body), black (base and head), and white (embroidery).
- Crochet hook: 2.5–3.0 mm, sized to yarn for tight, gap-free stitches.
- Stuffing: Fiberfill stuffing.
- Tools: Yarn needle and embroidery needle, scissors.
Size & Measurements
- Finished length: 2–2.5 inches (5–6.5 cm)
- Width: 1.5–2 inches (4–5 cm)
The size adapts easily by changing yarn weight and hook size.
Gauge & Stitch Details
Gauge is uncritical but stitches must be dense for well-shaped miniatures. Four rounds of single crochet work should yield a disc approximately 1 inch (2.5 cm) in diameter with DK yarn.
Crochet Abbreviations
- MR: Magic Ring
- SC: Single Crochet
- INC: Increase (2 SC in the same stitch)
- CH: Chain
- SLST: Slip Stitch
Special Stitch Guide
- Magic Ring (MR): Form a circle, hold the working yarn behind, insert hook and pull yarn through center, crochet required stitches into loop, and pull tail to close.
- Increase (INC): Work 2 SC into a single stitch.
- Rococo Embroidered Spot: Wrap thread four times around the needle before pulling through the fabric for a raised knot-like effect.
Important Notes
- Start each segment with a taut magic ring for clean shaping.
- When joining two pieces with single crochet, match stitch counts and maintain consistent tension for a seamless, flush border.
- Use lightweight stuffing; excessive fill may distort the petite size and plush appearance.
- All embroidery should be performed with a sharp yarn or tapestry needle and moderate thread tension, preventing puckering.
- Fasten and weave in ends discreetly.
Complete Crochet Pattern
1. The Red Body (Top Shell)
Increases and plain rounds form a smooth upper dome.
- Round 1: Start with a magic ring; 6 SC into the ring. (6 stitches)
- Round 2: 6 INC (work 2 SC in each stitch) – 12 SC total
- Round 3: ( 1 SC, 1 INC ) repeat 6 times – 18 SC
- Round 4: ( 2 SC, 1 INC ) repeat 6 times – 24 SC
- Round 5: ( 3 SC, 1 INC ) repeat 6 times – 30 SC
- Rounds 6–9: 1 SC in each stitch around for 4 rounds – 30 SC per round
2. The Black Base
Replicates the red shell base for a snug, layered finish. Work as for the red shell, but stop at Round 5.
- Round 1: MR, 6 SC
- Round 2: 6 INC – 12 SC
- Round 3: (1 SC, 1 INC) x 6 – 18 SC
- Round 4: (2 SC, 1 INC) x 6 – 24 SC
- Round 5: (3 SC, 1 INC) x 6 – 30 SC
End with a slip stitch and leave a long tail for joining.
3. The Head
Built using chain foundations and progressive rounds for an oval-shaped front.
- Base: CH 4
- Round 1: Begin in the second chain from hook: 1 SC in second chain, 3 SC in next (last) chain, Rotate to work other side of the chain: 1 SC , 1 INC in final stitch on underside (total: 7 stitches)
- Round 2: 1 INC in next stitch, 2 SC , 2 INC (next two stitches), 2 SC , 1 INC (total: 12 SC)
- Round 3: 1 SC in each stitch around – 12 SC
Assembly & Finished Size
Strategic joining, stuffing, sewing, and embroidery enhance realism and structure.
Closing the Body
Place the red shell and black base together, wrong sides touching and stitches aligned. With red yarn (or black for an accent border), insert hook through both layers. Make 1 SC in each pair of stitches around (30 SC total), sandwiching the two discs. Leave a small gap and insert stuffing to lightly fill the shell; close gap with remaining SC.
Attach the Head
Position the head at the start of the joined shell seam, centering along the body edge. With a yarn needle, sew the head securely to the closed body’s edge. Lightly stuff before completing final stitches for firmness and volume.
Details and Embroidery
With a yarn needle and embroidery needle, add the following details:
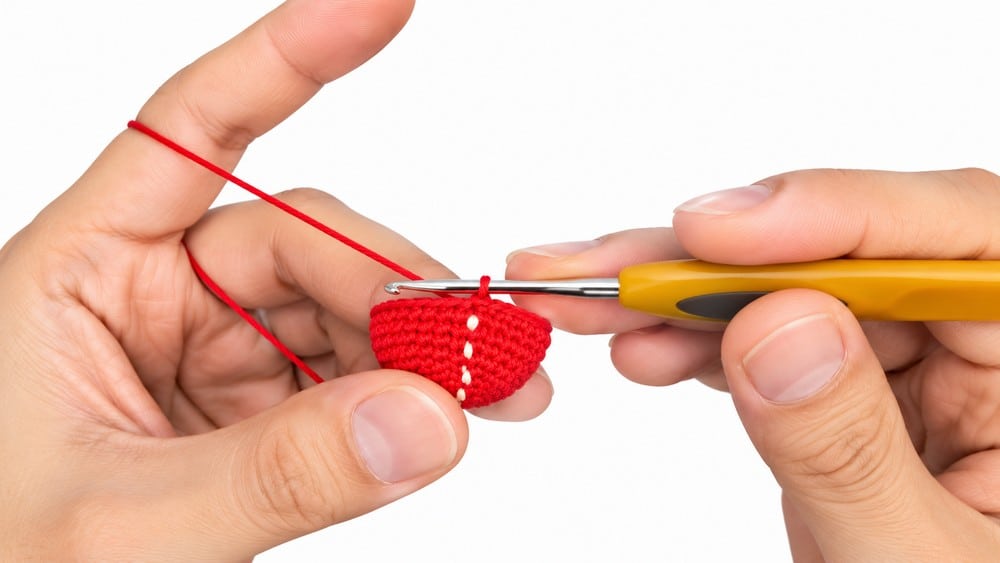
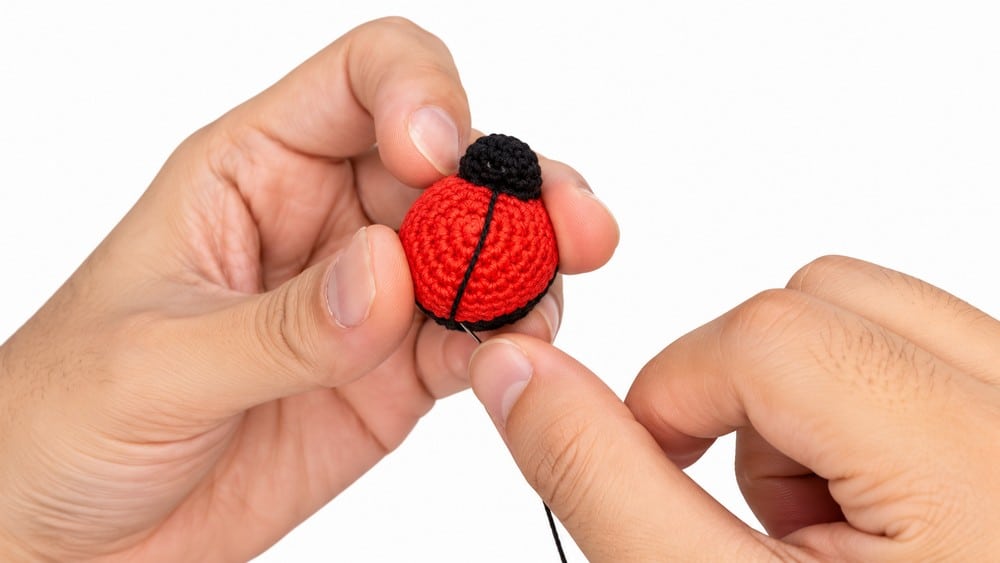
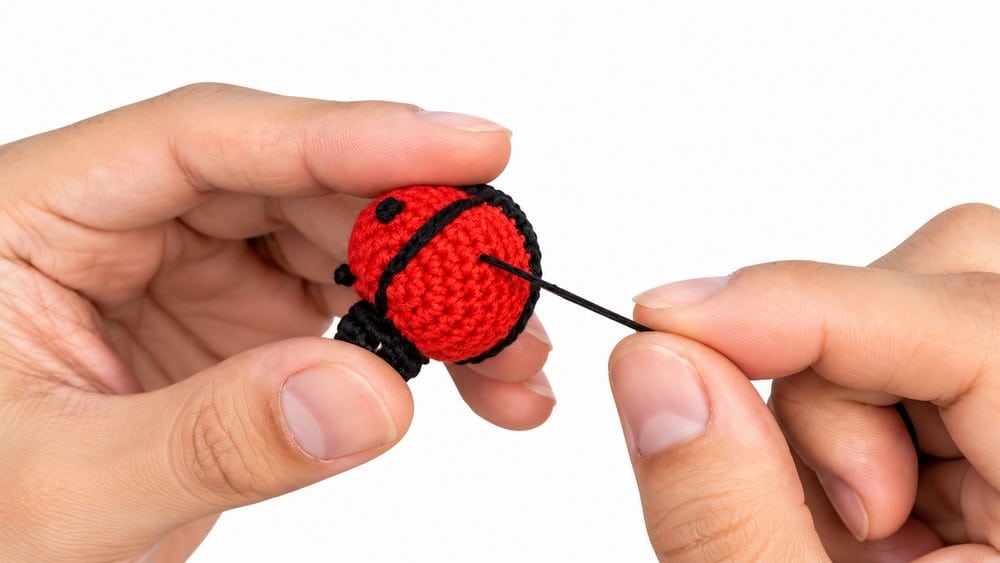
- Back Line: With leftover head-thread or black yarn, insert needle at head’s center and pass through to back end, stitching a straight dividing line over the shell.
- Spots: Using black yarn or embroidery floss and the Rococo stitch, place 2–3 spots on each half-shell: Insert the needle from underside, wrap thread 4 times around the needle, and pull through to create a neat raised knot. Space evenly for realism.
- Eyes: With fine white thread and embroidery needle, make 1–2 small stitches on the head surface to form tiny eyes.
Tips
This project is aimed at ambitious beginners and up. It presumes command of standard amigurumi methods: magic rings, increases, invisible joins, basic embroidery, and surface closure techniques. If you are looking for another quick project to build your skills, consider trying the cute Hello Kitty bow keychain pattern.
FAQs
What type of yarn is best for this pattern?
The pattern recommends DK or light worsted weight yarn. This weight allows for tight, gap-free stitches when used with a 2.5–3.0 mm hook, which is essential for keeping the stuffing inside this small amigurumi.
How do I make the black spots on the shell?
Use the Rococo stitch. Insert your embroidery needle from the underside of the red shell, wrap black yarn or floss 4 times around the needle, and pull through to create a neat, raised knot. Place 2–3 spots on each half of the shell.
Can I use this pattern for a keychain?
Yes. The finished size is small (2–2.5 inches), making it perfect for a keychain, bag charm, or desk ornament. You can attach a keyring to the top of the head or the back seam during assembly.
Do I need to stuff the ladybug tightly?
No. The notes advise using lightweight stuffing. Excessive fill may distort the petite size and plush appearance of the miniature. Lightly fill the shell and head to maintain the correct shape.
How do I join the red shell and black base?
Place the pieces together with wrong sides touching and stitches aligned. Insert your hook through both layers and make 1 SC in each pair of stitches around. This sandwiches the two discs together and creates a clean border.
Pin This Crochet Pattern!