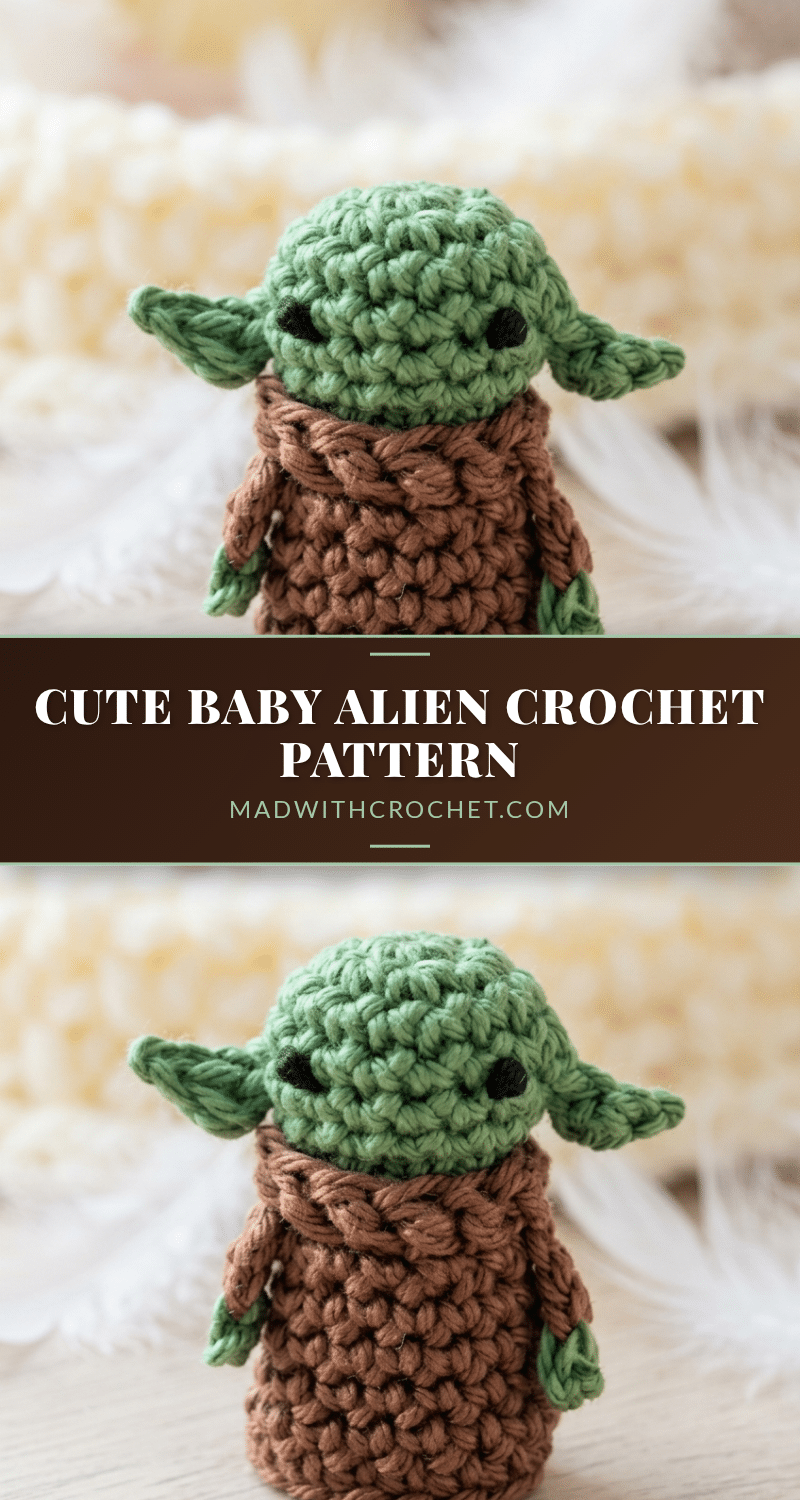
Hold this tiny, four-inch-tall sci-fi friend in your hands and you will immediately understand why amigurumi is such a beloved craft. It is undeniably cute, delightfully squishy, and tidy enough to sit on a desk without taking up much space. This Baby Alien Crochet Pattern creates a character that is as giftable as it is display-worthy, offering a satisfyingly quick project that results in a charming companion for any shelf.
Why the Finished Piece Stands Out
What makes this little alien truly special is the thoughtful construction that keeps the project from feeling repetitive. Instead of a simple blob, the design incorporates a separate robe and collar that slip over the body, creating a layered look that feels intentional and polished. The ears are integrated directly into the head during the crocheting process, eliminating the need for sewing them on later and giving the character a seamless, professional finish. It is a project that offers a bit of technique value through its assembly, making it a perfect stepping stone for crocheters looking to expand their skills while creating something with serious personality.
Project Overview
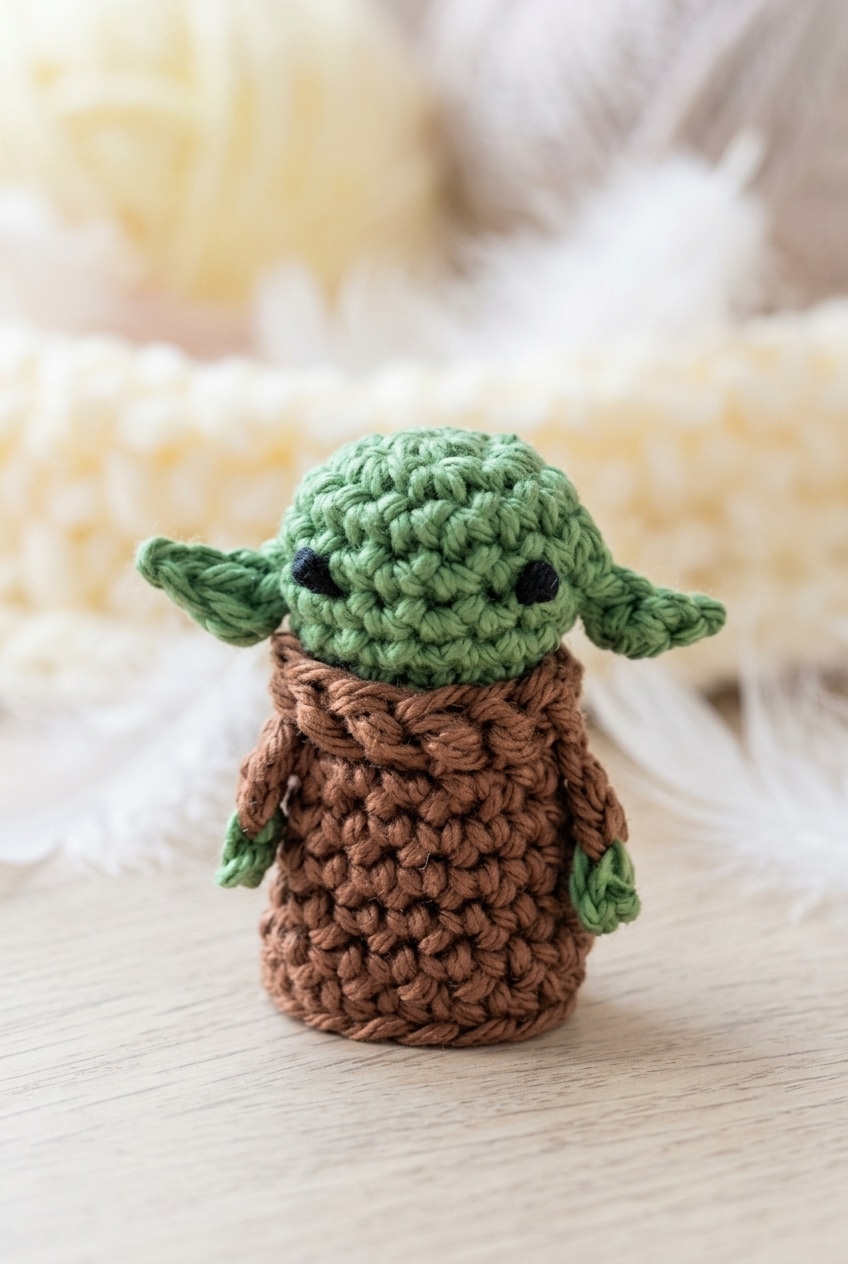
This is a beginner-friendly amigurumi project rated as easy, making it an excellent choice for anyone who is fairly new to crocheting in the round but comfortable with basic stitches. It is a quick project that can realistically be completed in a single sitting or a couple of short sessions. The finished size is approximately 4 inches (10 cm) tall, making it a perfect desk companion or a unique gift for sci-fi fans.
Materials
- Yarn: Sport Weight Yarn (Weight 2 Fine) in Green, Brown, and Black. Sport weight provides good stitch definition at a tight gauge, ensuring the piece holds its shape without looking lumpy. You will need approximately 50 to 100 yards total across all colors, with green used for the head and body, brown for the coat and arms, and black for the eyes.
- Crochet Hook: 3.00 mm hook. This size paired with sport weight yarn creates a firm, dense fabric that prevents stuffing from showing through.
- Stuffing: Polyfil stuffing. Have this within reach to stuff as you work.
- Notions: Yarn needle and scissors.
Gauge and Finished Size
Finished Size: Approx. 4 in (10 cm) tall.
Gauge: Gauge is not critical for this project. However, it is important to use a hook size that creates a tight, firm fabric so the stuffing does not show through. If you can see daylight through your fabric, go down a hook size.
Abbreviations
US Terms
- ch: chain
- st(s): stitch(es)
- sl st: slip stitch
- sc: single crochet
- dc: double crochet
- sc2tog: single crochet 2 stitches together (decrease)
- fpdc: front post double crochet (yo, insert hook from front to back to front around post of indicated stitch, yo, pull up loop, yo, pull through 2 loops, yo, pull through 2 loops)
Pattern Notes
- Starting Stitches: Always start your first stitch in the same stitch as your previous slip stitch. It is easy to skip past it by habit, so watch for this closely.
- Stuffing: With small amigurumi, it is easier to stuff as you work rather than trying to push filling in at the end once the opening is almost closed.
- Safety: The eyes are made with knotted black yarn rather than plastic safety eyes, which is a safer choice for young children. Always check the knots before handing the toy over; give the eye knots a firm tug to ensure they are secure.
Pattern Instructions
Head & Body
This section builds the entire head and body as one continuous tube. The ears are worked right into Round 4, so you do not need to attach them separately later.
Round 1: In green yarn, 7 sc into a magic ring or ch 4 and join into a ring, sl st in first sc to join. [7 sc] Ch 1 (does not count as a st here or throughout)
Round 2: 2 sc in each st around, sl st in first sc to join. [14 sc] Ch 1
Round 3: 1 sc in each st around, sl st in first sc to join. [14 sc] Ch 1
Round 4: 1 sc in first 5 sts, ch 4, sl st in 2nd ch from hook, 1 dc in next ch, sl st in last ch (ear made), 1 sc in next 8 sts on main body, ch 4, sl st in 2nd ch from hook, 1 dc in next ch, sl st in last ch (ear made), 1 sc in next st on main body, sl st in first sc to join. [14 sc (not incl. ears)] Ch 1 — the ears are worked off the main chain and don’t count toward your stitch total, so keep tracking only the 14 body stitches.
Round 5: 1 sc in first 5 sts, skip ear, 1 sc in next 8 sts, skip ear, 1 sc in last st, sl st in first sc to join. [14 sc] Ch 1 — skipping the ears here brings you back to working cleanly around the body only.
Round 6: 1 sc in each st around, sl st in first sc to join. [14 sc] Ch 1
Round 7: sc2tog until end, sl st in first sc to join. [7 sc] Ch 1 — this is a good point to add any stuffing to the head before the opening gets too small.
Rounds 8–13: 1 sc in each st around, sl st in first sc to join. [7 sc] Ch 1 — these six rounds form the body tube. Keep your tension consistent through all of them.
The Coat
The coat is worked as a separate tube in brown yarn that slips over the body. It starts with a foundation chain joined into a ring, then works straight before shaping and finishing with a decorative stitch round at the hem.
Round 1: In brown yarn, ch 14, sl st in first ch to form a large loop. [14 ch] Ch 1
Rounds 2–6: 1 sc in each st around, sl st in first sc to join. [14 sc] Ch 1 — work these five rounds straight with no shaping.
Round 7: 1 sc in next 2 sts, sc2tog repeat from * to * until last 2 sts, 1 sc in last 2 sts, sl st in first sc to join. [11 sc] Ch 1
Round 8: 1 fpdc around each previous sc to end, sl st in first dc to join. [11 dc] — front post double crochet worked around the post of each stitch creates a ribbed hem effect. Insert your hook from front to back to front around the post of the stitch below, not through the top loops.
Round 9 (Beginners Alternative): 1 dc in each st around, sl st in first dc to join. [11 dc] — if front post stitches are new to you, this straightforward dc round gives a clean finish without the post work.
Arms
Make 2. The arms are tiny and quick — just a few foundation stitches with a color change for the hands.
Step 1: In brown yarn, ch 2 sc foundation sts, join green yarn and crochet 1 more sc foundation st, fasten off, knot ends together, and sew onto body. — the color change on the last foundation stitch creates the green hand at the end of the brown arm.
Step 2 (Beginners Alternative): In brown yarn, ch 3, 1 sc in 2nd ch from hook and in next ch, fasten off, sew on a small hand with green yarn using knots.
Assembly
- Eyes: Use black yarn to make eyes using knots. Placement is up to you, but placing them just below the ears and spaced a few stitches apart works well. Fasten off and weave in ends.
- Coat: Slide the coat tube over the body so the hem sits near the bottom of the body section.
- Arms: Sew the arms onto either side of the body. Position them somewhere around rounds 8 and 9, roughly where the body narrows, though you can shift them up or down depending on your preference. Use the yarn tails from the arms to sew them in place.
- Finishing: Weave everything in securely once you are happy with the positioning.
Tips
Because this little alien is stuffed, the main thing to watch is keeping the stuffing from clumping. Hand wash in cool water and squeeze gently rather than wringing, then reshape the body while it is still damp so the stuffing sits evenly inside. Lay it flat to dry. The tiny size means it dries pretty fast, but do not rush it with a dryer or the stuffing can bunch up and the shape goes a bit lumpy. For more easy amigurumi ideas, check out our adorable chick and owl amigurumi or our baby shark amigurumi patterns.
FAQs
How are the ears made? Are they crocheted separately and sewn on?
No, the ears are worked directly into Round 4 of the head. You chain 4, slip stitch and dc back along the chain to form the ear shape, then continue crocheting around the body as normal. Round 5 skips past each ear so you are back on track with the main stitch count.
What’s the front post double crochet in the coat for, and do I have to use it?
Round 8 of the coat uses front post double crochet to create a ribbed or textured edge at the top. If you are not comfortable with post stitches yet, the pattern gives you a straightforward alternative: just work a regular dc in each stitch around instead. The finished look is slightly different but the coat still fits and sits well on the body.
When do I stuff the head and body?
Stuff before you close the body section. The head and body are worked in one continuous piece, and the stitch count drops down to 7 from Round 7 onward. Start adding stuffing after Round 7 while the opening is still workable, then add a little more as you go through Rounds 8 to 13 before fastening off and closing up.
How are the arms made? The sc foundation stitch is a bit unfamiliar to me.
The arms use a foundation single crochet method, which creates the base chain and the stitch in one step. If that is new to you, the pattern includes a beginner alternative: chain 3, then sc in the 2nd and 3rd chains from the hook. You get the same two-stitch arm either way. The green hand detail is added with a small knot of green yarn at the end.
The coat is started with a chain loop rather than a magic ring. Why does it work that way?
The coat is essentially a small tube that slides over the body, so it starts with a chain of 14 joined into a loop rather than working from a central point. From there you just work in rounds like any other section. It is a neat construction because the coat stays separate from the body and gives that layered look without any complicated shaping.
Pin This Crochet Pattern!