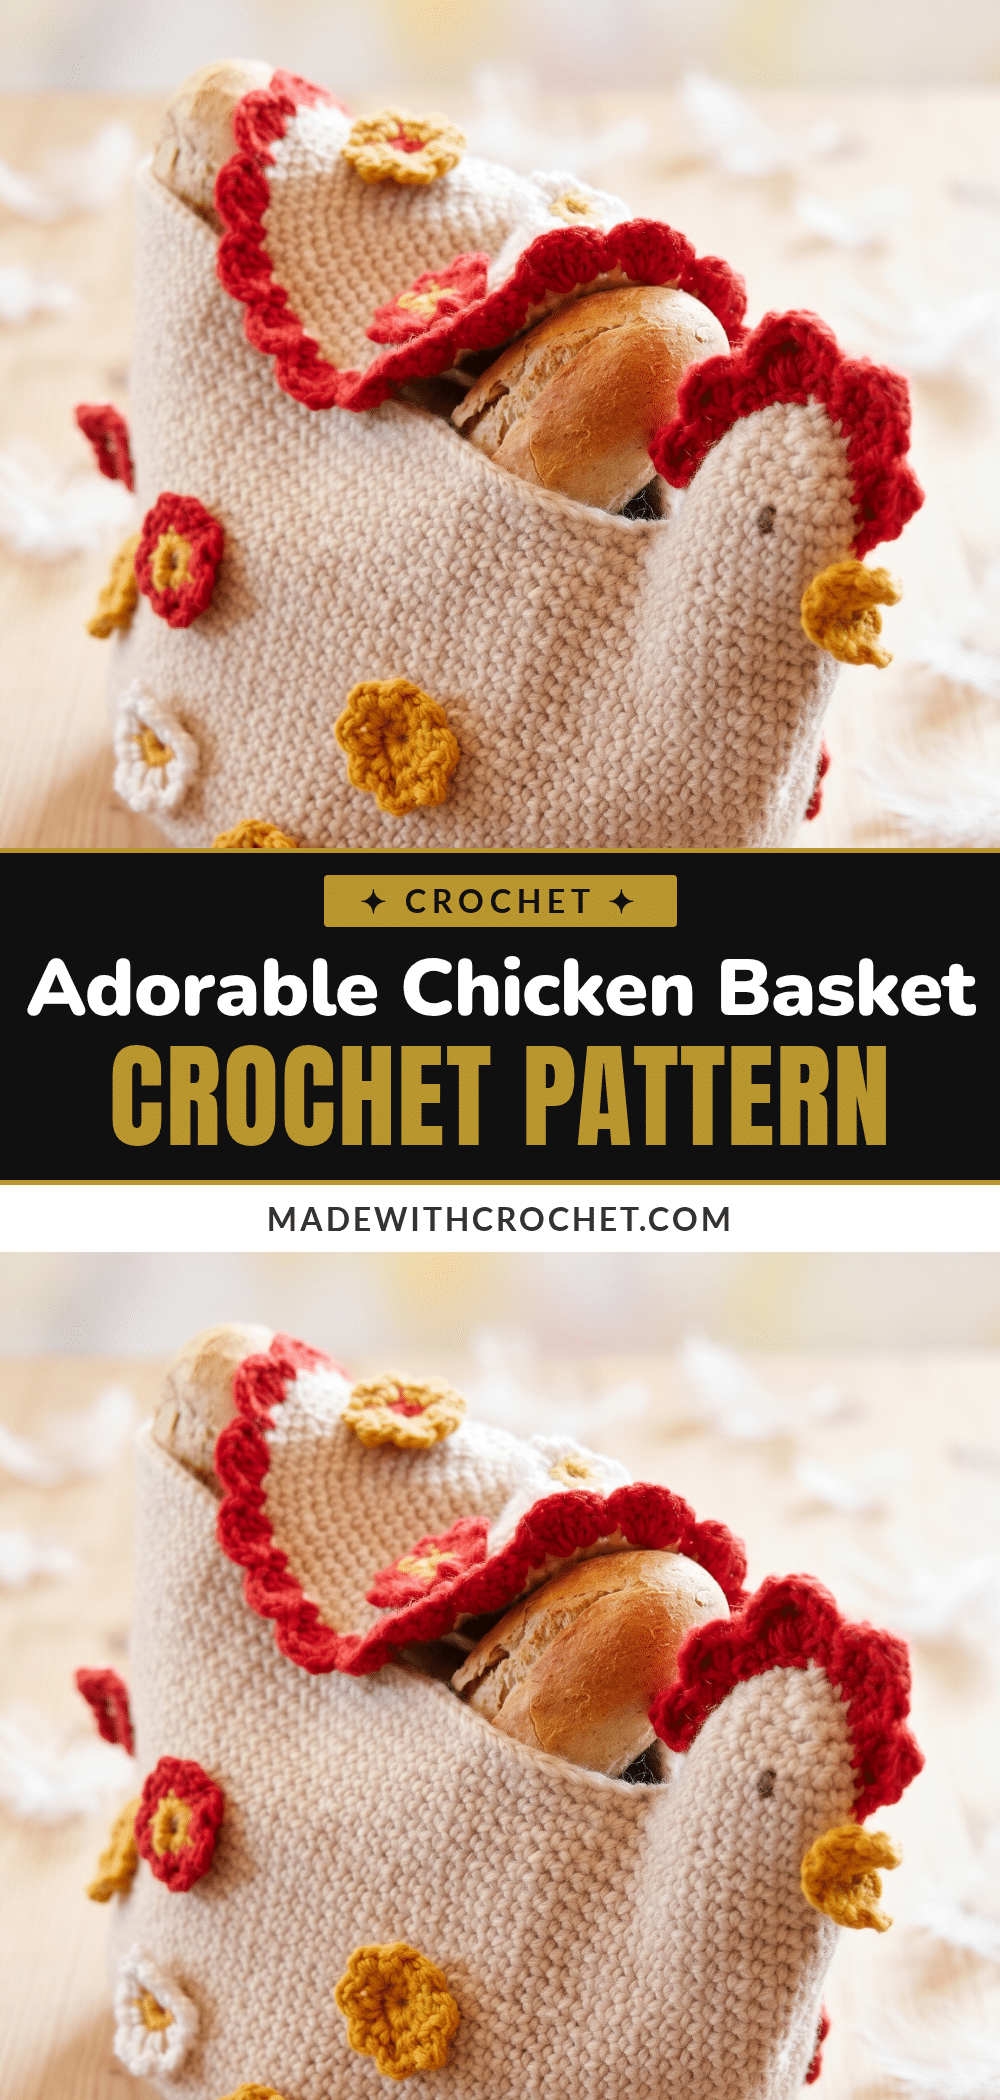
There is a specific kind of magic that happens when the house is quiet, the evening light is dimming, and you have a small batch of yarn ready to go. It is the ritual of counting stitches, feeling the rhythm of the hook, and letting a simple repeat carry you into a state of flow. This Chicken Basket Crochet Pattern is the perfect companion for those quiet evenings. It is an intermediate-level project that balances whimsy with utility, inviting you to slow down and build something charming that will eventually sit proudly on your kitchen counter or Easter table.
Small Details That Make It Better
What makes this project truly special is that it is not merely decorative; it is a functional container. The basket opening is built directly into the design, allowing you to store small treats, knitting supplies, or springtime keepsakes. The construction involves working several separate pieces—basket, head, comb, tail, and wing—that come together to form a cohesive whole. This multi-piece approach offers a satisfying sense of progress, as each component takes shape before the final assembly. The wool-alpaca blend provides just the right amount of structure to hold the basket’s form while remaining soft to the touch, and the addition of the hinged wing lid adds a delightful, interactive detail that elevates the piece from a simple amigurumi to a thoughtful handmade gift.
Project Overview
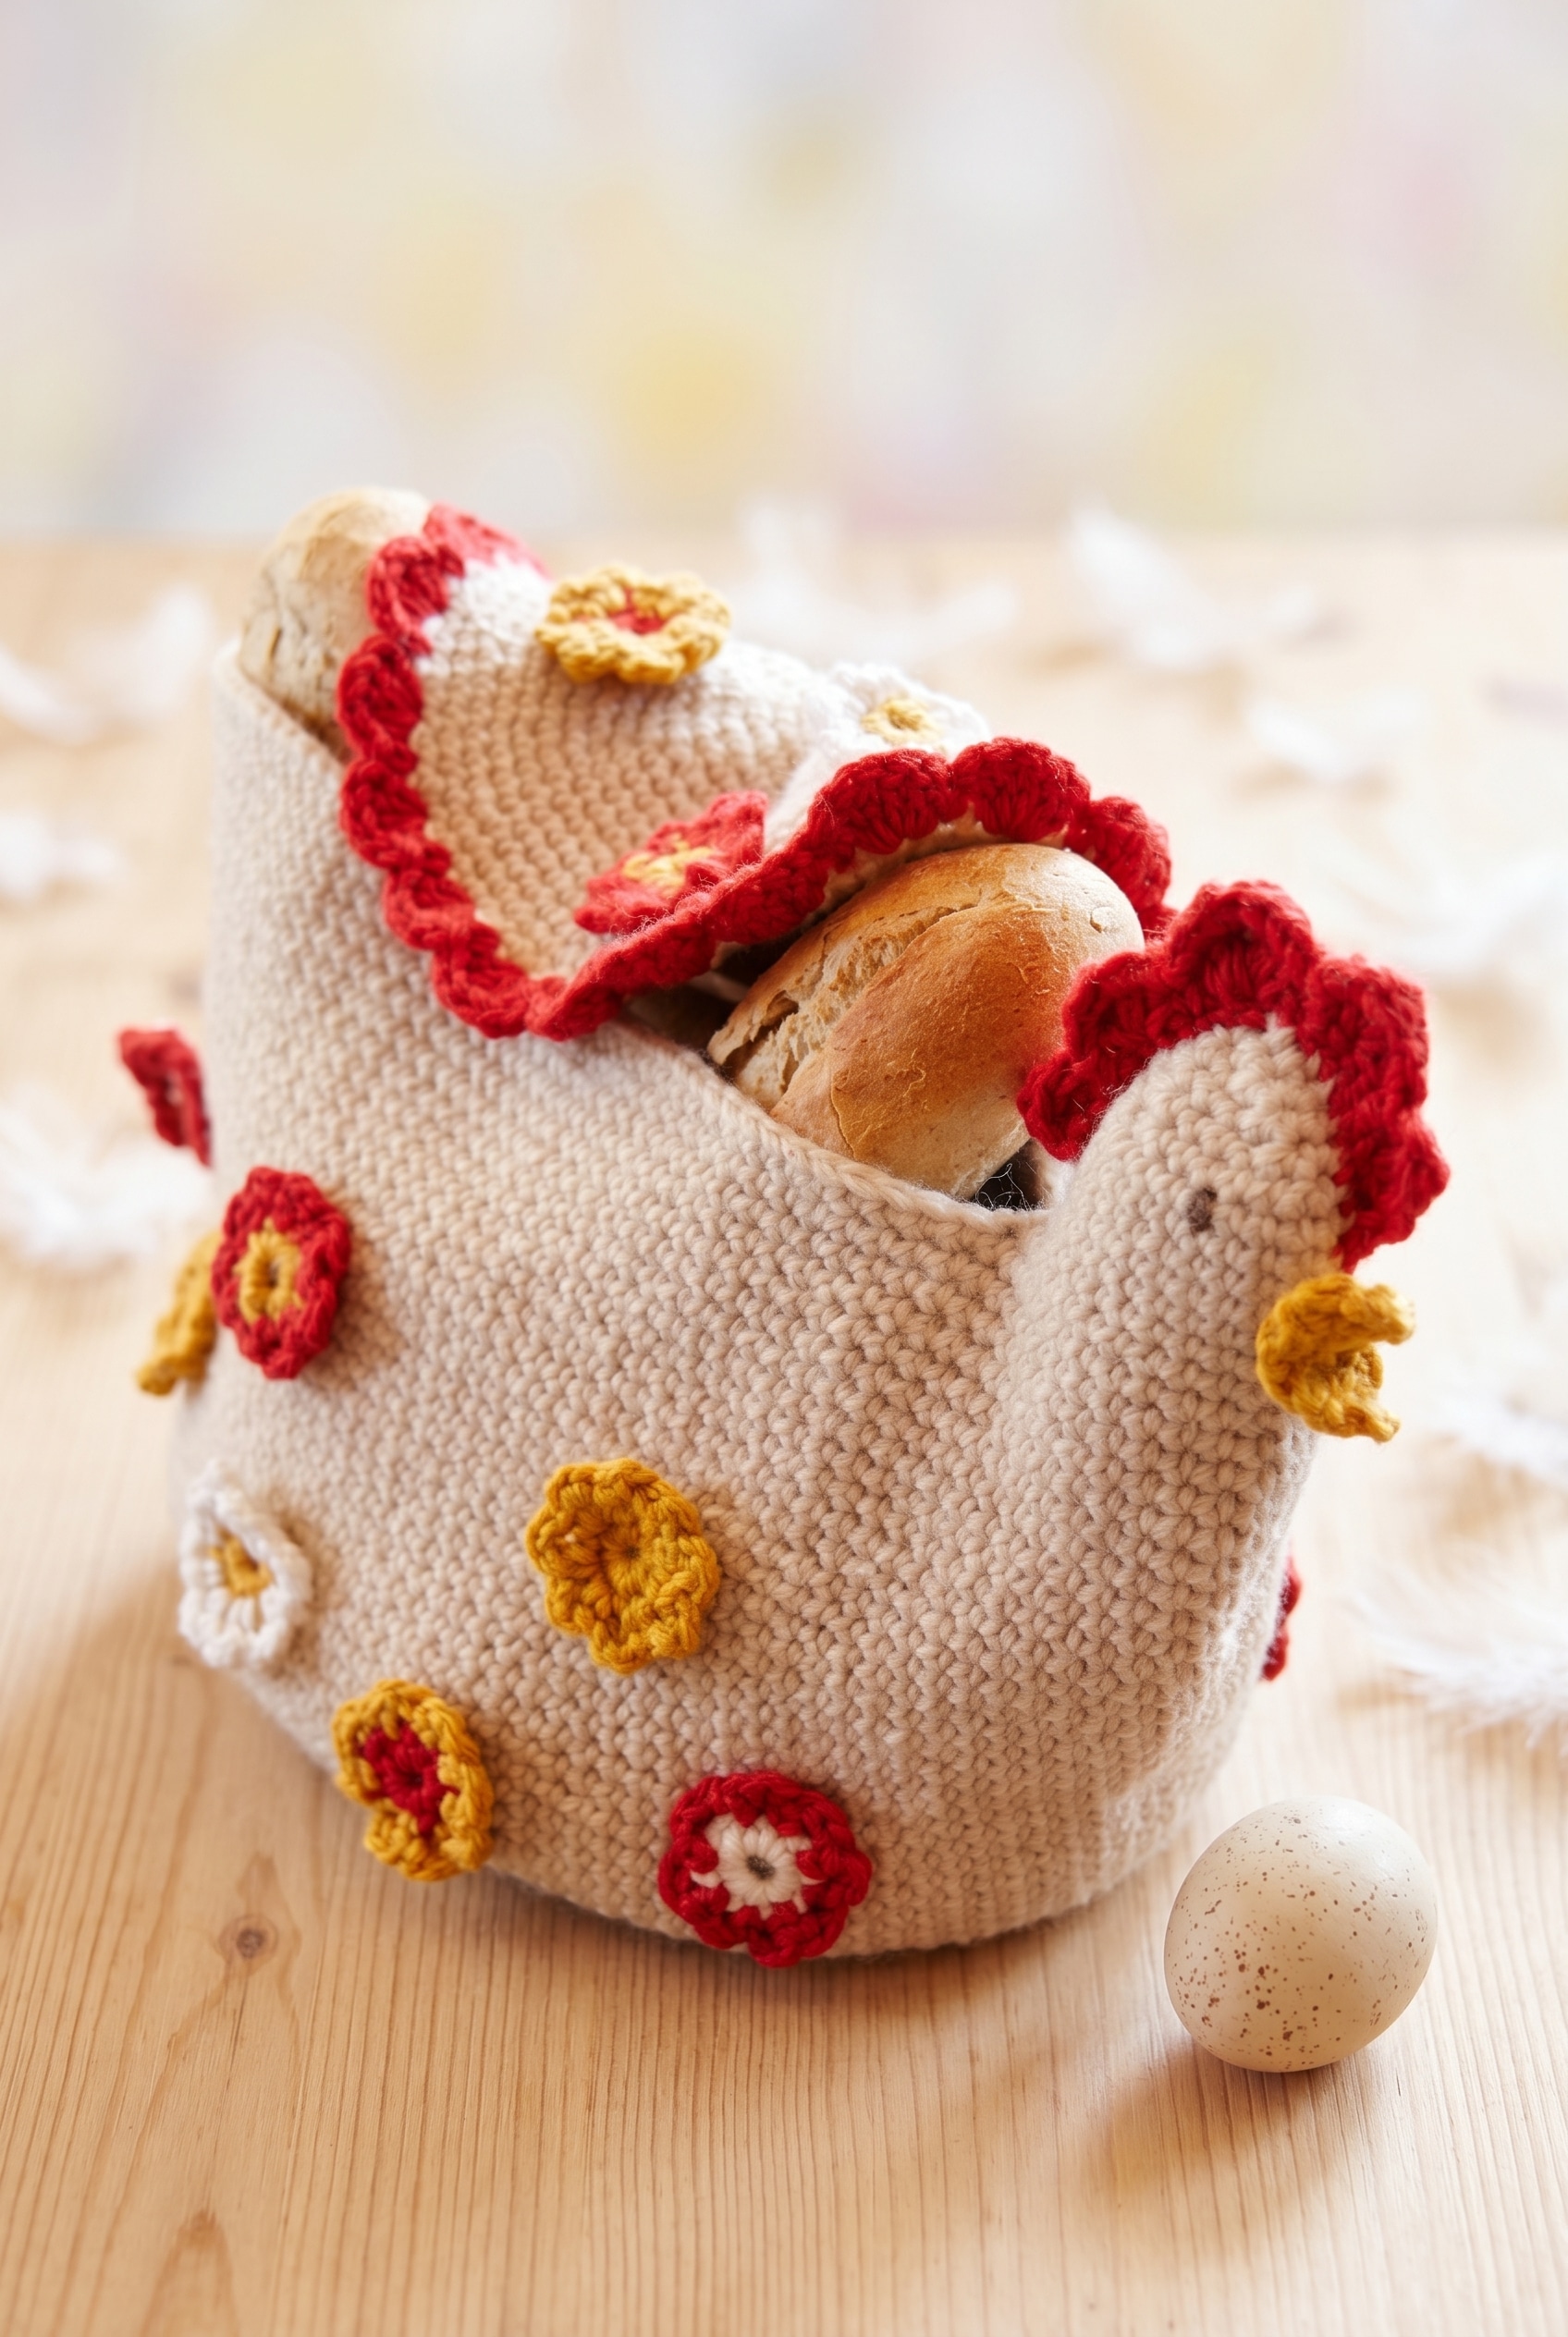
This pattern creates a charming crocheted basket shaped like a chicken. It is designed for crocheters with some basic shaping experience, making it an ideal project for intermediate makers looking to practice multi-piece construction and functional amigurumi design. The finished piece stands approximately 22 cm (8¾”) tall and features a hinged wing that serves as a basket lid.
Materials
- Worsted Weight Wool-Alpaca Blend (65% Wool, 35% Alpaca): This blend is ideal for this project. The wool provides structure to hold the shape of the basket and body, while the alpaca softens the fabric so it is not stiff or scratchy.
- 200 g of light beige for the main body work.
- 50 g of red for the comb, tail, and accent rounds.
- Small amounts (scrap yarn) of goldenrod, medium brown, and white.
- 4 mm / G6 Crochet Hook: This size pairs well with worsted weight yarn and creates a tight fabric to prevent stuffing from showing through.
- Poly stuffing, paper, or similar: Used to fill out the top of the head. A small handful of polyfil works well, but crumpled paper or fabric scraps are also suitable.
- Also needed: Stitch marker, yarn needle.
Gauge and Finished Size
Gauge: Gauge is not critical for this project. Use a hook size that creates a firm, dense fabric suitable for a basket. The reference gauge is 18 sc = width 10 cm / 4″. If your gauge runs loose or tight, adjust your hook size accordingly to ensure the fabric holds its shape.
Finished Size: Approximately 22 cm / 8¾” in height.
Abbreviations
The pattern uses standard US crochet terminology:
- beg = beginning
- ch = chain
- dc = double crochet
- dec = decrease
- inc = increase
- rnd = round
- sc = single crochet
- sl st = slip stitch
- st(s) = stitch(es)
- tog = together
- tr = treble crochet (US)
Pattern Notes
- Continuous Spiral: The basket is worked in the round in a continuous spiral. There is no joining at the end of each round and no turning. Place a stitch marker at the beginning of each round and move it up as you go to avoid losing your place, especially during color changes.
- Fabric Density: The basket requires a firm, dense fabric to hold its shape. If the fabric feels loose, size down your hook.
- Head Construction: The head grows directly out of the basket rim over 24 stitches. There is no joining or separate piece for the head.
Special Stitches
- Magic Circle: Wrap yarn to form an adjustable loop, ch 1, work the required number of sc into the loop, then pull tail to tighten.
- Inc: 2 sc in next sc.
- Dec (sc2tog): Insert hook in next st, yo, pull up a loop; insert hook in next st, yo, pull up a loop; yo, pull through all 3 loops on hook.
Pattern Instructions
Crocheting the Basket
Work in the round with light beige yarn, starting with a magic circle. Do not join rounds.
Round 1: 8 sc in magic circle. [8 sc]
Round 2: inc in every sc. [16 sc]
Round 3: *1 sc in next sc, inc* repeat around. [24 sc]
Round 4: *1 sc in each of next 2 sc, inc* repeat around. [32 sc]
Round 5: *1 sc in each of next 3 sc, inc* repeat around. [40 sc]
Round 6: 1 sc in every sc. [40 sc]
Round 7: *1 sc in each of next 4 sc, inc* repeat around. [48 sc]
Round 8: 1 sc in every sc. [48 sc]
Round 9: *1 sc in each of next 5 sc, inc* repeat around. [56 sc]
Round 10: 1 sc in every sc. [56 sc]
Round 11: *1 sc in each of next 6 sc, inc* repeat around. [64 sc]
Round 12: 1 sc in every sc. [64 sc]
Round 13: *1 sc in each of next 7 sc, inc* repeat around. [72 sc]
Round 14: 1 sc in every sc. [72 sc]
Round 15: *1 sc in each of next 5 sc, inc* repeat around. [84 sc]
Round 16: 1 sc in every sc. [84 sc]
Round 17: *1 sc in each of next 6 sc, inc* repeat around. [96 sc]
Round 18: 1 sc in every sc. [96 sc]
Round 19: *1 sc in each of next 7 sc, inc* repeat around. [108 sc]
Round 20: 1 sc in every sc. [108 sc]
Round 21: *1 sc in each of next 8 sc, inc* repeat around. [120 sc]
Round 22: Work 1 sc in every sc until the basket measures approximately 16 cm / 6¼” vertically. When the last sc on the last round is worked, move the marker to the 12th sc from the hook (on the right side of the last sc, end of round = mid front of head). Do not cut the yarn.
Shaping the Head
The head is worked directly from the basket rim over 24 stitches. Turn the basket so the marked stitch is towards you.
Round 1: Continue working 1 sc in each of the next 12 sc; there are now 24 sc in total counted from the st with marker. Work the head in the round over these 24 sts: Turn the basket so that st with marker is towards you, work 1 sc in this sc (this st is now 1st sc on round; move the marker upwards), continue with 1 sc in each of the next 23 sc. [24 sc]
Rounds 2–7: 1 sc in every sc. [24 sc]
Round 8: *1 sc in each of next 4 sc, dec* repeat around. [20 sc]
Round 9: *1 sc in each of next 3 sc, dec* repeat around. [16 sc]
Round 10: *1 sc in each of next 2 sc, dec* repeat around. [12 sc]
Round 11: *1 sc in next sc, dec* repeat around. [8 sc]
Round 12: Work all sc tog 2 by 2. [4 sc] Stuff the head firmly before this round gets too tight to reach inside comfortably.
Round 13: Cut yarn. Sew the last 4 sc tog with yarn end.
Making the Cock’s Comb
Work back and forth with red yarn.
Step 1: Ch 20, sl st in 2nd ch from hook, sl st in each ch across. [19 sl st]
Step 2: Turn. Skip 1st sl st, in next sl st work (1 dc, 1 tr, 1 dc), skip 1 sl st, 1 sc in next sl st, skip 1 sl st, in next sl st work (2 dc, 1 tr, 2 dc), skip 1 sl st, 1 sc in next sl st, skip 1 sl st, in next sl st work (2 dc, 3 tr, 2 dc), skip 1 sl st, 1 sc in next sl st, skip 1 sl st, in next sl st work (2 dc, 1 tr, 2 dc), skip 1 sl st, 1 sc in next sl st, skip 1 sl st, in next sl st work (1 dc, 1 tr, 1 dc), sl st in last sl st. Fasten off.
Crocheting the Beak
Work back and forth in rows with goldenrod yarn.
Row 1: Ch 2, 2 sc in 2nd ch from hook. [2 sc]
Row 2: Ch 1, inc in every sc. [4 sc]
Row 3: Ch 1, 1 sc in every sc. [4 sc]
Row 4: Ch 1, 1 sc in every sc. [4 sc]
Row 5: Ch 1, work all sc tog 2 by 2. [2 sc]
Row 6: Ch 1, work 2 sc tog. [1 sc]
Fasten off.
Making the Tail
Work back and forth with red yarn.
Step 1: Ch 12, sc in 2nd ch from hook, sc in each ch across. [11 sc]
Step 2: Turn. Skip 1st sc, in next sc work 3 dc, skip 1 sc, 1 sc in next sc, skip 1 sc, in next sc work (1 dc, 3 tr, 1 dc), skip 1 sc, 1 sc in next sc, skip 1 sc, in next sc work 3 dc, sl st in last sc. Fasten off.
Crocheting the Wing
The wing is worked in the round with light beige yarn, starting with a magic circle. It follows the same shaping as the basket for the first 17 rounds.
Rounds 1–17: Work as Basket rounds 1-17. [96 sc]
Round 18: Switch to red, *1 sc, skip 1 sc, 5 dc in next sc, skip 1 sc* repeat around. Fasten off.
Crocheting the Flowers
You will make 2 of each flower variation. Each uses the same two-round structure but swaps colors.
Flower 1 (Goldenrod)
Round 1: Ch 3 and form a ring with sl st in first ch. Ch 1, 8 sc in ring, sl st in first sc. [8 sc]
Round 2: Ch 1, *1 sc in next sc, ch 3* repeat around, ch 3, sl st in 1st sc (= 8 ch-spaces). Fasten off.
Flower 2
Work as Flower 1, but Round 1 in goldenrod and Round 2 in red.
Flower 3
Work as Flower 1, but Round 1 in red and Round 2 in goldenrod.
Flower 4
Work as Flower 1, but Round 1 in white and Round 2 in red.
Flower 5
Work as Flower 1, but Round 1 in goldenrod and Round 2 in white.
Assembly
With all pieces finished, assemble the chicken basket:
- Sew the cock’s comb to the top of the head.
- Attach the beak at the front of the head.
- Embroider the eyes with medium brown yarn.
- Attach the tail to the opposite side of the basket from the head.
- Place the wing over the basket and fasten it on one side only, allowing it to swing open and closed like a hinged lid.
- Fasten the flowers onto the basket and the wing lid, scattering them as desired.
Care Instructions
The wool-alpaca blend requires gentle care. Hand wash in cool water with a gentle wool detergent. Do not wring out the basket. Press the water out gently, reshape the basket while it is still damp, and lay it flat to dry. If the basket has been compressed, a quick steam from a distance can help restore its shape without flattening the texture.
Tips
- Yarn Substitutes: If a wool-alpaca blend is unavailable, 100% Wool Worsted (approx. 200 m per 100 g) provides similar structure and stitch definition. A Wool-Acrylic Worsted Blend (approx. 180-200 m per 100 g) is also a budget-friendly option that holds its shape well.
- Marker Placement: The head instructions rely on moving the stitch marker 12 stitches back from the end of the round. This repositioned marker becomes the center front of the chicken’s face. Take a moment to orient the basket correctly before continuing.
- Stuffing: Only the top of the head needs stuffing. Use a small amount of polyfil, paper, or fabric scraps to fill out the upper section before closing it.
Frequently Asked Questions
How does the wing work as a lid?
The wing is crocheted exactly like the basket base through round 17, matching the basket’s diameter. It is fastened on one side only, creating a hinge that allows the wing to open and close. Once the flowers are attached, it looks like an intentional decorative detail while remaining functional.
What’s inside the head to give it its shape?
The pattern calls for poly stuffing, paper, or similar filler packed into the top of the head before the final rounds are closed. This fills out the upper section to maintain the rounded shape of the chicken’s head.
Do I need a lot of the accent colors, or will small amounts do?
Small amounts are sufficient for the accent colors. Goldenrod, medium brown, and white are used for the beak, eyes, and flowers, so scrap yarn works perfectly. You will need approximately 50 g of red for the comb, tail, wing edging, and flower rounds.
The head instructions look confusing with the marker placement. What’s actually happening there?
After completing the basket, you move the marker 12 stitches back from the end of the round. This marked stitch becomes the center front of the face. You then work the head in rounds over just those 24 stitches, turning the basket toward you so the face sits at the front.
How many flowers do I make, and do they all look different?
You make two of each of the five flower designs, totaling ten flowers. They are all built on the same two-round structure but use different color combinations (goldenrod, red, and white) across the rounds to create variety.
For more cozy and whimsical amigurumi projects, check out our Adorable Chick and Owl Amigurumi or our Easy Crochet Bunny Pattern.
Pin This Crochet Pattern!