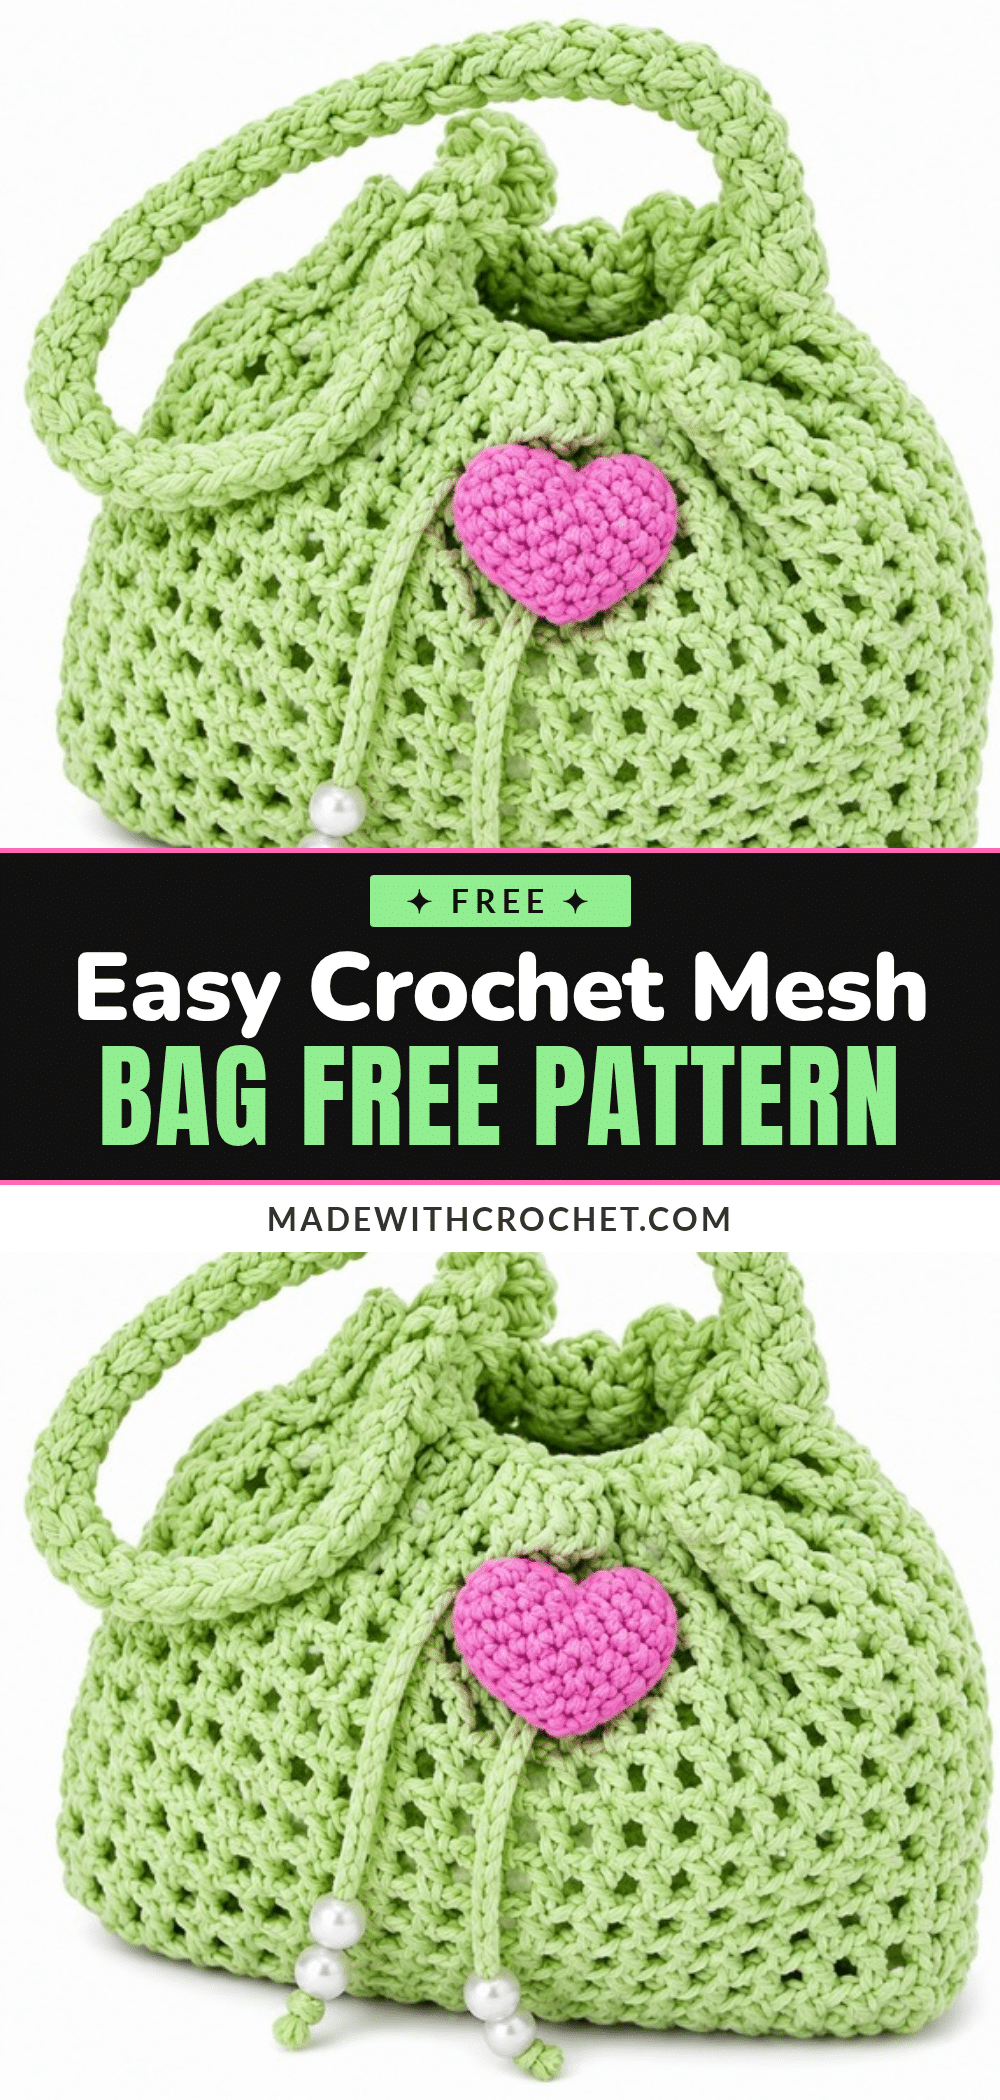
The rhythmic click of the hook and the steady rise of rows create a fabric that is as functional as it is beautiful. There is a specific satisfaction in watching a mesh bag take shape, row by row, as the alternating double crochet and chain spaces form an airy, structured grid. This pattern relies on the precision of those little details—consistent tension, smooth corner increases, and the satisfying pull of a drawstring closure—to transform simple cotton yarn into a versatile accessory. Whether you are drawn to the open texture for summer outings or the sturdy construction for daily errands, this project offers a rewarding balance of ease and elegance.
Texture and Stitch Notes
What makes this mesh bag truly stand out is the interplay between the solid double crochet stitches and the open chain spaces. This combination creates a fabric that is breathable and lightweight, yet holds its structure beautifully without collapsing. The texture is defined by the consistent spacing of the chain-1 gaps, which give the bag its signature “see-through” aesthetic while maintaining durability. Paying attention to the extra double crochet stitches added at the corners is crucial; these small additions prevent the edges from puckering and ensure the bag maintains a clean, rectangular silhouette as it grows taller. The tactile experience of working this pattern is smooth, allowing for quick progress while you enjoy the meditative rhythm of the stitch repeat.
Project Overview
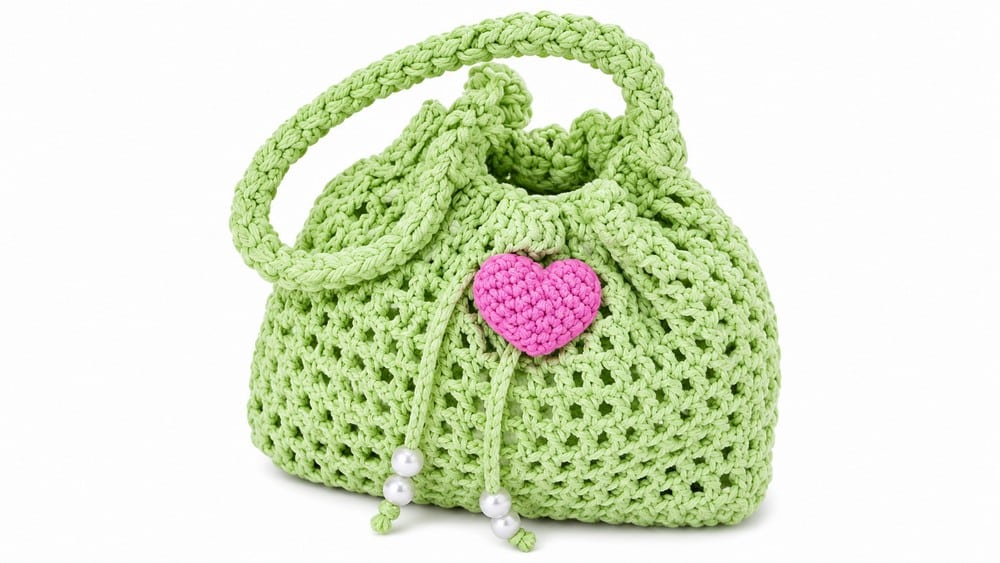
This free crochet mesh bag pattern is designed for beginners to intermediate crocheters who want to create a stylish, functional accessory. It features an elegant, minimalistic design using double crochet and chain stitches to create an open, breathable texture. The pattern includes instructions for a drawstring closure and a sturdy handle, making it suitable for use as a shoulder bag or a handbag. The finished size is approximately 26 cm (10 inches) wide by 30 cm (12 inches) tall, providing ample room for daily essentials like books, towels, or snacks.
Materials
- 8 ply cotton yarn (approx. 100g ball), any preferred color
- Crochet hooks: 3.5 mm (for bag base and body), 4.5 mm (for handle)
- Tapestry needle
- Scissors
Gauge and Finished Size
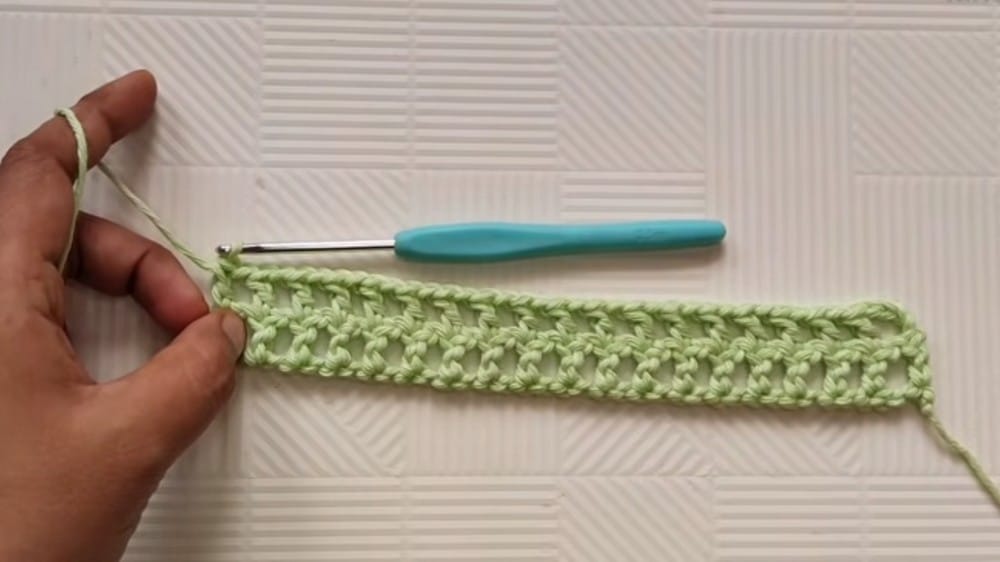
Gauge is flexible; consistent tension is recommended for a uniform texture. The pattern alternates double crochet (dc) and chain (ch) 1 spaces for an open yet structured fabric. Extra dc at corners are used for smooth shaping.
Finished Dimensions:
- Foundation chain: 46 stitches
- Approximate finished bag width: 26 cm (10 inches)
- Approximate finished bag height: 30 cm (12 inches)
- Handle length: Adjustable (shoulder bag handles are longer)
- Drawstring chain length: About 100 chains (adjust as needed)
Abbreviations
- ch: Chain
- sc: Single Crochet
- dc: Double Crochet
- sl st: Slip Stitch
Pattern Notes
- Keep stitch tension consistent for a neat finished piece.
- Chain spaces between stitches create an airy and flexible fabric.
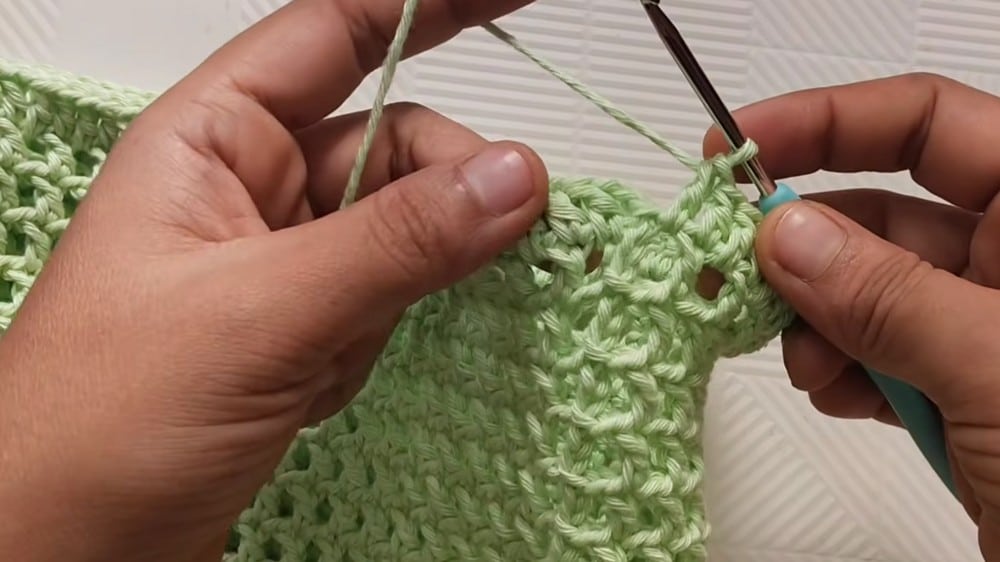
- Extra double crochet stitches at corners prevent puckering and help shape the bag.
- Use a tapestry needle to weave in ends securely and sew parts together.
- Adjust handle length to suit your preferred bag size.
- Refer to stitch abbreviations for clarity.
Special Techniques
- Turning Chain: Increases height at the beginning of rows by chaining 4 (counts as 1 dc and 1 ch).
- Chain Spaces: Gaps created by chains between stitches for texture and flexibility.
- Extra Corner Double Crochet: Added at corners to maintain bag shape and avoid puckering.
Pattern Instructions
Base of The Bag
Foundation Chain: Make a slip knot. Crochet 46 chains (ch).
Row 1: Skip the first 5 chains. Into the 6th chain: 1 double crochet (dc), 1 chain (ch), 1 Skip 1 stitch, 1 dc in next stitch. Repeat chain 1, skip 1, dc 20 times across. After the last dc, chain 1. Yarn over, skip the last chain, and make 1 dc into the last chain. This completes row 1.
Row 2
Chain 4 (counts as 1 dc, 1 ch) and turn your work. Yarn over and work 1 dc in the chain space directly above the last row’s dc. Chain 1. Repeat across the row: 1 dc in each chain space, Chain 1. At row end: Chain 1, Skip the first chain of turning chain, Make 1 dc in the next chain. This completes row 2.
Rows 3 to 7
Repeat the pattern of row 2 for rows 3 to 7: Chain 4, turn. Work 1 dc in each chain space from the previous row with 1 ch between. Maintain consistent spacing to create the base panel of the bag.
Body Construction: Row 1
Chain 4 and turn your work. Work dc in each dc of the previous row, leaving a ch 1 between. At each corner: After the last dc, chain 1. Yarn over and insert hook in the chain gap to make 1 dc (extra double crochet for smooth corner). Chain 1. Continue this around the row, always adding an extra dc at corners and chaining 1 between stitches. At row’s end, join with slip stitch into the third chain of the turning chain. Chain 4 to start the next row.
Rows 2 to 12
Repeat Row 1’s pattern thoroughly for 11 more rows (total 12 body rows). Keep the extra dc at corners and ch 1 spacing consistent for a neat rectangle panel. Join each row with slip stitch to maintain fabric shape.
Final Body Row (Row 13)
Chain 3 to start (counts as 1 dc). Work dc continuously across all stitches and chain spaces around, closing up the top edge of the bag. Join with slip stitch in the third chain of the starting chain. Chain 1, fasten off, leaving a long tail for weaving.
Weaving Ends
Use a tapestry needle to weave in all loose yarn ends carefully and securely.
Make the Drawstring
Create a slip knot leaving a long tail. Chain 100 (or desired length). Cut yarn and pull through to finish. Thread the drawstring using a big-eye needle. Insert the drawstring through chain spaces near the bag’s opening evenly for a functional closure.
Handle Construction
Use two strands of yarn for durability (or one strand for sling bags). Use a 4.5 mm hook for the handle. Make a slip knot, leaving a tail for sewing. Chain 2. Insert the hook into the first chain and pull a loop through both chains to create a single crochet (sc). Turn and chain 1. Continue working single crochet (sc) stitches onto each chain to create a sturdy cord handle. Crochet handle to your desired length depending on bag type. Slip stitch to close the handle. Fasten off and leave a tail for attaching.
Attach the Handle
Use the tapestry needle and yarn tail to sew the handle securely to opposite sides of the bag top. Pull to adjust the handle and ensure it lays straight. Tie knots and weave in yarn ends neatly.
Optional Decoration
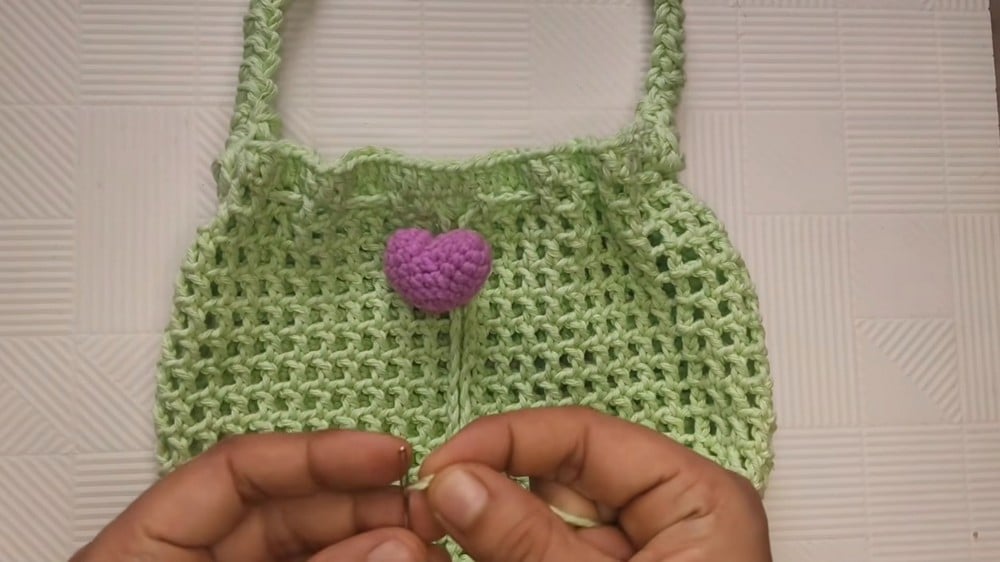
You may add flower appliques or amigurumi hearts sewn onto the bag or drawstring for a personal touch. For inspiration on small decorative elements, you might enjoy exploring our easy sunflower keychain pattern or the adorable crochet bunny for cute accents.
Assembly
The completed bag measures approximately 26 cm (10 inches) wide by 30 cm (12 inches) tall, varying with yarn and tension. The handle length depends on your choice: longer for shoulder bags, shorter for handbags. The drawstring snugly closes the bag opening for secure carrying. The bag maintains its shape from consistent spacing and added corner stitches.
Tips
- Keep stitch tension consistent for a neat finished piece.
- Chain spaces between stitches create an airy and flexible fabric.
- Extra double crochet stitches at corners prevent puckering and help shape the bag.
- Use a tapestry needle to weave in ends securely and sew parts.
- Adjust handle length to suit your preferred bag size.
- Refer to stitch abbreviations for clarity.
FAQs
What type of yarn is best for this mesh bag?
The pattern recommends 8 ply cotton yarn. Cotton is ideal for bags because it is durable, holds its shape well, and provides a nice structure for the mesh pattern.
Can I make this bag smaller?
Yes, you can adjust the foundation chain to make the bag narrower. However, keep in mind that changing the foundation chain will alter the final width, so you may need to adjust the number of rows to maintain the desired height.
How do I choose the handle length?
For a shoulder bag, crochet a longer handle. For a handbag or tote, keep the handle shorter. The pattern allows you to customize the length by chaining more or fewer stitches for the handle cord.
Is this pattern suitable for beginners?
This pattern is rated Beginner to Intermediate. It requires comfort with double crochet, chain stitches, and joining rows with slip stitches. If you are new to crochet, this is a great project to practice consistent tension and working in rows.
How do I attach the drawstring?
Thread the drawstring through the chain spaces near the top opening of the bag using a big-eye needle. Insert it evenly around the opening to ensure the bag closes securely and evenly.
Pin This Crochet Pattern!