There is something deeply satisfying about the quiet rhythm of a crochet hook moving through plush yarn. A cozy evening, a small batch of soft fibers, and the gentle counting of stitches create a meditative space where creativity flows effortlessly. As you work through the spiral rounds, feeling the fabric grow under your fingers, you are not just making a toy; you are crafting a moment of calm. This pattern invites you to slow down and enjoy the process of creating adorable Little Sweeties in Cozy Houses, perfect for gifting or keeping as a comforting companion.
Small Details That Make It Better
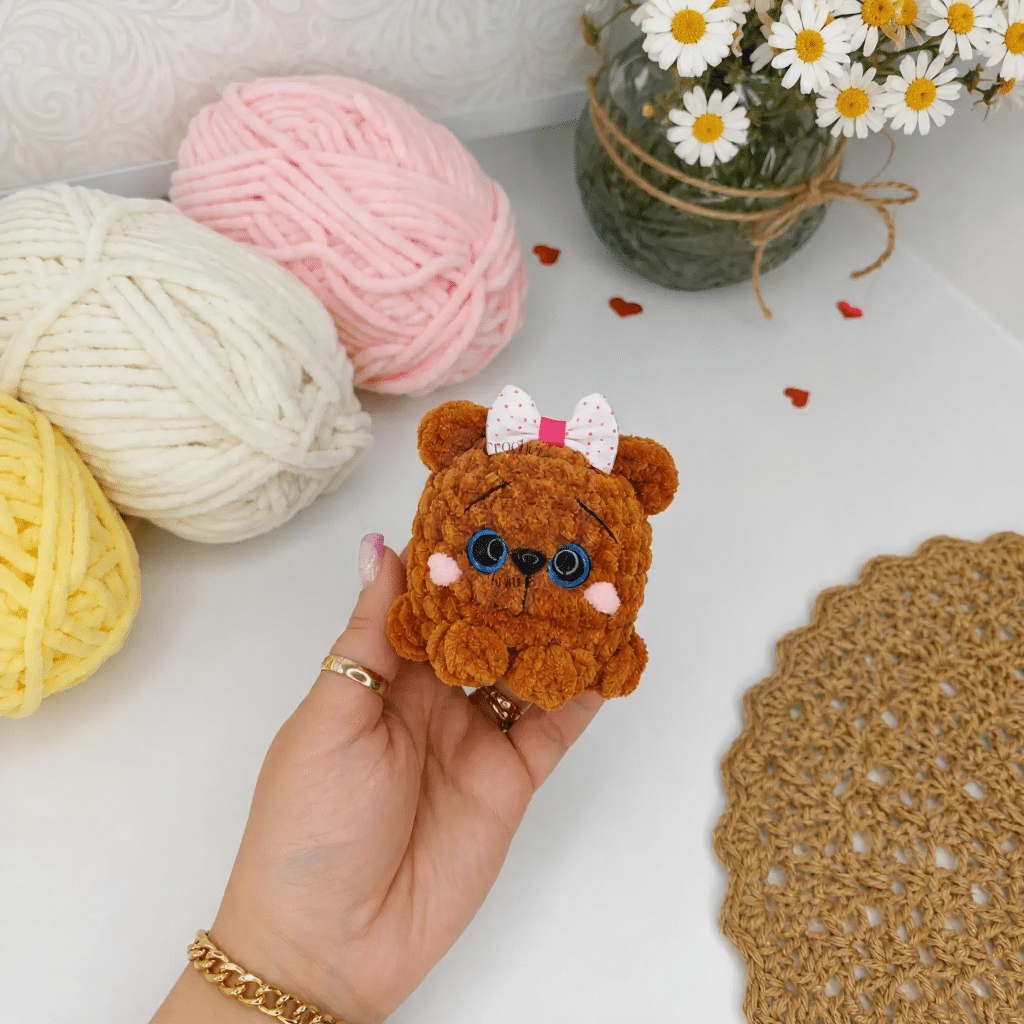
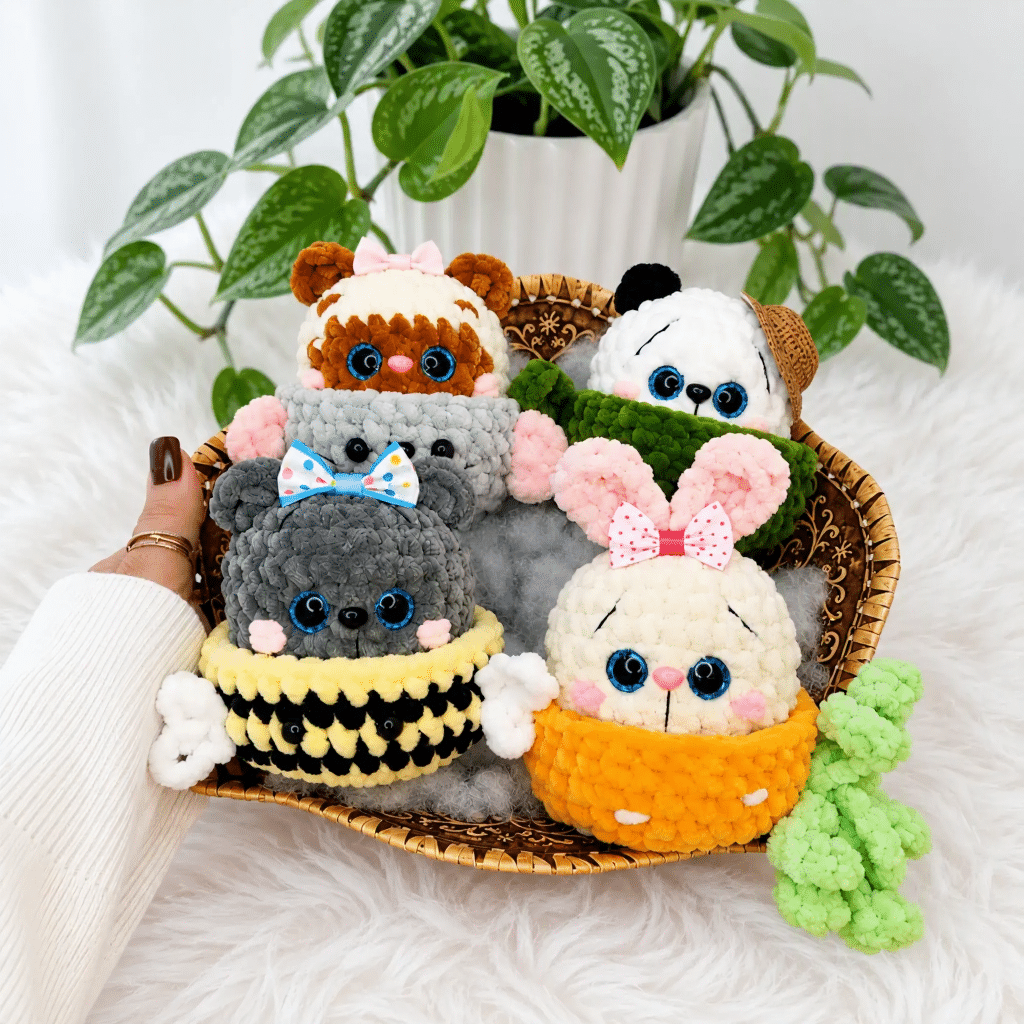
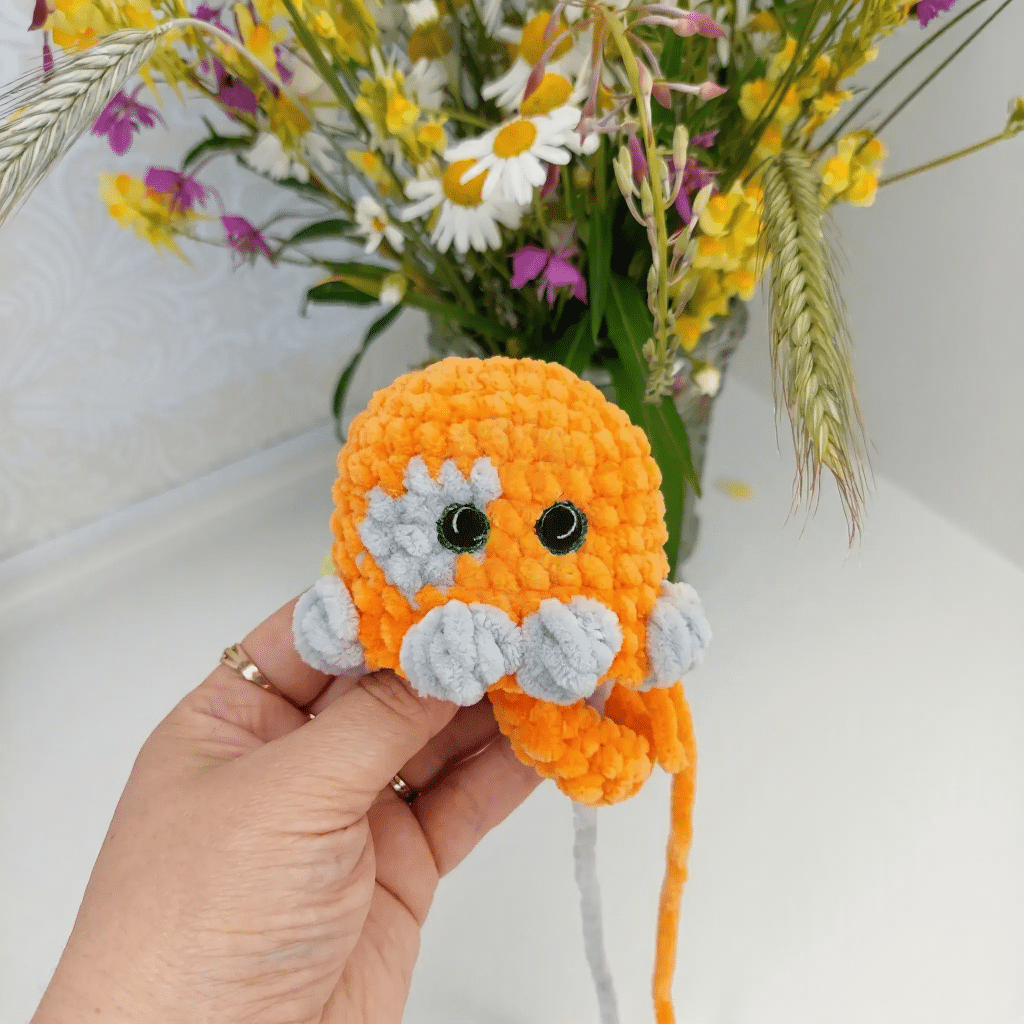
What truly elevates these amigurumi is the interplay between the soft, plush texture and the structured, whimsical houses. The choice of Himalaya Dolphin Baby or similar chenille yarn gives the Sweeties a cloud-like squishiness that is irresistible to hold. We love how the houses—whether a chubby mouse, a striped bumblebee, or a bamboo stalk—act as both a home and a display stand. The paws resting on the rim of the house create a charming narrative, as if the character is peeking out for a visit. Adding a tiny satin ribbon bow or a split ring for a bag charm transforms these from simple plush toys into functional accessories, making them delightful gifts for children or collectors of handmade decor.
Project Overview
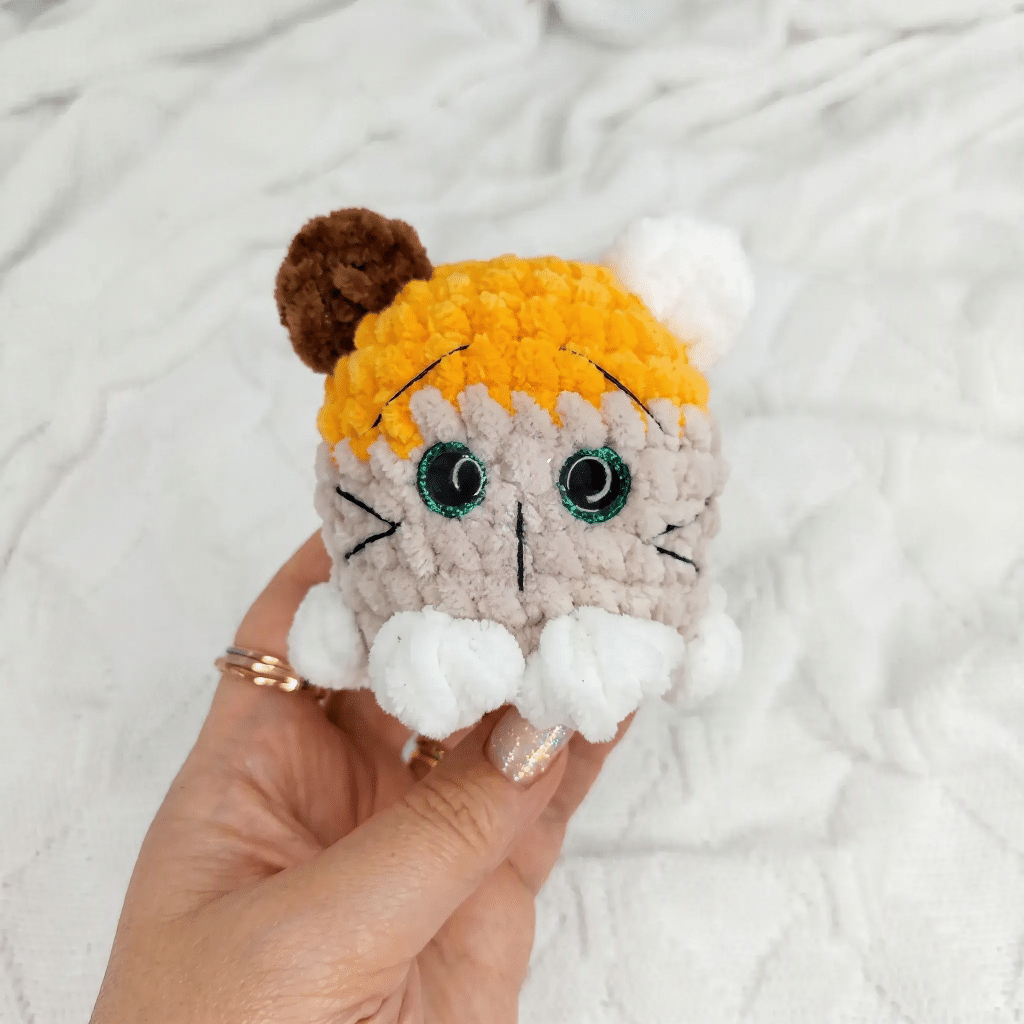
This amigurumi crochet pattern is perfect for a confident beginner. It gives you a Kitty, a Bear, and a Bunny, along with four Cozy Houses and a bonus Panda. Each Sweetie is worked as a single piece from the top down, head and body together, with tiny bobble paws and a wiggly tail. There is no neck to sew and very little seaming. You’ll need to be comfortable with the magic ring, single crochet, spiral rounds, color changes, and simple increases and decreases.
Materials
- Yarn: Plush or chenille yarn, approximately 25 g total per Sweetie (Himalaya Dolphin Baby was used in the sample; scraps are perfect).
- Main Color (MC): Your Sweetie’s body color, such as orange, grey, yellow, or brown.
- Contrast Color (CC): For paws, tail tip, and muzzle; white, cream, or pale grey all look adorable.
- House Yarns: Grey, orange, yellow, black, and green for the mouse, carrot, bee, and bamboo houses, plus pink (mouse tail and ears), white (bee wings), and beige or brown (carrot texture).
- Hook: 3.75 mm (US F-5/G-6); go smaller if your stitches gape.
- Safety Eyes: 12 mm for the Sweeties and 8 mm for the houses (glue-on or embroidered eyes work for baby-safe toys).
- Safety Nose: 12 × 10 mm or 12 × 14 mm, in any style you love (the sample uses glue).
- Stuffing: Polyester fiberfill or hollowfiber, a small handful per Sweetie.
- Embroidery Floss: Black (perle cotton or similar) for brows, whiskers, and the muzzle line.
- Blush: Soft pink yarn or chalk for the cheeks.
- Stitch Marker (SM): Removable.
- Yarn Needle: Large eye, blunt tip, since plush yarn needs a roomy eye.
- Scissors and Craft Glue: Sharp scissors and fabric-safe glue.
- Optional Extras: Satin ribbon about 1 cm wide for a bow, and a split ring or lobster clasp to turn a Sweetie into a bag charm.
Gauge and Finished Size
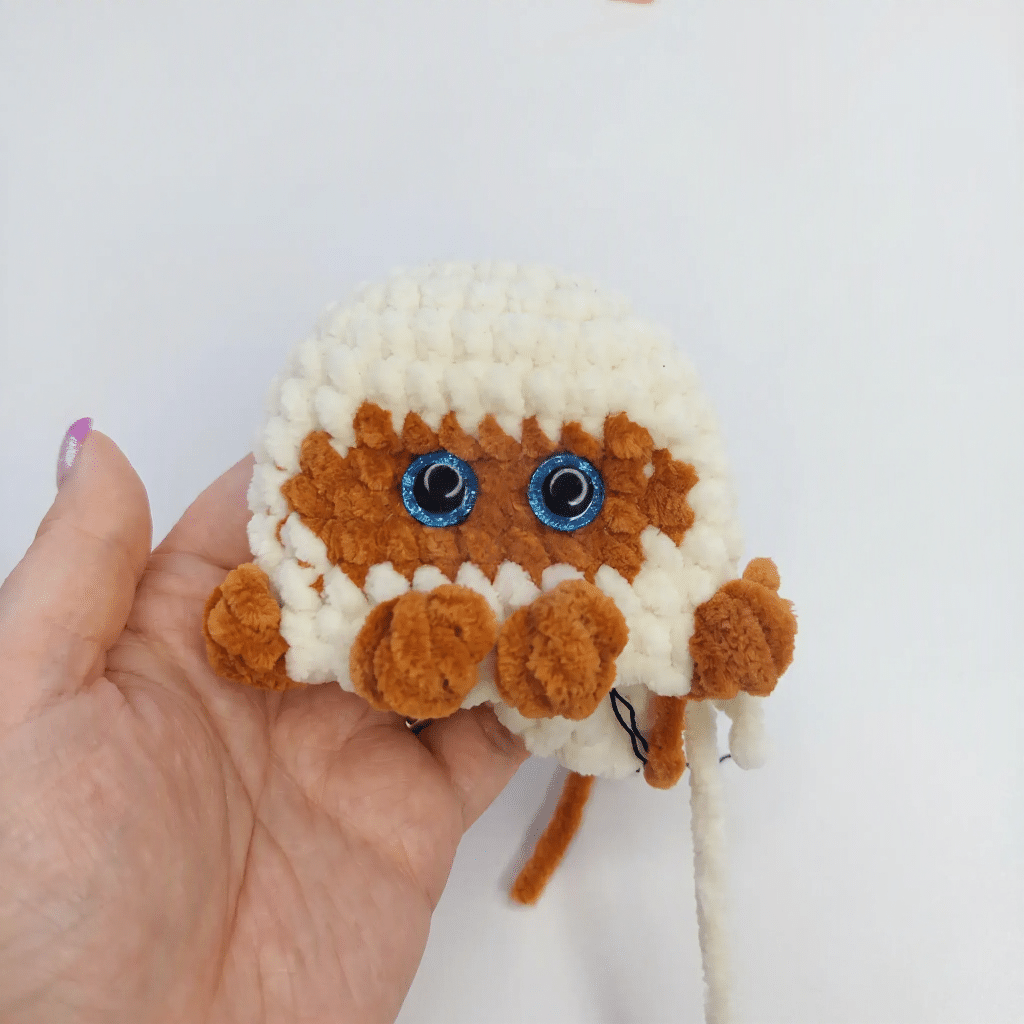
Gauge isn’t critical, but tension is. Four rounds of 24 sc should measure roughly 3.8 cm (1.5 in) tall in plush yarn. Work firmly enough that no stuffing peeks through, and if you can see fluff, drop down a hook size.
- Finished Size: Each Sweetie stands approximately 10–12 cm (4–4.75 in) tall.
- House Size: Each House measures approximately 7 cm (2.75 in) across and sits snugly around the base of its Sweetie.
Abbreviations
- BLO — Back Loop Only
- bo — Bobble Stitch (3 dc worked in one stitch and closed together at the top)
- CC — Contrast Color
- ch — Chain
- dc — Double Crochet
- dec — Invisible Decrease (work through the front loops of the next 2 sts)
- FO — Fasten Off
- hdc — Half Double Crochet
- inc — Increase (2 sc in the same st)
- MC — Main Color
- MR — Magic Ring
- Rnd — Round
- Row — Row
- sc — Single Crochet
- sl st — Slip Stitch
- st(s) — Stitch(es)
Pattern Notes
This pattern is written in US crochet terminology and worked in continuous spiral rounds. Do not join or turn unless the pattern says so. Place a removable stitch marker in the first stitch of each round and move it up as you go, keeping it at the side of the work rather than the center back so the paws land symmetrically. Stitch counts appear in parentheses at the end of each round: (##).
The head and body are one piece, worked from the top down. Kitty and Bear ears are crocheted directly into the head, and only the Bunny’s ears are sewn on. Eyes go between Rnds 6 and 7, spaced 3 sc apart and positioned above the paws, with the nose glued between Rnds 6 and 7 right between the eyes. Add small pinches of fiberfill from around Rnd 8 onward and top up before the final decreases. Firm but squishy is the goal.
Pattern Instructions
Kitty Head and Body
Using MC, ch 6. Work into the 2nd ch from hook, around both sides of the chain.
- Rnd 1: 4 sc, 3 sc in same st, 3 sc along opposite side, inc. (12)
- Rnd 2: inc, 3 sc, inc repeat 3 times, 3 sc, inc repeat 2 times. (18)
- Rnd 3: sc, inc, 3 sc, sc, inc repeat 3 times, 3 sc, sc, inc repeat 2 times. (24)
- Rnds 4–9: sc in each st around. (24)
Pause here: insert your 12 mm eyes between Rnds 6 and 7, spaced 3 sc apart. Begin stuffing firmly.
- Rnd 10: 6 sc, ch 12, then work into the 3rd ch from hook: 3 dc, 3 hdc, 3 sc, sl st (your tail is made!). Continue in MC: 6 sc, CC bo, MC 3 sc, CC bo, MC 2 sc, CC bo, MC 3 sc, CC bo. (24) Fasten off CC and weave the end inside. Finish stuffing now, because the opening closes quickly.
- Rnd 11: In MC, 2 sc, dec repeat 6 times around. (18)
- Rnd 12: sc, dec repeat 6 times around. (12) Pull the opening closed, FO, and weave in the end.
Kitty Ears
Join MC or CC between Rnds 2 and 3 at the side of the head. Work (sc, hdc, ch 1, hdc, sc) all in the same stitch. Work the second ear the same way on the opposite side, mirroring the first. Secure and weave in the remaining ends. With black floss, embroider the eyebrows, whiskers, and the little muzzle line beneath the nose.
Kitty Variation A: Face Patch
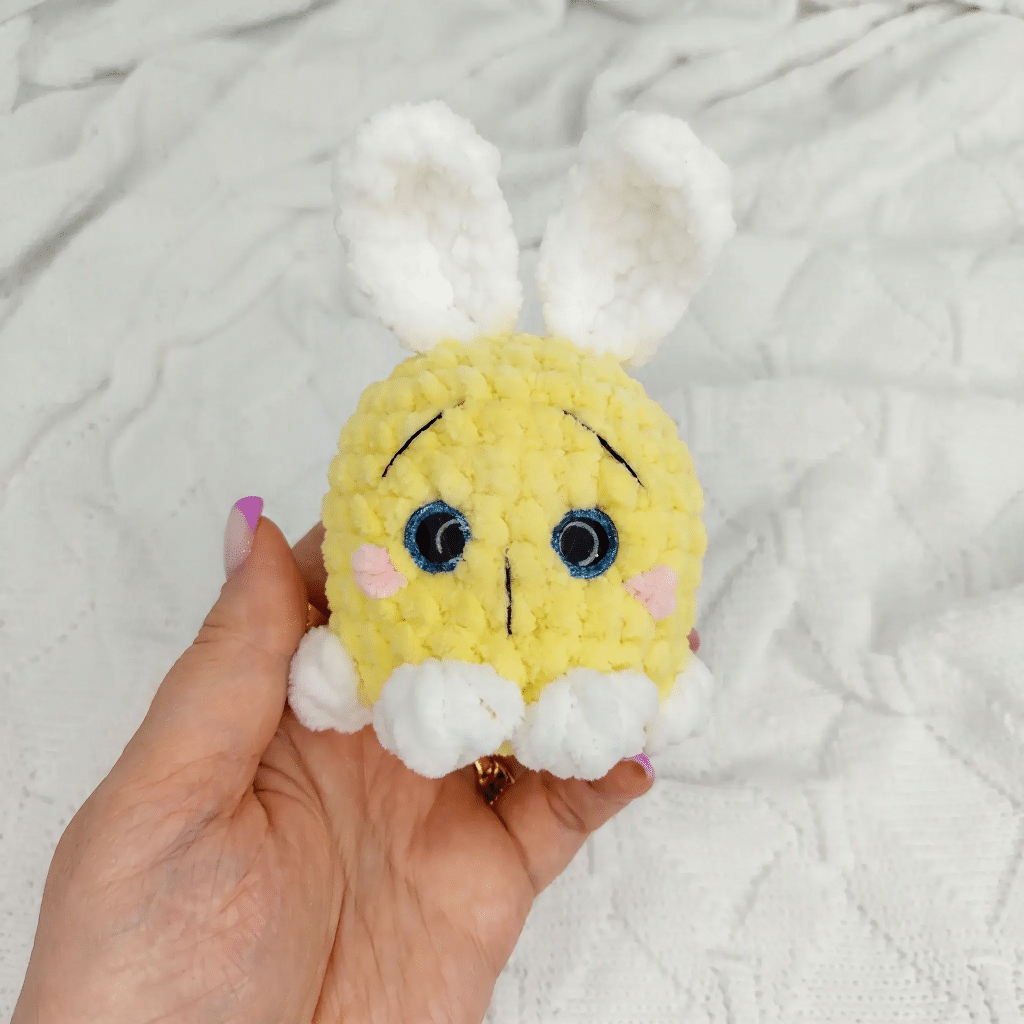
Work Rnds 1–4 as for the basic Kitty, then:
- Rnd 5: 14 sc MC, 7 sc CC, 3 sc MC. (24)
- Rnds 6–7: 13 sc MC, 9 sc CC, 2 sc MC. (24)
- Rnd 8: 14 sc MC, 7 sc CC, 3 sc MC. (24)
- Rnd 9: sc in each st around. (24)
Insert eyes between Rnds 6 and 7, 3 sc apart. Then work Rnds 10–12 exactly as for the basic Kitty.
Kitty Variation B: Spot
Work Rnds 1–4 as for the basic Kitty, then:
- Rnd 5: 14 sc MC, 3 sc CC, 7 sc MC. (24)
- Rnds 6–7: 13 sc MC, 4 sc CC, 7 sc MC. (24)
- Rnd 8: 14 sc MC, 2 sc CC, 8 sc MC. (24)
- Rnd 9: sc in each st around. (24)
Insert eyes between Rnds 6 and 7, 3 sc apart. Then work Rnds 10–12 exactly as for the basic Kitty.
Bear Head and Body
Using MC, ch 6. Work into the 2nd ch from hook, around both sides of the chain.
- Rnd 1: 4 sc, 3 sc in same st, 3 sc along opposite side, inc. (12)
- Rnd 2: inc, 3 sc, inc repeat 3 times, 3 sc, inc repeat 2 times. (18)
- Rnd 3: sc, inc, 3 sc, sc, inc repeat 3 times, 3 sc, sc, inc repeat 2 times. (24)
- Rnds 4–9: sc in each st around. (24)
Pause here: insert your 12 mm eyes between Rnds 6 and 7, spaced 3 sc apart. Begin stuffing firmly.
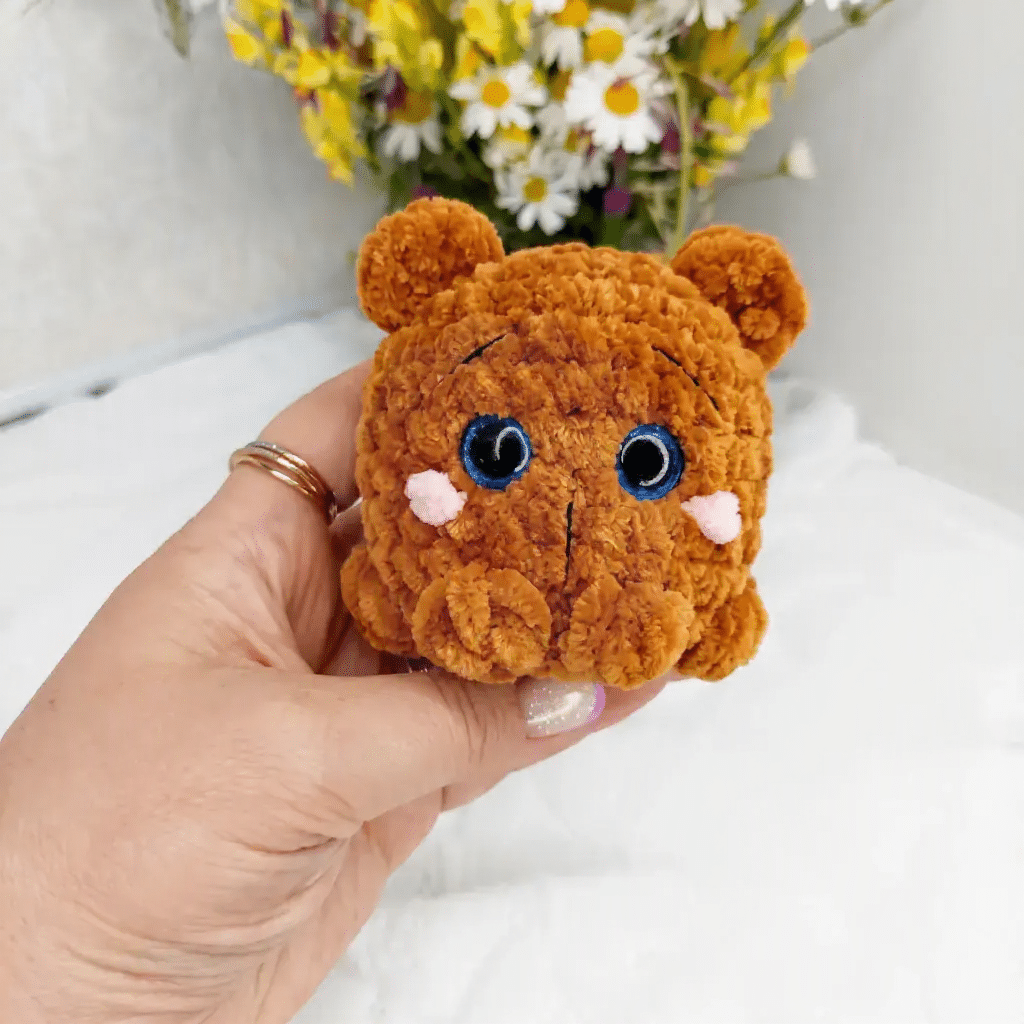
- Rnd 10: 5 sc, bo (this is the tail), 6 sc, bo, 3 sc, bo, 2 sc, bo, 3 sc, bo. (24)
- Rnd 11: 2 sc, dec repeat 6 times around. (18)
- Rnd 12: sc, dec repeat 6 times around. (12) Top up the stuffing, pull the opening closed, FO, and weave in the end.
Bear Ears
Join MC between Rnds 2 and 3 at the side of the head. Work 3 hdc all in the same stitch. Work the second ear the same way on the opposite side. Secure and weave in the remaining ends. Embroider the eyebrows and muzzle line, then add soft pink cheeks.
Bunny Head and Body
Using MC, ch 6. Work into the 2nd ch from hook, around both sides of the chain.
- Rnd 1: 4 sc, 3 sc in same st, 3 sc along opposite side, inc. (12)
- Rnd 2: inc, 3 sc, inc repeat 3 times, 3 sc, inc repeat 2 times. (18)
- Rnd 3: sc, inc, 3 sc, sc, inc repeat 3 times, 3 sc, sc, inc repeat 2 times. (24)
- Rnds 4–9: sc in each st around. (24)
Pause here: insert your 12 mm eyes between Rnds 6 and 7, spaced 3 sc apart. Begin stuffing firmly.
- Rnd 10: 5 sc, White bo (this is the fluffy tail), MC 6 sc, White bo, MC 3 sc, White bo, MC 2 sc, White bo, MC 3 sc, White bo. (24)
- Rnd 11: In MC, 2 sc, dec repeat 6 times around. (18)
- Rnd 12: sc, dec repeat 6 times around. (12) Pull the opening closed, FO, and weave in the end.
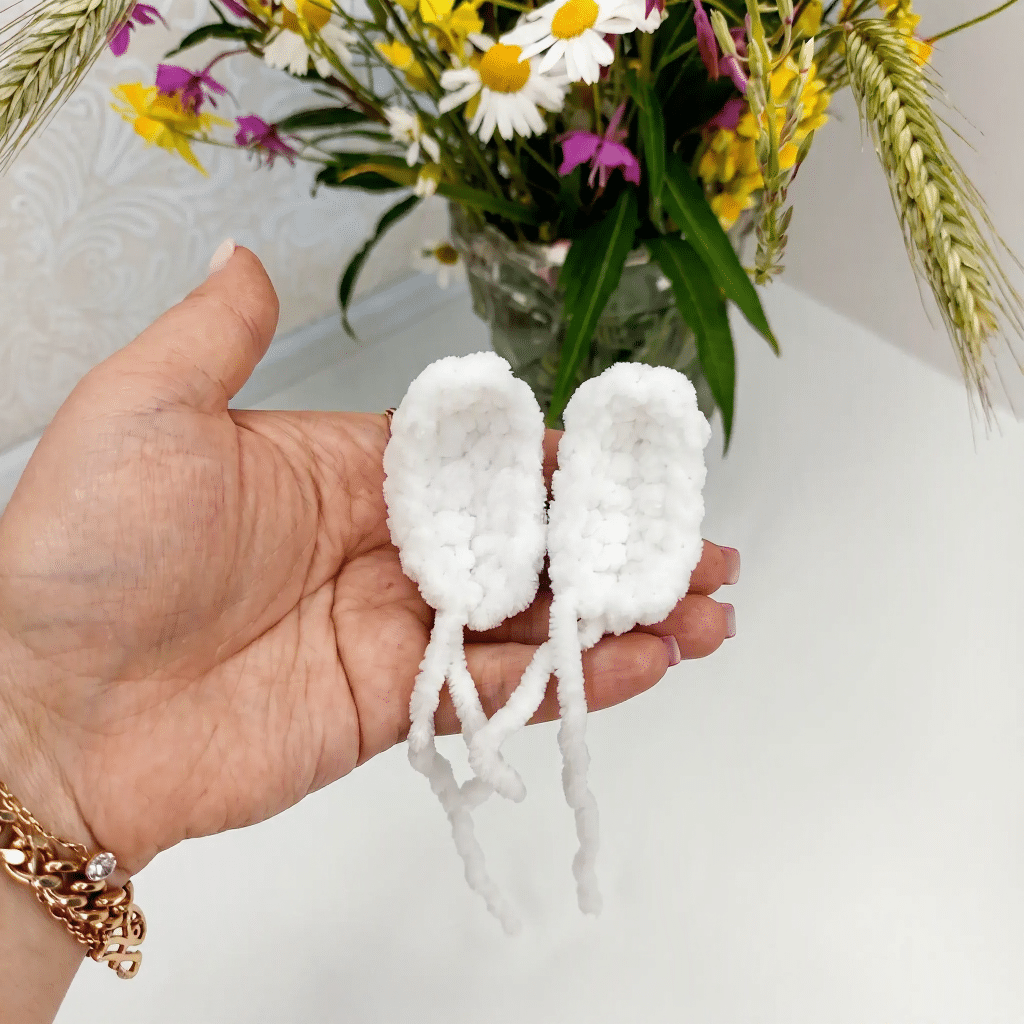
Bunny Ears (make 2)
In White, ch 6. Work into the 2nd ch from hook, around both sides of the chain.
- Row 1: sc, 3 hdc, 4 hdc in same st, 3 hdc along opposite side, sc. (12) Leave a long tail for sewing. Do not stuff the ears. They should stay soft and floppy.
Basic House Base
Use this base for all four houses.
- Rnd 1: 10 sc in MR. (10)
- Rnd 2: inc repeat 10 times around. (20)
- Rnd 3: sc, inc repeat 10 times around. (30)
- Rnd 4: BLO, sc in each st around. (30)
- Rnds 5–8: sc in each st around. (30) FO and weave in the end. Do not stuff; the house is a little open bowl. Working Rnd 4 in BLO is what makes the sides stand up crisply, so don’t skip it!
House 1: The Mouse
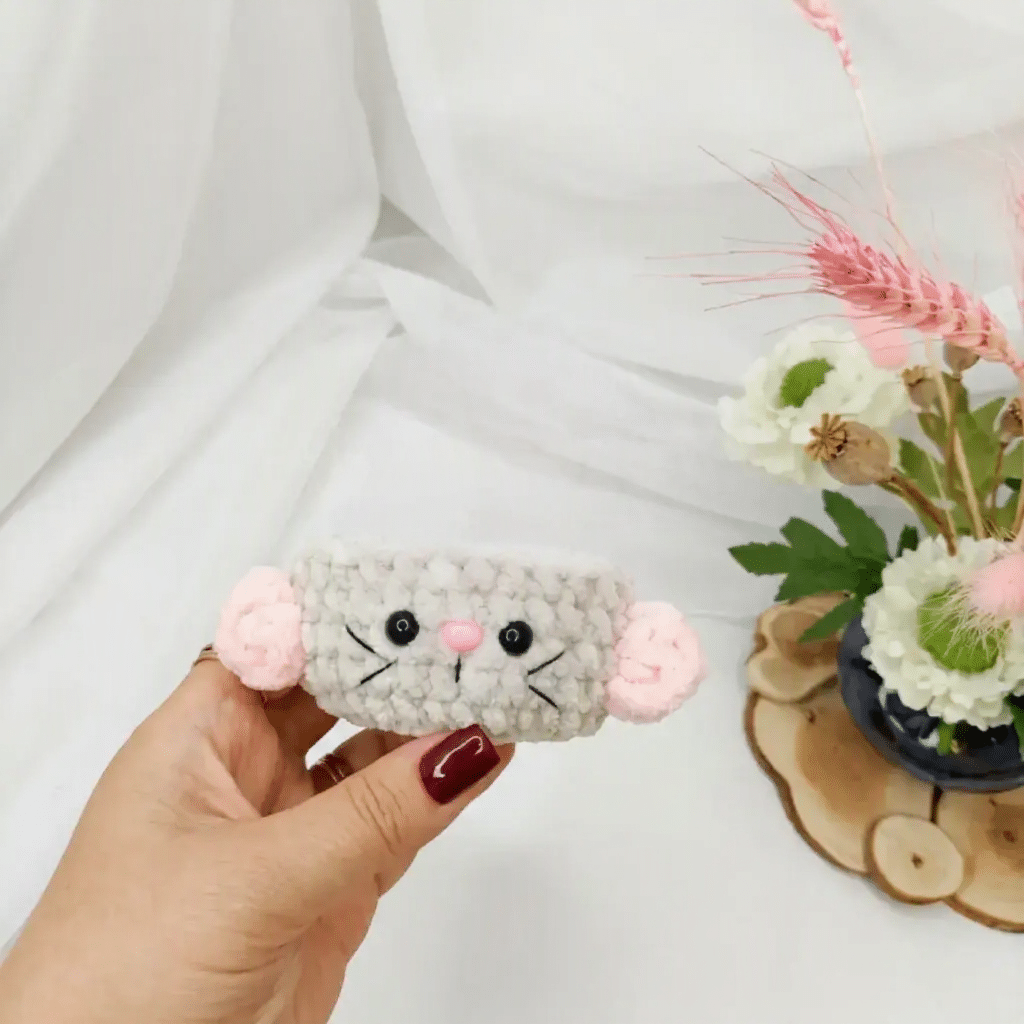
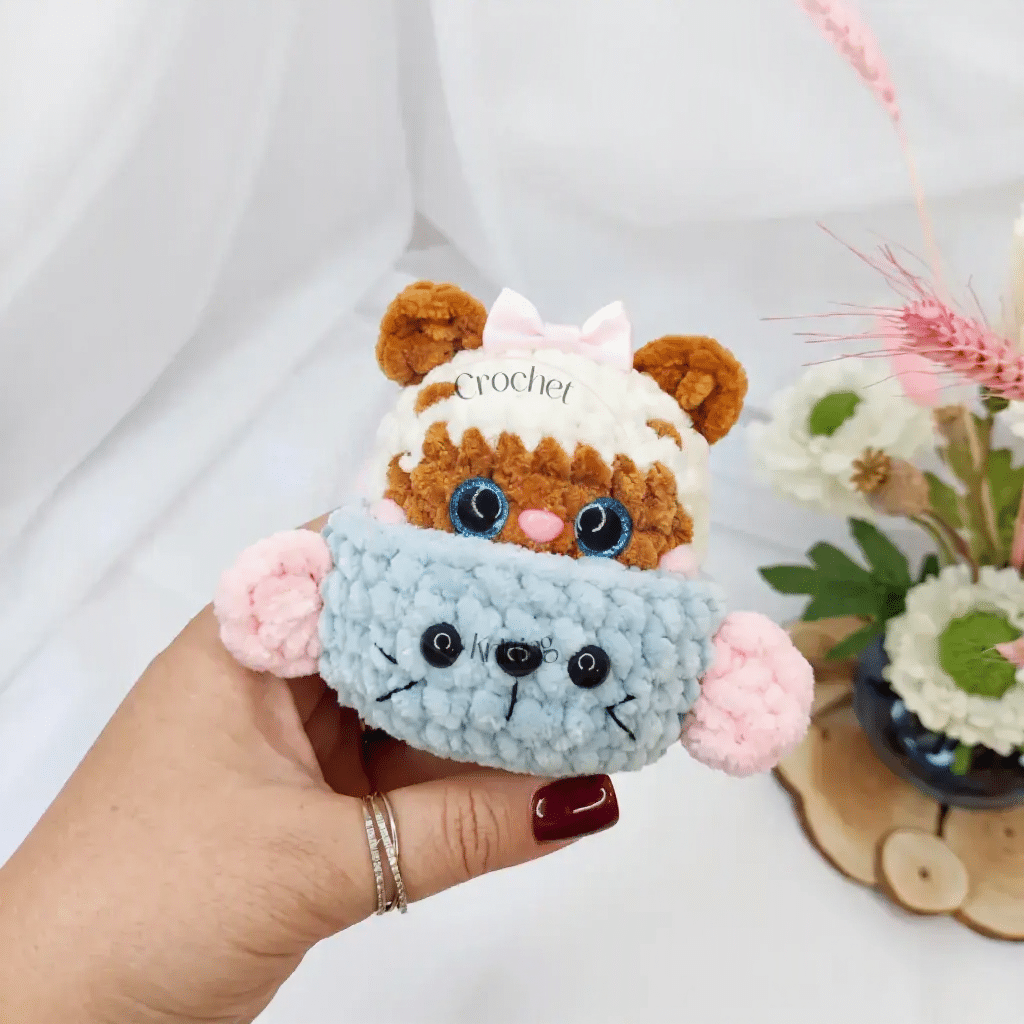
Made for the Kitty. Work the Basic House Base in grey or cream.
- Tail: Join pink between Rnds 4 and 5. Ch 11, then work into the 2nd ch from hook: 10 sl st. Secure.
- Ears: Join pink between Rnds 6 and 7. Work (sc, 3 hdc, sc) all in the same stitch. Work the second ear the same way, leaving 10 sc between the two ears. With black floss, embroider the muzzle line and whiskers. Glue on 8 mm eyes and a nose between Rnds 6 and 7, spaced 3 sc apart.
House 2: The Carrot
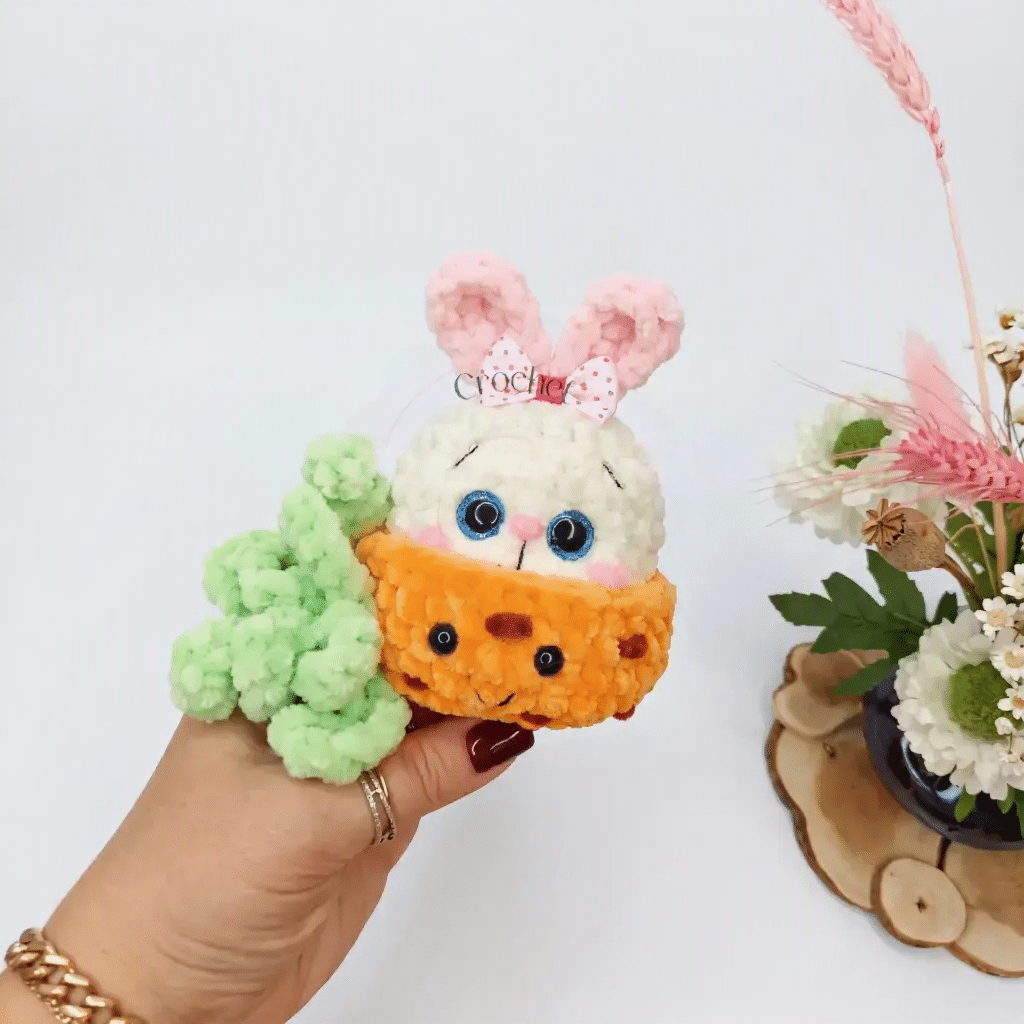
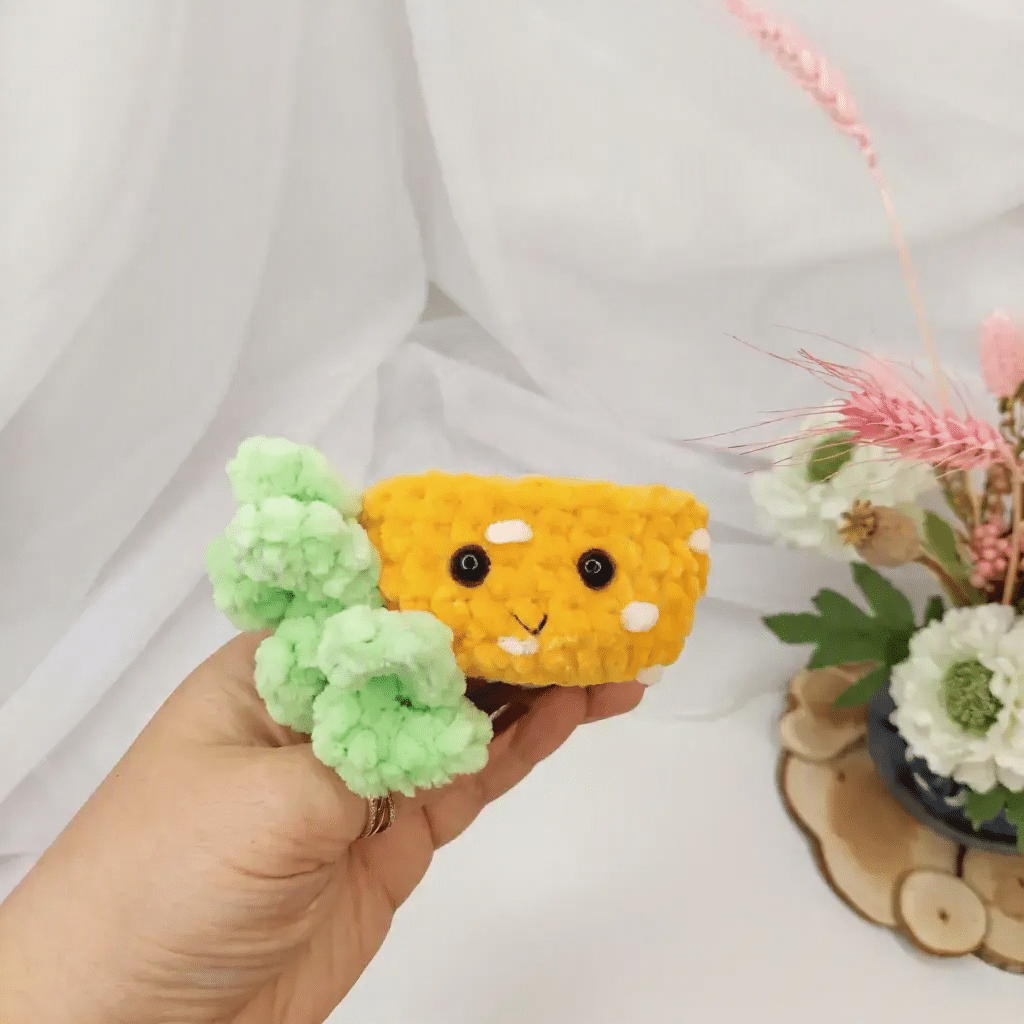
Made for the Bunny. Work the Basic House Base in orange.
- With beige or brown plush yarn, embroider short scattered lines across the body for carrot texture. Freestyle it, because no two carrots match!
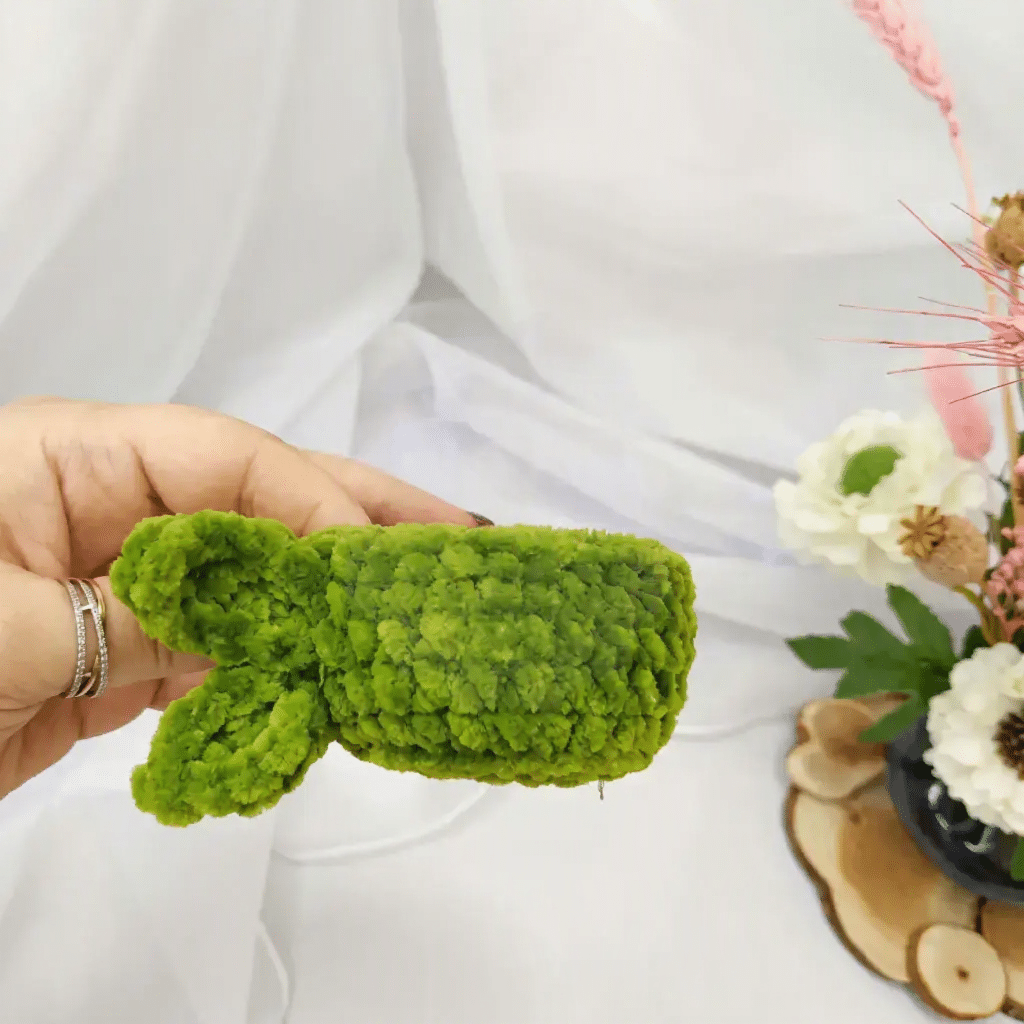
- Leafy top: In green, ch 11. Work into the 2nd ch from hook: inc repeat 10 times. Make this chain-and-increase strip 4 times in total. Gather the four strips together concertina-style and leave a long tail for sewing. Sew the leafy top between Rnds 6 and 7. Glue on 8 mm eyes between Rnds 6 and 7, 3 sc apart, and embroider a smiling mouth.
House 3: The Bumblebee
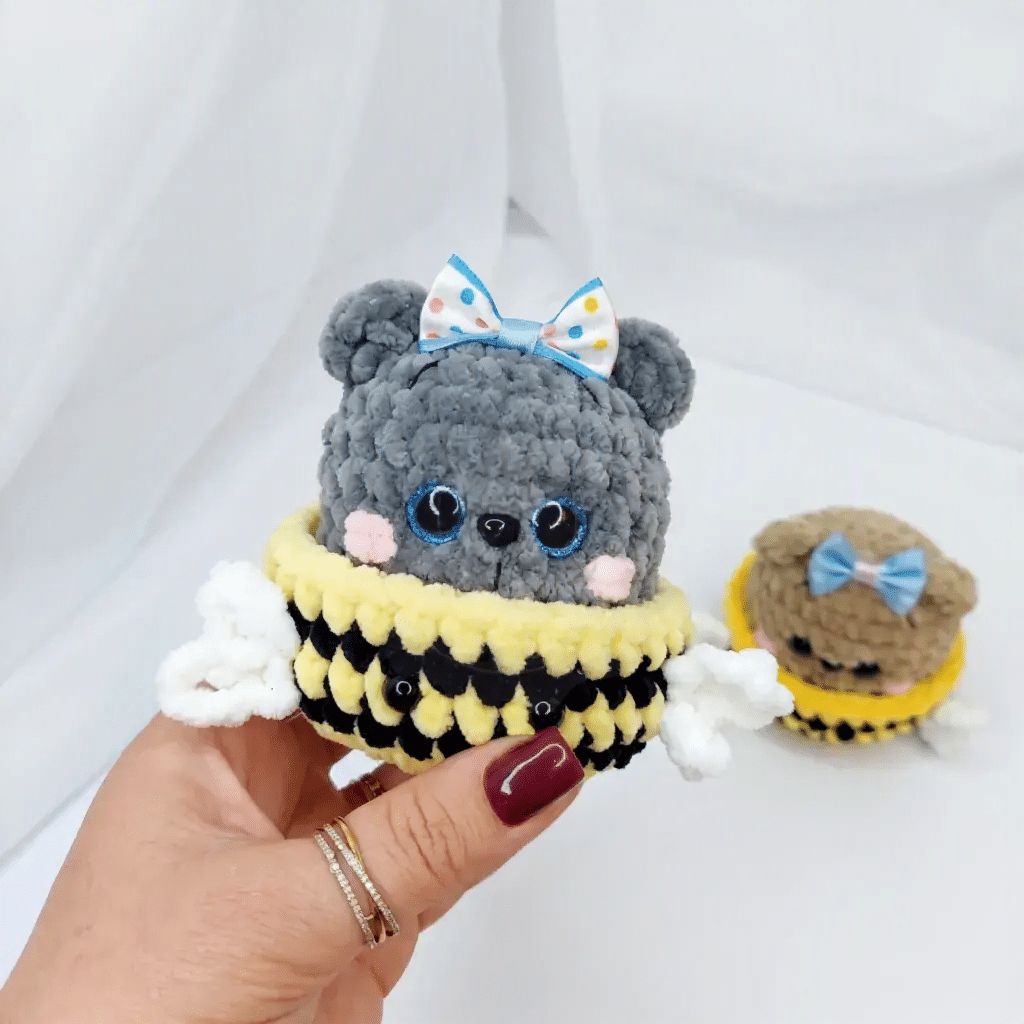
Made for the Bear. Work Rnds 1–4 of the Basic House Base in yellow, then:
- Rnd 5: In black, sc in each st around. (30)
- Rnd 6: In yellow, sc in each st around. (30)
- Rnd 7: In black, sc in each st around. (30)
- Rnd 8: In yellow, sc in each st around. (30) FO and weave in the end.
- Wings: Join white between Rnds 6 and 7. Into the same stitch work: ch 5, sl st, ch 5, sl st. Work the second wing the same way, leaving 10 sc between the wings. Secure all ends and tuck them neatly inside. Glue on 8 mm eyes between Rnds 6 and 7, spaced 3 sc apart.
House 4: The Bamboo
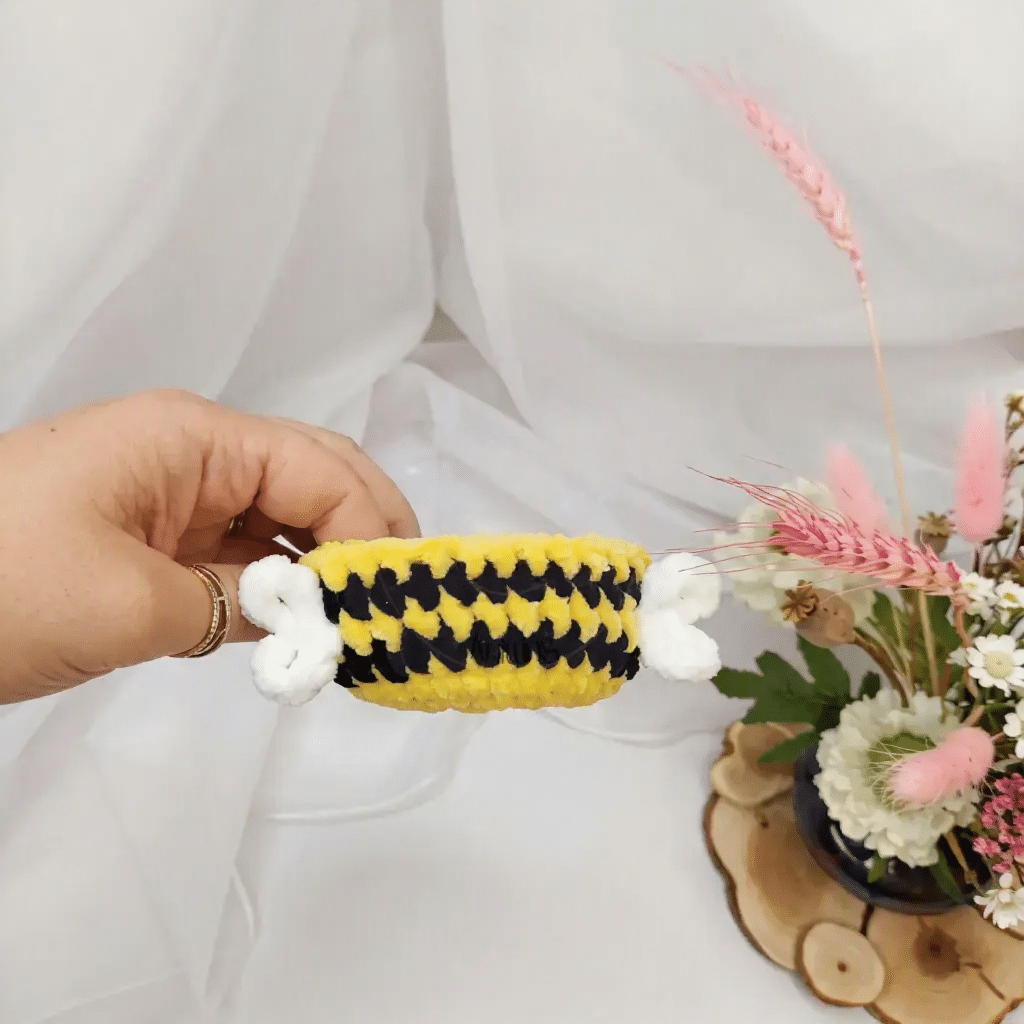
Made for the Panda. Work the Basic House Base in green.
- Leaves (make 2): Ch 6. Work into the 3rd ch from hook: 2 hdc, sc, sl st, ch 1, then along the opposite side: sl st, sc, 3 hdc. Leave a long tail for sewing. Sew both leaves to the side of the house so they fan outward.
Bonus Panda
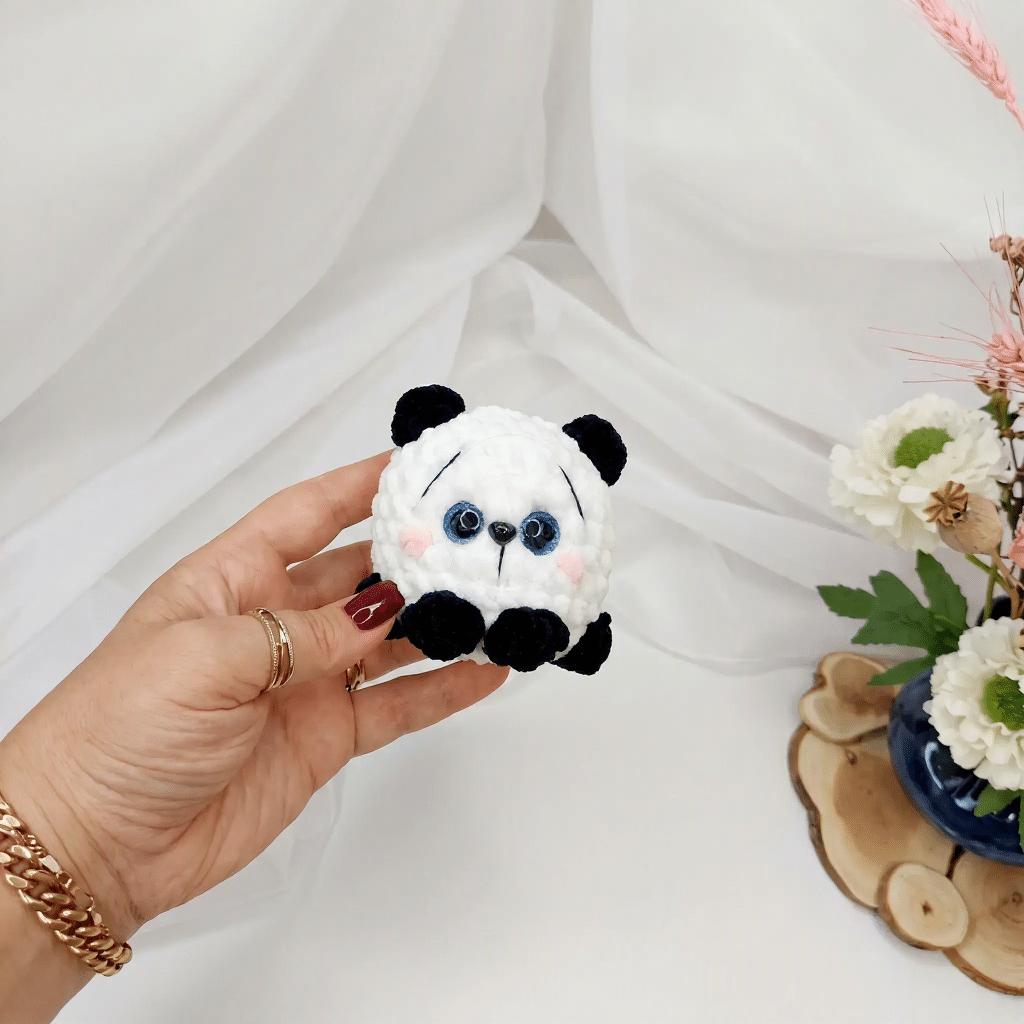
Work the Bear pattern exactly as written, with one sweet change: work the ears and ALL bobble stitches in black, and everything else in white. Add a soft grey or black muzzle line and you have a panda!
Assembly
Putting Your Sweeties Together:
- Check your stuffing. Give each Sweetie a gentle squeeze. It should feel firm and round, with no flat spots at the top of the head. Add a little more fiberfill through the closing hole if needed. Close and secure. Pull the final opening tight and knot securely. Then pass the needle through the body and out the other side before trimming so the end disappears inside.
- Attach the ears. Kitty Ears and Bear Ears are already crocheted in place, so simply weave in the ends. For the Bunny Ears, pin both ears to the top of the head about 3 sts apart, check they are even, then sew them on securely with the tails you left.
- Glue the nose. Position the nose between Rnds 6 and 7, exactly between the eyes. Use a small dab of craft glue and hold for a few seconds.
- Embroider the face. Add eyebrows above the eyes, a fine muzzle line beneath the nose, and whiskers for the Kitty. Keep your stitches light, because over-tightening will dimple the plush.
- Add the cheeks. Work two tiny satin stitches in pale pink yarn, or brush on chalk pastel, just below and outside each eye.
- Finish the houses. Weave in all house ends and tuck them inside where they will never be seen.
- Pop them in! Slide each Sweetie down into its house so the paws rest on the rim. The plush grips beautifully on its own, but a few hidden stitches will hold them together permanently if you prefer.
- Add the finishing touches. Tie a ribbon bow beside one ear, and attach keychain hardware through the top of the head if you are making a bag charm.
- Admire your work. Turn your Sweetie around, check that the face is centered and the paws are even, then weave in any remaining ends.
Tips
- Keep your tension firm. Plush yarn is forgiving, but loose stitches let stuffing show through. If you can see fluff between stitches, go down a hook size rather than stitching tighter by force.
- Mark the side, not the back. The paws and tail rely on your stitch marker sitting at the side of the work, so the Rnd 10 bobbles land evenly on both sides.
- Stuff before the opening closes. Add small pinches of fiberfill from Rnd 8 onward, and finish stuffing before Rnd 11. Stop when the Sweetie feels firm but squishy with no flat spot on top.
- Use the invisible decrease. Working dec through the front loops of the next 2 sts keeps the closing rounds smooth, which matters in fuzzy yarn where gaps are hard to hide.
- Choose a roomy needle. A large-eye, blunt-tip needle glides through plush yarn for sewing the Bunny Ears and gathering the carrot top.
- Keep embroidery stitches light so the face doesn’t dimple.
FAQs
Can I make these toys safe for babies?
Yes, by using embroidered eyes and noses instead of safety eyes, and ensuring all yarn ends are securely woven in, you can create a baby-safe toy. The pattern suggests glue-on or embroidered eyes for this purpose.
What hook size should I use?
The pattern recommends a 3.75 mm (US F-5/G-6) hook. However, because plush yarn can be thick, you may need to go down a hook size if your stitches gape or if you see stuffing through the fabric.
How do I keep the paws symmetrical?
It is crucial to place your stitch marker at the side of the work rather than the center back. This ensures that the bobble stitches for the paws in Round 10 land evenly on both sides of the Sweetie.
Can I turn these into keychains?
Absolutely. You can attach a split ring or lobster clasp through the top of the head to turn any Sweetie into a bag charm or keychain.
Do I need to join rounds?
No, this pattern is worked in continuous spiral rounds. Do not join or turn unless the pattern specifically instructs you to do so.
If you enjoy creating cute amigurumi characters, you might also like our Cute Lumiling Amigurumi patterns or this Adorable Mini Capybara Amigurumi for more adorable projects.


