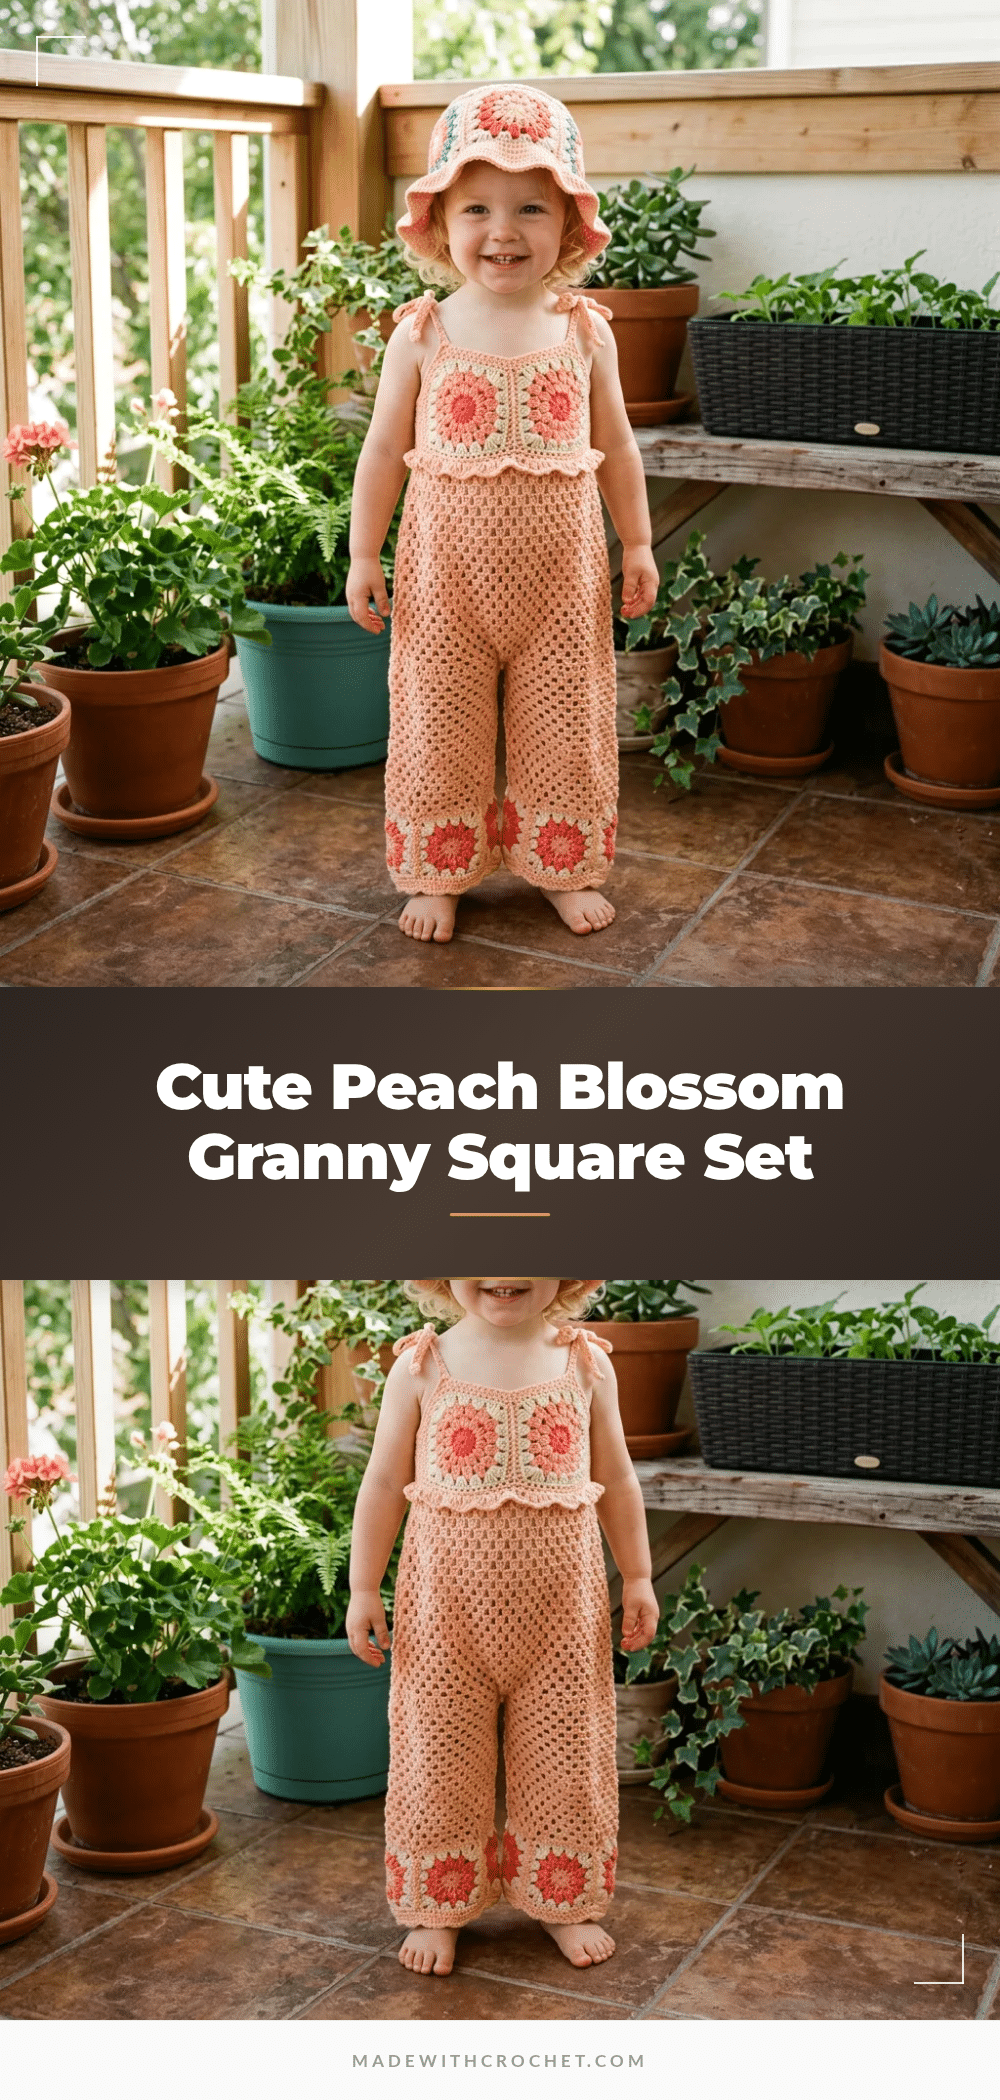
There is something deeply satisfying about the rhythmic build of a classic granny square, watching those clusters grow into structured, geometric shapes. This peach blossom toddler set captures that joy perfectly, blending the nostalgic appeal of vintage crochet with a modern, airy construction. The design relies on the distinct texture of the granny square motifs for the bodice and leg hems, contrasted against the breezy, open mesh of the pants and hat. It is a project that rewards patience, offering a beautiful interplay of solid and lacy stitches that makes the finished garment feel like a boutique piece.
Texture and Stitch Notes
The visual appeal of this set comes from the contrast between the dense, structured granny squares and the fluid, open mesh. The bodice is built from individual squares joined with flat slip stitches, creating a crisp, tailored look. In contrast, the pants and hat utilize a mesh stitch that provides excellent drape and breathability, perfect for warm weather. Pay close attention to the scallop edging on the ruffle and leg hems; these shells add a soft, wavy texture that softens the geometric lines of the squares. Blocking is essential here—wet blocking the granny squares ensures the corners pop and the seams align perfectly during assembly.
Project Overview
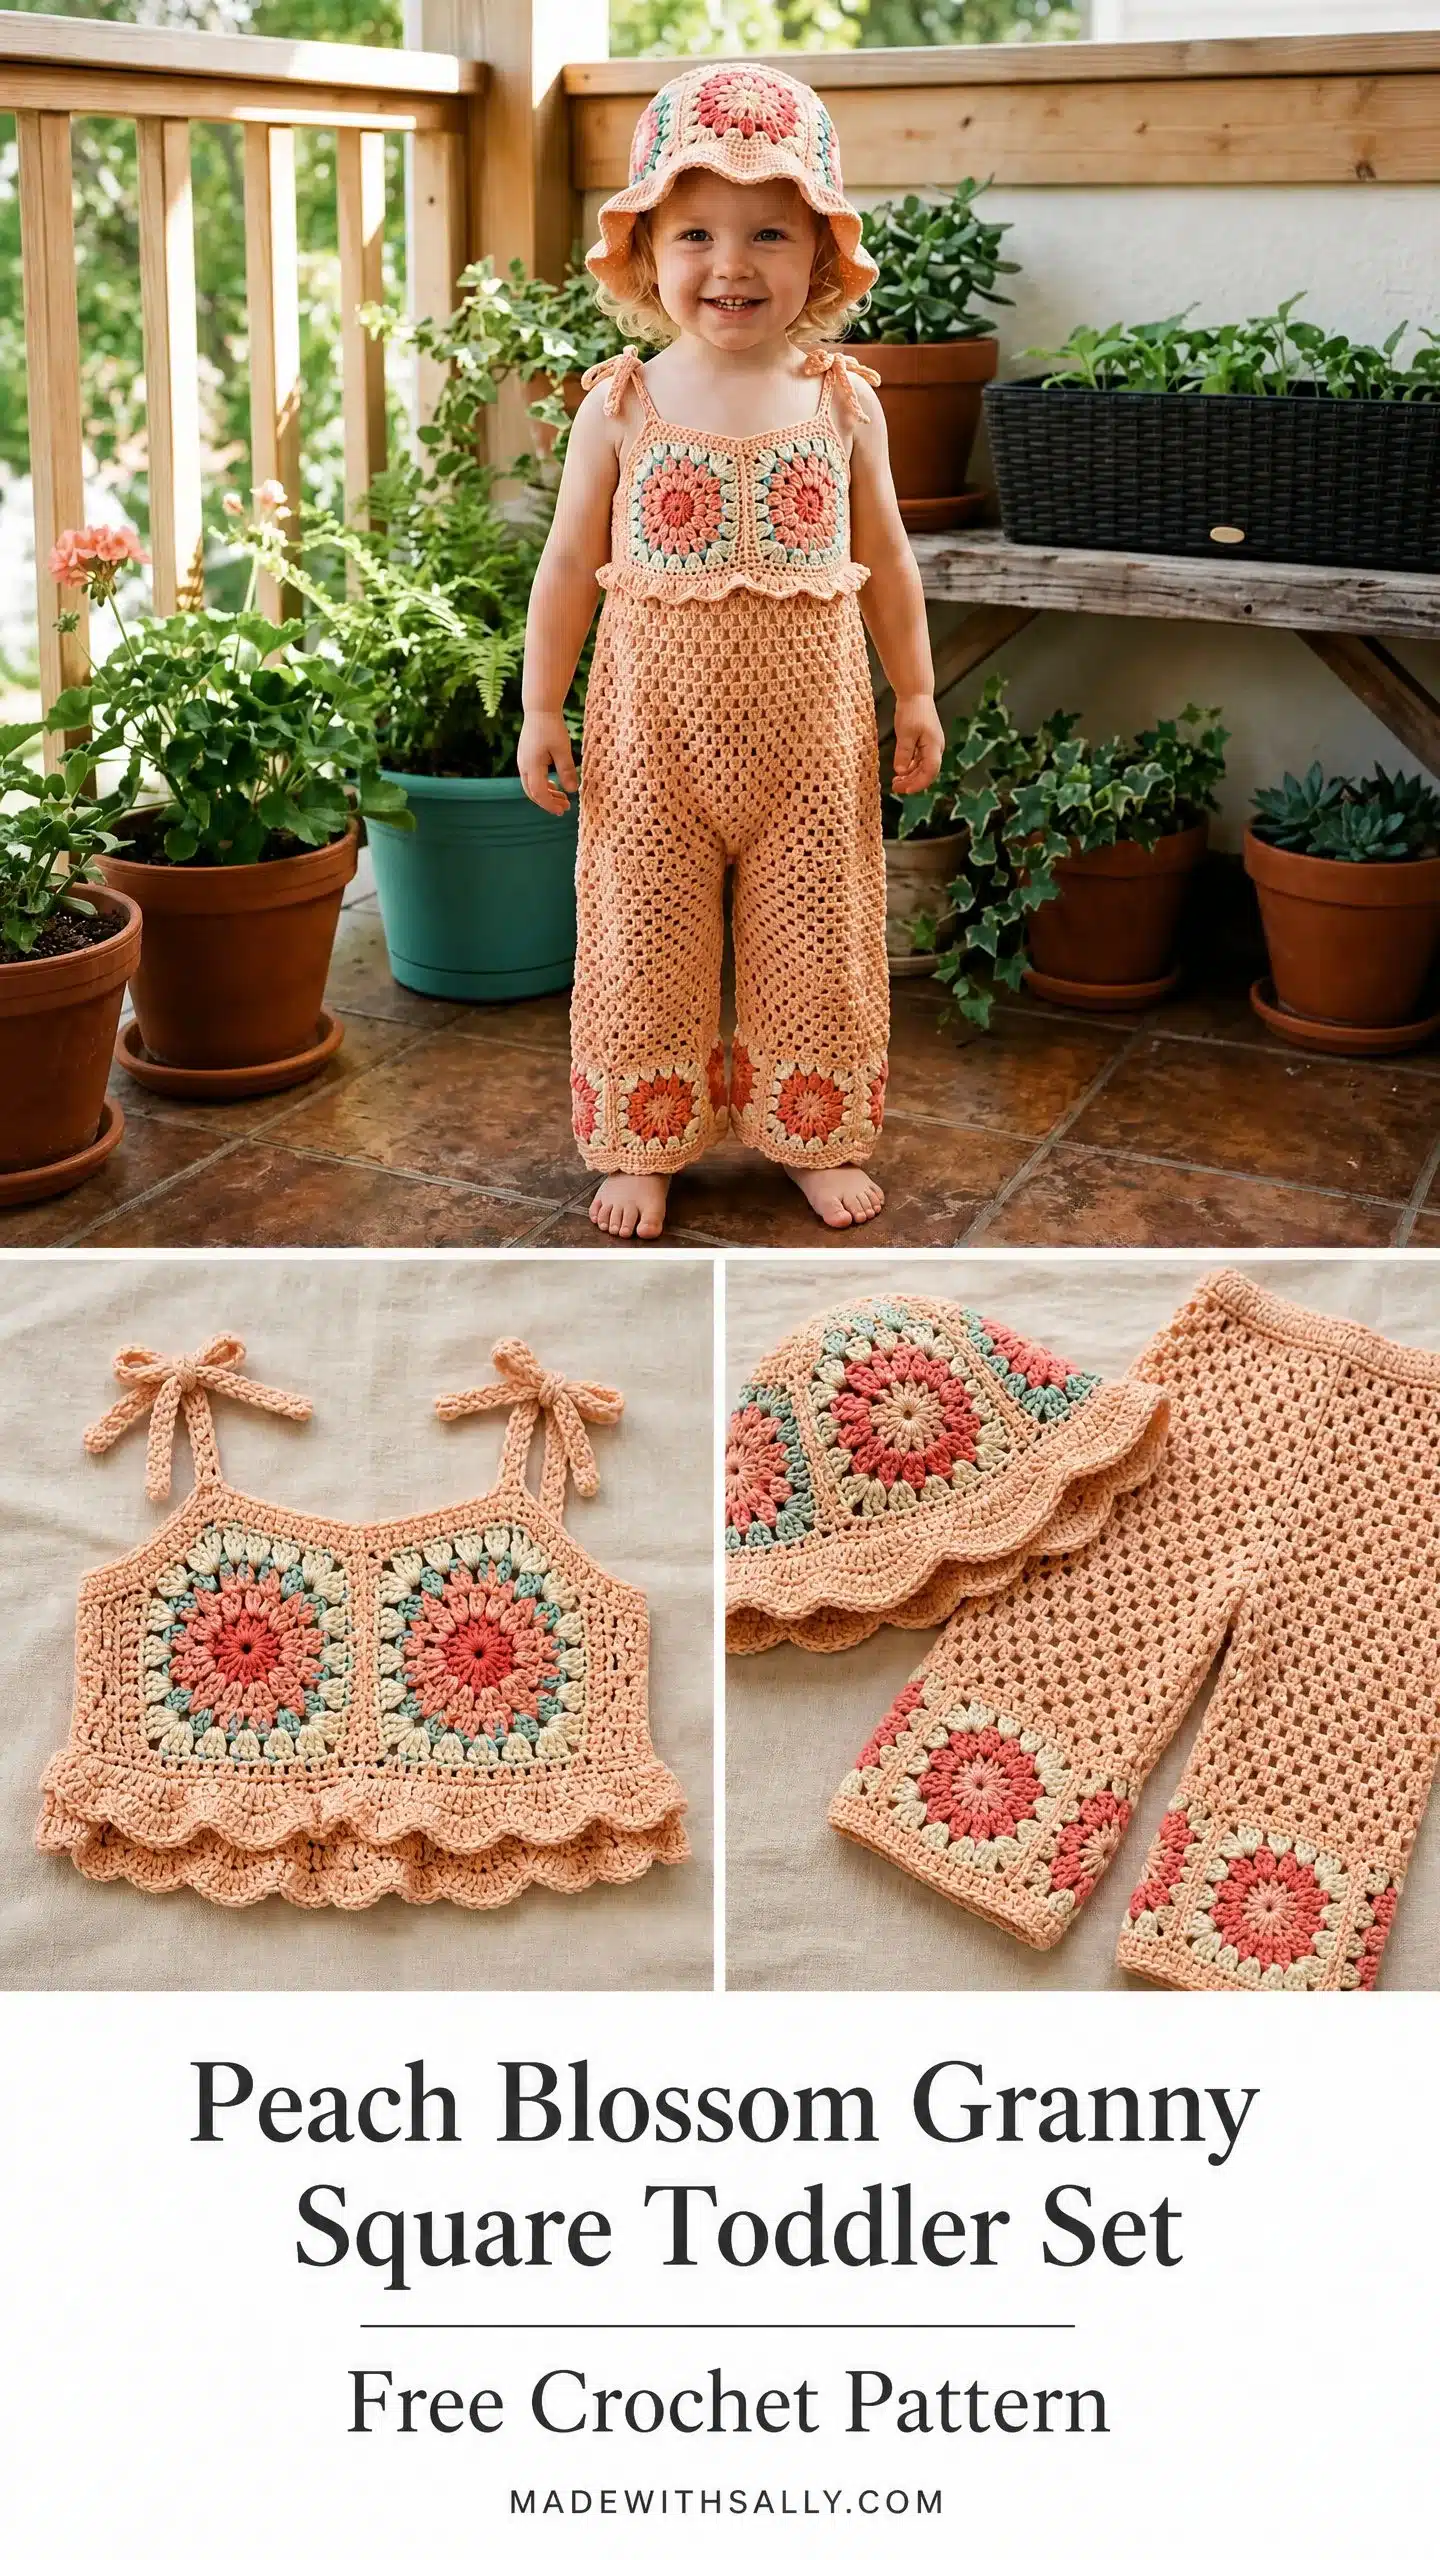
This pattern provides instructions for a complete toddler outfit, including a romper and a matching bucket hat. The romper features a bodice made of joined granny squares, a scalloped ruffle at the waist, and mesh pants with granny square borders at the leg openings. The shoulders feature tie straps for an adjustable fit. The hat mirrors the romper with a crown of joined squares and a mesh body finished with a scalloped brim.
Materials
- Yarn:
- MC (Main Color, Peach): Approximately 400 yards (366 m) of DK weight cotton or cotton blend.
- Color A (Coral): Approximately 120 yards (110 m) of the same yarn base.
- Color B (Cream): Approximately 80 yards (73 m) of the same yarn base.
- Hook: US size G-6 / 4.0 mm, or size needed to obtain gauge.
- Notions: Yarn needle for weaving ends, scissors, 4 to 6 locking stitch markers, blocking mat and rust-proof pins.
Yarn Recommendations: Any of the following will work beautifully:
- Lion Brand 24/7 Cotton in Peach, Coral, and Ecru (100% mercerized cotton).
- Paintbox Yarns Simply DK in Melon Sorbet, Lipstick Pink, and Champagne White (soft acrylic).
- We Are Knitters The Cotton in Peach, Red, and Ecru (organic pima cotton).
Note: A smooth, even twist DK weight yarn (CYCA weight 3) is strongly recommended. Avoid fuzzy yarns as they will obscure the open mesh and stitch definition.
Gauge and Finished Size
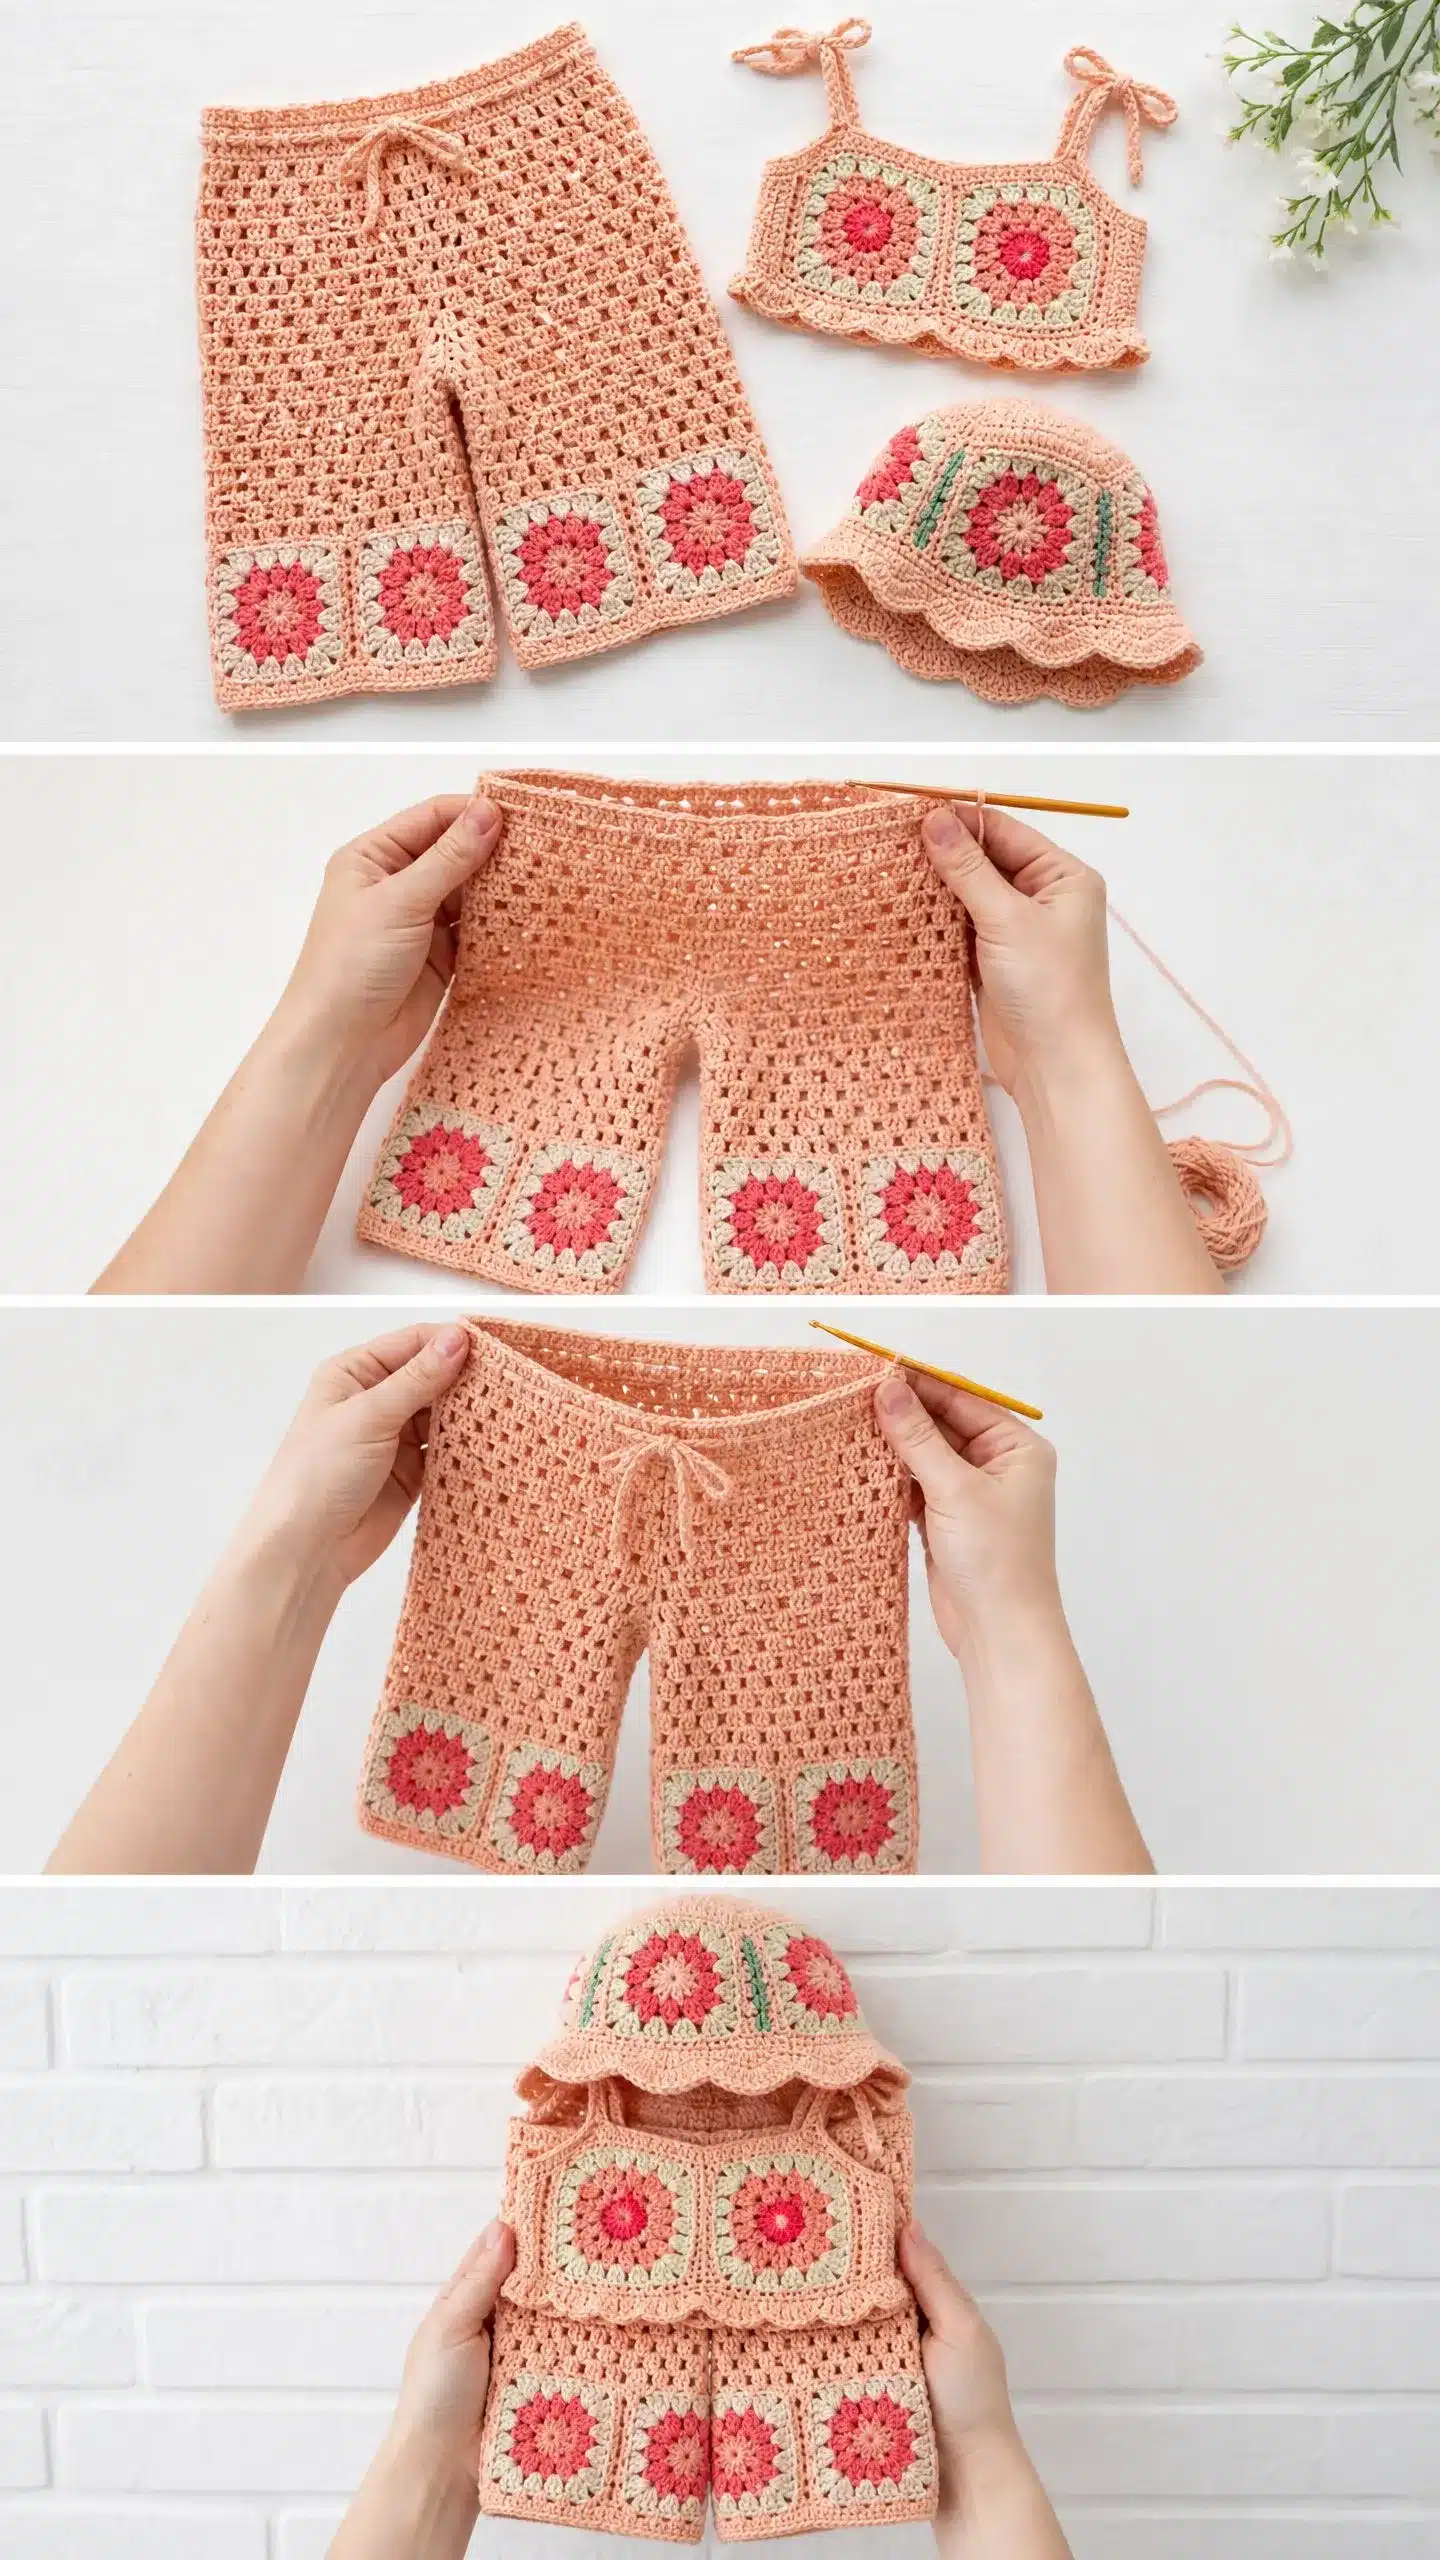
- Granny Square Motif: One completed 4-round square should measure 3.5 inches x 3.5 inches (9 cm x 9 cm) when blocked.
- Mesh Body: 4 mesh repeats (each repeat equals chain 2, single crochet) x 4 rows should equal 2 inches x 2 inches (5 cm x 5 cm).
- Romper Size: Fits toddlers approximately 18 to 24 months. Chest: approx. 20 inches (51 cm). Total length: approx. 22 inches (56 cm).
- Hat Size: Fits head circumference of 18 to 19 inches (46 to 48 cm).
Please make at least one full granny square swatch and block it before starting. Gauge is critical for proper fit on a toddler.
Abbreviations
- ch: chain
- sl st: slip stitch
- sc: single crochet
- hdc: half double crochet
- dc: double crochet
- tr: treble crochet
- sp: space
- ch-sp: chain space
- sk: skip
- st(s): stitch or stitches
- rep: repeat
- pm: place marker
- beg: beginning
- rnd(s): round or rounds
- yo: yarn over
- tog: together
- RS: right side
- WS: wrong side
- MC: main color
- A: Color A
- B: Color B
- fasten off: cut yarn and pull tail through last loop
Pattern Notes
- The romper has no zipper or buttons. It pulls on over the head, and shoulder straps tie in adjustable bows.
- All granny squares are made individually first and then joined using the flat slip stitch join method (hold two squares with wrong sides together and slip stitch through corresponding chain spaces).
- Magic ring may be substituted with chain 4 joined to a ring with slip stitch. Pull the starting tail snug after Round 1.
- Weave in all ends from the granny squares before joining. Blocked squares join much more neatly.
Pattern Instructions
Special Stitches
Granny Square Motif (GSM)
This is the building block of your entire set. It is a 4-round square worked from a central ring. All rounds begin with a slip stitch to the first double crochet to join unless noted otherwise.
Round 1: With Color A, make a magic ring (or chain 4 and slip stitch to first chain to form ring). Chain 3 (counts as first dc). Work 2 dc into the ring, ch 2. Then work (3 dc into ring, ch 2) three more times. Sl st to top of beg ch 3 to join. Fasten off Color A. You now have four 3-dc clusters and four ch-2 corner spaces.
Round 2: Join Color B with sl st to any corner ch-2 sp. Ch 3, work 2 dc in same sp, ch 2, 3 dc in same sp (first corner made). Ch 1. Then work (3 dc, ch 2, 3 dc) in next corner ch-2 sp, ch 1. Repeat from parentheses two more times. Sl st to top of beg ch 3. Fasten off Color B. You now have eight 3-dc clusters with two per corner, four ch-2 corner spaces, and four ch-1 side spaces.
Round 3: Join MC with sl st to any corner ch-2 sp. Ch 3, 2 dc in same sp, ch 2, 3 dc in same sp for the corner. Ch 1, 3 dc in next ch-1 side sp, ch 1. Work (3 dc, ch 2, 3 dc) in next corner ch-2 sp. Repeat around with ch 1 between clusters on sides. Sl st to top of beg ch 3. Fasten off MC. You have twelve 3-dc clusters, four ch-2 corner spaces, and eight ch-1 spaces.
Round 4: Join MC with sl st to any corner ch-2 sp. Ch 3, 2 dc in same sp, ch 2, 3 dc in same sp for the corner. (Ch 1, 3 dc in next ch-1 sp) twice, ch 1. Work (3 dc, ch 2, 3 dc) in next corner ch-2 sp. Repeat around. Sl st to top of beg ch 3. Fasten off MC. You now have sixteen 3-dc clusters, four ch-2 corner spaces, and twelve ch-1 spaces. Completed square should measure 3.5 inches (9 cm) per side when blocked.
Scallop Edging
This creates the pretty wavy trim on the ruffle and hems. Join MC to first stitch. Work (sc in next stitch, sk 1 stitch, 5 dc in next stitch, sk 1 stitch) across, ending with sc in last stitch. Each scallop shell uses 4 stitches from the base row.
Granny Mesh Stitch (Worked Flat)
Row 1 (setup, RS): Ch 4 (counts as dc plus ch 1). Work dc in 4th ch from hook and every 3rd ch thereafter, with ch 1 between each dc. Turn.
Row 2 (WS): Ch 4, dc in first ch-1 sp. Work (ch 1, dc in next ch-1 sp) across to last sp. Ch 1, dc in top of turning ch. Turn.
Repeat Row 2 for pattern. Each ch-1 sp counts as one mesh unit.
Granny Mesh Stitch (Worked in the Round)
Round 1: Sl st to any ch-1 sp. Ch 4 (counts as dc plus ch 1). Work (dc in next ch-1 sp, ch 1) around. Sl st to 3rd ch of beg ch 4 to join.
Round 2: Sl st into first ch-1 sp. Ch 4. Work (dc in next ch-1 sp, ch 1) around. Sl st to 3rd ch of beg ch 4.
Repeat Round 2 for pattern.
Step by Step Crochet Pattern for the Romper
Section 1: Making the Bodice Granny Squares
Make 4 Granny Square Motifs following the GSM instructions above. Do not cut your tails short. Leave at least 6 inches (15 cm) for seaming later. Block all four squares to 3.5 inches x 3.5 inches (9 cm x 9 cm). Label your squares: Front Left (FL), Front Right (FR), Back Left (BL), and Back Right (BR).
Section 2: Joining the Bodice Squares
Step 1: Join FL to FR along one side edge (center front seam). Hold with wrong sides together, aligning right edge of FL with left edge of FR. With MC, sl st through corresponding ch spaces from top corner to bottom corner. This seam runs 3.5 inches (9 cm). You now have one joined front panel measuring 7 inches (18 cm) wide x 3.5 inches (9 cm) tall.
Step 2: Join BL to BR the same way along their center edges. This forms your back panel, also 7 inches (18 cm) wide x 3.5 inches (9 cm) tall.
Step 3: Join front panel to back panel along both side edges. Leave top and bottom open. This creates your bodice tube measuring 7 inches (18 cm) wide when flat (14 inches circumference), and 3.5 inches (9 cm) tall. Work this entire section with MC.
Section 3: Bodice Neckline and Strap Edging
Step 1: Count the ch spaces along the top opening of the bodice tube. Each granny square contributes ch spaces along its top edge. Working into each ch-1 sp as 1 space and each ch-2 corner sp as 2 spaces, the front top edge yields 11 space units and the back yields 11 space units.
Step 2: Join MC to the right outer corner of the front panel top edge. Work sc evenly across the front top edge. Work 2 sc in the first corner ch-2 sp. Then work sc in each ch-1 sp and 2 sc in each corner ch-2 sp across, ending with 2 sc in the last corner ch-2 sp. Front top should have 16 sc. Repeat for back top edge. (16 sc front, 16 sc back).
Step 3, Shape Front Neckline:
- Row 1: Join MC to first sc of front top edge. Sc across all 16 sc. Turn. (16 sc)
- Row 2: Ch 1, sl st in first 3 sc. This pulls in the outer shoulder edge. Sc in next 10 sc. Sl st in last 3 sc. Turn. (10 sc active, 3 sl sts each side)
- Row 3: Ch 1, sc in each of the 10 center sc. Turn. (10 sc)
- Rows 4 to 5: Repeat Row 3. (10 sc)
- Fasten off MC.
Step 4, Shape Back Neckline: Repeat Step 3 on back top edge. (16 sc across, sl st first/last 3, sc 10 center for Rows 1-5). Fasten off MC.
Section 4: Shoulder Tie Straps
Make 4 straps total, 2 for front and 2 for back. For each strap: With MC, ch 65. Sc in 2nd ch from hook, sc in each ch across. Fasten off. (64 sc, length approx. 9.5 inches or 24 cm). This longer length gives you room for adjustable bows.
Attachment: Working from the right side, fold one end of each strap over by 0.5 inches (1.25 cm) and sew flat to the outer shoulder sc stitch on the front neckline row. Attach one strap per outer corner of front neckline. Attach corresponding straps to the back neckline at the same shoulder positions. The pairs tie together over the shoulder in a bow.
Section 5: Creating the Ruffle
The ruffle is worked along the lower edge of the bodice tube.
Step 1: Join MC to any corner ch sp at the lower bodice edge. Work sc evenly all the way around the lower opening. Work 2 sc in each corner ch-2 sp and 1 sc in each ch-1 sp. End with sl st to first sc to join. (32 sc total in the round).
Step 2, Ruffle increase round: Ch 1, 2 sc in each sc around. Sl st to first sc to join. (64 sc).
Step 3, Ruffle scallop: Ch 1. Work (sc in next sc, sk next sc, 5 dc in next sc, sk next sc) around. Sl st to first sc to join. This round uses all 64 sc in groups of 4 per scallop. 64 divided by 4 equals 16 scallop shells. Fasten off MC. Weave in ends.
Section 6: Pants Body in Granny Mesh
The pants body is worked downward from the lower bodice edge, below the ruffle.
Step 1, Establish pants foundation: The ruffle was added on top of the 32 sc round. Now flip the garment and work into those same sc stitches from the other side. The ruffle naturally faces outward and the pants hang below.
Round 1, Pants foundation: Ch 4 (counts as dc plus ch 1). Sk next sc. Work (dc in next sc, ch 1, sk next sc) around. End with sl st to 3rd ch of beg ch 4 to join. (16 dc + 16 ch-1 sps = 16 mesh units).
Rounds 2 to 14: Sl st to first ch-1 sp. Ch 4. Work (dc in next ch-1 sp, ch 1) 15 times around. Sl st to 3rd ch of beg ch 4. (16 mesh units per round).
After Round 14, the pants body should measure approx. 5.5 inches (14 cm) below the ruffle base.
Section 7: Crotch Split and Leg Tubes
At Round 14, split the pants tube into two separate legs. Each leg will have half the mesh units.
Step 1: Place stitch markers at the side seams of the pants tube. These are the points where the front and back bodice seams align below. This divides the tube into front half (8 mesh units) and back half (8 mesh units).
Step 2, Left Leg: Join MC with sl st to the first ch-1 sp of the left half. Left Leg Round 1: Ch 4. Work (dc in next ch-1 sp, ch 1) 7 times. Sl st to 3rd ch of beg ch 4. (8 mesh units). Left Leg Rounds 2 to 6: Repeat as established. (8 mesh units). After Round 6, left leg should measure approx. 3 inches (7.5 cm) from the crotch split.
Step 3, Right Leg: Attach MC to the ch-1 sp directly opposite, at the beginning of right half. Work identical to Left Leg Rounds 1 to 6. (8 mesh units per round).
Section 8: Leg Hem Granny Squares
Each leg hem gets a border of granny squares. Four granny square motifs attach around each leg opening.
Step 1: Make 8 Granny Square Motifs following the GSM instructions. Block to 3.5 inches x 3.5 inches (9 cm x 9 cm).
Step 2: Arrange 4 squares in a row and join them side to side using the same method as bodice joining. This forms a strip 14 inches (35.5 cm) wide x 3.5 inches (9 cm) tall. Repeat for second leg with the other 4 squares.
Step 3: Join each strip into a ring by joining the first and last square’s outer edges together. This forms a ring with 14 inches (35.5 cm) circumference.
Step 4: Attach each granny square ring to the bottom of its corresponding leg tube. With MC, hold the leg tube and granny ring with right sides together. Working through corresponding ch spaces of the leg tube’s last mesh round and the top edge of the granny square ring, sl st all the way around to join. Ease gently to match the circumferences.
Step 5, Lower hem edging: With MC, work 1 rnd of sc along the bottom edge of each granny square ring. Then work 1 rnd of scallop edging along the sc rnd. (Each leg: 32 sc base, 8 scallop shells).
Total romper length from shoulder to leg hem after adding the granny square border: approx. 22 inches (56 cm).
Step by Step Crochet Pattern for the Hat
Section 9: Hat Crown with Granny Squares
Make 6 Granny Square Motifs following the GSM instructions. Block all 6 to 3.5 inches x 3.5 inches (9 cm x 9 cm).
Step 1: Join 6 granny square motifs side by side in a row. Join first and last squares to form a ring of 6 squares measuring approx. 21 inches (53 cm) circumference.
Step 2, Close the crown top:
- Round 1: Join MC to top edge of the ring. Work sc evenly around the top edge of all 6 squares. Work 16 sc per square top, which equals 96 sc total. Sl st to first sc. (96 sc)
- Round 2: Ch 1. Work (sc in next 6 sc, sc2tog) around. Sl st to first sc. (84 sc)
- Round 3: Ch 1. Work (sc in next 5 sc, sc2tog) around. Sl st to first sc. (72 sc)
- Round 4: Ch 1. Work (sc in next 4 sc, sc2tog) around. Sl st to first sc. (60 sc)
- Round 5: Ch 1. Work (sc in next 3 sc, sc2tog) around. Sl st to first sc. (48 sc)
- Round 6: Ch 1. Work (sc in next 2 sc, sc2tog) around. Sl st to first sc. (36 sc)
- Round 7: Ch 1. Work (sc in next sc, sc2tog) around. Sl st to first sc. (24 sc)
- Round 8: Ch 1. Work (sc2tog) around. Sl st to first sc. (12 sc)
- Round 9: Ch 1. Work (sc2tog) 6 times. Sl st to first sc. (6 sc)
- Fasten off, leaving a 12 inch (30 cm) tail. Thread tail through yarn needle, pull through all 6 remaining sc, draw tight and secure. Weave in end.
Section 10: Hat Body
Work downward from the bottom edge of the 6-square ring.
Step 1: Join MC to any ch sp along the bottom edge of the 6-square ring. Work sc evenly around the bottom edge of all 6 squares. Work 16 sc per square lower edge, which equals 96 sc. Sl st to first sc. (96 sc).
Step 2, Mesh body of hat:
- Round 1: Ch 4 (counts as dc plus ch 1). Sk next sc. Work (dc in next sc, ch 1, sk next sc) around. Sl st to 3rd ch of beg ch 4. (48 mesh units)
- Rounds 2 to 4: Sl st to first ch-1 sp. Ch 4. Work (dc in next ch-1 sp, ch 1) 47 times. Sl st to 3rd ch of beg ch 4. (48 mesh units)
After Round 4, the hat should measure approx. 3 inches (7.5 cm) from crown seam to lower body edge.
Section 11: Hat Brim
The brim is worked in the rnd with increases to create the flat outward flange.
- Round 1: Sl st to first ch-1 sp. Ch 3 (counts as dc). Work 2 dc in same sp for first shell. Ch 1. Work (3 dc in next ch-1 sp, ch 1) 47 times. Sl st to top of beg ch 3. (48 x 3-dc shells = 144 dc, 48 ch-1 sps)
- Round 2: Sl st to first ch-1 sp. Work (3 dc, ch 1, 3 dc) in that sp. Ch 1. Work (3 dc in next ch-1 sp, ch 1, (3 dc, ch 1, 3 dc) in next ch-1 sp, ch 1) 23 times. Sl st to top of beg ch 3. This increases every other ch-1 sp, adding 24 extra 3-dc clusters. (72 clusters, 72 ch-1 sps)
- Round 3: Sl st to first ch-1 sp. Ch 3, 2 dc in same sp. Ch 1. Work (3 dc in each ch-1 sp, ch 1) around. Sl st to top of beg ch 3. (72 clusters, 72 ch-1 sps)
- Round 4, Brim scallop edging: Join MC to first ch-1 sp. First work 1 sc in each ch-1 sp around. Sl st to first ch-1 sp. Ch 1. Sc in each ch-1 sp around. (72 sc) Then work scallop round. Ch 1. Work (sc in next sc, sk 1, 5 dc in next sc, sk 1) around. 72 divided by 4 equals 18 shells. Sl st to first sc. Fasten off MC. (18 scallop shells)
The finished hat should measure approx. 18 to 19 inches (46 to 48 cm) in circumference at the body and 5.5 inches (14 cm) from crown to brim edge.
Assembly
Step 1: Weave in all remaining ends using your yarn needle. Weave through the back of multiple stitches in different directions for security.
Step 2: Wet block the finished romper. Soak in cool water for 15 minutes. Gently squeeze out excess water without wringing. Lay flat on a blocking mat. Pin to the finished measurements. Pay special attention to the granny squares, pulling each corner point to a crisp 90-degree angle. Allow to dry fully before removing pins.
Step 3: Block the hat over a bowl or round object approx. 6 inches (15 cm) in diameter to hold the crown shape while drying.
Tips
- To make the romper larger (24 to 36 months): Work each granny square to 4 inches x 4 inches (10 cm x 10 cm) by adding a 5th round. Add 2 extra rounds to the pants mesh body. Add 2 rounds to each leg tube. This adds approx. 1.5 inches (4 cm) in chest and 2 inches (5 cm) in length.
- To make the romper smaller (12 to 18 months): Work squares to 3 inches x 3 inches (7.5 cm x 7.5 cm) by omitting Round 4 of the granny square motif. Reduce pants body to 12 rounds. Reduce leg tube to 4 rounds. This reduces chest by approx. 2 inches (5 cm).
- To add inseam length without changing width: Simply add more rounds to the leg tube.
- For the hat: To increase circumference, add a 7th square to the hat ring. Begin with 112 sc in Round 1 of the hat body and continue decreasing by sc2tog evenly each round until 6 sc remain.
FAQs
What is the best yarn to use for this pattern?
A DK weight cotton or cotton blend is strongly recommended. Cotton provides excellent stitch definition for the granny squares and keeps the mesh pants breathable for warm weather. Avoid fuzzy yarns as they will obscure the open mesh and scallop details.
How do I adjust the size for a growing toddler?
You can easily scale the pattern up or down. To size up, add a 5th round to the granny squares and add rounds to the pants and legs. To size down, omit Round 4 of the squares and reduce the number of mesh rounds in the pants body.
Why is blocking so important for this project?
Blocking is critical for this set. It ensures the granny squares are uniform in size so they join neatly without puckering. It also helps the scalloped edges lay flat and gives the mesh fabric a professional, finished drape.
Can I make the hat without the granny square crown?
The pattern is designed specifically to use the granny squares for the crown to match the romper. However, you could substitute a standard crochet hat pattern for the crown if you prefer a simpler construction, though the matching aesthetic would be lost.
How do the shoulder straps work?
The straps are separate chains attached to the outer corners of the front and back neckline. They are long enough to tie in bows over the shoulder, allowing you to adjust the fit as your toddler grows.
If you loved making this crochet pattern, save it to your Pinterest boards so you can find it easily later. And please drop a comment below if you make this adorable toddler set. I always love hearing how your projects turn out! For more wearable toddler patterns, check out our Peach Sunflower Baby Romper or the Sunset Ombre Granny Square Baby Romper.
Pin This Crochet Pattern!